How to create Locator Module
- Go to the WebEd site and log in as Administrator
- Make sure you added the Location Types before you can proceed to use the Locator module.
- Go to Pages and open the page content editor where you want to add this curly bracket.
- In the editor, click the Curly Bracket icon to open the configuration curly brackets

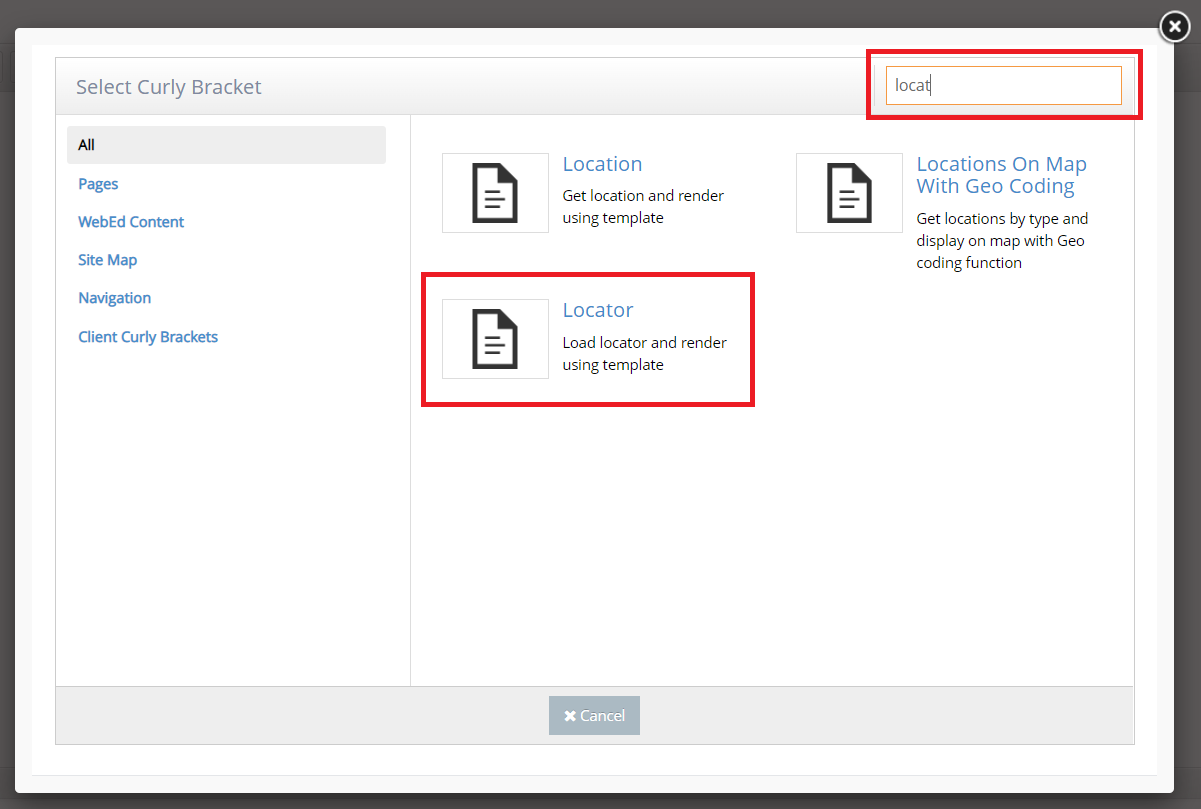
- Once clicked, the Curly Bracket box pops up and there you can see the list of Curly Bracket modules

- In the Search box, you can put the specific name of the Curly Bracket that you want to create. Search for Locator and click on the Locator item in the search results box.
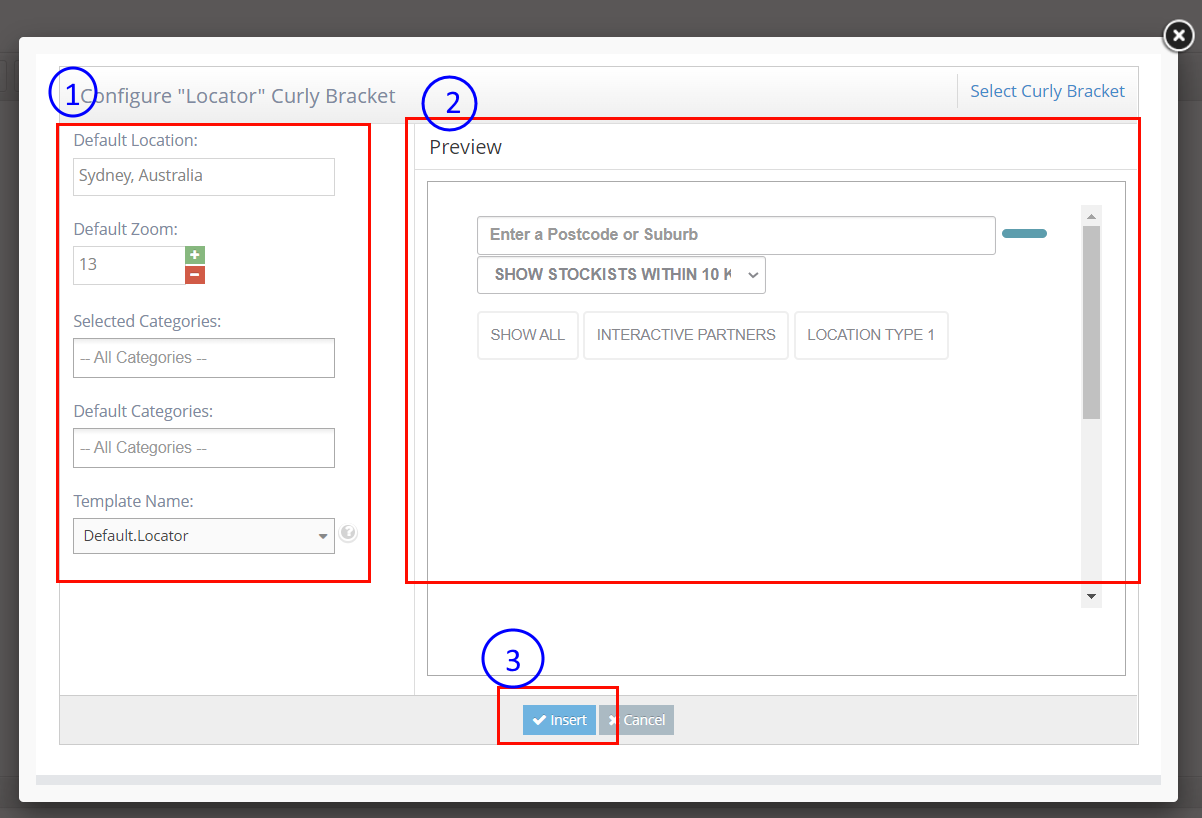
- The Configure "Locator" will display. Set up configuration options on the left side and review the UI (User Interface) on the right side.
- Parameter Names - this is where you can set the required value for your Locator module.
- Preview - this is where to display the preview of your selected module.
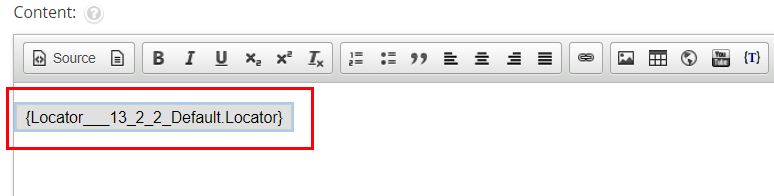
- Insert - click this button to insert in your page content editor.
- Click Update And Close. Then you can see the Locator on the page.
To customize or create new a TemplateName for Locator
- These steps will guide you on how to create/customize the display and styles of your Locator curly bracket.
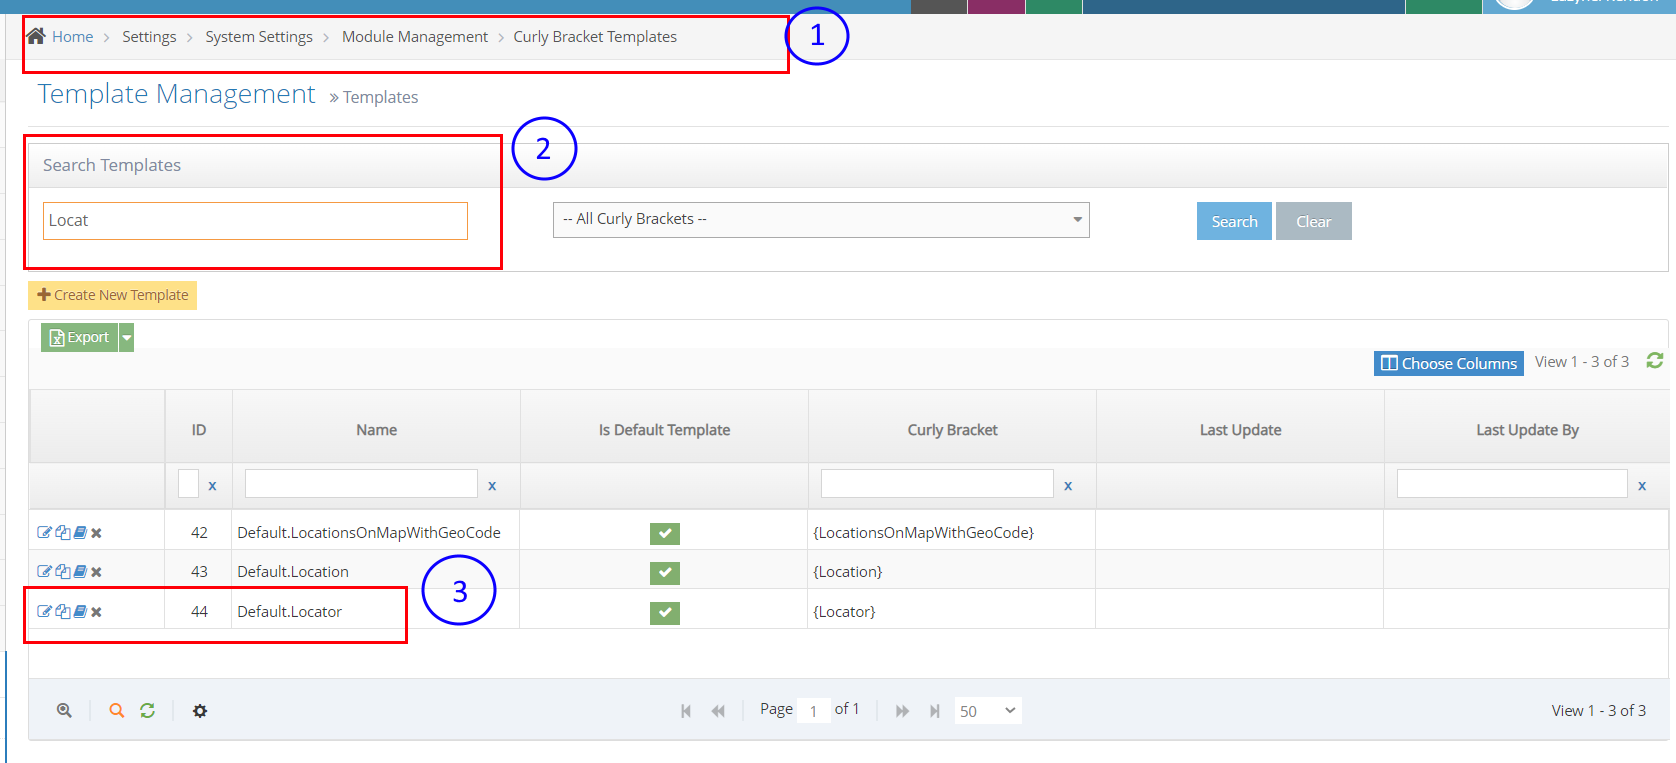
- Go to the Admin, search for Curly Bracket Templates.

- Or you may directly go to Home > Settings > System Settings > Module Management > Curly Bracket Templates
- Once you're on the Template Management page, you can search the template name of the curly bracket module in the text fields.
- On the left side icons, there you can edit the Template or you can duplicate a template to create a new one.