Why you would use a Payment Method?
Payment method allows a user to make payments using a variety of methods online.
Creating a Payment Method
STEP-BY-STEP
-
1Log in as an administrator and go to the Admin Dashboard.
Learn how to log in here → -
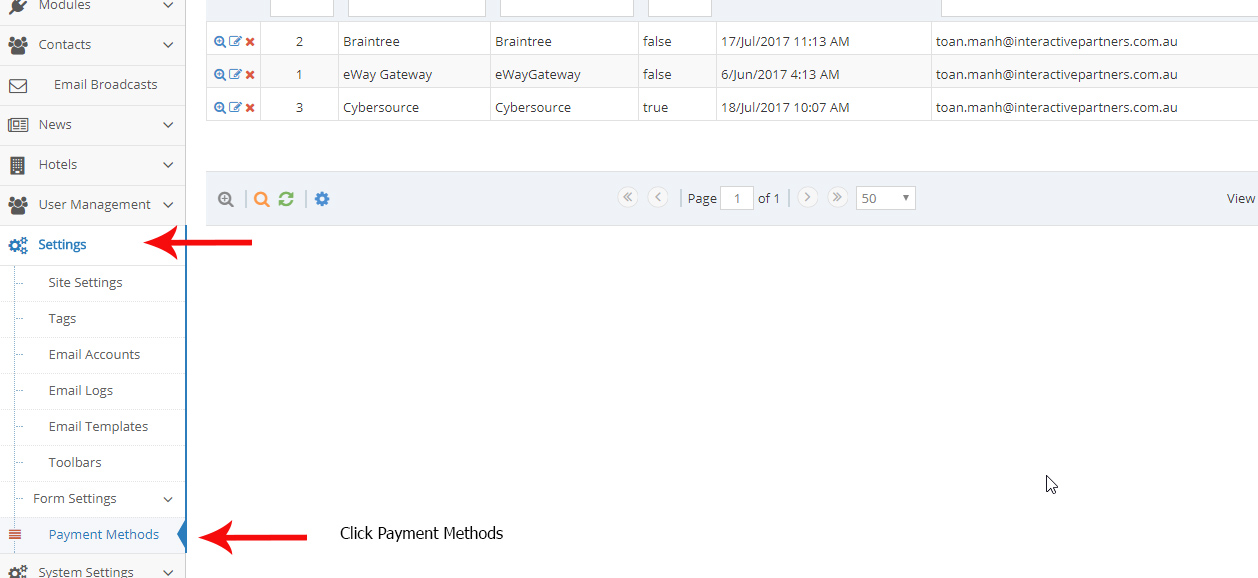
2Go to Admin > Settings > Payment Methods
-
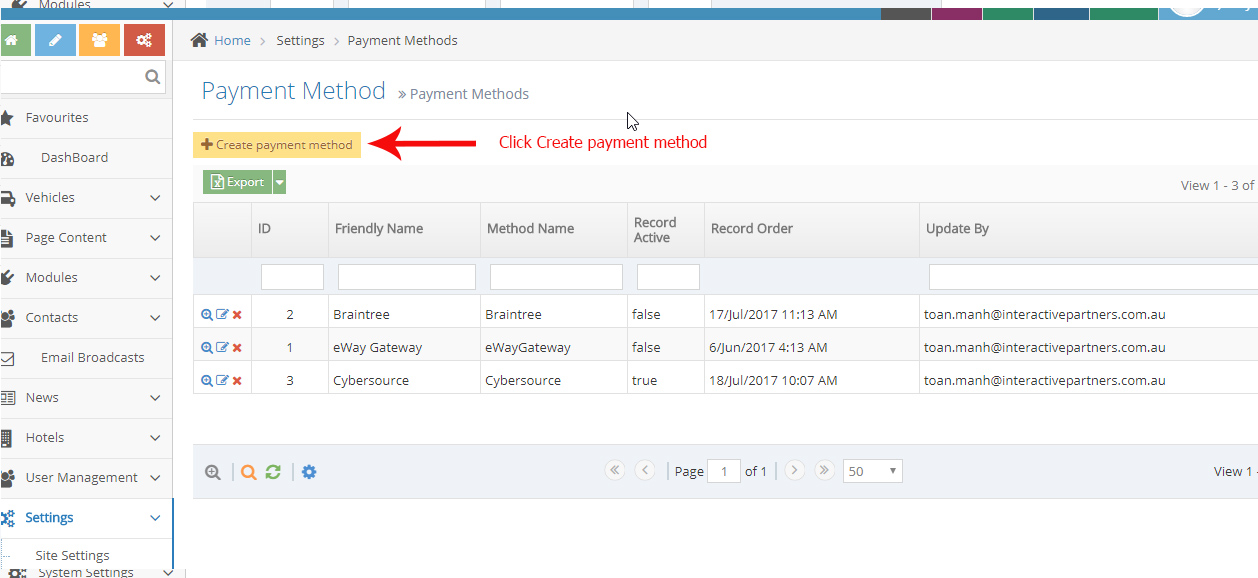
3Click Create New Payment Methods
-
3Fill up the necessary fields:
- Method Name - The name of your payment method
- Friendly Name- assign a friendly name for this method
- Payment Type - select a type of payment either credit card, Cash or etc..
- Record Active - Select or check this option to activate this payment method
- Record Order - The display and arrangement of payment method from the grid.
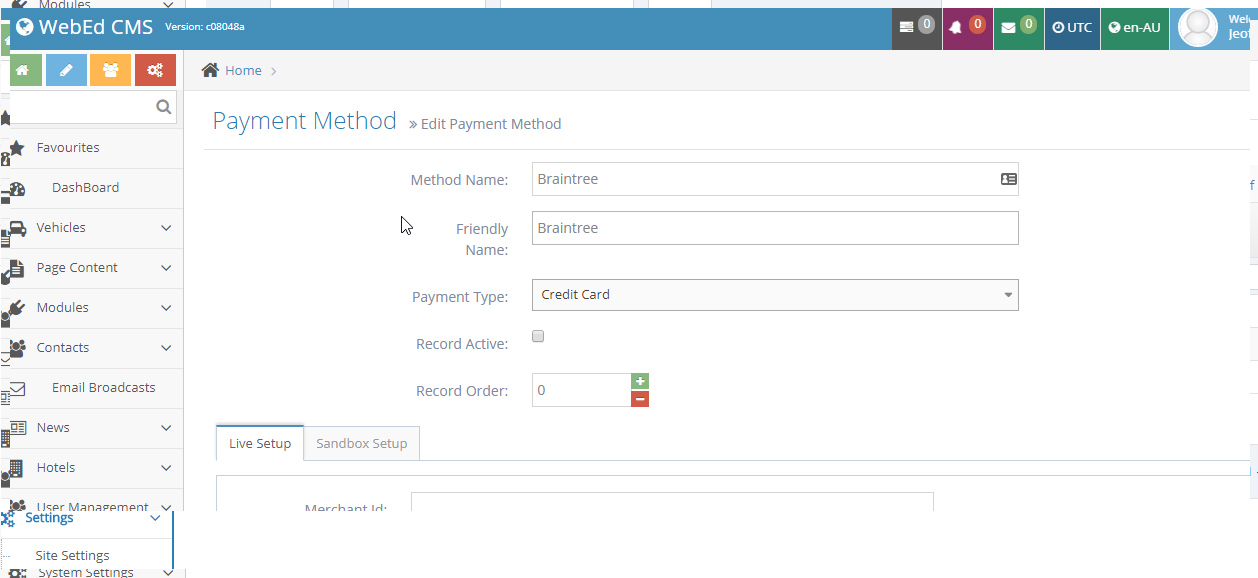
Payment Method Live and Sandbox Setup
STEP-BY-STEP
-
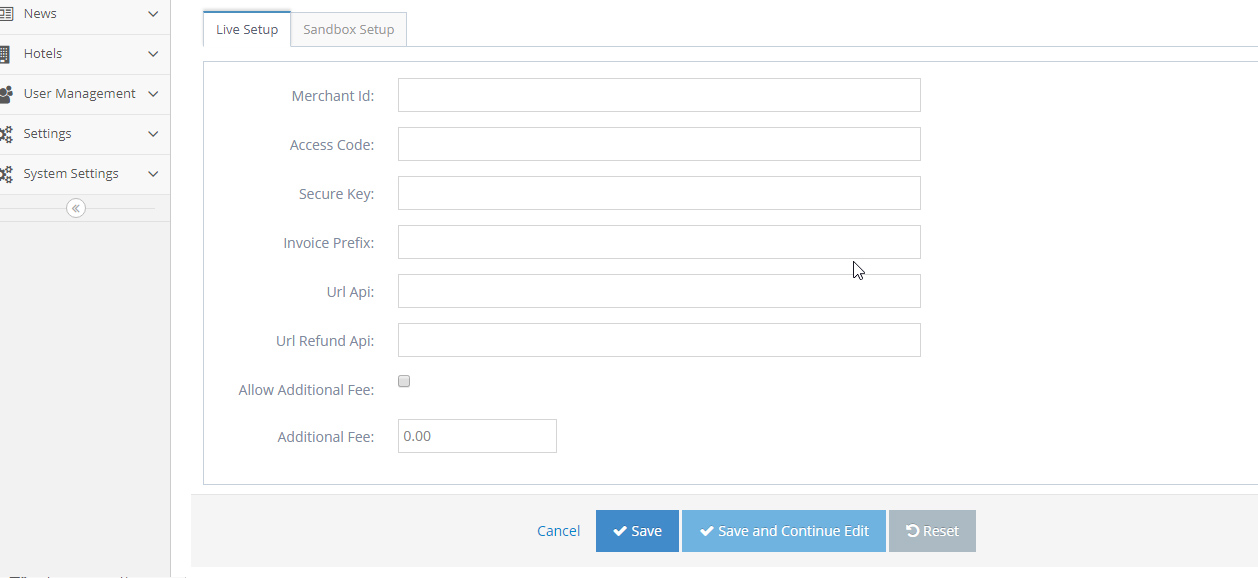
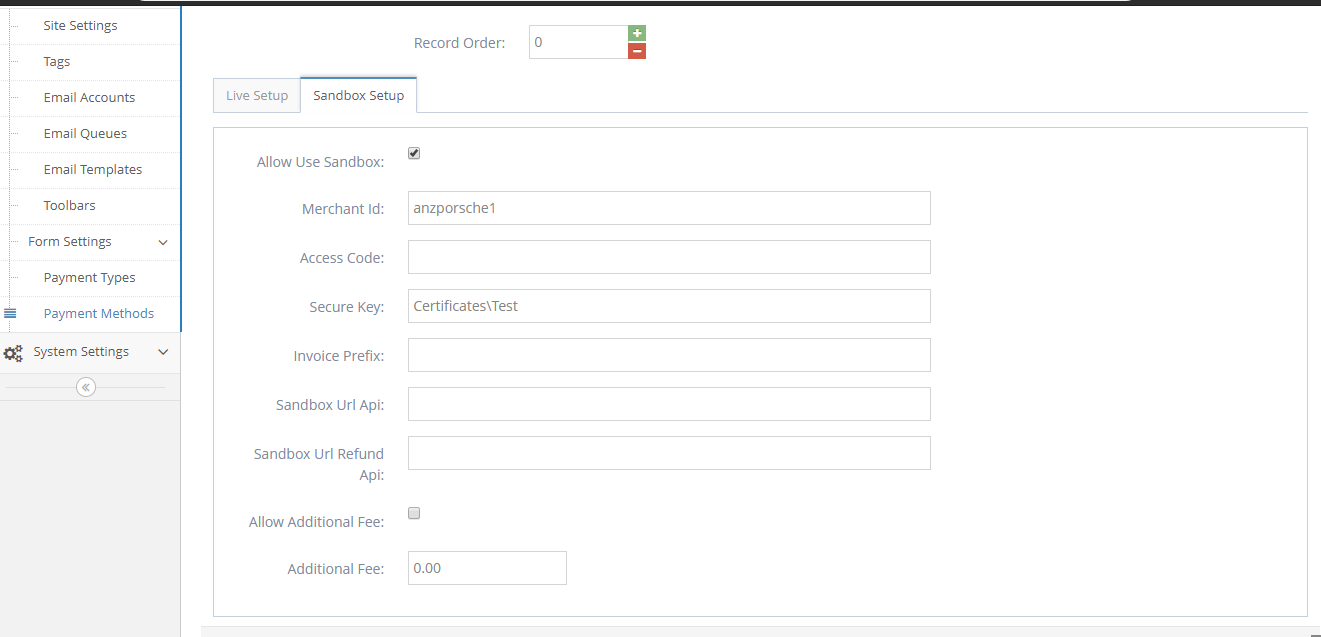
1Live and Sandbox Setup fields are the following:
- Merchant ID - is a unique identification to a specific account.
- Access Codes - are issued by agencies and unique characters or digits for making special transfers and payments to your account.
- Secure key - a payment authentication from your account.
- Invoice Prefix - to identify the type of Sales Invoice that has been issued.
- URL API - the URL interface represents an object and variables to send data of payment.
- URL refund API - the URL for the refund object and variables
- Allow Additional Fee - check if you want to add a price or fee for this method.
- Additional Fee - add a fee or price for this payment method.
-
2For Sandbox setup there's an additional field for allowing to use "Sandbox" modes
- Test Mode - tick to set the payment gateway to Sandbox
- Live Mode - untick to set the payment gateway to live mode
-
3Click Save