How to add a Noticeboard Curly Bracket to the page
STEP-BY-STEP
-
1Log in as an administrator and go to the Admin Dashboard.
Learn how to log in here → -
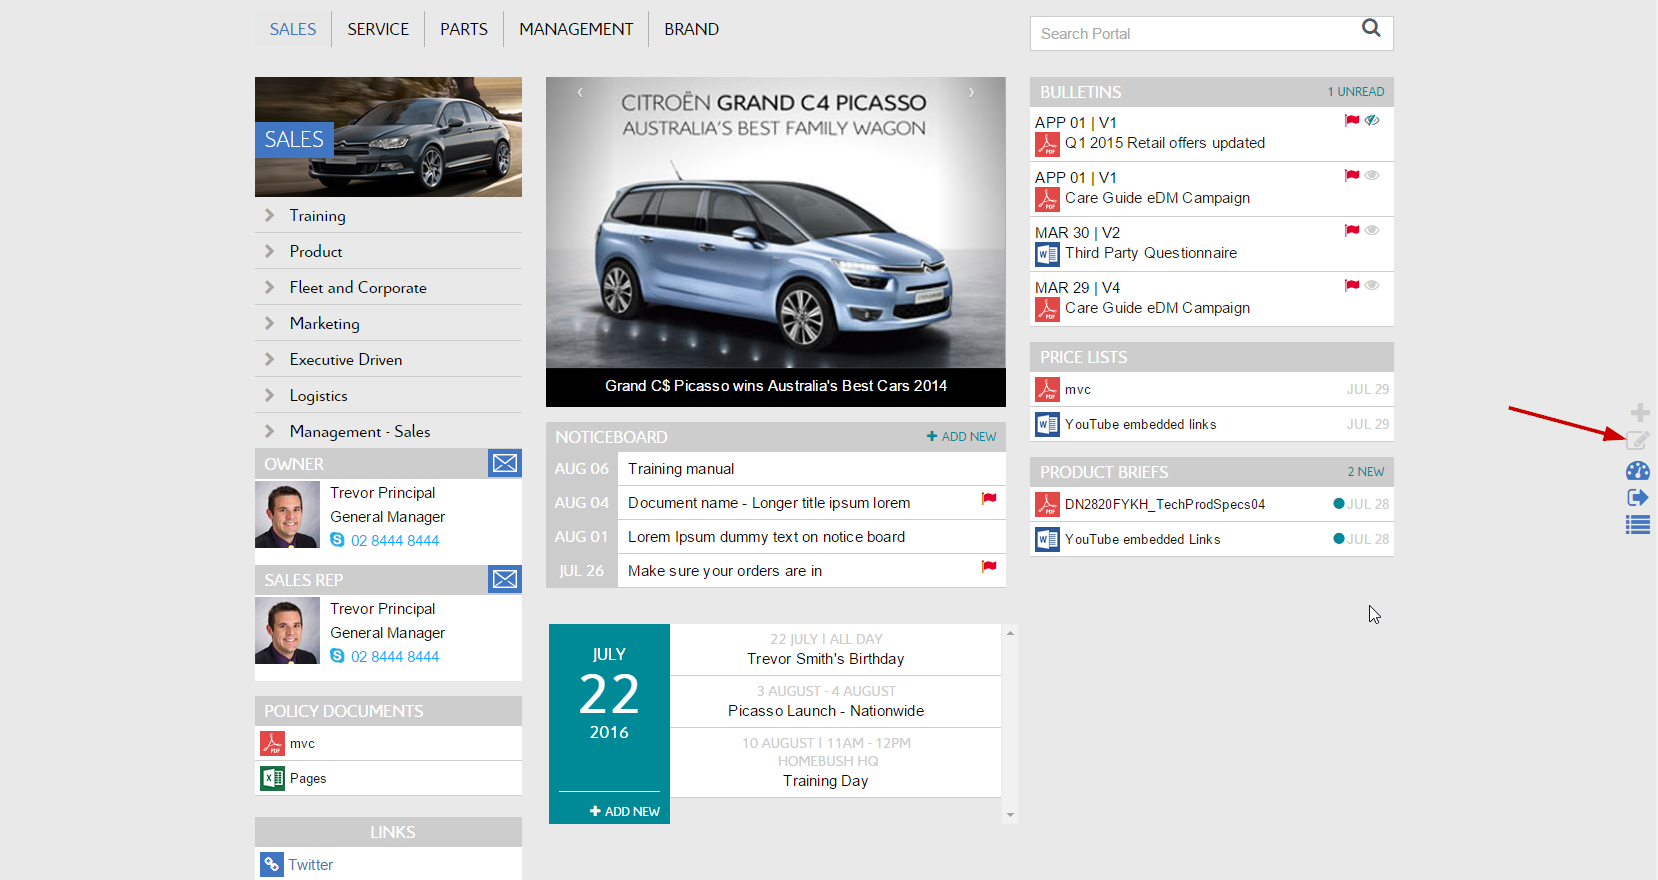
2Go to the page that you want to show notices and click Edit
-
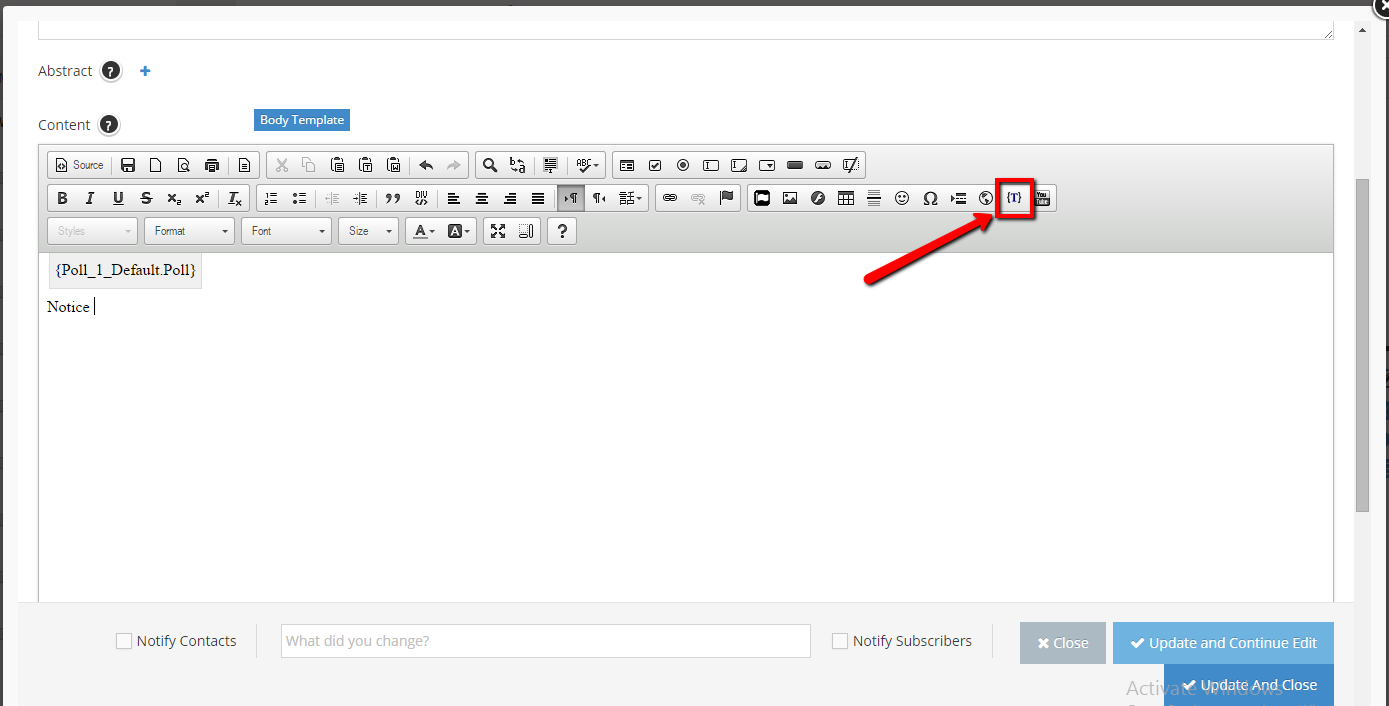
3Add a Notice to your desired location then select the Curly Bracket icon
-
4Click the Configuration button in the popup
In the new popup, type typing Noticeboard keyword into the textbox search. Then click on an item in the resulting search. -
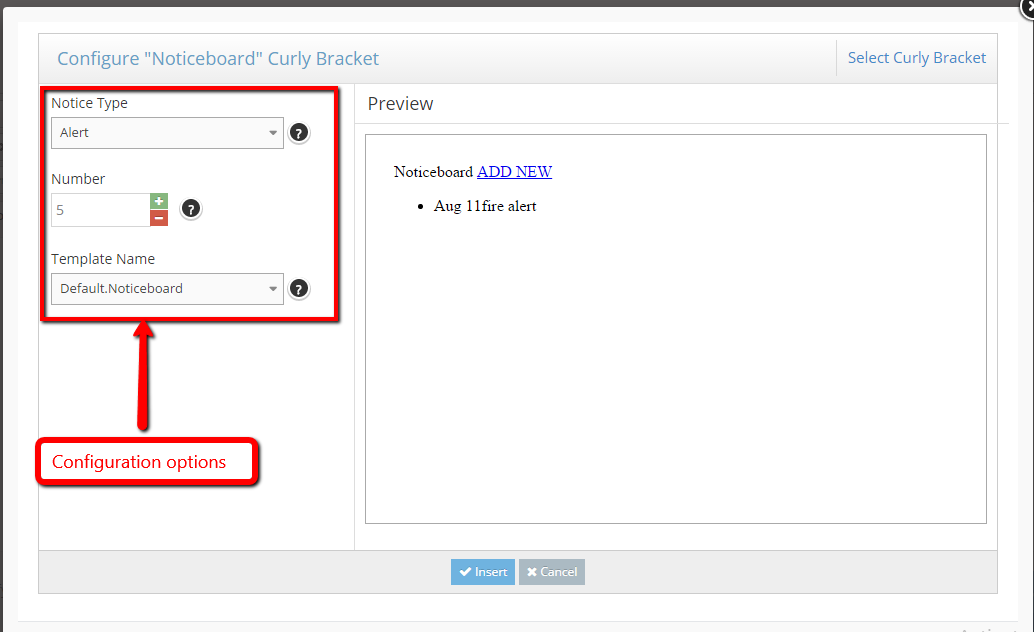
5Select the option on the left side, and review the UI on the right side.
-
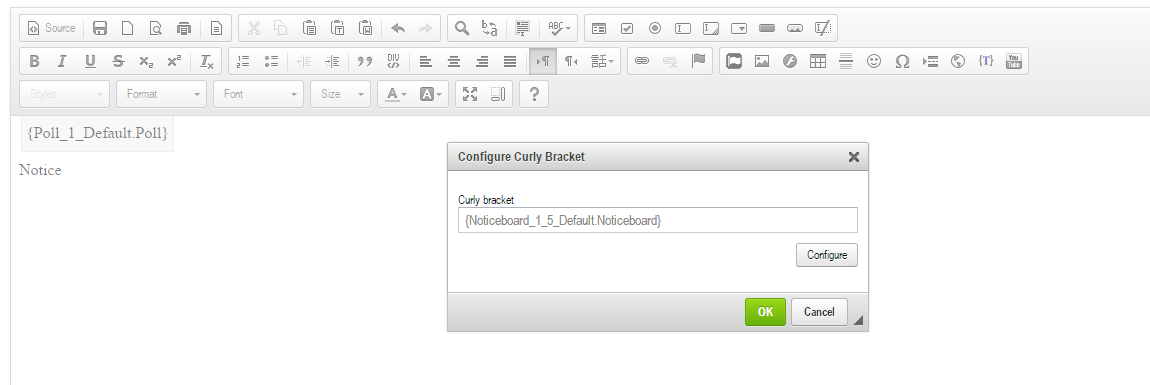
6Click the Insert button to save the Curly Bracket configuration
-
7Click OK button to finish
-
8Click Update And Close
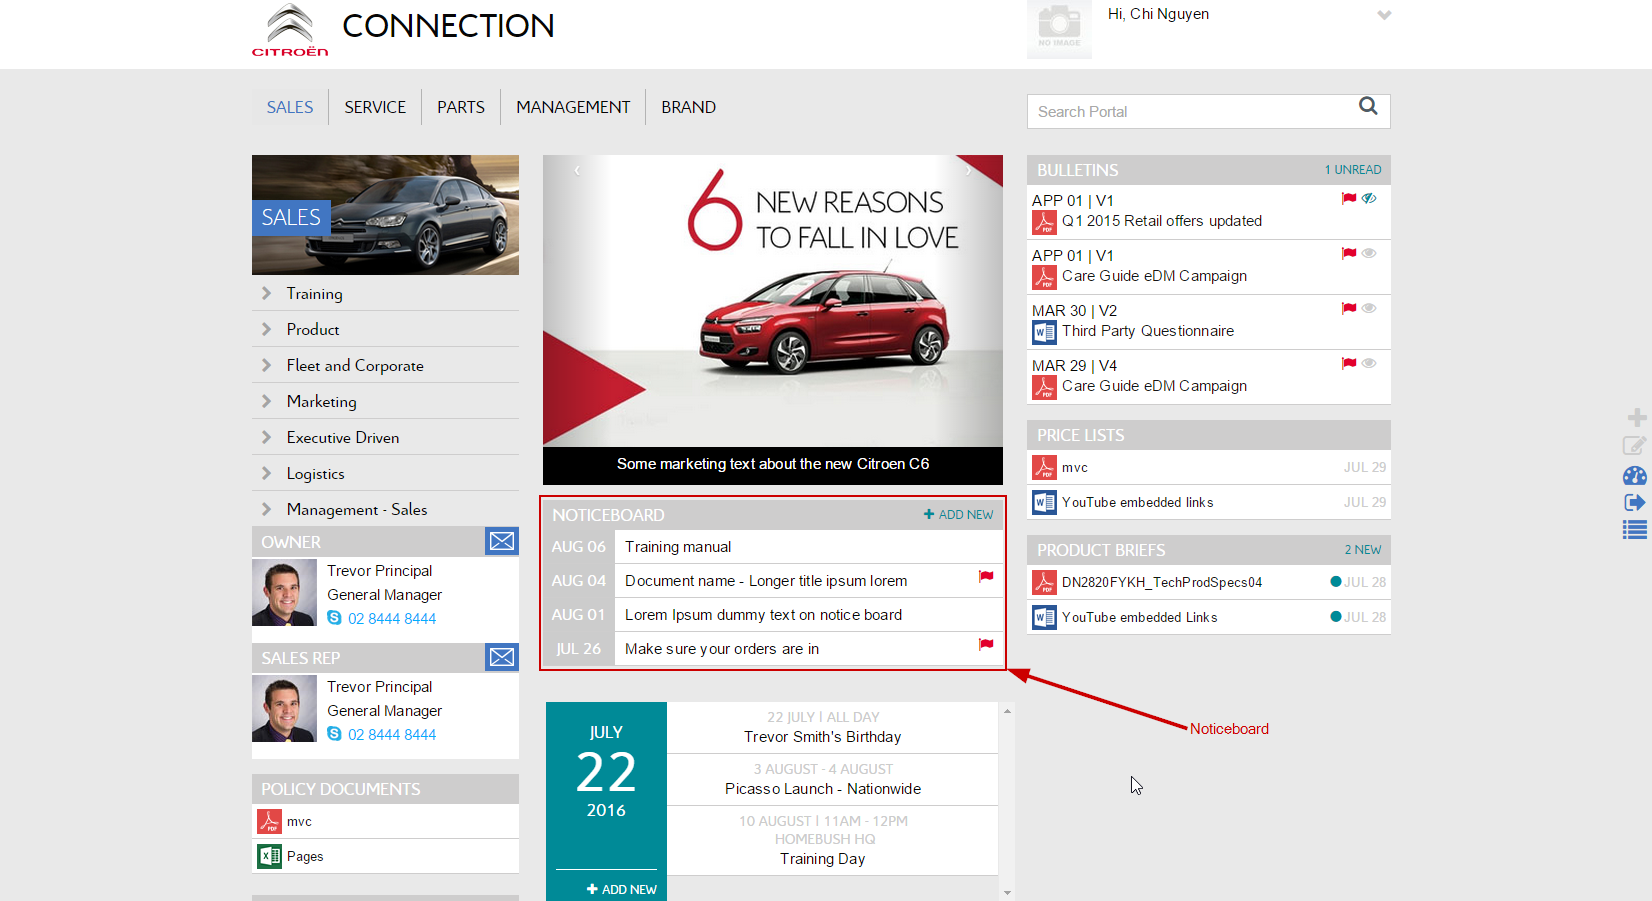
-
9Edit NoticeBoard:
Double click or right click on the Curly Bracket then select Edit curly bracket option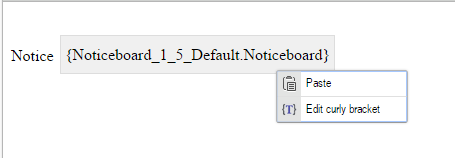
How to Create, Edit and Delete a Notice in Admin Dashboard
STEP-BY-STEP
-
1Log in as an administrator and go to the Admin Dashboard.
Learn how to log in here → -
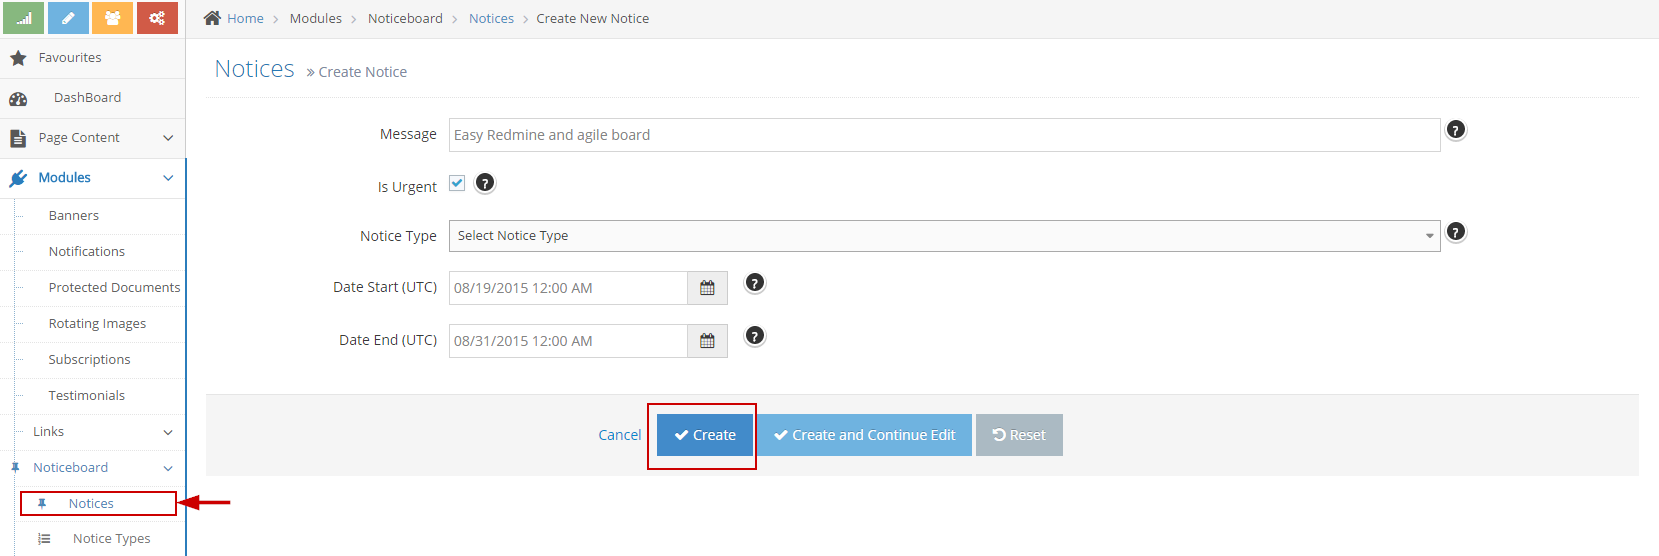
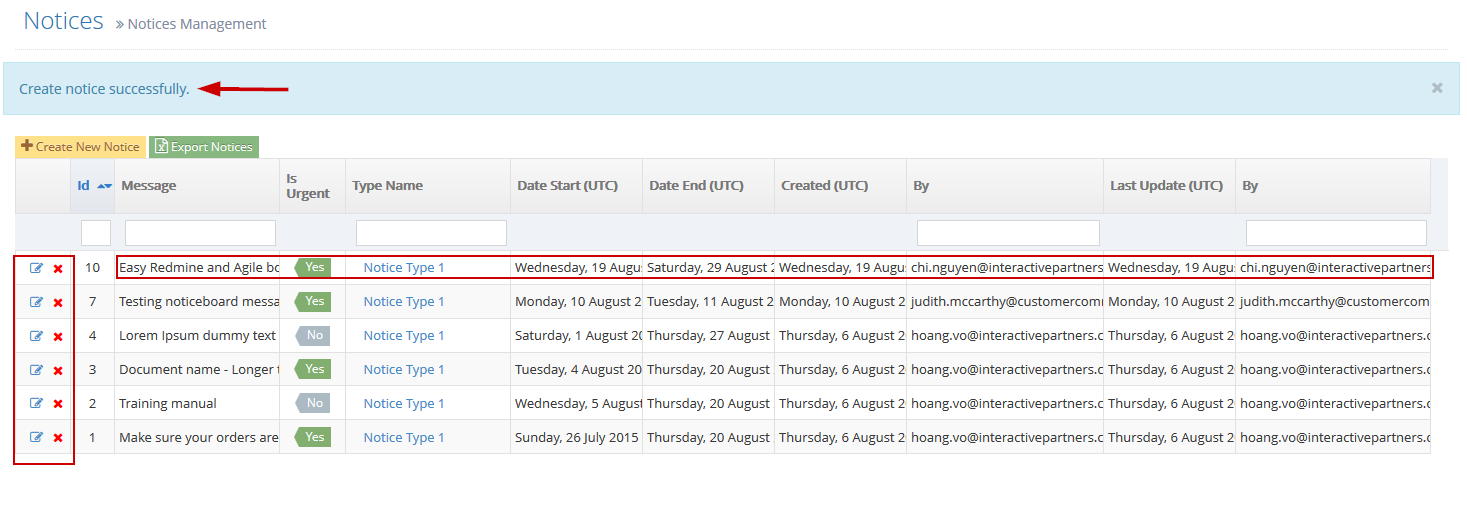
2Go to Admin Dashboard >> Modules >> Noticeboard >> Notices and select your suitable action in the 1st column or select Create New Notice
How to Create, Edit, View Details and Delete a Notice Type in Admin Dashboard
STEP-BY-STEP
-
1Log in as an administrator and go to the Admin Dashboard.
Learn how to log in here → -
2Go to Admin Dashboard >> Modules >> Noticeboard >> Notice Types and select your suitable action in the 1st column or select Create New Notice Type

-
3Click Create button. It will be saved on the grid and on the grid you can edit and delete link.
-
4Edit Notice Type and click Save button.

How to change the Noticeboard Curly Bracket display on the page
WebEd 9 curly brackets use the template to render content onto the screen. Each curly bracket has 1 default template that cannot be removed. You could edit that template or create a new template to suit your requirement.
STEP-BY-STEP
-
1Log in as an administrator and go to the Admin Dashboard.
Learn how to log in here → -
2Go to Admin Dashboard >> System Settings >> Module Management >> Curly Brackets Tags and search for the keyword Noticeboard

-
3You can click on Default Template name to edit the Default Template or click on + symbol in the 2nd column to create new template for that curly bracket
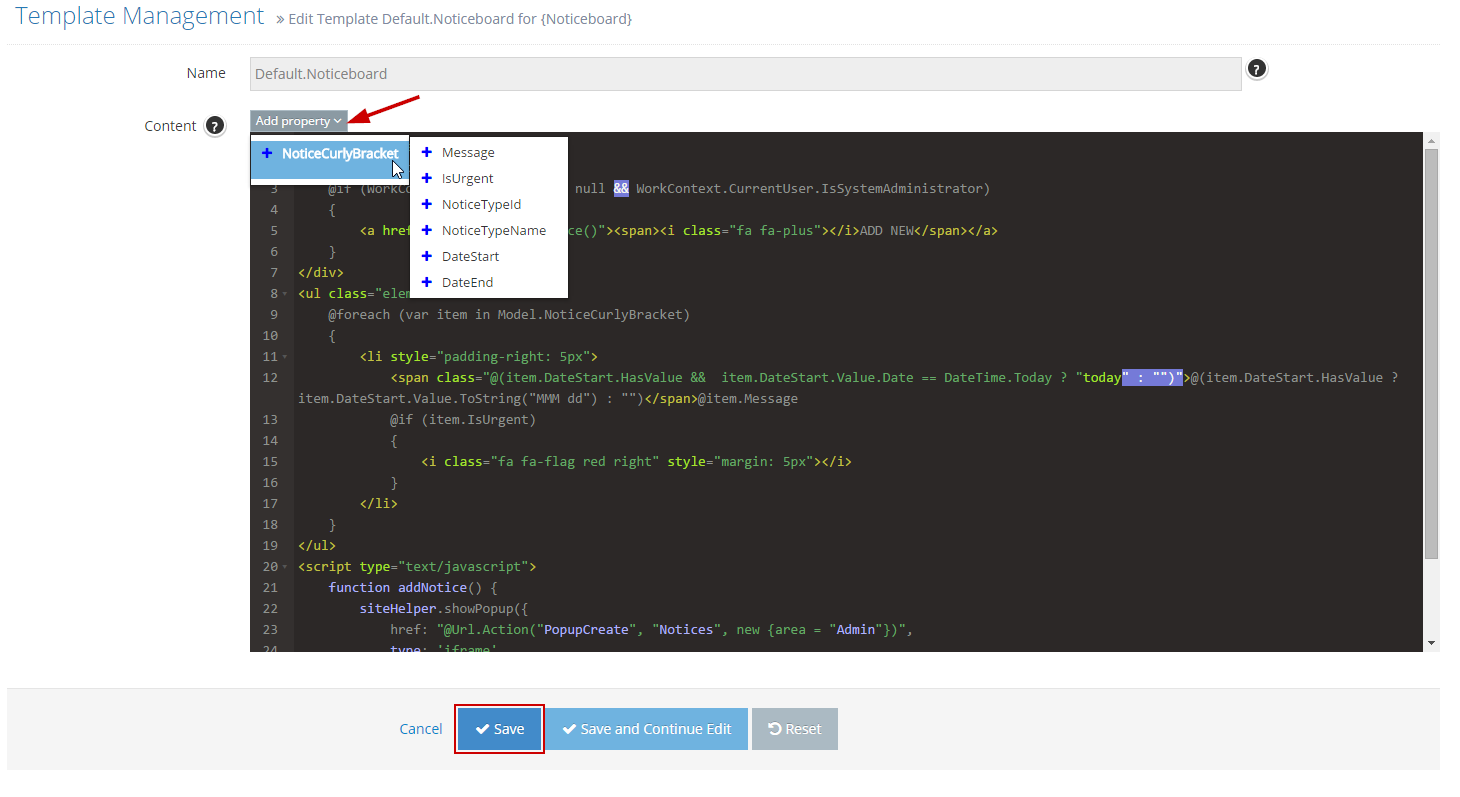
Name Description Message Message of notice IsUrgent Notice is urgent or not NoticeTypeId Id of Notice Type NoticeTypeName Name of Notice Type DateStart Start date of the notice DateEnd End date of the notice