Booking an Event
What is Event Booking
This documentation shows how a user can book a particular event schedule
Event booking is when a user wants to join a particular event that will happen in a particular event schedule for the user to be allowed to join, he/she must first book.
How to Book an Event
STEP-BY-STEP
-
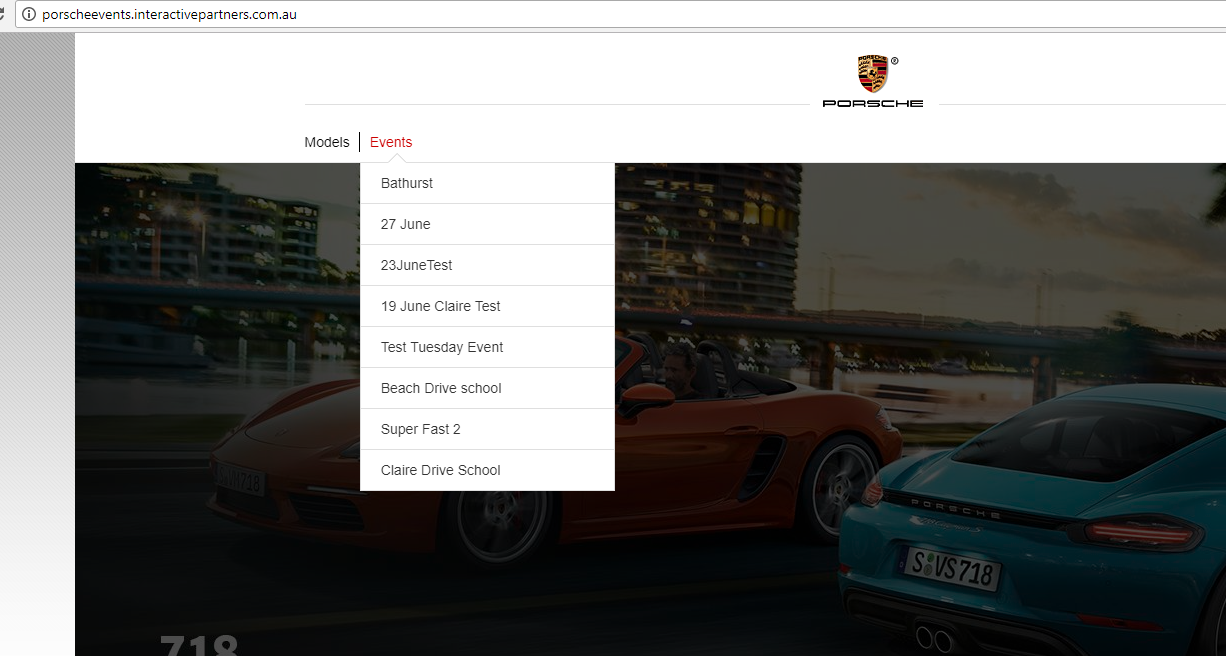
1Go to Events Events Page
-
2Choose the event that you want to attend
-
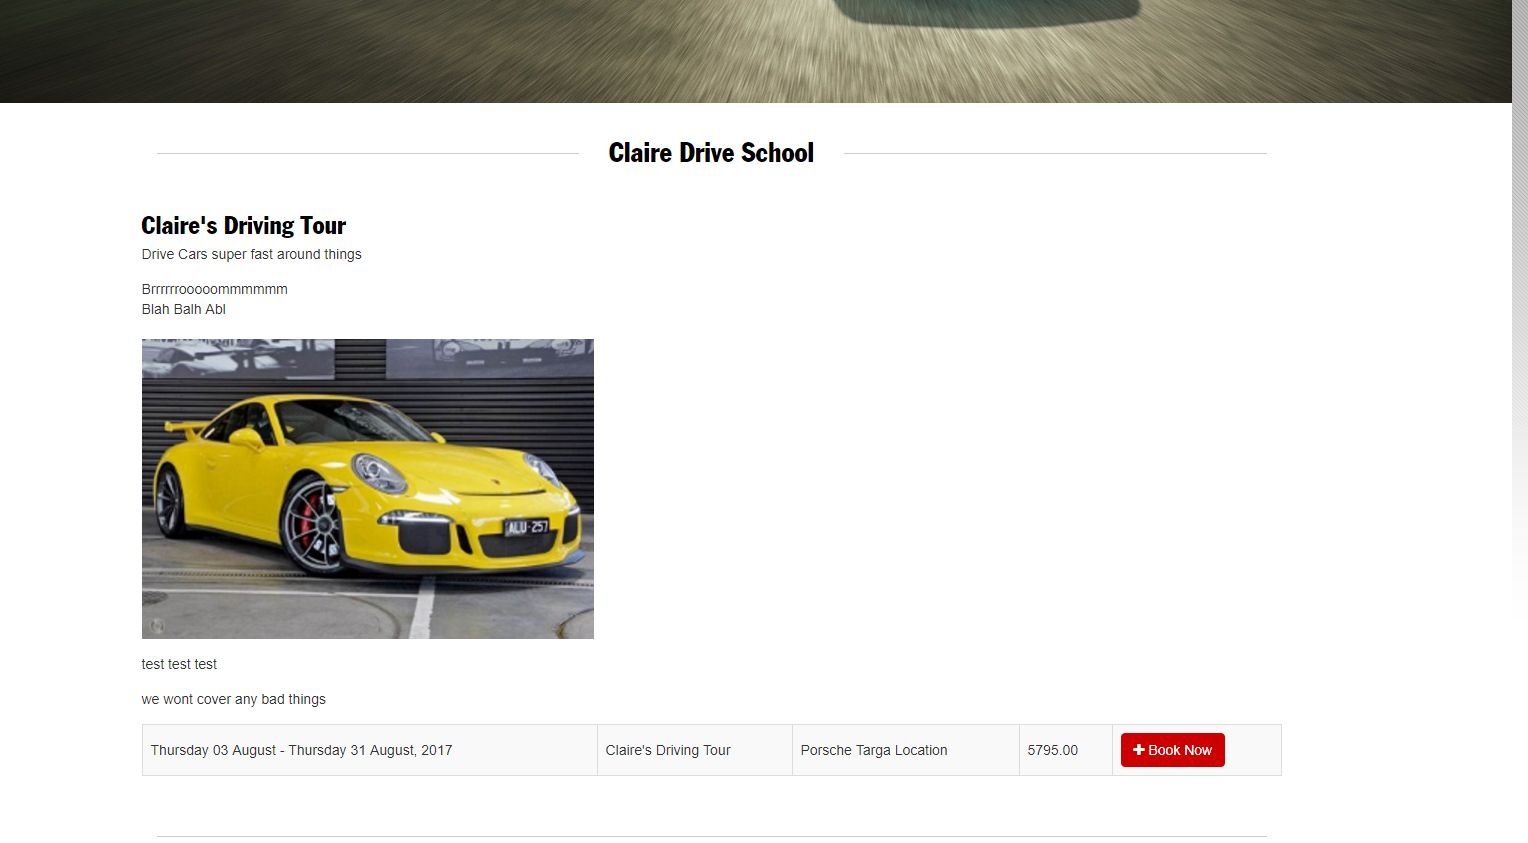
3Scroll down to see if there's an available event schedule, if there is no list then there is no event schedule available for the chosen event
-
4Click the "Book Now" button on your chosen event schedule
-
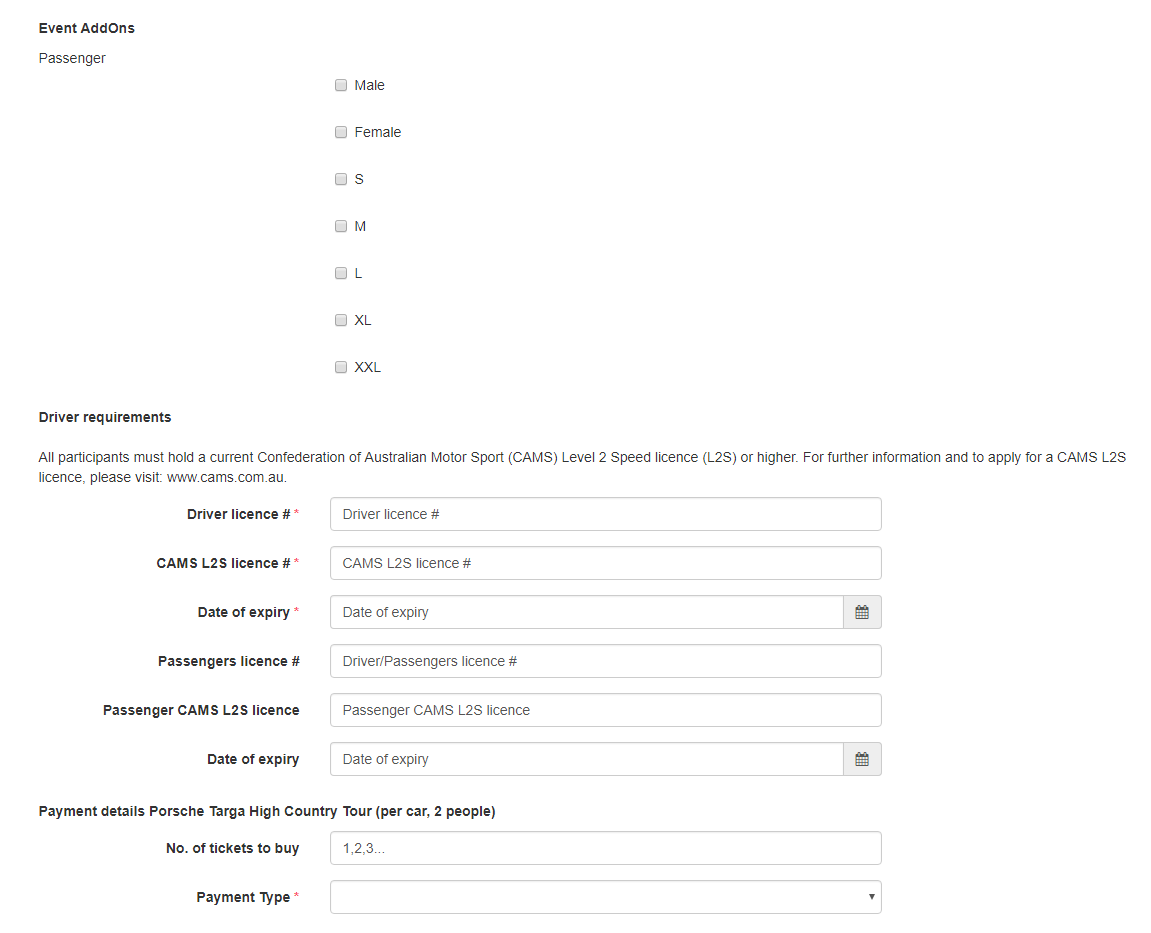
5Fill out all required fields and other information
-
6Click the "Submit" button if finished
-
7If "No. of tickets to buy" were left blank then it will assume that the user will just buy 1 ticket

-
8Fill out your Credit Card Information if you have chosen "Pay online by credit card" on "Payment Type"
-
9Click "Pay Now"
-
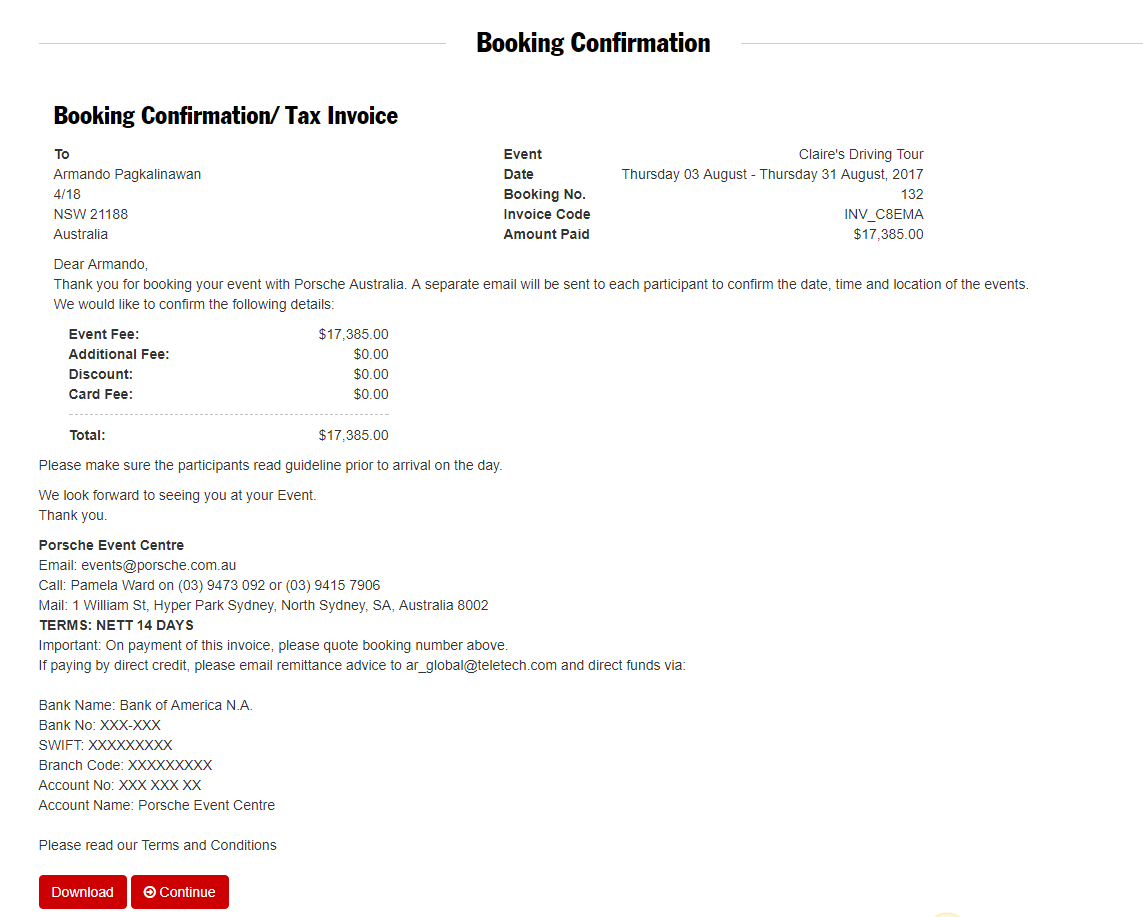
10See Booking Confirmation
-
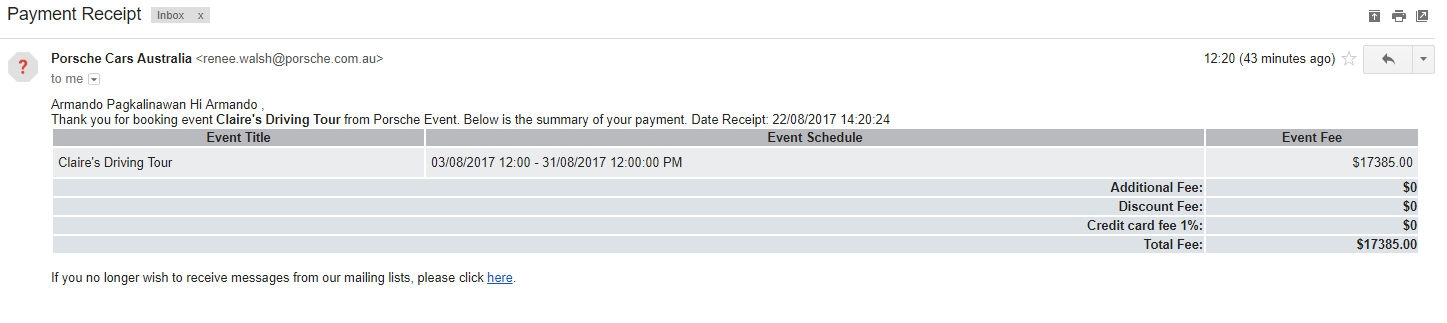
11See Payment Receipt Email
-
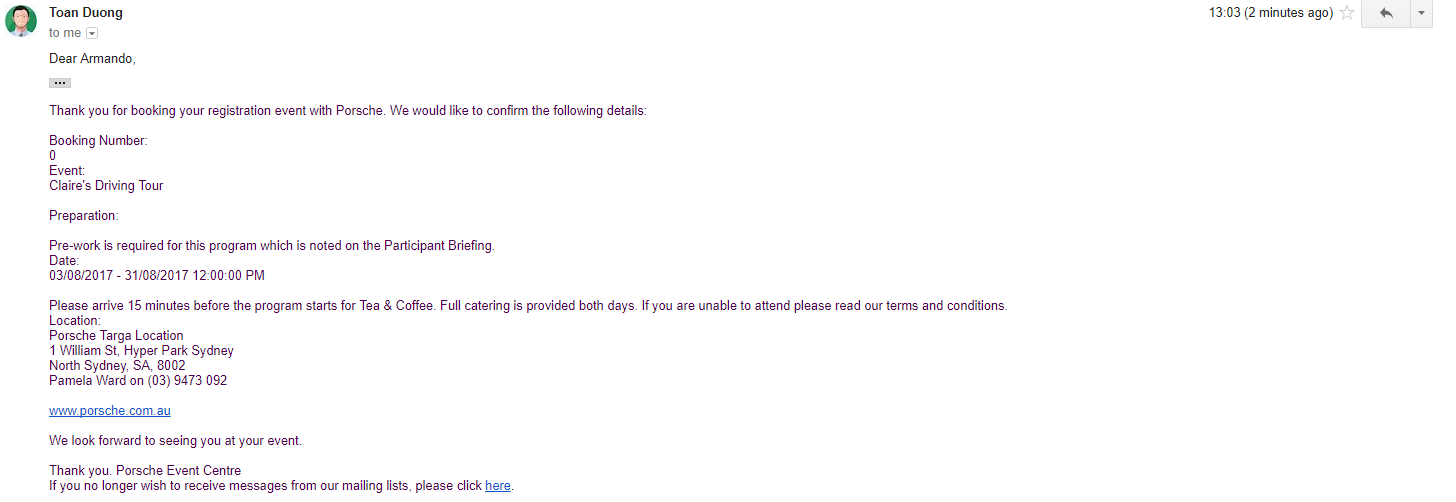
12See Booking Confirmation Email
-
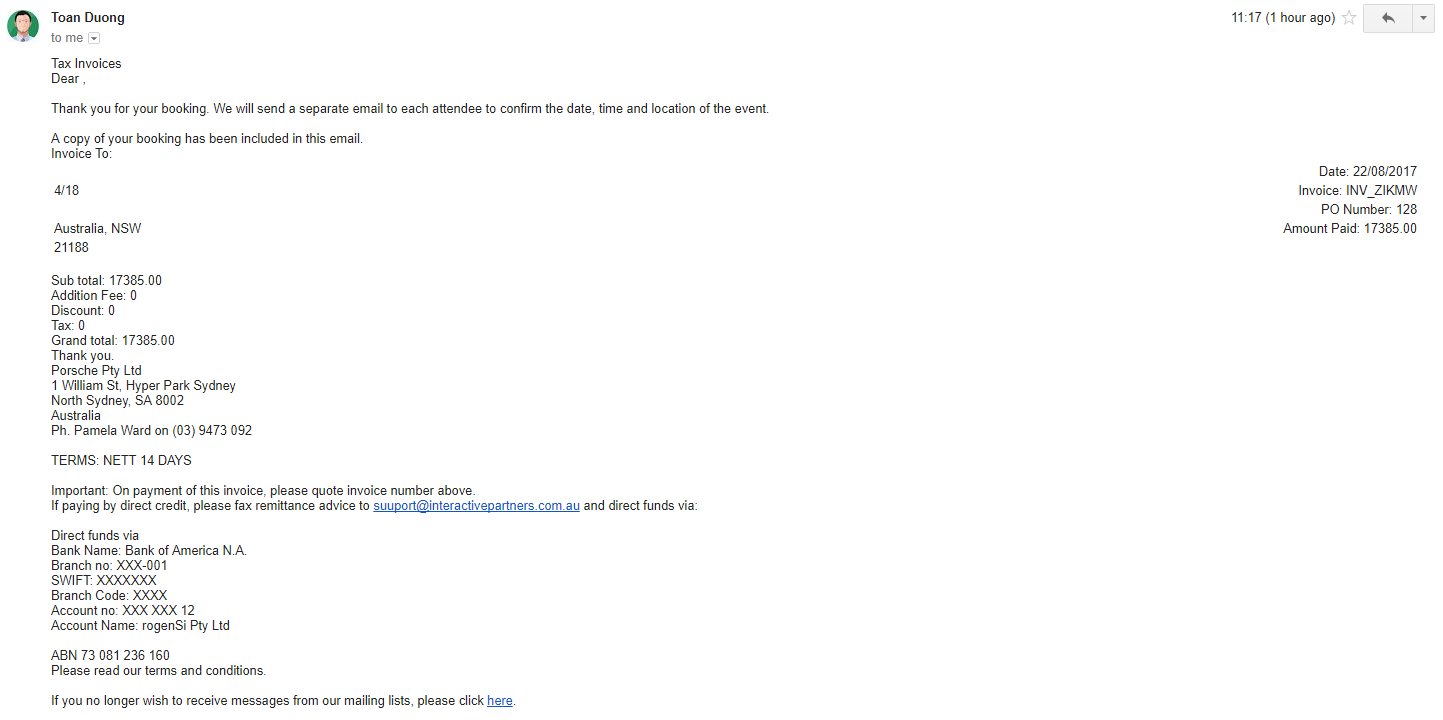
13See Tax Invoice Email
-
14Congratulations! You've completed booking an event.
Updating Payment/Booking Status
STEP-BY-STEP
-
1Log in as an administrator and go to the Admin Dashboard.
Learn how to log in here → -
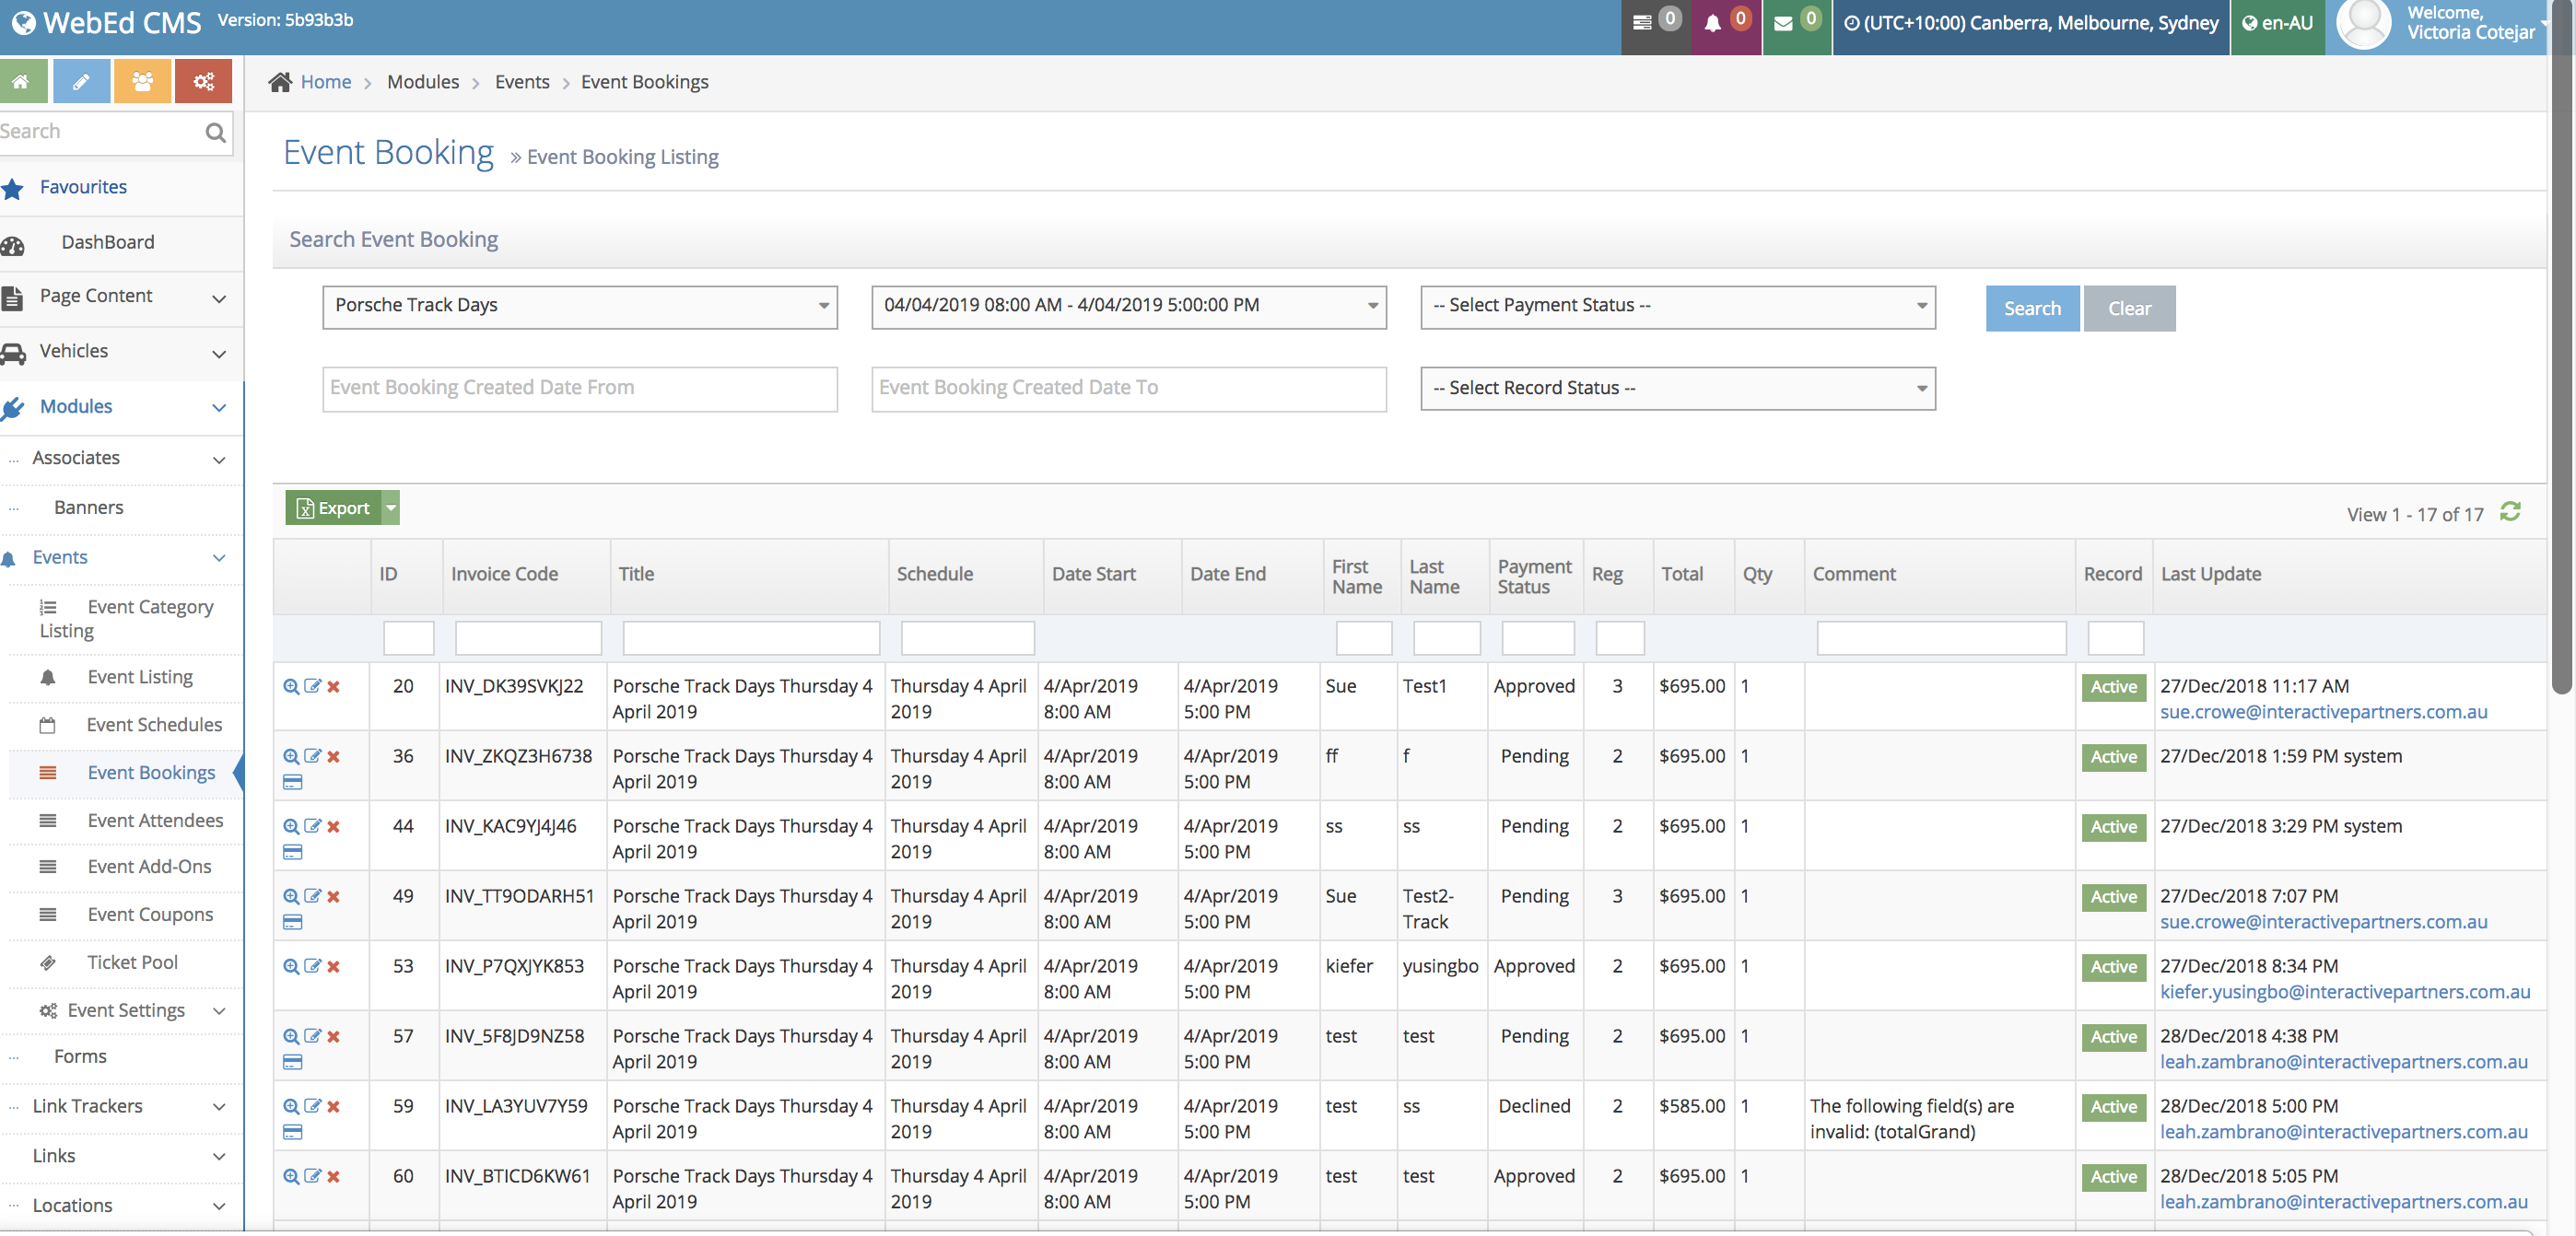
2Under Modules on the left menu, choose Events
-
3Click Event Bookings
-
4Under the column, First Name and/or Last Name, enter the user's details accordingly.
-
5Click on the Update Booking Status
 icon on the left<
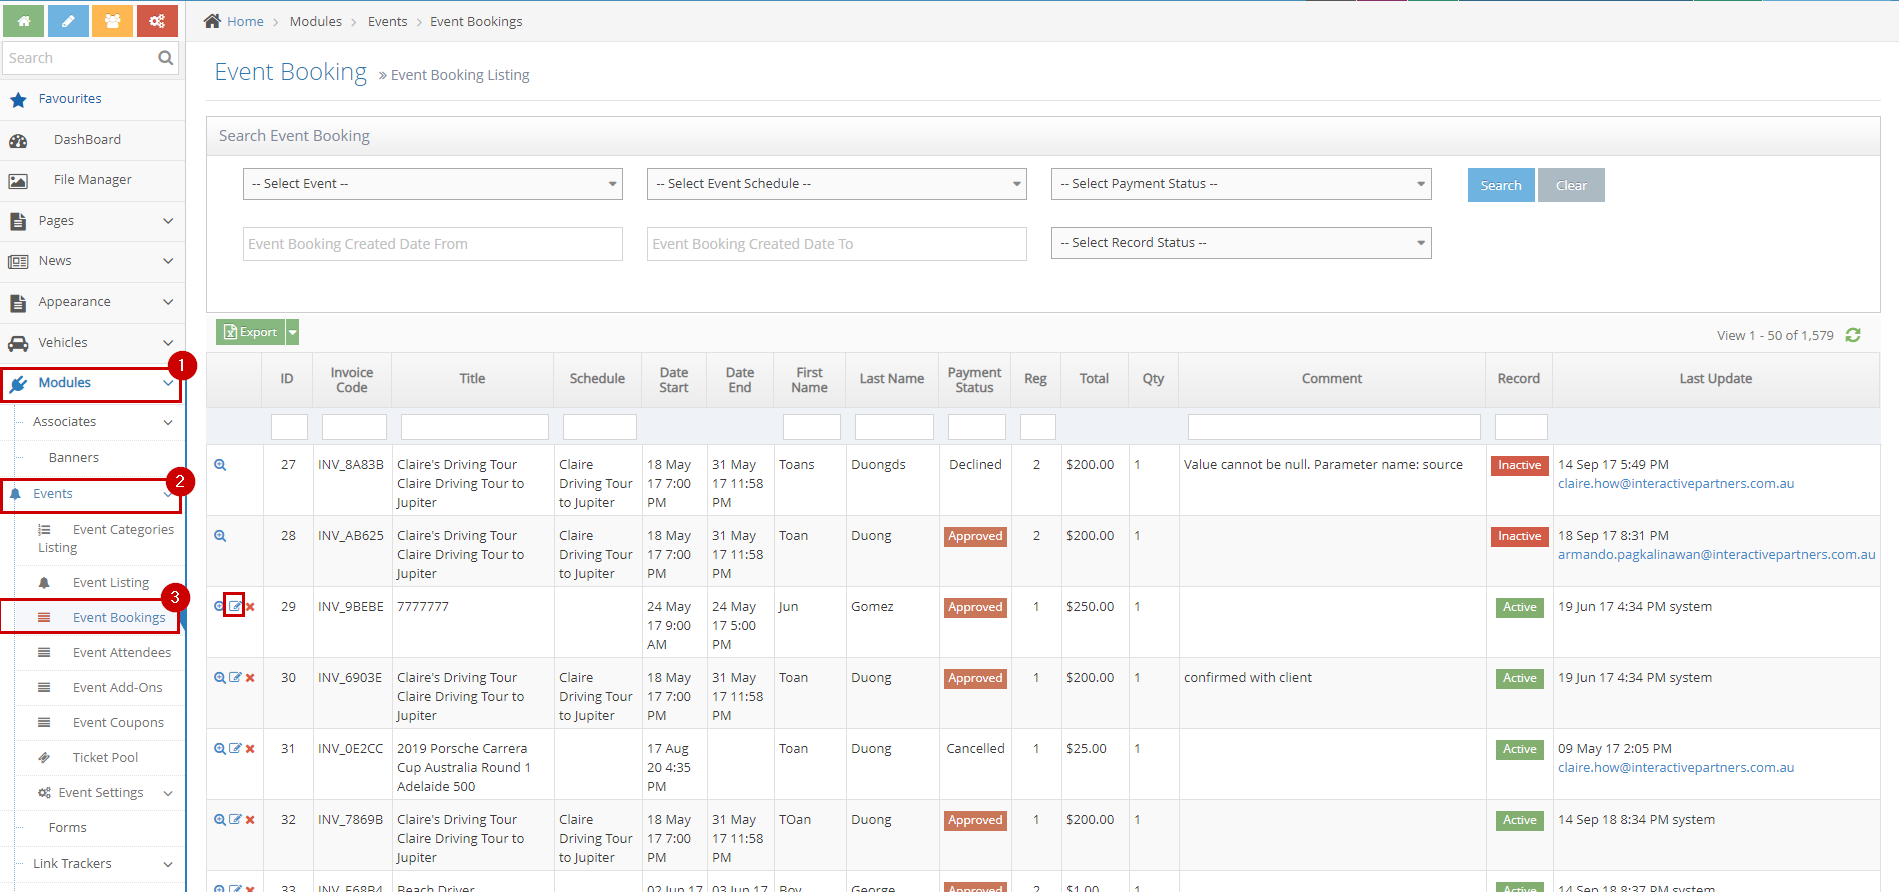
-
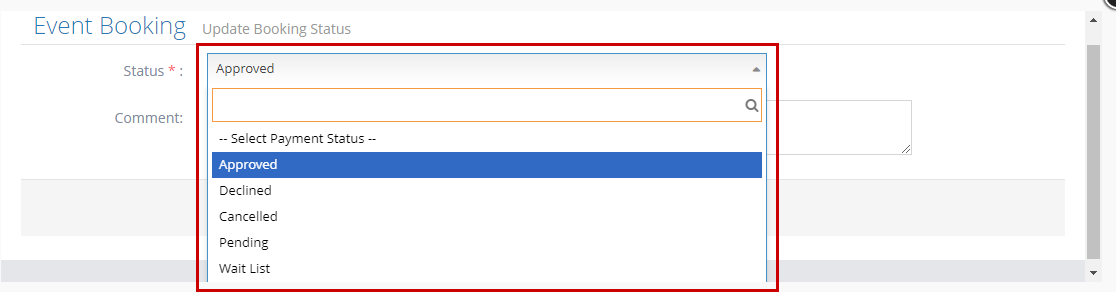
6Select the booking status from the options
- Approved - When the user booked and finished the process until payment
- Declined - When the user booked and finished the process until payment but the payment is invalid
- Cancelled - When the user booked and finished the process until payment then cancelled the booking
- Pending - When the user booked but did not finish the process with the payment
- Waitlist - When the user booked and the event is currently sold out but allow wait list
-
7Put a comment (optional)
-
8Click Save or Save and Continue Edit to apply changes
-
9Click Close if you want to cancel the update and close the box

Exporting Event Booking Registered Data
STEP-BY-STEP
-
1Log in as an administrator and go to the Admin Dashboard.
Learn how to log in here → -
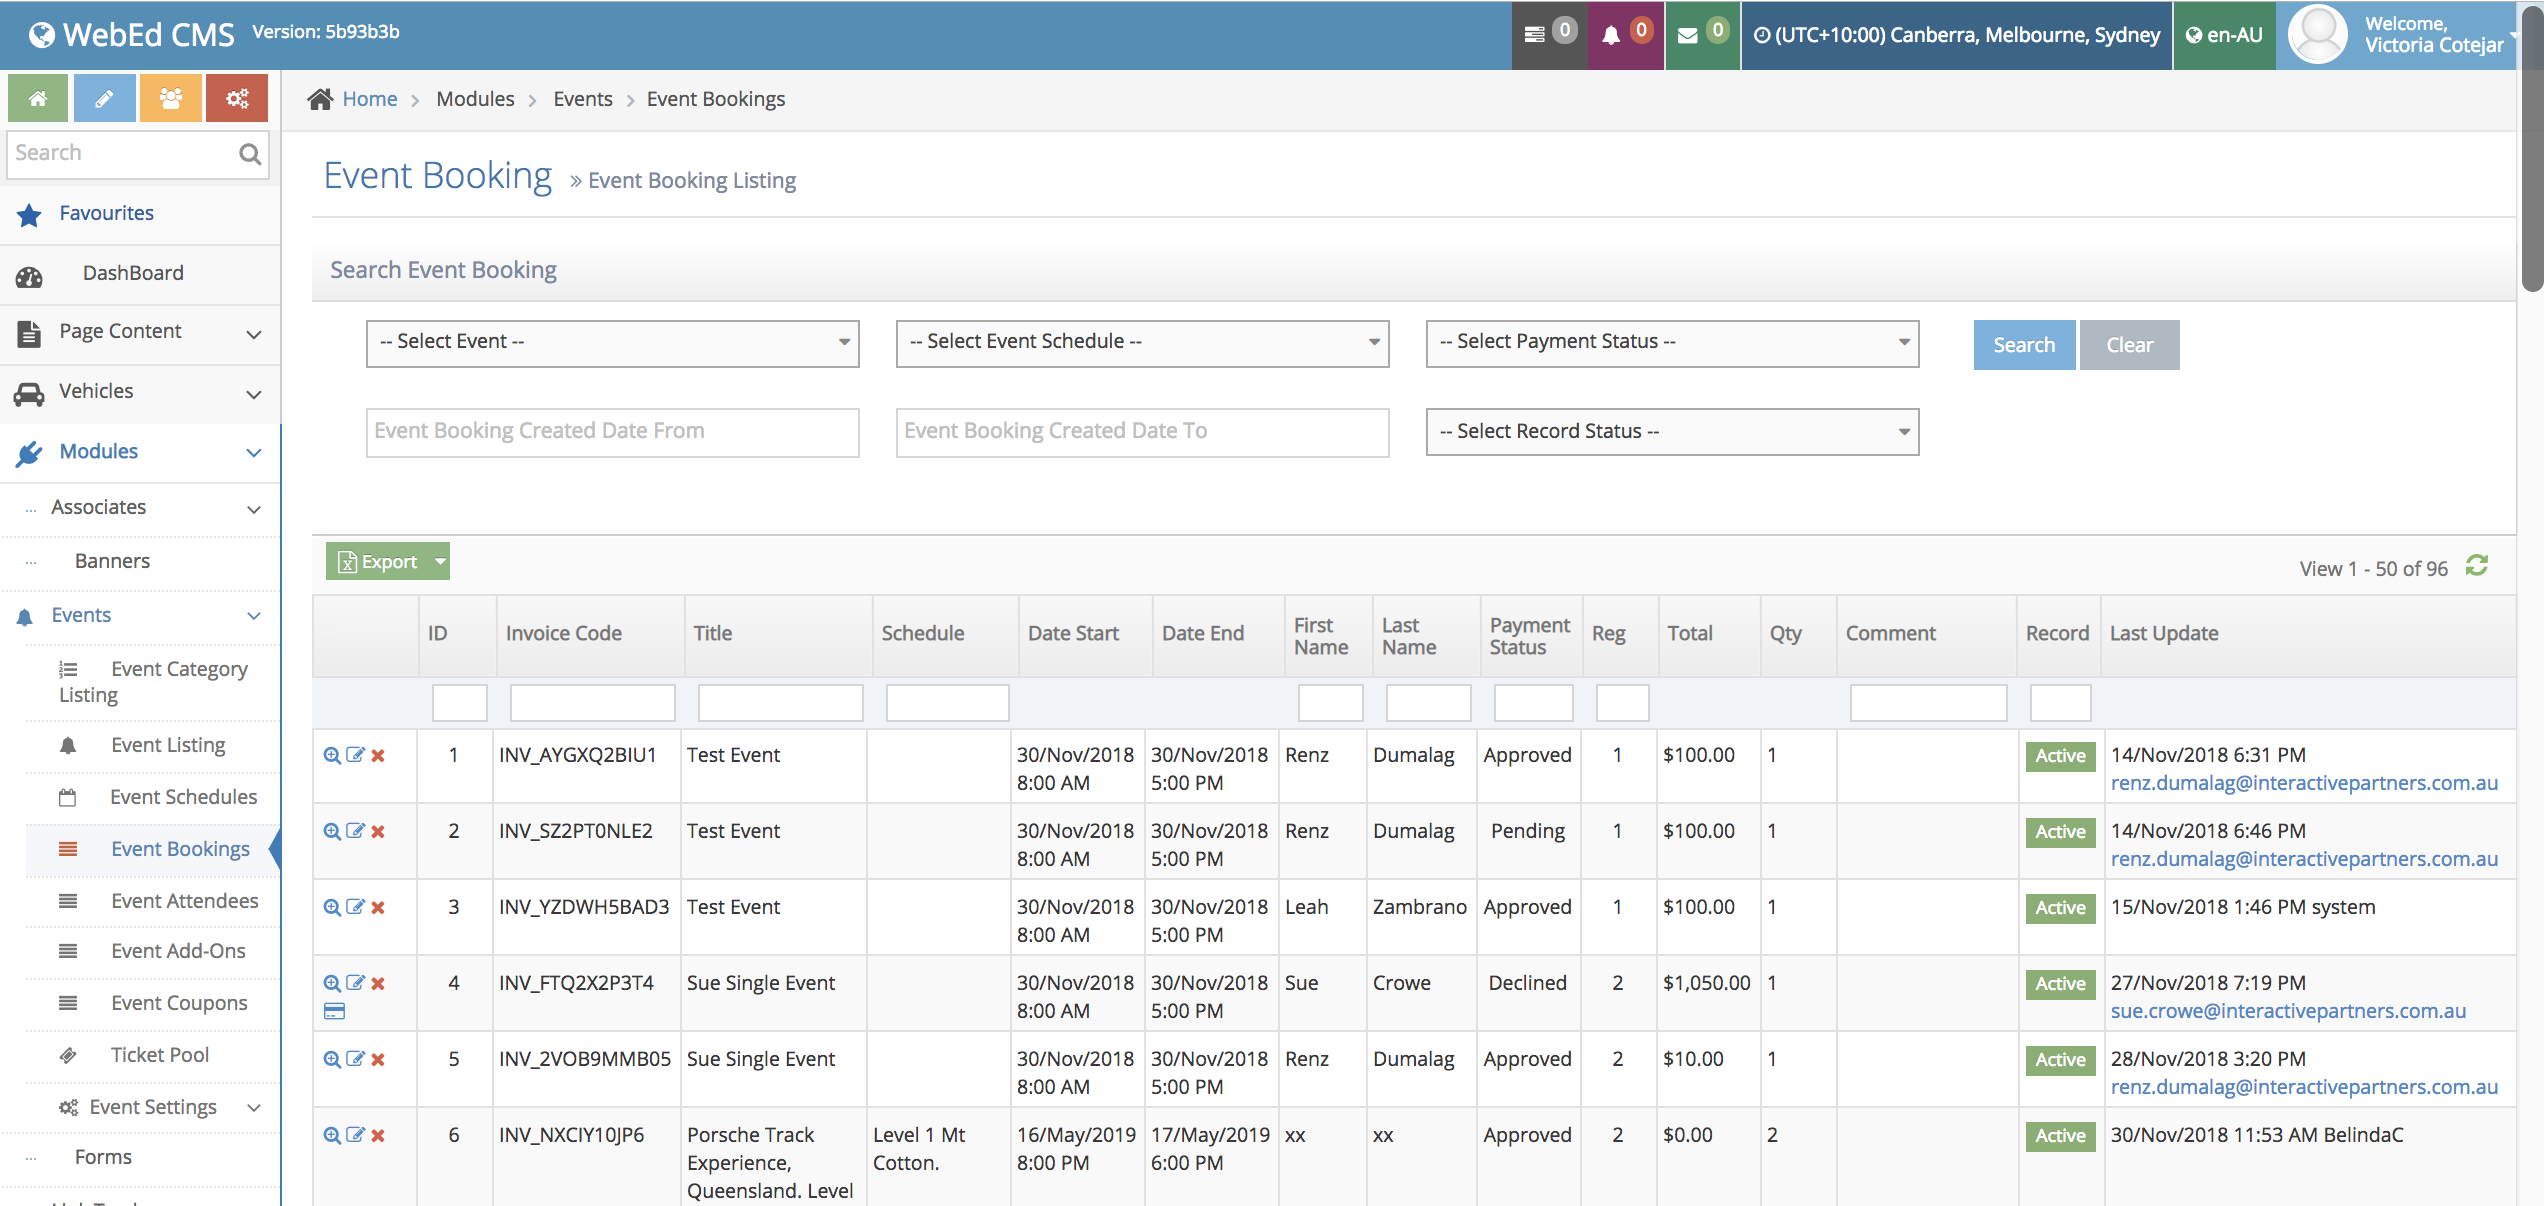
2Go to Events > Event Bookings
-
3A list of registered participants/leads will show.
-
4Filter through the leads by selecting your event from the Select Event drop-down, then click Select Event Schedule.
-
5Note: You can also filter through Select Payment Status and/or Select Record status.
-
6Once Filtered a list of all the leads will come out. Then click on the Export button. All the leads on there will automatically be downloaded and exported into an excel sheet.