- Curly Bracket Overview
- Why you would use Curly Bracket Function
- How to add a Curly Bracket to Page Content
- Using Templates to Format the Output
- List of Curly Bracket Modules
- Menus Module
- Pages Module
- PageContent Module
- RSS Feeds Module
- List of Curly Bracket Functions
How to add a Curly Bracket to Page Content
via Front-End Editor
STEP-BY-STEP
-
1Log in as an administrator and go to the Admin Dashboard.
Learn how to log in here → -
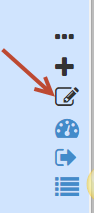
2On the page you want to update, click on the Edit page icon to start.
-
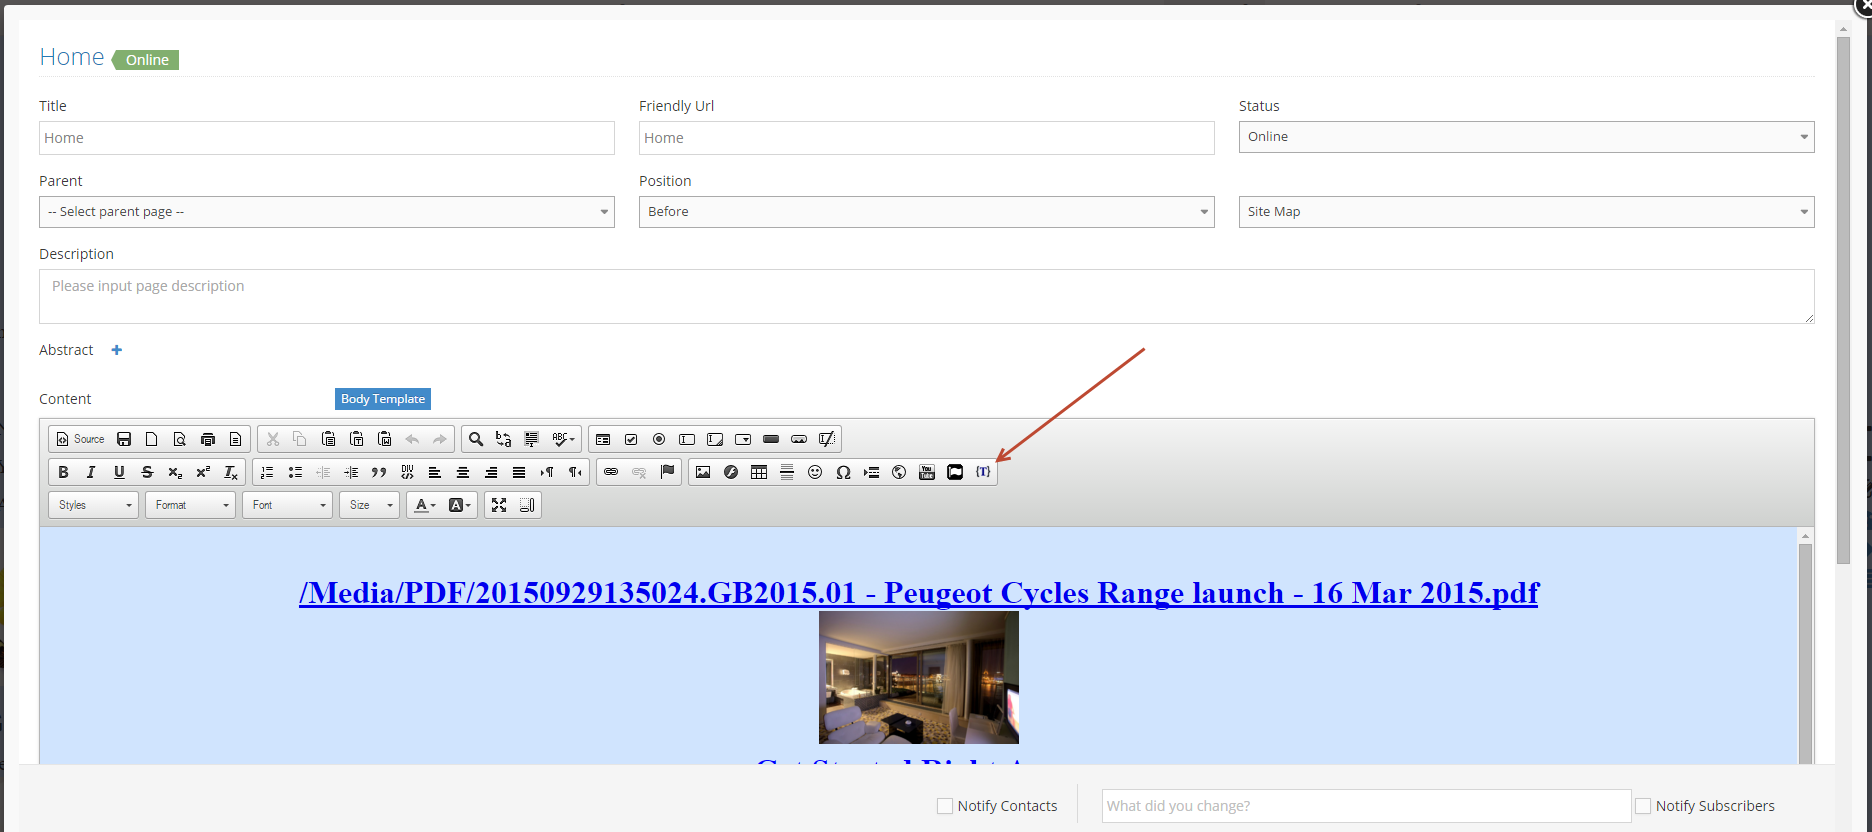
3In the new popup, click the icon to find a Curly Bracket

-
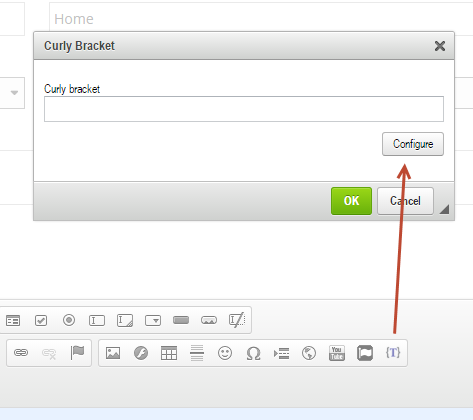
4In the new popup, click the Configure button
-
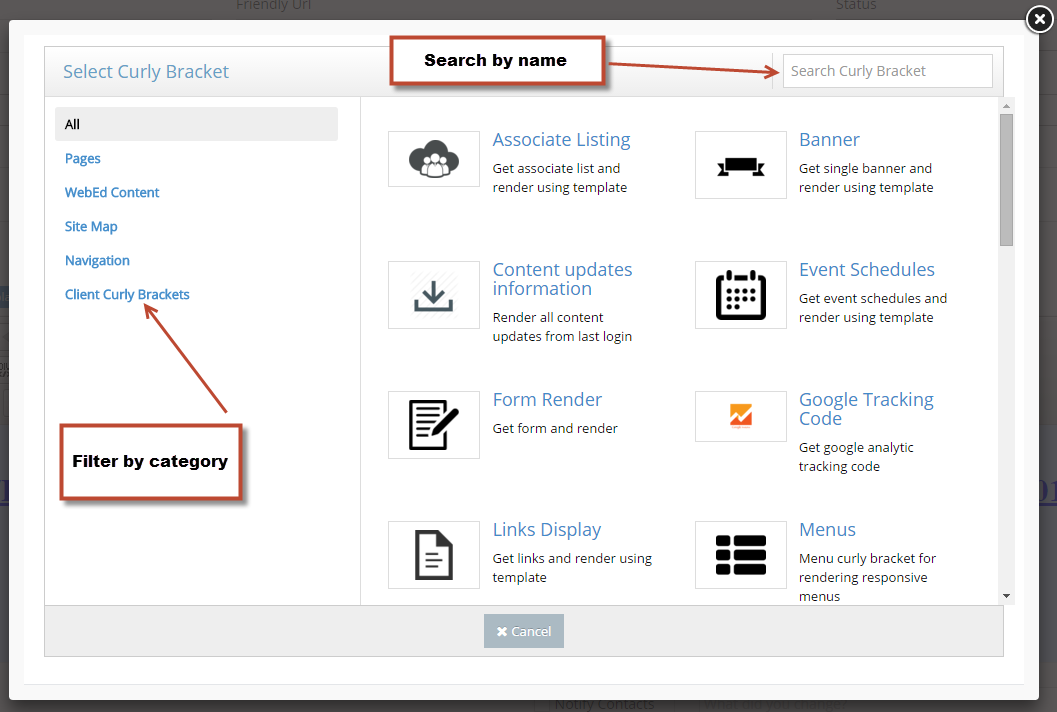
5List Curly Brackets: Search the Curly Bracket by category in the left column or enter a part of the name in the textbox in the top right.
-
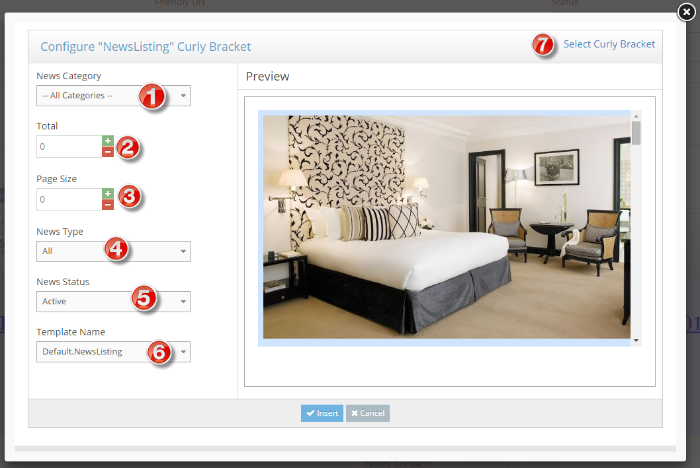
6Each Curly Bracket has different configurable parameters which make it easy to control the content displayed.
Configure parameters of a Curly Bracket:- For example, News Listing Curly Bracket
- (1)- News Category: select a category in the drop-down list or all categories
- (2)- Total: Enter the number of items to display, and enter zero to show all items
- (3)- Page size: enter a number to limit the number of items displayed per page and zero to show all
- (4)- Type: select a news type to display (There are two types: General and Hot)
- (5)- Status: select a status (Active, Inactive, Archive)
- (6)- Template Name: select a template to display news items.
- (7)- Select Curly Bracket: choose another Curly Bracket
- Preview: A simple view to review news and template before completing configuration.
-
7Click the Insert button to complete configure step.
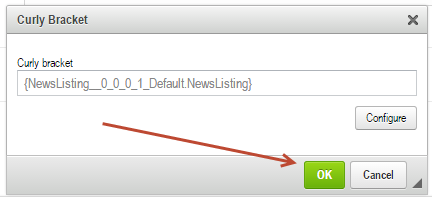
-
8Click OK in a small popup to complete.
-
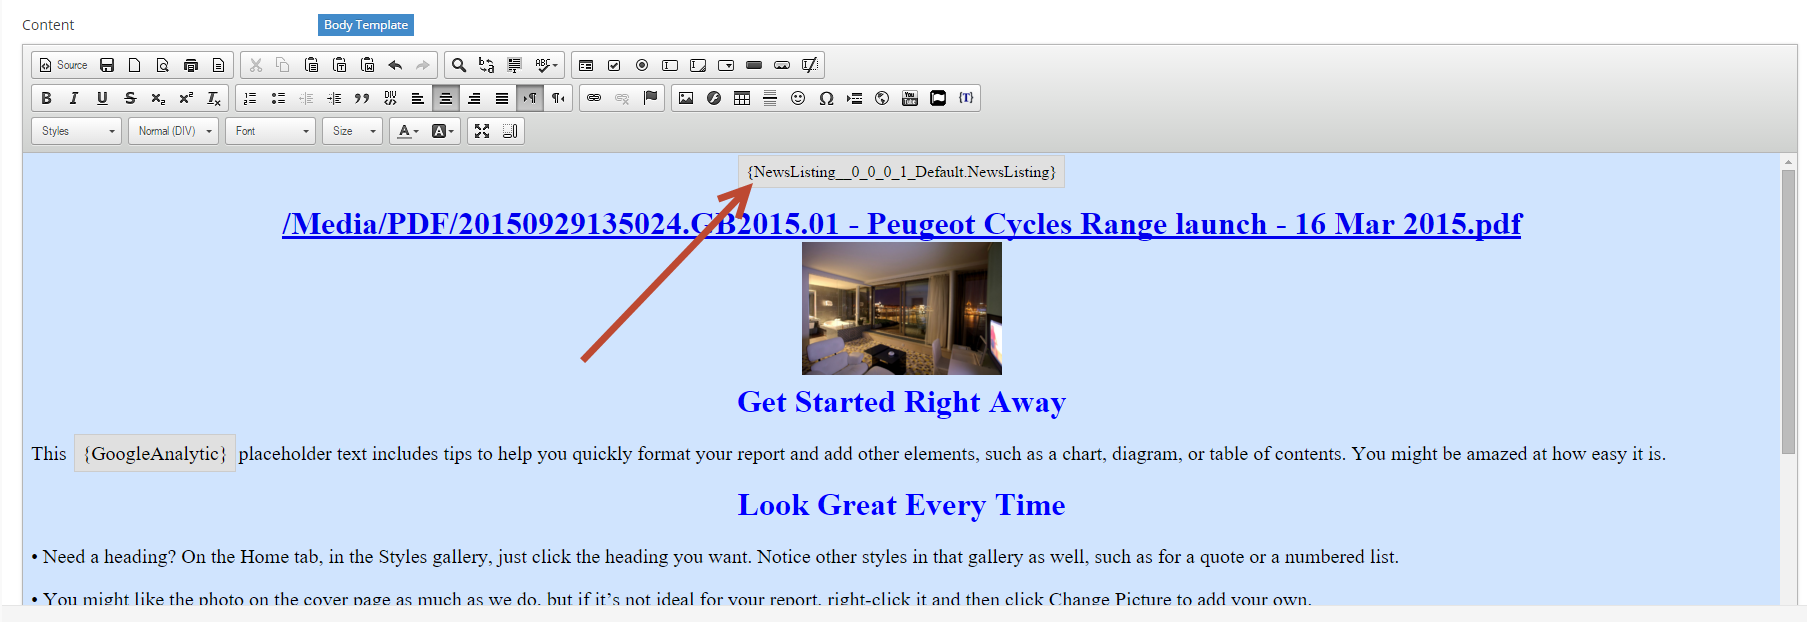
9The Curly Bracket will display a preview of the content of a page.
-
10Click Update and Close to view the result.