Why you would use an Attendee Type?
This documentation will show information on managing attendees in the events module.
The reason why the attendee type is necessary is that the user or admin can specify the different types of people that will attend the event.
Create an Event Attendee Type
STEP-BY-STEP
-
1Log in as an administrator and go to the Admin Dashboard.
Learn how to log in here → -
2Under Modules on the left menu, choose Events
-
3Click Event Settings
-
4Select Attendee Types
-
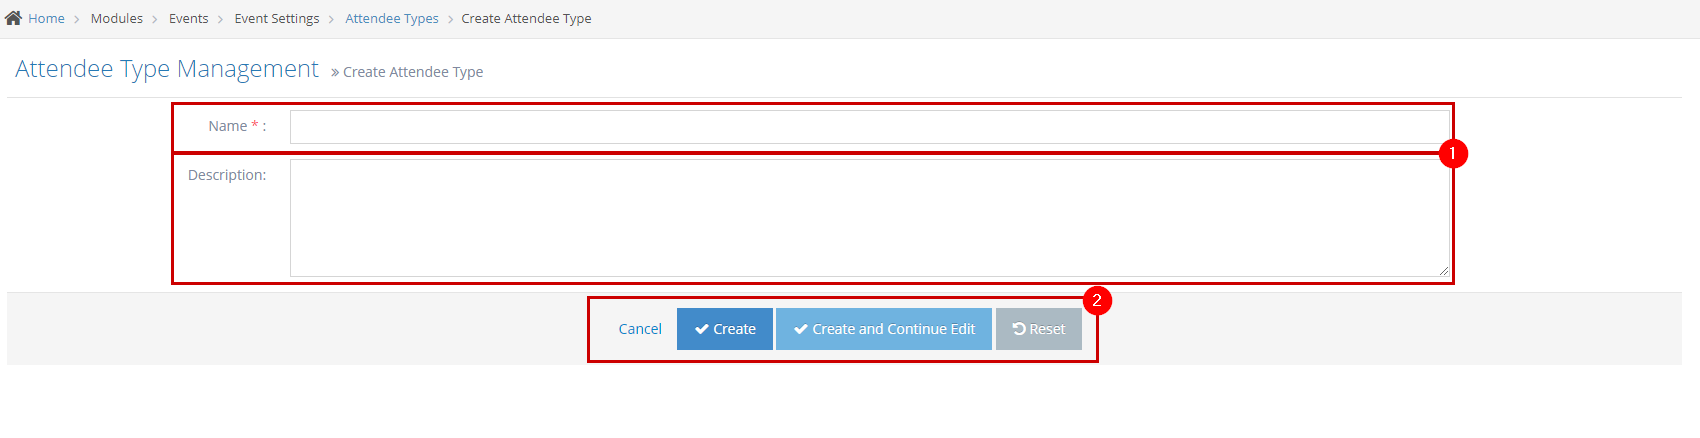
5Click the 'Create Attendee Type' button

-
6Fill out the details
- Name - enter the name of the attendee type.
- Description - a brief or short description of the attendee type.
-
7Click Create, Create and Continue Edit or Reset
- Create - click the 'Create' button to submit the new add-on type. This action creates your add-on, closes the page, and redirects you to the Attendee Type Management page (see image below). On the Event Attendee Type Management, you will see a note "Attendee type created successfully".
- Create and Continue Edit - Click the 'Create and Continue Edit' button to submit the new Attendee Type. This action creates your Attendee Type but lets you stay on the page.
- Reset - click the 'Reset' button to start over. This action refreshes the page and shows a blank fields page. Your Attendee Type will not be saved/created.
Update existing Event Attendee Type
STEP-BY-STEP
-
1Log in as an administrator and go to the Admin Dashboard.
Learn how to log in here → -
2Under Modules on the left menu, choose Events
-
3Click Event Settings
-
4Select Attendee Types
-
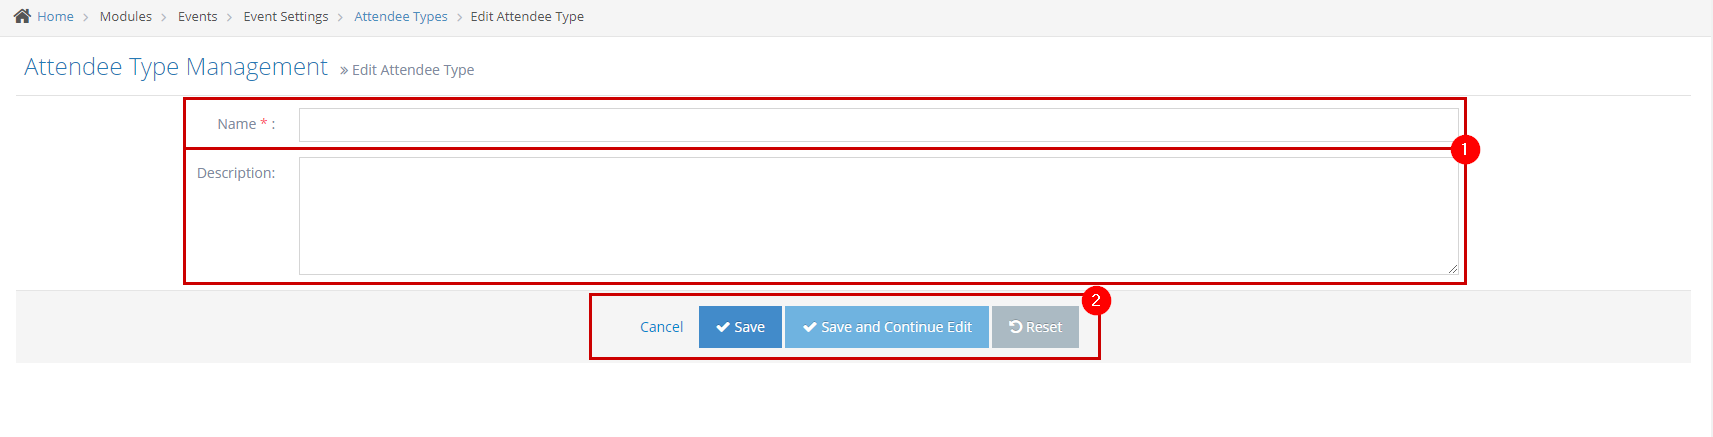
5Click the Edit
 icon on the leftmost side of the Attendee Type you wish to update
-
6Update the details
- Name - enter the name of the attendee type.
- Description - a brief or short description of the attendee type.
-
7Click Save, Save and Continue Edit or Reset
- Save - Click the 'Save' button to save the changes. This action saves the changes, closes the page, and redirects you to the listing page and you will see a note "Attendee type updated successfully."
- Save and Continue Edit - Click the 'Save and Continue Edit' button to save the changes. This action saves the changes but lets you stay on the page.
- Reset - click the 'Reset' button to start over. This action refreshes the page and shows a blank fields page. Your Attendee Type will not be saved/created.
Delete and Event Attendee Type
STEP-BY-STEP
-
1Log in as an administrator and go to the Admin Dashboard.
Learn how to log in here → -
2Under Modules on the left menu, choose Events
-
3Click Event Settings
-
4Select Attendee Types
-
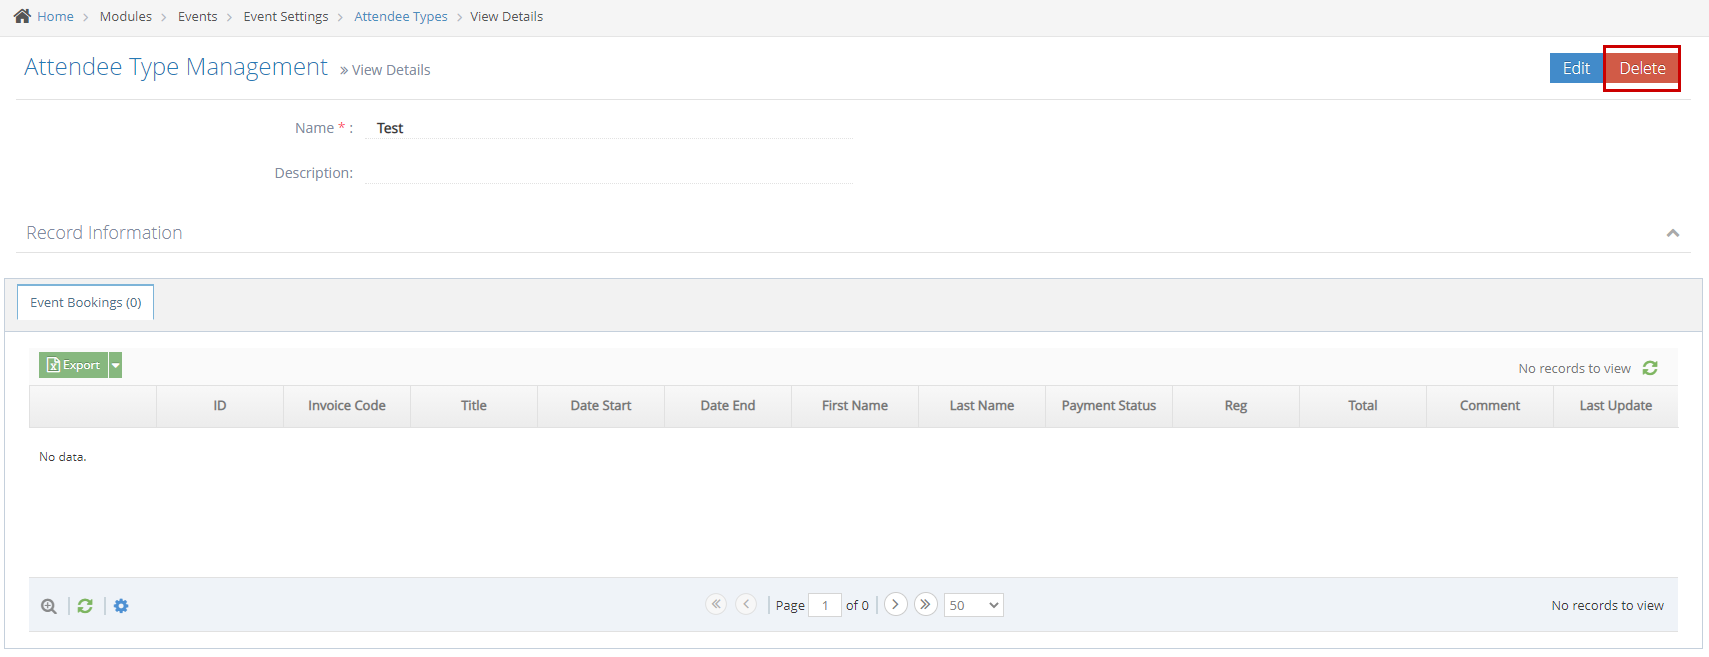
5Click the View Details
 icon on the leftmost side of the Attendee Type you wish to remove<
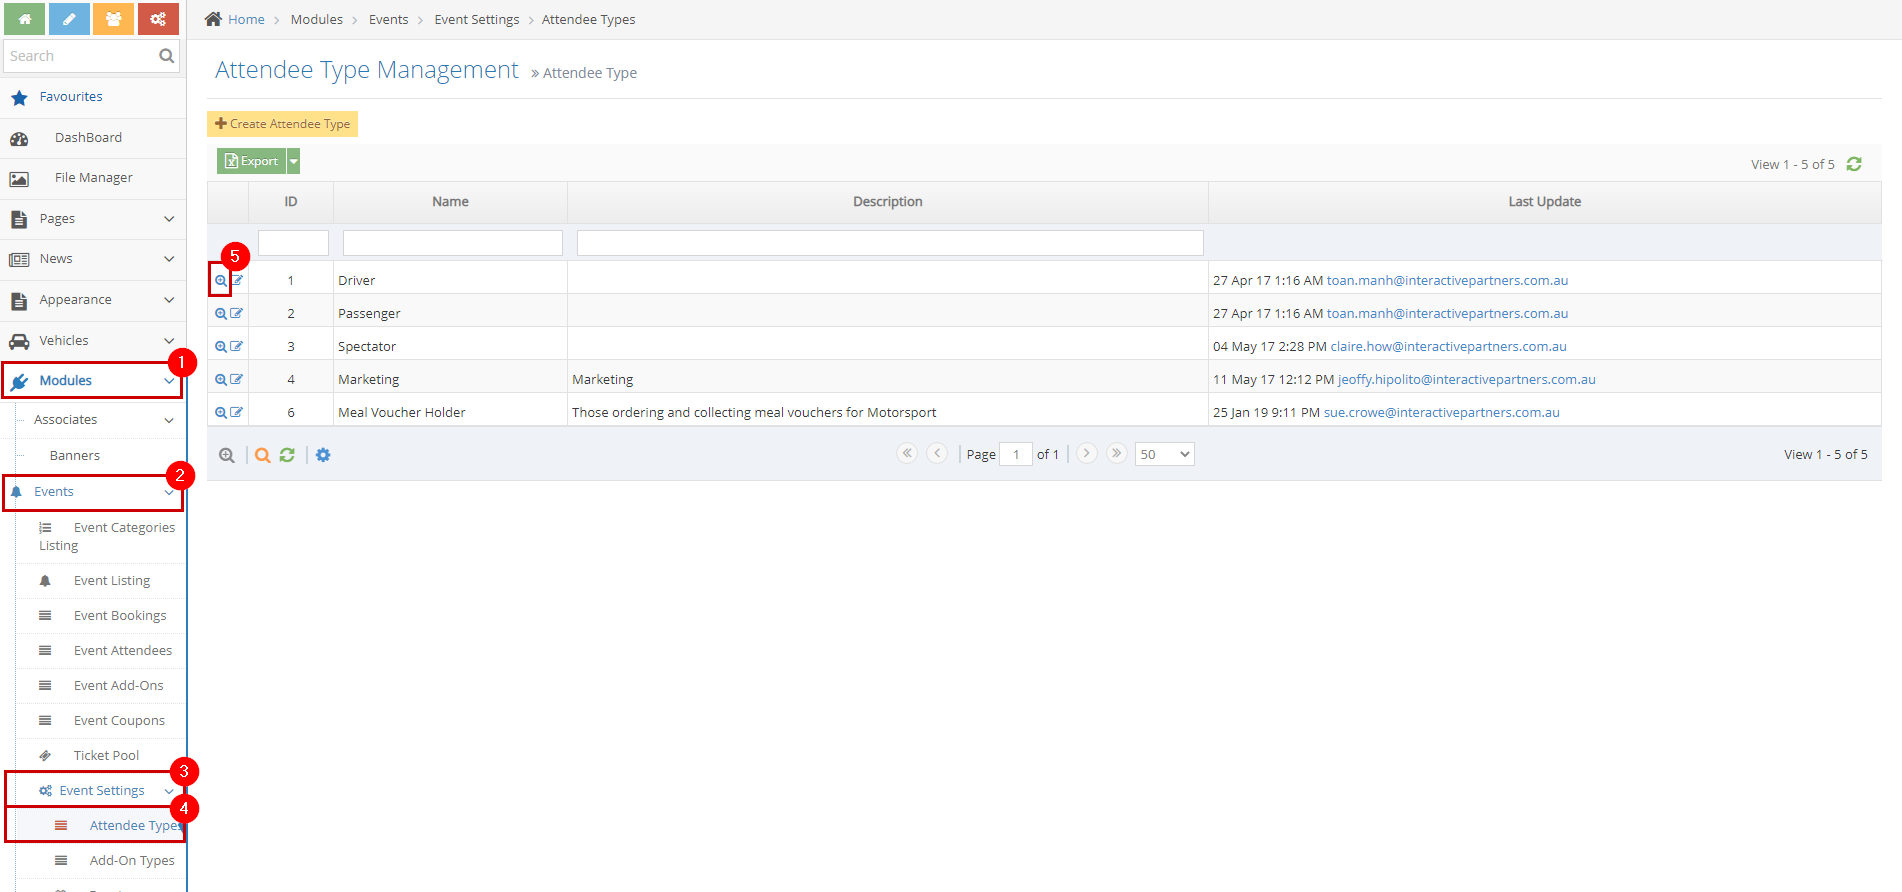
-
6Click the Delete button on the top right of the View Details page
-
7Click OK on the "Are you sure you want to delete this attendee type? This action cannot be undone." popup.
-
8Click OK on the "Attendee type deleted successfully." popup.
-
9Congratulations! You have successfully managed the Event Attendee type.