- Why do you need an email account?
- Creating a new email account
- Set an email account as the default account
- Editing an Email Account
- Deleting an Email Account
- View the Details and Email Queues/Sent of an Email Account
- Email Account Site Settings
- Match Email Account By Email Address
- Use Email Pickup Folder
Managing Email Accounts
This part of the user guide will show you how to manage your email accounts.
Why do you need an email account?
The email account will serve as a default FROM email account when sending email notifications.
Creating a new email account
STEP-BY-STEP
-
1Log in as an administrator and go to the Admin Dashboard.
Learn how to log in here → -
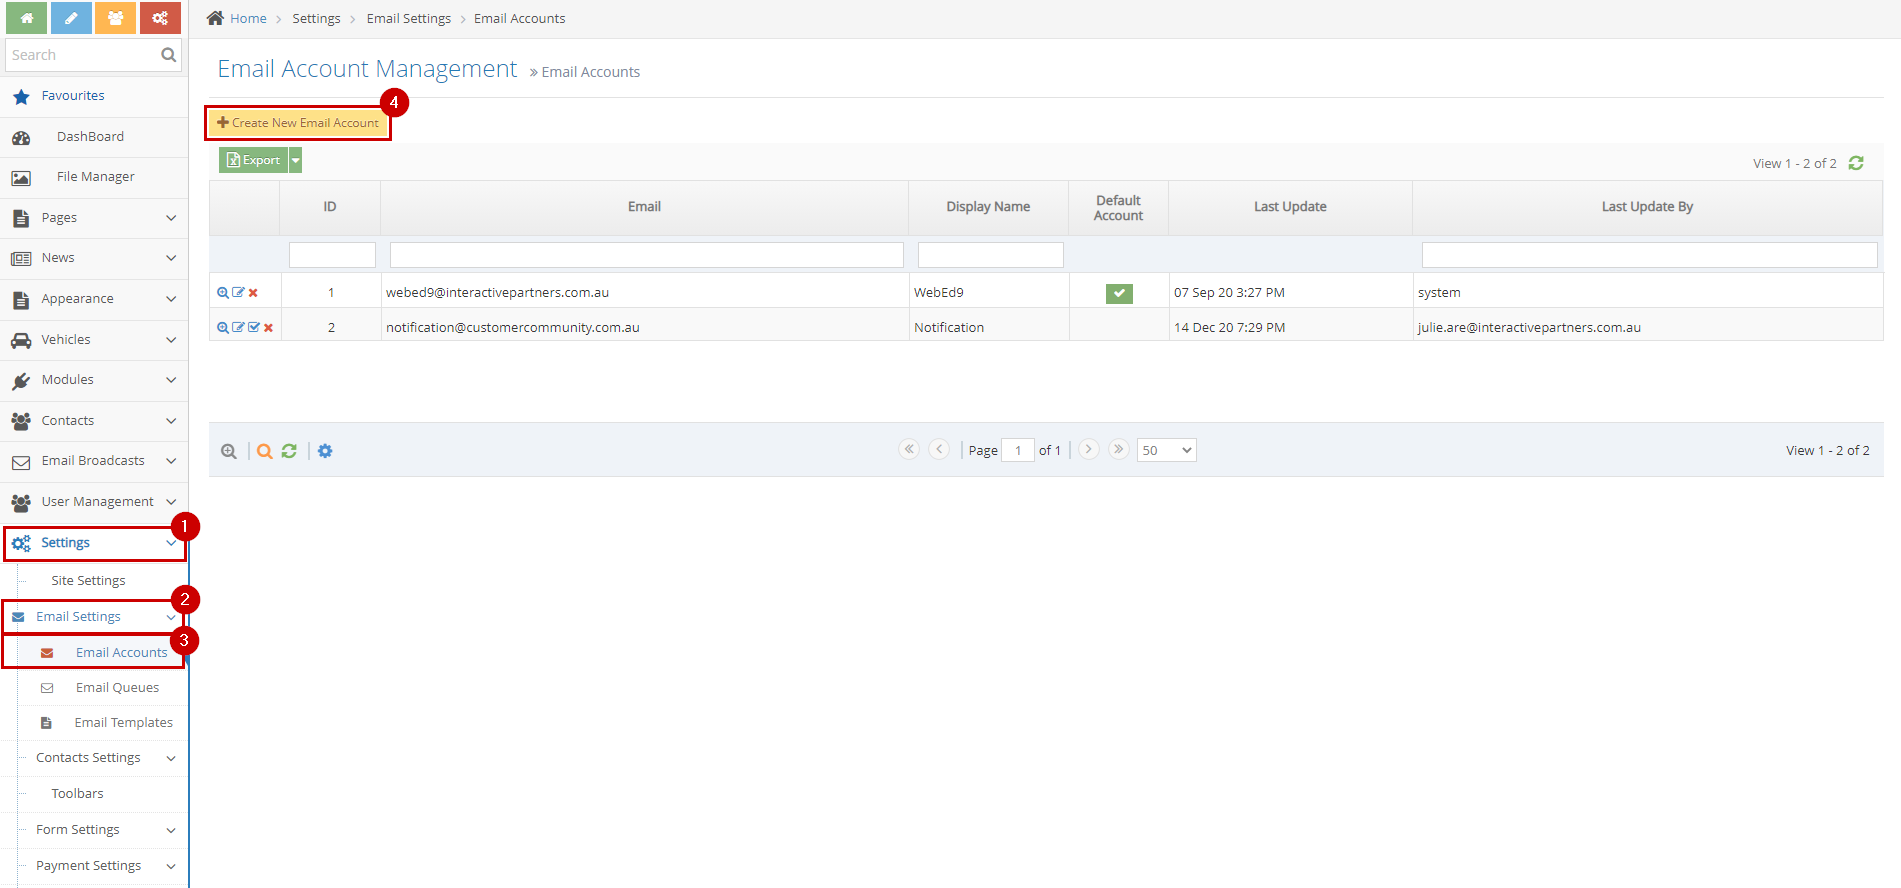
2Click Settings
-
3Click Email Settings and select Email Accounts
-
4Click Create New Email Account
-
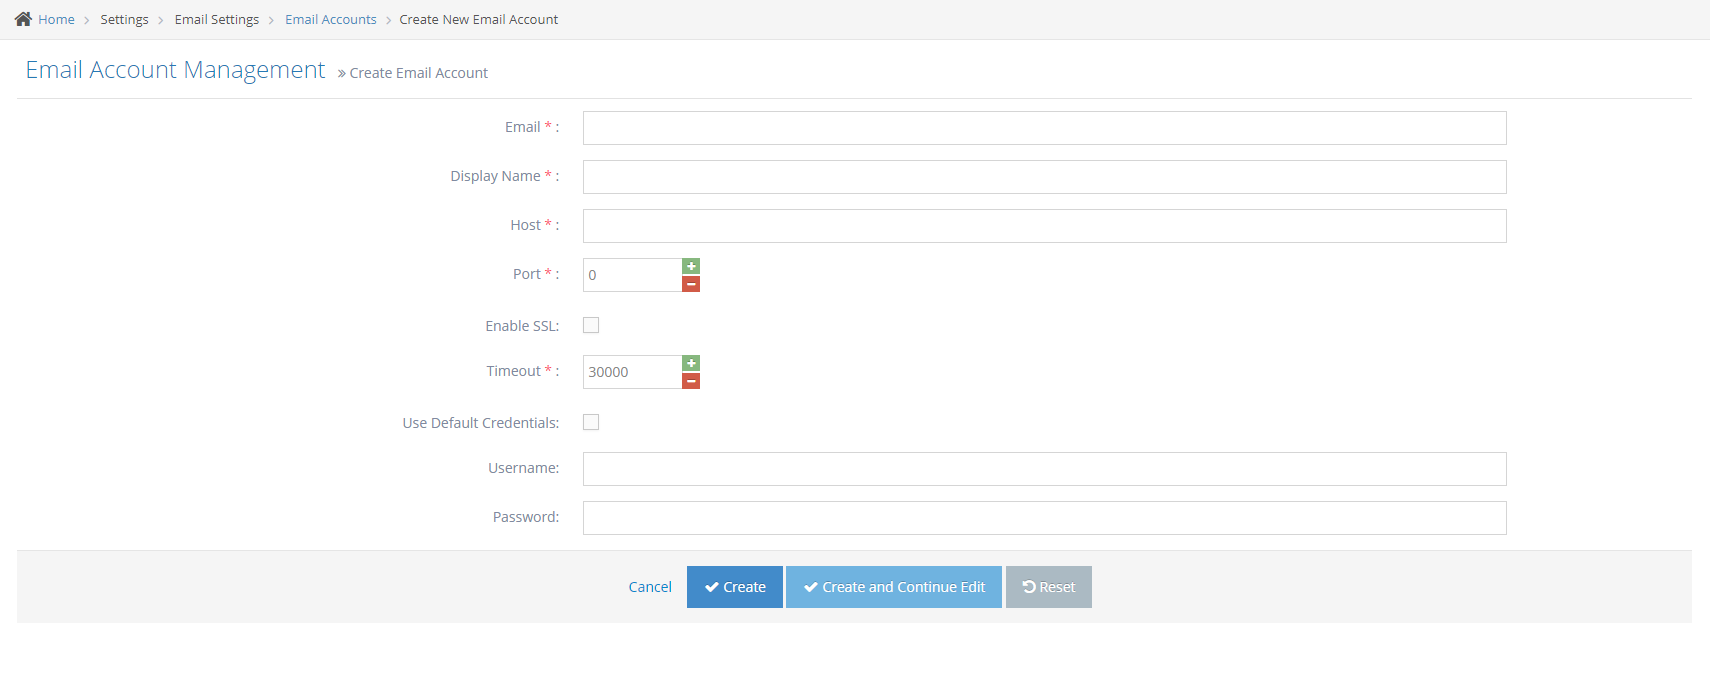
5Input information for the new email account
- Email - This is the email address of the email account
- Display Name - This is the display name on the email notification
- Host - This is the host server where the emails messages and stored files are stored
- Port
- 25 – this is the default SMTP non-encrypted port;
- 2525 – this port is opened on all SiteGround servers in case port 25 is filtered (by your ISP for example) and you want to send non-encrypted emails with SMTP;
- 465 – this is the port used if you want to send messages using SMTP securely.
- Enable SSL - tick this to enable SSL
- Timeout -
- Use Default Credentials - Tick this to set the email account as the default email account
- Username -
- Password -
-
6Apply Changes
- Create - Click the 'Create' button to save the changes. This action saves the changes, closes the page, and redirects you to the back to the list page. You will see a note above that it is successfully created.
- Create and Continue Edit - Click the 'Create and Continue Edit' button to save the changes. This action saves the changes but lets you stay on the page.
- Reset - Click the 'Reset' button to start over. This action refreshes the page and shows the current event information. The changes will not be saved.
Set an email account as the default account
Only one default account in the system is used to send an email. To mark an email account as default, please follow the steps below:
STEP-BY-STEP
-
1Log in as an administrator and go to the Admin Dashboard.
Learn how to log in here → -
2Click Settings
-
3Click Email Settings and select Email Accounts
-
4Click Mark As Default Account on the email account user wants to set as default.
The current default account doesn't have this icon.
Editing an Email Account
Only one default account in the system is used to send an email. To mark an email account as default, please follow the steps below:
STEP-BY-STEP
-
1Log in as an administrator and go to the Admin Dashboard.
Learn how to log in here → -
2Click Settings
-
3Click Email Settings and select Email Accounts
-
4Click Edit on an email account

-
5Update information on the existing email account
- Email - This is the email address of the email account
- Display Name - This is the display name on the email notification
- Host - This is the host server where the emails messages and stored files are stored
- Port
- 25 – this is the default SMTP non-encrypted port;
- 2525 – this port is opened on all SiteGround servers in case port 25 is filtered (by your ISP for example) and you want to send non-encrypted emails with SMTP;
- 465 – this is the port used if you want to send messages using SMTP securely.
- Enable SSL - tick this to enable SSL
- Timeout - This is the time until the server refuses to send the email
- Use Default Credentials - Tick this to set the email account as the default email account
- Username - This is the username if the SMTP server requires credential
- Password - This is the password if the SMTP server requires credential
-
6Apply Changes
- Save - Click the 'Save' button to save the changes. This action saves the changes, closes the page, and redirects you to the back to the list page. You will see a note above that it is updated successfully.
- Save and Continue Edit - Click the 'Save and Continue Edit' button to save the changes. This action saves the changes but lets you stay on the page.
- Reset - Click the 'Reset' button to start over. This action refreshes the page and shows the current event information. The changes will not be saved.
Deleting an Email Account
STEP-BY-STEP
-
1Log in as an administrator and go to the Admin Dashboard.
Learn how to log in here → -
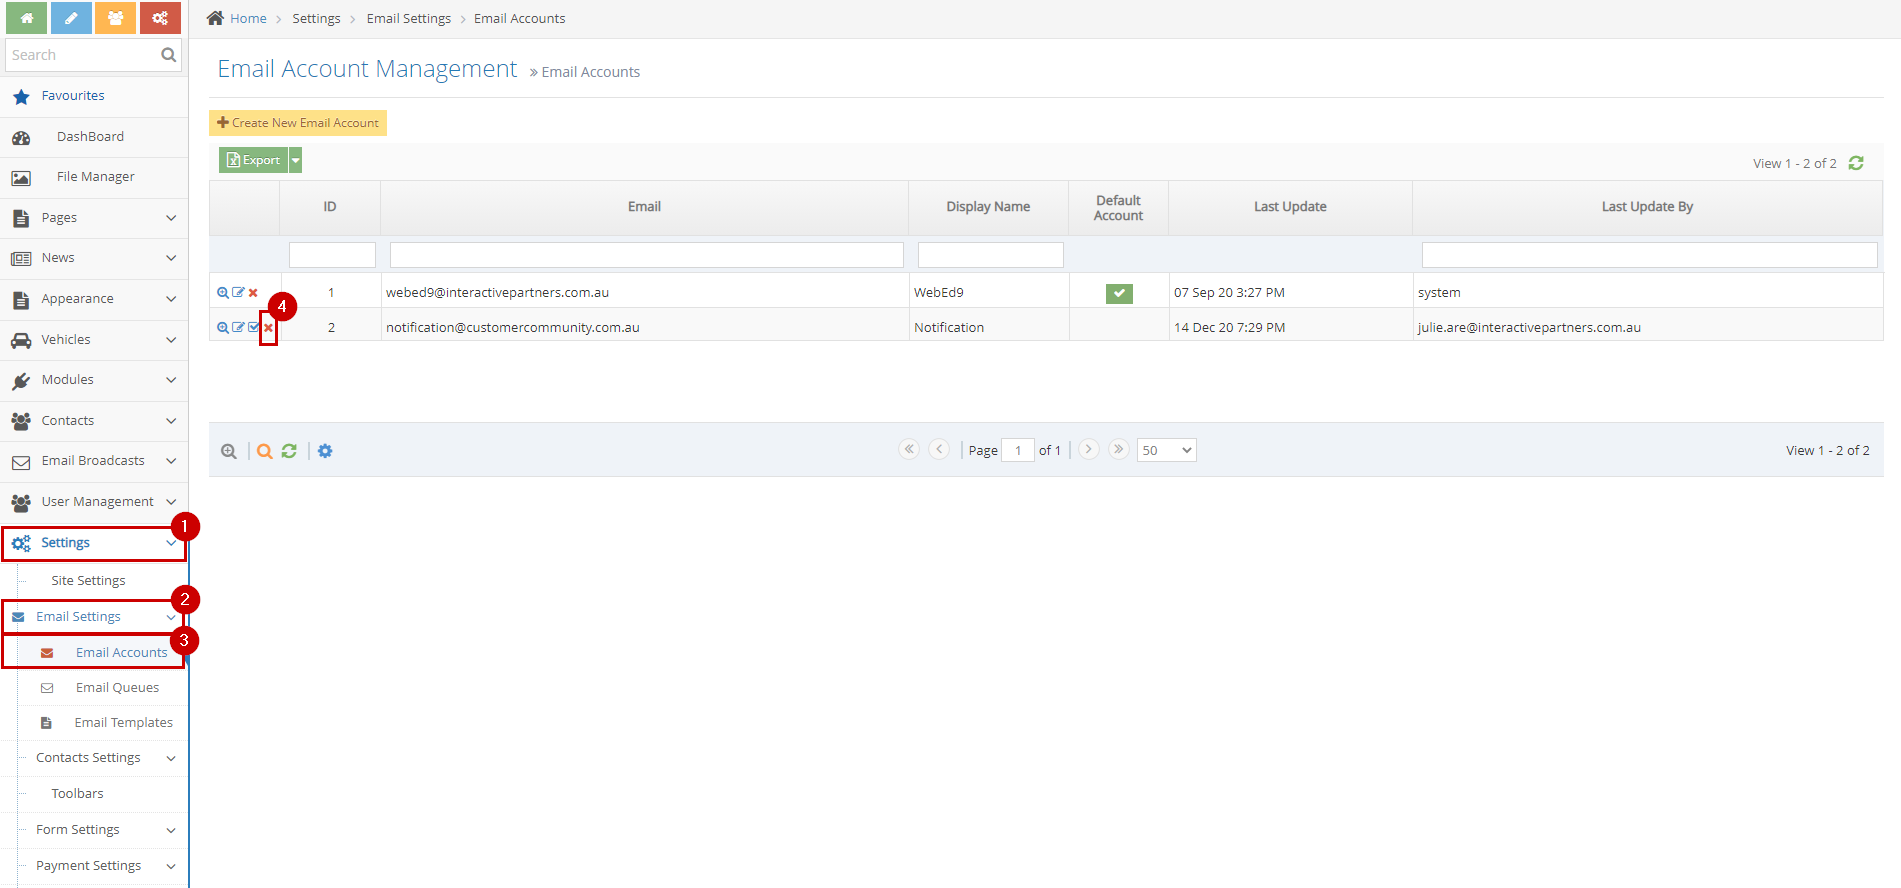
2Click Settings
-
3Click Email Settings and select Email Accounts
-
4Click Delete on an email account
-
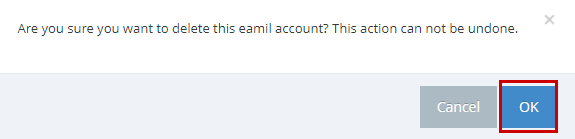
5Click OK on the popup modal 'Are you sure you want to delete this email account? This action can not be undone.'
-
6Click OK on the popup "Email account deleted successfully."
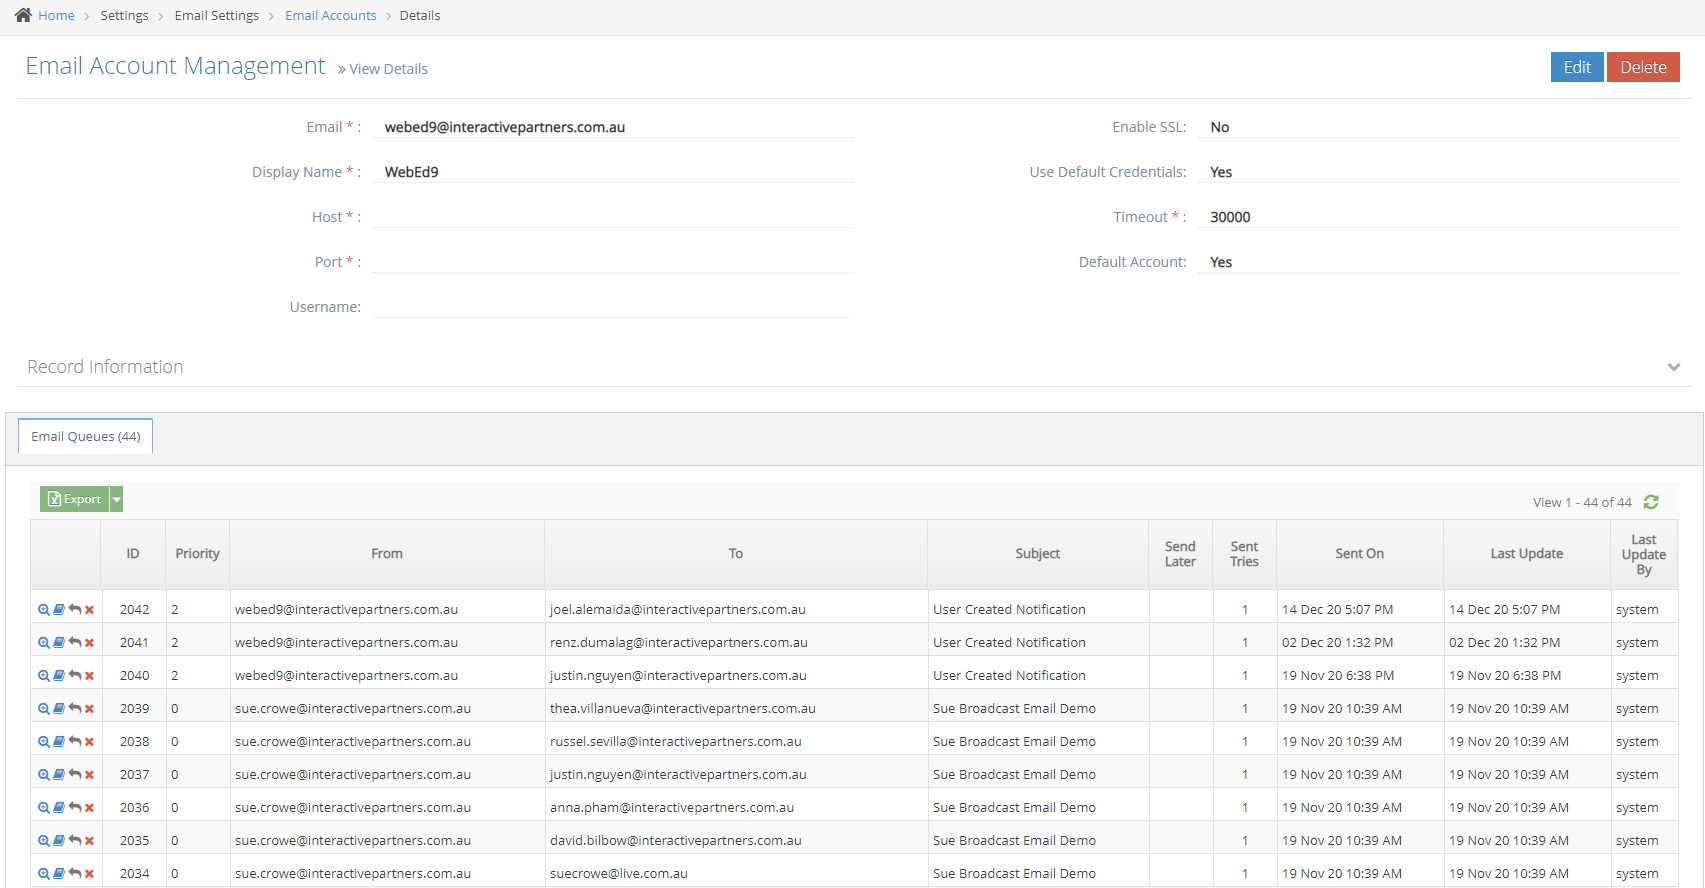
View the Details and Email Queues/Sent of an Email Account
STEP-BY-STEP
-
1Log in as an administrator and go to the Admin Dashboard.
Learn how to log in here → -
2Click Settings
-
3Click Email Settings and select Email Accounts
-
4Click View Details on an email accounts
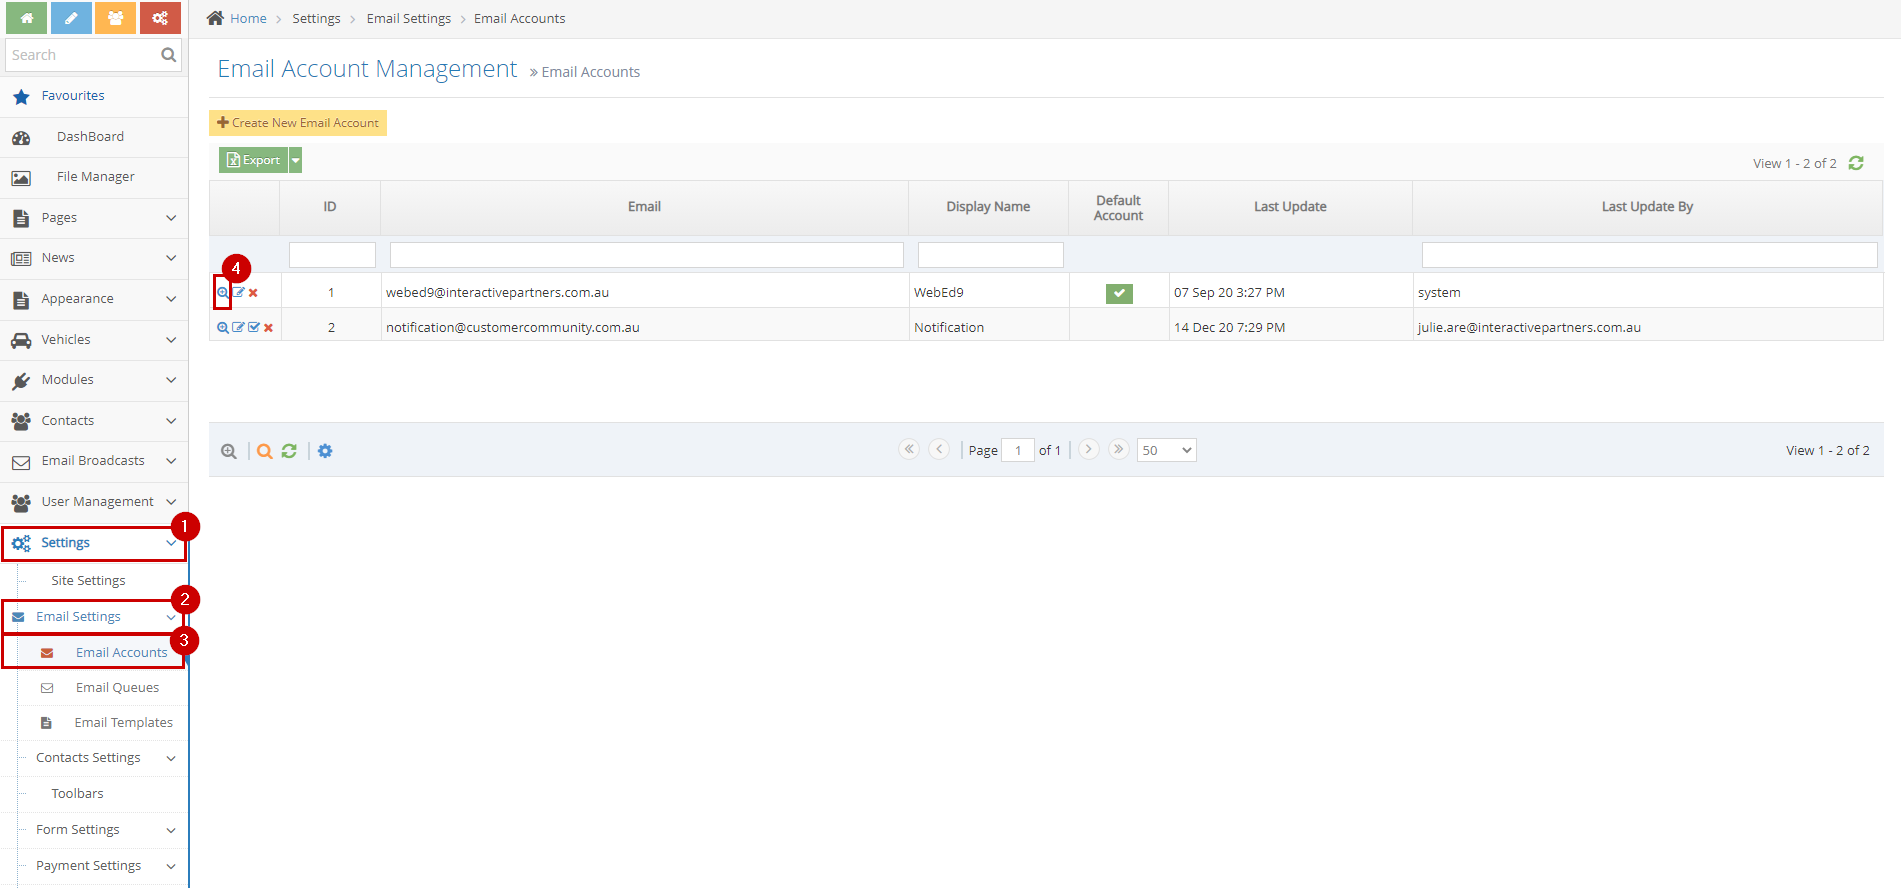
-
5You are now able to view the details of the Email Account
Email Account Site Settings
Additional Information:
To go to Site Settings, follow the steps below :
STEP-BY-STEP
-
1Log in as an administrator and go to the Admin Dashboard.
Learn how to log in here → -
2Click Settings
-
3Click Site Settings
-
4Search the Settings you wish to update
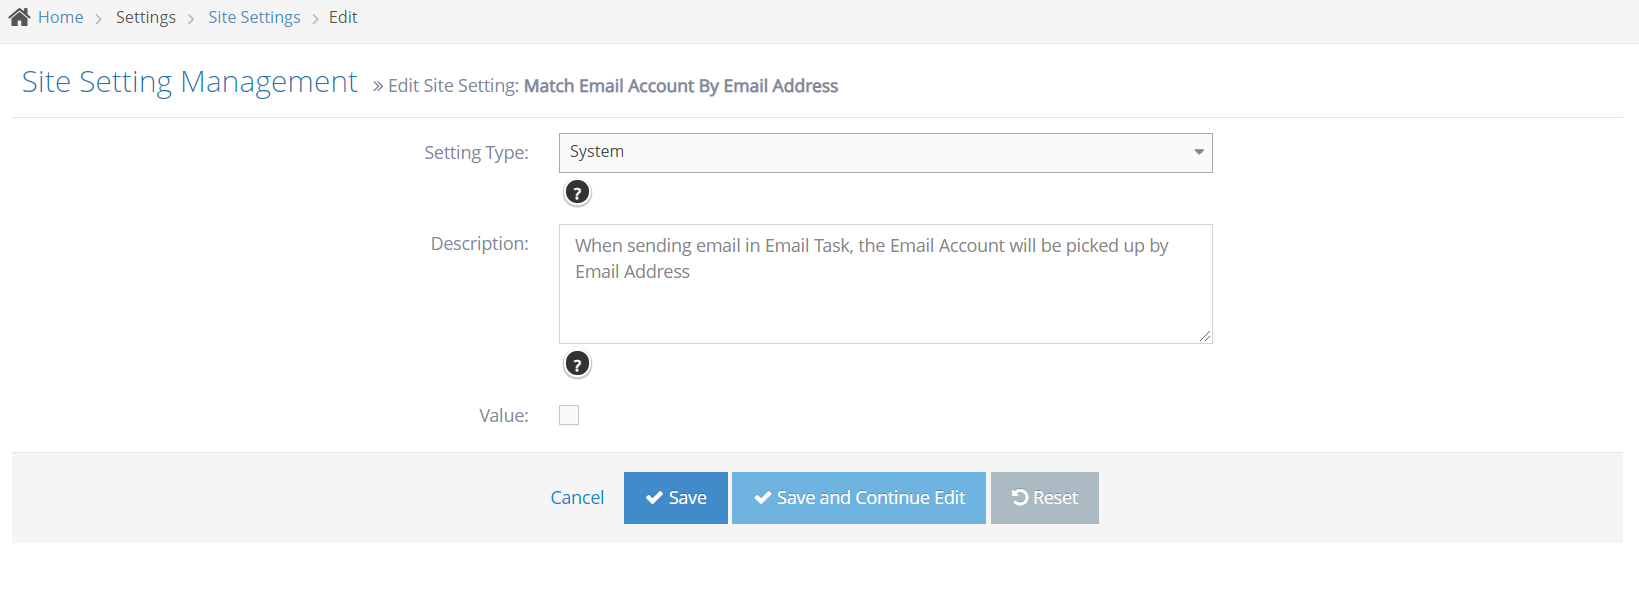
Match Email Account By Email Address
STEP-BY-STEP
-
1There is a site setting "Match Email Account By Email Address". If this setting is True, the Email Account will be picked up Email Address.
-
2The default value for this issue is False. If the setting is False, the Email Account will be the Default Email Account.
Use Email Pickup Folder
- There is a site setting called "Use Email Pickup Folder".
- This site setting has 2 fields, the enable/disable and the directory path. They already have default values set.
- If this setting is True, the email processor will use a Pickup Directory rather than an SMTP account.
- The default value for this is False.
- You can also specify the folder that will be used to put the emails that will be generated. An external program will process them and this will remove some load from the web app.
