Tasks Module Overview
The Tasks Module is a great way to manage tasks in your company. You can assign to individuals and set status, priority and due dates. Easy reminders will appear when tasks are due. When working with tasks, you must first define which users can be assigned tasks. This guide covers all aspects of the task assignment setup and how to work with search, create, view and mark completed.
NB! - Who can be Assigned Tasks?
- Assigning who is controlled by a user group, first set up the group.
- This is controlled by selecting a user group for people allowed to work on tasks.
- The group allowed to be assigned tasks is set in site settings under the "Assignable user groups for tasks"
- Once you set the user group for tasks, you can then edit the allowed user group settings and add them to the group defined
Task Setup Steps
STEP-BY-STEP
-
1Create the user group for tasks (say "task assignees")
-
2Change the site setting "Assignable user groups for tasks" and add the group you just created
-
3Find the users you wish to assign tasks to and edit the user groups to include the group you just created
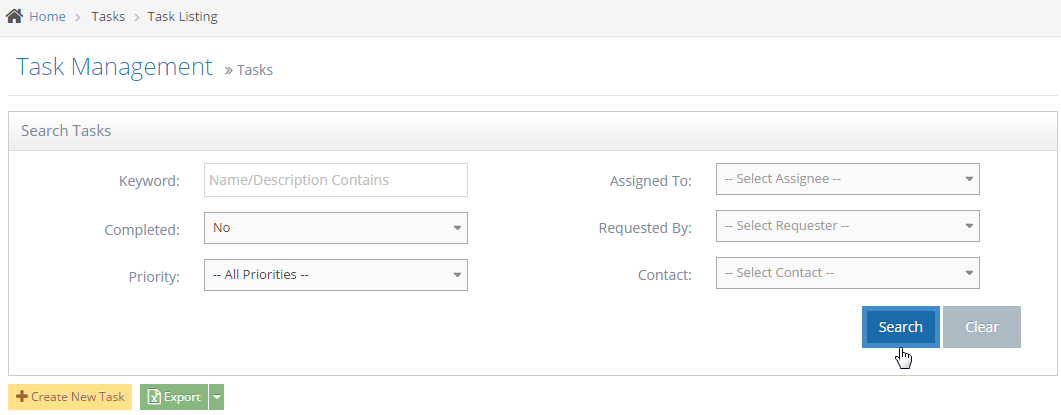
Searching Tasks
STEP-BY-STEP
-
1Log in as an administrator and go to the Admin Dashboard.
Learn how to log in here → -
2Go to Task>> Task Listing
-
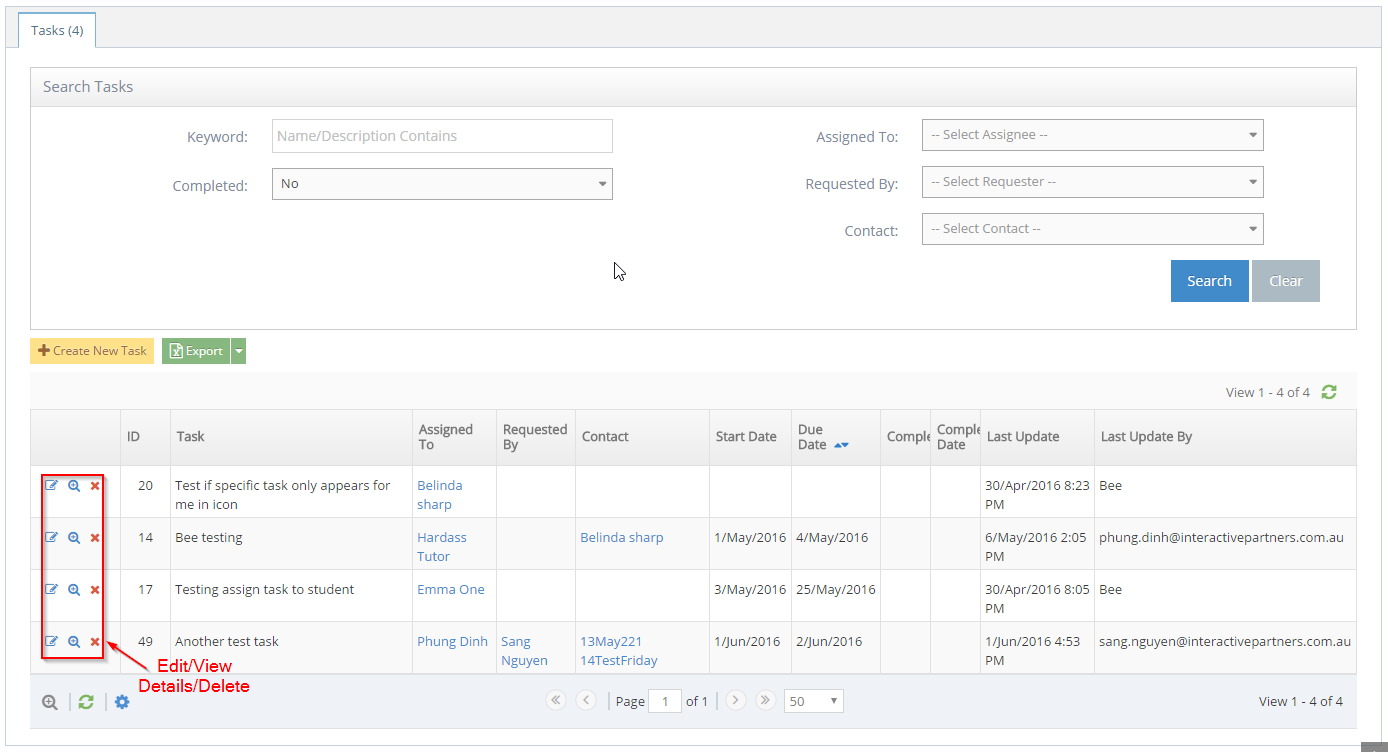
3In the Search Tasks region, enter any of the following
- Keyword (Name/Description contains this keyword)
- Completion status: Yes/no, the default option is No
- Priority
- Requester (the contact who created the task)
- Assignee (who is assigned the task)
- Contact (Who the task is for)
-
4Click Search button
Note: Values displayed for assignees, requesters and contacts are calculated from real task data, which means you can only select the contacts who are already selected in tasks
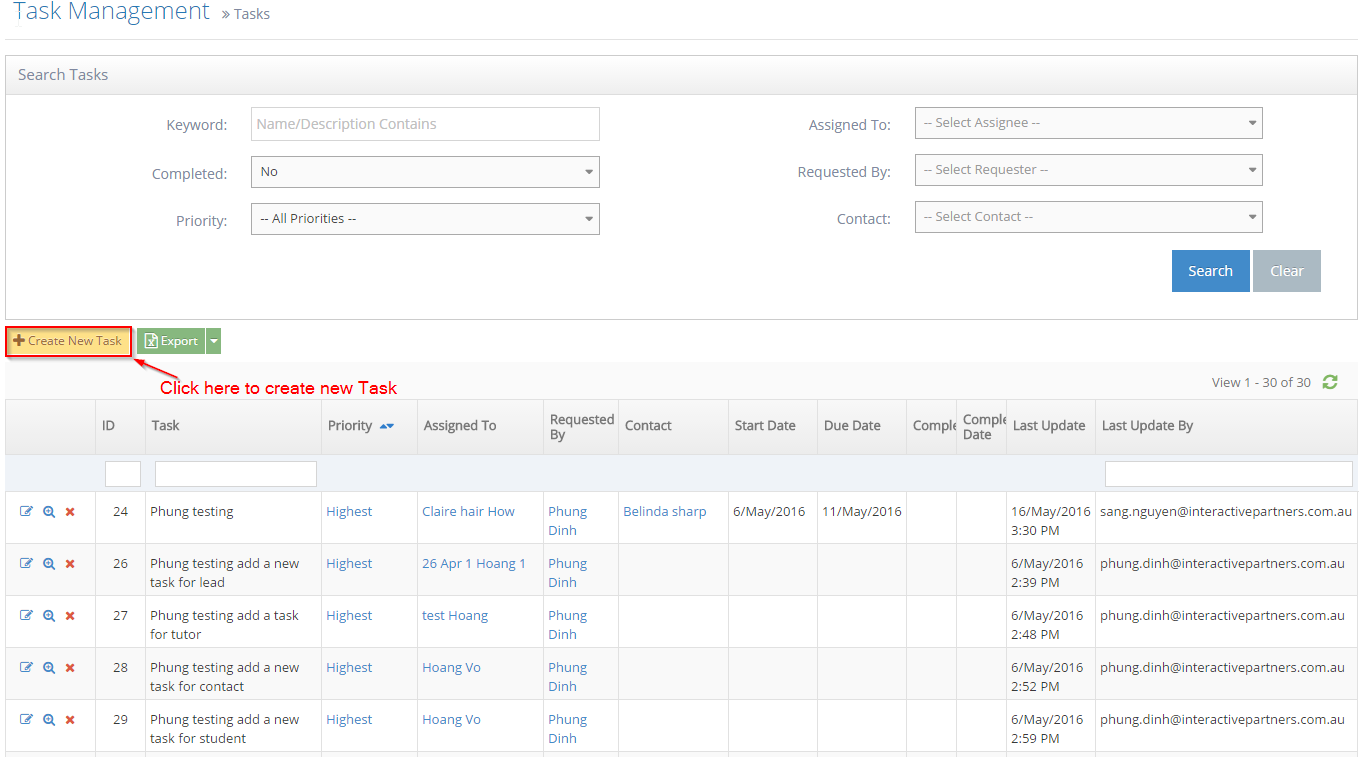
Creating a New Task
STEP-BY-STEP
-
1Log in as an administrator and go to the Admin Dashboard.
Learn how to log in here → -
2Go to Task >> Task Listing
-
3Click on Create New Task button
-
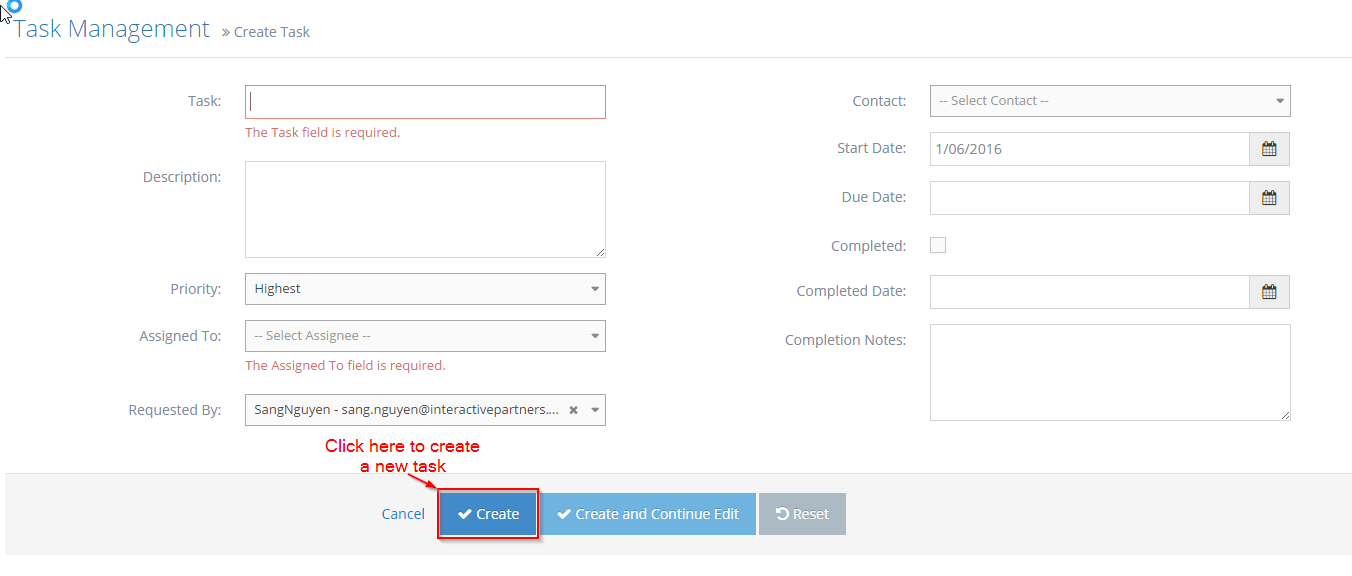
4Enter Details
- Task Name (mandatory)
- Description (optional)
- Select Task priority (the default task priority is selected as a default - see more at Managing Task Priorities)
- Set the Assignee (The contact who does the task - required)
- Requester (The contact who created the task - current contact as default)
- Select Contact (The contact this task is about)
- Start Date (default is today)
- Set the Due Date
- Optionally:
- Flag if the task is completed
- Set the completed date if the task is already complete
- Enter the completion notes
-
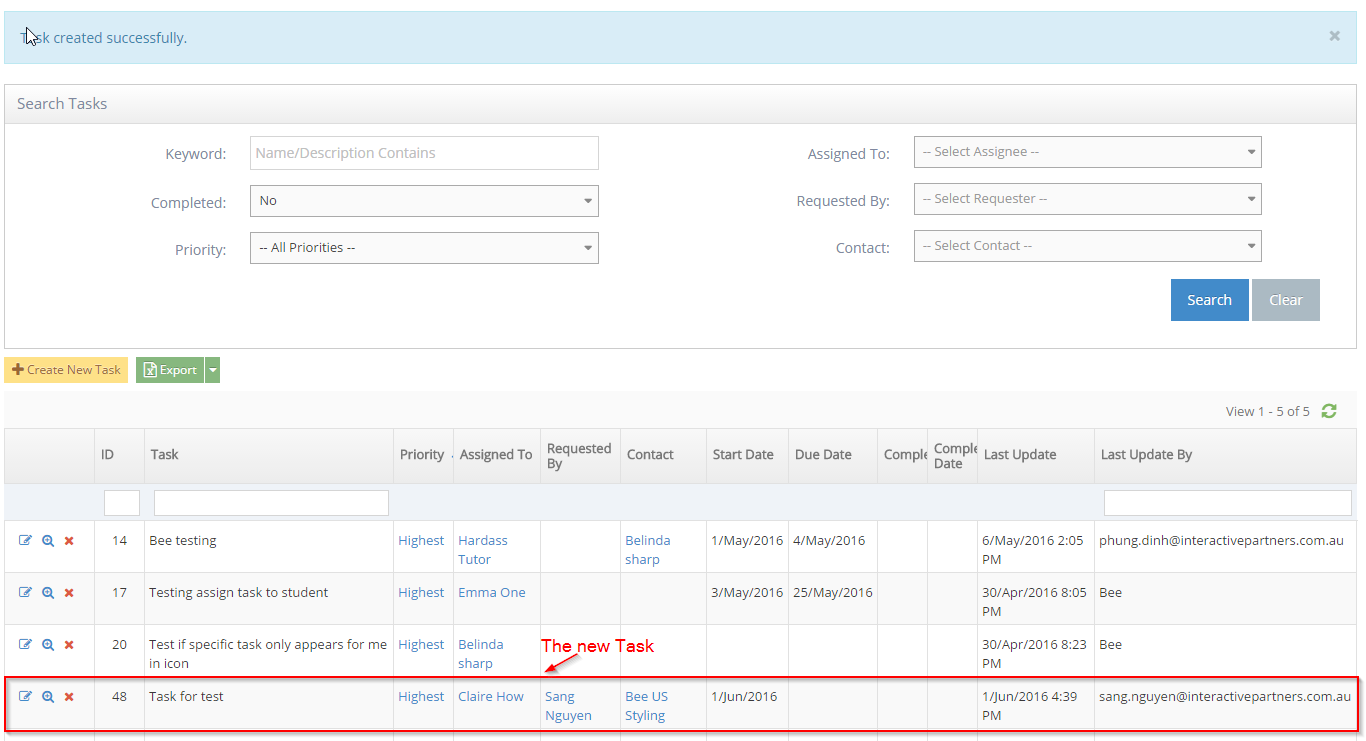
5Click Create
-
6The new Task was created successfully
Edit/View Details/Delete a Task
STEP-BY-STEP
-
1Log in as an administrator and go to the Admin Dashboard.
Learn how to log in here → -
2Go to Tasks
-
3Select the icon to work on any task
- Edit Task
- View Details
- Delete a Task
Reviewing Task Notifications
STEP-BY-STEP
-
1When you go to your website admin
-
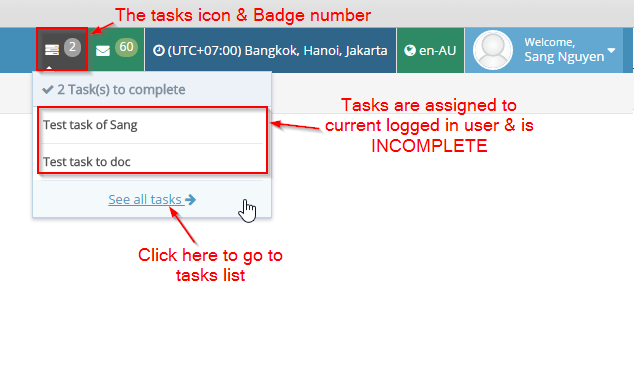
2There is a tasks icon and badge number on the header menu
-
3This will show you the number of tasks assigned to you not yet complete
-
4The tasks icon will vibrate for a while to draw your attention to the tasks
-
5Click on this icon to show the list of tasks assigned to you
-
6Click on a task to see the task details
-
7Click on See all tasks to go to the tasks listing page
Managing Task Priorities
How to create new a Task Priority
STEP-BY-STEP
-
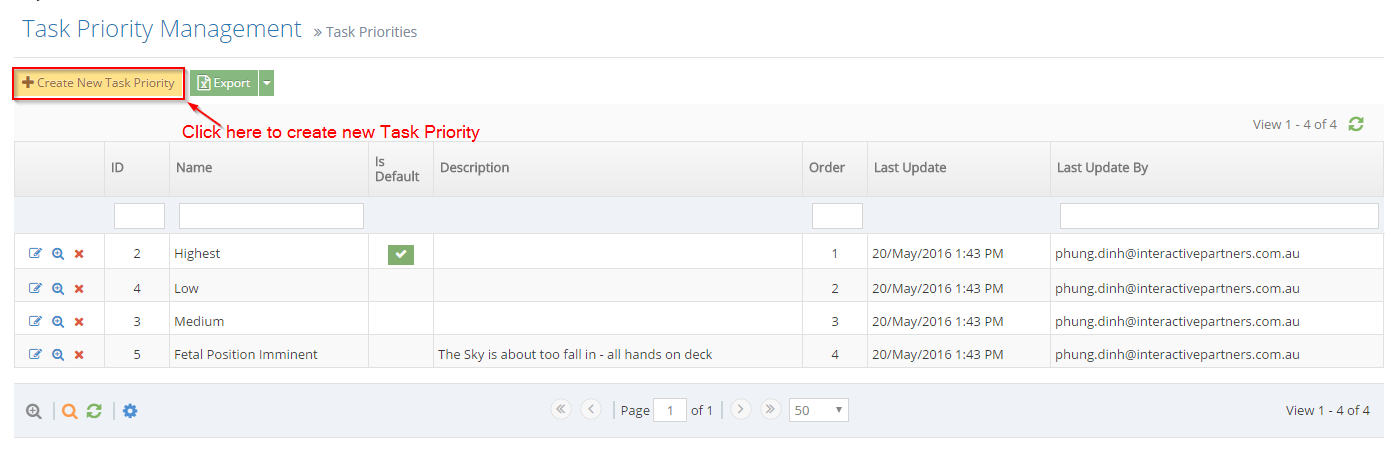
1Go to Tasks >> Task priorities
-
2Click on Create New Task Priority button
-
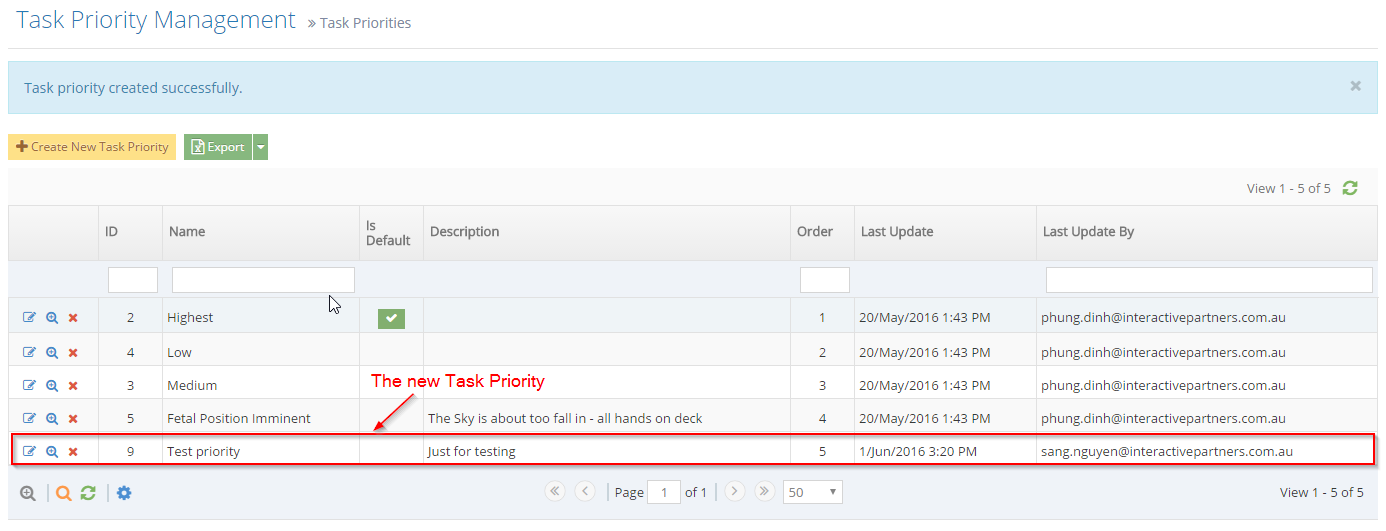
3Enter Name (mandatory),
Is Default (setting a specific task to be the default)
Description (optional),
Order
And click Create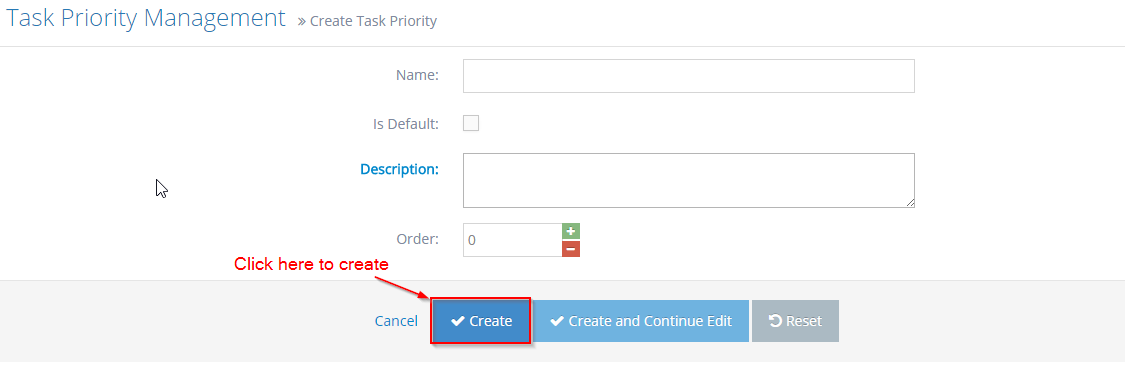
-
4The new Task Priority was created successfully
How to Edit/View Details/Delete a Task Priority
STEP-BY-STEP
-
1Log in as an administrator and go to the Admin Dashboard.
Learn how to log in here → -
2Go to Tasks >> Task priorities
-
3Click Edit / View Details / Delete icon on a Task Priority
