Configuring Editor Toolbars
Why you would use a ToolBars module
Discover the benefits of using a Toolbars module to streamline website navigation, enhance user interaction, and improve accessibility with customisable tools.
How to Create a New Toolbar configuration
-
1Log in as an administrator and go to the Admin Dashboard.
Learn how to log in here → -
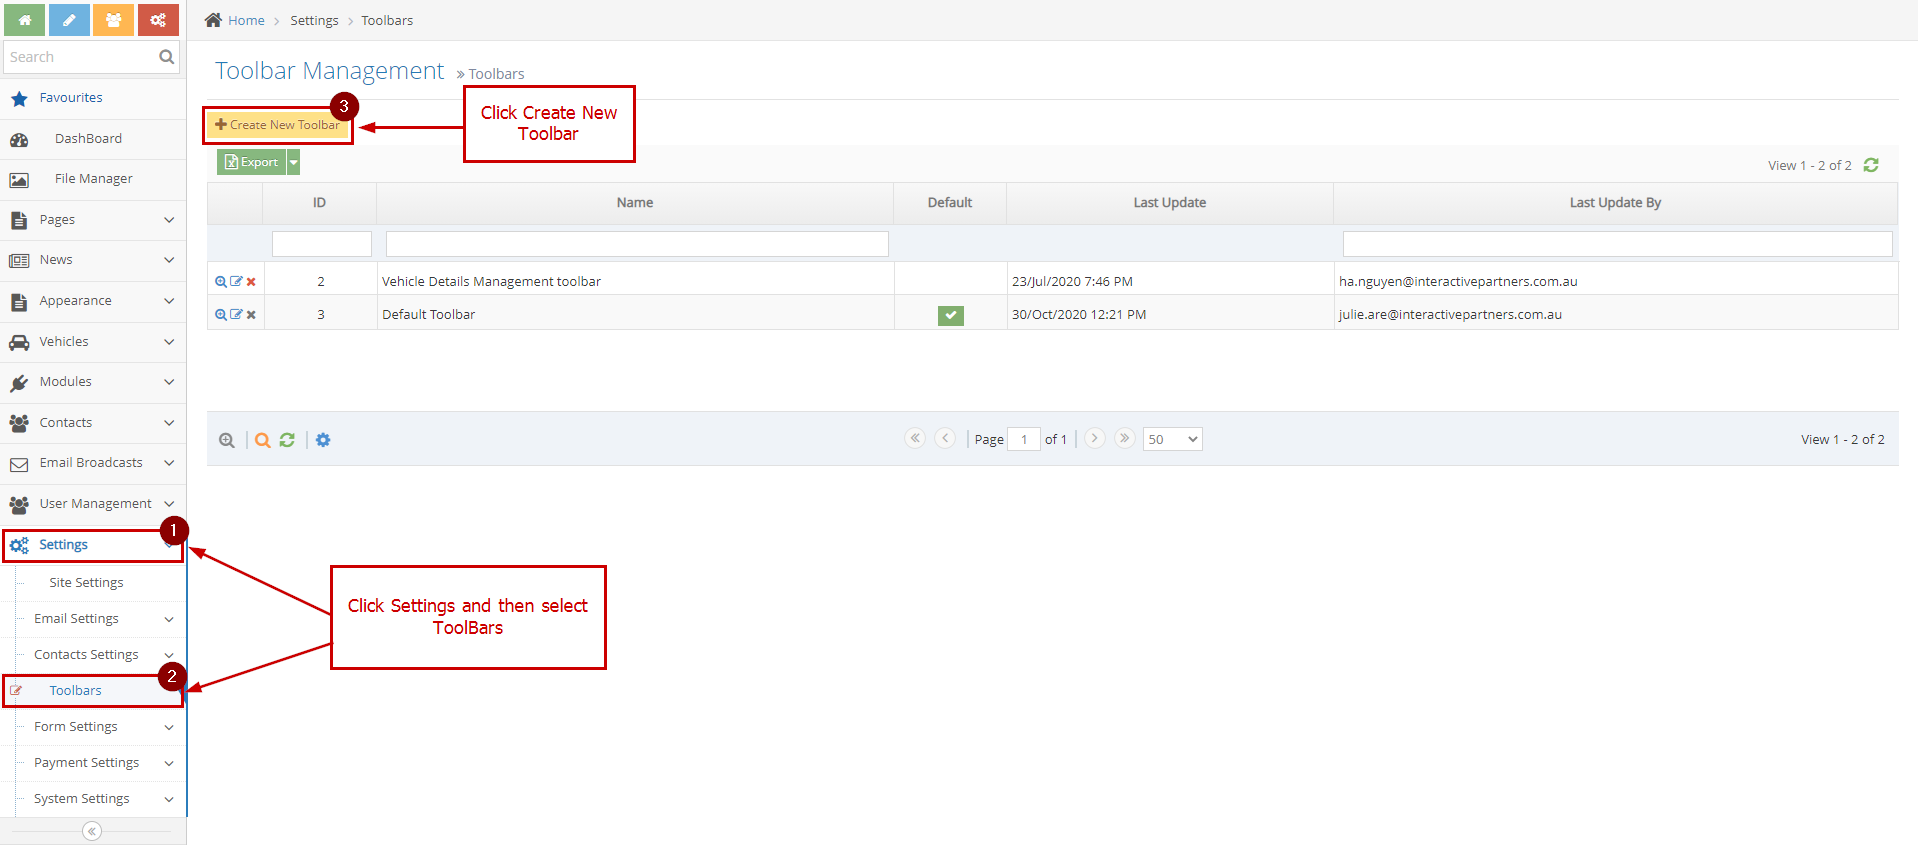
2Click Settings > ToolBars in the left navigation
-
3Click Create New Toolbar
-
4Field Overview:
- Name (1): Toolbar configuration Name
- Page Toolbar Setup (2): setup for page content editor
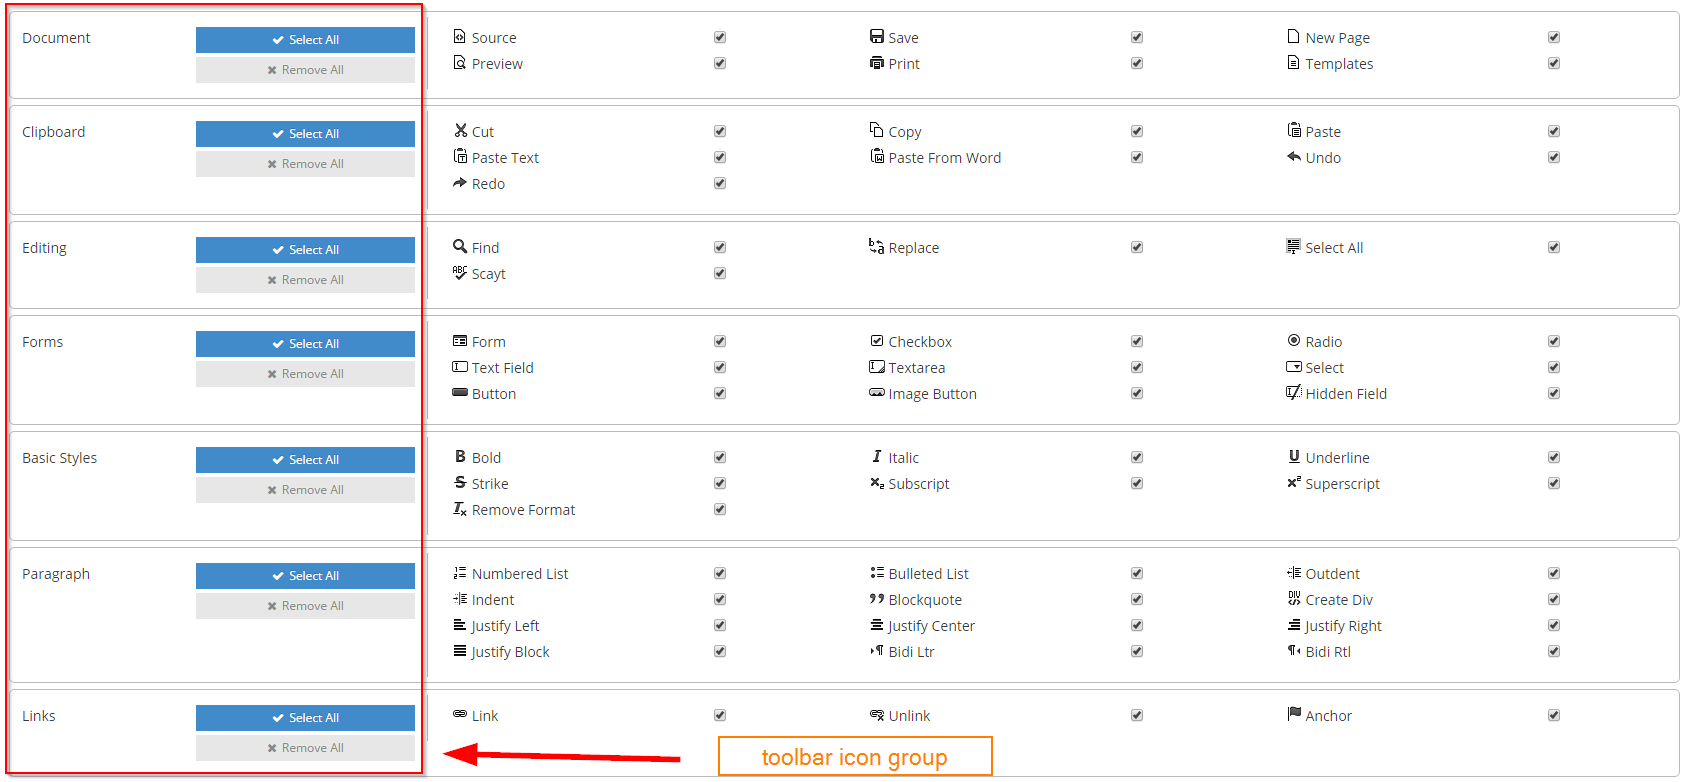
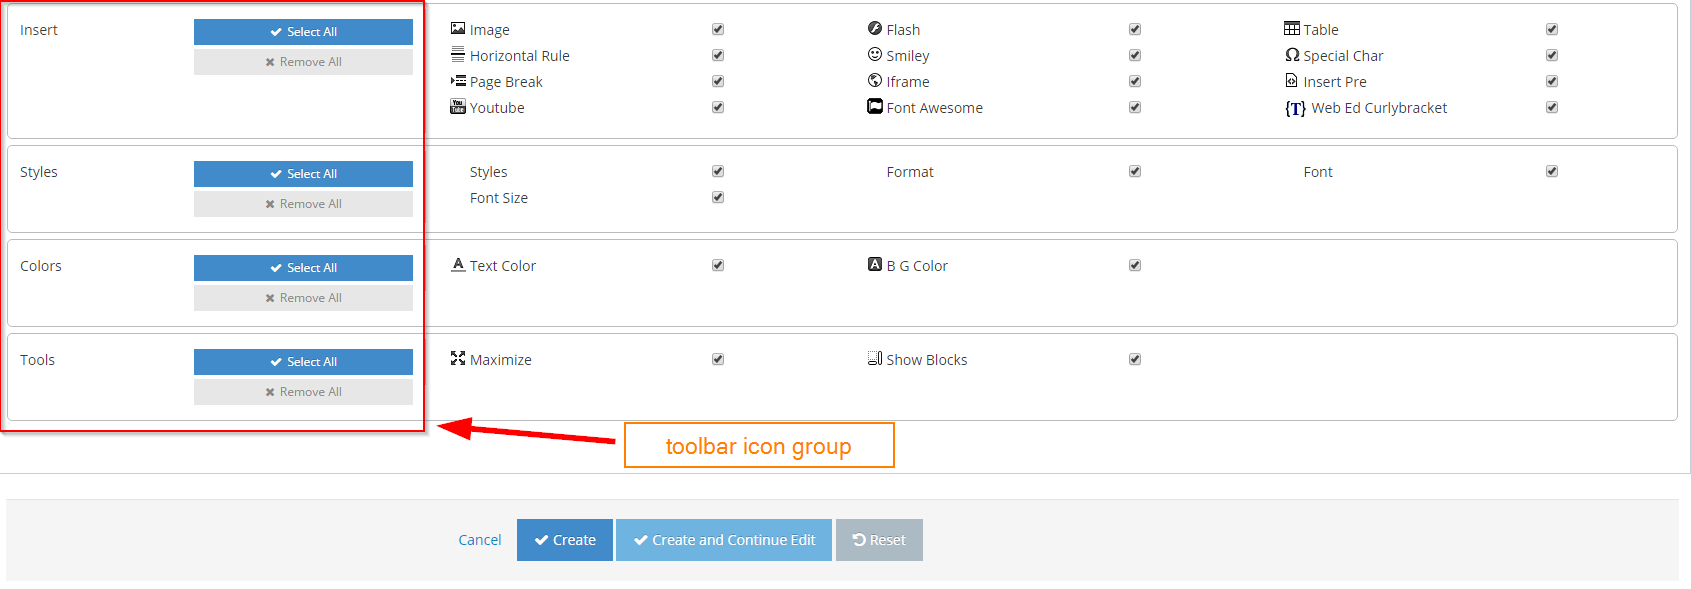
- Basic Toolbar Setup (3): setup for basic toolbar
- Preview (4): preview icons on the toolbar to display

-
5Input the name required field, set up the page toolbar and basic toolbar then click Create button.
-
6View the Toolbar listing on the grid.

How to Edit Toolbar configuration
-
1Log in as an administrator and go to the Admin Dashboard.
Learn how to log in here → -
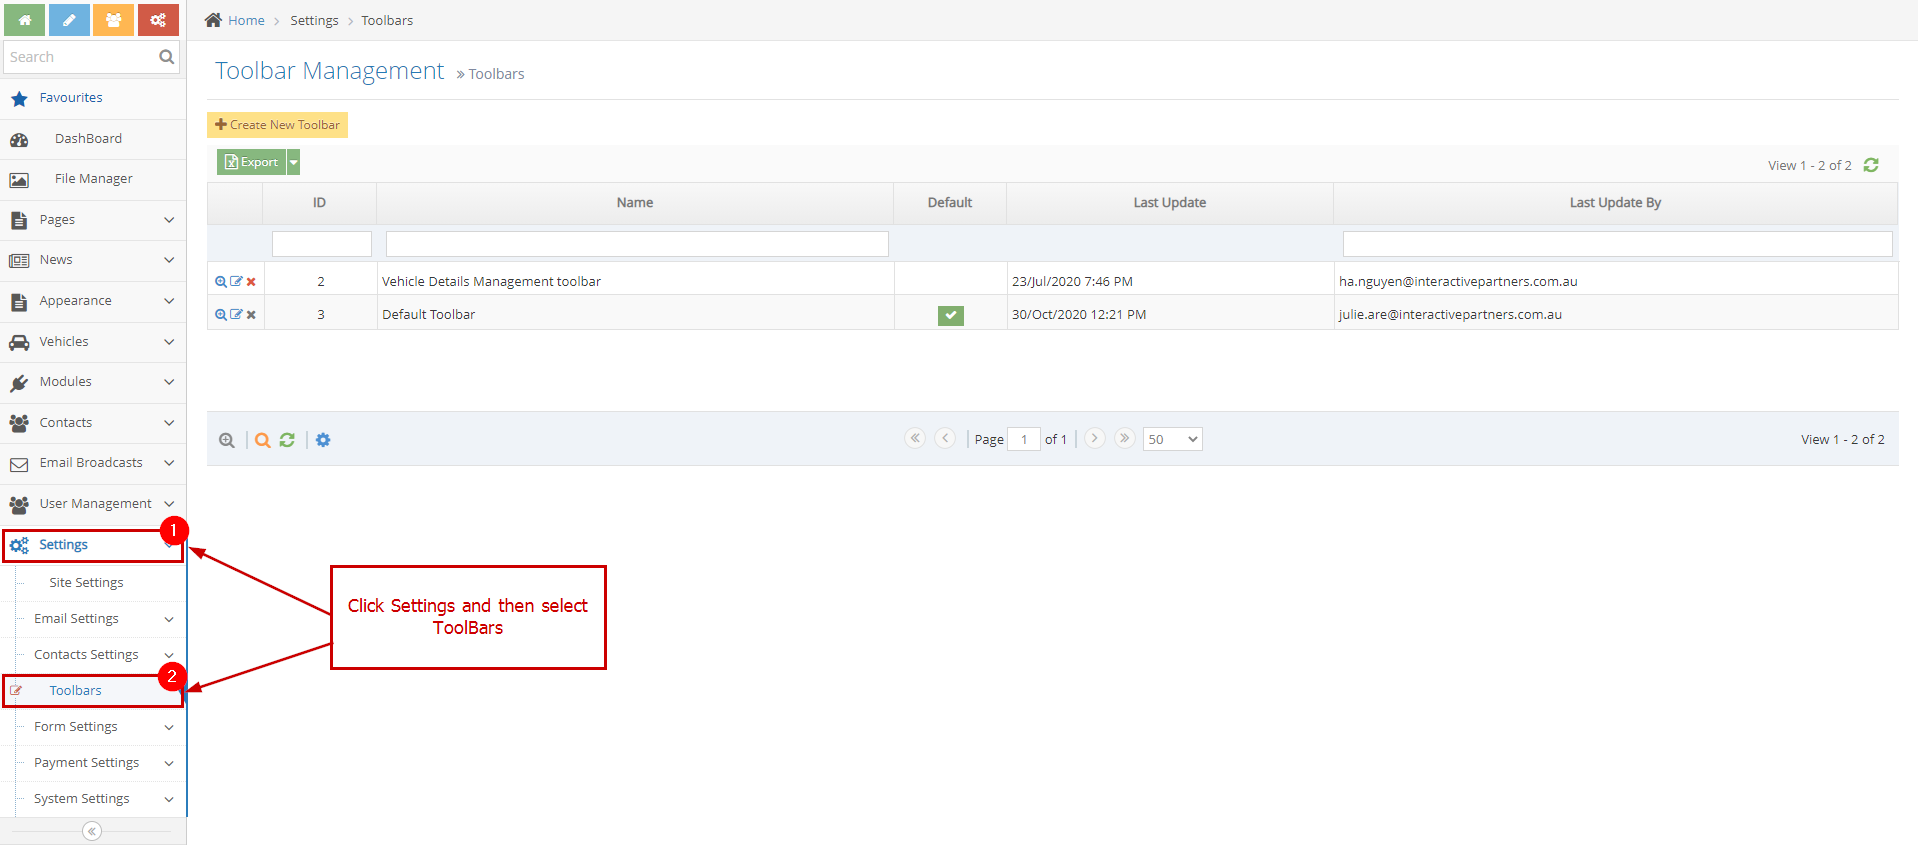
2Click Settings > ToolBars in the left navigation
-
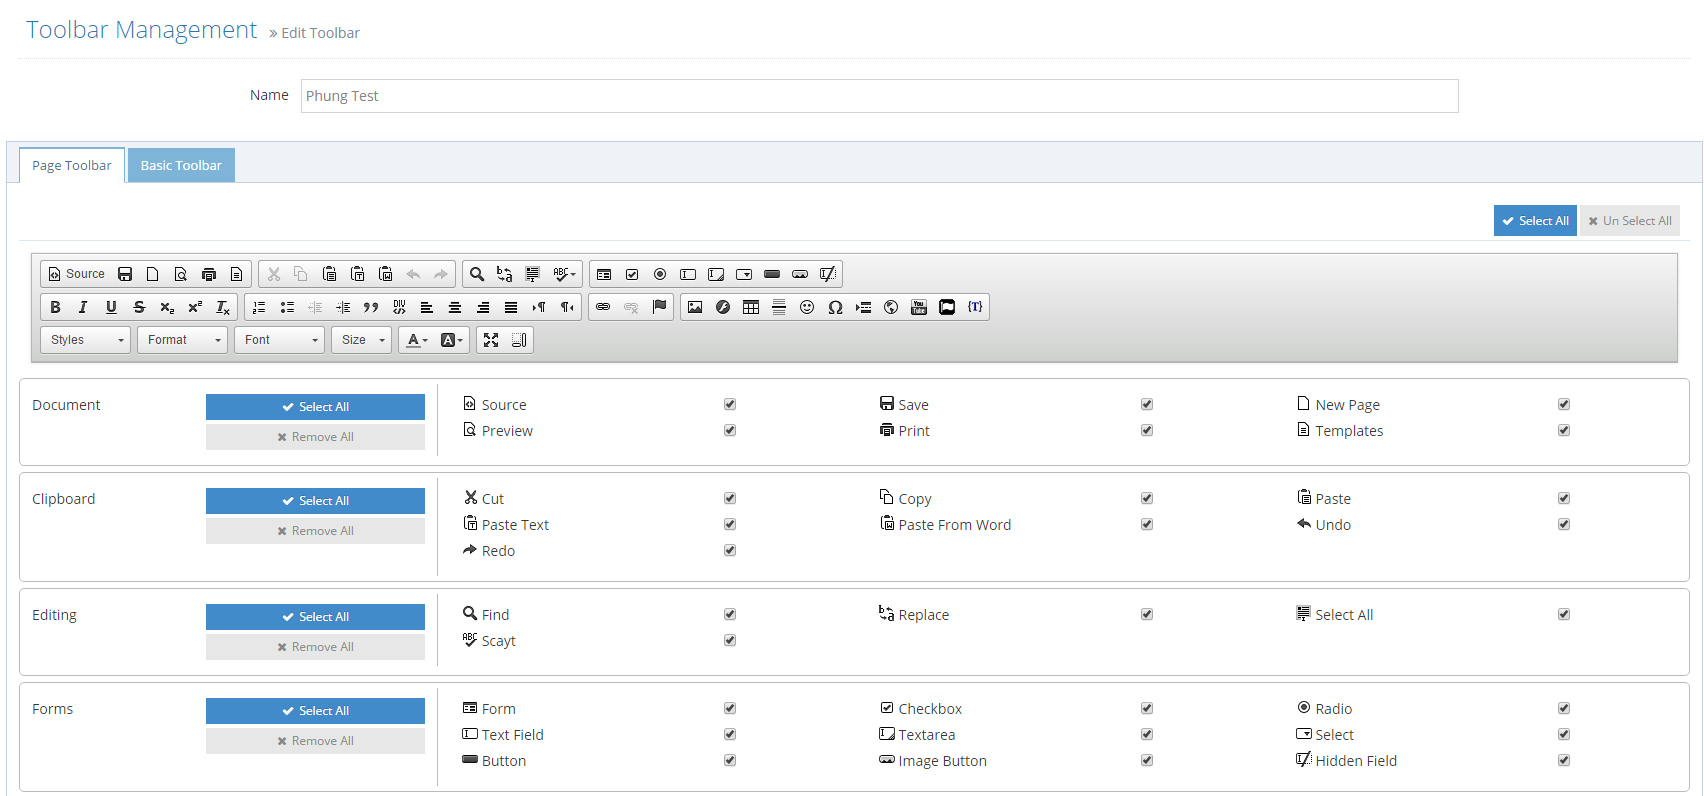
3Click the first icon per row on the grid.

-
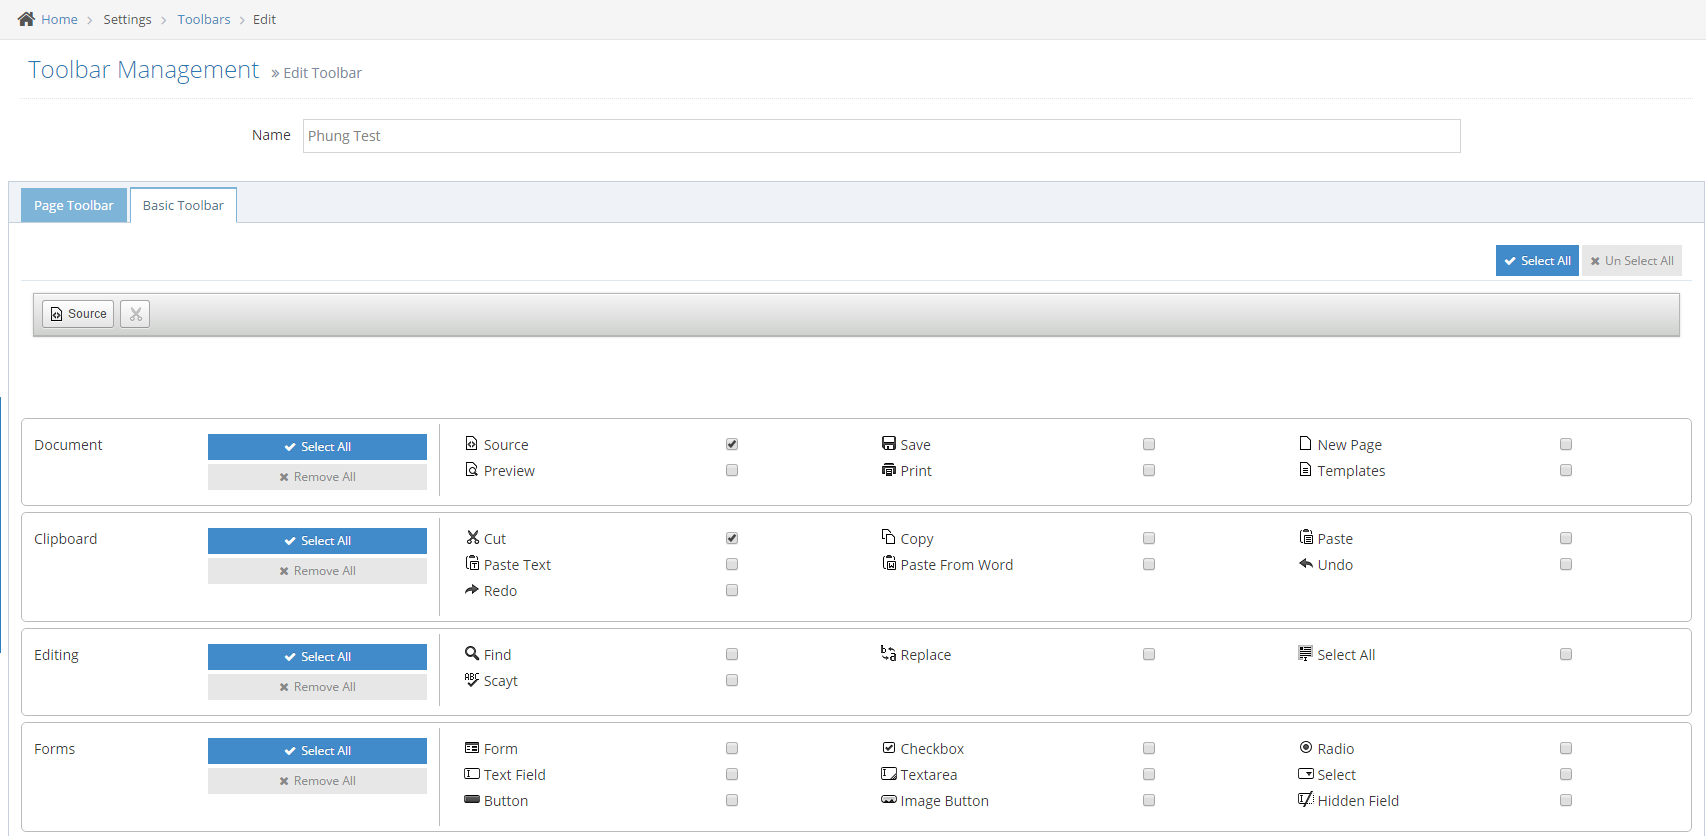
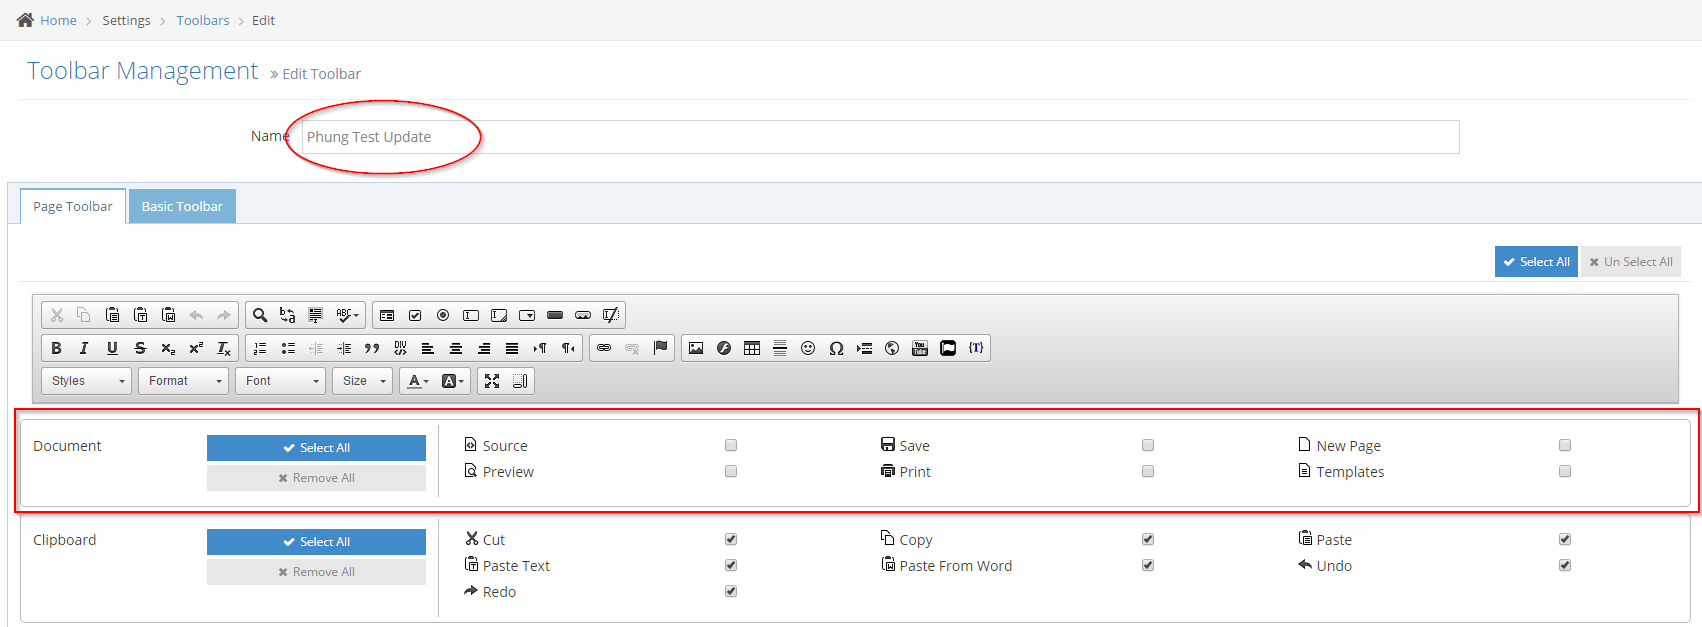
4Input information for update and click Save or Save And Continue Edit: need to pass the validation before the update.
-
5View the Toolbar Listing.

How to Delete Toolbar configuration
-
1Log in as an administrator and go to the Admin Dashboard.
Learn how to log in here → -
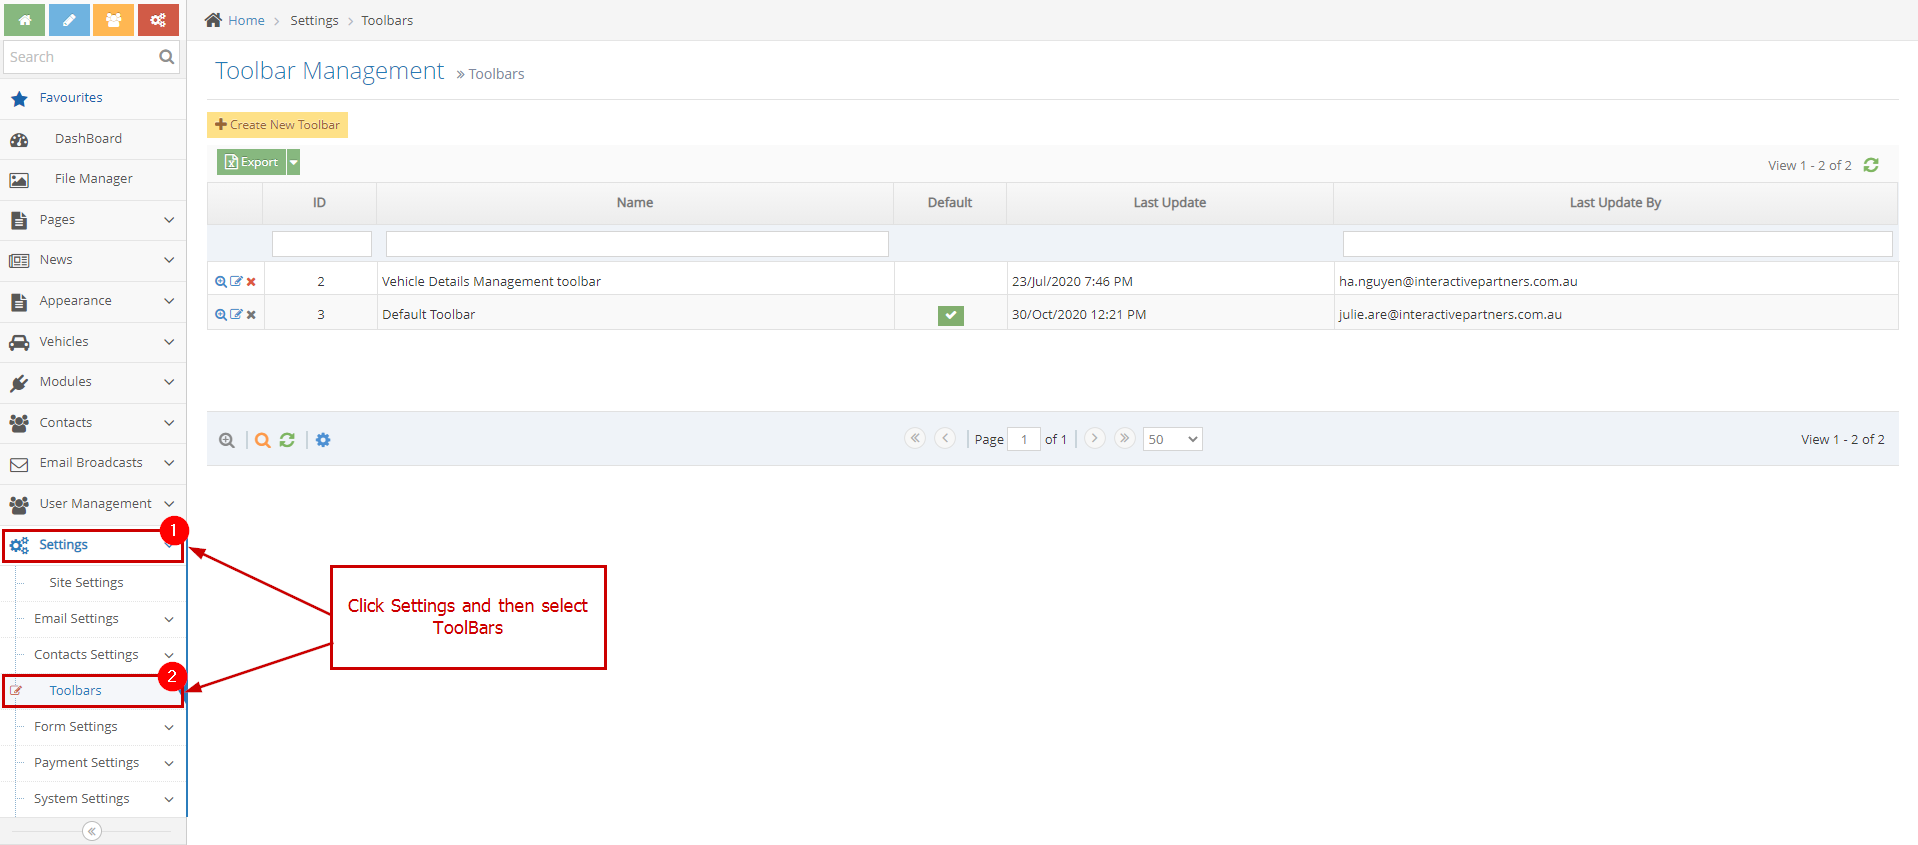
2Click Settings > ToolBars in the left navigation
-
3Click the third icon per row on the grid.

-
4Click OK from confirm message: need to pass the validation before deleting a record.
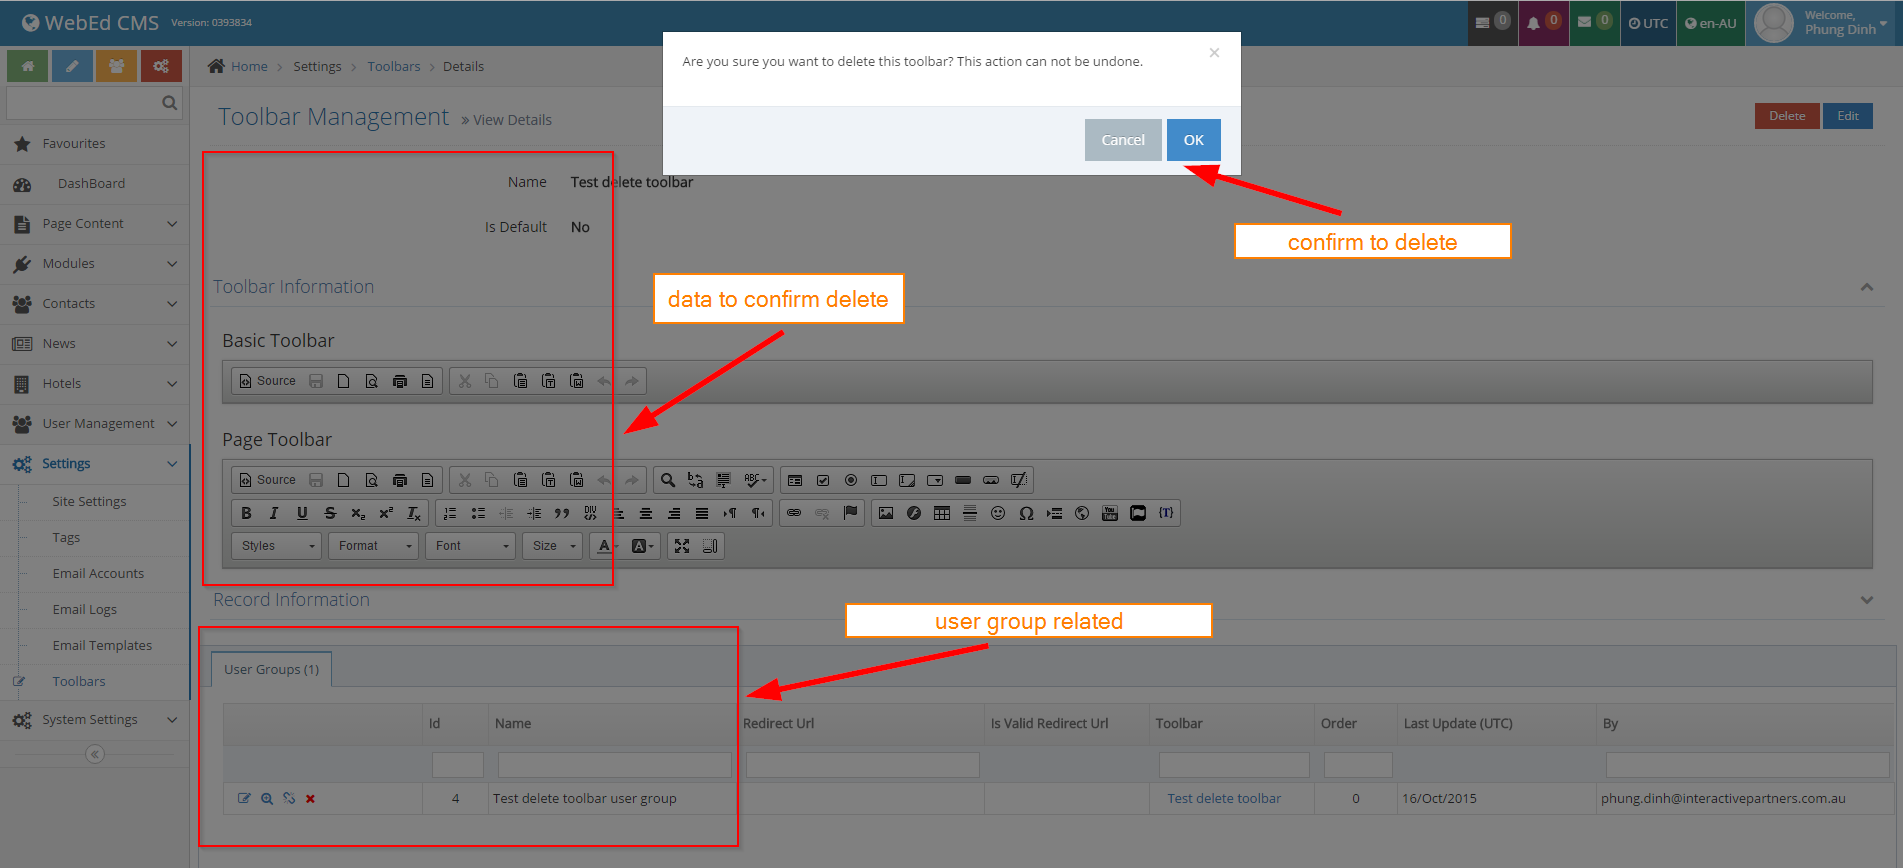
- If this toolbar is related to a user group.
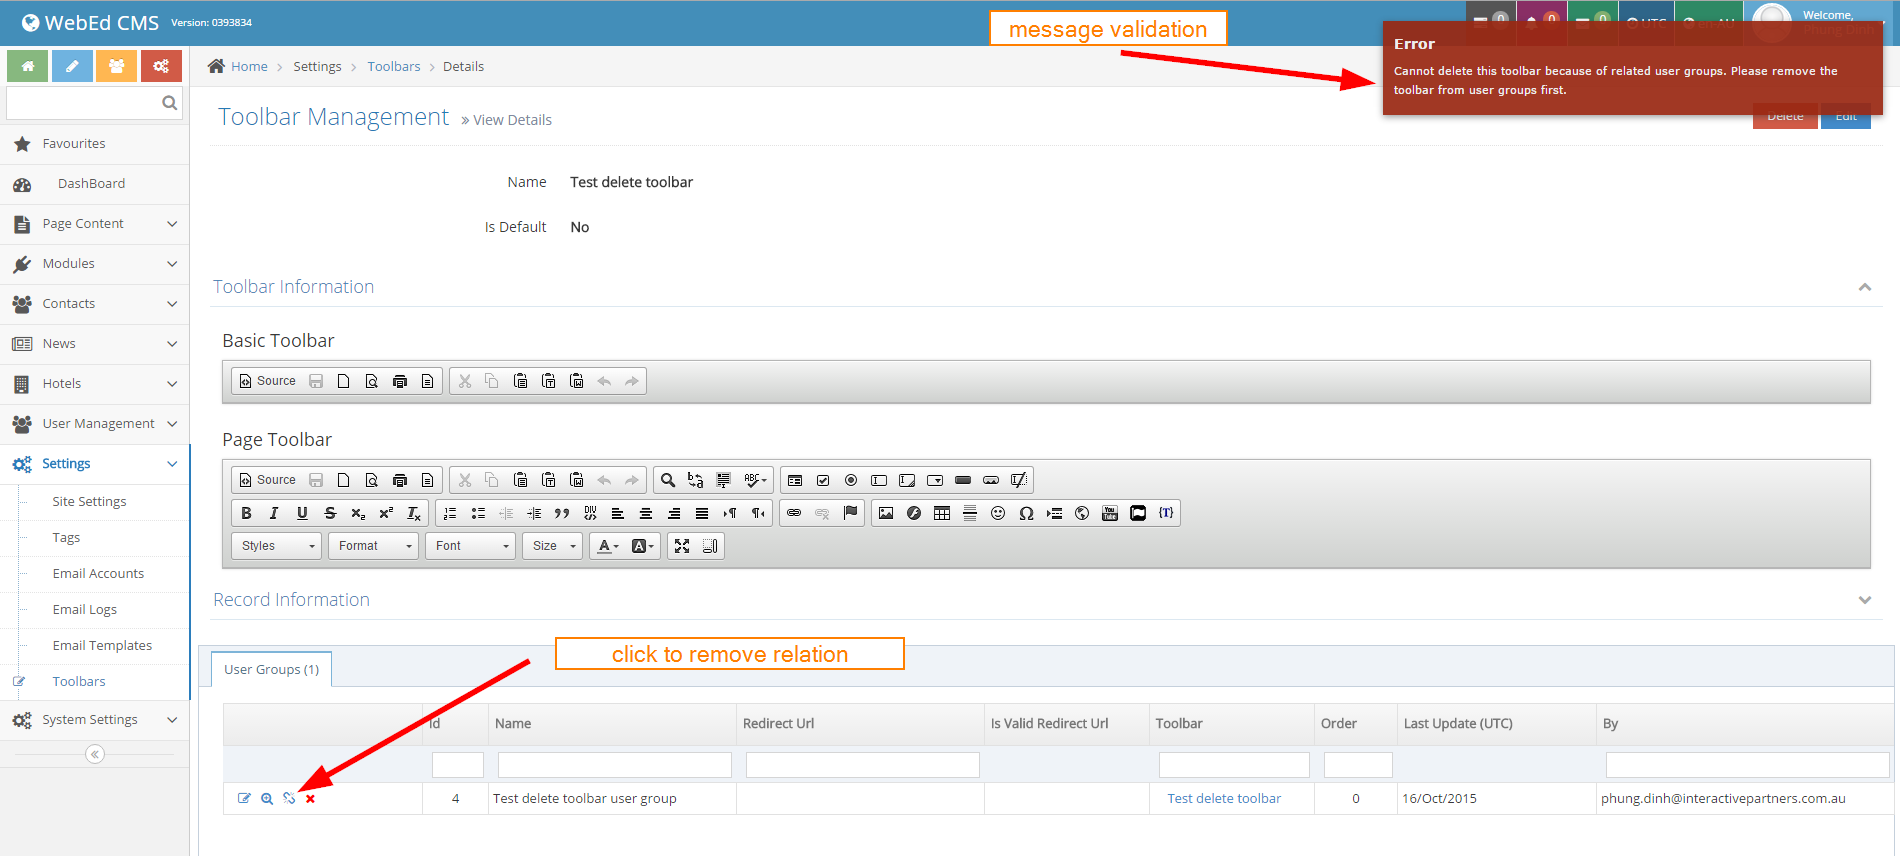
- - Click unlink before deleting the toolbar.

- - Click the delete button in top-right
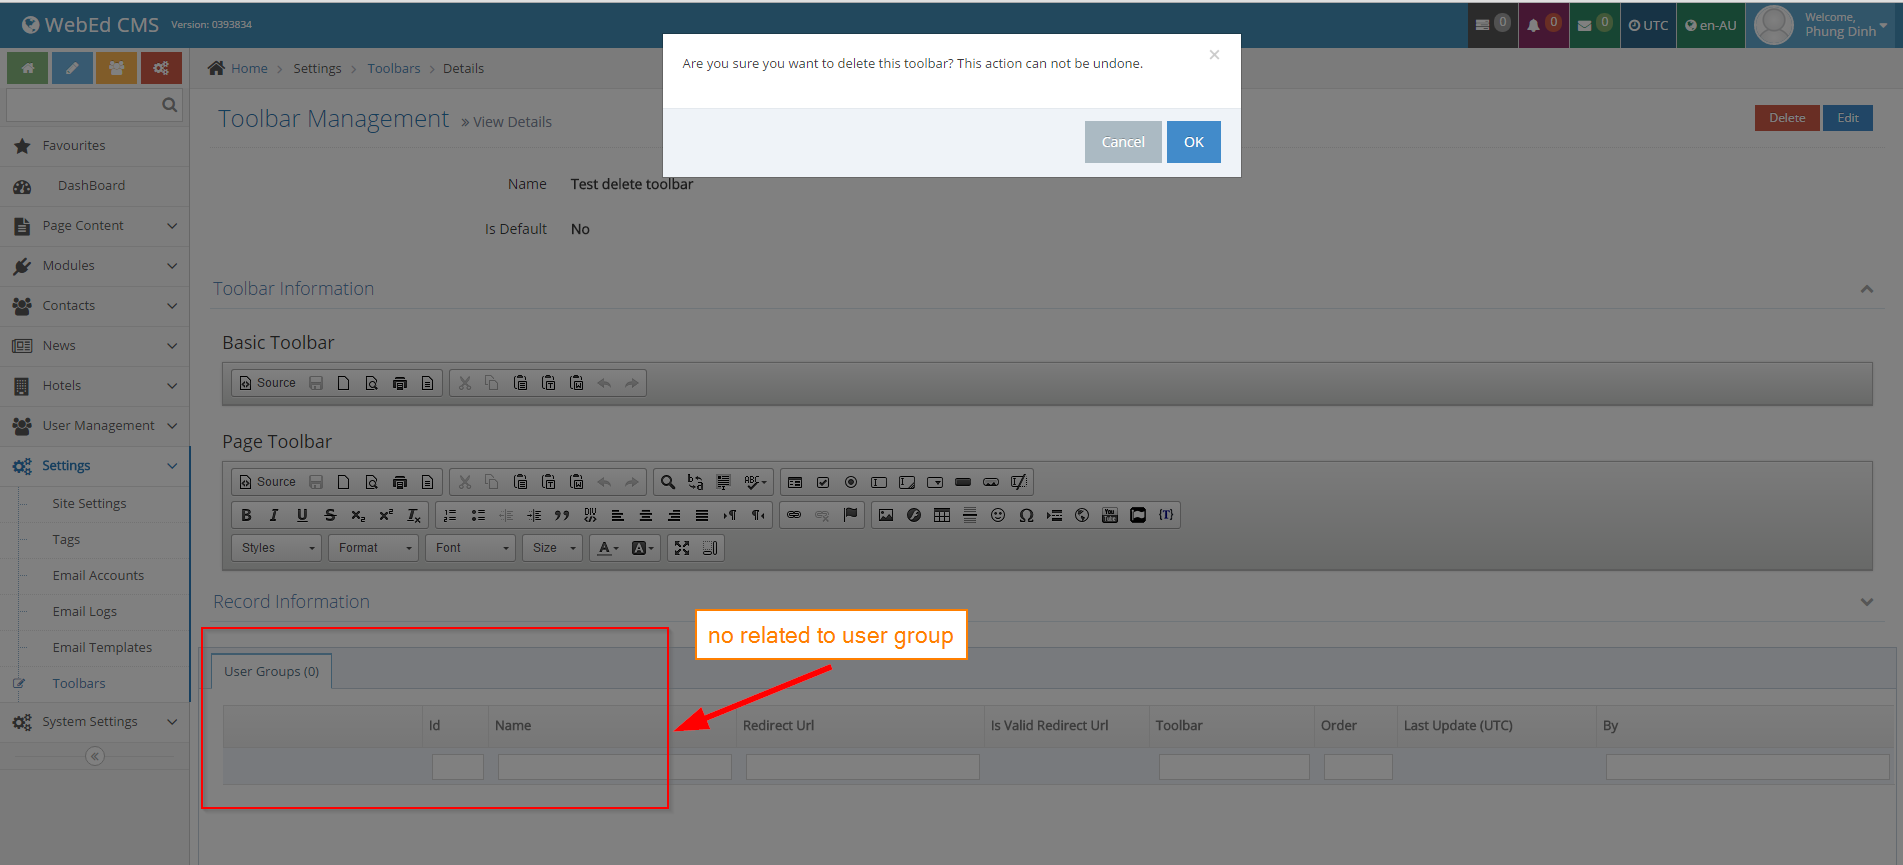
- If this toolbar is related to a user group.
-
5Click OK from the successful message

-
6Confirm from the list if toolbar is already deleted

Set Up Toolbar for New User Group
-
1Log in as an administrator and go to the Admin Dashboard.
Learn how to log in here → -
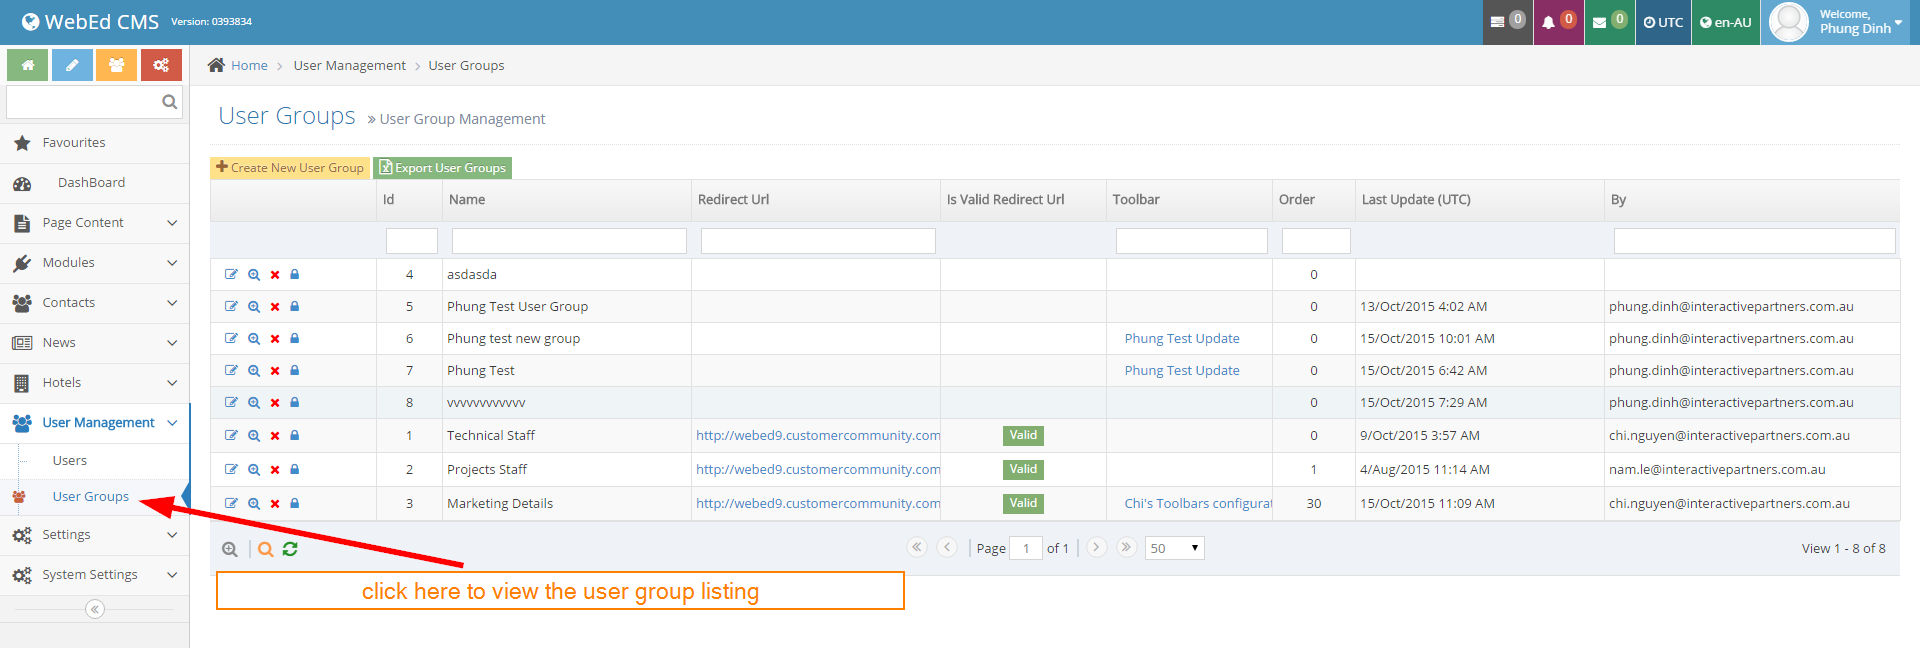
2Go to User Management > User Groups
-
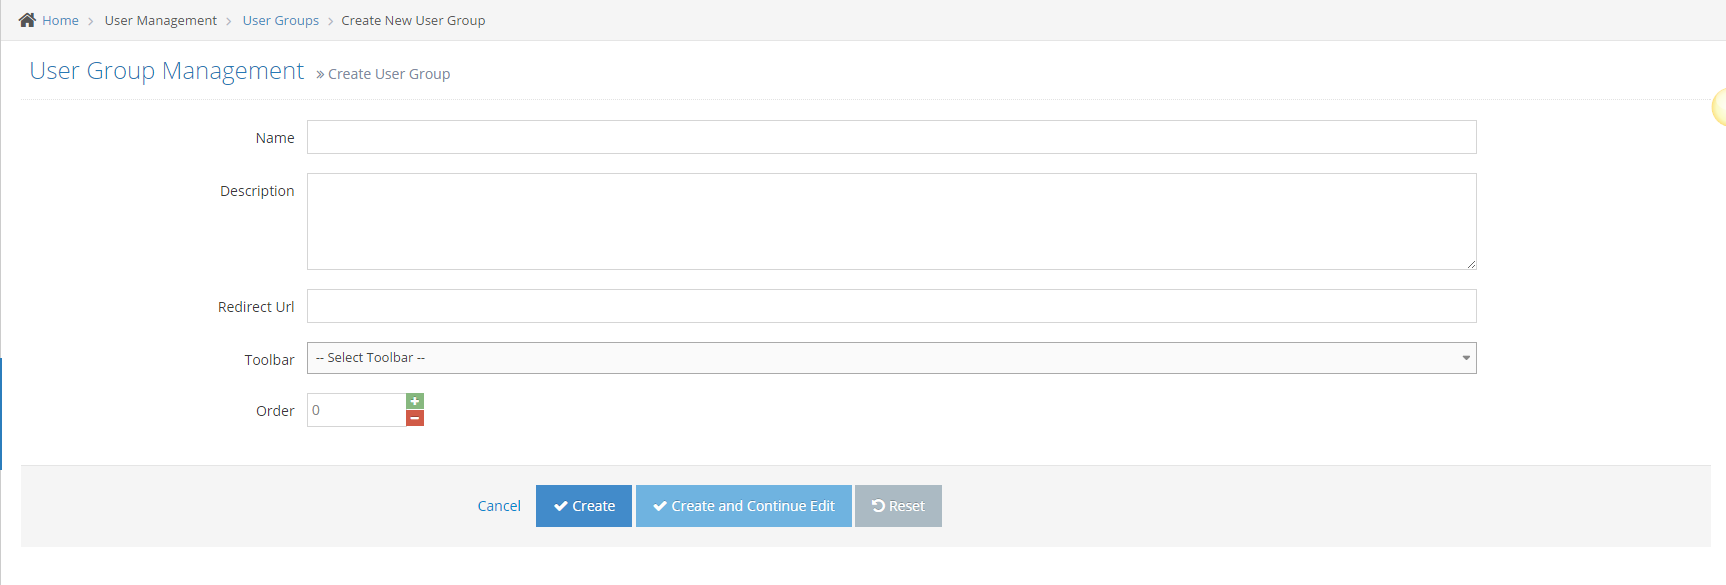
3Click Create New User Group
-
4Input data must pass all failed cases

-
5Click Create or Create And Continue Edit
-
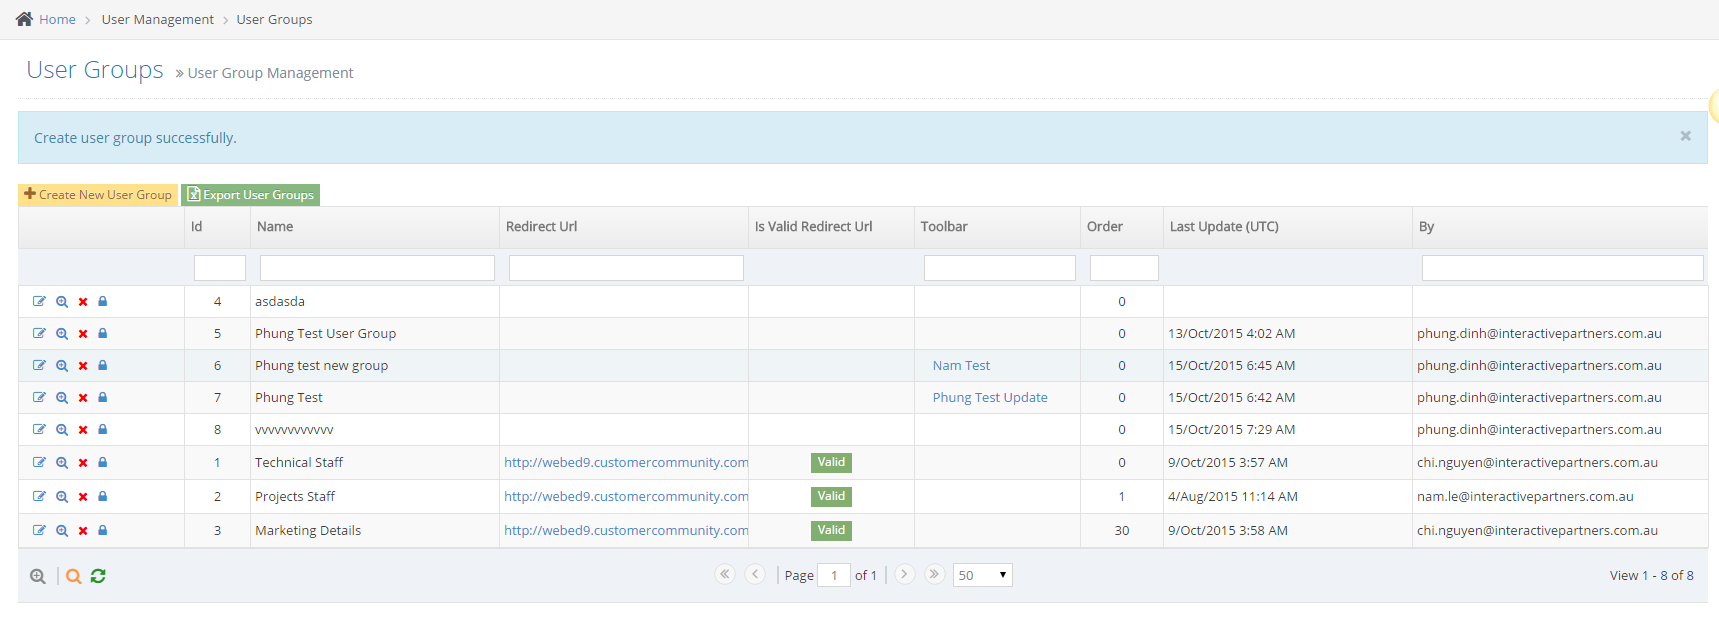
6Click Create: back to the User Group listing and show a message create successfully
-
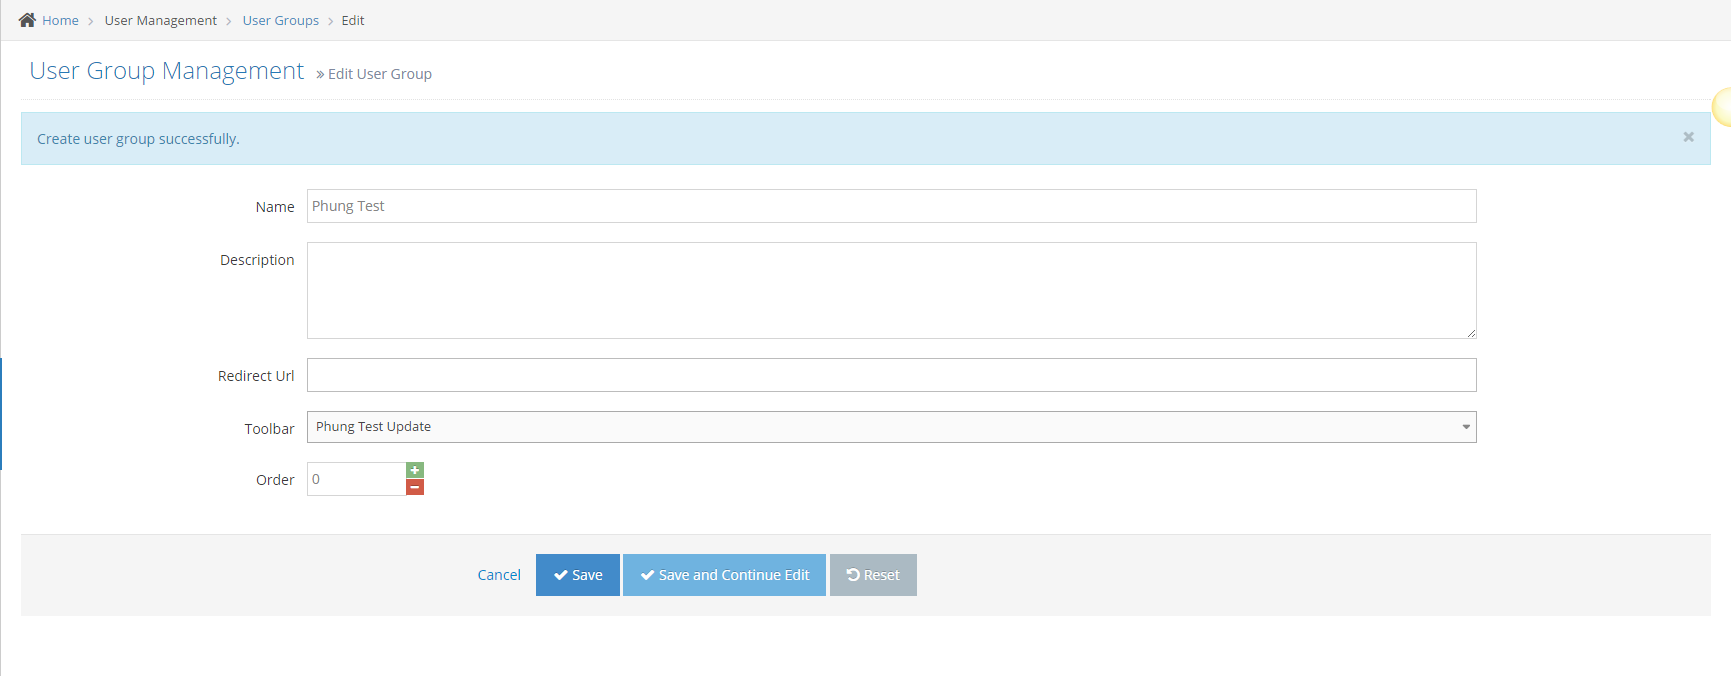
7Click Create And Continue Edit: redirect to the edit user group page and show a message create successfully
Set Up a Toolbar for Existing User Group
-
1Log in as an administrator and go to the Admin Dashboard.
Learn how to log in here → -
2Go to User Management > User Groups

-
3In the User Group listing, click the first icon to go to the user group for the editing page.

-
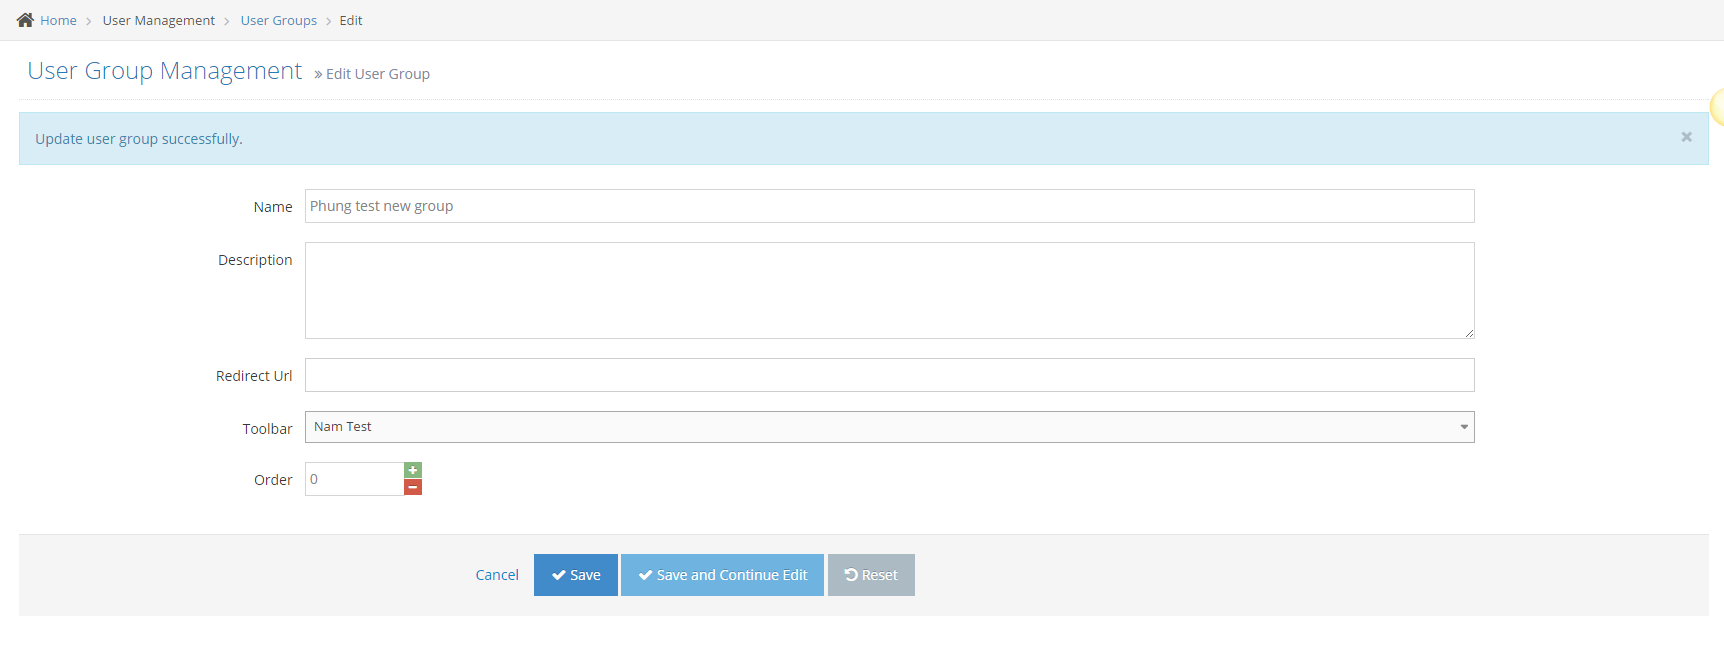
4Update value, select toolbar for user group if any

-
5Click Save or Save And Continue Edit
- Click Save: back to User Group listing and show message edit successfully
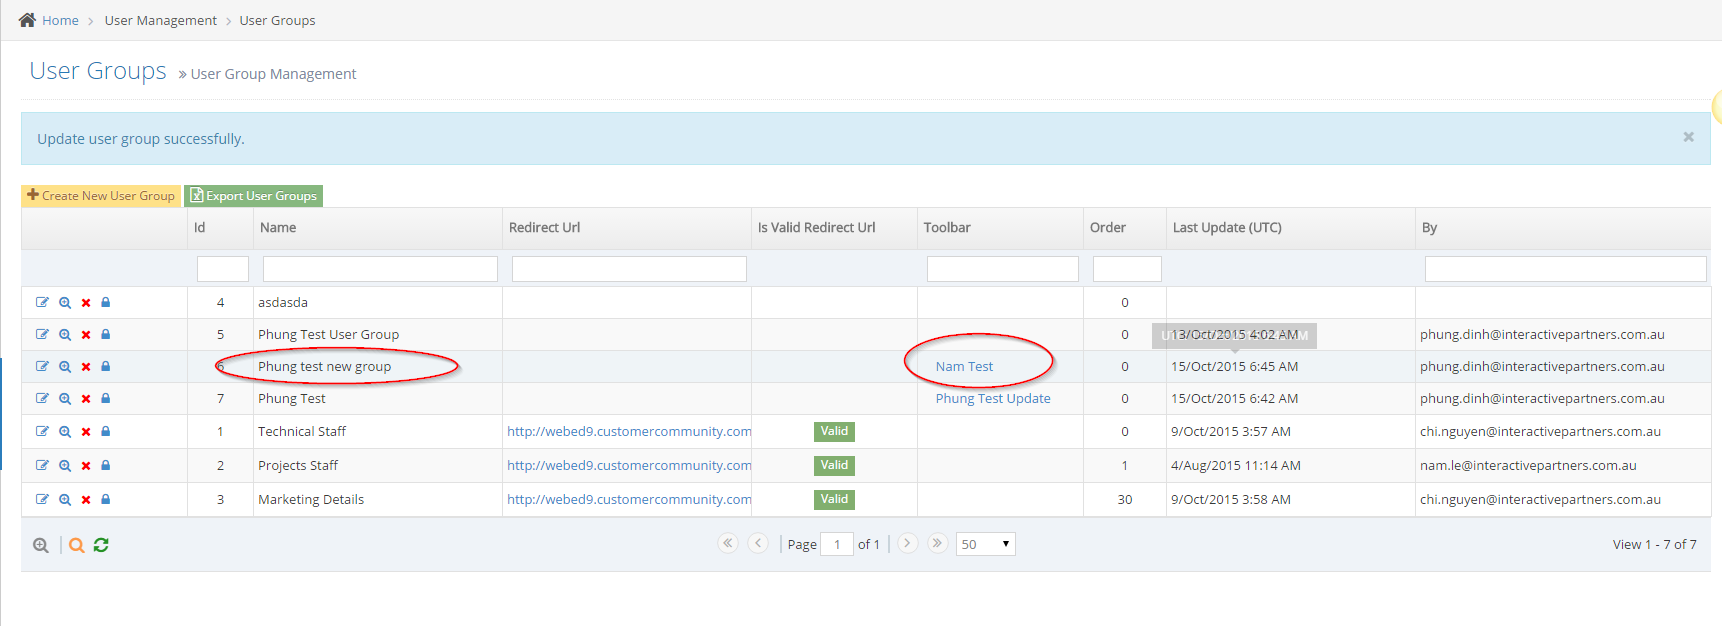
- Click Save And Continue Edit: keep going to the edit page and show a message edit successfully
- Click Save: back to User Group listing and show message edit successfully
Setup User Group for New User
-
1Log in as an administrator and go to the Admin Dashboard.
Learn how to log in here → -
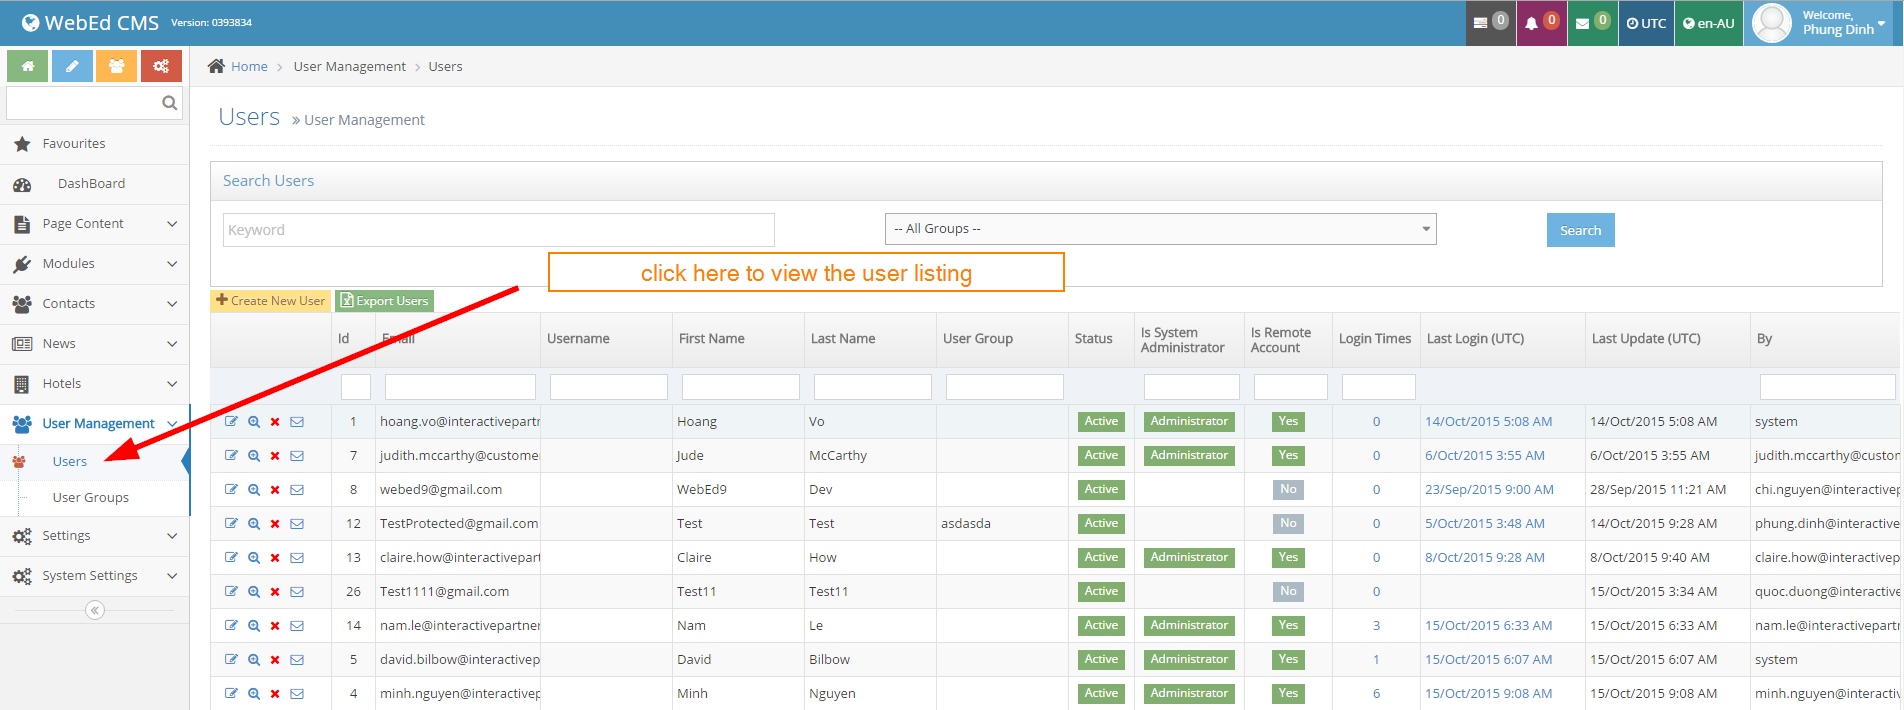
2Go to User Management > Users
-
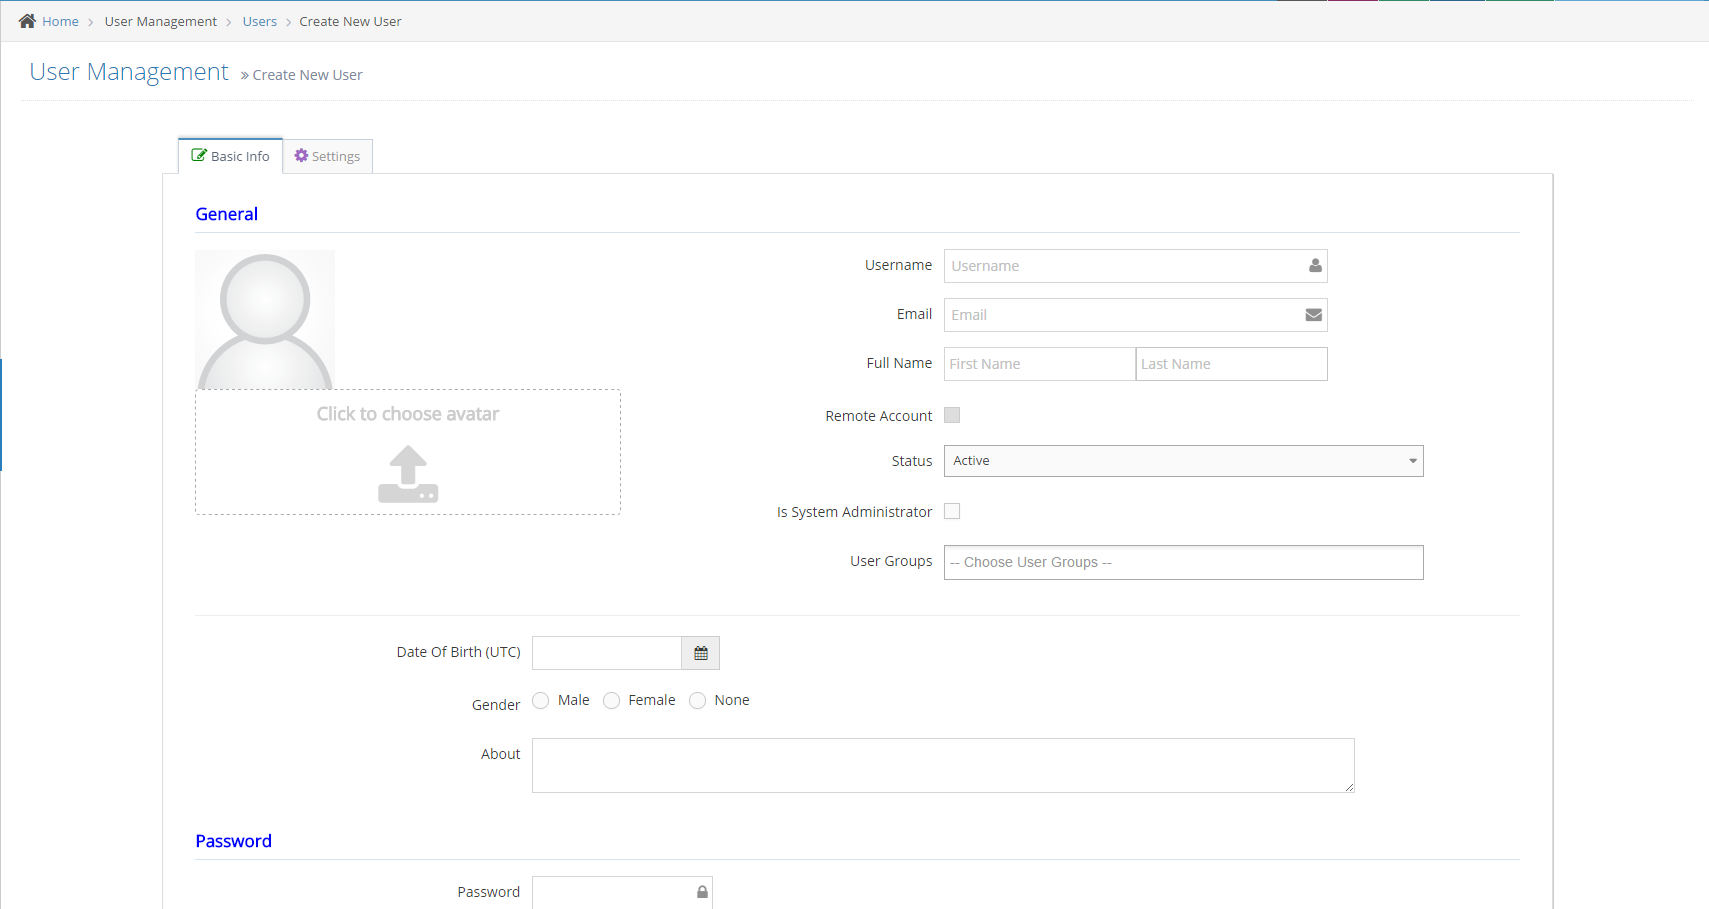
3Click Create New User
-
4Input information for the User
-
5Select User Group
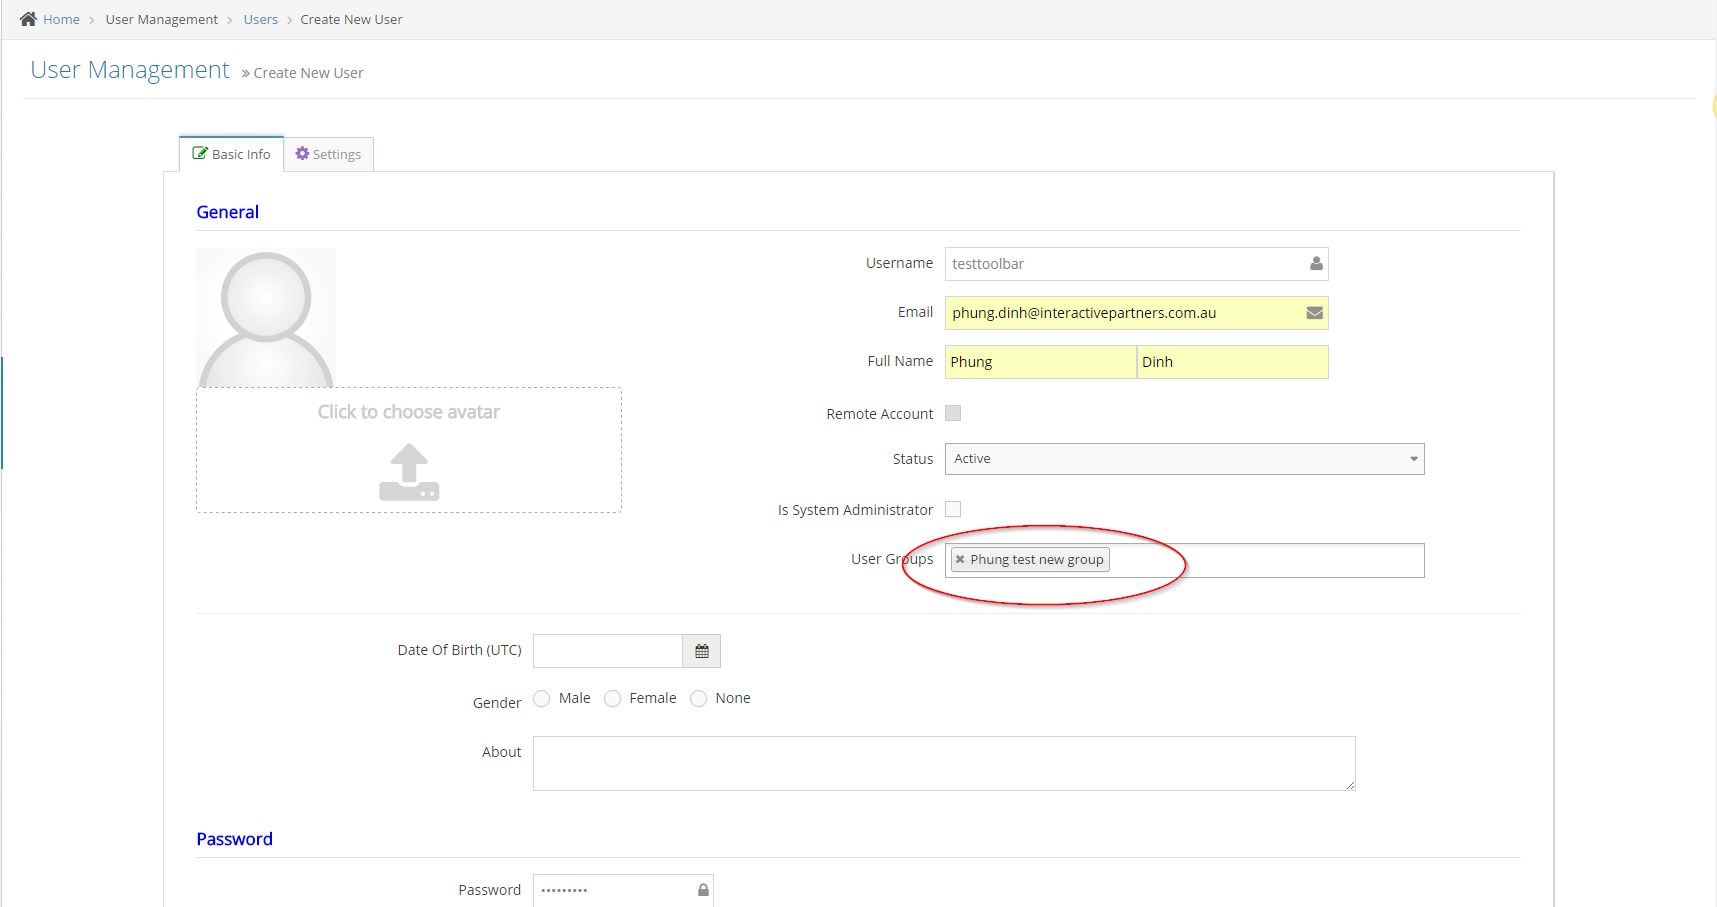
-
6Click Create or Create And Continue Edit: must pass all failed cases
- If you click Create:
Create message successfully
Back to grid - If you click Create And Continue Edit:
Create message successfully
Redirect to form edit
- If you click Create:
Set Up a User Group for Existing User
-
1Log in as an administrator and go to the Admin Dashboard.
Learn how to log in here → -
2Go to User Management > Users

-
3From the User listing, click the first icon per row on the grid
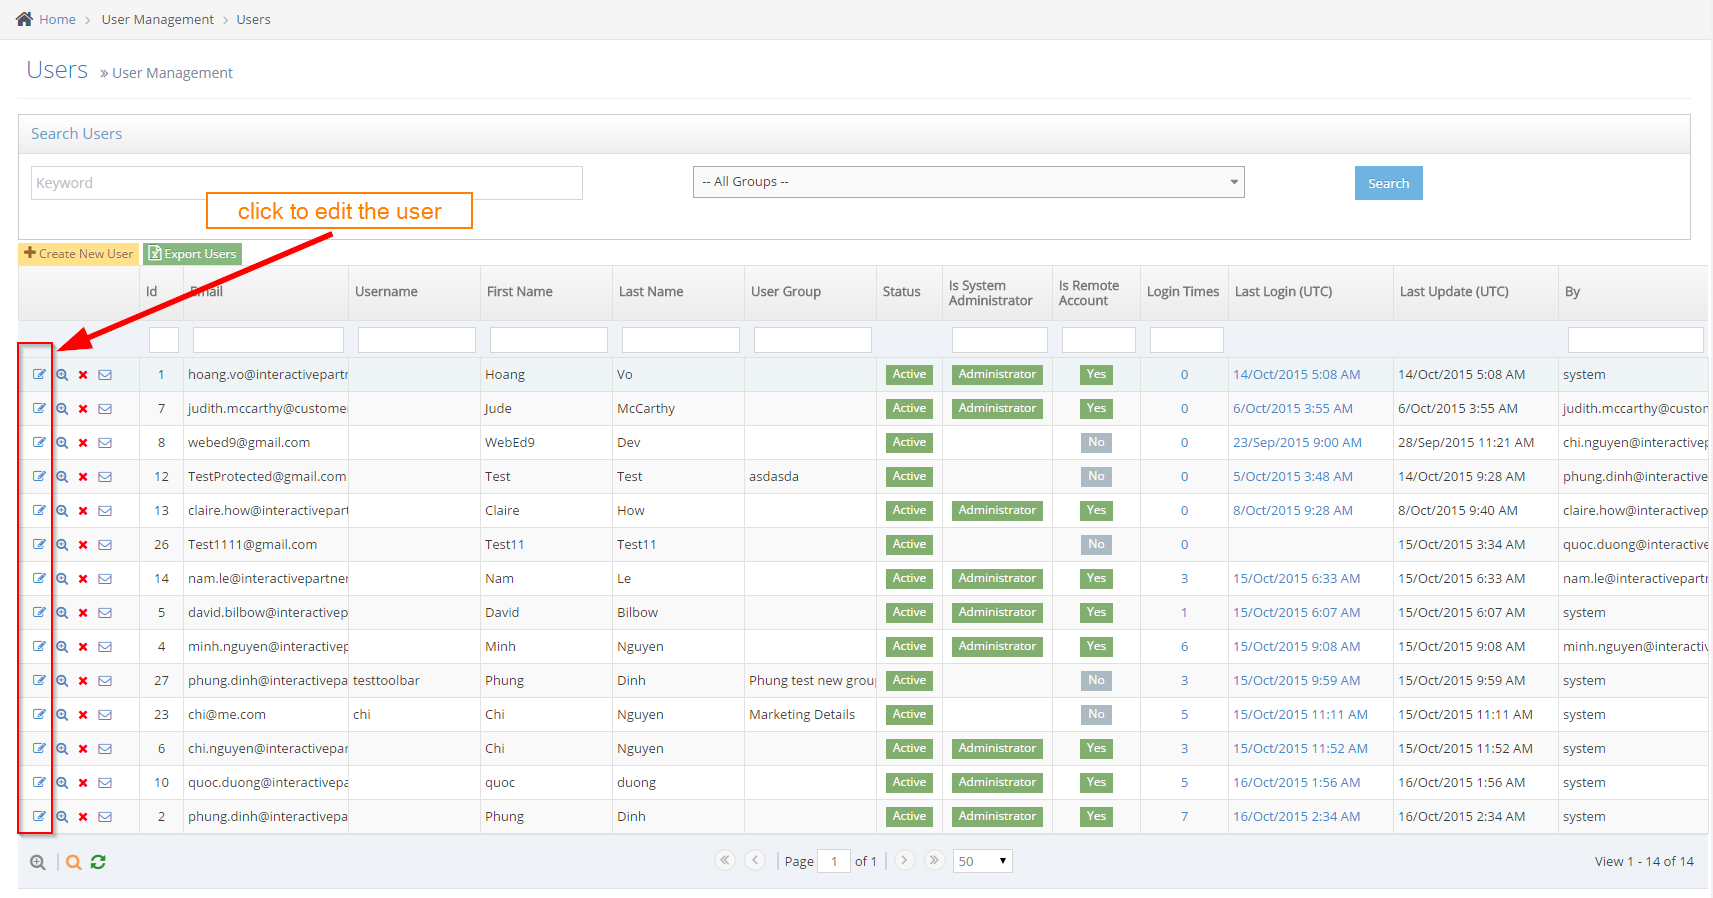
-
4Setup User Group for User
-
5Select User Group
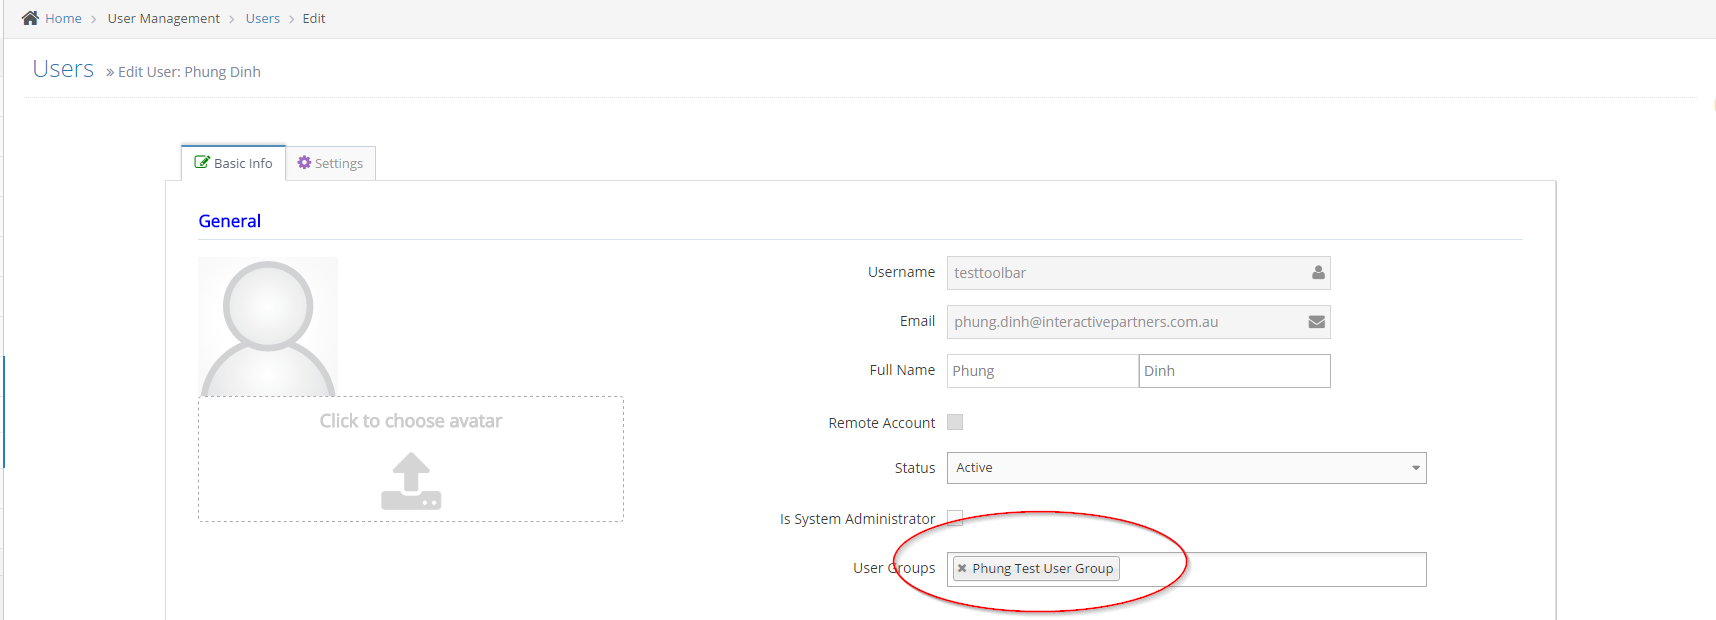
-
6Click Create or Create And Continue Edit: must pass all failed cases
- If Click Create
Create message successfully
Back to grid - If Click Create And Continue Edit
Create message successfully
Redirect to form edit
- If Click Create
Loading Toolbar by User Login
-
1Log in as an administrator and go to the Admin Dashboard.
Learn how to log in here → -
2Set user group that can edit the page

-
3Log in as the user that has the user group assigned toolbar access
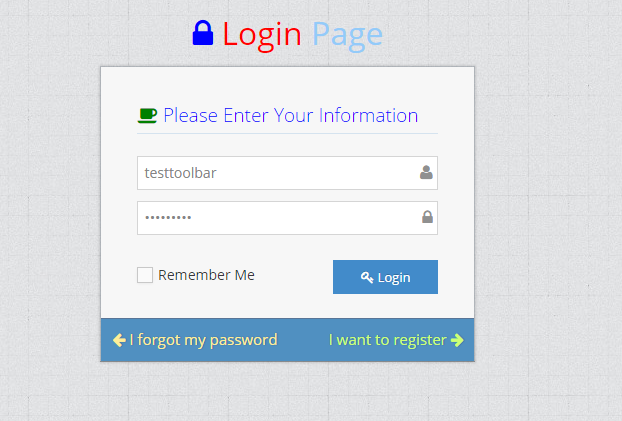
-
4Go to the page to edit or create a page
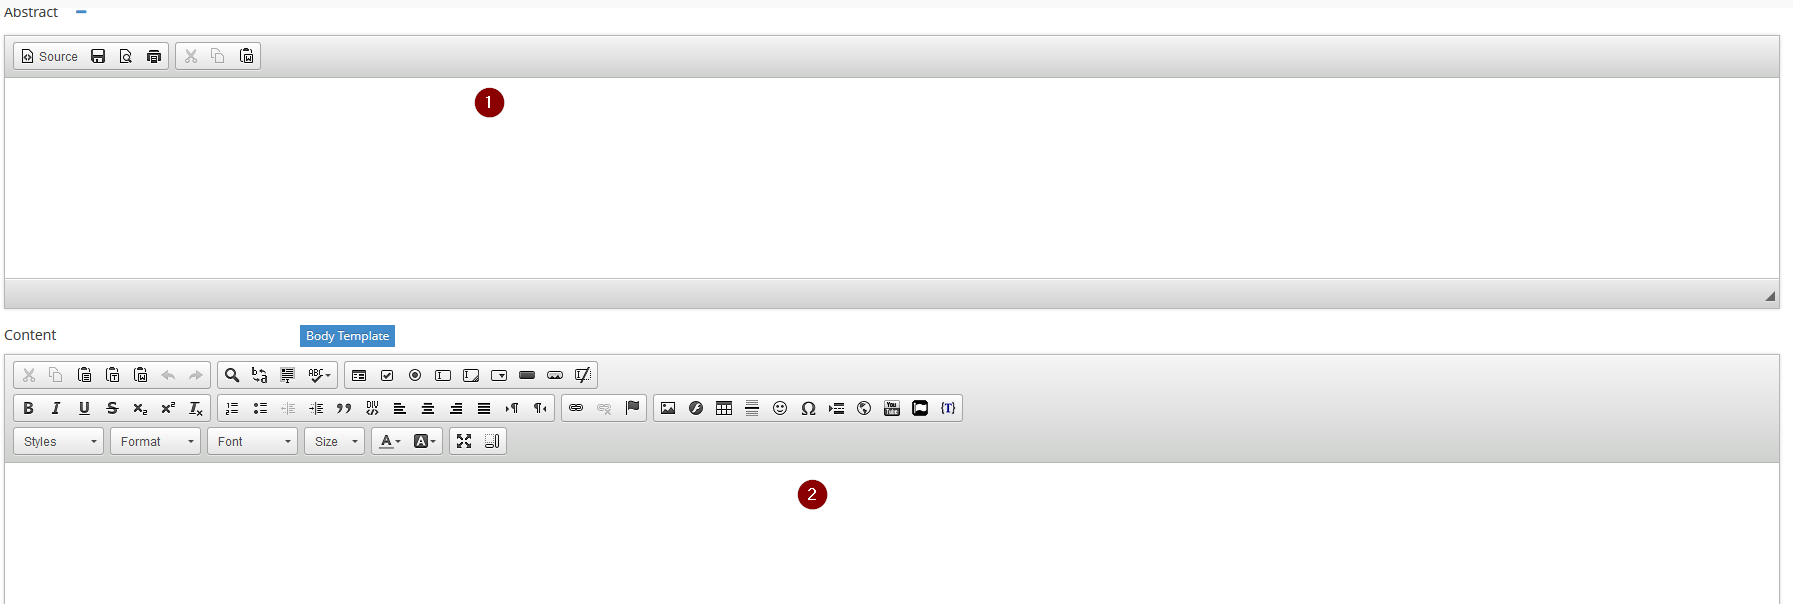
- (1) Basic Toolbar
- (2) Page Toolbar
Configuring Editor Toolbars for User Groups
Configuring Editor Tool Bars for User Groups Overview
Group Messages
What is a group message?
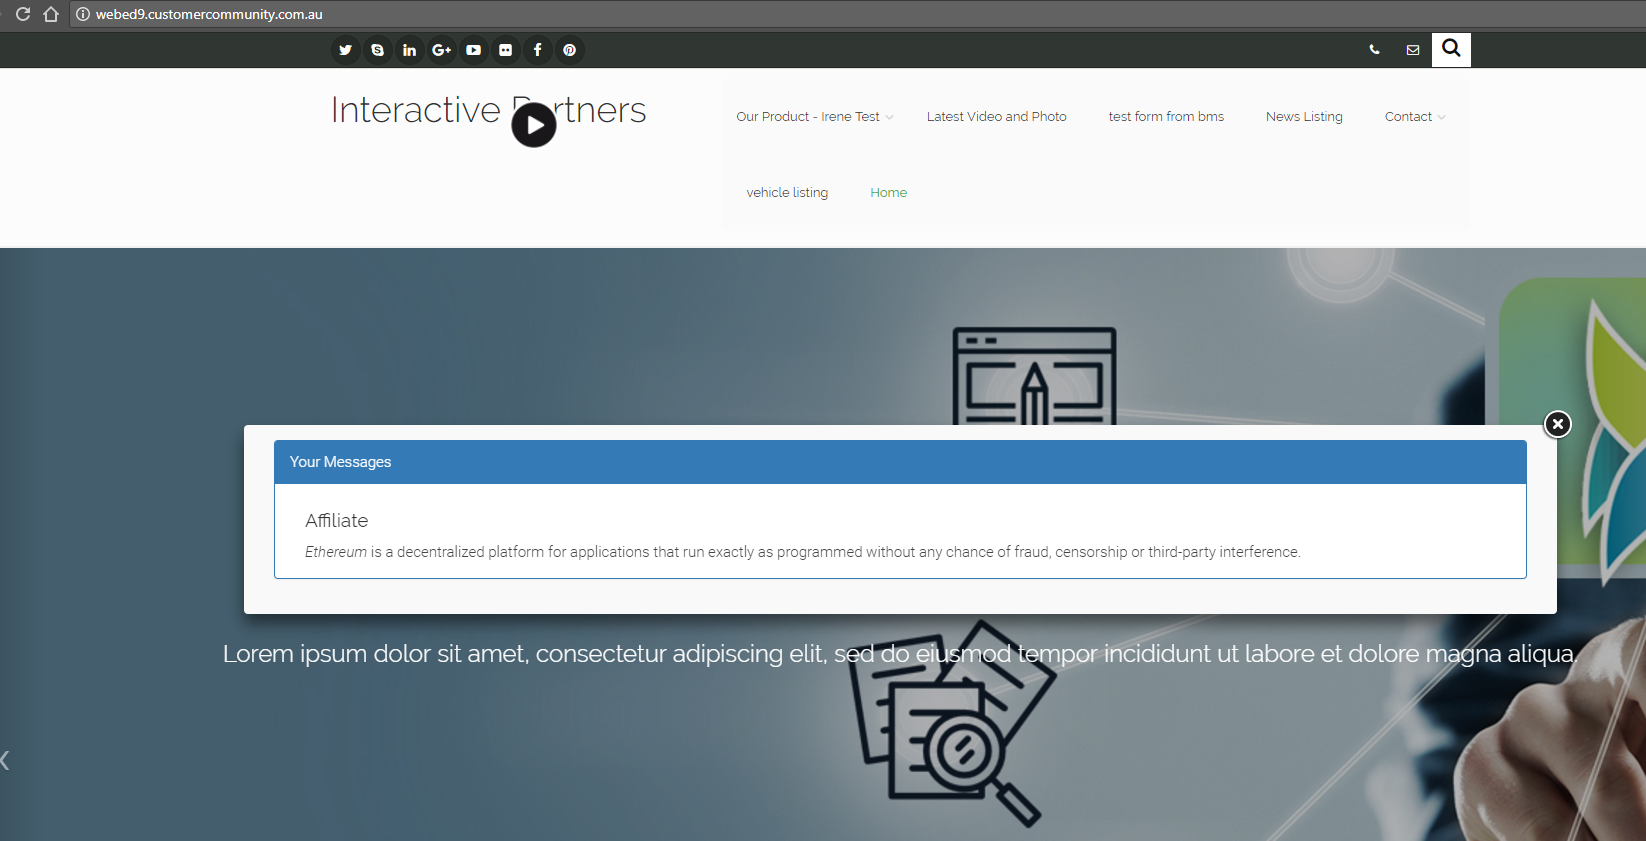
A group message can be used to notify a group of users on login. Each member of the group will see a message on the screen when they log in to your portal or website.
Not sure about user groups? See how to manage User Groups
Why would you use a group message?
This function provides a simple way for the admin can send messages to users in many groups at the same time. This module can be very useful if an admin user wants to send information through a bulk of users or organisations.
- An example of a Group Message
Creating a Group Message
-
1Log in as an administrator and go to the Admin Dashboard.
Learn how to log in here → -
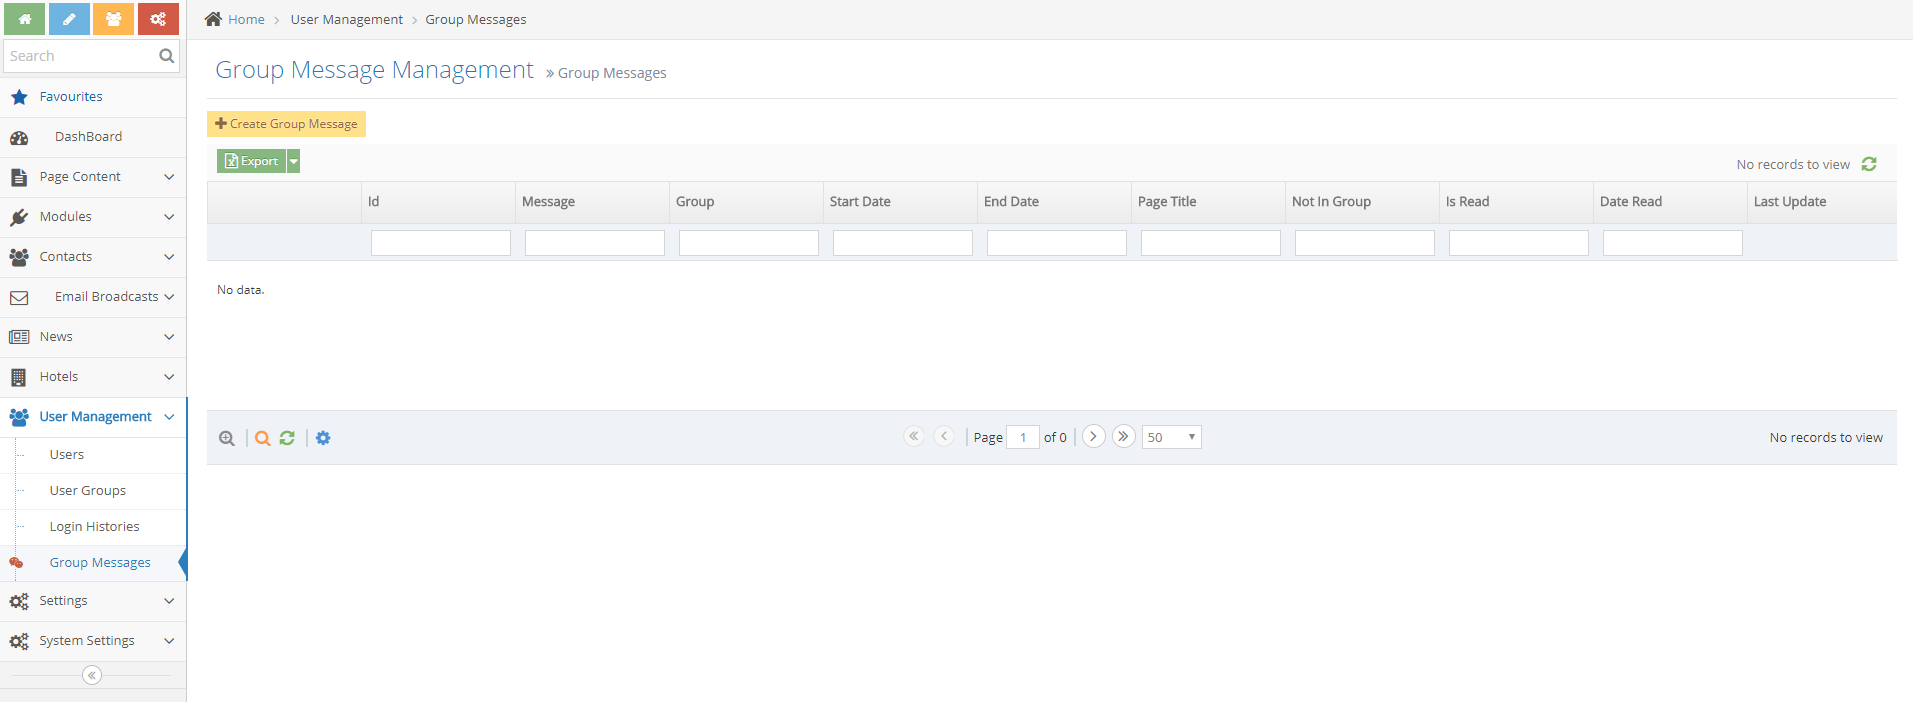
2On the left navigation, select User Management > Group Messages
-
3Create a message on the Group Message Listing page
-
4Click on the Create Group Message button
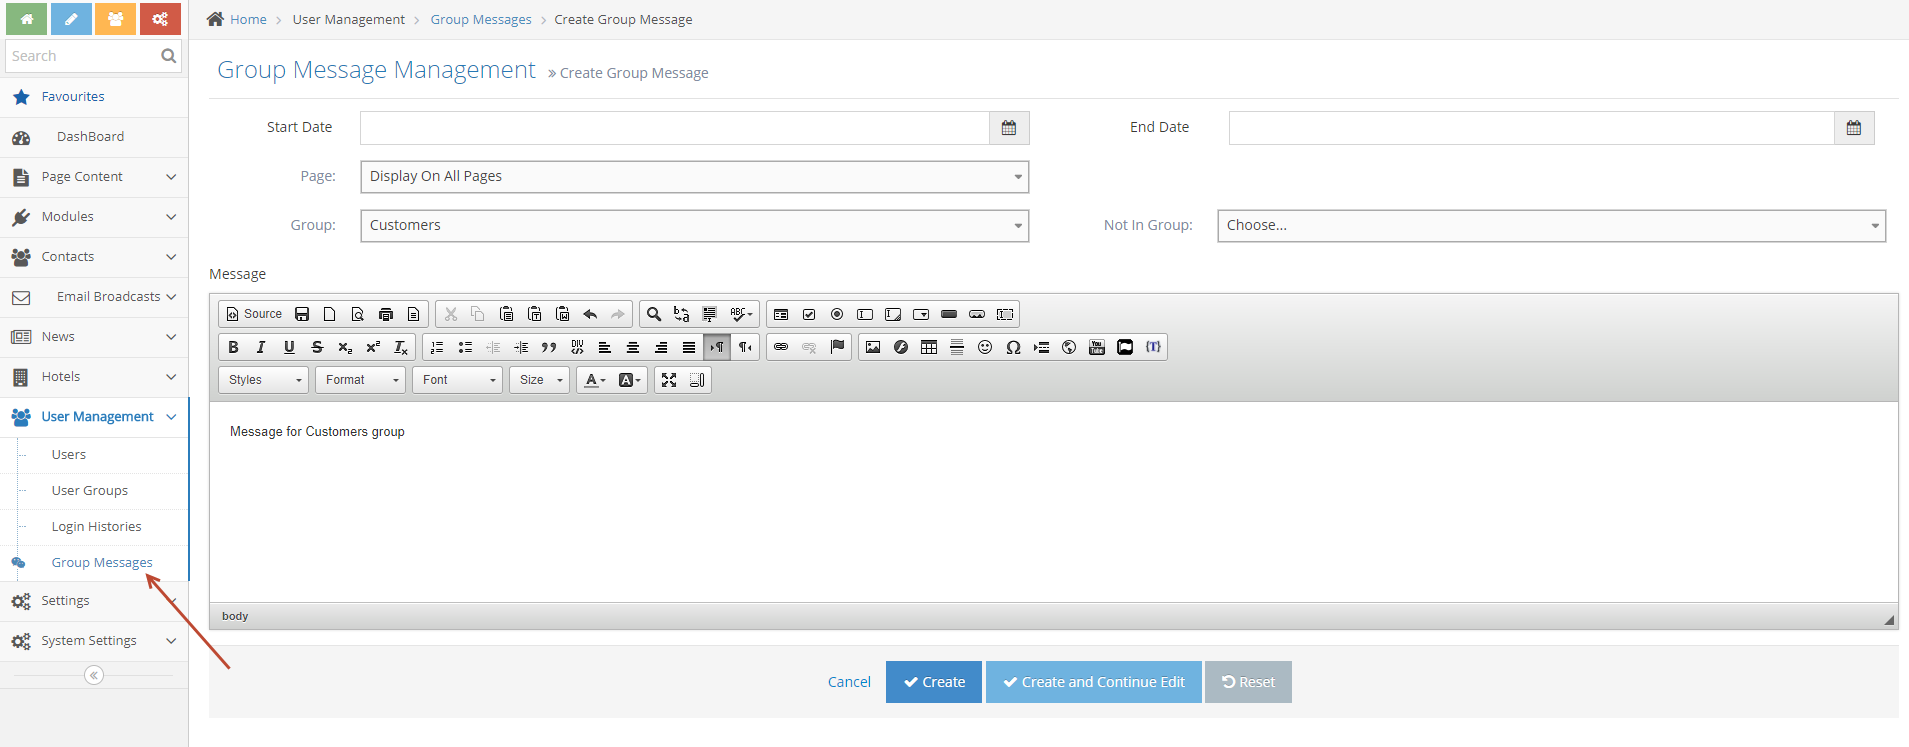
Fill in the following details:- Enter an optional Start and End Date if you want to control the group messages by date
- Page: select a page on which the message will show, normally this would be set to the home portal main page visited by most people
- Select the Group: The group which will be shown the messages (mandatory)
- Not In Group: Users who may be in the group selected for the messages but are also in this group, will not see the messages
-
5Click Create or Create and Continue Edit once done
Group Redirects
Why use the Group Redirect Module?
Often a company wishes its users to land on a specific page - regardless of where else they may need to go on the website.
This is the way to control the landing page for a specific group
How to automatically navigate to a document or page?
When a client has Logged In successfully, the user will be redirected to the URL specified in the Group settings.
Creating a Redirect for a User or User Groups
-
1Log in as an administrator and go to the Admin Dashboard.
Learn how to log in here → -
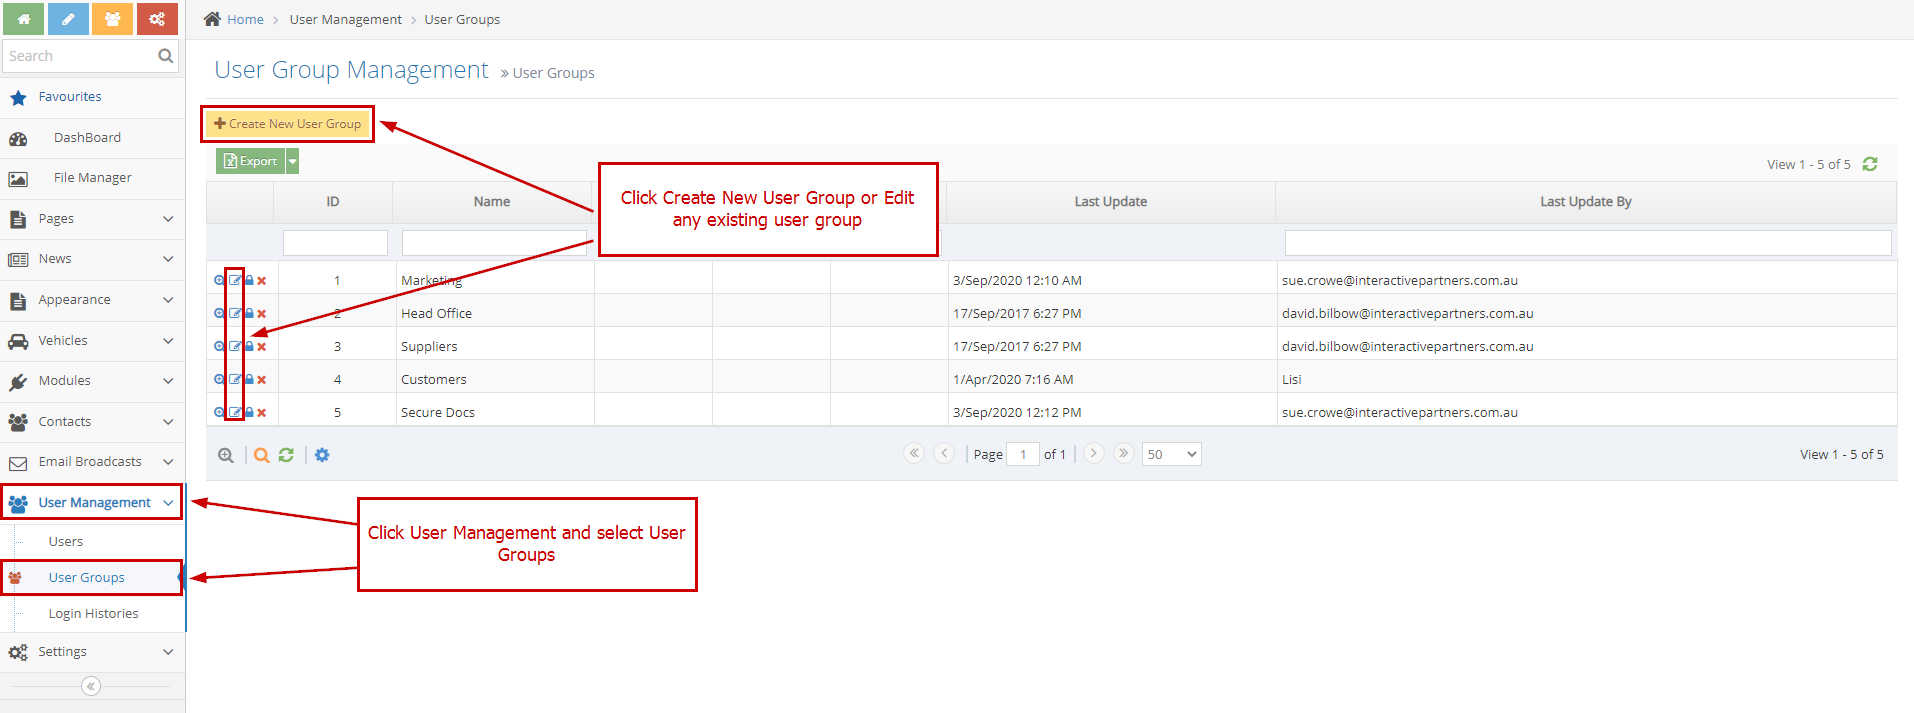
2Click User Management > User Groups
-
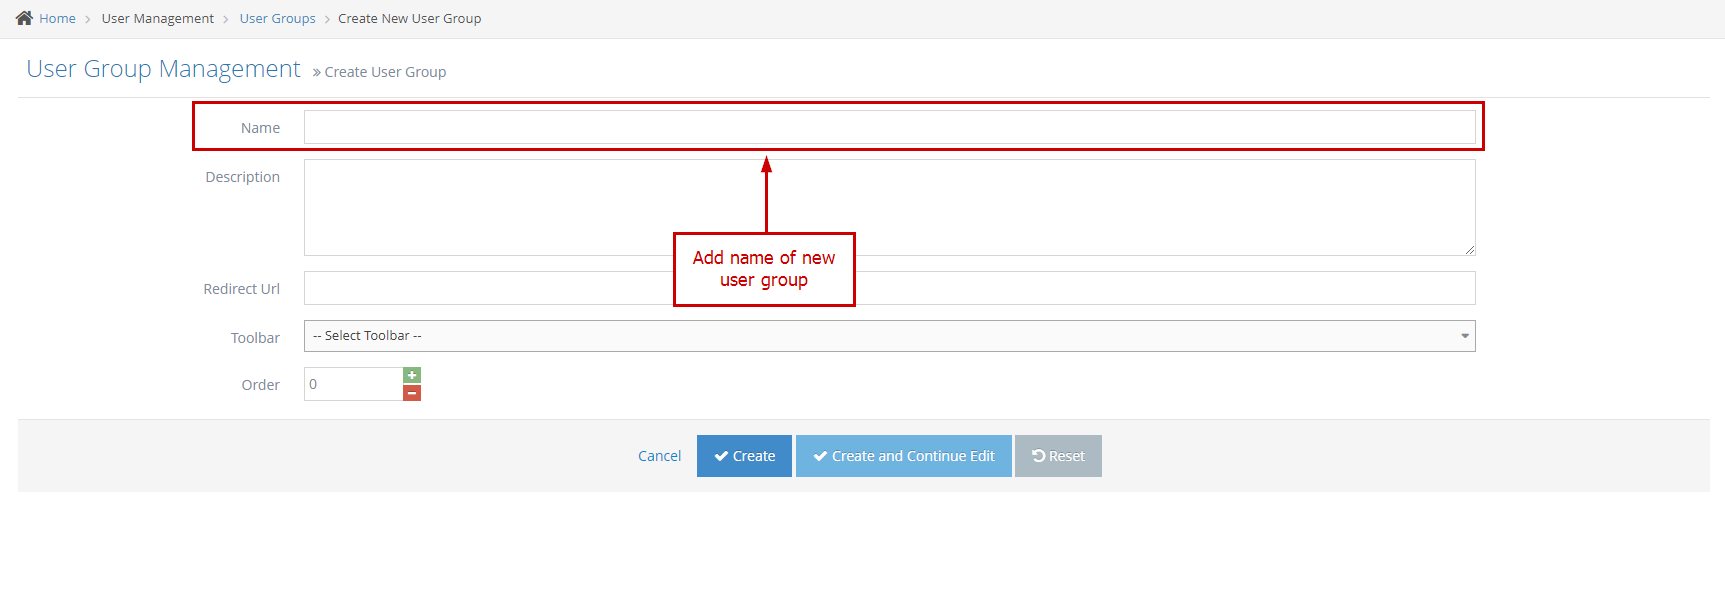
3Create a New User Group (or edit the name of an existing group)
-
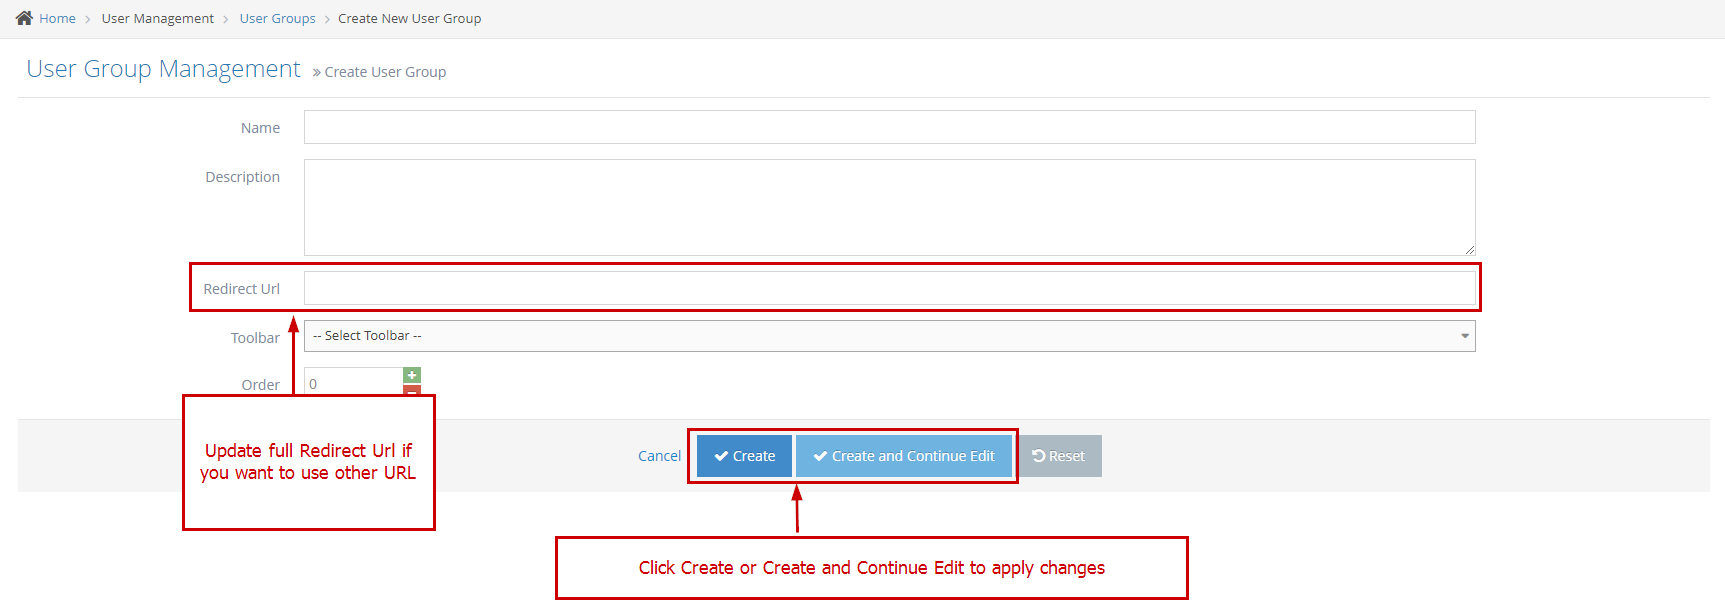
4Update Redirect URL in the available User Group
Set Up User related to User Group
-
1Log in as an administrator and go to the Admin Dashboard.
Learn how to log in here → -
2Go to User Management
-
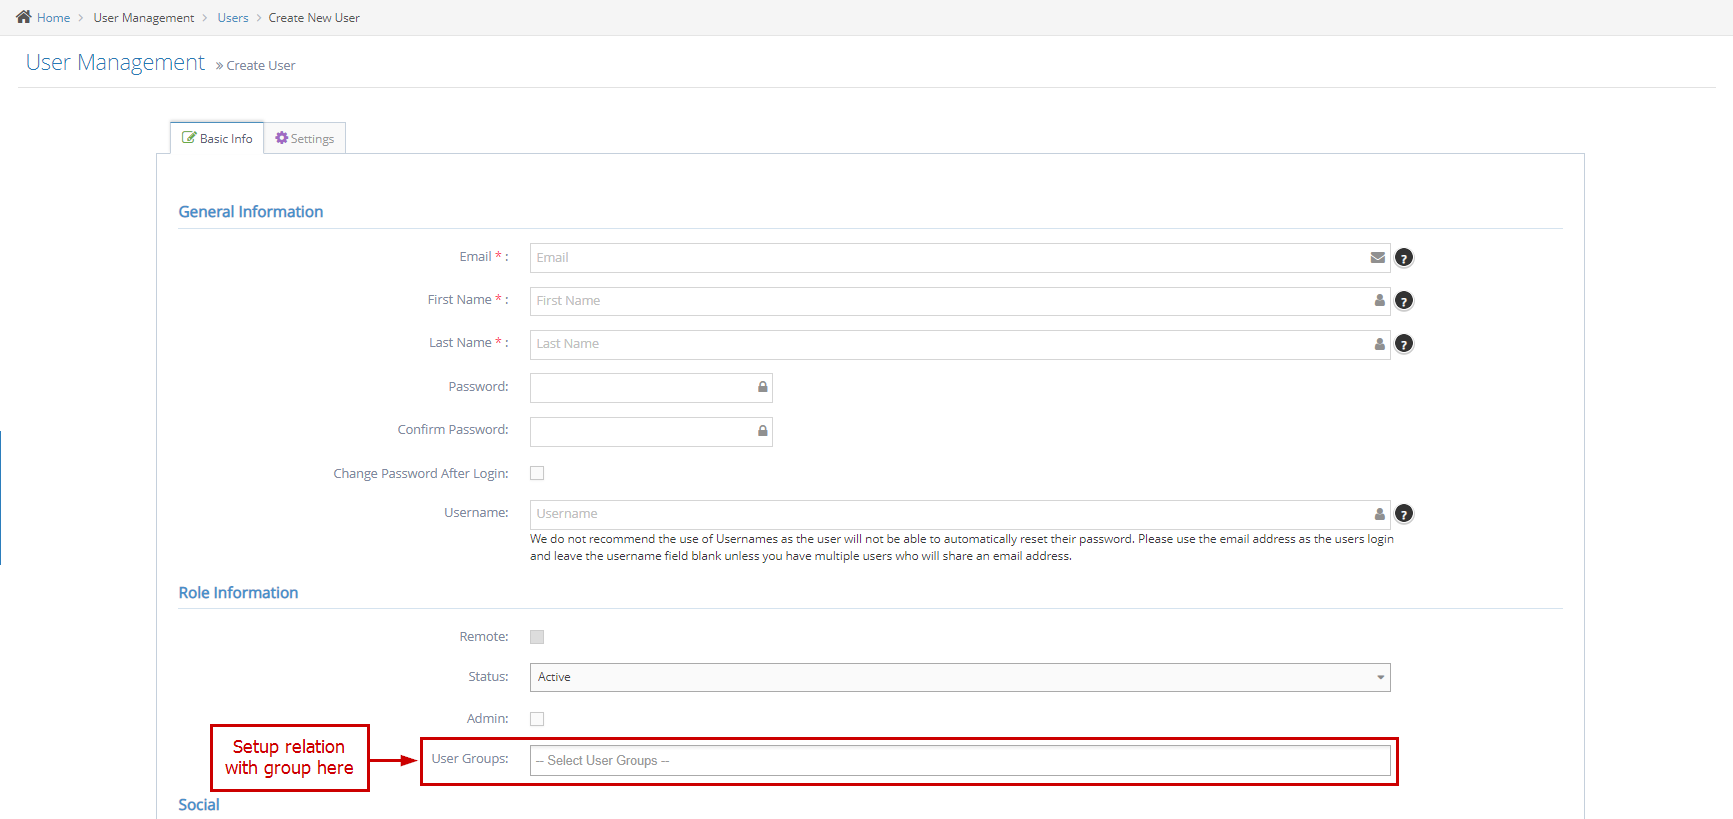
3Users and choose to Create New User (or edit an existing user)
-
4Or update the User Group
-
5Log in with the user and check the result
-
6Log in page

-
7After Logging in successfully, the user will be redirected to the URL specified in the Group Settings and the selected page will be displayed.
