- What Image Types Can I use?
- Image Dimensions
- Image Uploaded Converting to WebP format
- How will images convert to WebP?
- WebP advantages
- Image Quality
- Upload images directly on the page/page content
- Upload images to my website using File Manager
- Update existing images on the page/page content
- Check Image Size
- Check the Image size on each page separately
- Resizing Images
- Updating a Photo Gallery
- Remove an image on the page/page content
- Editing a Banner Image
- Creating a Photo Gallery on a Page
- Adding a Popup Lightbox Effect on an Image
- Troubleshooting Tips for Image Loading Problems
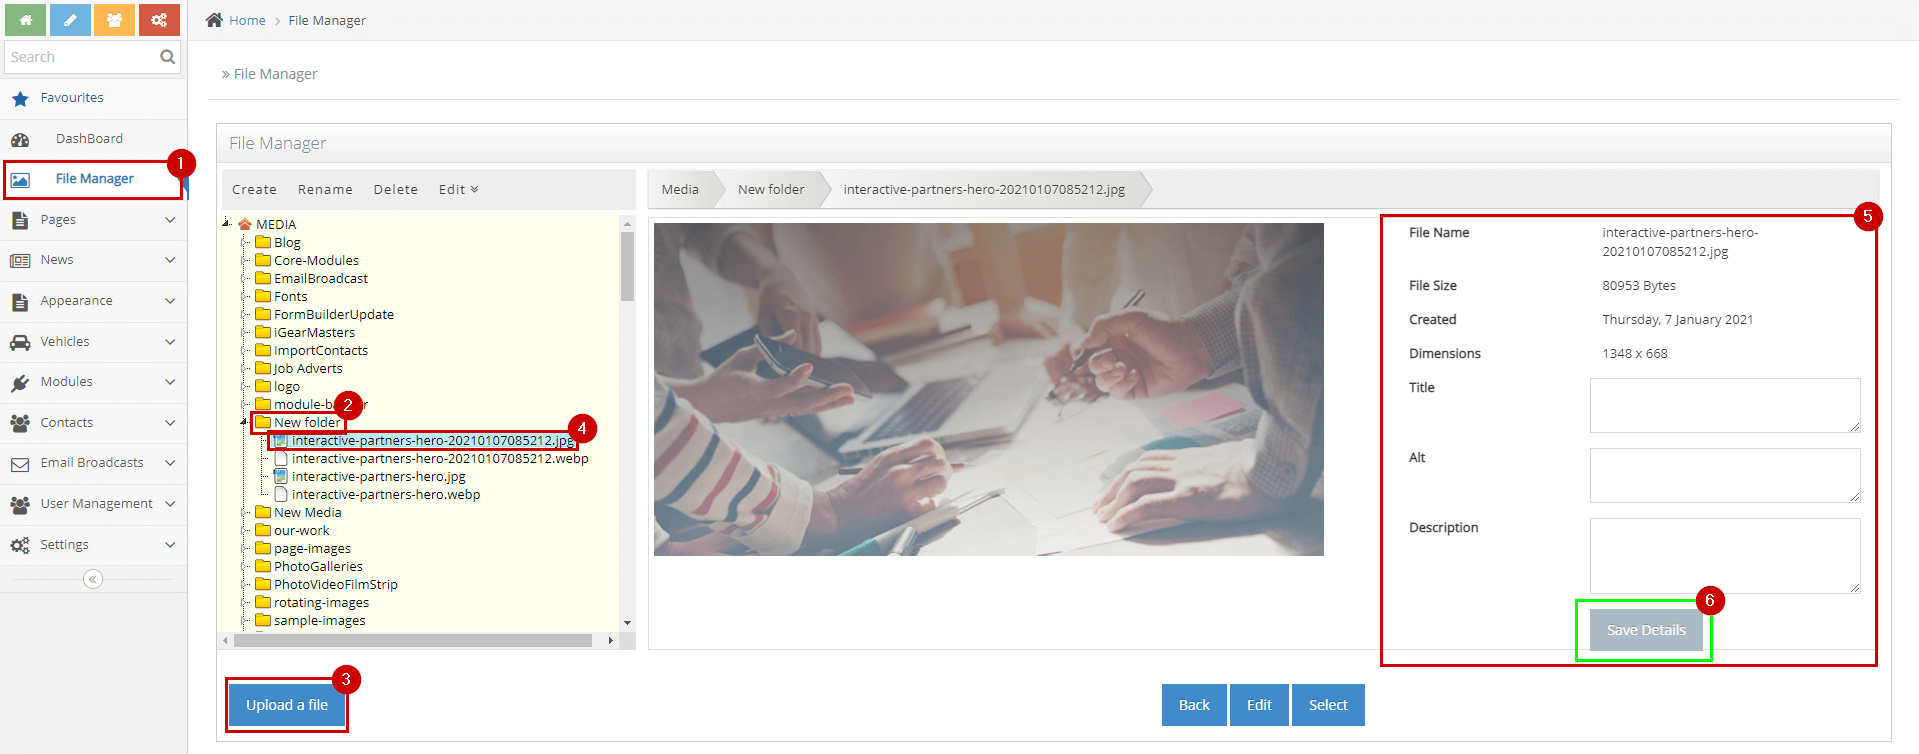
Upload images to my website using File Manager
STEP-BY-STEP
-
1Log in as an administrator and go to the Admin Dashboard.
Learn how to log in here → -
2In the Admin, on the left menu, click File Manager
-
3On the File Manager/Medi dashboard, Select the folder
-
4Upload an image to the folder (will AUTOMATICALLY convert and create a WebP file)
-
5Click the image uploaded
-
6Check the details if correct and Update if needed
- Title - The image title text attribute is an attribute that is used to provide additional information about the image.
- Alt - The image ALT text describes the image textually so that search engines and screen readers (software used by the visually impaired) can understand what the image is.
- Description - The image description gives more details than alt text and allows someone to learn more about what is in an image that goes beyond alt text.
-
7If the details changed, Click the Save Details button and you have successfully uploaded the image.