- Getting Started
- Syndicated Content
- Event Management
- Forms/Webforms
- Locations Module
- Managing News in WebEd: A Complete Guide
- Tickets and the Workflow Engine
- Testimonials
- Users and User Groups
- Editor Toolbars
- Associates
- Snippets Module and Snippet Effects
- Poll / Quiz Module
- Social Media
- Sitemaps
- Curly Bracket Functions
- Vehicles
- Link Tracker
- Links Listing
- Notice Board
- Notifications
- Memberships Management
- Tickets and Support Management
- Exporting Data
- File Manager
- Contacts
- Email Broadcasts
- Task Priorities
- Site-Settings
- Content Developers Guide to WebEd
- Developers Guide to WebEd
- Google Cloud Console
- Contact Support
Tickets and Support Management
Tickets and the Workflow Engine
Tickets Overview
- Mailboxes are configured as ticket boxes, for example, [email protected], [email protected] or [email protected], any email address can be used
- The Workflow engine connects to the mailbox and imports from the mailbox using IMAP or POP3 to create tickets for each enquiry
- Each enquiry then appears in the ticket listing for handling by team members
- Tickets have a range of statuses depending on the status of the ticket
- Tickets can be responded to using canned responses
What is the Purpose of the Ticket Workflow Engine?
- Any emails sent to your website can be managed through the Tickets Workflow Engine.
- The engine supports multiple different ticket types, canned responses and the ability to automate the processing and management of enquiries and requests from customers and leads.
Ticket Mailboxes
Ticket Mailboxes Overview
- Mailboxes are just temporary storage locations for tickets
- Generally, you will have an email address configured for customers to contact your organisation
- The same mailbox can be used to generate the tickets
- You can have multiple mailboxes which can then be used to manage different ticket types, for example, sales@ service@ etc.
Setup Oauth for Outlook Account
Step 1: Register an application
Detail Steps can be found at: https://learn.microsoft.com/en-us/graph/auth-register-app-v2
- For this step, you will need access to the mailbox you need and register in Azure Portal.
- Get the Application Id, Redirect URI/URL and Client Secret.
- Go to https://portal.azure.com/ and access the created application:
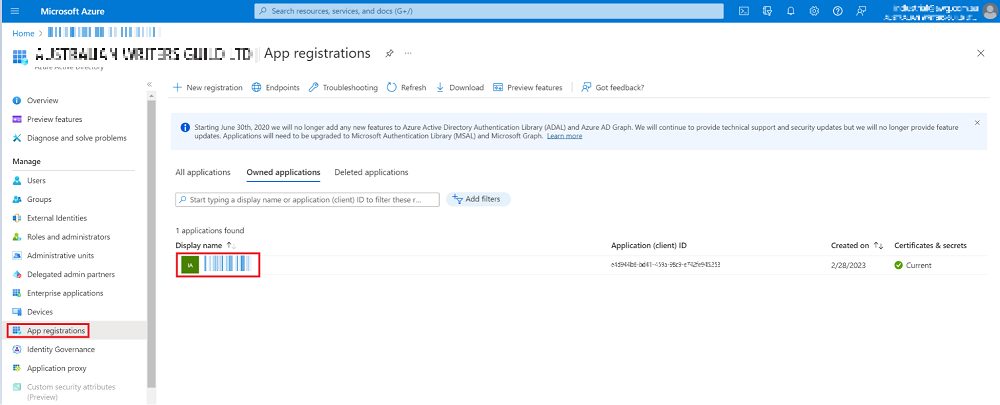
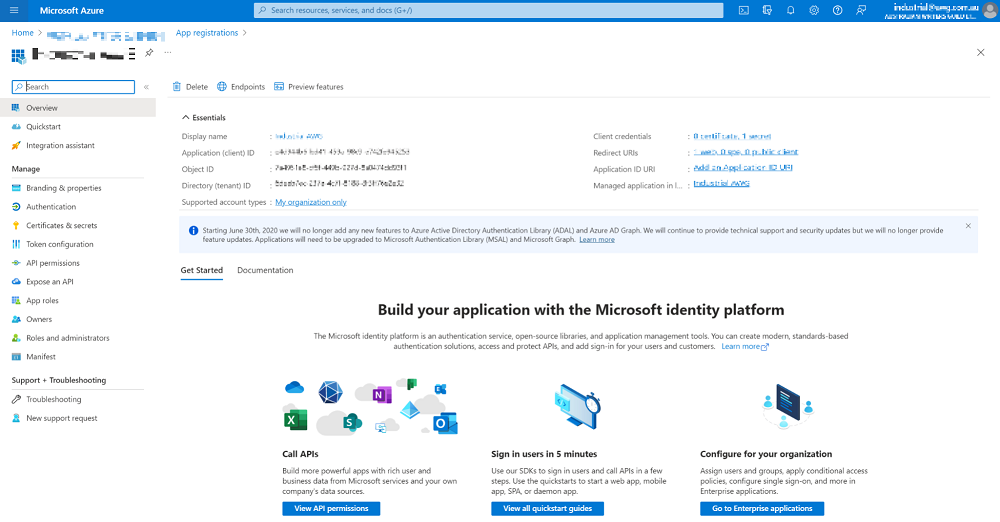
- Click on the application and it will redirect you to Overview page:
- The Application (client) ID is the Application Id.
- The Directory (tenant) ID is the Tenant Id.
- You click on the Redirect URIs to get the Redirect URI, in this case, I set it https://interactivepartners.com.au/.
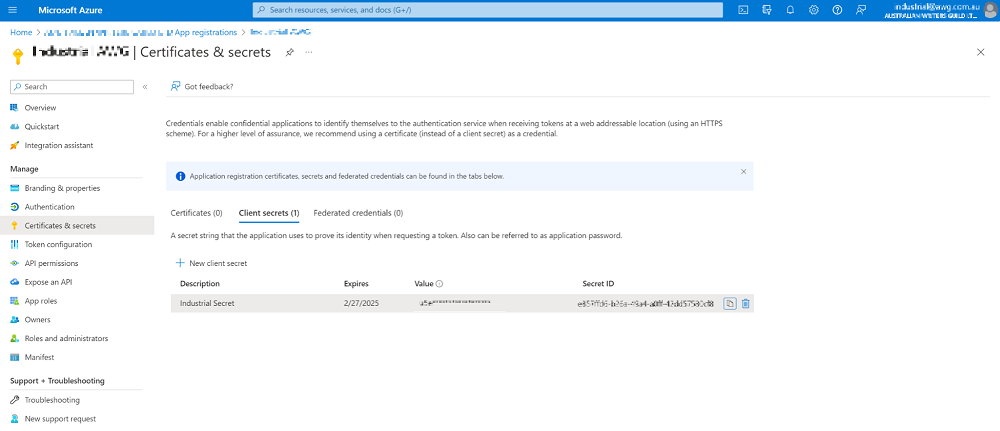
- Click on Certificates & secrets to get the Client Secret:
You can only get this the first time, then store it in a secure location. If you cannot remember it, you can create a new one.
Note: The client secret only lives for maximum 730 days (2 years), so we may need to manually refresh it to make sure the API works (I use may as I’m not sure if the API will not work after 730 days).
Step 2: Get access token and refresh token
Step 2.1: Get the code to request tokens
The goal of this step is to get the code to use to get the refresh token and access token.
Sample URL(Paste this in your browser):
https://login.microsoftonline.com/{tenant_id}/oauth2/v2.0/authorize?client_id={client_id}&response_type=code&redirect_uri={redirect_url}&response_mode=query&scope=offline_access%20
https://outlook.office.com/IMAP.AccessAsUser.All%20
https://outlook.office.com/POP.AccessAsUser.All&state=12345&access_type=offline
https://login.microsoftonline.com/d495ee85-b84b-4540-960a-6657fa931007/oauth2/v2.0/authorize?client_id=c22dc3e0-b946-4ecb-abaf-37d32819be07&response_type=code&redirect_uri=https://interactivepartners.com.au/&response_mode=query&scope=
offline_access%20https://outlook.office.com/IMAP.AccessAsUser.All%20https://outlook.office.com/POP.AccessAsUser.All&state=12345&access_type=offline
The value needed for the request are:
- tenant_id : it’s the tenant id from step 1
- client_id : it’s the application id from step 1
- response_type : code
- redirect_uri : the redirect url you set up from the first step, I set it https://interactivepartners.com.au/
- scope : offline_access%20https://outlook.office.com/IMAP.AccessAsUser.All%20https://outlook.office.com/POP.AccessAsUser.All
to have the permission for read/write emails from Outlook
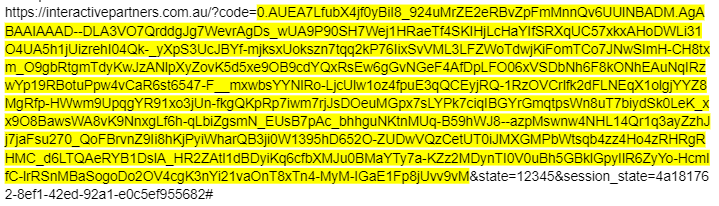
Then, you paste this link to Google Chrome and it will redirect you to the Microsoft Login page, you need to login and it will redirect you to the Redirect URL, then you copy the redirect URL to get the code (highlighted in yellow), for example:
Sample of what you will see, this is not the actual code to use in your setup
Step 2.2: Get Access token and refresh token
After having the code, we can send an API request to get both the access token and refresh token, as below image:
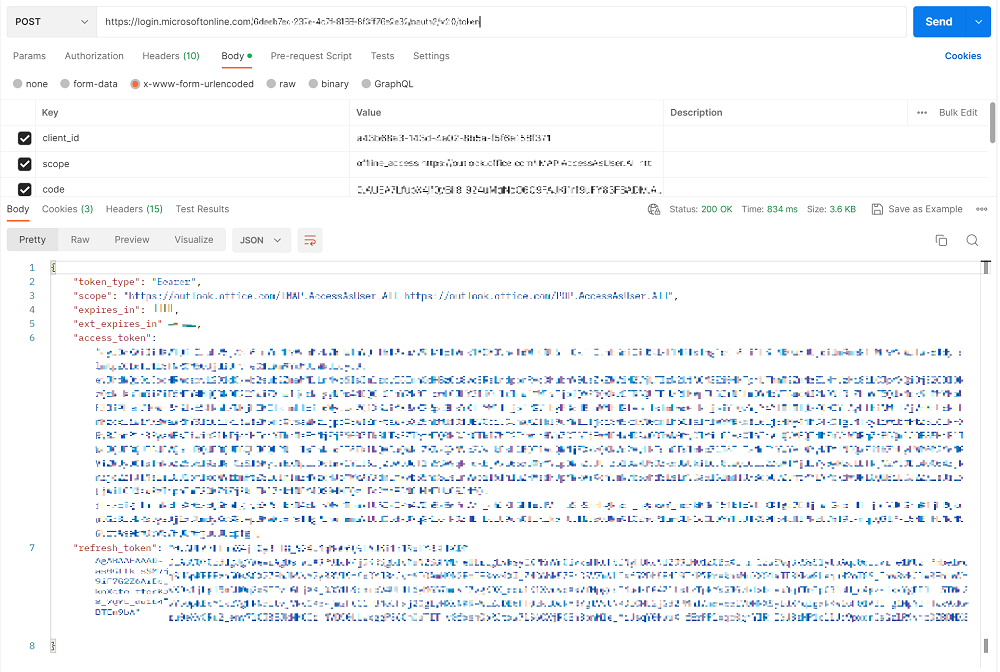
Endpoint: https://login.microsoftonline.com/{tenant_id}/oauth2/v2.0/token
Please use postman to get the response. The parameters below should be in the BODY of the request.
Parameters:
- client_id: you get it from Step 1
- scope: offline_access https://outlook.office.com/IMAP.AccessAsUser.All https://outlook.office.com/POP.AccessAsUser.All
- code: you get it from Step 2.1
- redirect_url: you set it up in Step 1
- grant_type : authorization_code
- client_secret: you set it up in Step 1
After this step, you can get both access_token and refresh_token.
- The access_token is used to request for the Microsoft Graph API, but it has expiry date and time.
- The refresh_token cannot be used to request API, but it can be used to get the access_token again without getting a new code manually. The refresh_token lives for 90 days and every time you use the refresh_token to get the new access_token, Microsoft will return you a new refresh token, you should replace the old one with the new one, so that it will never expire.
As the schedule to get the tickets is running every 10 minutes, you shouldn’t worry about the expiry time of the refresh token.
For this step, after we get the refresh token manually, we will store the refresh token (with expiry time) in the DB of WebEd9, so we can reuse it and update it for future usage.
Step 3: Create the Mailbox with token information
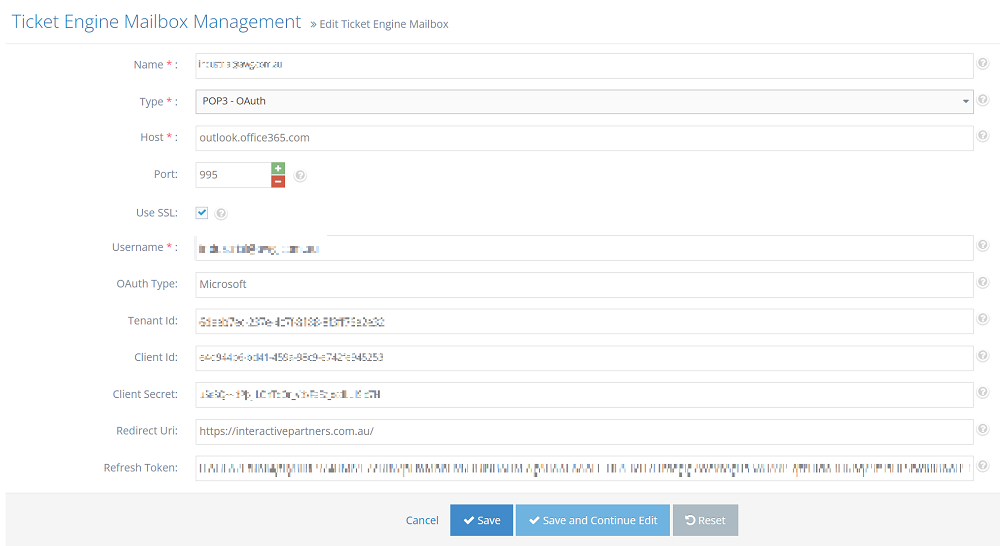
Step 3.1: Create mailbox in Ticket Engine Mailbox Management
- Name: Can be anything: Industrial AWG or using email
- Type: POP3 - OAuth
- Host: outlook.office365.com
- Port: 995
- Use SSL: true
- Username: [email protected]
- OAuth Type: Microsoft
- Tenant Id: get from Step
- Client Id: get from Step 1
- Client Secret: get from Step 1
- Redirect Url: get from Step 1
- Refresh Token: get from Step 2.2
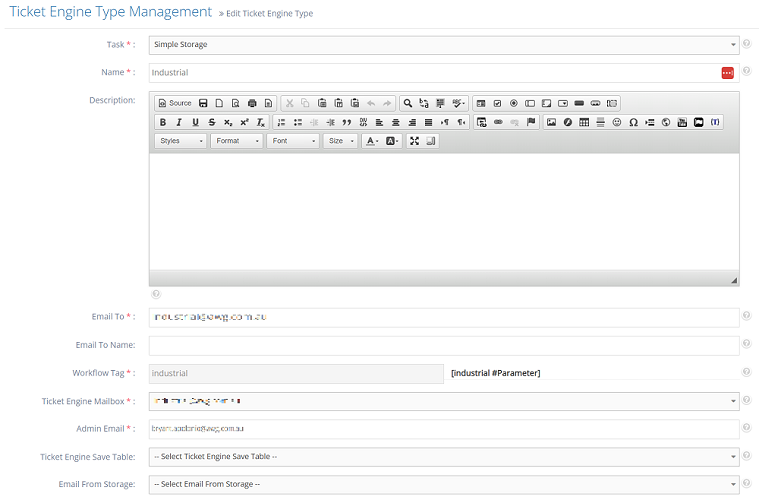
Step 3.2: Create ticket type in Ticket Engine Type Management
- Go to the Menu and type 'Ticket Types'.
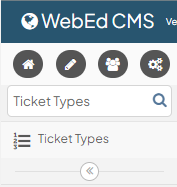
- Click the 'Ticket Types', this will redirect you to the Ticket Engine Management.
- Then configure the following:
Task: Simple Storage
Name: ticket type name
Ticket Engine Mailbox: choose the mailbox you created in Step 3.1
Admin Email: the email of the admin who will handle the tickets
Access another mailbox on the same Directory
-
1Go to https://portal.azure.com/ and access the created application:
-
2Click on Certificates & secrets to get a NEW Client Secret.
-
3Once you have the Client Secret, repeat Step 2 but use the new user email address you need and the new Client Secret.
-
4This step makes sure that only the mailbox of the user will be accessed when we pass that authorization to the Mailbox.
-
5Then continue the whole process from Step 2 until Step 3.2.
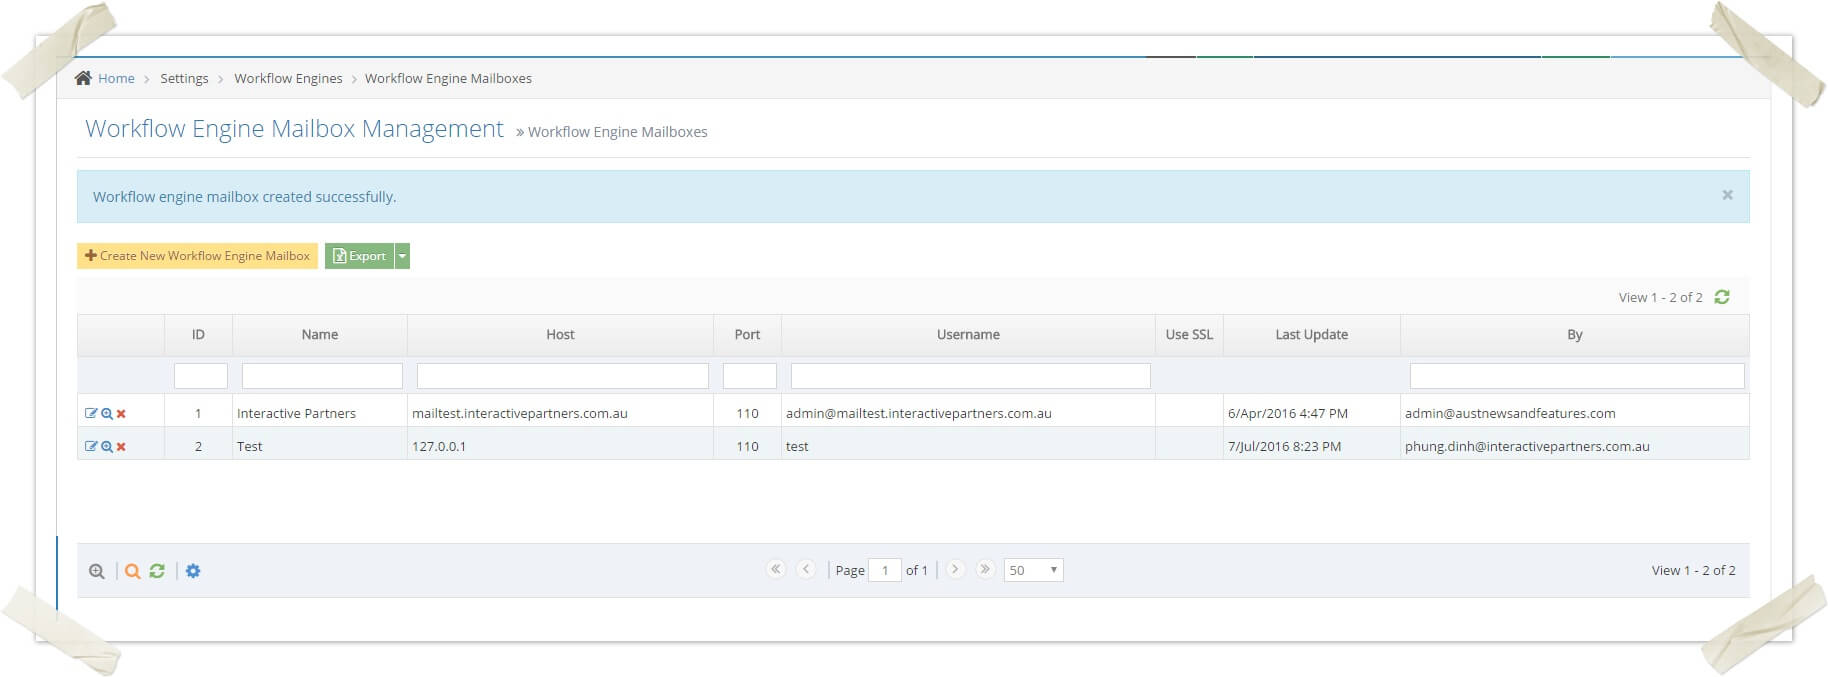
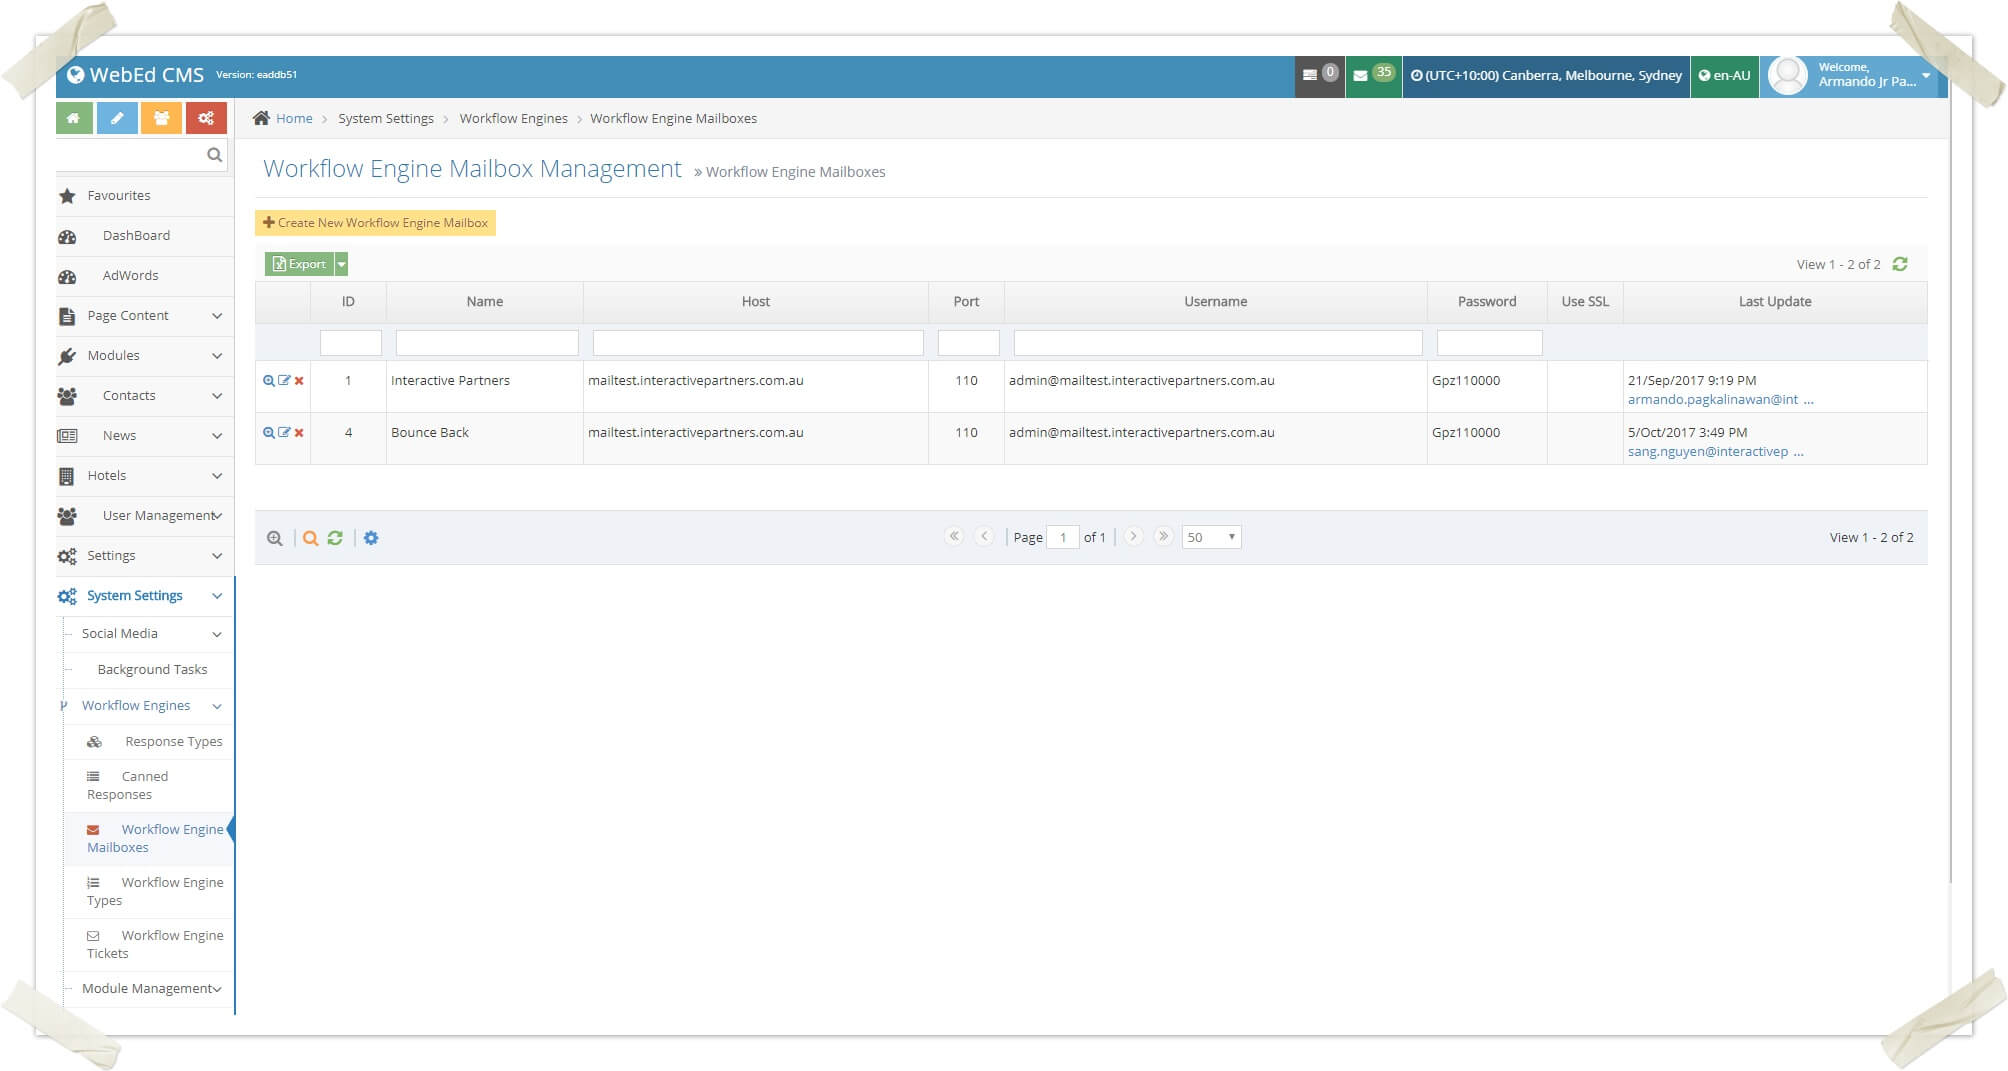
How To Manage Workflow Engine Mailbox
How to create new mailbox
-
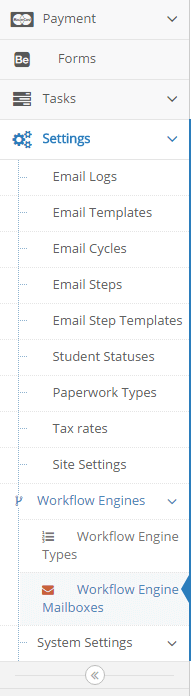
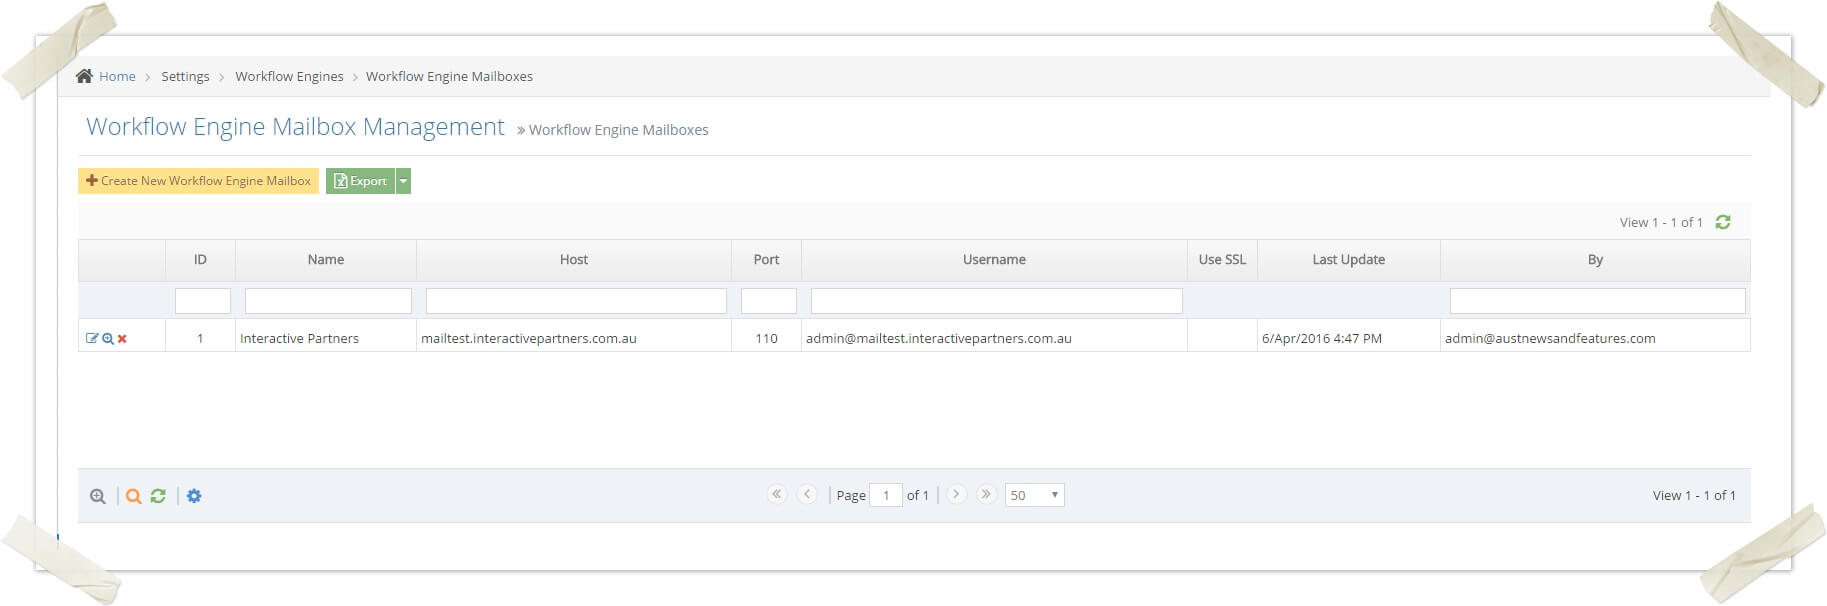
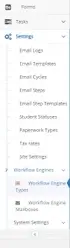
1Go to Settings > Workflow Engines > Workflow Engines Mailboxes
-
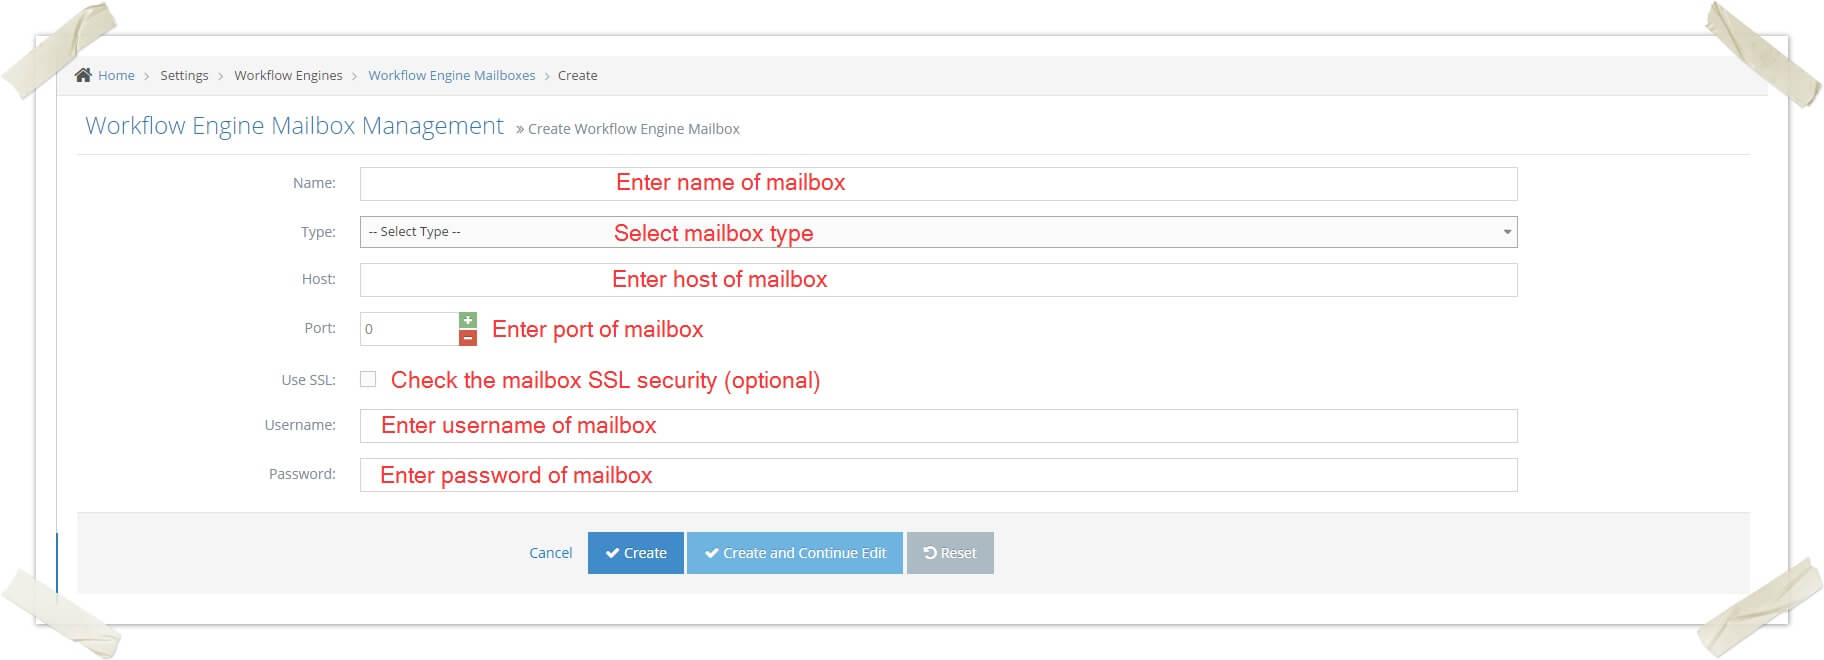
2Click Create New Workflow Engine Mailbox
-
3Enter name, select type, enter host, port, check user SSL(optional), enter the username and password
-
4Click Create
-
5A new workflow engine mailbox is created
57 - Test plan manage the mail box (PASS)
| Target Release | 9.0 |
| Epic | |
| JIRA issue | |
| Document status | DRAFT |
| Document owner | Phung Dinh (Unlicensed) |
| Developers | Minh Nguyen (Unlicensed) |
| Enter your name | Belinda Sharp (Unlicensed) |
(Use @ above to add someone by name)
What are we testing
- Testing for managing the mailbox
Assumptions
- Login as CRM admin successfully
Requirements
| # | Test Steps | Expected Result | Actual Result | Test By (use @) | Date | Notes |
|---|---|---|---|---|---|---|
| 1 | Go to Settings >> WorkflowEngines >> Workflow Engines Mailboxes |
List of mailboxes appears |
Pass |
Belinda Sharp (Unlicensed) |
06 Aug 2016 |
|
| 2 | Click Create New Workflow Engine Mailbox |
Create screen for mailbox appears |
Pass |
Belinda Sharp (Unlicensed) |
06 Aug 2016 |
|
| 4 |
Enter name, select type, enter host, port, check user SSL(optional), enter the username, password |
Create successfully |
Pass |
Belinda Sharp (Unlicensed) |
06 Aug 2016 |
|
| 5 |
Click the Edit icon on a row in the list of mailbox |
Edit screen appears |
Pass |
Belinda Sharp (Unlicensed) |
06 Aug 2016 |
|
| 6 | Click Save |
Update mailbox successfully |
Pass |
Belinda Sharp (Unlicensed) |
06 Aug 2016 |
|
| 7 |
Click the View Details icon on a row in the list of mailbox |
The Details screen appears correctly |
Pass |
Belinda Sharp (Unlicensed) |
06 Aug 2016 |
|
| 8 |
Click the Delete icon on a row in the list of mailbox |
Details screen appears with a message to confirm deleting |
Pass |
Belinda Sharp (Unlicensed) |
06 Aug 2016 |
|
| 9 | Click OK |
If the mailbox doesn't have related data => Delete successfully If the mailbox has related data => Show an error message |
Pass |
Belinda Sharp (Unlicensed) |
06 Aug 2016 |
Background Task Explained
- The background task "Email Processing Task" is used to process emails that come into the ticket mailbox defined
- Each ticket mailbox can have none, one or many workflow engine ticket type/s
- Every time the background task run, it will get all the ticket boxes that have workflow engine ticket type/s..
- Recommendations on how often it should be configured to run: Use whatever the default time is set, as for the Email Processing Task, the interval seconds is 600 seconds. To understand more on how to configure the Background Task please click here.
Processing Steps
- If the bounce-back is existing, it will run first to catch and process bounce-back emails Tickets and the Workflow Engine#Bounce-backEmails
Creating Tickets
-
1With each mailbox, connect to the mailbox and get all the emails from the box
- With each email, get the email info (to address, from address, subject, content, ...)
- If the email cannot be read - failure (the email is too big or any reason) → an error ticket is created, this ticket does not have contact
-
2Get all the items not yet processed from the current mailbox and create a ticket for each, note only emails with a To, CC or BCC Address matching the valid ticket types will create a ticket
-
3Determine whether this email is a new email or a reply to a previous ticket.
-
4Each outbound email from the ticketing engine has a generated subject line for the ticket type
- example [Support #123-789] - This is a "Support" type ticket, the Ticket ID is 123 and the Support Log ID is 789.
-
5If this email has a ticket-generated subject line it is a reply and is added to the existing ticket, if not a new ticket is created.
The Email Process
-
1From the ticket and the ticket log that has just been created above, we generate:
- The email subject with the format: [WorkflowTag #TicketId-TicketLogId] Subject
- The attachments
- Determine the email, name and contact for the receiver
-
2Update for the ticket log (update the receiver info)
-
3Finally, create an email queue to notify the admin there is a new ticket (this email queue will be sent via email sending background task)
-
4Finally, delete the email from the mailbox
Assignment Emails
- From the ticket and the ticket log that has just been created above, we determine the email, name and contact for the receiver
- Update for the ticket log (update the receiver info)
- Get the student assignment for this ticket (based on the ticket id).
- If there is no assignment → this is submitted as an assignment
- Check if this is submitted by a student or not?
- If so → Run the submit assignment flow by email (based on the ticket log)
- If no → Update the ticket to NULL type (Invalid ticket)
- If there is an assignment, we will check if this is a student re-submits assignment or the tutor giving feedback to the admin (other cases cannot be controlled by workflow engine ticket)
- If this is a re-submitting assignment by a student → Run the re-submit assignment flow by email (based on the ticket log)
- If this is feedback by the tutor → Run the feedback returned by tutor flow by email (based on the ticket log)
- Generate:
- The email subject with the format: [WorkflowTag #TicketId-TicketLogId] Subject
- The attachments
- Finally, create an email queue for the ticket log (this email queue will be sent via email sending background task)
- In some cases, the email queue cannot be created:
- An admin sent to himself/herself ([email protected])
- Someone tries replying to an email that is NOT sent to him/her
- → We will delete the ticket and ticket log
- Finally, delete the email from the mailbox
Invalid Emails
In some cases, an invalid ticket will be created. This can happen when you drag an email from another mailbox to a question mailbox.
- An invalid ticket will be created for this email.
- This ticket does not belong to any type (assignment or question) and the receiver (email to) is not specific.
- No email is created either.
- Admin user can reassign this ticket to the correct ticket type (in CRM - ticket management)
- When a ticket is re-assigned an email will be generated and sent
- The invalid email is deleted from the mailbox
Workflow Engine Management and Test Plans
How To Manage Workflow Engine Mailbox
How to create new mailbox
-
1Go to Settings > Workflow Engines > Workflow Engines Mailboxes
-
2Click Create New Workflow Engine Mailbox
-
3Enter name, select type, enter host, port, check user SSL(optional), enter the username and password
-
4Click Create
-
5A new workflow engine mailbox is created
57 - Test plan manage the mail box (PASS)
| Target Release | 9.0 |
| Epic | |
| JIRA issue | |
| Document status | DRAFT |
| Document owner | Phung Dinh (Unlicensed) |
| Developers | Minh Nguyen (Unlicensed) |
| Enter your name | Belinda Sharp (Unlicensed) |
(Use @ above to add someone by name)
What are we testing
- Testing for managing the mailbox
Assumptions
- Login as CRM admin successfully
Requirements
| # | Test Steps | Expected Result | Actual Result | Test By (use @) | Date | Notes |
|---|---|---|---|---|---|---|
| 1 | Go to Settings >> WorkflowEngines >> Workflow Engines Mailboxes |
List of mailboxes appears |
Pass |
Belinda Sharp (Unlicensed) |
06 Aug 2016 |
|
| 2 | Click Create New Workflow Engine Mailbox |
Create screen for mailbox appears |
Pass |
Belinda Sharp (Unlicensed) |
06 Aug 2016 |
|
| 4 |
Enter name, select type, enter host, port, check user SSL(optional), enter the username, password |
Create successfully |
Pass |
Belinda Sharp (Unlicensed) |
06 Aug 2016 |
|
| 5 |
Click the Edit icon on a row in the list of mailbox |
Edit screen appears |
Pass |
Belinda Sharp (Unlicensed) |
06 Aug 2016 |
|
| 6 | Click Save |
Update mailbox successfully |
Pass |
Belinda Sharp (Unlicensed) |
06 Aug 2016 |
|
| 7 |
Click the View Details icon on a row in the list of mailbox |
The Details screen appears correctly |
Pass |
Belinda Sharp (Unlicensed) |
06 Aug 2016 |
|
| 8 |
Click the Delete icon on a row in the list of mailbox |
Details screen appears with a message to confirm deleting |
Pass |
Belinda Sharp (Unlicensed) |
06 Aug 2016 |
|
| 9 | Click OK |
If the mailbox doesn't have related data => Delete successfully If the mailbox has related data => Show an error message |
Pass |
Belinda Sharp (Unlicensed) |
06 Aug 2016 |
How To Manage Workflow Engine Type
How to create a new mailbox
-
1Go to Settings >> WorkflowEngines >> Workflow Engines Types
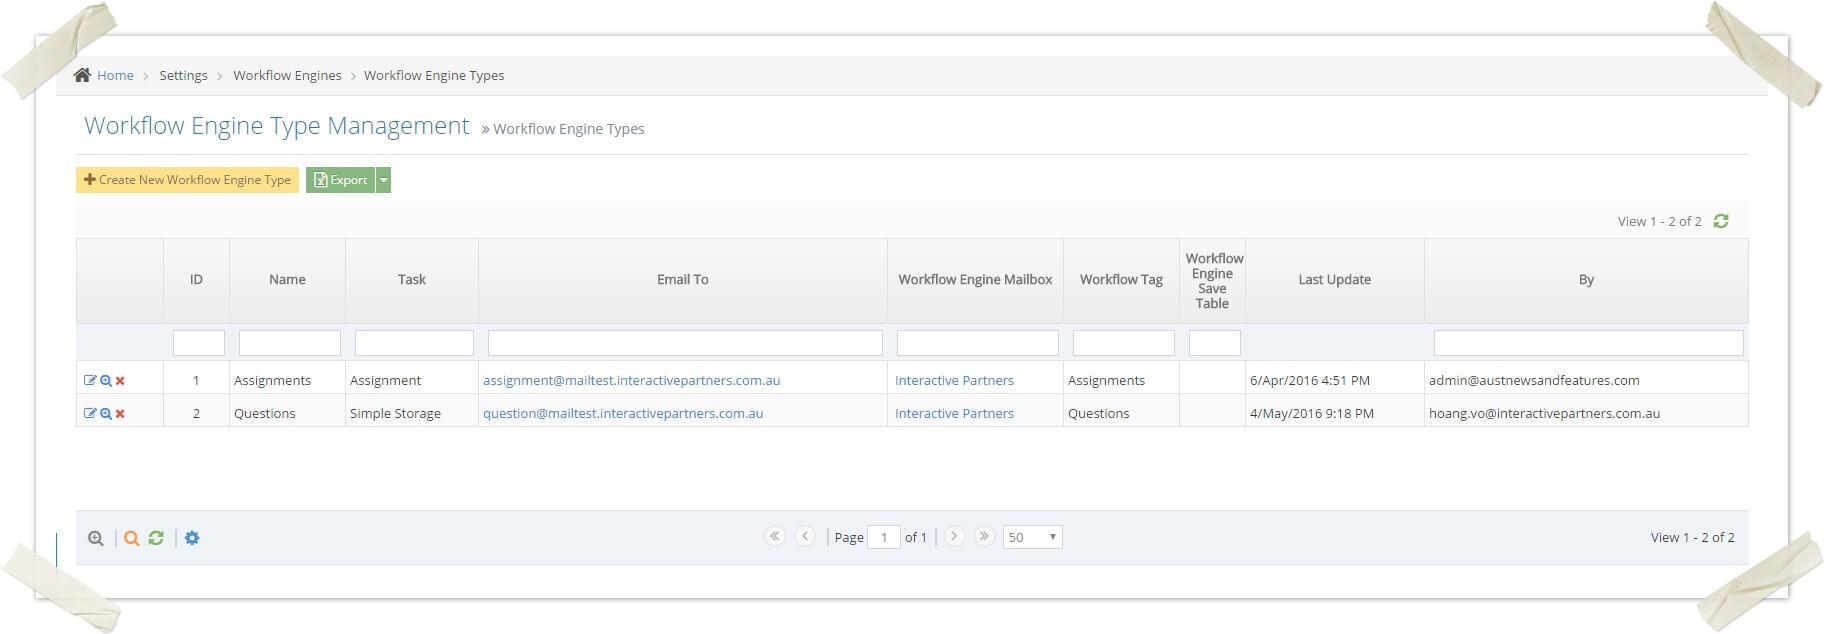
-
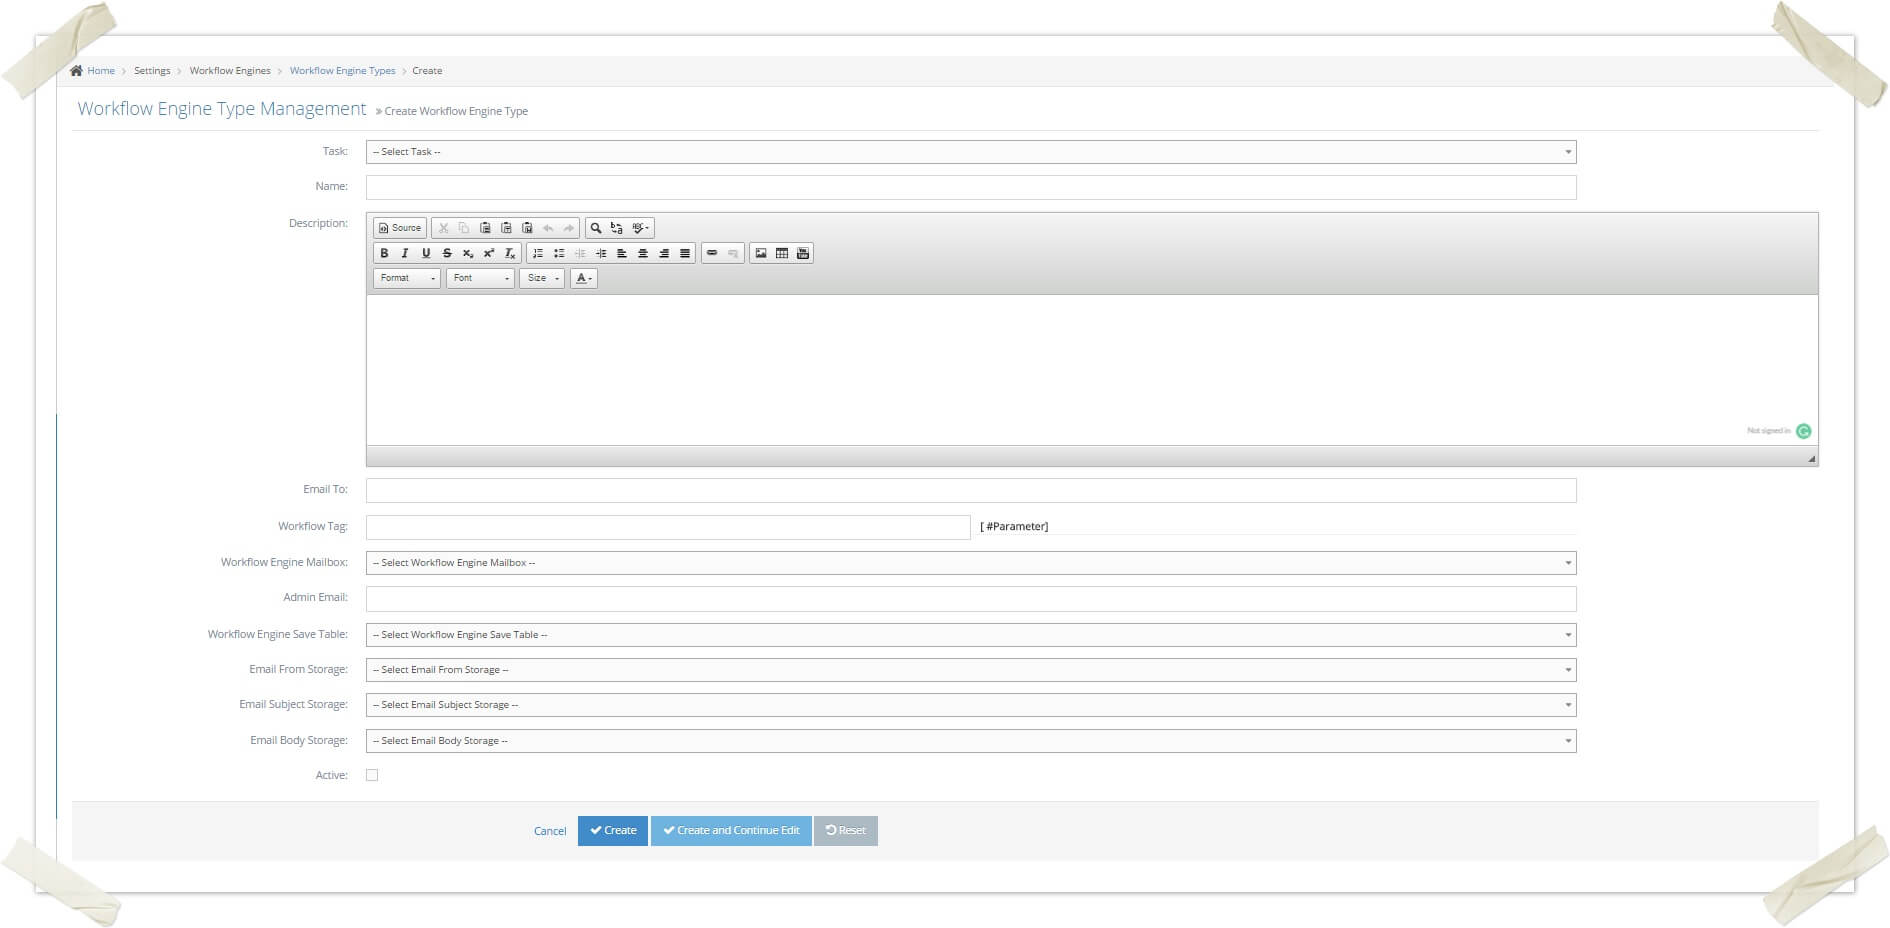
2Click Create New Workflow Engine Type
-
3Select the task, enter a name, enter a description, enter the email toe
-
4Enter the workflow tag, select the mailbox, enter the email forward, select the workflow engine save table to store the workflow engine information
-
5Select an email from storage, select email subject storage, select email body storage, and check active(optional)
-
6New workflow engine type created
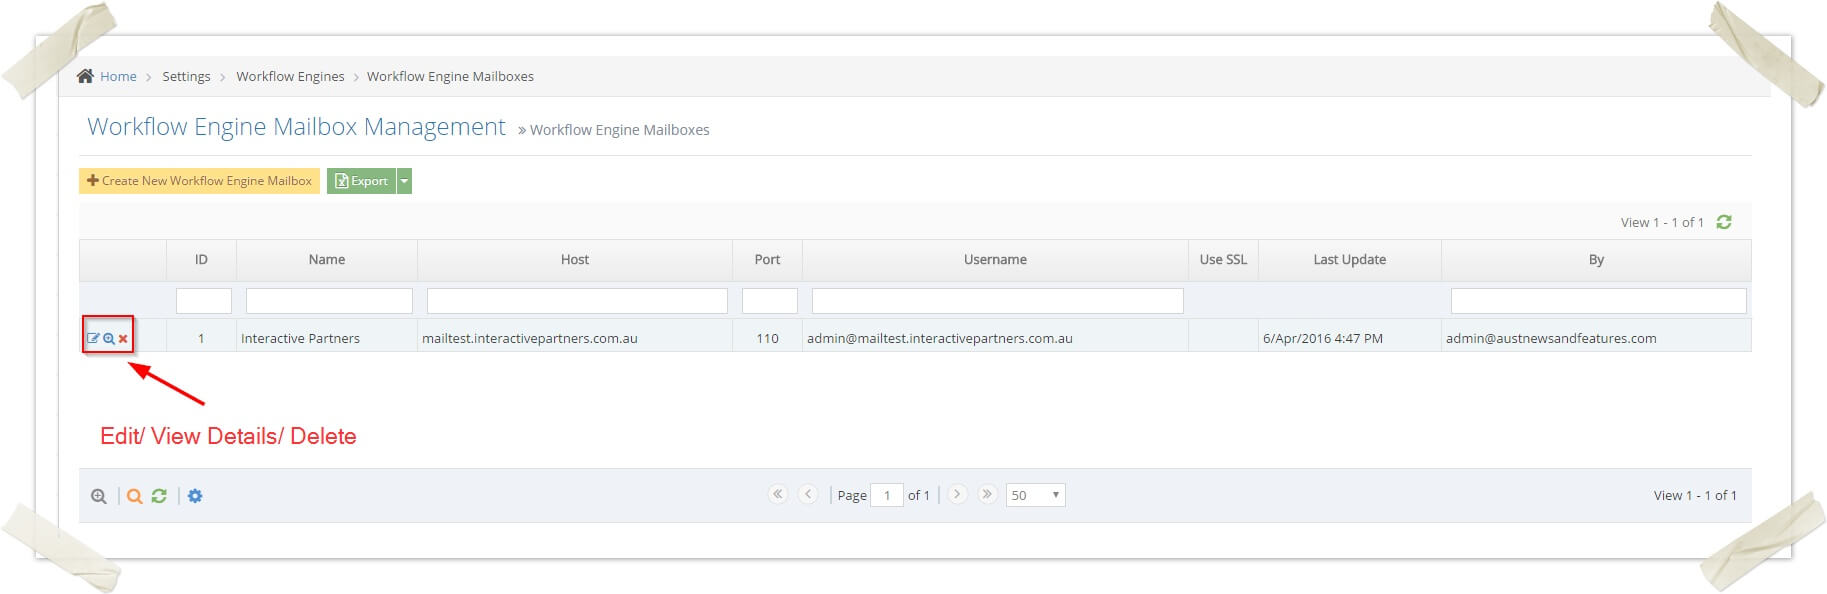
How to edit/view details/delete a workflow engine type
-
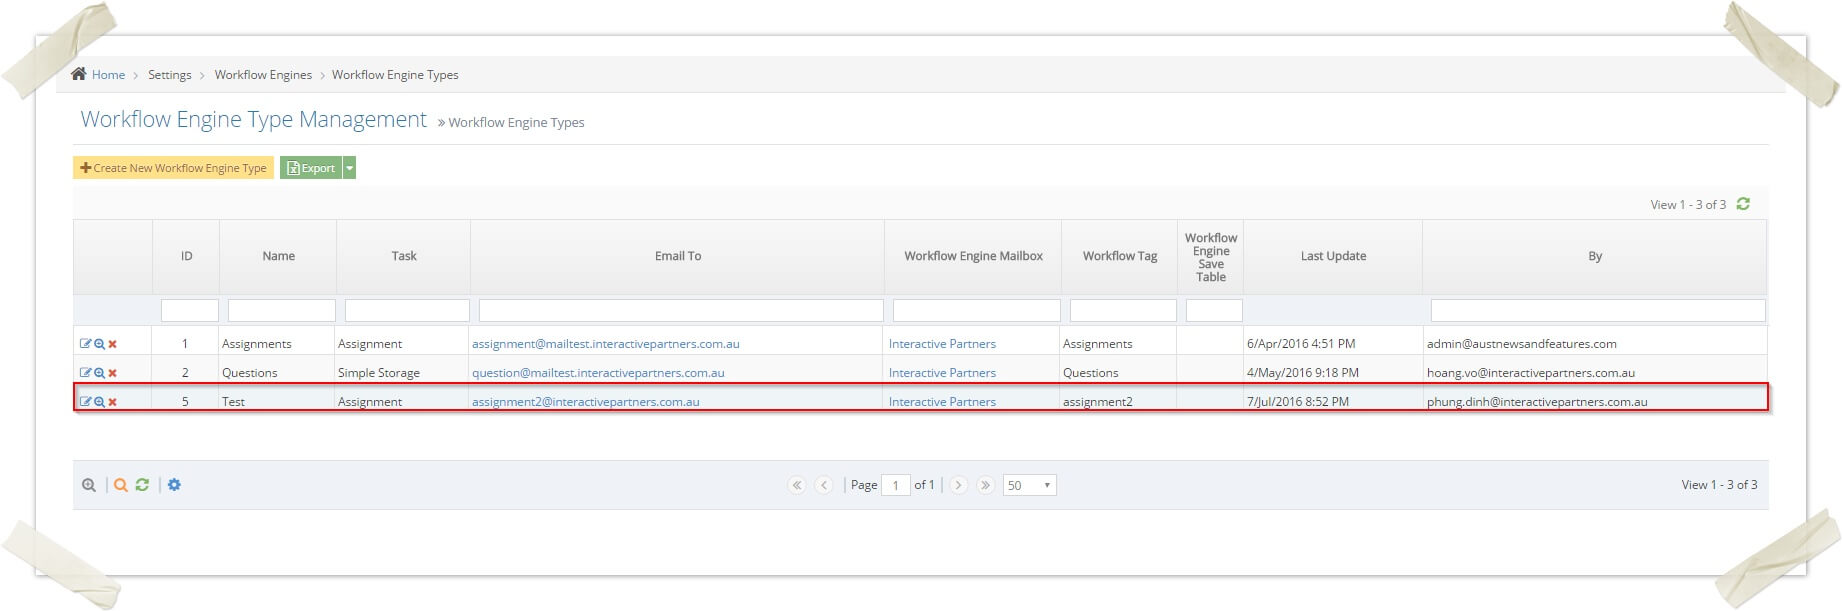
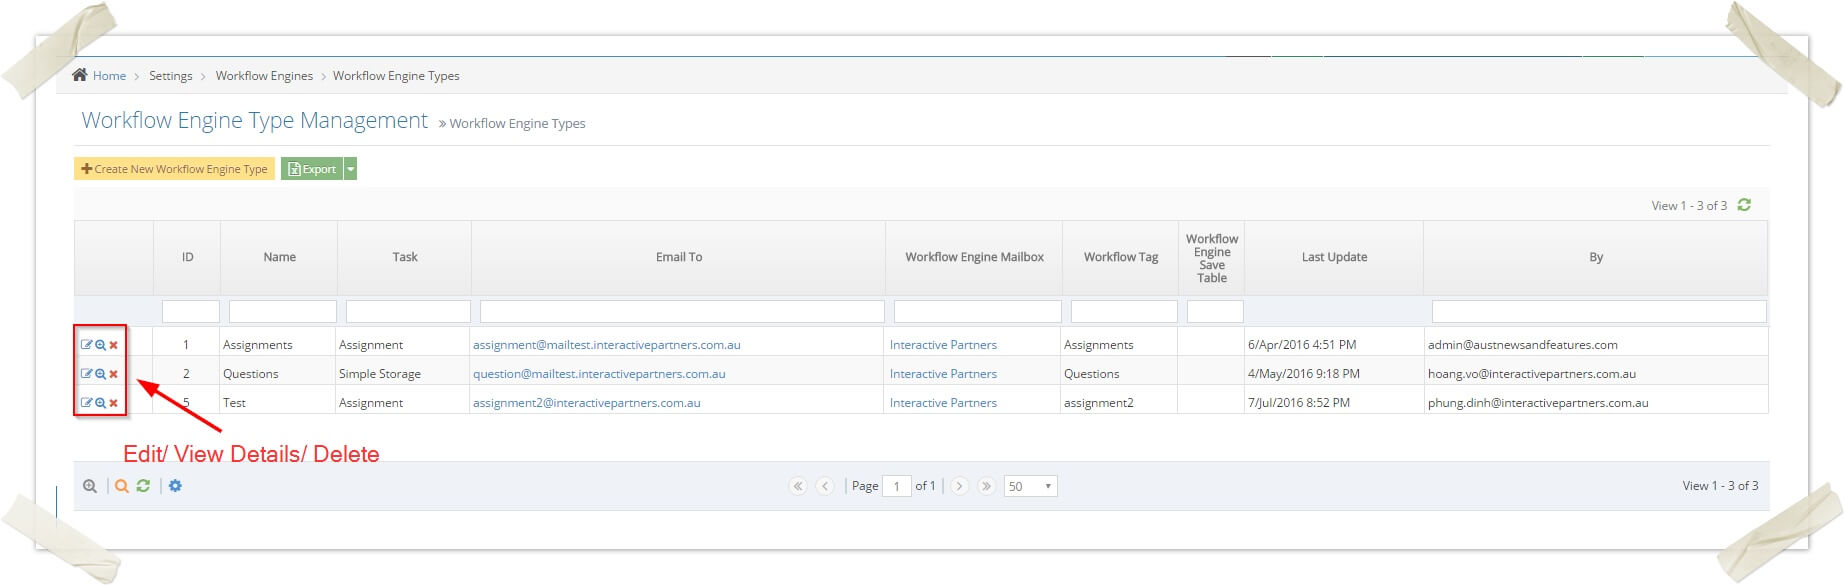
1Go to Settings >> WorkflowEngines >> Workflow Engines Types
-
2Click the Edit/View Details/Delete button on the row you want
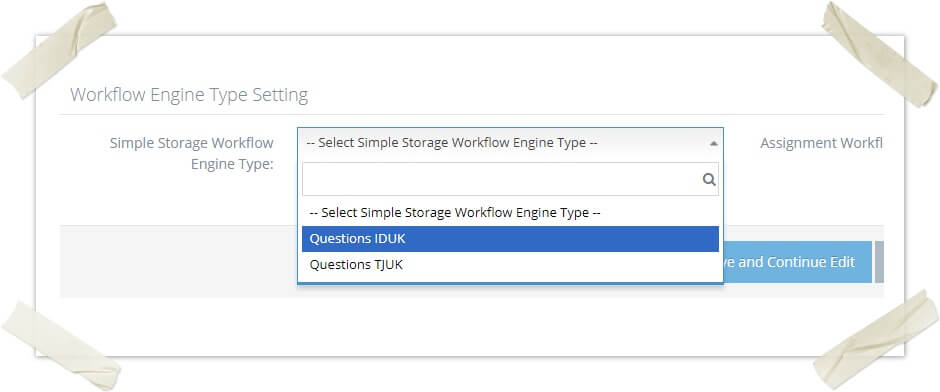
How to assign Workflow Engine to Course
-
1Open Edit Course in BMS
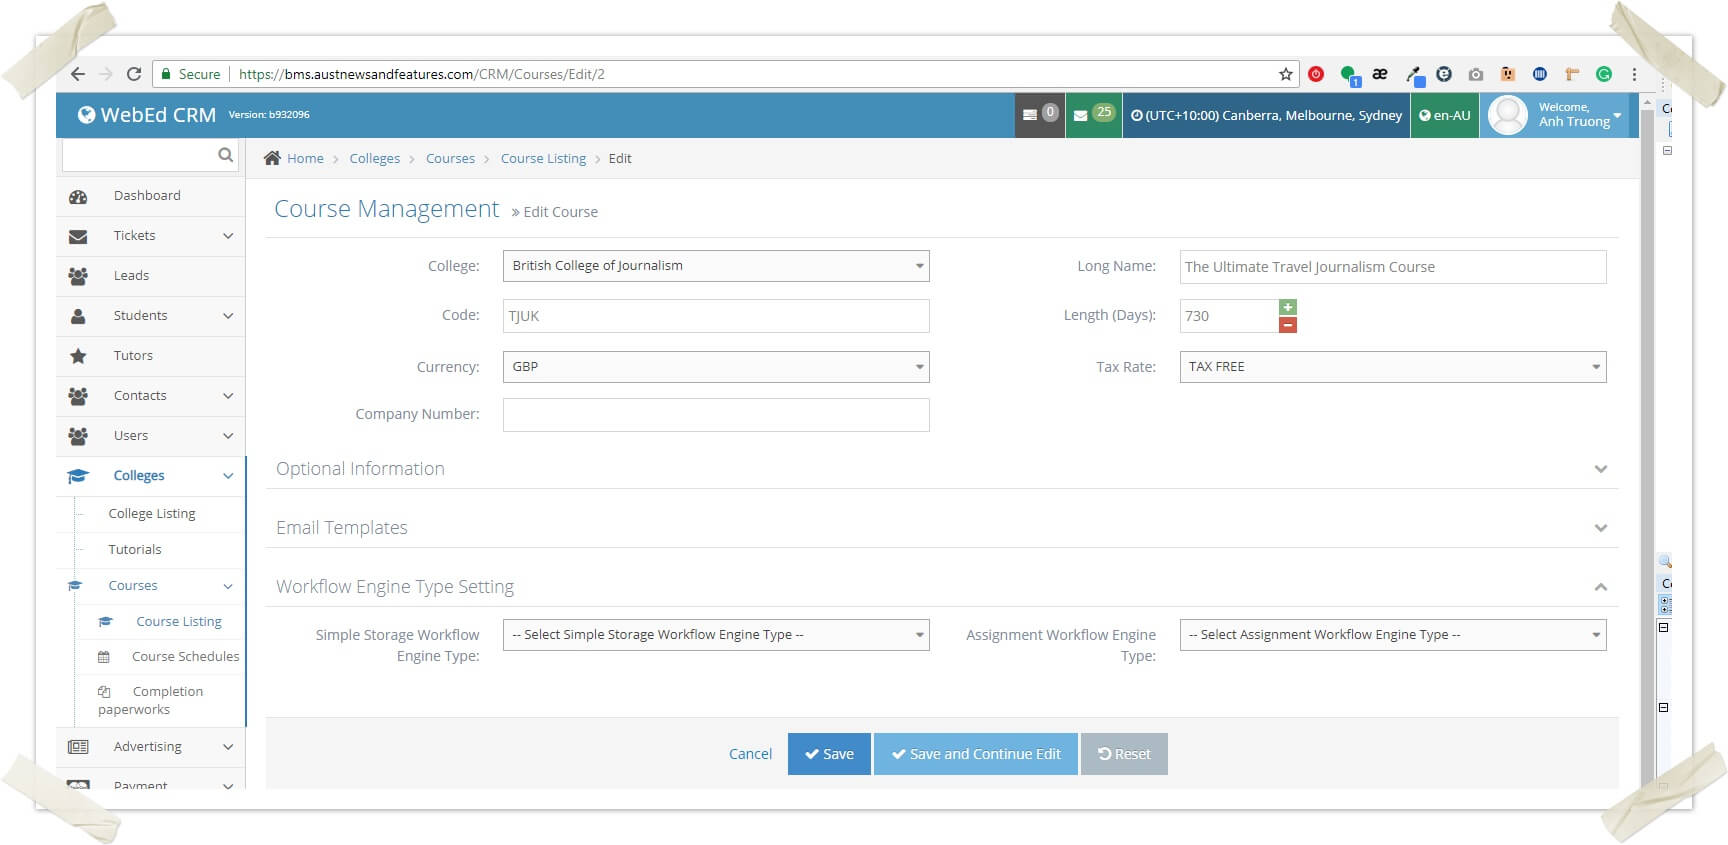
-
2Select the type of Workflow Engine Type for Simple Storage (Questions) and Assignment.
55 - Test plan manage the workflow engine type (PASS)
| Target release | 9.0 |
|---|---|
| Epic | |
| JIRA issue | |
| Document status |
DRAFT |
| Document owner |
Phung Dinh (Unlicensed) |
| Developers |
Minh Nguyen (Unlicensed) |
| Enter your name |
(Use @ above to add someone by name)
What are we testing
- Testing for managing workflow engine type
Assumptions
- Login as CRM admin successfully
Requirements
| # | Test Steps | Expected Result | Actual Result | Test By (use @) | Date | Notes |
|---|---|---|---|---|---|---|
| 1 | Go to Settings >> WorkflowEngines >> Workflow Engines Types |
List of workflow engine types appears |
Pass | Belinda Sharp (Unlicensed) |
01 Feb 2017 |
|
| 2 | Click Create New Workflow Engine Type |
Create screen for type appears |
Pass | Belinda Sharp (Unlicensed) |
01 Feb 2017 |
|
| 4 |
|
Create successfully |
Pass | Belinda Sharp (Unlicensed) |
01 Feb 2017 |
|
| 5 |
Click the Edit icon on a row in the list of mailbox |
Edit screen appears |
Pass | Belinda Sharp (Unlicensed) |
01 Feb 2017 |
|
| 6 | Click Save |
Update workflow engine type successfully |
Pass | Belinda Sharp (Unlicensed) |
01 Feb 2017 |
|
| 7 |
Click the View Details icon on a row in the list of workflow engine type |
The details screen appears correctly |
Pass | Belinda Sharp (Unlicensed) |
01 Feb 2017 |
|
| 8 |
Click the Delete icon on a row in the list of workflow engine type |
Details screen appears with a message to confirm deleting |
Pass |
01 Feb 2017 |
||
| 9 | Click OK |
If workflow engine type doesn't have related data => Delete successfully If workflow engine type has related data => Show error message |
Pass | Belinda Sharp (Unlicensed) | 01 Feb 2017 |
How To Handle Bounces
What is a bounce email?
When users want to handle bounce emails in the system.
When an email message cannot be delivered to an email address, it's called a bounce.
There are lots of different reasons why emails bounce so when it happens, a message is sent from the recipient's mail server to explain why.
How to setup Bounce Back workflow engine mailbox and workflow engine type
-
1Log in as an administrator and go to the Admin Dashboard.
Learn how to log in here → -
2Go to Admin > System Settings > Workflow Engine Mailboxes
-
3Click Create New Workflow Engine Mailbox
-
4Put all of your mailbox information
-
5Note: If you will use multiple mailboxes, set the name to Bounce Back so you easily identify what is the mailbox for a Bounce Back
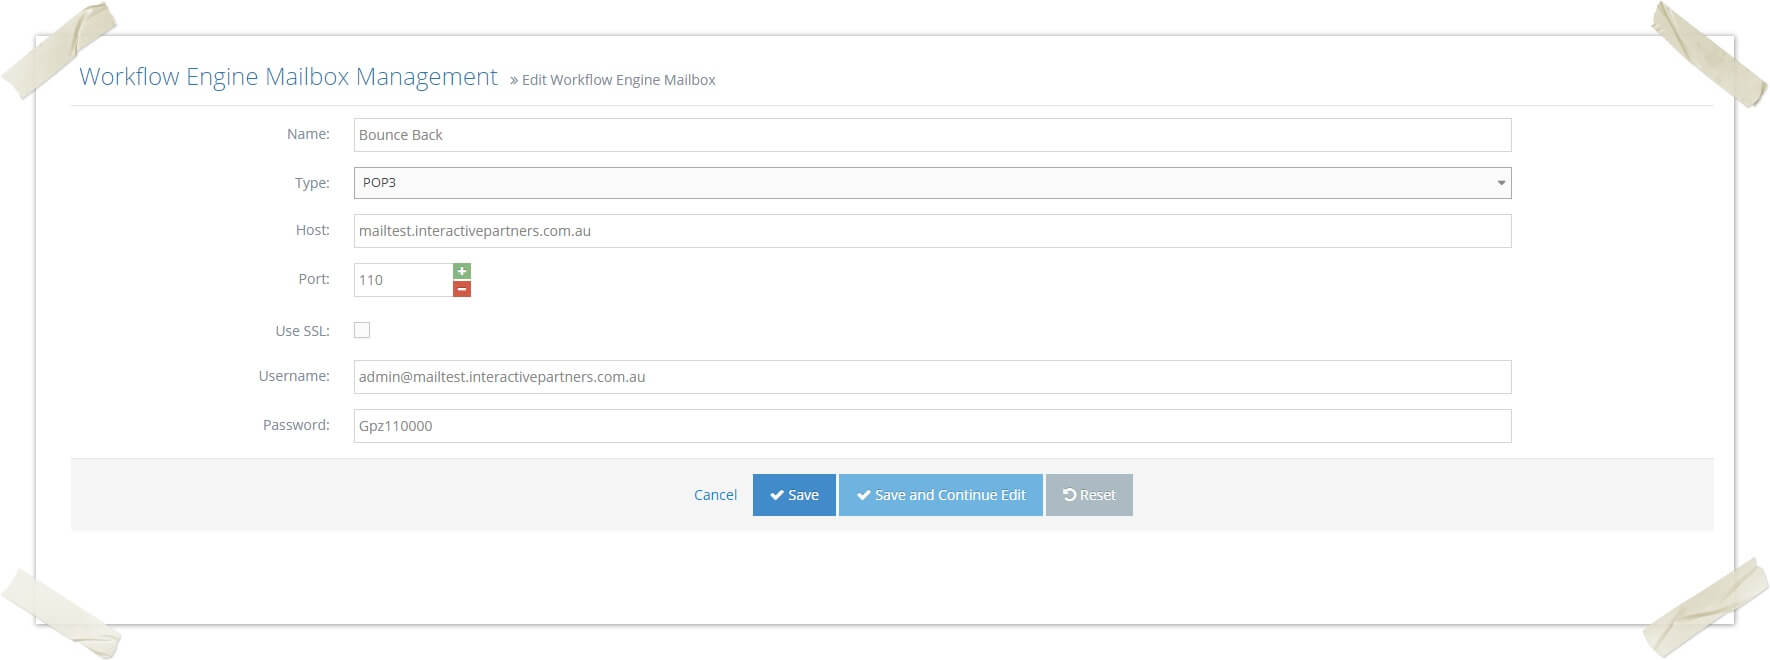
-
6Click Save
-
7Go to Admin > System Settings > Workflow Engine Types
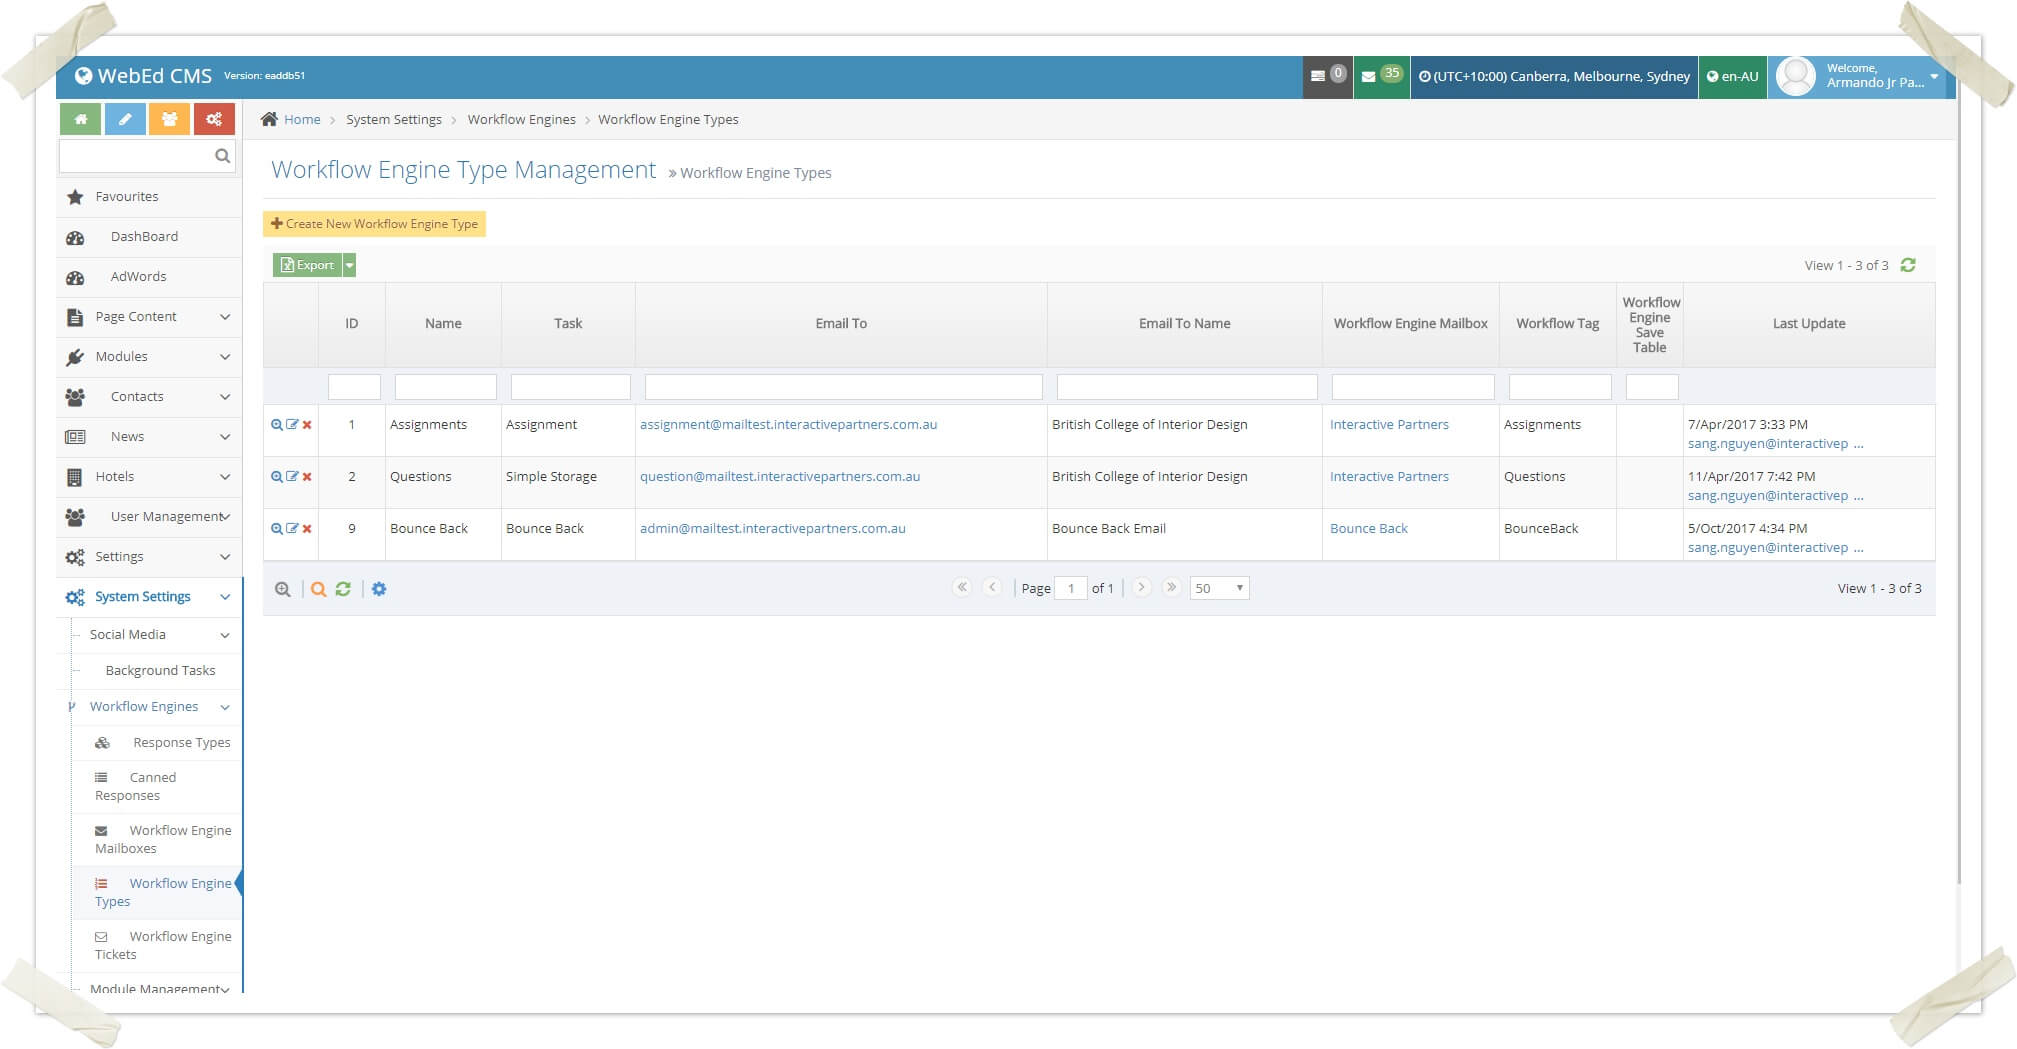
-
8Click Create New Workflow Engine Type
-
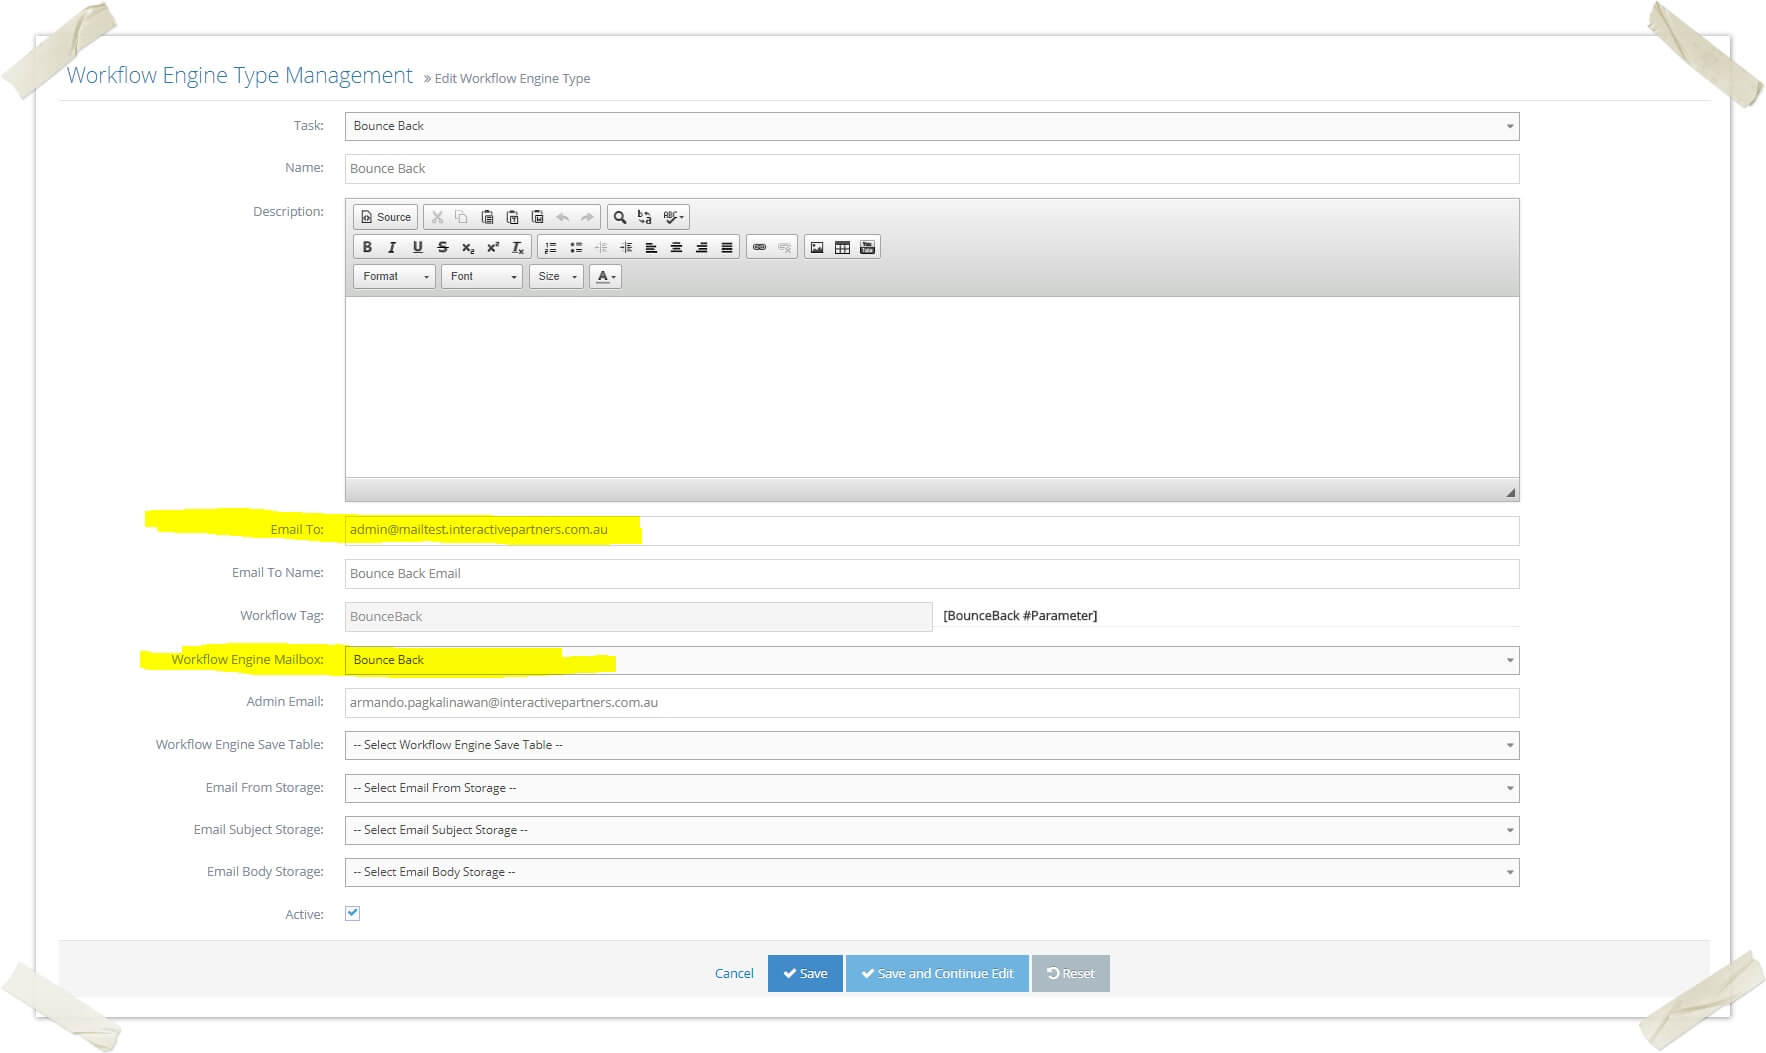
9Put all your Workflow Engine Type information
Note:- Do not forget to set the Workflow Engine Mailbox to the Bounce Back mailbox you created
- Always be mindful of the Email To field because the system will get the domain of that email and use it as the receiver of the bounce back, in the image below the domain for the Email To field is (@mailtest.interactivepartners.com.au)
-
10Click Save
How to review the list of bounced emails
-
1Log in as an administrator and go to the Admin Dashboard.
Learn how to log in here → -
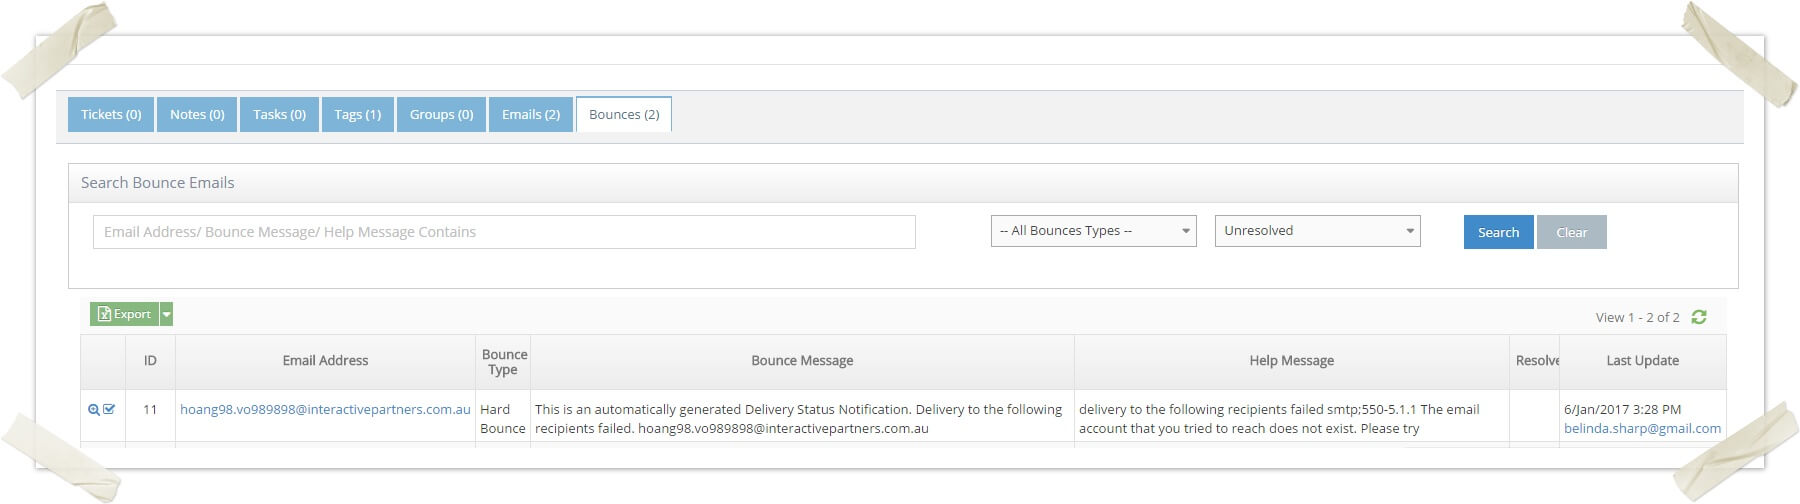
2Go to Settings >> Bounces
-
3A list of bounced emails appears. The default filter is 'Unresolved' to make staff easier for reviewing.

-
4Click the View Details icon to go to the details page of a bounce

-
5Click the checkbox icon to resolve a bounce.

How to review bounce emails for individual contact/ lead/ student/ tutor
-
1Log in as an administrator and go to the Admin Dashboard.
Learn how to log in here → -
2Go to the details page of a contact/ lead/ student or tutor.
-
3Navigate to the bounces tab
-
4A list of bounce emails for this contact appears. The default filter is 'Unresolved' to make staff easier for reviewing
-
5Click the View Details icon to go to the details page of a bounce
-
6Click the checkbox icon to resolve a bounce.