- How to Create a Form
- Why use Forms?
- Terms to Know for Keywords Management
- Using Segmentation Fields - Communication Data
- Editing an existing Form
- Adding Page Breaks for a Multi-Step form
- Copying a Form to Quickly Make a New Form
- Segmenting Your Contacts
- Grouping Your Contacts
- Using Hidden Communication Controls
- Products of Interest
- Change the Submit Button Label
- Sending an Email When a User Submits
- How to Add Additional Notifications for Team Members
- Editing Thank you Message
- Form Submission and Redirect to A New Page
- Understanding and Setting Up Auto-Responders
- Notification Email
- Ajax Submit
- How to Pre-populate a Form with a User's Previously Submitted Data
- Finalising the Form
- Managing Forms from the Grid
- How to add a Form to a Page in WebEd
- How to edit the curly bracket
- How to Embed a Form Script in HTML
- Submit the form and send an email to the user
- Inserting a Form via CurlyBracket
- Checking Form and Email Notifications
- Google reCaptcha Validation
- Reinitializing Form Components
- Setting Up Reply Emails
- Show Contact Details in Emails
- Vehicle Request More Info Form
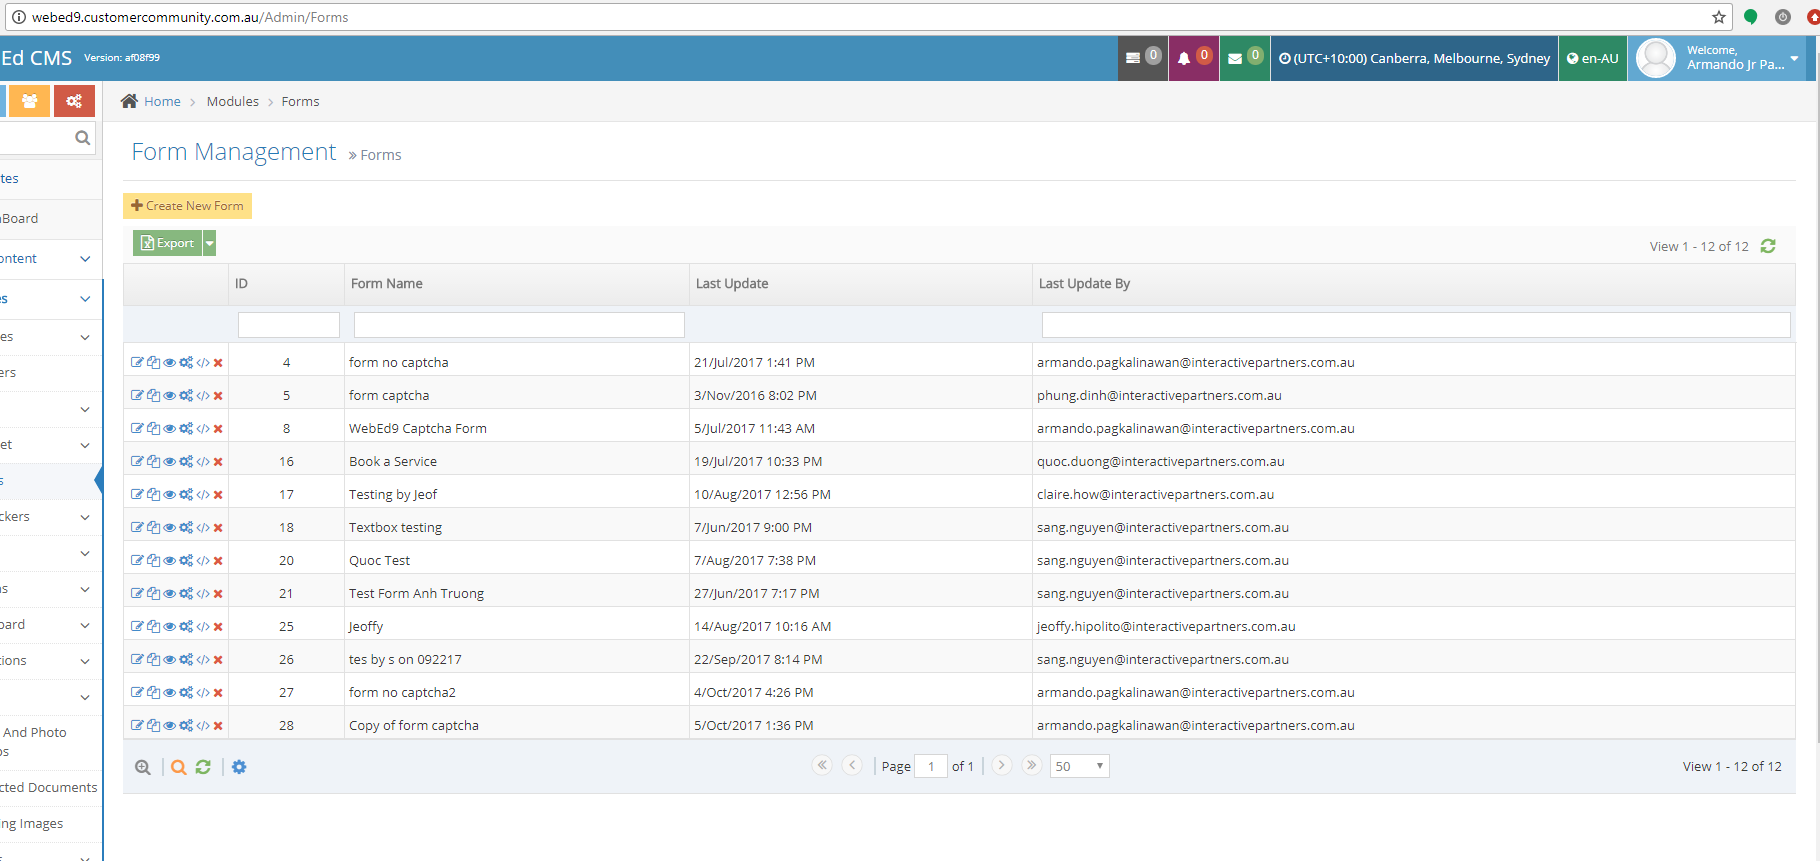
Copying a Form to Quickly Make a New Form
A fast way to create a form is to copy an existing one. Use these steps to copy a form:
STEP-BY-STEP
-
1Go to Admin→ Forms
-
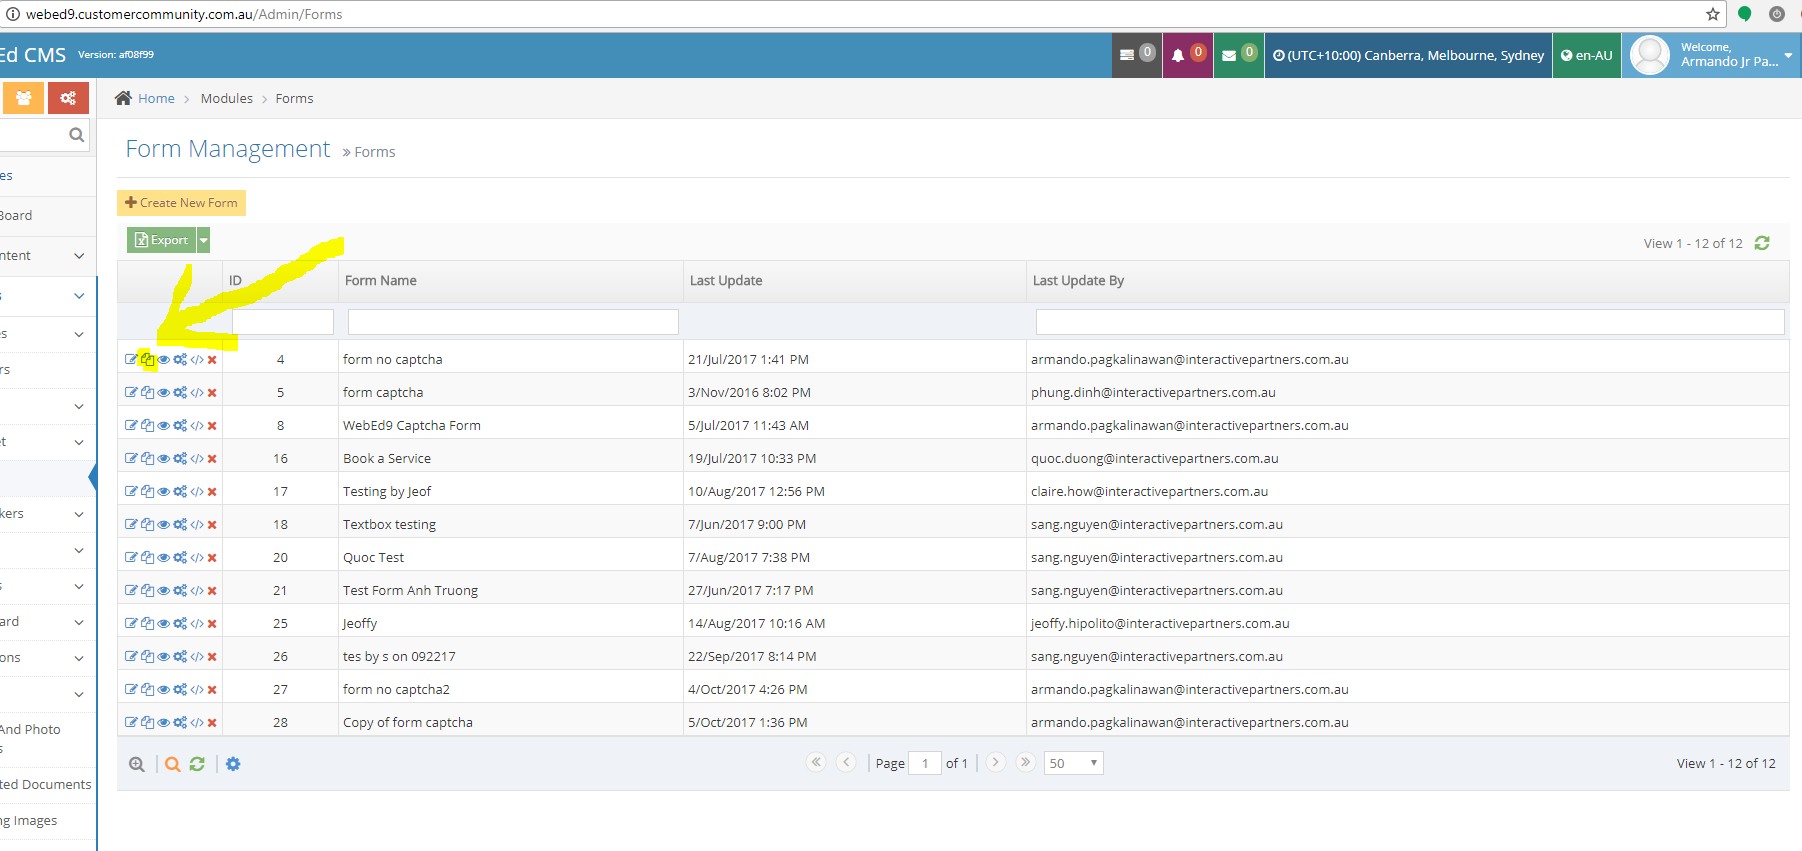
2Click the Copy button on the leftmost part of any Form
-
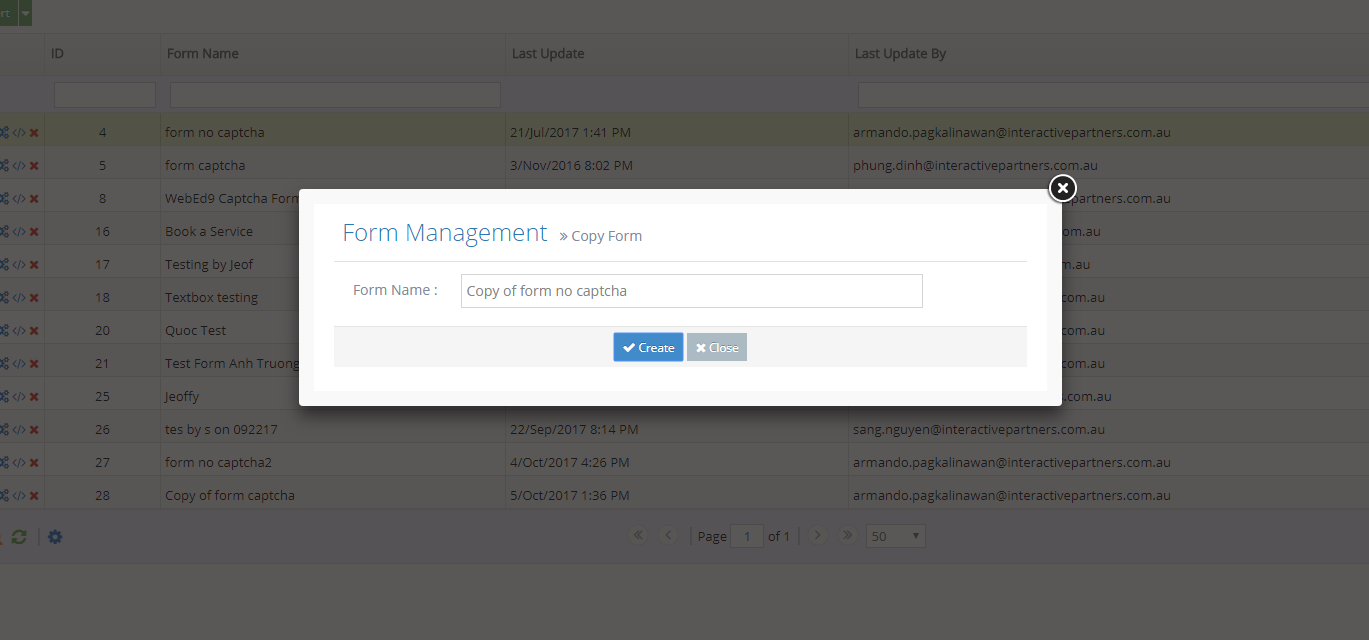
3Edit the form name on the pop-up
-
4Click Create button to create the new Form
-
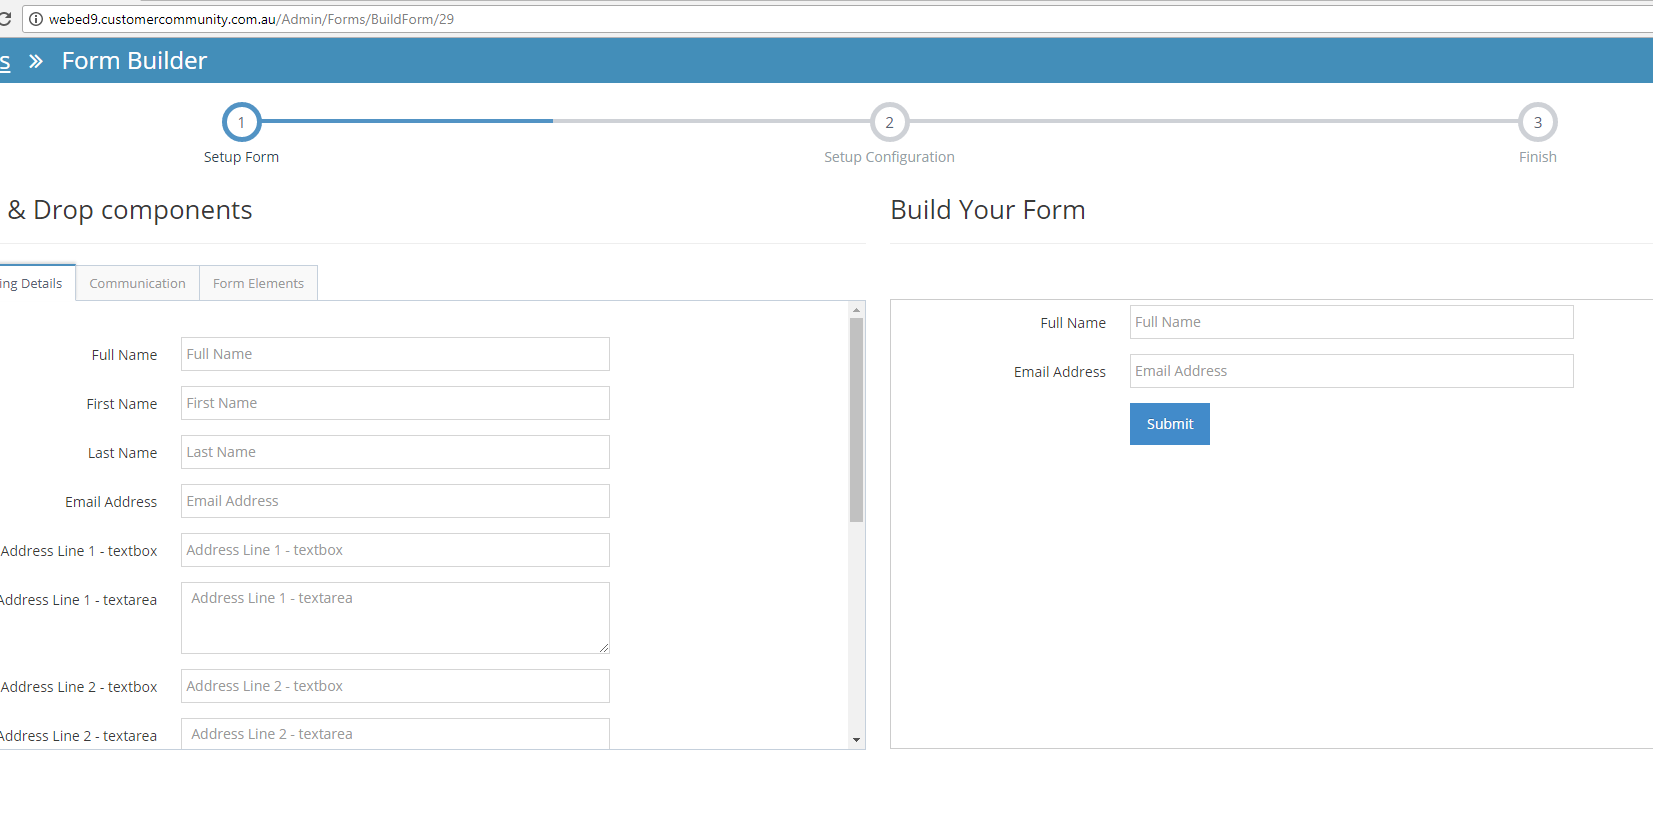
5The new form will have all the form components from the copied form
-
6Edit the form components to suit your requirements
-
7Click Finish Build Form And Start Configuration
-
8The new form will also have all the Configure form details from the copied form