STEP-BY-STEP
-
1Log in as an administrator and go to the Admin Dashboard.
Learn how to log in here → -
2Click on "Launch The Admin Module" after Logging in to your site
-
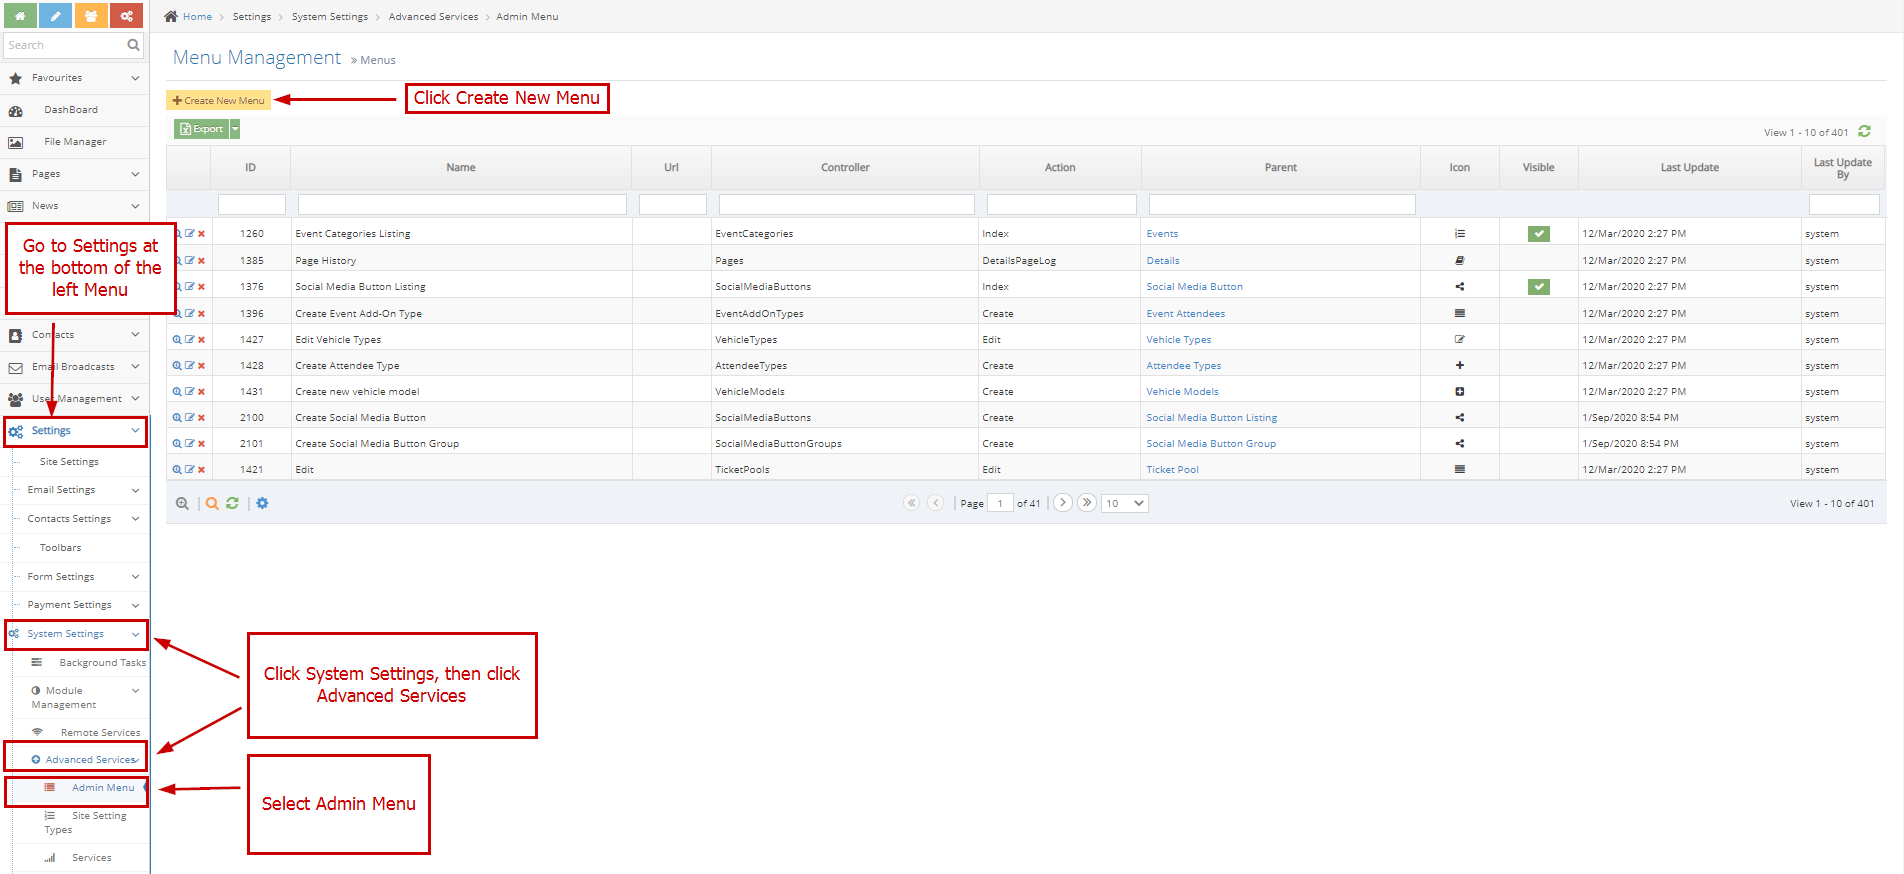
3Go to Settings at the bottom of the left Menu
-
4Click System Settings, then click Advanced Services
-
5Select Admin Menu
-
6Click Create New Menu
-
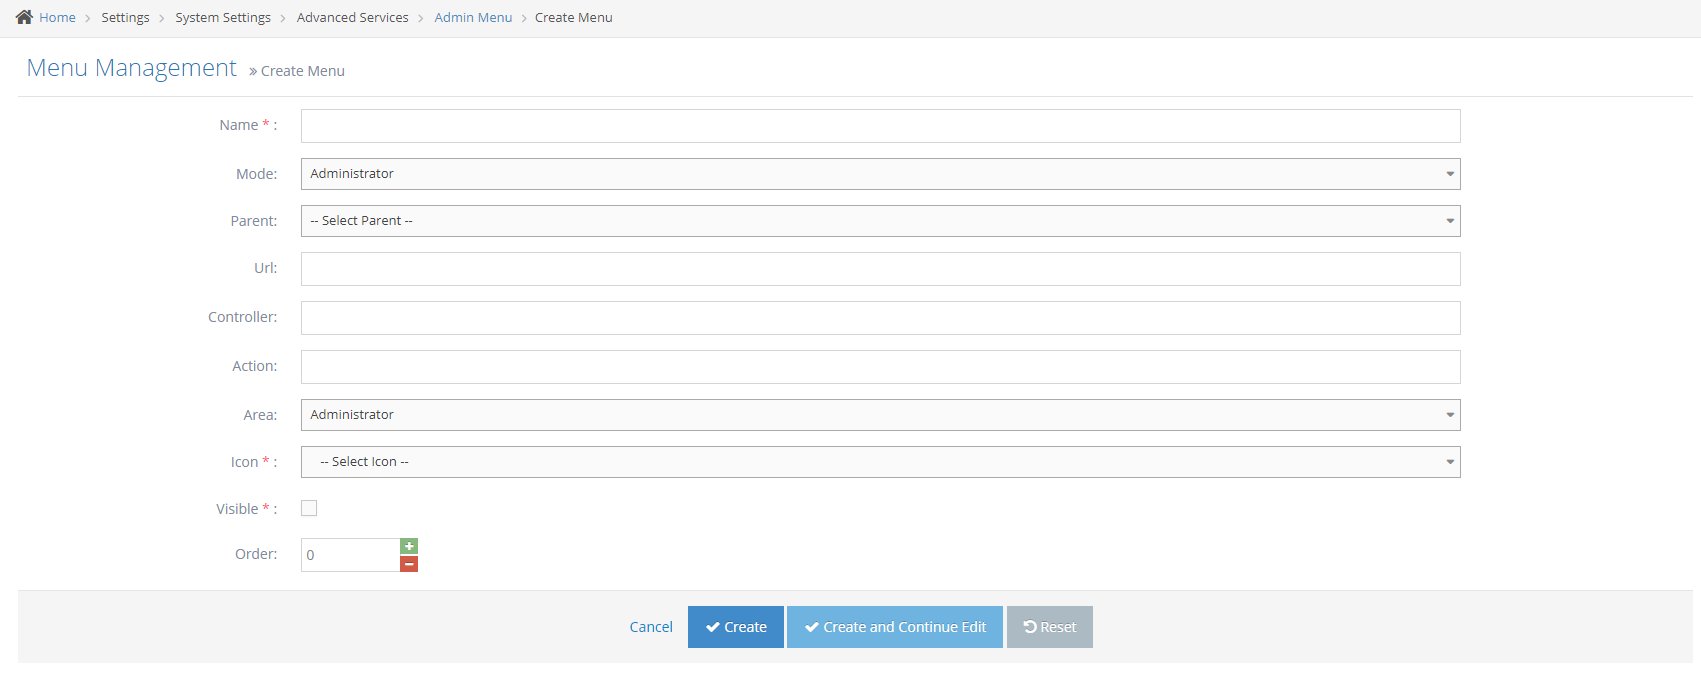
7Enter Details of the Page
-
8Input the new value in the correct format (separate each PartnerTypeID by a comma) then save.
- Name - This is the word/text that will appear to represent the menu
- Mode and Area - This is where the user can set which section the menu will appear
- Parent - If the menu should be shown as part of the main navigation meaning it is not under any other menus then the parent should not be changed from --Select Parent--, if the menu was meant to be shown under a certain menu that already exists then that menu should be selected in this field
- URL - URL of the menu (This is optional)
- Controller - The controller of the menu in the back codes for example in http://webed9.customercommunity.com.au/Admin/Events the controller is always the last word after the last backslash in any URL in WebEd cloud admin or CRM. In the example given the controller is Events
- Action - The action of the menu in the back codes to load the listings of any controller you can just type Index if not then, you should contact your system administrator to ask for the action of a certain controller
- Icon - The icon that will appear beside the Name of the Menu
- Visible - Check if you want the menu to be visible
- Order - Position of the Menu, the lowest will be at the top and the highest will be at the bottom
-
9Click Create button to apply changes made