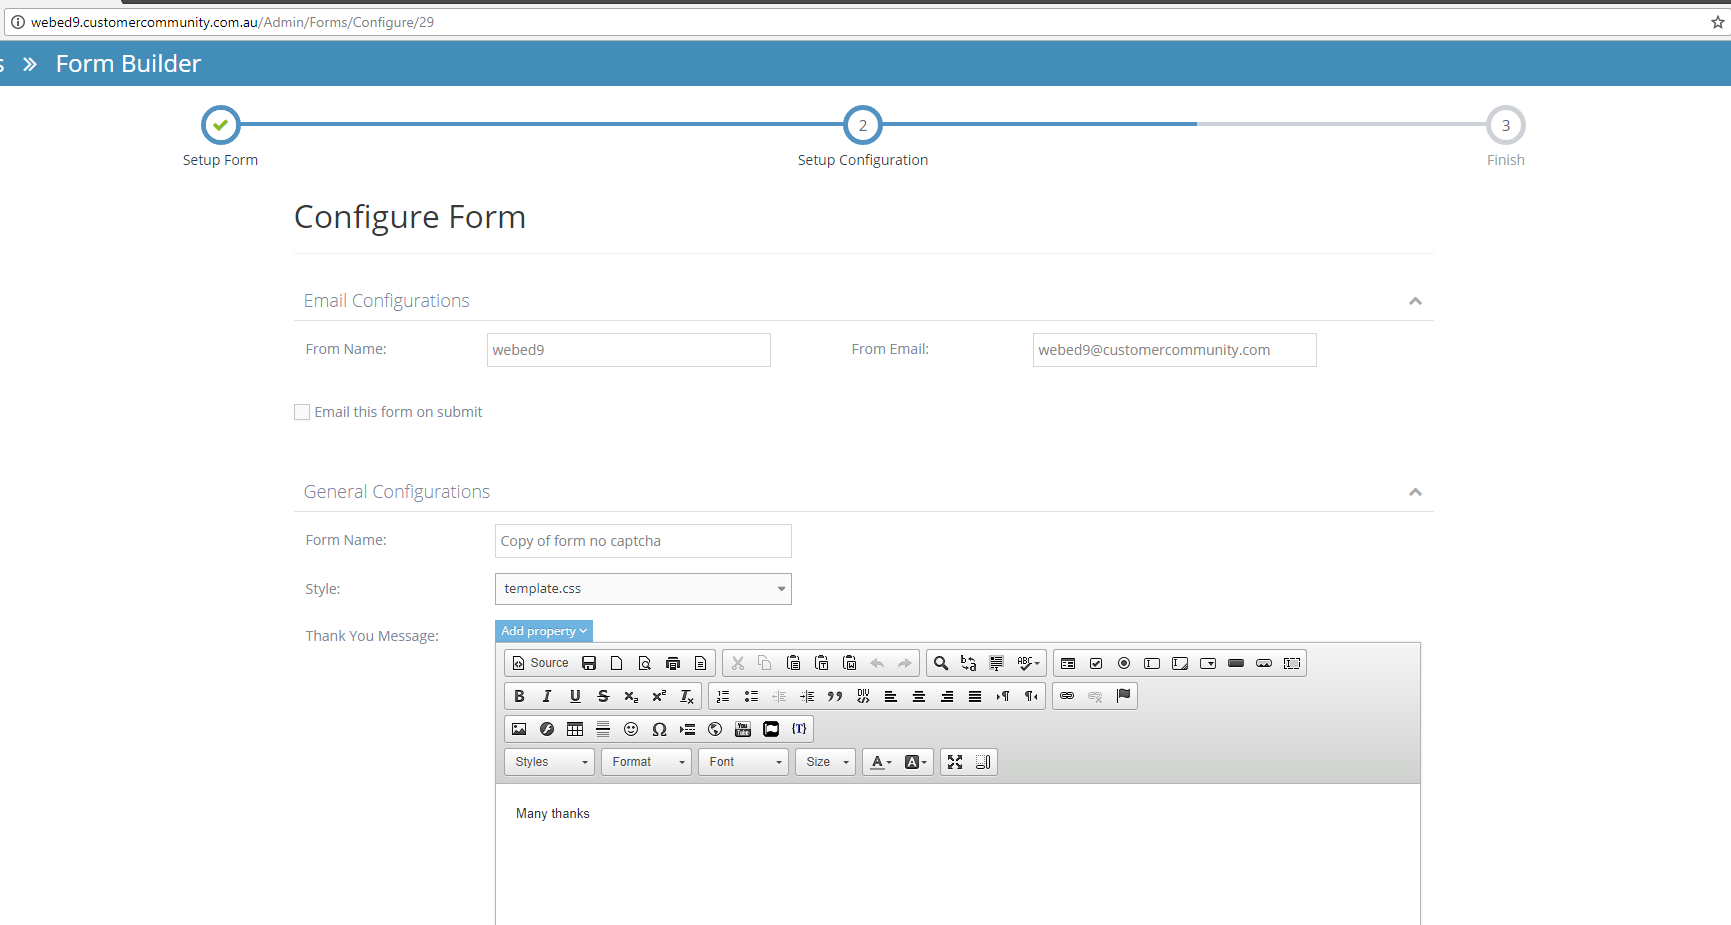
Step in creating the Form where you can set the Email and General Configurations
STEP-BY-STEP
-
1Edit the form configuration to suit your requirements
-
2Add in a "From Name" and "From Email" so you can be notified when someone submits your form
-
3Enable "Email this form on submit" and provide the necessary information if you want this form emailed on submission

-
4Add in general configurations like the Form Name and the Thank You Message
-
5Expand the Advanced Options to show additional configurations such as enabling the following: DataSheet Form, Send Auto Response, Send Notification Email, Allow Ajax Submit and Pre-populate form with User's previously submitted data. Enabling most of these expands the setting that requires you to provide additional information


-
6Click Finish Configurations
-
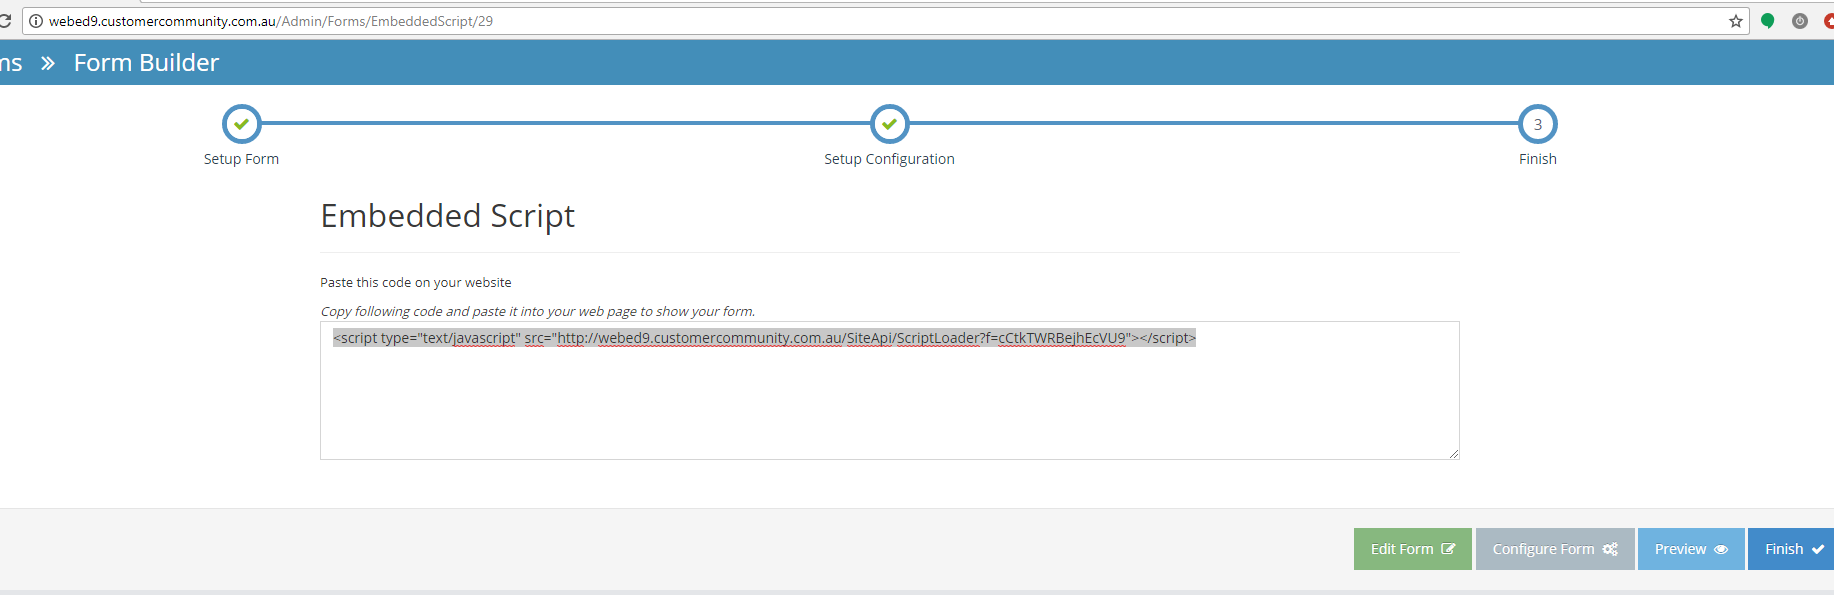
7The Embedded Script can be used and pasted to other pages if you want to use this form outside the WebEd environment. However, if this form is for use on a WebEd site, please click Finish and go to the website page to add the form via Curly Brackets.
-
8See the new form created on the form list