- Vehicle Listing Module Purpose
- How to manually add vehicles to vehicle module
- Adding and Uploading Images to your Vehicle Listing
- Controlling the Order
Manually Adding Vehicles into the Vehicle Listing Module
Vehicle Listing Module Purpose
The vehicle listing module creates a fast & efficient way of recording and displaying information on vehicles on your website. It creates a database of stock for easy integration into internal stock and inventory systems and is downloadable into Excel.
How to manually add vehicles to vehicle module
STEP-BY-STEP
-
1Log in as an administrator and go to the Admin Dashboard.
Learn how to log in here → -
2Launch the Admin Module
-
3In the blue tabs on the left-hand side select:
- Vehicles – then
- Vehicles Listing
-
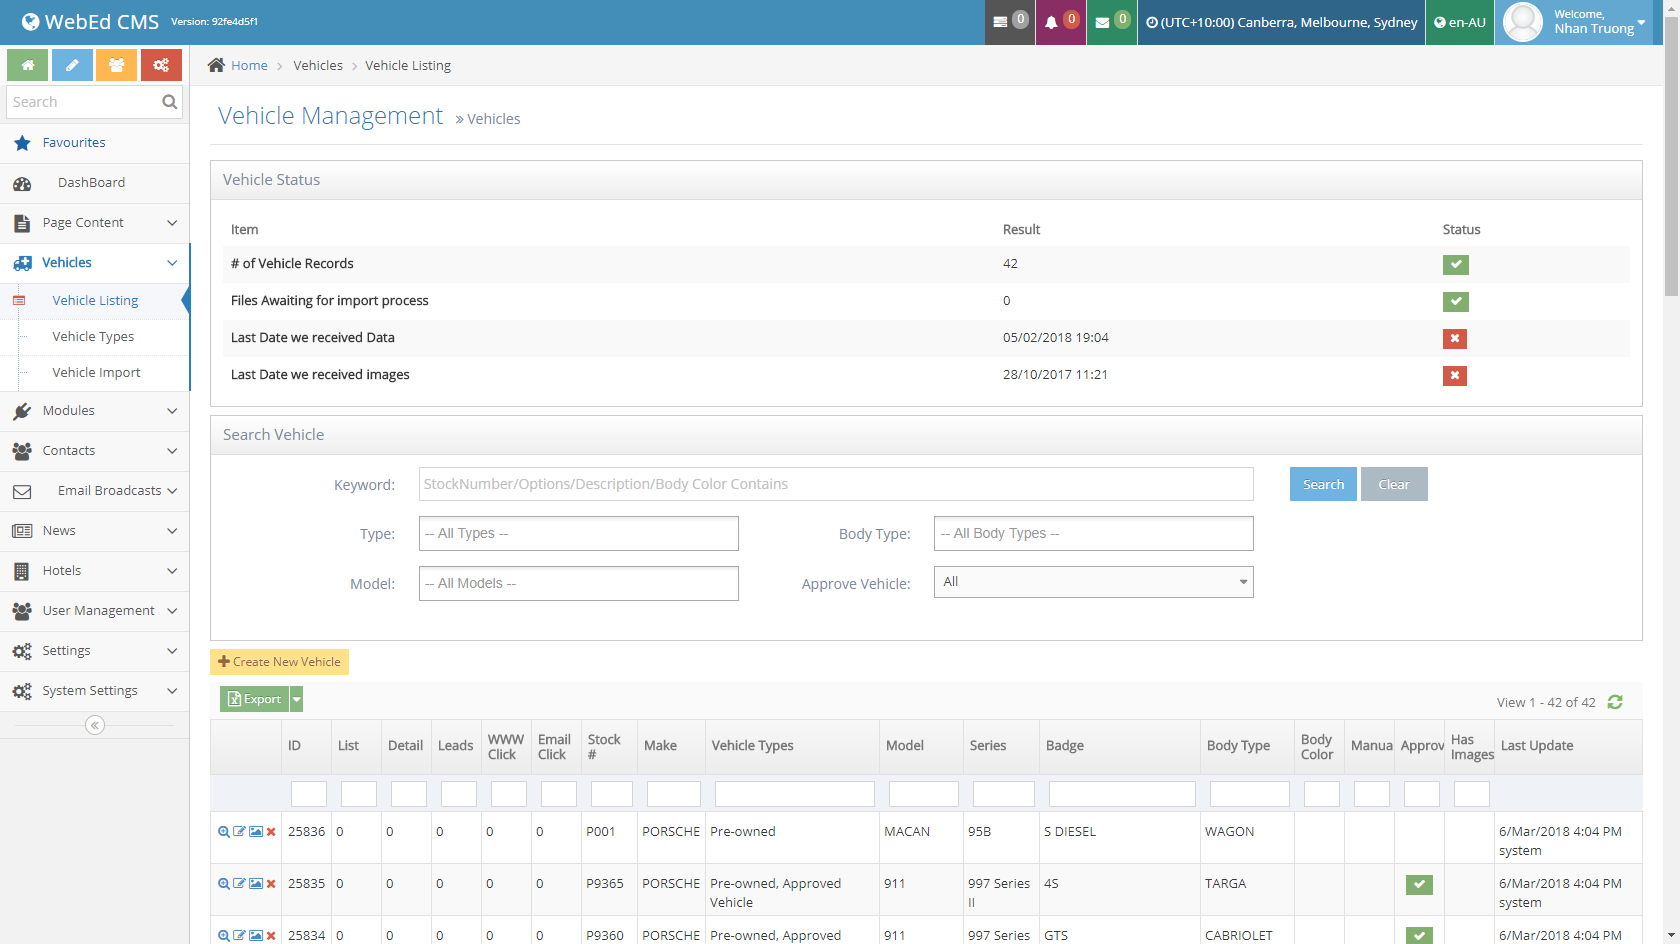
4From this index page, you can:
- Create new vehicle listings
- Edit existing listings (using the pencil icon)

- Delete listings (using the X icon)

- Upload Images (using the image icon)

You can also export the data to an excel spreadsheet using the Export to CSV button in the top right-hand corner
Adding and Uploading Images to your Vehicle Listing
STEP-BY-STEP
-
1Once your details are complete, return to the index to add images to your vehicle
-
2Choose the image icon next to the vehicle you added
-
3The images listing will appear, without images
-
4Click upload More Images
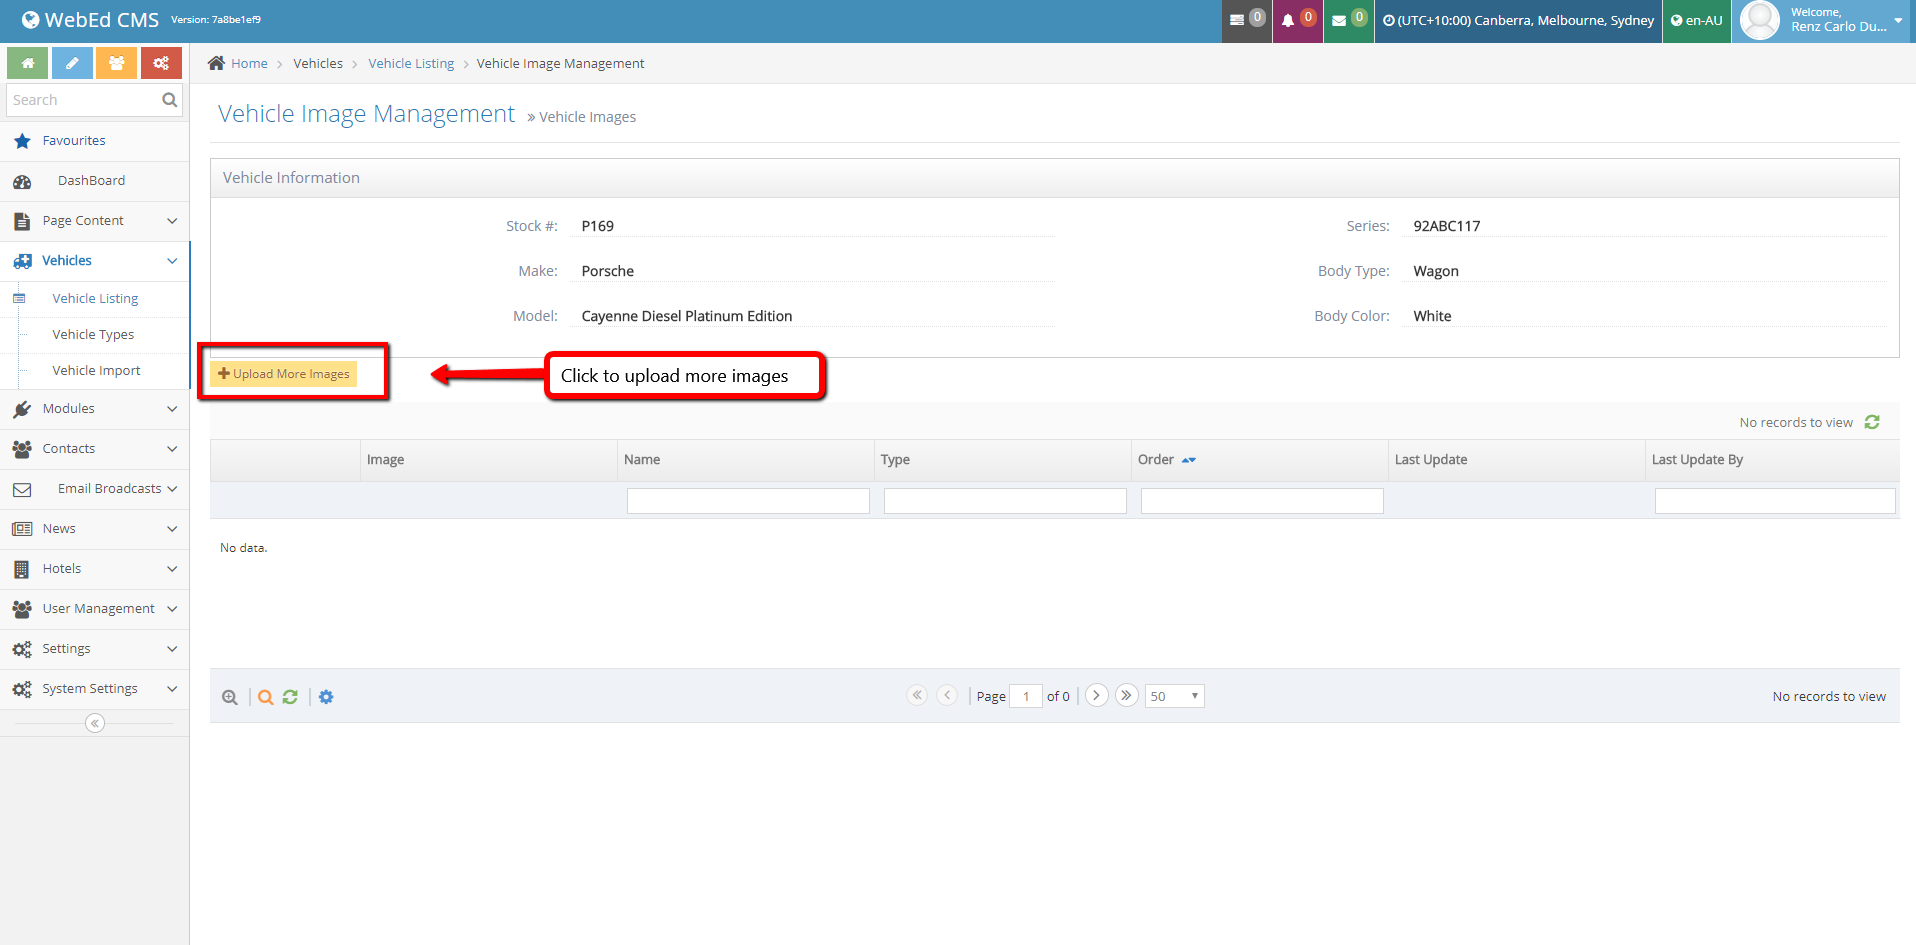
-
5To load an image – click Upload More Images
-
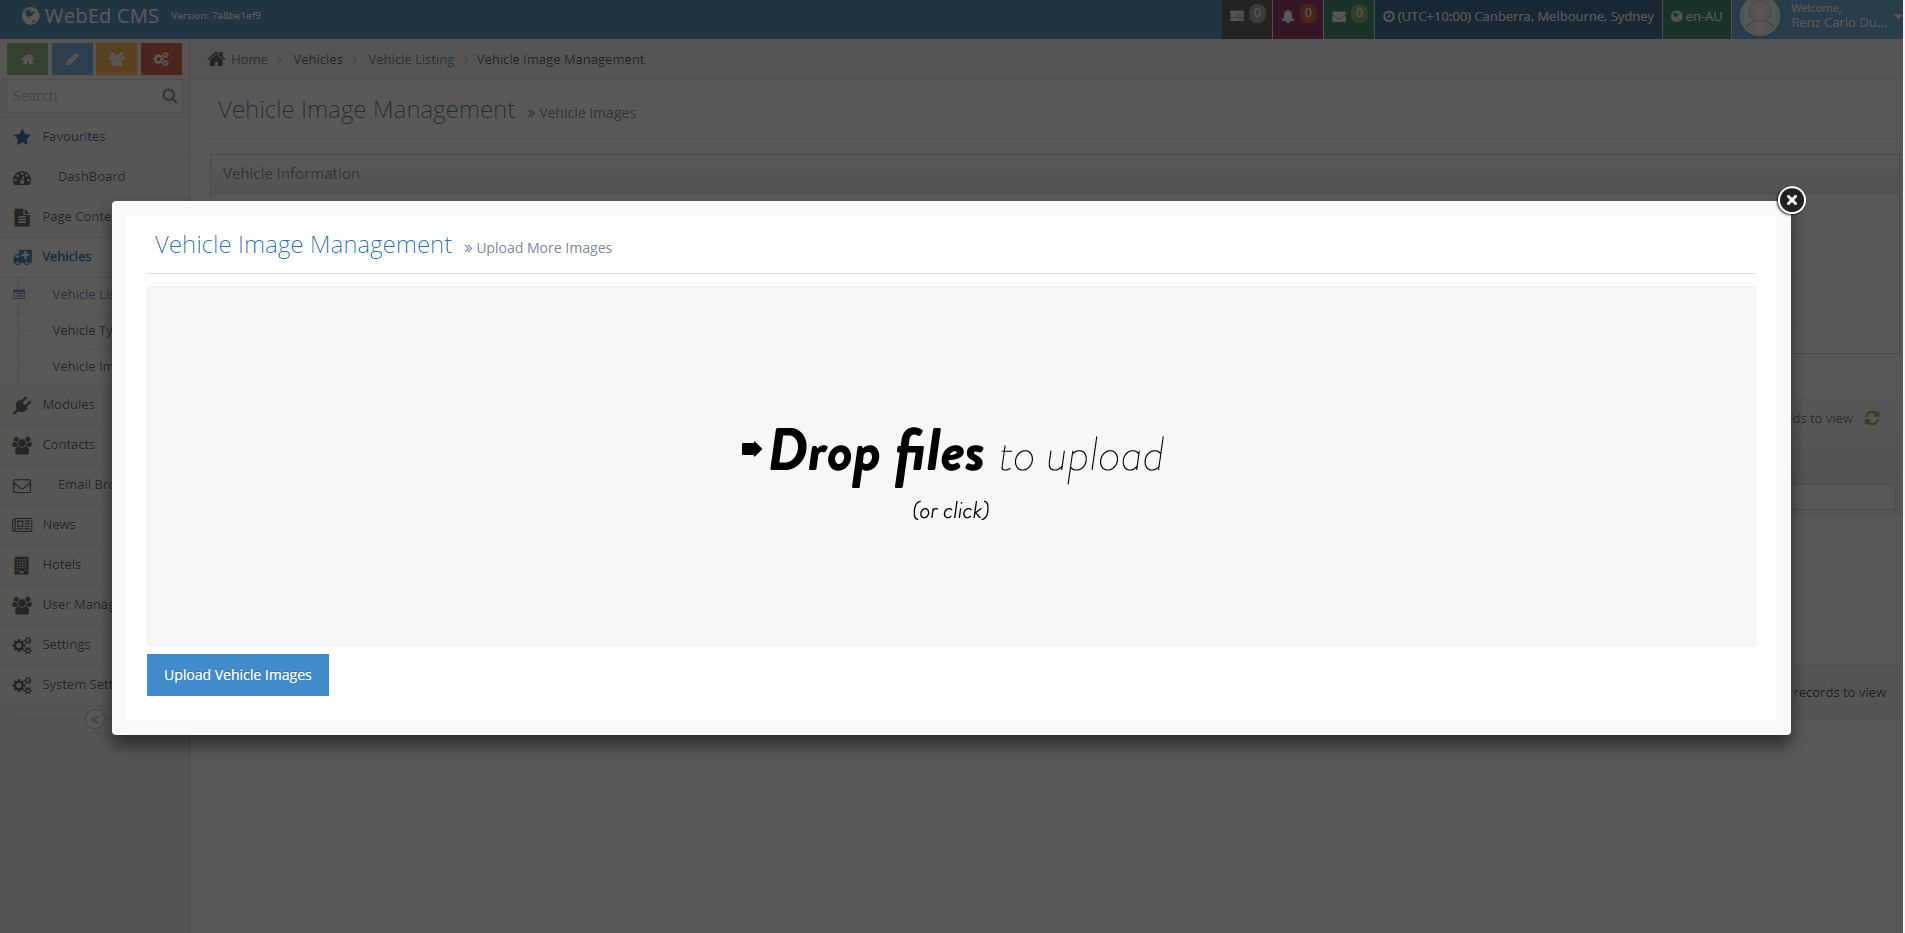
6A window will open
-
7Drag and Drop Files from your desktop or click the Upload Vehicle Images button.
-
8Choose from your desktop or file image
-
9You can upload multiple images by selecting more than one image at a time
-
10The images will be uploaded and automatically deposited against your vehicleOnce vehicle details and images are complete – they will appear on the listing page of your website.