- Adding site domain from TPP to Cloudflare
- Technology and System Requirements
- Installation Guide
- WebEd 9 Templates
- WebEd Cloud Developer FAQ
- Managing Page Templates
- Form Builder: Add Custom Controls
- Editing the Login Template Setting
- Maintenance Mode
- Webpage Load Performance
Developers Guide to WebEd
Adding site domain from TPP to Cloudflare
Troubleshooting on the Cloudflare Overview
- This will guide you on how you can add/connect domains from TPP to Cloudflare.
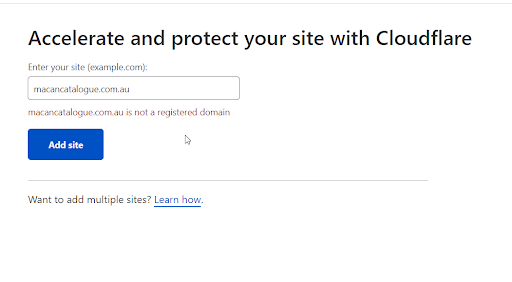
- Troubleshooting on the Cloudflare site with an unregistered the domain
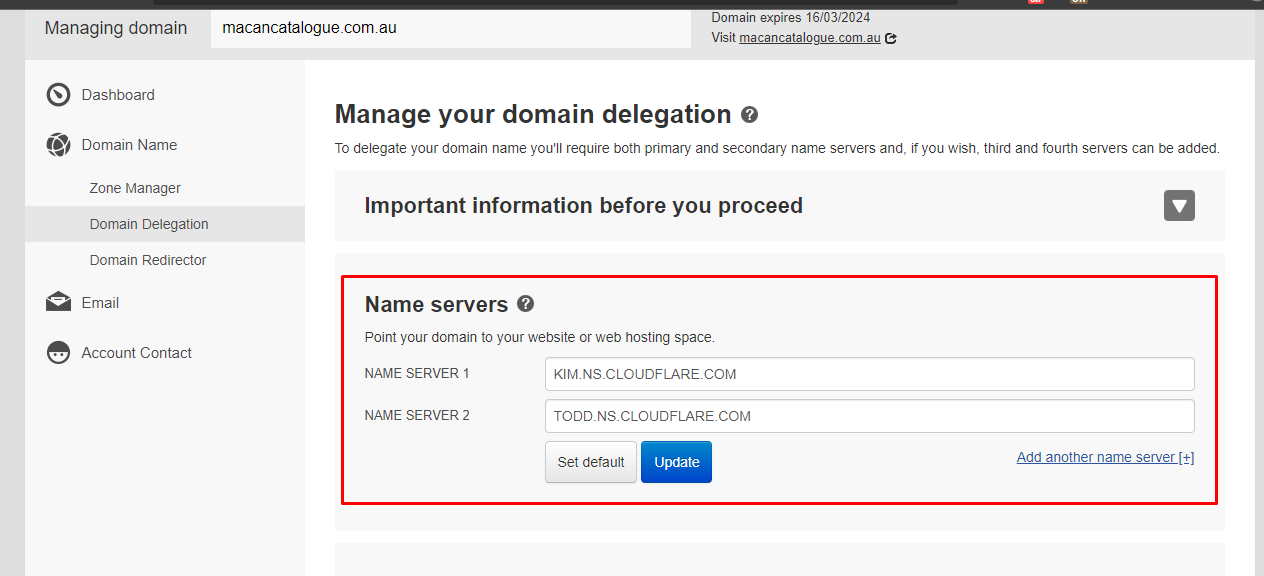
Managing a domain on TPP
-
1Go to TPP wholesale
-
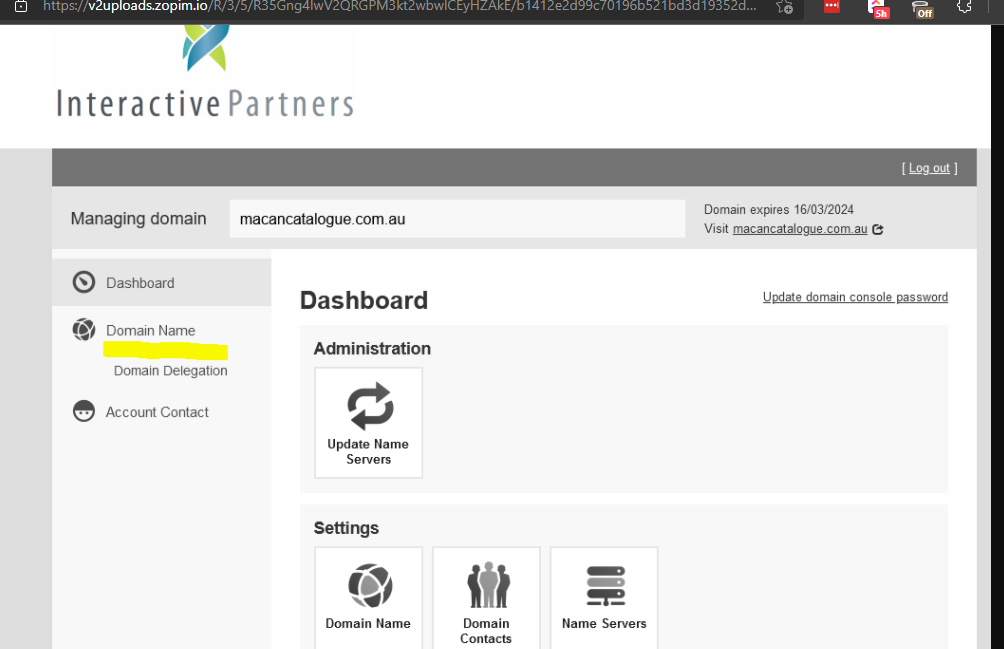
2Go to Domain > Manage
-
3Search the domain that cannot be registered via Cloudflare
-
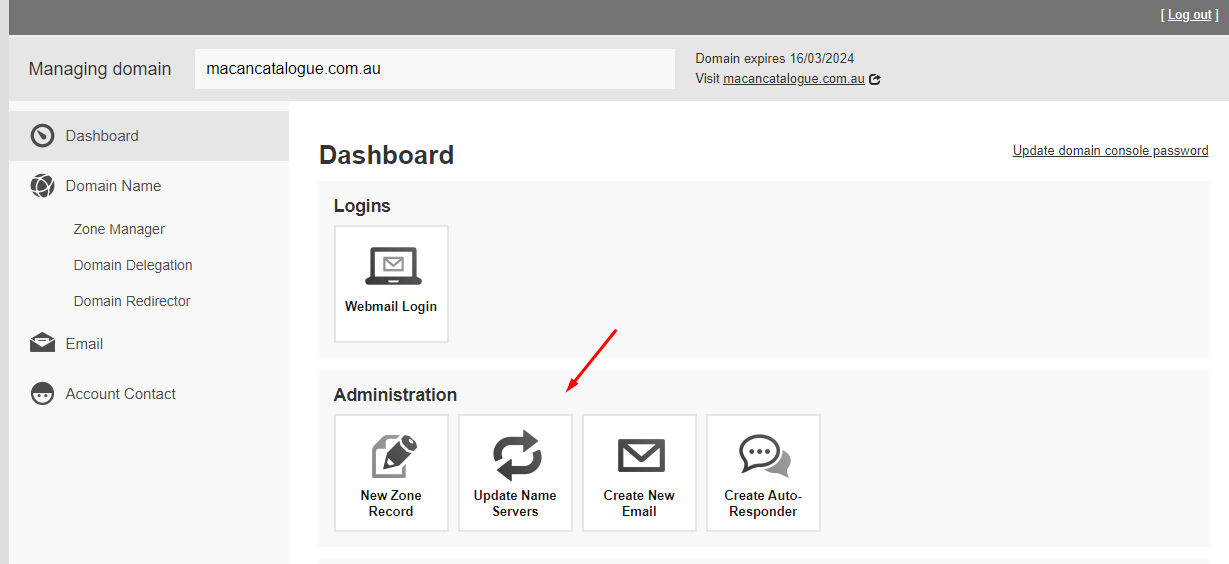
4check its Zone Manager if it's set, and if not set meaning the domain setup is not yet completed
-
5add the Zone Manager under your domain selected
-
6before changing the domain to Cloudflare we should retain first the current DNS record of the domain that we're trying to import from Cloudflare
-
7after updating the DNS of the domain just wait for a couple of minutes until the domain is properly propagated
-
8then just visit Cloudflare again then it will prompt that the DNS propagated properly.
Technology and System Requirements
To run WebEd Cloud, you will need the following installed on your server/computer:
Supported operation systems:
- Windows 7 or above
- Windows Server 2008 or above
Supported web servers:
- Internet Information Service (IIS) 7.0 or above
- ASP.NET 4.5 (MVC 5.0) and Microsoft .NET Framework 4.5 or above
Supported databases:
- MS SQL Server 2008 or above
- MS SQL Server Compact 4.0 or above
Supported browsers
- Microsoft Internet Explorer 9 and above
- Mozilla Firefox 2.0 and above
- Google Chrome 1.x
- Apple Safari 2.x
MS Visual Studio 2013 or above. Required for developers who want to edit source code.
Installation Guide
WebEd9 Installation Overview
Before you begin the installation, ensure that you and your web host have the minimum requirements to run WebEd Cloud. Then download the required WebEd Cloud software to a local directory and extract the downloaded package. We provide two versions of WebEd Cloud a source code version and a no-source version.
Source Code version
-
1You need to Install Source Tree and know the basic setup of a Bitbucket repository
-
2Make sure you are allowed to pull the source code from our repository by asking for credentials/permissions from the repository owner
Non-Source Code version
-
1Download the files in the link above. The link contains the latest code from the master branch of WebEd9
Running the site using IIS (package without source code)
To use IIS, copy the contents of the extracted WebEdCloud folder to an IIS virtual directory (or site root), and then view the site using a browser.
-
1Open IIS on your local machine, if you do not have one installed, please follow this guide.
-
2Extract the zip file in the web app you created in your local IIS. If you are not familiar with creating a web app in IIS, please follow this guide.
-
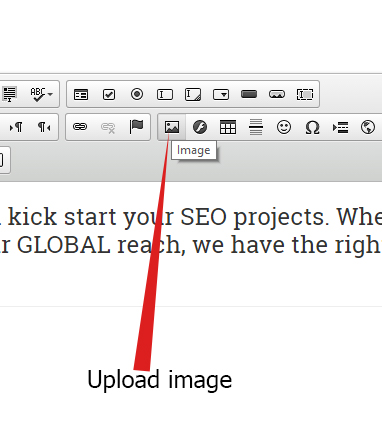
3Once you have extracted the files, access the web app you created locally and the installation screen will popup (see below)
NOTE: If you are using IIS 7, configure it to run in integrated mode, and configure the application pool to run the .NET Framework version 4.
Running the site using Visual Studio (package with source code)
This step describes how to launch a site in Visual Studio:
-
1To run the site in Visual Studio, pull the full source code repository to your local folder.
-
2Launch Visual Studio and open WebEd.sln.
-
3Restore the NuGet Packages first to make sure that all packages are loaded (Right-click the Solution then click "Restore NuGet Packages")
-
4Build (CTRL + SHIFT + B) the project first then make sure that there are no errors.
-
5Create a new Blank Database in your SQL Server instance.
-
6Set the WebEd.Web Project as the startup project and click Run or hit F5.
-
7Make sure that you have had Git installation and configured the environment variables for it.
Getting the "ready to deploy" package (without source code) from a package with source code
-
1Unzip the Downloaded file into the desired location and proceed to the "Installation process"
WebEd Installation Process
WebEd Cloud requires to write permissions for IIS user account (IUSR) for the directories and files described below:
- \App_Data\
- \Logs\
- \Media\
Before installing WebEd Cloud, ensure you have one of the following databases installed on your system:
- SQL Server 2008 or higher
- SQL Server Express
If you are using SQL Server 2008 or higher, you can use any of the following authentication methods to connect to the server:
- SQL Server Account: When connecting using this method, logins are created in the SQL Server that is not based on the Windows user accounts. Both the user name and the password are created using the SQL Server and are stored in SQL Server. When using this method you must enter your login and password.
- Integrated Windows Authentication: When connecting using this method, the SQL Server validates the account name and password using the Windows principal token in the operating system. This means the user identity is confirmed by Windows. The SQL Server does not request a password and does not perform identity validation. Windows Authentication is the default authentication mode and is much more secure than SQL Server Authentication. Windows Authentication uses Kerberos security protocol, provides password policy enforcement with regard to complexity validation for strong passwords, provides support for account lockout, and supports password expiration. A connection made using Windows Authentication is sometimes called a trusted connection, because SQL Server trusts the credentials provided by Windows.
-
1Once you open the site for the first time, you’ll be redirected to the installation page, as follows:
-
1Read the Welcome file/text
-
2Click Let's get started to go to the Licence screen
-
3Read the licence
-
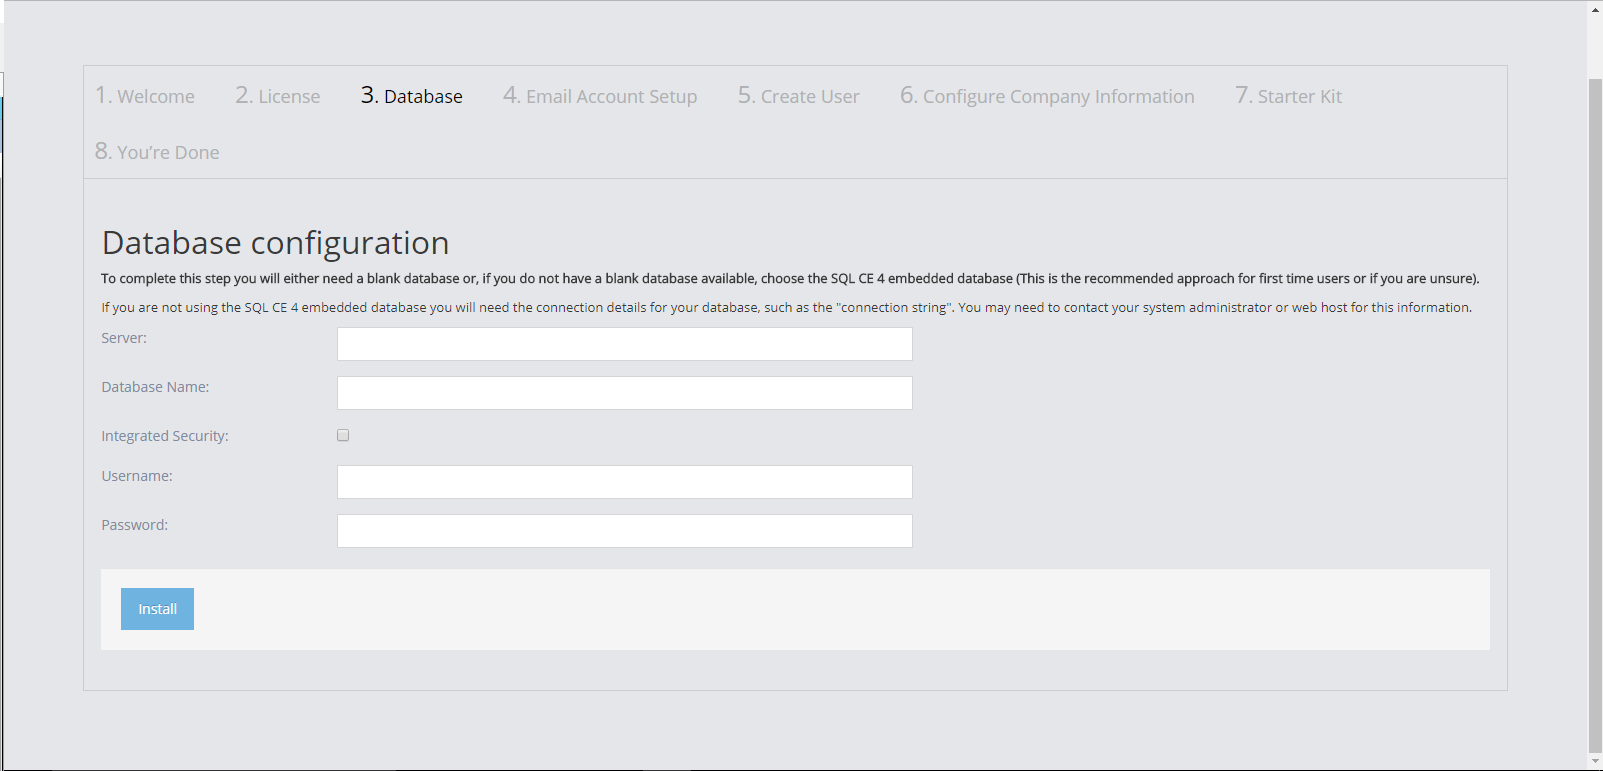
3You need to open SQL Server Management Studio first and create a blank database (with or without credentials)
-
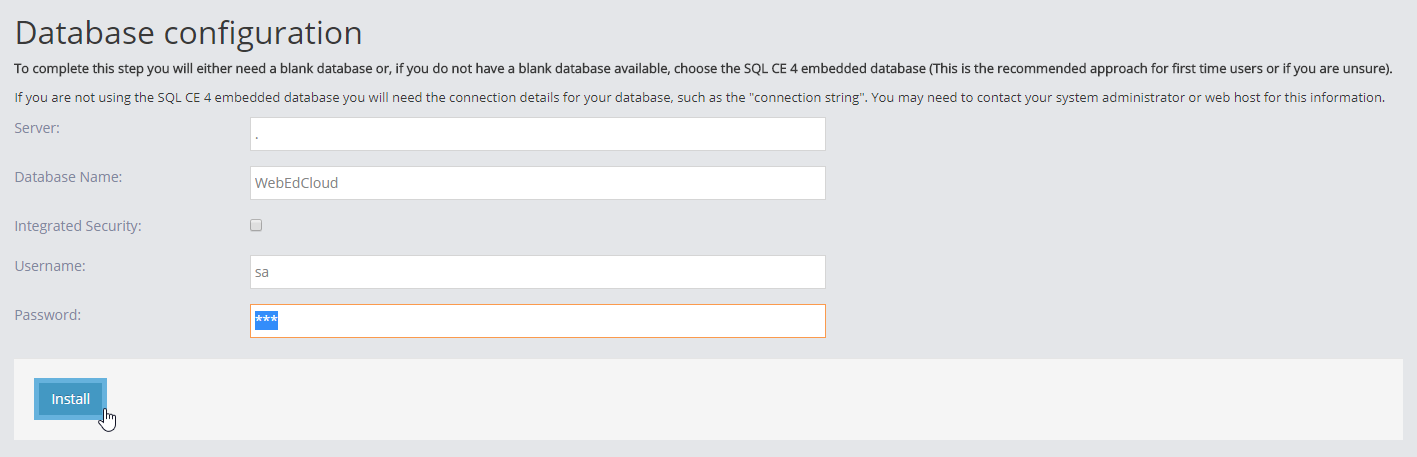
3In the Server field, enter the required server name
-
3In the Database name field, enter your database name. This database can be:
- New empty database
- If not created yet, the installation will generate it
-
3Select the Integrated Security option if your SQL Server uses Integrated Windows Authentication and the database you created does not require credentials. Username and Password fields can be ignored.
-
3If your database requires credentials (SQL Server Authentication), enter your login and password
-
3Click Install and wait for the database generated
-
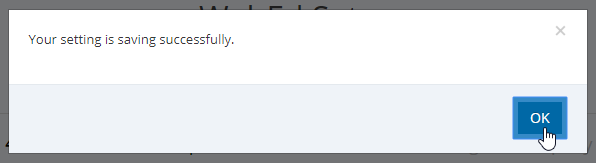
3When the database is created successfully, click on Ok button to go to setup Email Account
-
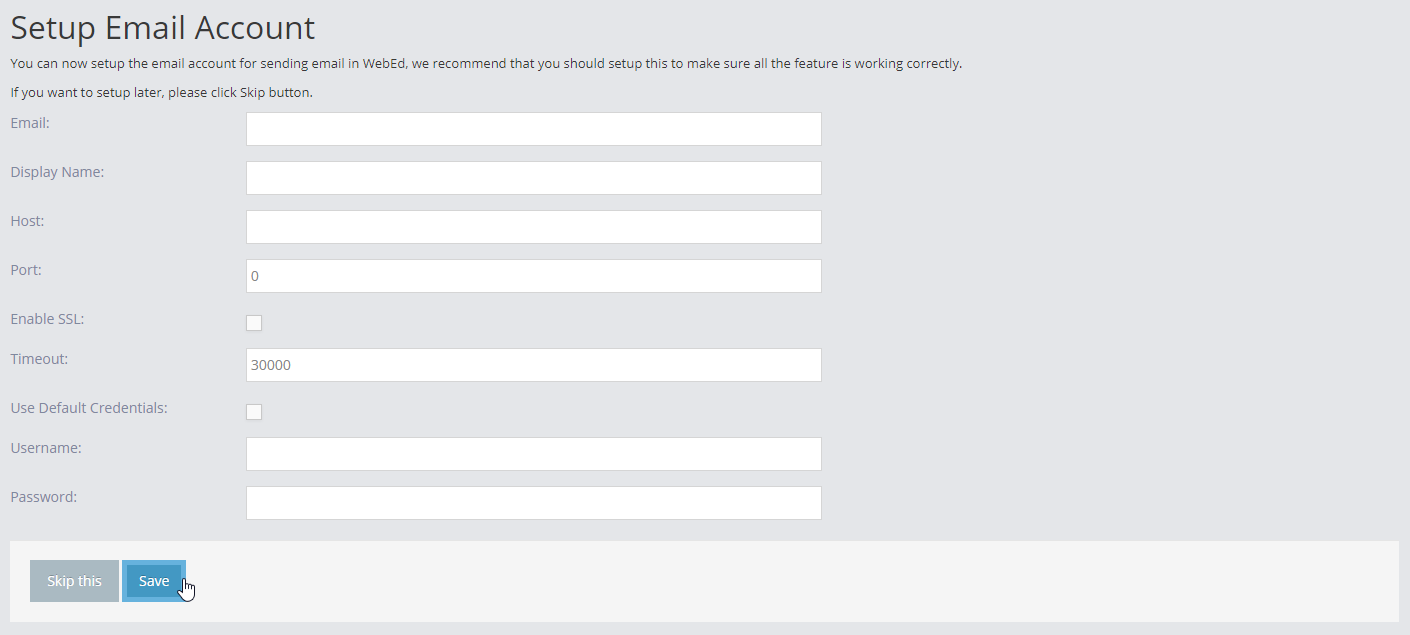
3Enter the information for Email Account. This step is optional and you can skip it but the system cannot send emails. You can update it later in Admin/Email Accounts
-
3Click Skip this (a default email account will be created) or Save to go to Create User step
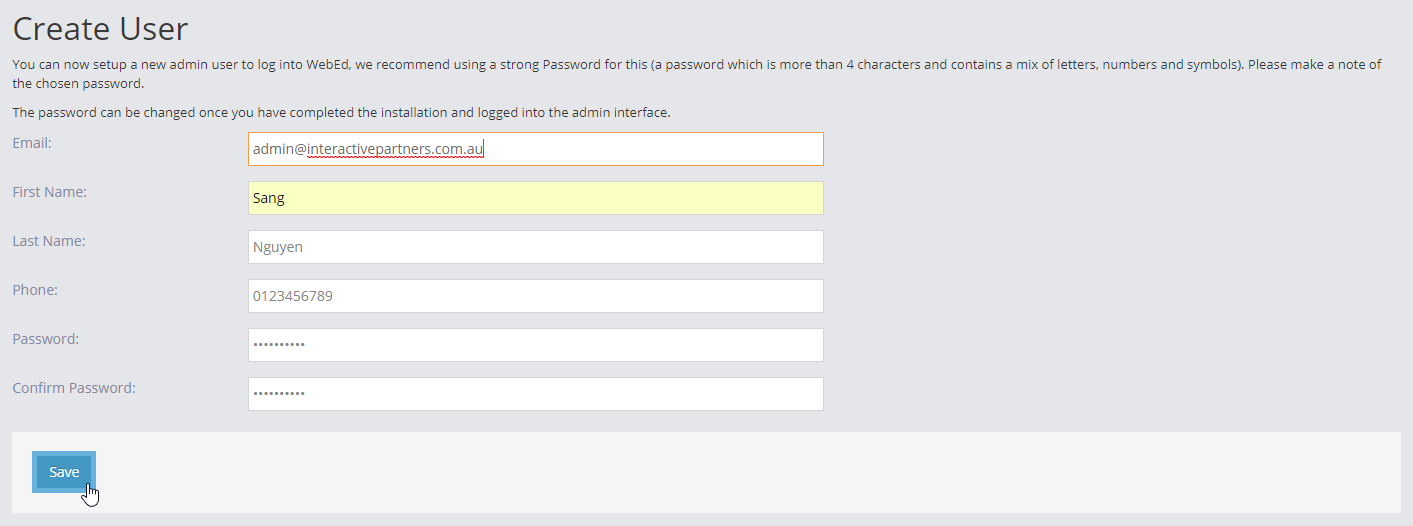
- In the Email field, enter your email (also username)
- In the First Name field, enter your first name
- In the Last Name field, enter your last name
- In the Phone field, enter your phone number
- In the Password field, enter your password
- In the Confirm Password field, enter your password again
- Click Save to go to Setup company
- Enter your company information. You can skip this step and update it later in the site settings
- Click Skip this or Save to go to the next step
-
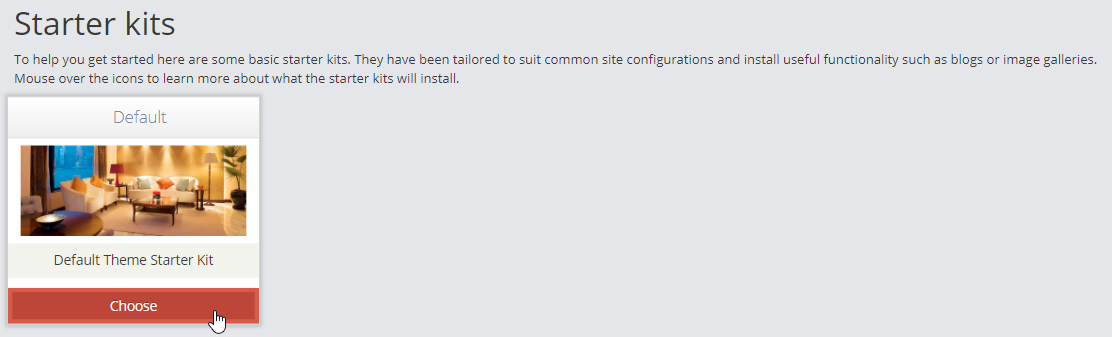
3Starter Kit step:
- This step is for generating some default templates for your CMS
- The idea is that we will build up some default kit for you so that you can generate the site with CSS, script, template and HTML
- Select a theme. There is only a default theme now
-
3Congrats! You have finished the installation. Now you can:
- Click Preview your new website to go Home page
- Click Set up your new website to go to the Admin module
Note 1
Ensure that your application pool is set to Integrated mode
Note 2
If you want to completely reset a WebEd Cloud site to its default settings, you can delete the Site.config file from the App_Data directory. When using IIS you might want to read this article.
Note 3
There is a folder called Copy2Bin in WebEd.Web project that contains some bin files that need for the application to run correctly. These bin files are copied to the bin folder automatically at the build or publish time. But please check it, if they are not please copy these files to the bin folder
Note 4
When building/debugging WebEd Cloud with Visual Studio we use a Git command to get the version from the repository, so please make sure that you have Git installed and configured the environment variable for Git
WebEd 9 Templates
A Step-by-Step guide on how to build WebEd 9 sites using Master Templates, Page Templates and modules. Outlines the best practises and processes for designers when creating a new site in an empty installation.
This procedure is moved to this document.
WebEd Cloud Developer FAQ
Where to Find the Database for WebEd Cloud: Locating and Accessing Your Database
- WebEd Cloud is developed using ASP.NET MVC and Entity Framework with Code First Approach.
- The framework will create the database itself using the current schema in WebEd.EntityModel library/project.
- All you have to do is to start to debug and follow the steps of WebEd Cloud Setup till it requires you to input the connection string.
- Database step in WebEd Cloud Setup
Where is the Connection String? What is the Connection String in WebEd Entities?
- The connection string that WebEd Cloud uses is stored in /WebEd.Web/App_Data/Site.config or /App_Data/Site.config
- There is a connection string named WebEdEntities in Web.config by default:
- The connection string for development only updates the changes from entity context to a database.
- With Entity Framework and Code First Approach, every change you make to the entity context is migration. For more detail, please find them here.
I got an error with Git on building WebEd Cloud.
- The error would be something like the image below :

- Please copy Git folder from C:\Program Files\ to C:\Program Files (x86)\
- Why did it happen? :
- WebEd Cloud project has a pre-build event command line "C:\Program Files (x86)\Git\bin\git.exe" rev-parse --short HEAD> "$(ProjectDir)\App_Data\version.txt" to get the current revision on Git to write to WebEd.Web\App_Data\version.txt, so that we will have a version to display on WebEd Cloud Admin.
-
- The process to read the version seems to not check where Git was installed, so it blindly picked "C:\Program Files (x86)\Git\bin\git.exe" to execute the command.
- You must have installed a 64-bit version of Git on your 64-bit machine if you faced this problem. Your Git folder must be at "C:\Program Files\Git\bin\git.exe", so the command to get the current revision could not find git.exe and execute the command.
- Please do a copy to "C:\Program Files (x86)" as a quick bandage.
- You can also change the pre-build event command line but please be aware that you should not commit the change to the repository.
- If you are still receiving the error but with a different error code, for error code 128 or error message "Not a git repository", please make sure have check-out the source code properly and completely, because the compiler could not find .git folder, which is for Git repository.
Missing Unable to locate XML License file
-
1You can find the LIC file in WebEd.Web\Copy2Bin
-
2Please copy all the files in the Copy2Bin folder to the bin folder.
About software and source code
- Visual Studio 2013 is required. If you use Visual Studio 2015, Please don't use it.
- Checking earlier version of Browser are required when you are doing checklists, which is a step of handling the site to the customer.
- Works are on Bitbucket. You will have a branch to work on, then just push your work when you complete it.
- We use Entity Framework with code first approach.
- There is a dedicated project in our source code to handle schema, WebEd.Entity Model. It has a folder to contain Migrations.
Managing Page Templates
The Basics of managing Page Templates on WebEd9
Templates in WebEd 9 are 2 types:
- Master
- This controls the overall layout of a site.
- This is the place you should put all your JavaScript, CSS and overall "wrapper" for the site.
- Non-Master or Other
- This is for various areas of the page layouts and gives you granular control over page areas.
Templates can cascade in a parent-child relationship:
- Master
- Page Template Blah 1
- Page Template not Blah 1
When you create a new page, you will be prompted for a page template to use.
Sample Layouts
Assume we have the following layouts for the explanation
| Layout for home pages | Layout for the following pages | |||||||||
|---|---|---|---|---|---|---|---|---|---|---|
|
|
|||||||||
Using Master Templates
The simple way
WebEd 9 allows you to have multiple Master templates - one way you can do this is to have two Master pages
- Home Page Master
- Following Page Master
This will allow you to select the template you require for each page type, but what happens if say, the header layout needs to change? You now have to edit in two places and it doubles the work required.
The better way
- Have one Master Template which controls the wrapper or main layout of the page
- Have two child templates that use the Master as a parent
- Master
- Home Page
- Following Pages
Now you will have all the static layouts like header and footer in one place and easily managed. Plus the layouts for the following and the homepage are in one place and easy to manage. At the time of page creation, you just select the page layout you want.
How this works is:
- You select the correct page template for the page (say, Home Page)
- The topmost parent for the page is found (Master)
- Then all page templates which are children, are added to the HTML sent to the browser
- Master
- Home Page
- Master
- Then all page templates which are children, are added to the HTML sent to the browser
- Because templates cascade, you can have very complex template structures if needed.
- Of course, with more complexity comes more maintenance work so we suggest you keep it as simple as possible
Adding Cool Stuff to Specific Pages
Say we have a widget or specific piece of content we need to use in a few places on the site.
- You could just add a piece of content on each page if you need it
- Of course, if it changes, you will need to edit it in multiple places.
Using Cascading Templates, this is a snap
First set up your template structure says:
- Master
- Home Page
- Following Page
Then add the widget as a template. You can do this because templates inherit from their parent.
- Master
- Home Page
- Following Page
- My Very Cool Widget Page
Because the Widget page is just a template, you can control the positioning of the Widget using standard HTML or CSS. Now when you create your new page, you select the My Very Cool Widget template and everything gets rendered correctly due to the Rollup/Hierarchy/Cascade nature of the templates.
Over the long term, your maintenance work will be significantly less as you can easily break things down into simple templates for all kinds of stuff.
- Master
- Home Page
- Following Page
- My Very Cool Widget Page
- Products Page
- Products with Widgets
- My Special Landing Page Master
- My Very Cool Form Template
Managing the Page Template in WebEd9
Where can I find the Page Template module in the system?
-
1Log in as an administrator and go to the Admin Dashboard.
Learn how to log in here → -
2Go to Contents > Pages > Templates > Page Templates
How to create a Page Template?
-
1In the Page Template listing page, click on Create New Template
-
2In the Create screen, you can:
- Edit the page template content
- The Template Name must be unique
- {RenderBody} is required for all templates
- You can use the rich functionality of curly brackets defined here: Config curly brackets
- Or some of the Razor helpers defined here: /wiki/spaces/DEV/pages/13140017
- Choose the parent template
- Edit as needed (don't forget to insert your {RenderBody} tag)
- Click Save to save the template
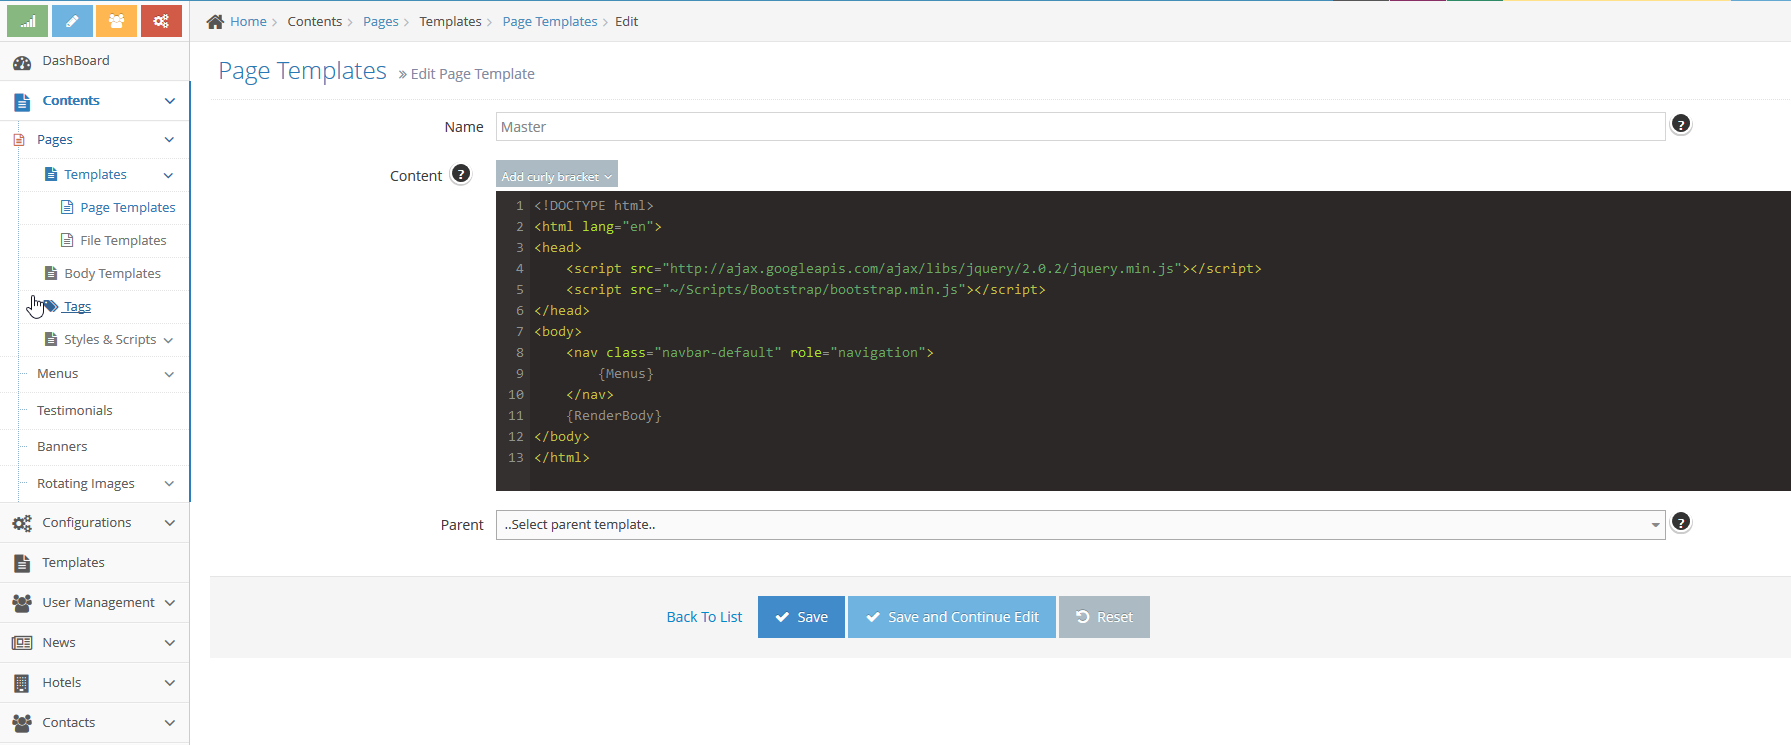
- Edit the page template content
How to use a Page Template?
-
1Log in as an administrator and go to the Admin Dashboard.
Learn how to log in here → -
2Click On Manage Your Website
-
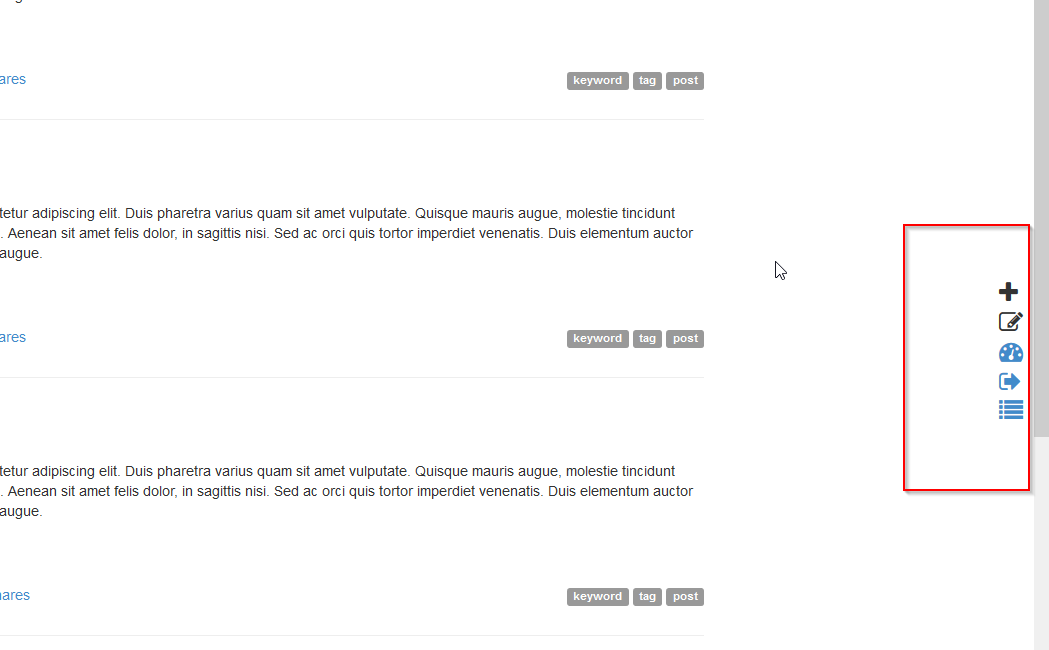
3The system will reload the page with admin icons on the right-hand side of the page
 <
<
Creating a new page
-
1Log in as an administrator and go to the Admin Dashboard.
Learn how to log in here → -
2Click On Manage Your Website
-
3Click the Plus icon to create a new page
-
4In the Create Page screen, input some required information
-
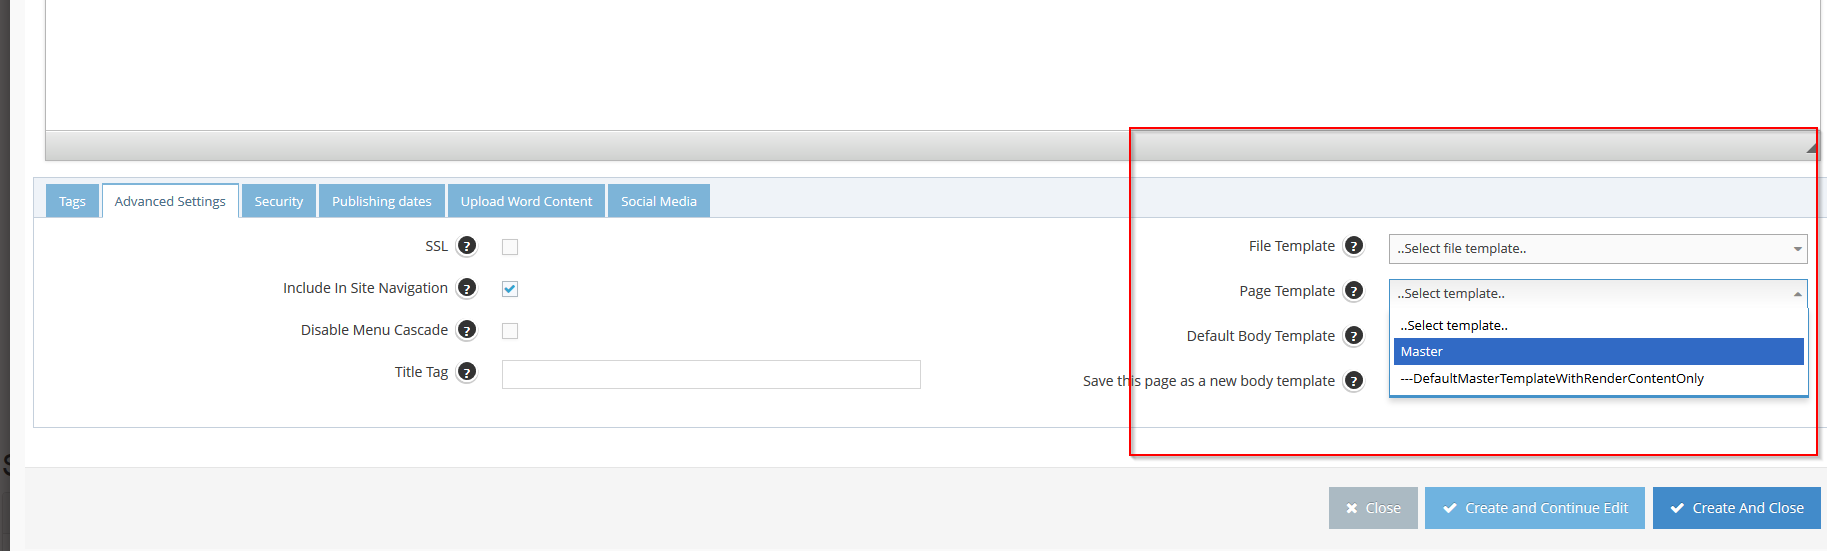
5Go to the tab Advance Settings at the bottom
-
6Choose the template you just create
-
7Click Create And Close
-
8The system will redirect to the newly created page with the template rendered
Applying a template to an existing Page
-
1Log in as an administrator and go to the Admin Dashboard.
Learn how to log in here → -
2Click On Manage Your Website
-
3Click the Plus icon to create a new page
-
4In the Create Page screen, input some required information
-
5Go to the tab Advance Settings at the bottom
-
6Choose the template you require
-
7Click Save And Close
-
8The system will redirect to the page with the template selected
The Technical Stuff
Warning! Danger! Geek speak ahead!
- Working with WebEd 9, all the templates/ scripts/ styles can be stored into the database making maintenance easy.
- There are 2 templates types
- Page Template for any page layouts
- File Template
- WebEd 9 template support Razor Syntax and C#
- You can use most of the features of Razor including:
- You can define section to render between Page Template: http://weblogs.asp.net/scottgu/asp-net-mvc-3-layouts-and-sections-with-razor (*)
- You can also write C# code inside the template
- You can use most of the features of Razor including:
- Page Template can be either a Master Template (no parent) or a child template
- All the content will be placed in {RenderBody} curly bracket
- If the page template has a parent template, then all of its content (except the (*) section) will be placed in the {RenderBody} of the parent template
- All the content will be placed in {RenderBody} curly bracket
- There are some extended helpers you can use when editing page template
- You can add dynamic script and style (from Scripts and Styles modules) in the template, more information here: How to manage and use dynamic Script / Style in the CMS?
- Currently, there are 2 default templates for the system is:
- DefaultMasterTemplateWithRenderContentOnly: this is used for setup some initialize script and HTML for a page like:
- Edit / Create/ Login / Logout / Site map buttons
- Some script is the default script that the CMS need to use like some information about user logged-in, user groups, email and id
- This template will always render as the final template in the system
- Master: This is used to set up the master HTML of the application where you can define sections and body for the page
- DefaultMasterTemplateWithRenderContentOnly: this is used for setup some initialize script and HTML for a page like:
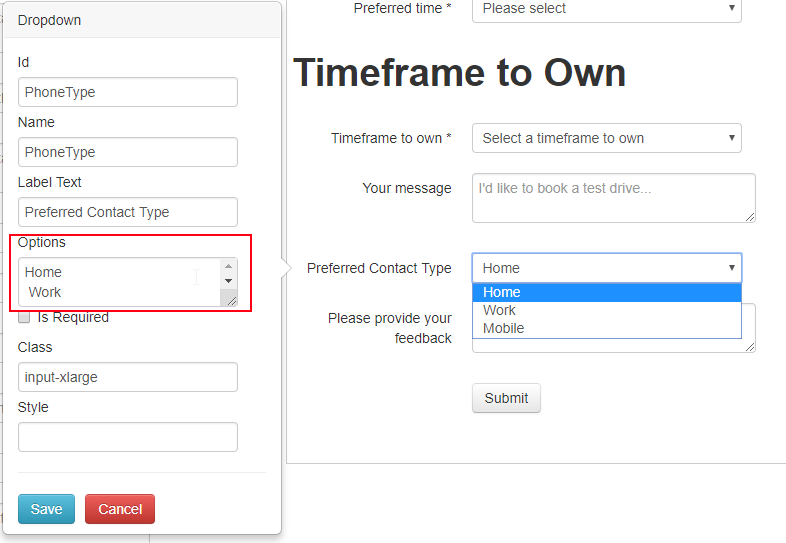
Form Builder: Add Custom Controls
Form Builder Overview
- Form Builder provides the ability for users to quickly create forms on the fly and embed them into any website.
- The form builder contains multiple predefined types of a component such as input, button, image, drop-down... and so on.
In this guide, we will demonstrate adding a custom control.
Form Builder Architecture
The form components are controlled by the Config.xml in {Solution Folder}\Web\Control\Config.XML
The XML format allows you to define
- Title - the name of the control
- Type - allowed types are:
Models Dropdown
-
1You can find the LIC file in WebEd.Web\Copy2Bin
-
2Locate the section "Components" we will find all components
-
3The format is:
- Title - what do you want the control called in the UI
- Name - how we can call it in code or ID
- Type - Valid types are:
- button
- checkbox
- checkgroup
- heading
- hidden
- img
- normaltext
- radiobutton
- radiogroup
- select
- textarea
- textbox
- SQL - the SQL statement to build the control values (only relevant for radio and listbox)
- Template - the template to use for the UI, use an existing one and check the result.
- Generally, Listbox and Radio will use this
- Validate - is this a required value by default

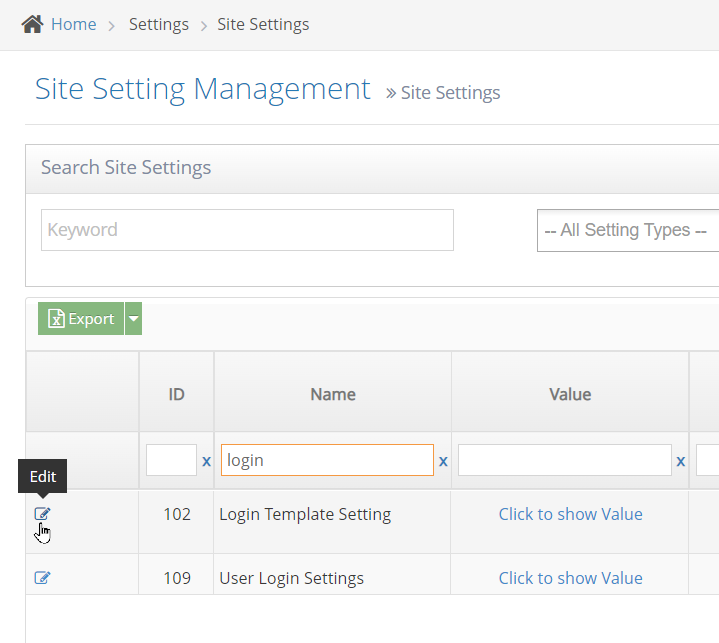
Editing the Login Template Setting
The Login Template Setting are controlled by the login site settings.
-
1Go to Settings > Site Settings.
-
2Then filter by typing "login" on the Name column field
-
3Click Edit to edit the settings
-
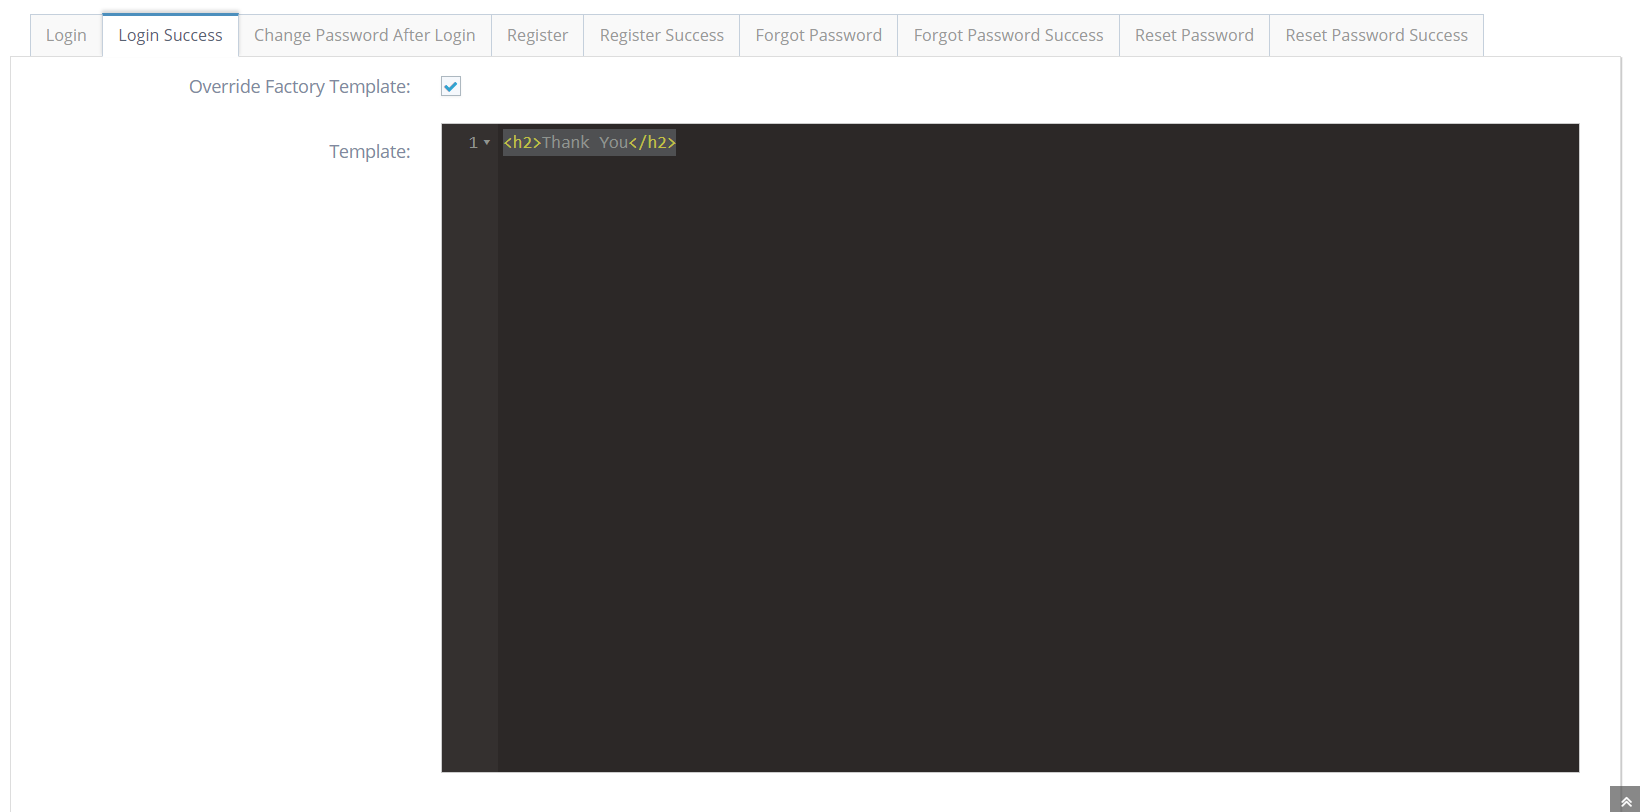
4Choose which template you want to change (Ex: Login, Login success, Reset Password,...etc)
-
5Check the Override Factory Template if you want to use your own template.
-
6Update the template using HTML as needed or edit the existing templates.Note: styles are controlled under Admin/Styles if you want to make style changes to the templates.
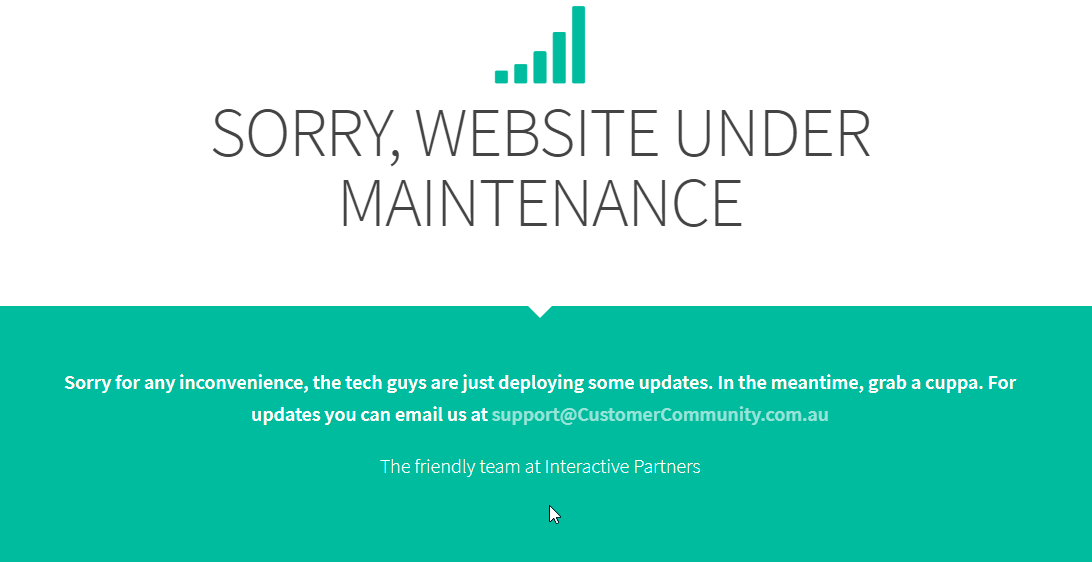
Maintenance Mode
When you want to deploy some new changes to your website, you may need to put your whole site under maintenance mode. This will show your client a friendly screen and message rather than a 500-error page
-
1Go to your site root folder
-
2Looking for the file app_offline.inactive.htm
-
3Change its name to app_offline.htm
-
4Rename the file to app_offline.inactive.htm again to bring your site back to working
-
5This is just a static HTML file with some styles. You can also edit it to get a new look
Webpage Load Performance
Webpage Load Performance Overview
This is a documentation of ways you can check your website's loading speed.
Introduction to Webpage Load Performance
Page speed is mostly controlled by the content. For example, you may have a lightly loaded "Contact us" page that has little content loading in under 1 second. On the same site, a page full of large videos or images may take 10 seconds to load. The page size will determine load speed generally.
For basic websites, a loading time of under 3 seconds is our aim. But automotive sites tend to have lots of content and images, so we try to get the sites loading in under 4s, which makes it considered good for an automotive site. This is because some dealers use very large images which then means we miss the target time. Content is the limiting factor.
File Size
The file size checks for how many pixels the image contains in bytes. For example, an image of 2,340,000 pixels has a file size of 2,340,000 bytes or about 2.34 MB (this is because there are 1024 bytes in a kilobyte and 1024 kilobytes in an MB).
The recommended file size of images is less than 100 kilobytes for a fairly small image, and within 200 kilobytes for banners and large images.
Why you need to check your website's page load performance?
- The loading speed of your website affects your user experience, no one wants to wait for a slow-loading page.
- Visitors will wait no more than 3-5 seconds for the web page content to appear before abandoning a site.
- Recent stats show a half a second difference in page load time can make a 10% difference in sales for an online retailer.
How to check a page's load performance - Tip! don't use Google PageSpeed Insights
You might have read several articles telling you to use Google's PageSpeed Insights to measure your website's performance, here's why it is bad advice:
- PageSpeed Insights does not measure the loading time of your pages.
- The PageSpeed grade you get on the result is not an indicator of page speed. It is a score based on some fixed assumptions.
- For example, it ignores the lazy loading of images which is a known technique to improve the visitor experience.
- In PageSpeed Insights, no website ever gets a perfect grade, so it is impossible to get 100. This means you are targeting between 0 and 80, not 100 as it appears to suggest.
- The score on Page Insights does not correlate to loading speed.
How to measure your website speed?
So given the above cons of PageSpeed Insights, what should I use to accurately measure my website's load performance?
The answer is your browser's Developer Tools.
- Developer Tools is accurate, easy and free.
- It is a true measurement of a page's loading time.
- You can measure the page's load time perceived by your users and the loading time once all Javascript, CSS and files have been loaded.
How to use your browser's Developer Tools to check a page's load performance?
See Developer Tools in action
Here's the demo for checking a page's performance by using Developer Tools on Chrome or Internet Explorer browser.
Guide on checking a page's load performance
-
1Open your browser
-
2Load the page you want to check.
-
3Click the F12 button on PC, and other platforms:
-
Chrome:

- "More Tools" > "Developer Tools"
-
Internet Explorer:

- "F12 Developer Tools" on the dropdown.
Google Chrome Internet Explorer 

-
-
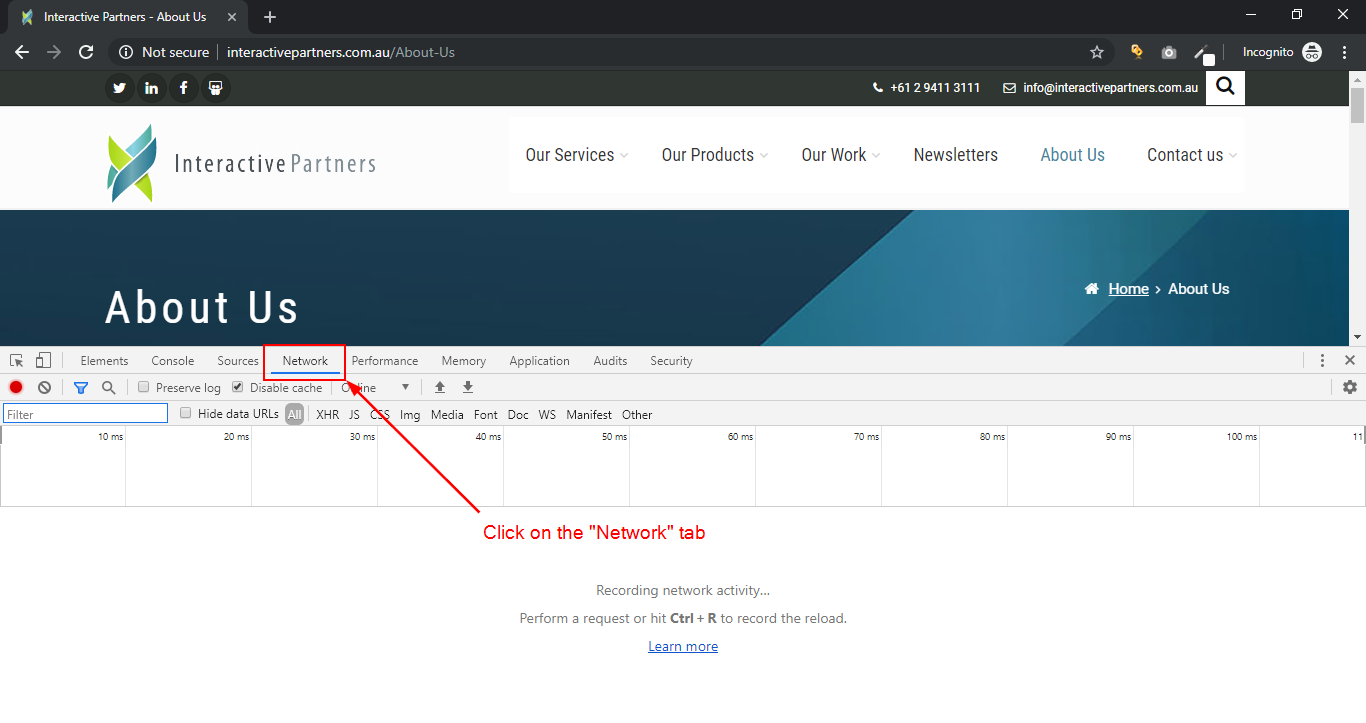
4A window like this will open at the bottom (or on the side of the browser).
-
5Click on the "Network" tab.
-
6Reload the page and watch for the results.
-
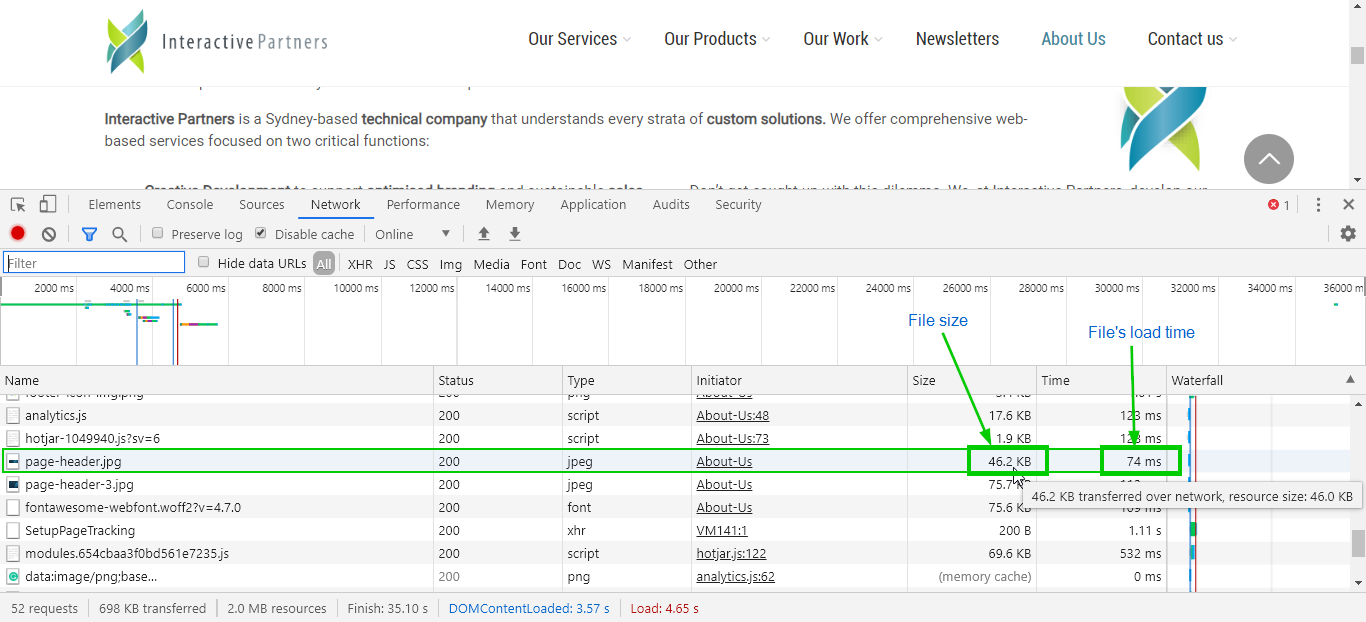
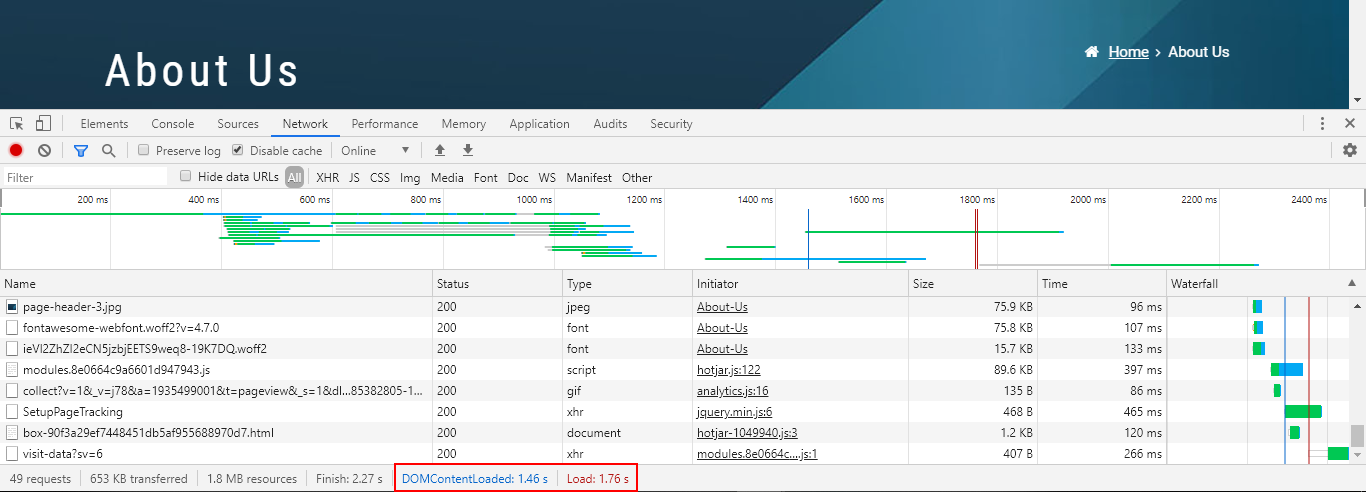
7Once the page has been completed, you can see the waterfall results showing the
-
8At the bottom of the pane are the two important records for optimisation, "Load" and "DOMContentLoaded".
-
Load - this event is the time to load the page, including all of the JavaScript, CSS, and image files that are in the original HTML document. This event generally takes longer than the DOMContentLoaded event.
-
DOMContentLoaded - this event represents the perceived time by a user to load the page. It is time to render the page as described in the original document before JavaScript requests additional resources. This time is stored when the browser fires the DOMContentLoaded event in JavaScript. (An example of a resource that is requested outside of the DOM is Google Analytics.)
-
-
9Additionally, you can check each file's size and load time on the page.
- Generally, files like images have a huge impact on the page load, this is why images should be optimised.
-
10Under "Name", you will find the filenames of each file, on the same row, the file size is displayed under "Size", and the load time is under "Time".