- Where Will PDFs from Forms Be Attached?
- Display PDF Changes When Checkbox is Checked
- Attaching a Different File with a PDF
- What if Multiple Events on One Page Use Different Word Templates?
- Setting Up a Word Template
- Using a Word Template for PDF Creation in Events
- Adding a Default Word Template of PDF Form for All Events
Event PDF attachment on email
Where Will PDFs from Forms Be Attached?
This documentation shows information on managing event PDF attachments on email notifications.
Created PDFs from event forms will be attached in the following emails :
- Booking confirmation email - which will be emailed to the organiser email of the event after the attendee submits the booking form.
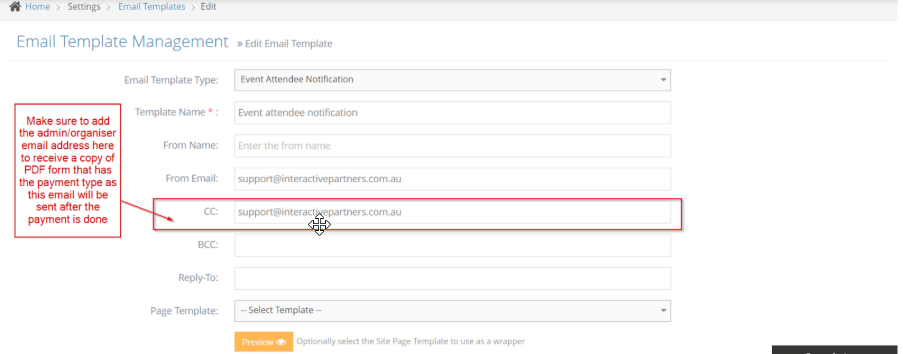
- Attendee notification email - which will be emailed to the attendee after the payment is done.
NB! Since the payment type may not be included in the PDF created in the organiser email, you can cc the email of the Event organiser on the Attendee Notification email template so they can also receive the PDF attachment with the Payment type. Here’s a video guide on how to find the Attendee Notification email template for the Event.
Display PDF Changes When Checkbox is Checked
It will display as "on" if the checkbox is ticked and empty if not.
Attaching a Different File with a PDF
It is not part of the original requirements, so it is not possible for now.
However, you can either add the text on the word template or create a page that includes the content of the file and then add the link on the word template. As a result, it will display as a hyperlink on the PDF form attached to the email and they can just go to the pages created for the terms and conditions.
What if Multiple Events on One Page Use Different Word Templates?
If all events on the same page have their own different Word Template, all of the PDF forms will be received by both the organiser and the attendee. So if the page has three different events and three different word templates, all of the three PDF forms that are created will be received by the attendee.
Setting Up a Word Template
What is a Word Template
It is a word document (.doc or .docx) that will be used as a template for the PDF creation.
What is a Curly Bracket
Curly Bracket { } is a script that will help the system add the details from the event-form to the PDF.
Finding the Curly Bracket ID
-
1Log in as an administrator and go to the Admin Dashboard.
Learn how to log in here → -
2Go to Modules > Forms
-
3Search for the event form that is being used
-
4Click the
 "Edit" icon to edit the event form
 -
5Click on the form field you wish to save on your PDF document
-
6Look for the “ID / Name” on the popup window
-
7Copy the “ID / Name” of the field
How to add the Curly Brackets on Word Template properly
-
1Open the word document
NB! Should be .doc or .docx -
2Add the copied ID/Name on the document
NB! Make sure you put it between the two Curly Brackets. For example below the ID/Name is FirstName, it should be added on the document like this - {FirstName}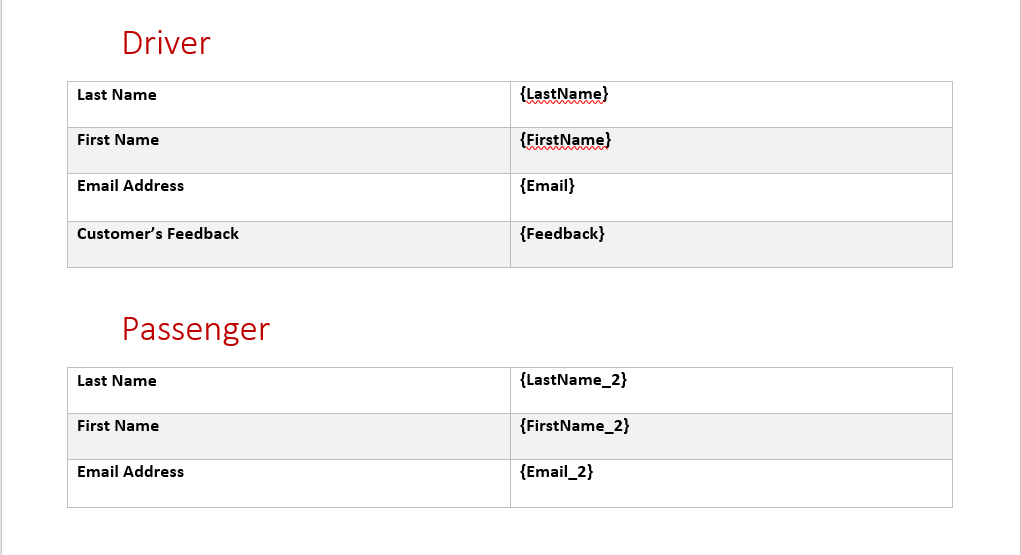
-
3Save the changes on the word document and you are now ready to upload the template for the event using the guide on
How to Add Word Template of PDF form in Events link here → -
4
If there are fields that have the same ID/Name. Please follow the below:
- Get the duplicate fields ID in the Form then add an underscore and chronological order number after the field ID/Name - i.e Three FirstNames will have a record of FirstName_1(Can also be just FirstName), FirstName_2 and FirstName_3. We are using field_(index) format and not field(index) because there are fields with numbers in them like AddressLine1.
- When the admin wants to check the index or the chronological order of the duplicate fields, use the order of the Fields in the form builder to find the index
NB! To get correct results, make the duplicate fields required.
NB! The ID/Name of the form fields under the Marketing tab can't be renamed. However, some of the form fields on the Marketing tab are also on the Form Elements tab - there you can rename the ID/Name of the form fields. -
5Congratulations! - you have now finished creating a word template.
Using a Word Template for PDF Creation in Events
-
1Log in as an administrator and go to the Admin Dashboard.
Learn how to log in here → -
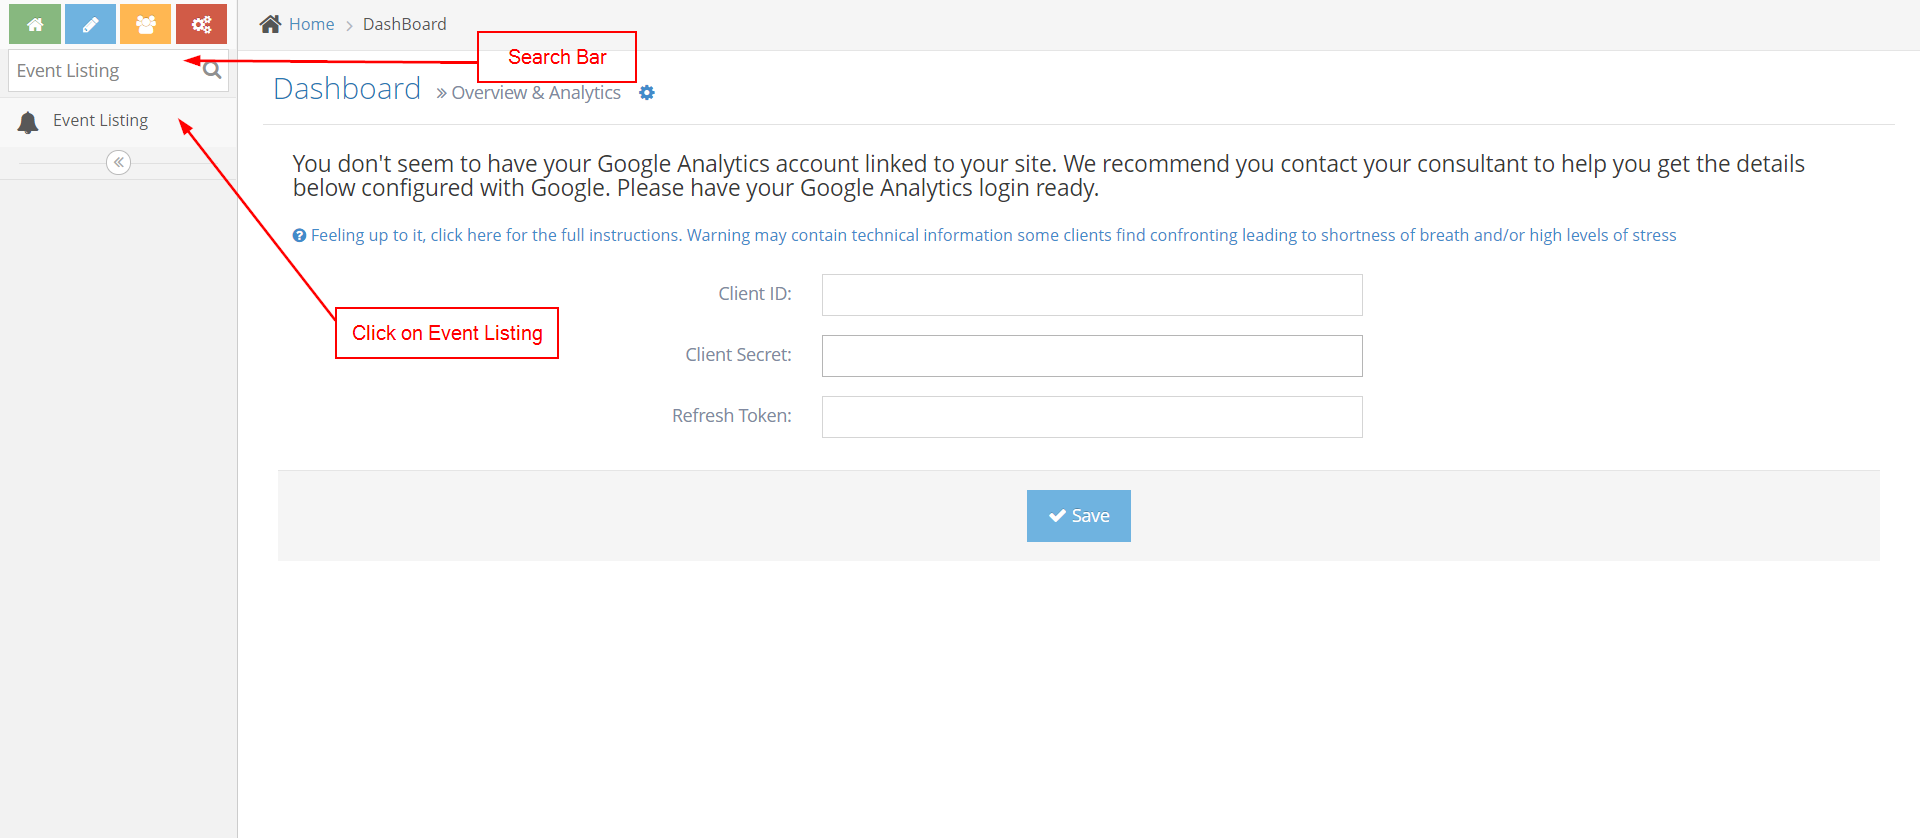
2On the Search bar at the top left of the Admin Dashboard, search for Event Listing
-
3Click Event Listing
-
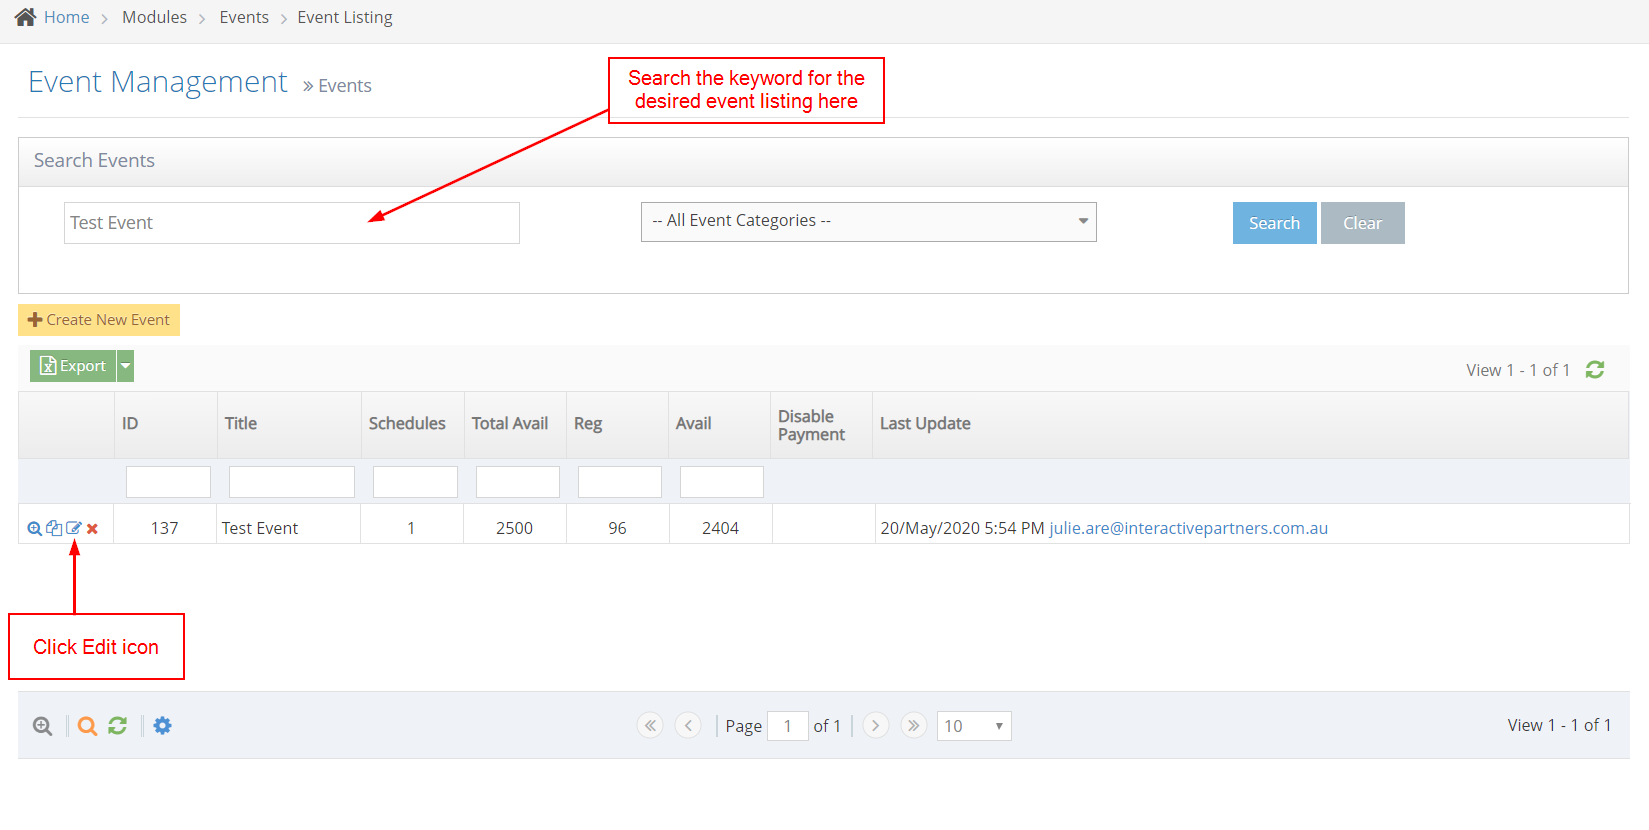
4Search for the desired event listing in the Search Events section in the Keyword search bar
-
5Click the edit icon on the left side of the desired event listing
-
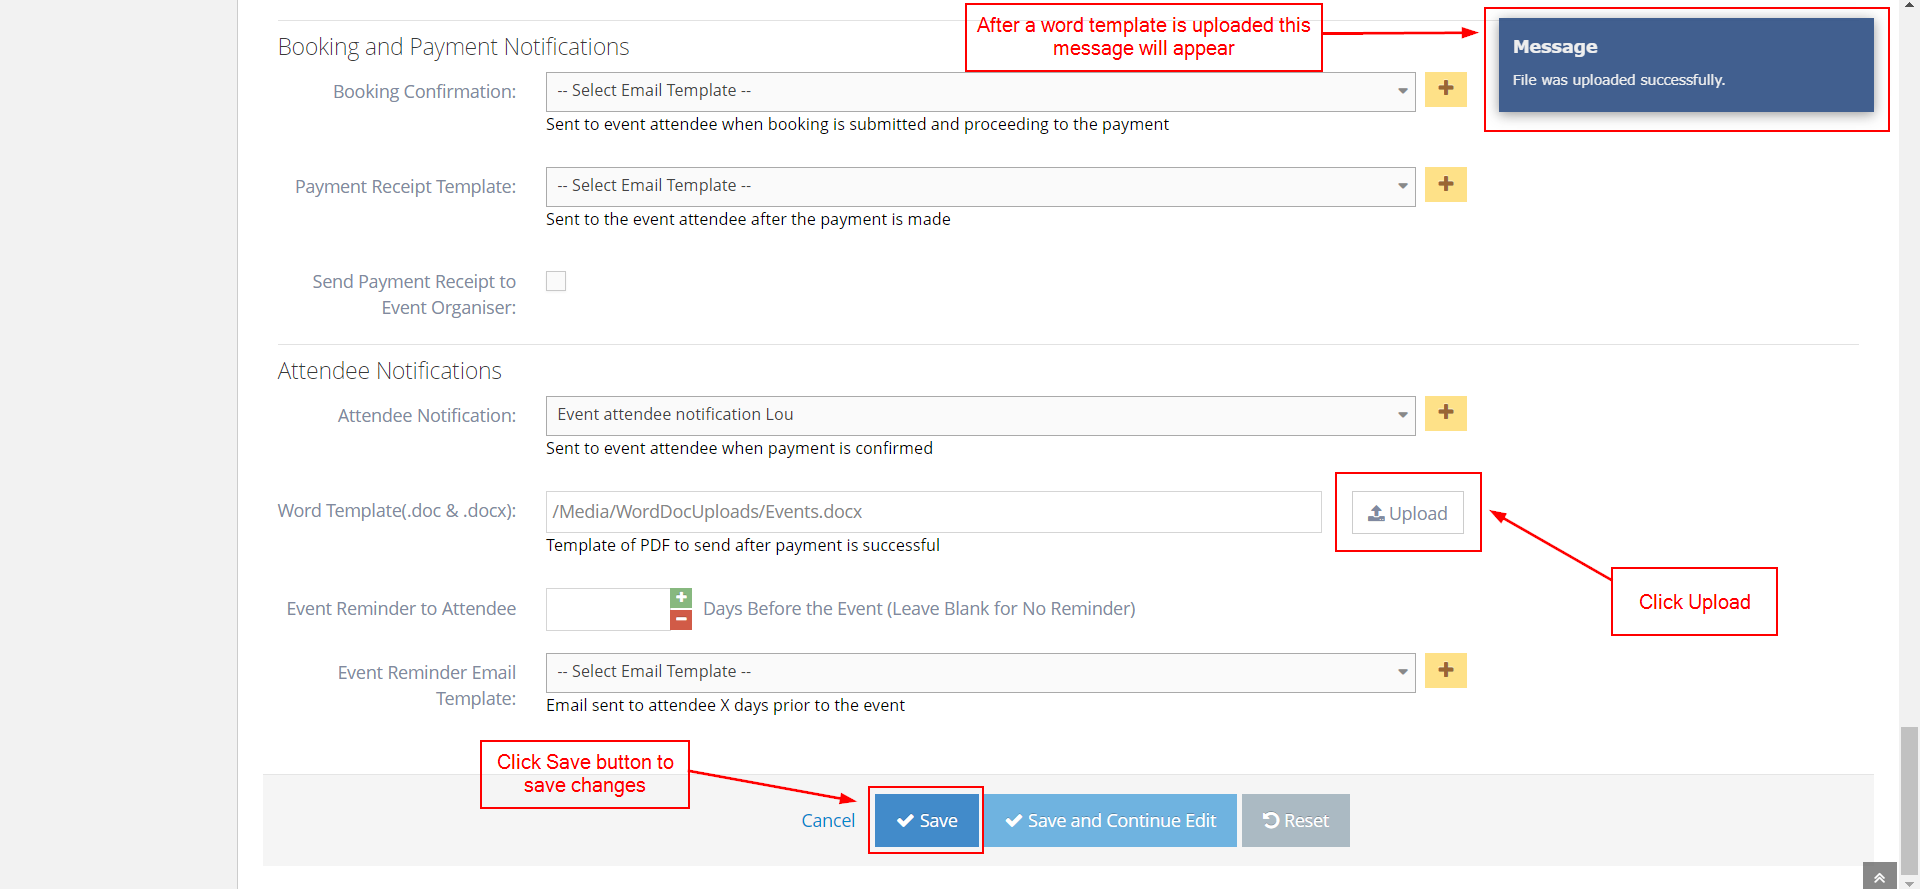
6Click Upload on the Word Template(.doc & .docx) section at the bottom part of the event settings
-
7Upload the word templates
NB! Word template cannot be longer than 3 pages. -
8Click Save
-
9Congratulations! - you have now added an event word template. See related articles below.
Adding a Default Word Template of PDF Form for All Events
NB! If you have a Word Template set in the Event, the system will use this. If not the system will check if a site setting word template is set. If not no PDF will be attached to the email.
-
1Log in as an administrator and go to the Admin Dashboard.
Learn how to log in here → -
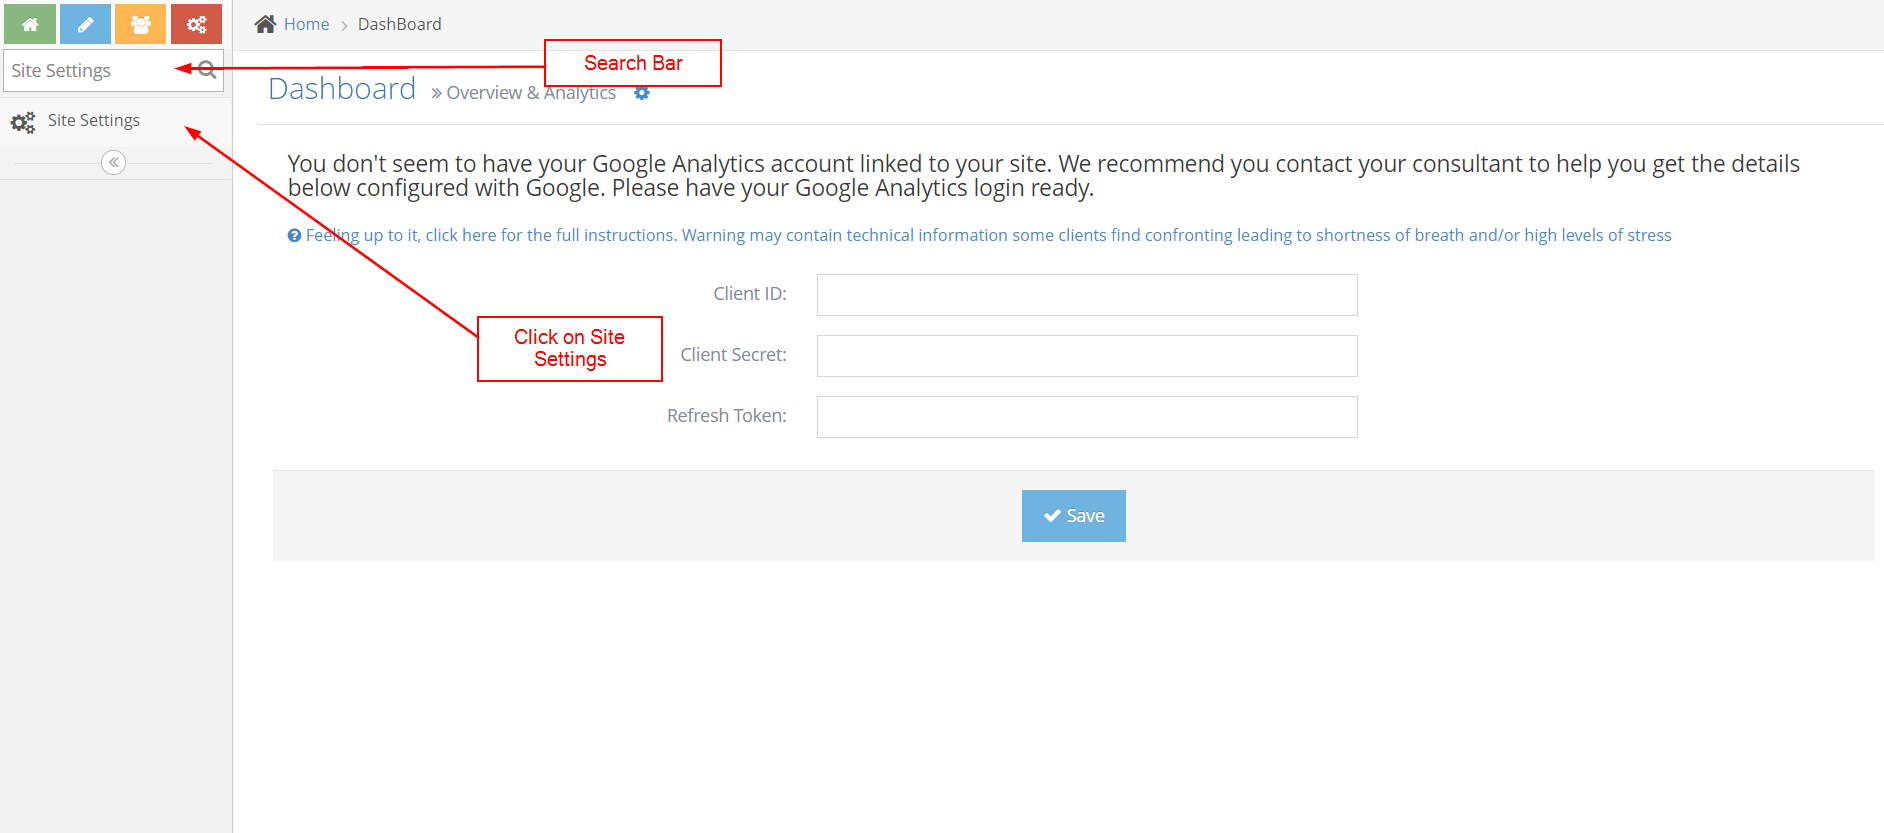
2On the Search bar at the top left of the Admin Dashboard, search for Site Settings
-
3Click Site Settings
-
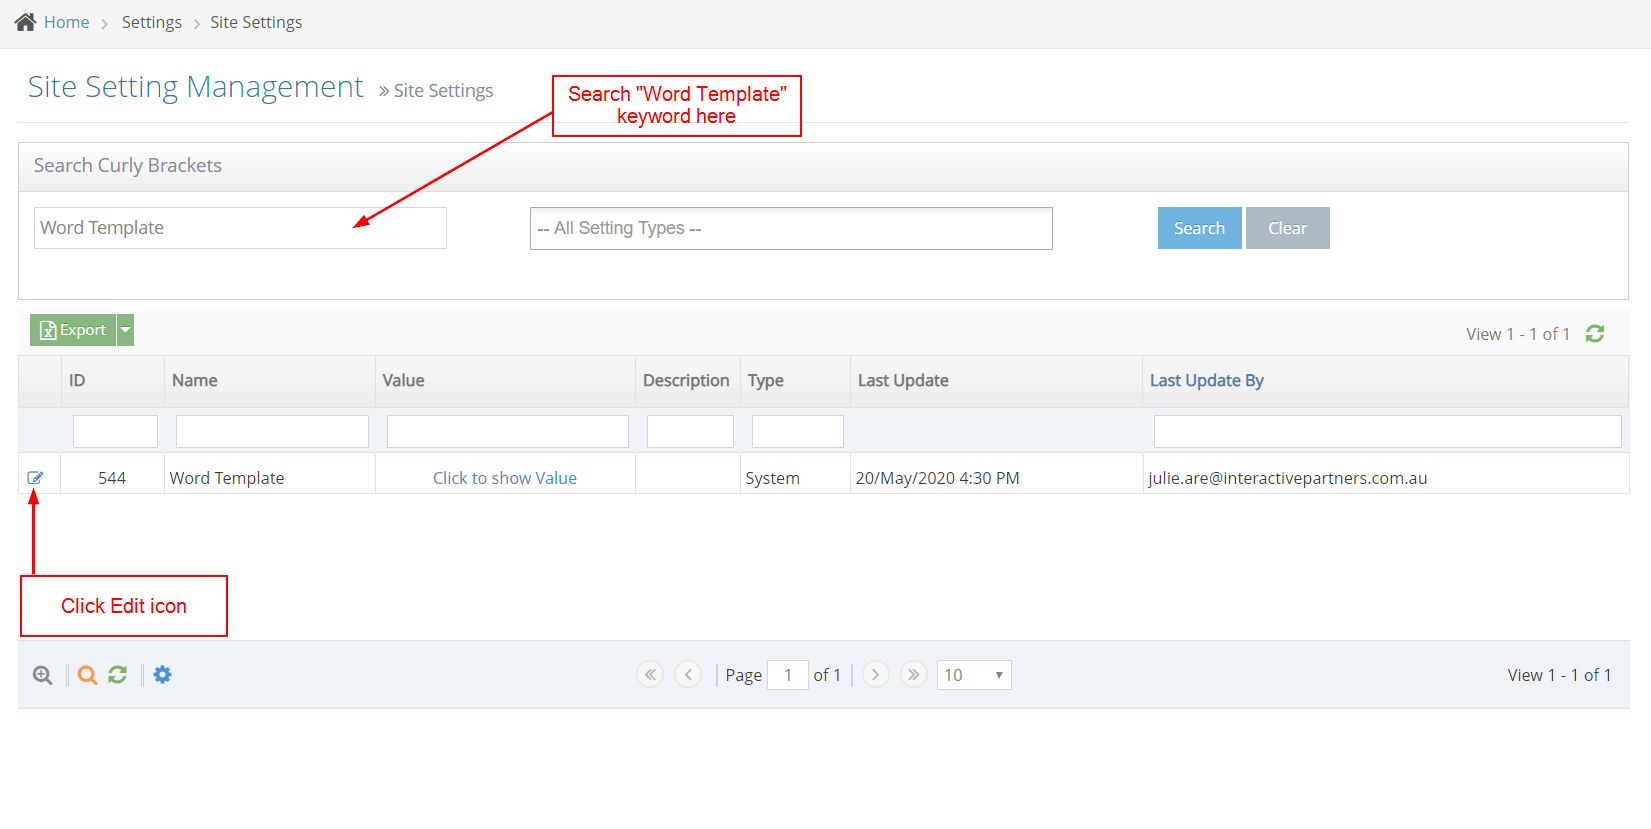
4On the Search Curly Brackets section, search Word Template at the Keyword search bar
-
5Click the edit icon on the left side of the Word Template
-
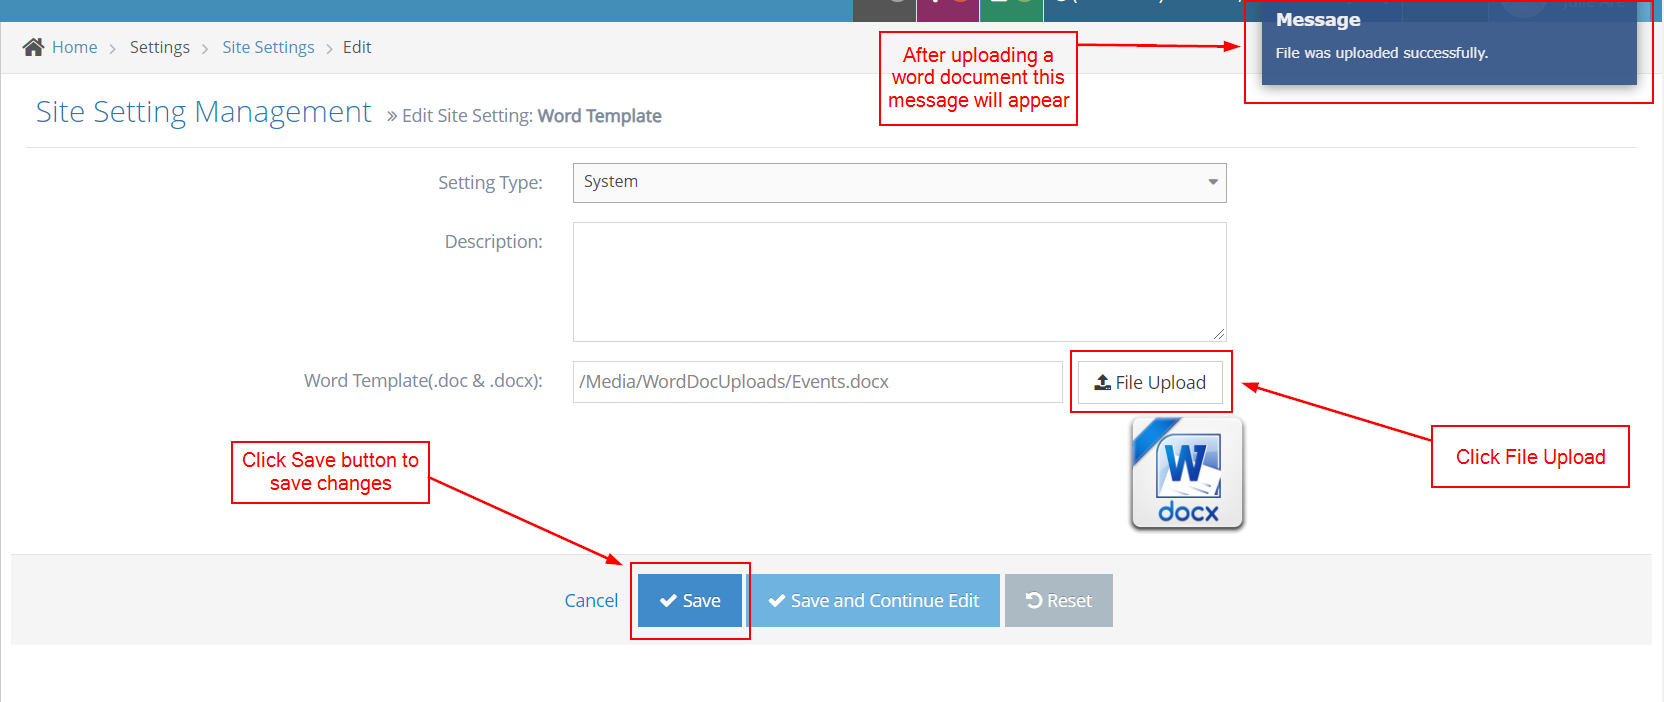
6Click File Upload on the Word Template(.doc & .docx) section
-
7Upload the word template NB! Word Templates cannot be longer than 3 pages.
-
8Click Save
See the demo here
-
9Congratulations! - you have now added a default event word template. See related articles below.