Why you would use an Event Ticket Pool module
A Ticket Pool module lets users manage the ticket pools which will then be linked to an event/event booking.
Creating an Event Ticket Pool
STEP-BY-STEP
-
1Log in as an administrator and go to the Admin Dashboard.
Learn how to log in here → -
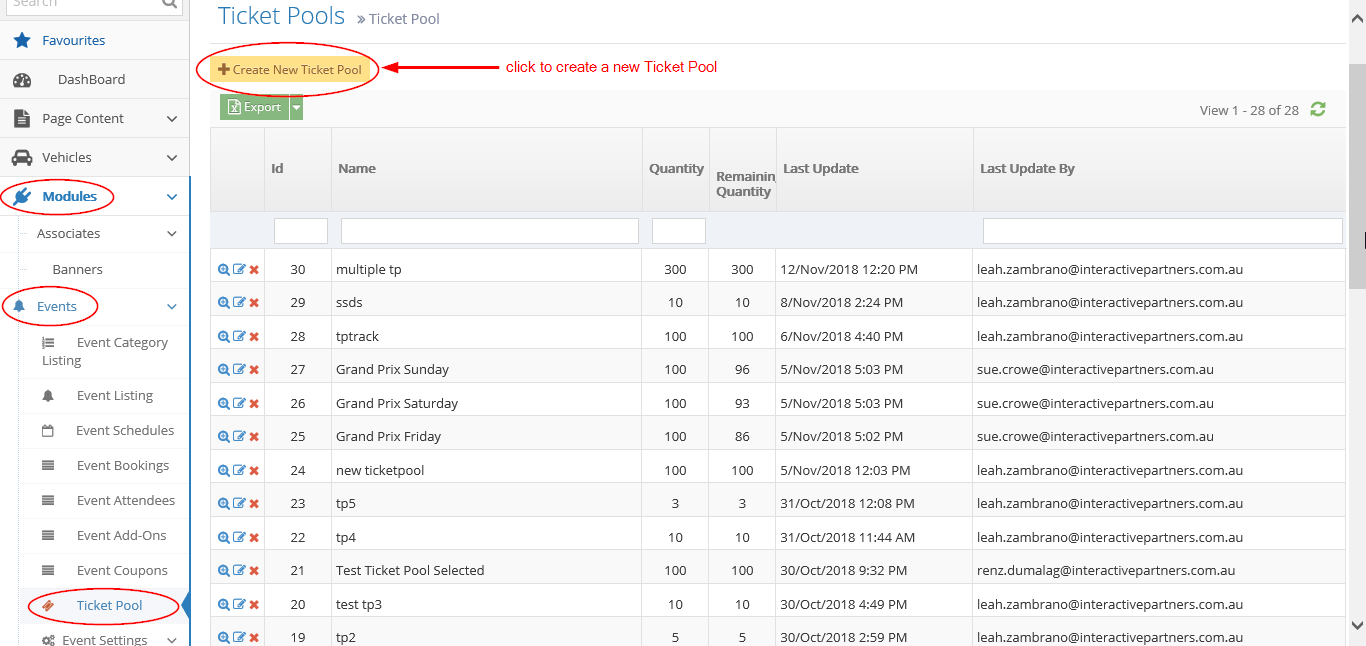
2Go to Admin > Modules > Events
-
3Select 'Ticket Pool'
-
4Click the 'Create New Ticket Pool' button
-
5Fill up the Ticket Pool Information
- Name - enter the name of the new ticket pool. This field is required.
- Quantity - enter a number for how many attendees will be attending a specific event. This field is required.

-
6Submit the new ticket pool
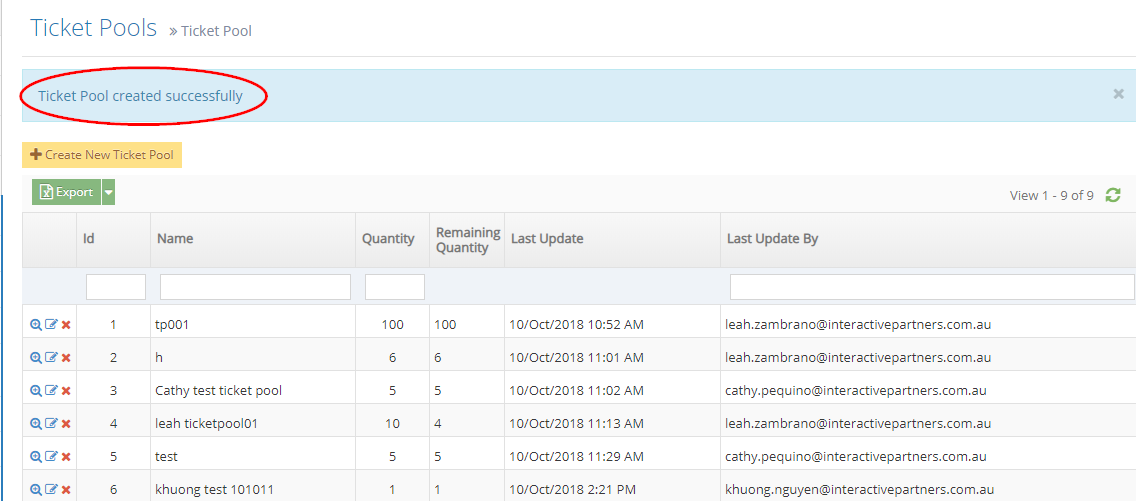
- Create - click the 'Create' button to submit the new ticket pool. This action creates your ticket pool, closes the page and redirects you to the Ticket pools page (see the image below). On the Ticket Pools page, you will see a note "Ticket Pool created successfully".
- Create and Continue Edit - Click the 'Create and Continue Edit' button to submit the new ticket pool. This action creates your ticket pool but lets you stay on the page.
- Reset - click the 'Reset' button to start over. This action refreshes the page and shows a blank 'Create Ticket Pool' page. Your ticket pool will not be saved/created.
Events and Schedules linked to a Ticket Pool
STEP-BY-STEP
-
1Log in as an administrator and go to the Admin Dashboard.
Learn how to log in here → -
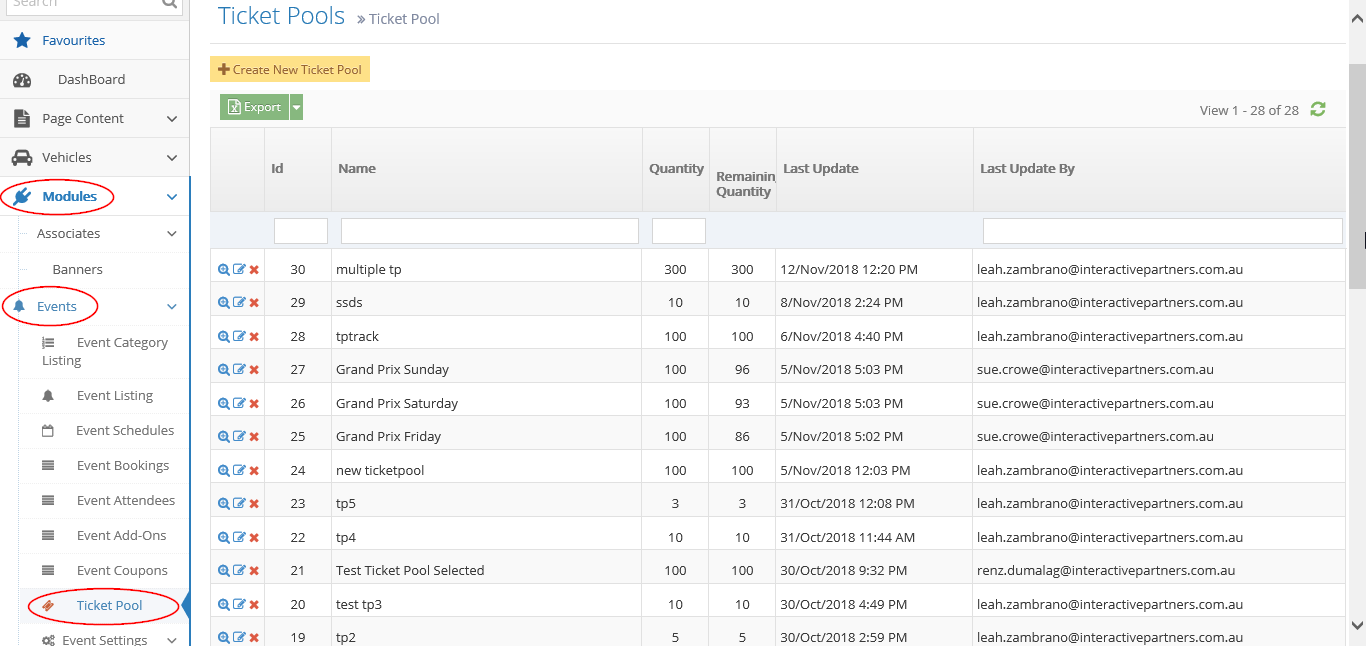
2Go to Admin > Modules > Events
-
3Select 'Ticket Pool'
-
4From the Ticket Pool listing, search for the ticket pool you want to edit
-
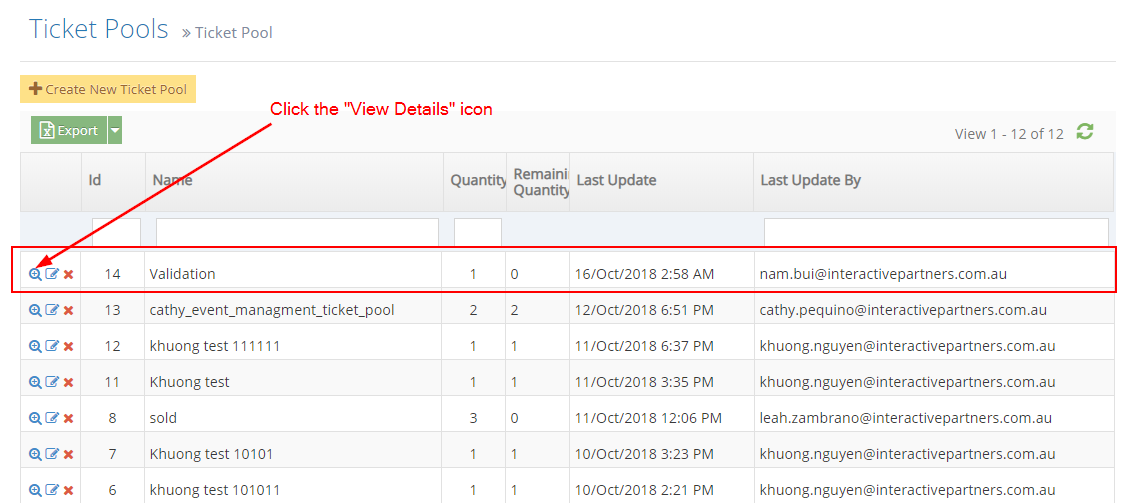
5Click the
 "View Details" icon to see the ticket pool's details
-
6Navigate to "Events" or "Event Schedules"
-
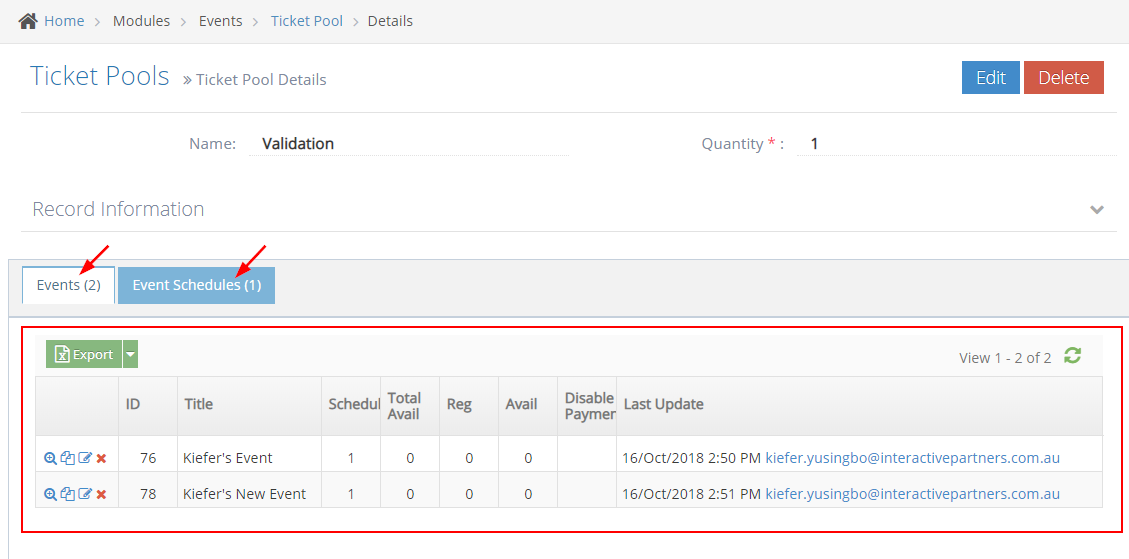
7Under "Record Information", select the tab you want to check
- Events - select the "Events" tab to see the events using the ticket pool
- Event Schedules - select the "Event Schedules" tab to see the event schedules are associated with the ticket pool
- The events and event schedules will be displayed in a listing as shown below:
Editing a Ticket Pool
STEP-BY-STEP
-
1Log in as an administrator and go to the Admin Dashboard.
Learn how to log in here → -
2Go to Admin > Modules > Events
-
3Select 'Ticket Pool'

-
4From the Ticket Pool listing, search for the ticket pool you want to edit
-
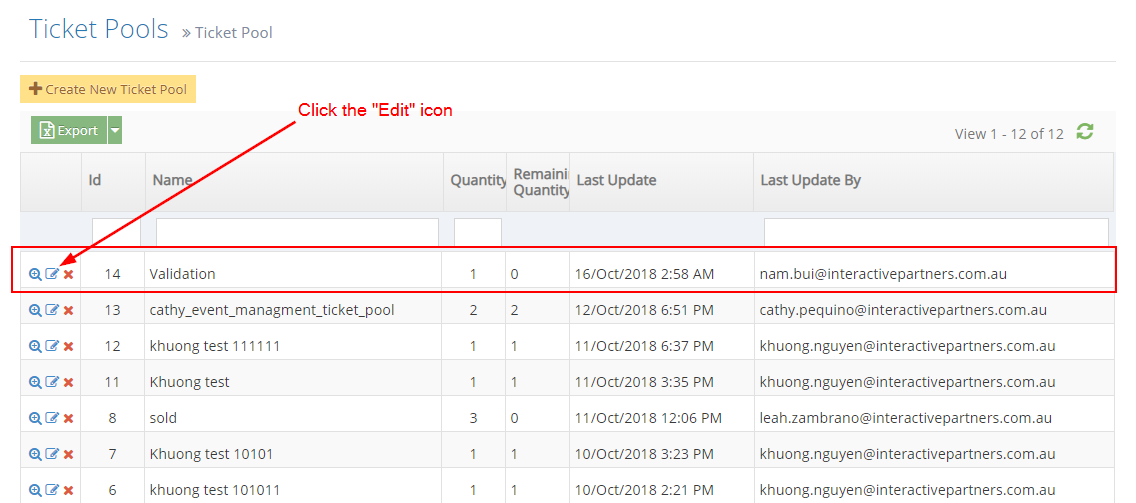
5Click the
 "Edit" icon to edit the ticket pool
-
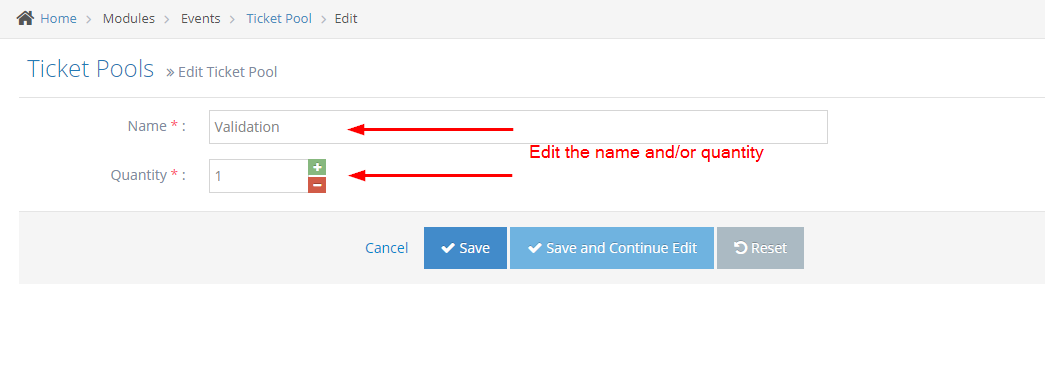
6Update the information
- Name - current ticket pool name is displayed, enter new information here.
- Quantity - current ticket pool quantity is displayed, enter the new quantity here.
-
7Save the changes
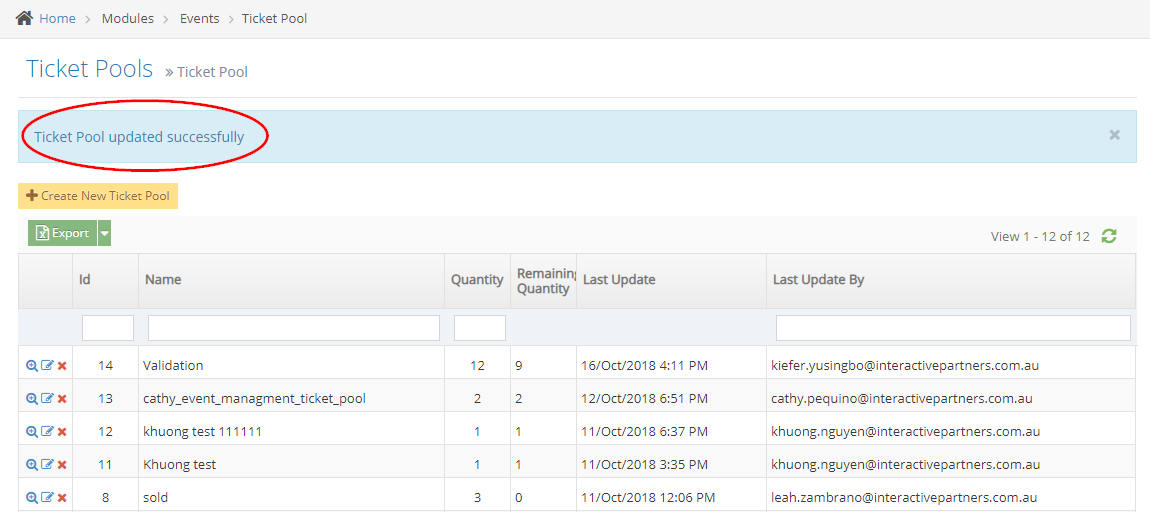
- Save - click the 'Save' button to save your changes. This action saves the new information, closes the page and redirects you to the Ticket Pools page (see the image below). On the Ticket Pools page, you will see a note "Ticket Pool updated successfully".
- Create and Continue Edit - Click the 'Create and Continue Edit' button to save your changes. This action saves the new information but lets you stay on the page.
- Reset - click the 'Reset' button to start over. This action refreshes the page and shows the current information.
Deleting a Ticket Pool
STEP-BY-STEP
-
1Log in as an administrator and go to the Admin Dashboard.
Learn how to log in here → -
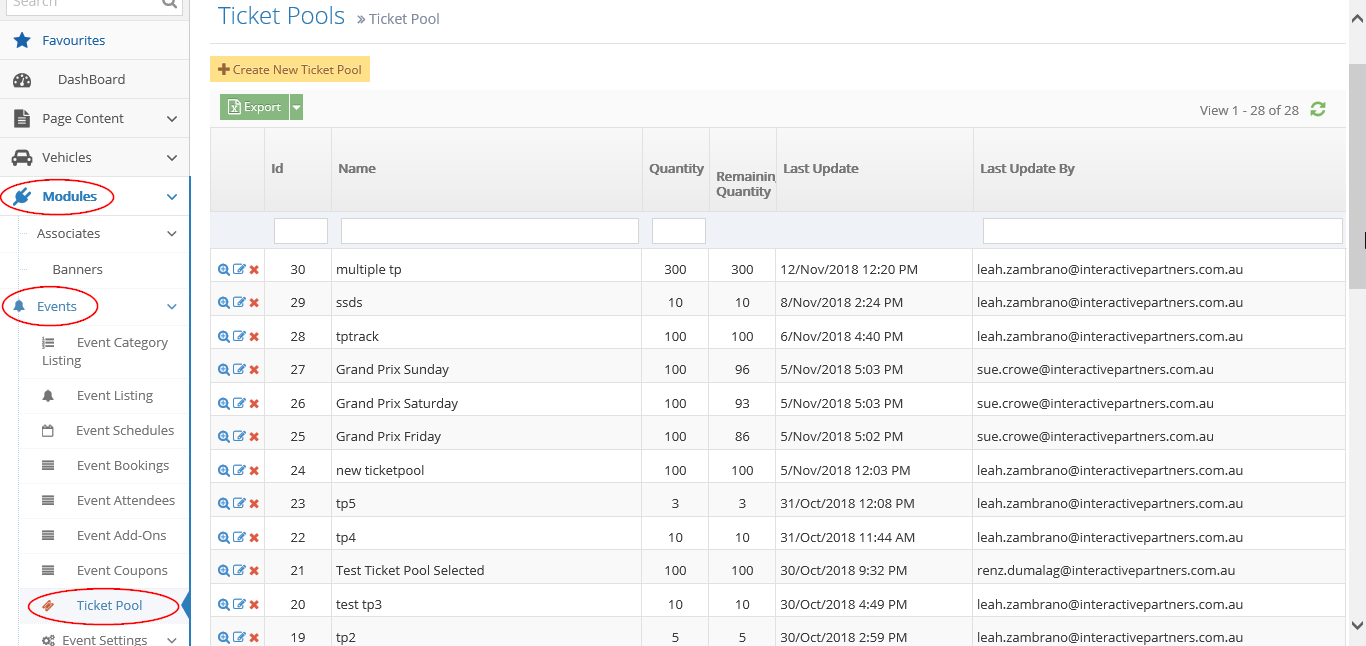
2Go to Admin > Modules > Events
-
3Select 'Ticket Pool'
-
4From the Ticket Pool listing, search for the ticket pool you want to delete
-
5Click the
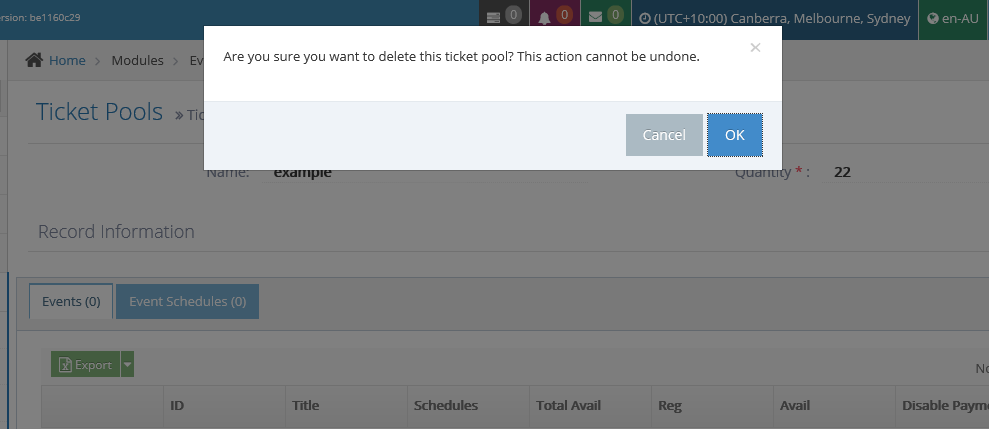
 'Delete' icon to delete the ticket pool
-
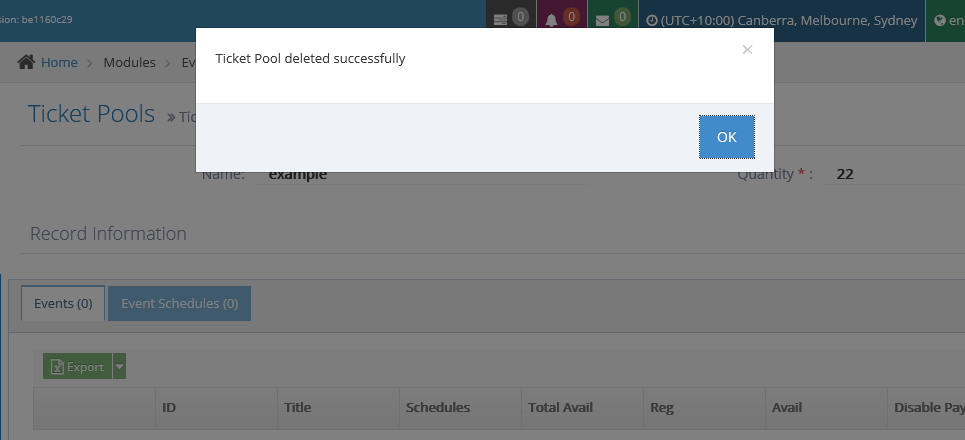
6Click 'OK' to delete the ticket pool.
-
7Click 'Cancel' if you want to cancel.
-
8Click 'OK' to go back to the Ticket Pool listing.
