Configuring Editor Tool Bars for User Groups Overview
Group Messages
What is a group message?
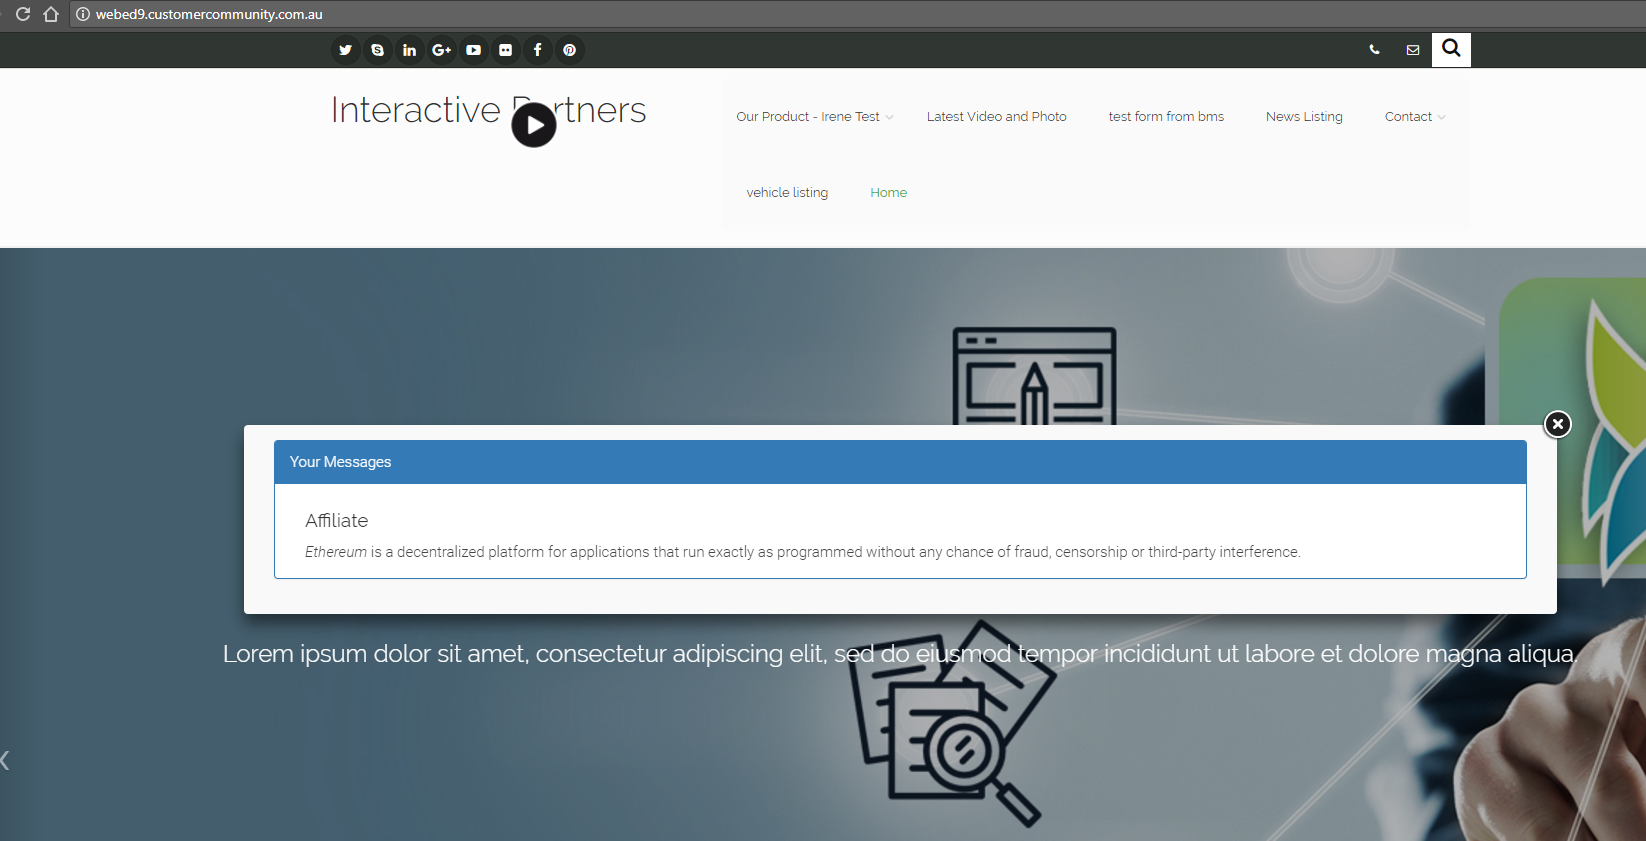
A group message can be used to notify a group of users on login. Each member of the group will see a message on the screen when they log in to your portal or website.
Not sure about user groups? See how to manage User Groups
Why would you use a group message?
This function provides a simple way for the admin can send messages to users in many groups at the same time. This module can be very useful if an admin user wants to send information through a bulk of users or organisations.
- An example of a Group Message
Creating a Group Message
-
1Log in as an administrator and go to the Admin Dashboard.
Learn how to log in here → -
2On the left navigation, select User Management > Group Messages
-
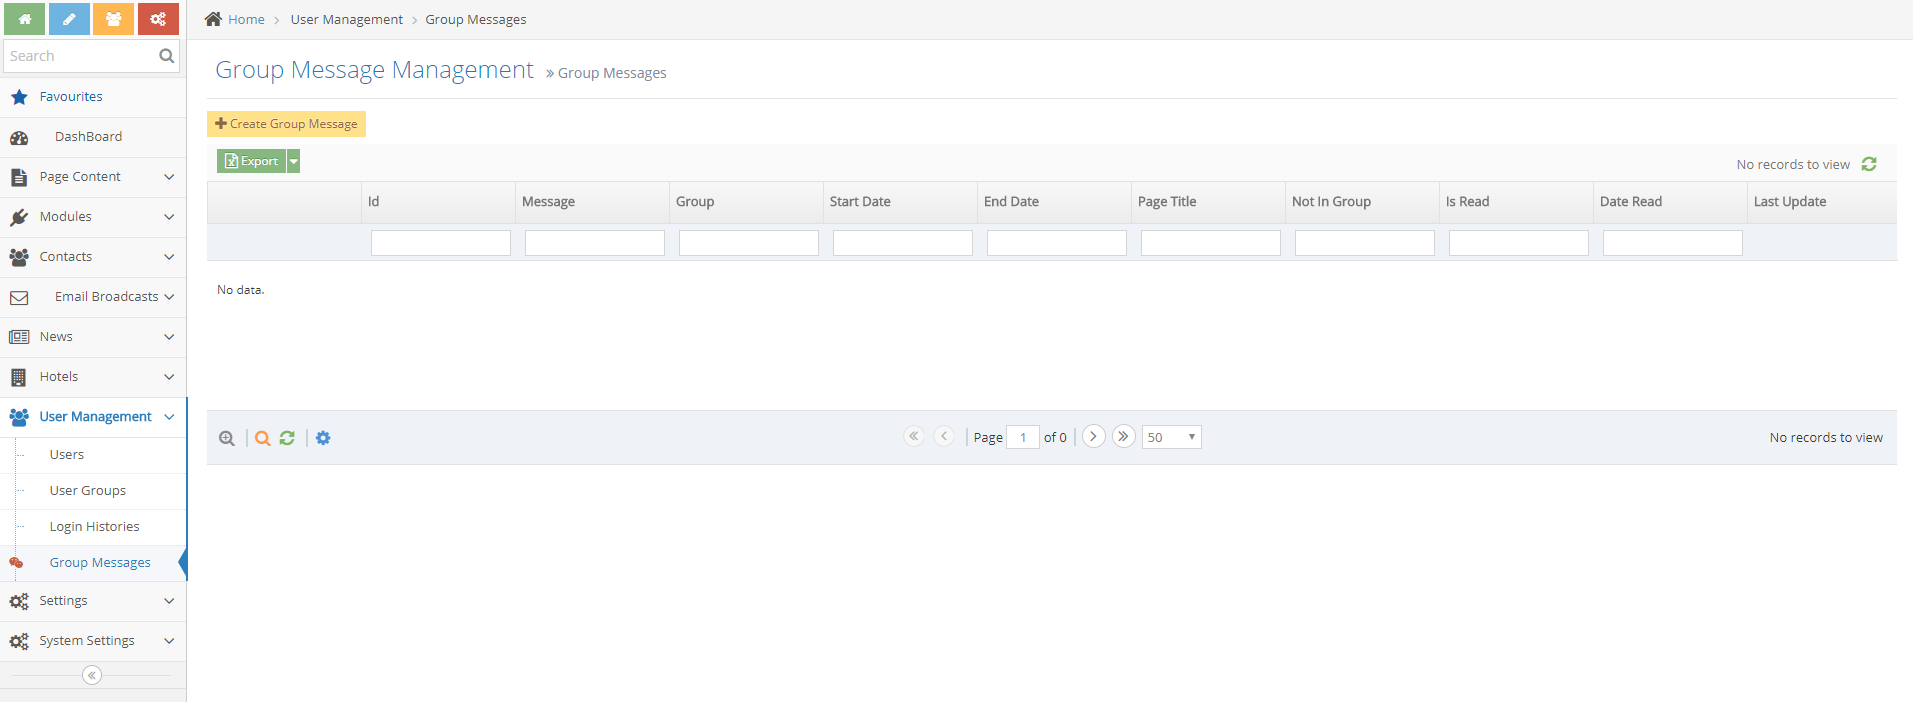
3Create a message on the Group Message Listing page
-
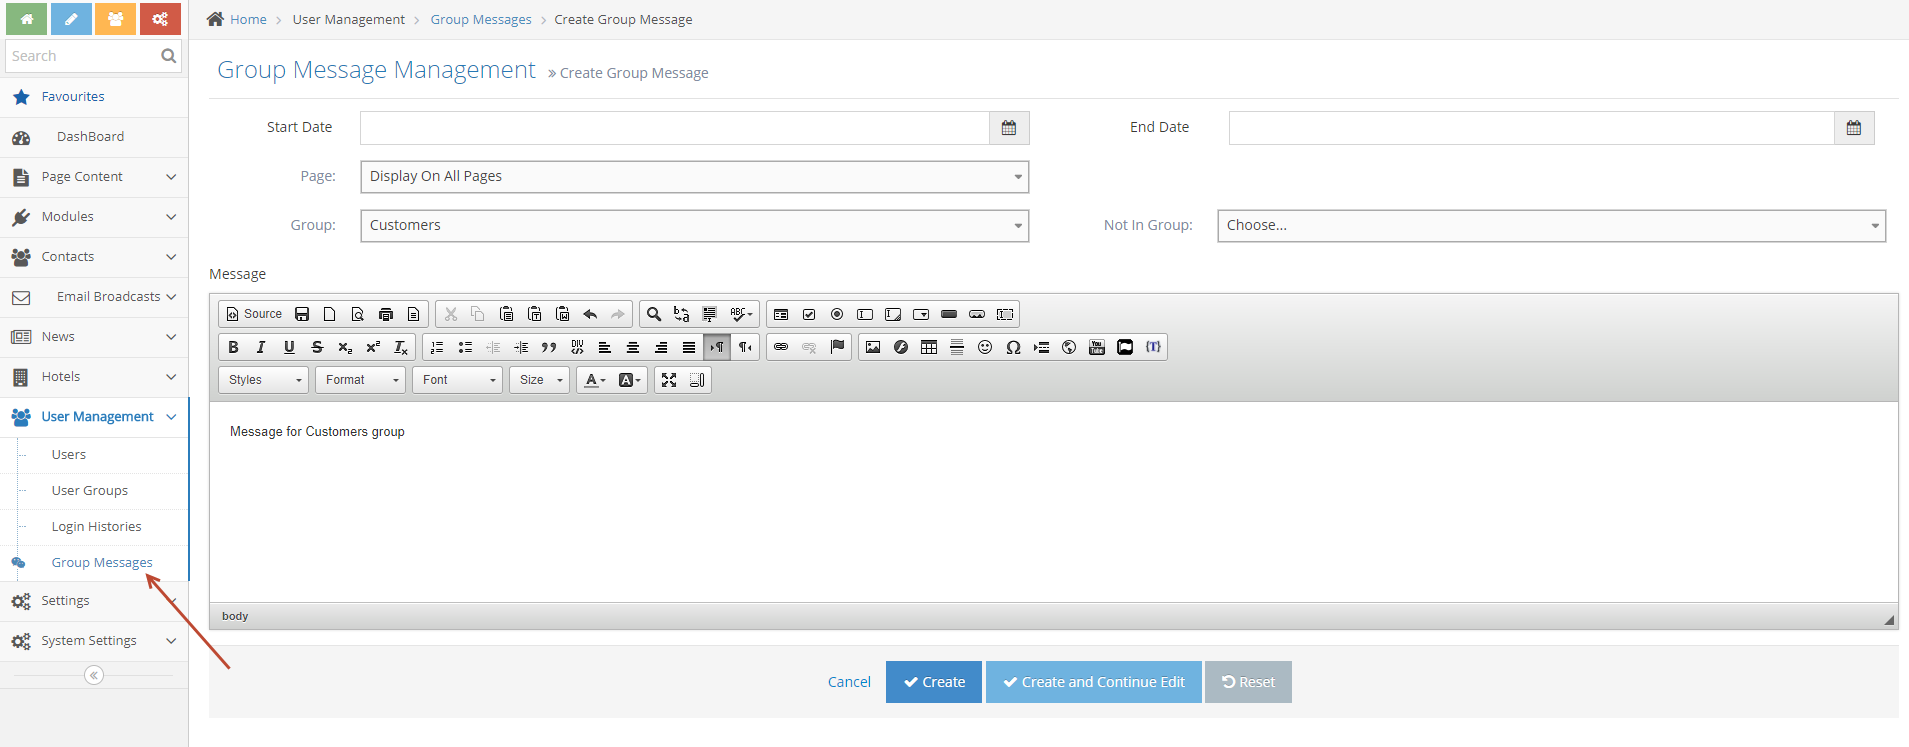
4Click on the Create Group Message button
Fill in the following details:- Enter an optional Start and End Date if you want to control the group messages by date
- Page: select a page on which the message will show, normally this would be set to the home portal main page visited by most people
- Select the Group: The group which will be shown the messages (mandatory)
- Not In Group: Users who may be in the group selected for the messages but are also in this group, will not see the messages
-
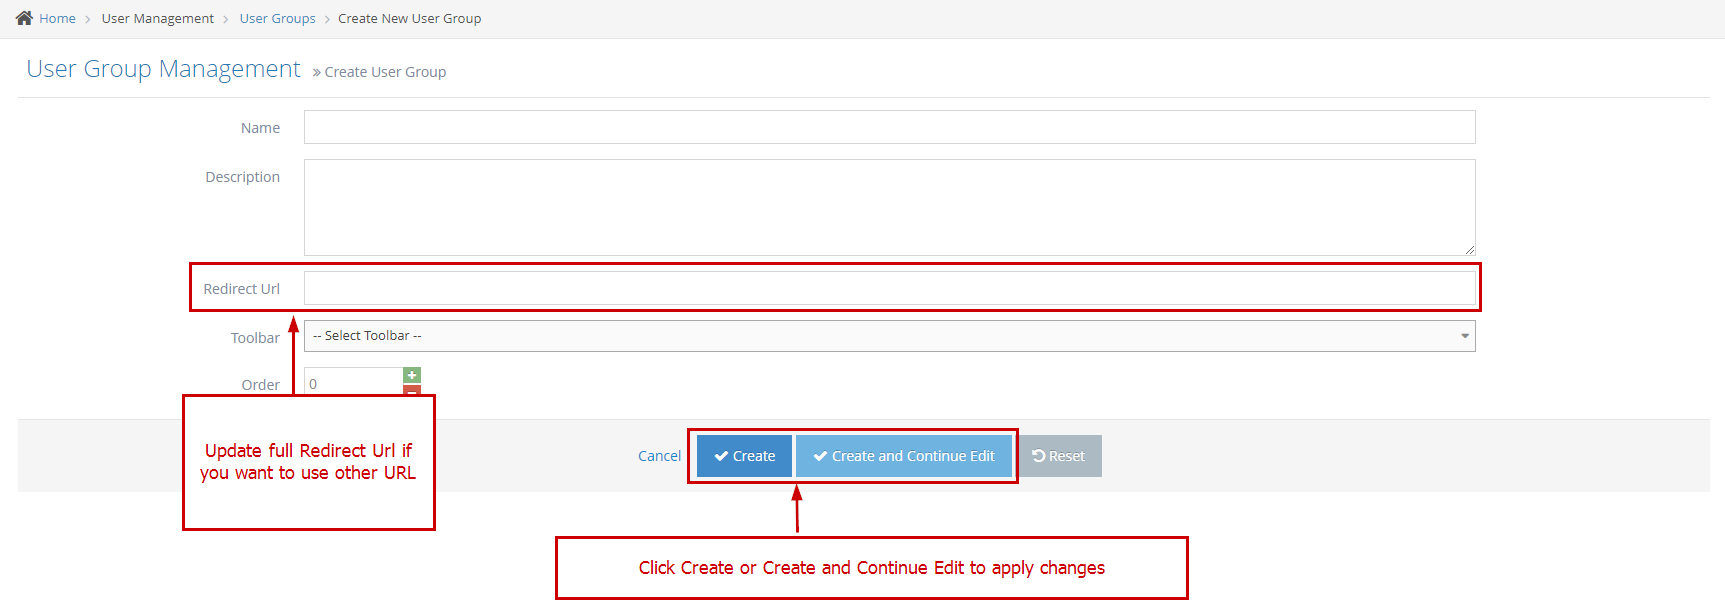
5Click Create or Create and Continue Edit once done
Group Redirects
Why use the Group Redirect Module?
Often a company wishes its users to land on a specific page - regardless of where else they may need to go on the website.
This is the way to control the landing page for a specific group
How to automatically navigate to a document or page?
When a client has Logged In successfully, the user will be redirected to the URL specified in the Group settings.
Creating a Redirect for a User or User Groups
-
1Log in as an administrator and go to the Admin Dashboard.
Learn how to log in here → -
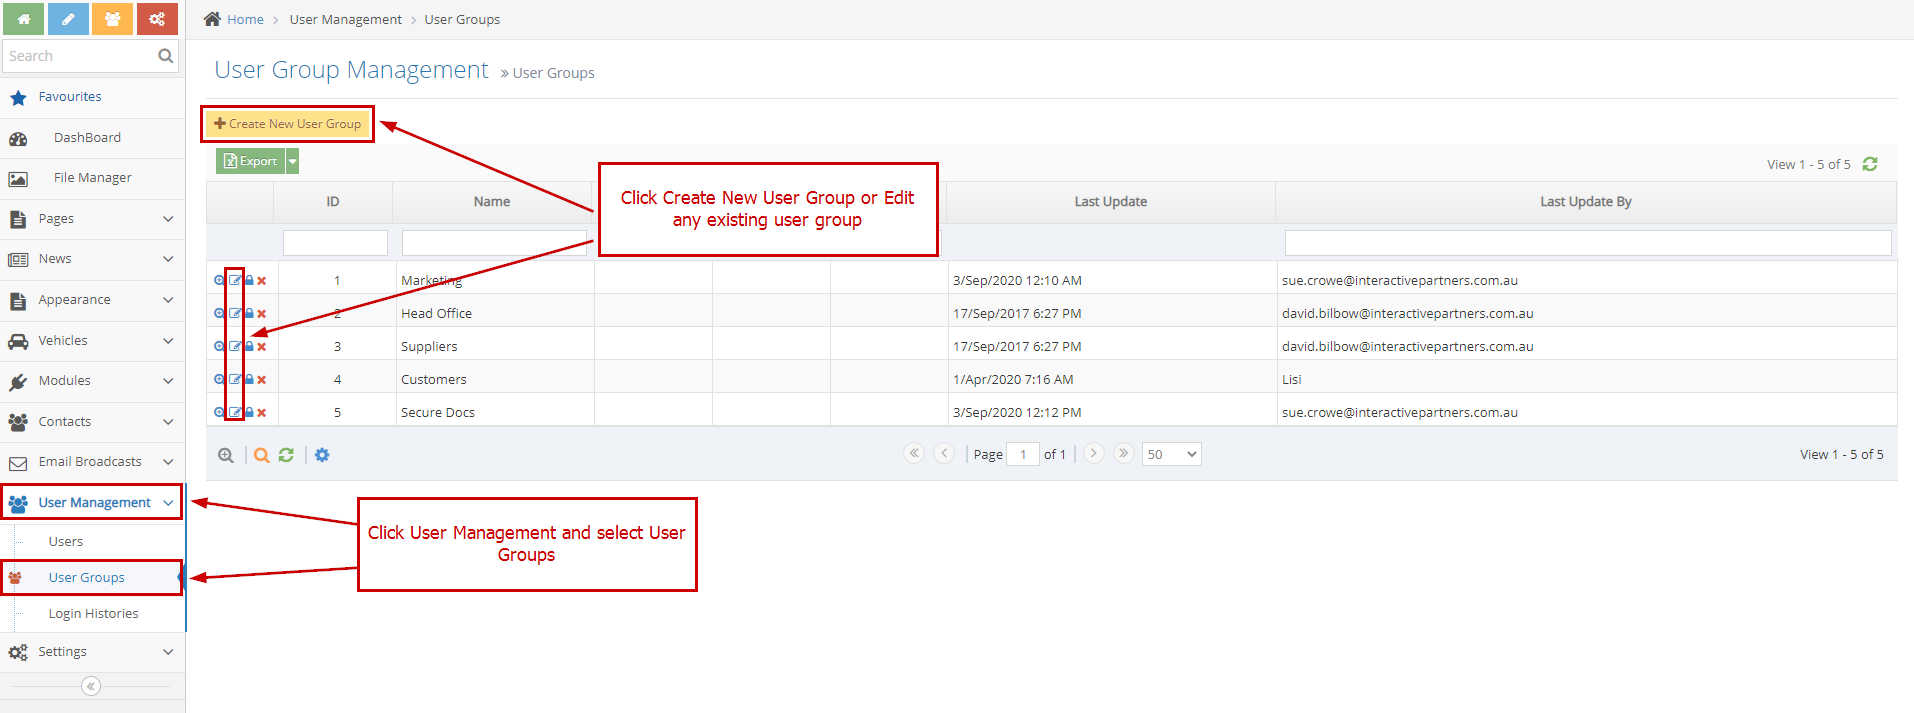
2Click User Management > User Groups
-
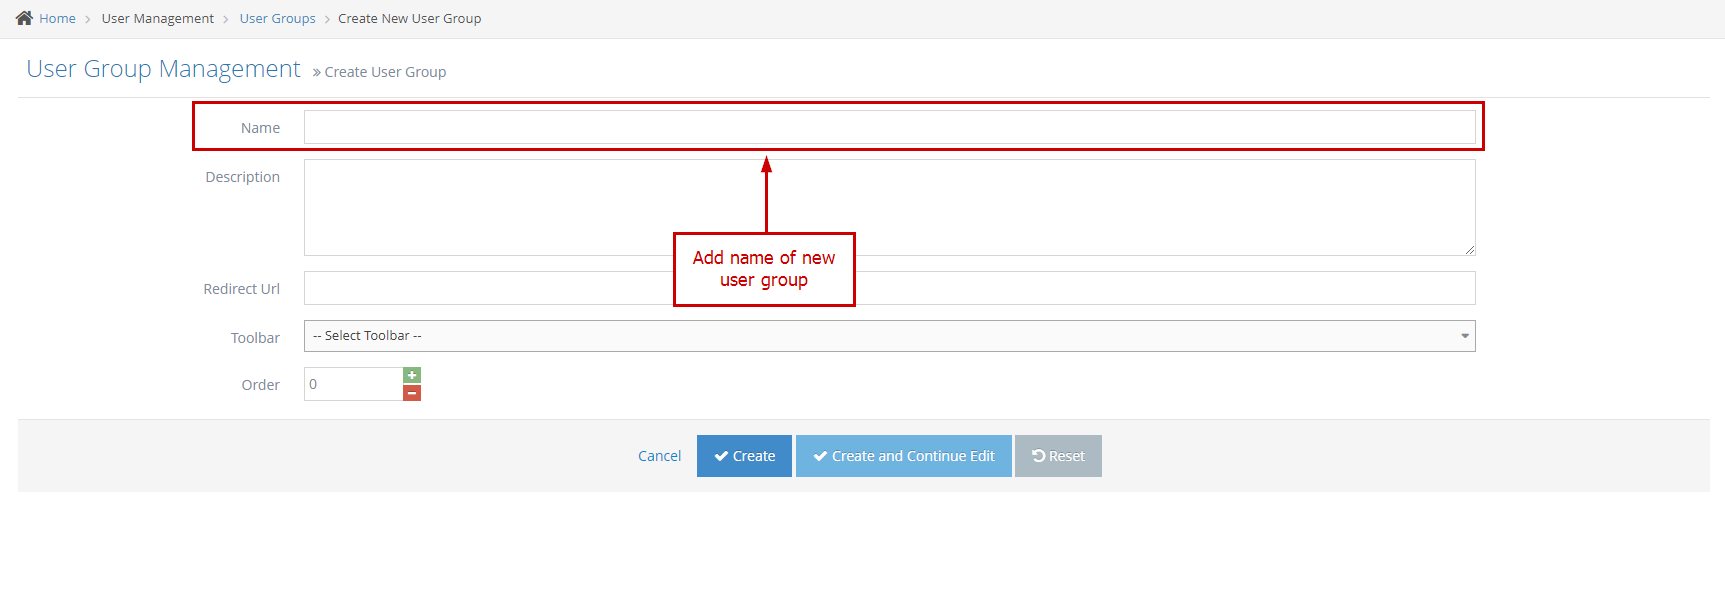
3Create a New User Group (or edit the name of an existing group)
-
4Update Redirect URL in the available User Group
Set Up User related to User Group
-
1Log in as an administrator and go to the Admin Dashboard.
Learn how to log in here → -
2Go to User Management
-
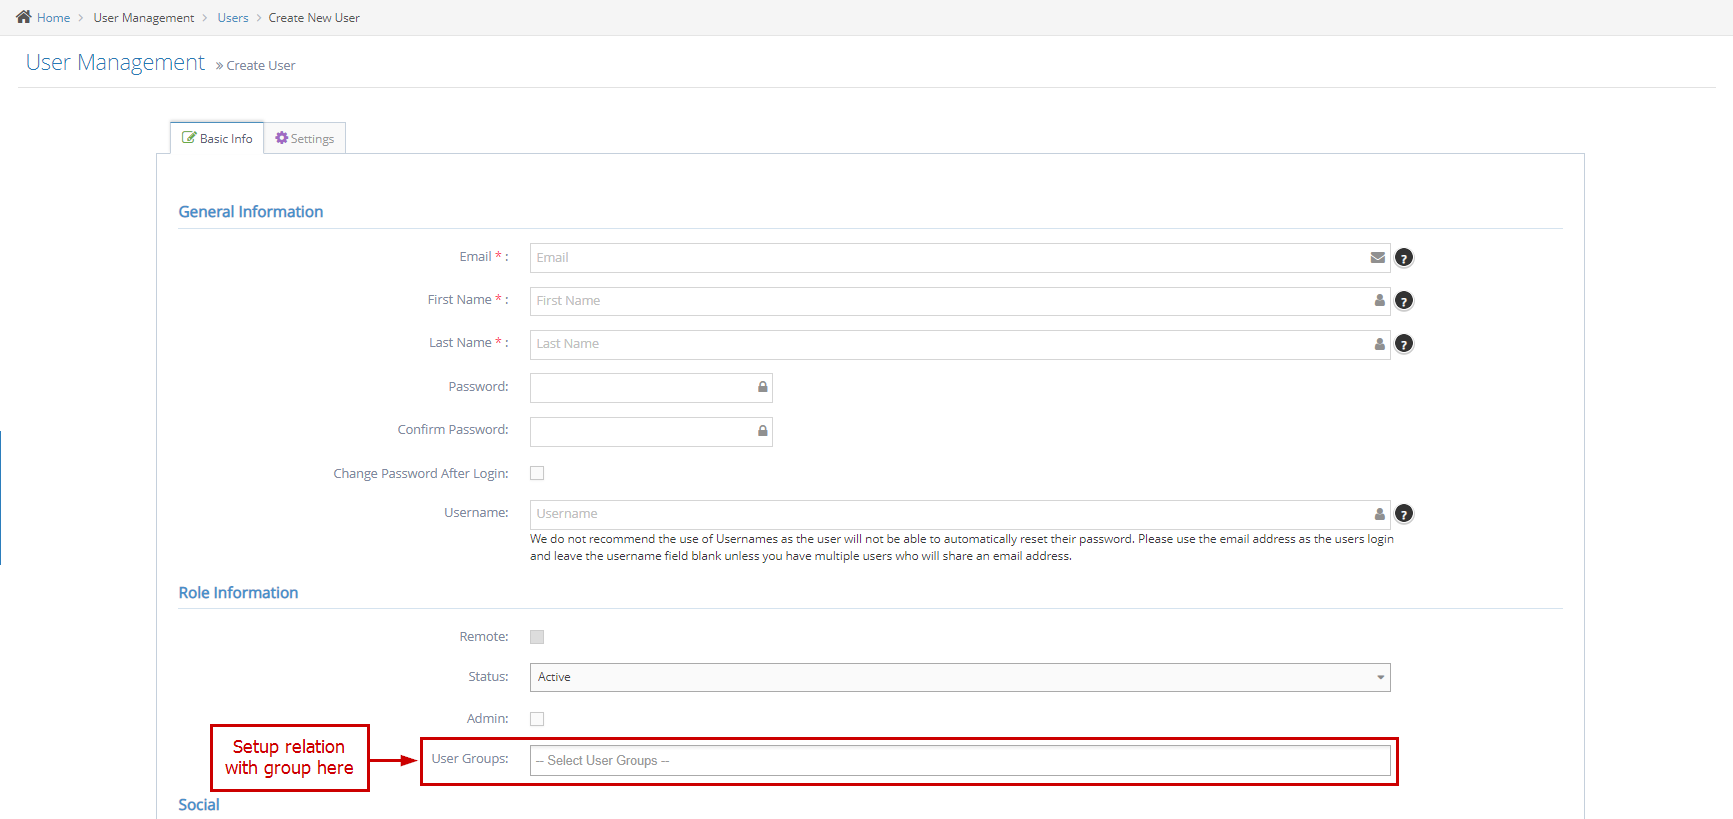
3Users and choose to Create New User (or edit an existing user)
-
4Or update the User Group
-
5Log in with the user and check the result
-
6Log in page
-
7After Logging in successfully, the user will be redirected to the URL specified in the Group Settings and the selected page will be displayed.
Securing Sections on WebEd
This module is to limit the access of specific page for the public users and allowed only selected users and groups.
Learn how to create User Groups here →
Securing Sections (Page Security) Overview
What are Secure Pages
Secure Pages are a WebEd tool that restricts access to pages or sections of your website to select users. Secure pages and authorised viewers are managed in the Admin Module through Users & User Groups.
The user must be logged in to a user group that is configured to view this page or part of the website, otherwise the page content will not be displayed to the user. The following message is displayed to unauthorised visitors to a page.
Page Security allows you to set permission to a group of users that are currently using your site. This is how you can display specified content to specified users, for example securing a section of pages for dealers' information on pricing not to be seen by the general public. Securing a particular page by giving authorisation to a certain group will only allow a logged-in member of that group permission to view the secured page, this security applies to all pages that are a child of this page, making it easy to secure whole sections of your website.
Why you would use Secure Sections/Page Security
Lack of awareness of the risks and consequences may lead to the threat of stealing customer information and other transaction data/files. Website owners must protect their website even if it's small or big business and this Secure Sections/Page Security module will help you provide security and assurance from any internet or online threats.
How to Secure a Page
-
1Log in as an administrator and go to the Admin Dashboard.
Learn how to log in here → -
2Go to Admin > Pages > Pages
-
3Select Edit or Create a New Page
-
4At the bottom or below the text editor click the "Security" tab
-
5Assign each group to the "Can View" or "Can Edit" the page
-
6Click Save or Create button
The front page result
-
1Go to the front page and see the changes. If you are part of the group of users that was checked on the above instruction or an administrator you can see the default page like the below screenshots
-
2If you are not part of the group then you will be redirected to the log in page
Setting Account Expiration
Setting Account Expiration Overview
This guide is for setting days of the expiration date of an account, days to inform before the expiration date, configuring background tasks for sending notification emails, and deactivating accounts whose expiration date has passed.
Why would you set expiration to a user account?
- It allows you to disable the account automatically if the user account is inactive for a configurable duration.
- It allows you to create a temporary user account added to a user group that will expire automatically on the specified dates.
How does this work?
If the functionality is enabled, it will take effect on the set 'Expirable User Groups'. if there is nothing set, it will affect all the user accounts on the website.
- The system will get the 'Number Of Days To Keep Account Alive' if a new user account was created
- If the account is inactive, it will send an 'Account Expired Notification' email 'Days Prior To Suspension We Should Notify User' at a specified time in the 'Account Expires Notification Task' and 'Deactivation Expired Accounts Task'
How to configure the Account Expired Setting
-
1Log in as an administrator and go to the Admin Dashboard.
Learn how to log in here → -
2Click Settings
-
3Select Site Settings
-
4Search 'Account Expired Setting'
-
5Click the Edit icon
-
6The Edit screen will appear with the following fields:
- Number Of Days To Keep Account Alive: The number of days will be added to the expiration date once creating a new account or extending the expiration date of an account.
- Days Prior To Suspension We Should Notify User: Days prior to suspension we should notify the user by email.
- Expirable User Groups: Users in these groups will have an expiry date.
Learn how to a specified User Group here → - Extend Expiration Date Page Template: set up the template for extending the expiration date page
-
2Click Save
How to configure the Account Expires Notification Task
This background task is used to send mail notifications to accounts that are near expiration date
-
1Log in as an administrator and go to the Admin Dashboard.
Learn how to log in here → -
2Click Settings
-
3Select System Settings > Background Tasks
-
4Search 'Account Expires Notification Task'
-
5Click Config icon
-
6Config screen appears. The administrator can update the task with 2 modes:
- Interval: running by an interval time
- Daily: running every day at a specific time
-
7Click Save
How to configure the Deactivation Expired Accounts Task
This background task is used to send mail notifications to accounts that are near expiration date
-
1Log in as an administrator and go to the Admin Dashboard.
Learn how to log in here → -
2Click Settings
-
3Select System Settings > Background Tasks
-
4Search 'Deactivation Expired Accounts Task'
-
5Click Config icon
-
6Config screen appears
-
7Config schedule information for the task and click Save
How to activate an account
This background task is used to send mail notifications to accounts that are near expiration date
-
1Log in as an administrator and go to the Admin Dashboard.
Learn how to log in here → -
2Click User Management
-
3Select Users
-
4Click the Edit icon to edit the user you want to activate
-
5The edit screen appears. Navigate to Status
-
6Set status to Active
-
7Click Save
-
8This user will be activated and the expiration date will be the activation date increased by the number of days added (config in site setting)
Changing an email template for an Expired Account notification
-
1Log in as an administrator and go to the Admin Dashboard.
Learn how to log in here → -
2Click User Management
-
3Select Email Setting > Email Templates
-
4A list of email templates in the system appears
-
5On the Subject column, search for 'Account Expired Notification'
-
6Click Edit
-
7The edit screen appears to adjust the email template
-
8Click Add property to use available properties in the body.
-
9Click Save