Creating an Event Form
The Event form serves as the booking form and includes information fields needed specifically for the Event.
Please note that for the attendee type, second drivers do not count as a participant - please use a simple text box and set the ID and label as Second Drivers
-
1Log in as an administrator and go to the Admin Dashboard.
Learn how to log in here → -
2Under Modules on the left menu, choose Events
-
3Click Event Listing
-
4Click the Create New Event button
-
5You will be redirected to the Event Management configuration page
-
6Click
 on the Booking Form
 -
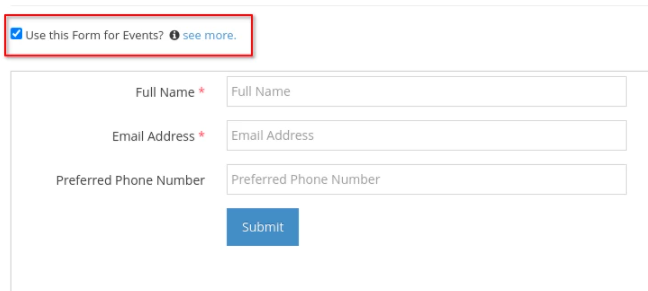
7On the Modal pop up Click the Use this Form for Events checkbox
-
8IMPORTANT: Make sure to tick the checkbox Use this Form for Events on the top of the form, otherwise, it will not show on the Events Management
-
9Add the required fields you want to appear in the form:
- First Name and Last Name or Full Name - this will show as the Booking Attendee
- Email Address
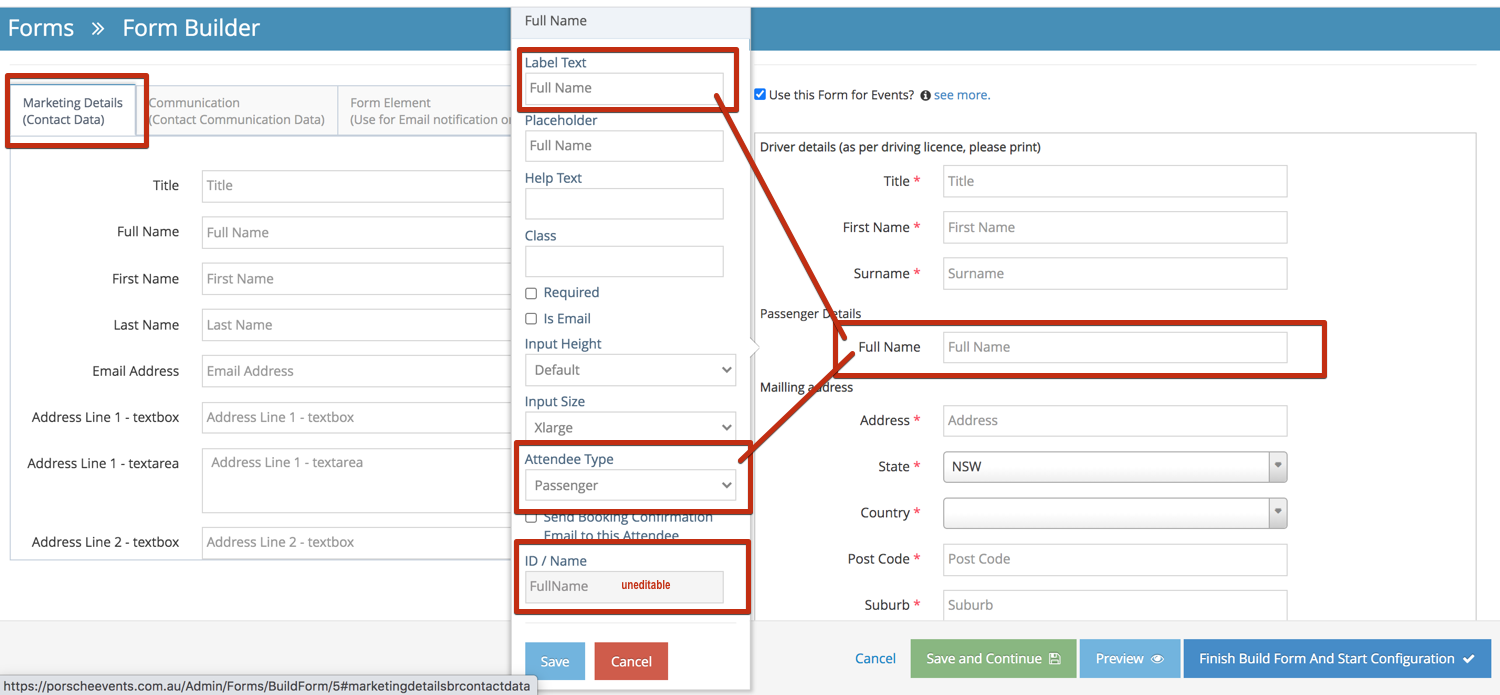
- Select Attendee Type of First Name or Full Name
- Add other desired fields on your event form then click ‘Finish Build Form and Start Configuration’
- Configure form email settings and the Thank You Message, then click ‘Finish Configuration’
-
10Once done, click Submit to save changes.
How to Create an Event Form from an Event
NB!:Try and use one form for many events. It is much easier to use an existing form than to keep building new ones. The system is designed to enable a single form to be used across multiple events. It makes set-up quicker and easier.
-
1Log in as an administrator and go to the Admin Dashboard.
Learn how to log in here → -
2Use ‘Search’ or look under ‘Modules’ on the left menu, find and choose Forms
-
3Click ‘Create New Form’ on the top left of Form Management
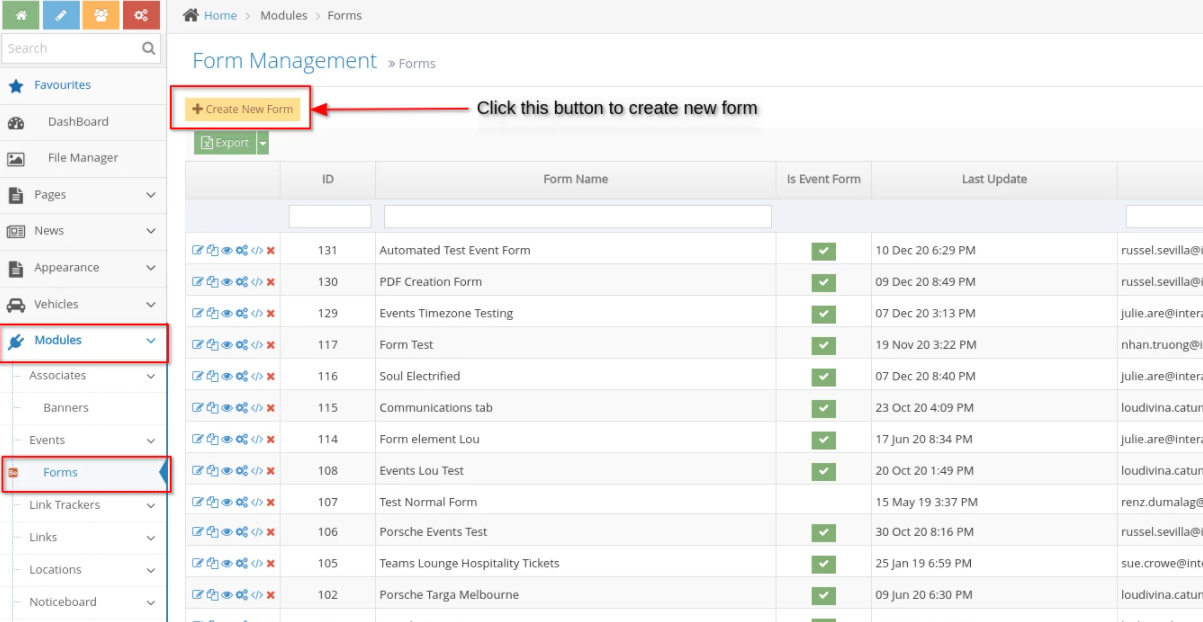
-
4You will be redirected to the Form configuration
-
5IMPORTANT: Make sure to tick the checkbox Use this Form for Events on the top of the form, otherwise, it will not show on the Events ManagementYou can copy an existing form if easier. Keep forms as simple as possible.
-
7Add the required fields you want to appear in the form:
- First Name and Last Name or Full Name - this will show as the Booking Attendee
- Email Address
- Select Attendee Type of First Name or Full Name
- Add other desired fields on your event form then click ‘Finish Build Form and Start Configuration’
- Configure form email settings and the Thank You Message, then click ‘Finish Configuration’.
Important Tips to Remember in Creating an Event Form
There are 3 tabs in Form creation:
- Marketing Details (Contact Data)
These are your most important details - First Name / Last Name / Email / Address etc.
The ID/Name of these fields cannot be changed ... and you ought only to use them once in a form. Names are an exception to the rule because you have different options for Attendee types (Driver / Passenger etc.) and this allows the field to be used more than once.
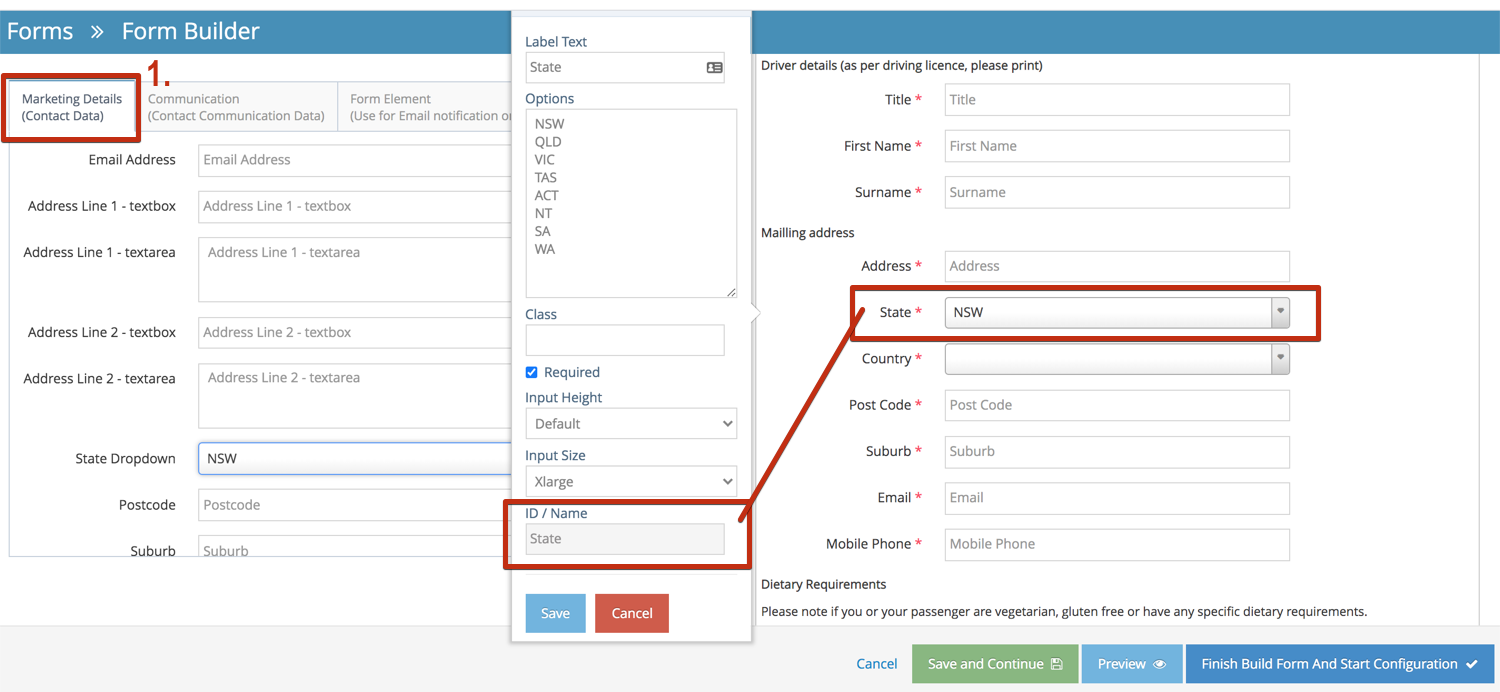
The general rule is - If you cannot edit the ID/Name, please only use it once (unless it is a name)
Always use an Attendee type to differentiate your contact's details
When it comes to fields like 'State' - You are able to change the LABEL (not the ID/Name field and also adjust the States you need to use. This needs to be flexible to allow you to use multiple options.
- Communication (Contact communication Data)
These fields enable you to track contacts who fill out the forms. Whilst this is automatically covered for an event on your own website - if you wanted to place the form on someone else's website and be able to track where contacts came from - you might add a 'Referred by' field. In this way, you can separate different areas (when & If required).
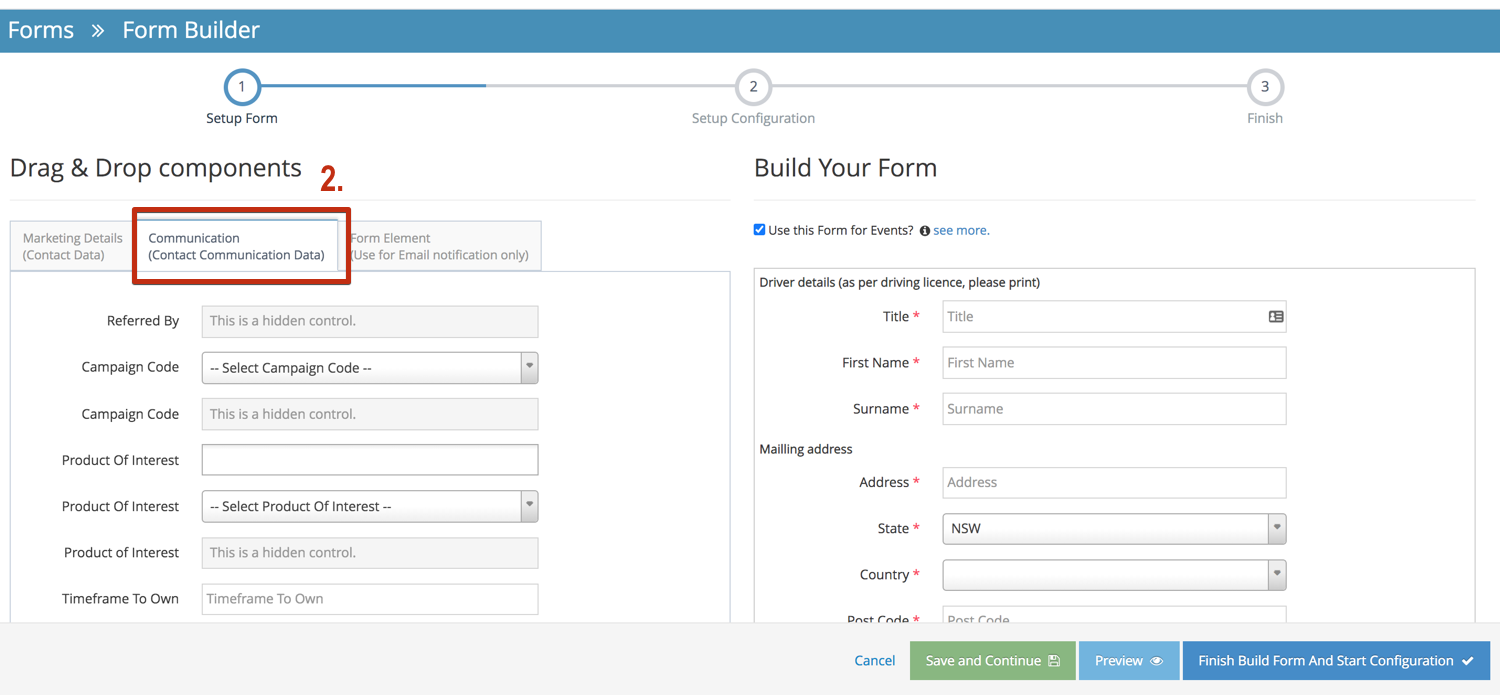
- Form Element
You will need to use these whenever you want to include additional fields. They can be used over and over again. These fields can be renamed & the ID/Name field changed. This ensures recovering the additional data is easy. There are drop-downs and other options which provide flexibility within your form
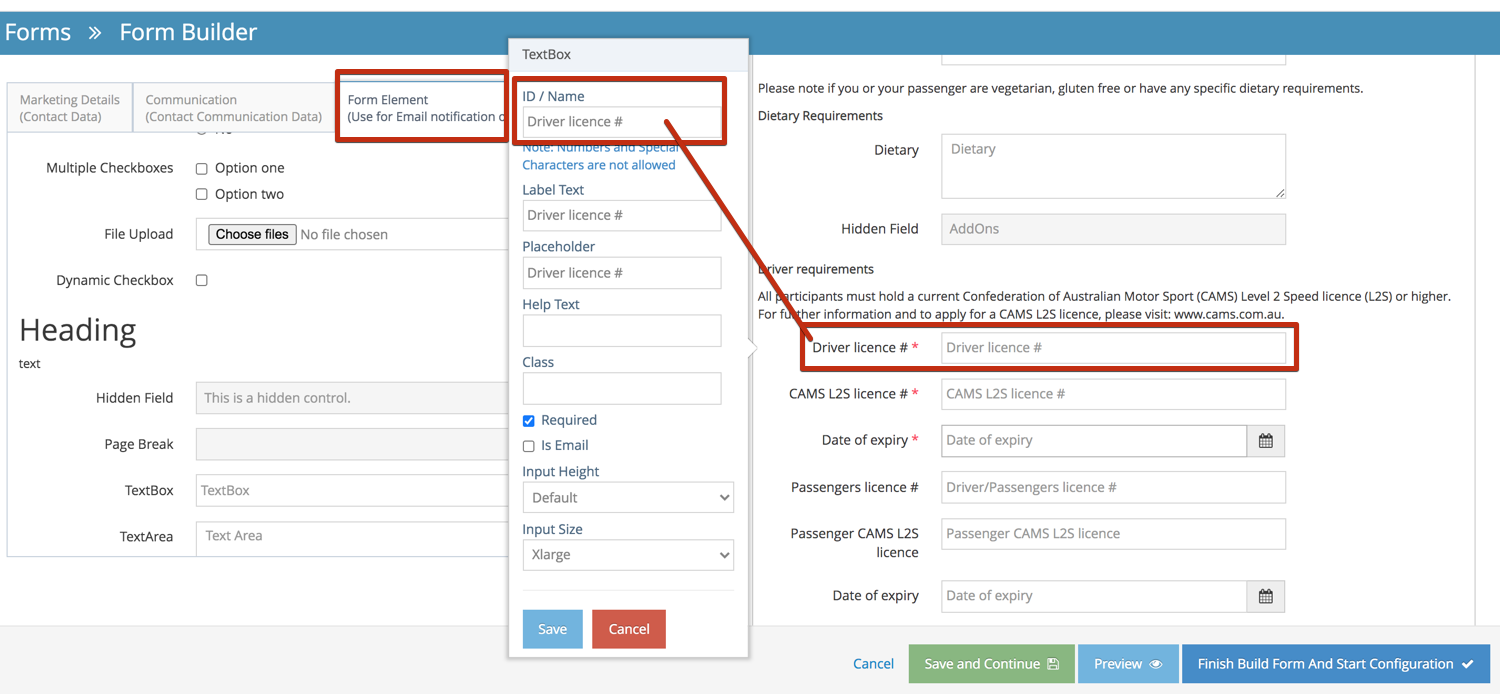
NB! Always use Form Elements for additional data and Marketing Details for essential
Update the Event Form on an existing event
-
1Log in as an administrator and go to the Admin Dashboard.
Learn how to log in here → -
2Under Modules on the left menu, choose Events
-
3Click Event Listing
-
4From the Event Listing, search for the event you want to edit
-
5Click the
 "Edit" icon to edit the event
 -
6Select the new Booking Form on the list

-
7Click Save to apply changes
Advanced Form Options
Auto Responders (Editing your Auto Responder)
You can also send autoresponders and notifications to other parties using the advanced options
-
1Scroll down and click on Advanced Options. You can edit the text in the Auto Response Body field (as shown below)
-
2You can use the property drop-down to customise the message using the data supplied from the form
-
3Any field you add to the form will be available
Notification Email
-
1Check the box Send Notification Email
-
2Then configure the email to send using the properties
-
3Properties can also be used in the subject line allowing a great deal of creativity and flexibility
- Email to will send a formatted email to the address you configure
- A notification email will allow you to send the same information submitted to someone else using a completely different formatting
- You may want to use it for notifying your sales team, or perhaps an external provider for catering or any other reason you can think of
Ajax Submit
- Submits the form without refreshing the page
- Generally, this is the best way for forms to work and you should usually ensure this setting is set
Pre-populate the form with User's previously submitted data
- Once a user re-visits the form they’ve submitted, their stored information will automatically be populated on the form fields.