Update the Google Analytics Configuration
STEP-BY-STEP
-
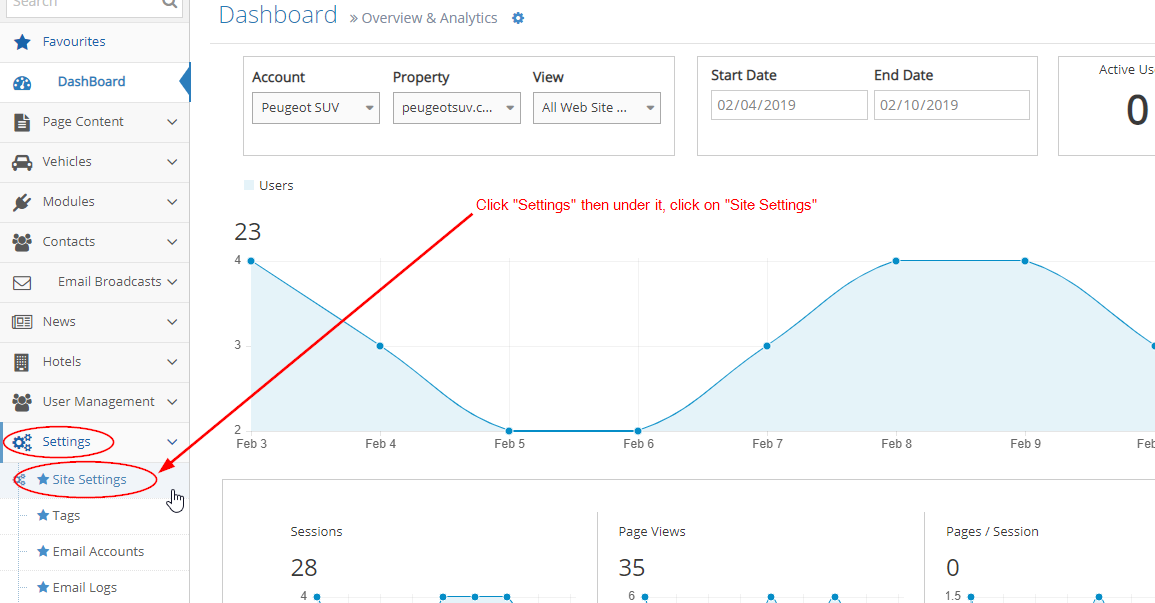
1Go to Admin > Site Settings > click 'Site Settings'
-
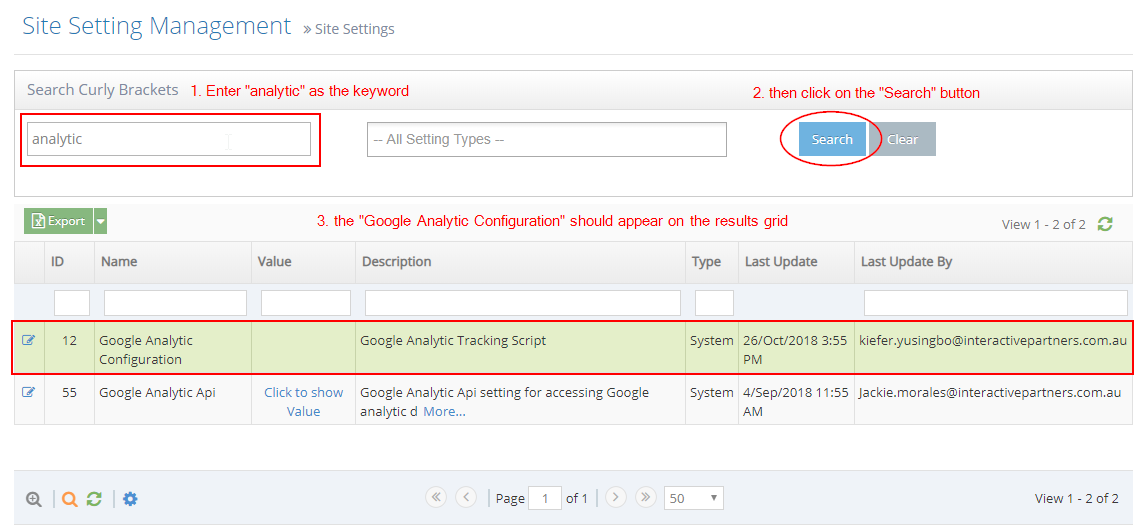
2Under the 'Search Curly Bracket' input field, enter "analytic" as the keyword
-
3Click on the 'Search' button on the right
-
4The 'Google Analytic Configuration' should appear on the results grid
-
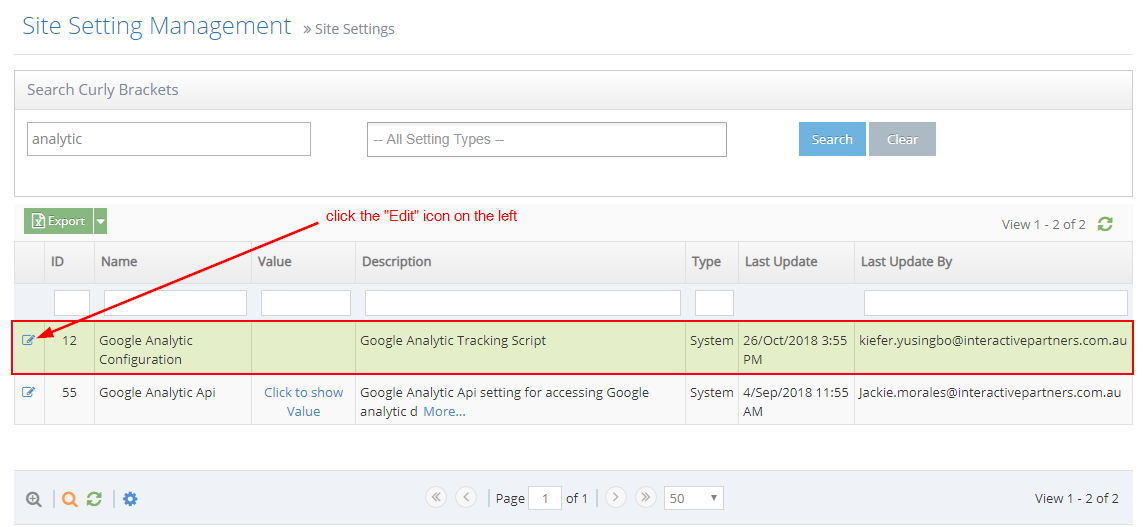
5On the grid results, click on the 'Edit' icon on the left.

-
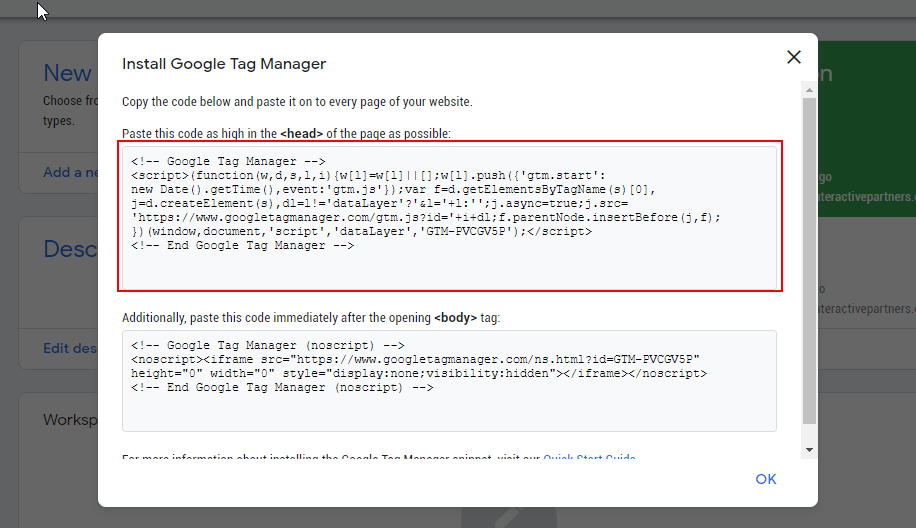
6Log in to your Google Tag Manager account https://tagmanager.google.com
-
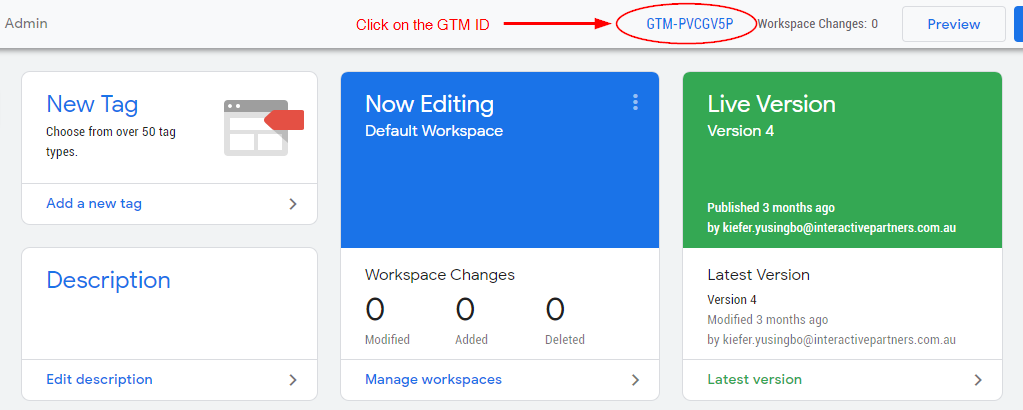
7Go to Google Tag Manager and click on the GTM ID at the top
-
8You should be able to see the codes for the installation of Google Tag Manager
-
9Copy the code for the <head> (the first field)
-
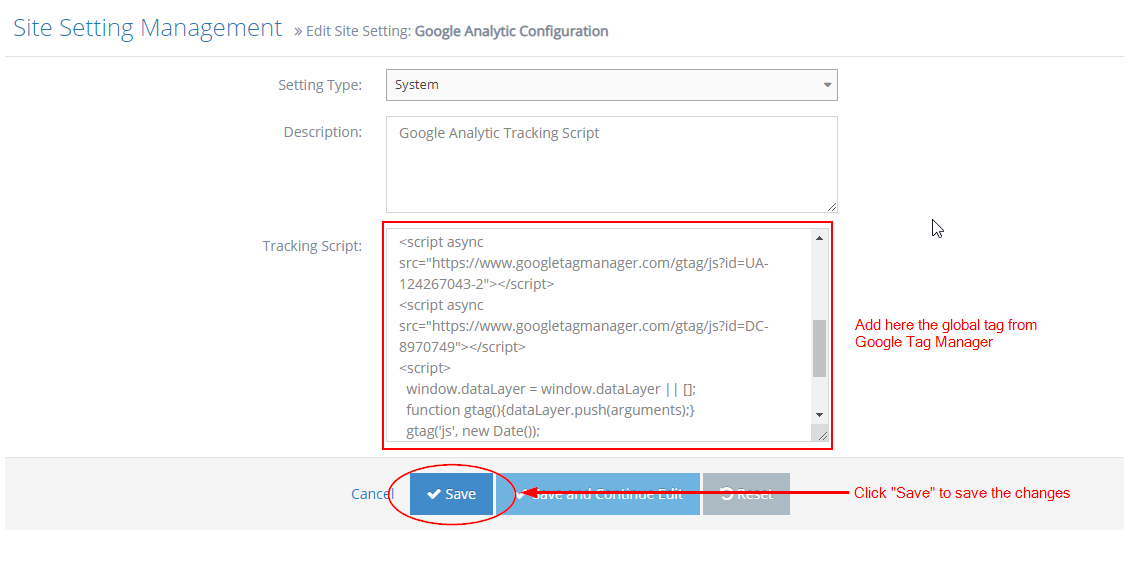
10Go back to your site and paste this on the 'Tracking Script' field.
-
11Click the 'Save' button below to save the changes.