STEP-BY-STEP
-
1Log in as an administrator and go to the Admin Dashboard.
Learn how to log in here → -
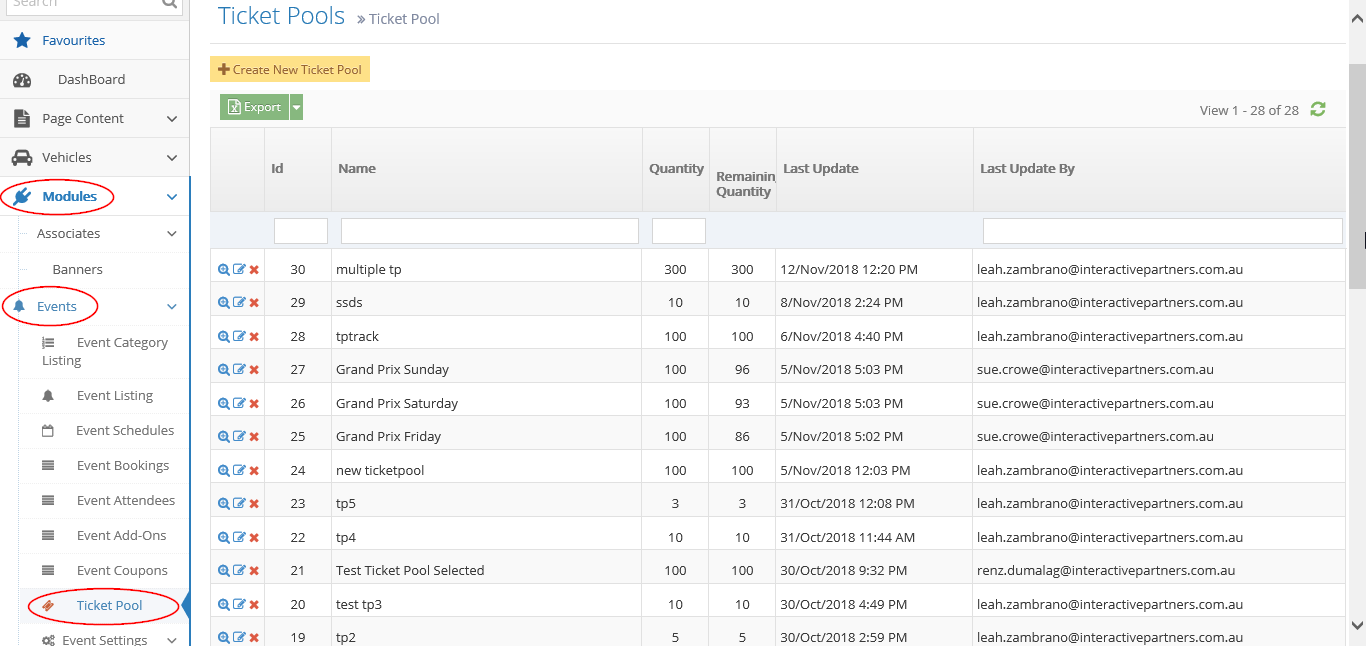
2Go to Admin > Modules > Events
-
3Select 'Ticket Pool'

-
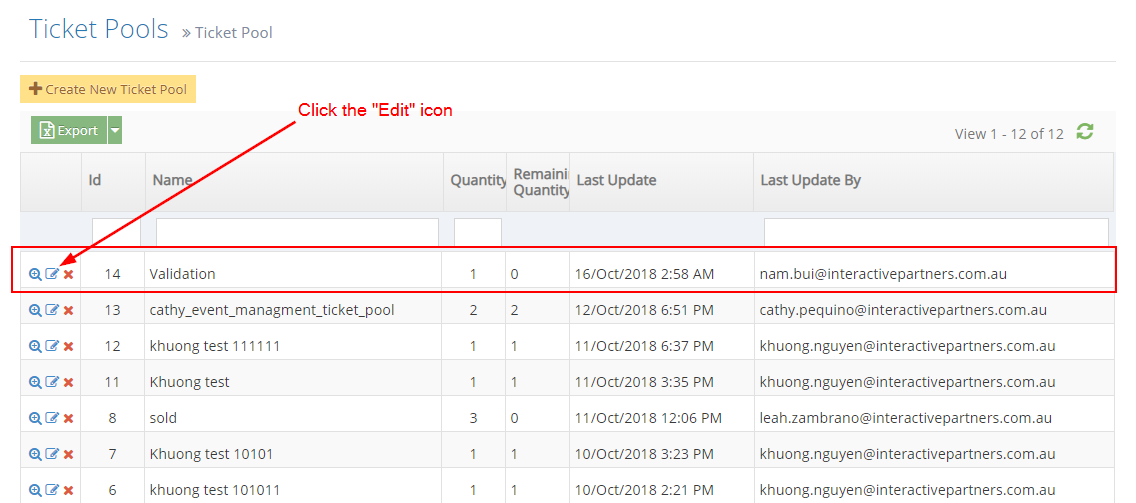
4From the Ticket Pool listing, search for the ticket pool you want to edit
-
5Click the
 "Edit" icon to edit the ticket pool
-
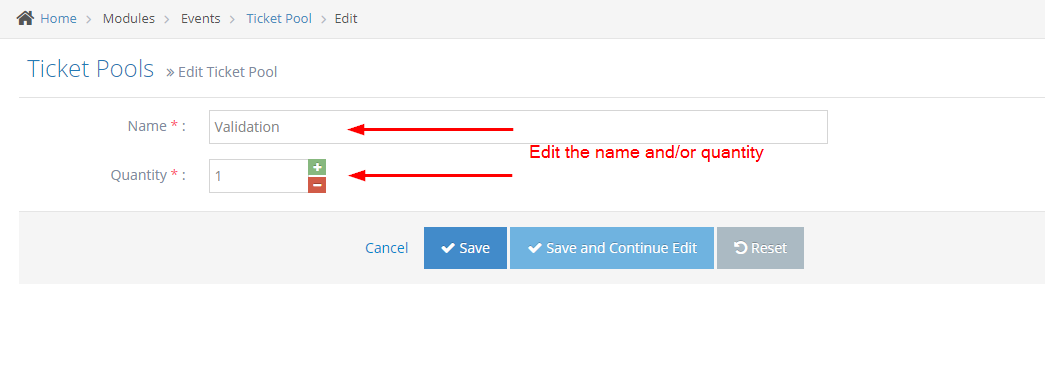
6Update the information
- Name - current ticket pool name is displayed, enter new information here.
- Quantity - current ticket pool quantity is displayed, enter the new quantity here.

-
7Save the changes
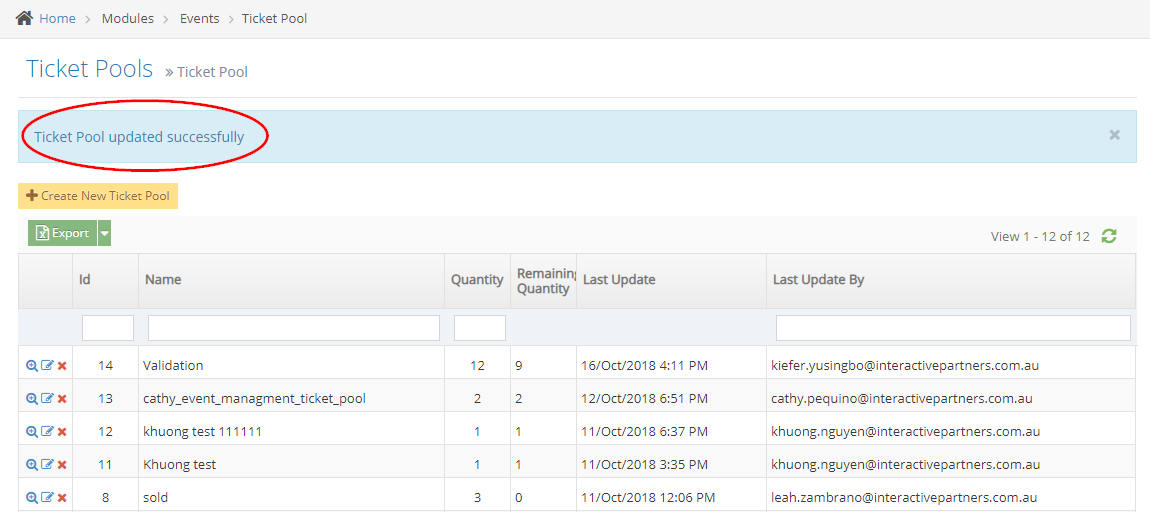
- Save - click the 'Save' button to save your changes. This action saves the new information, closes the page and redirects you to the Ticket Pools page (see the image below). On the Ticket Pools page, you will see a note "Ticket Pool updated successfully".
- Create and Continue Edit - Click the 'Create and Continue Edit' button to save your changes. This action saves the new information but lets you stay on the page.
- Reset - click the 'Reset' button to start over. This action refreshes the page and shows the current information.
