Managing Users and User Groups Overview
Most of the website has protected pages that need to limit access from the public view and so we need to assign each user to a group instead of assigning them individually.
Why you would use a Users and User Groups module?
A website owner can set up a user group for a specific access level within the site pages. Using this module can help the administrator to set up a group of users that has similar interests, goals, or concerns within the site. It is also helpful for a user to focus on the use of particular files and directories.
How to create a User Group
-
1Log in as an administrator and go to the Admin Dashboard.
Learn how to log in here → -
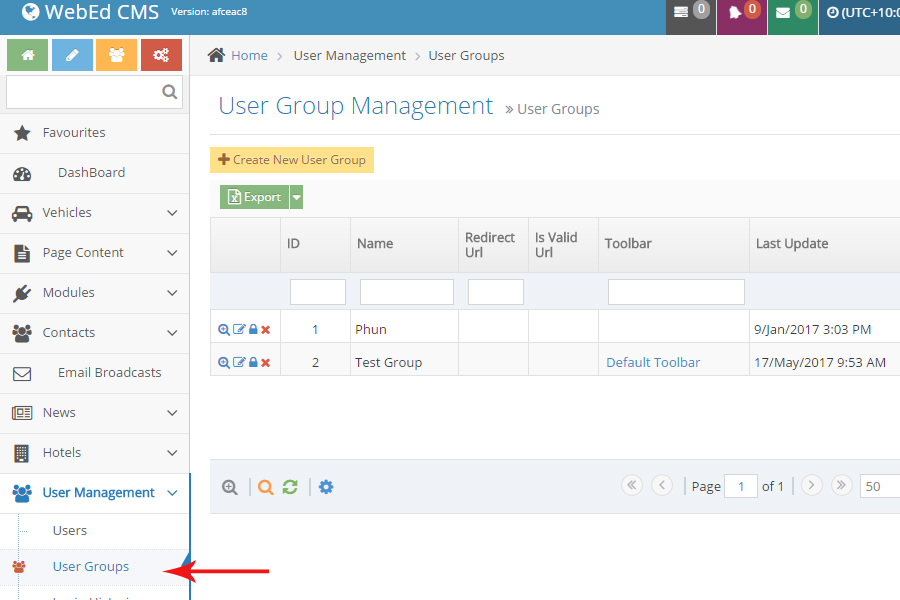
2Navigate to the User Groups under User Management main menu >> User Group and create New User Groups
-
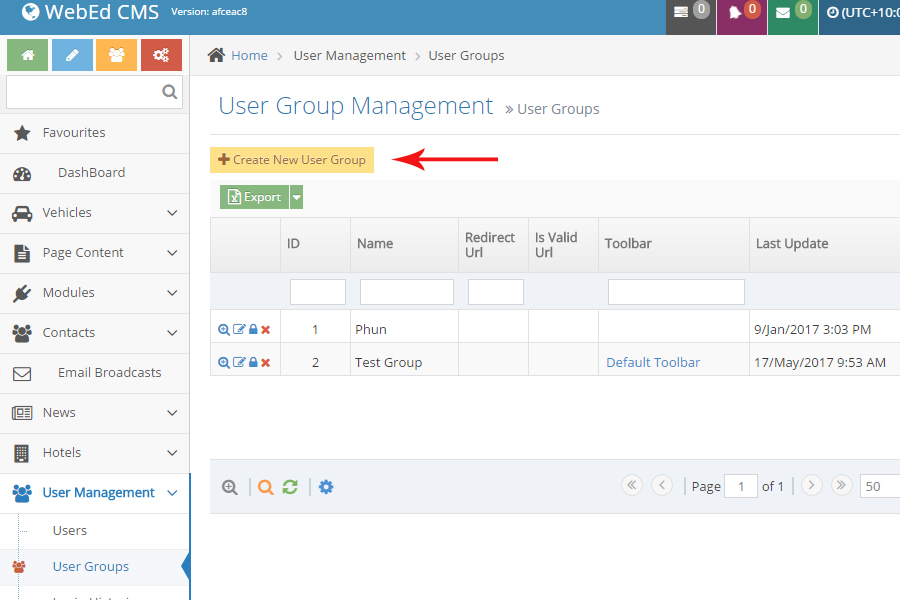
3Click on Create New User Group to add a new user group or click on the Edit icon to change the group name

-
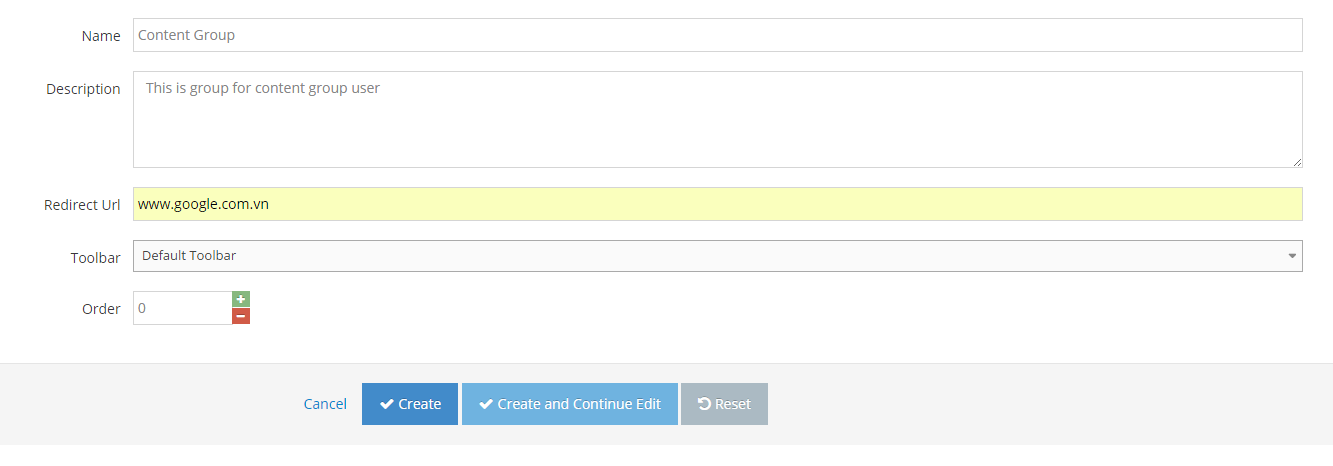
4Enter the user group name and other fields:
- Name - the name of the user group
- Description - a short description of the purpose of this group
- Redirect URL- the URL any members of this group will be redirected to when they log in.
- Toolbar - You can configure different toolbars to different groups.
- Order - the order in this group will be listed on pages where the group can be selected
-
5Click Create (for new user group) or Save (for editing existing user group) button.
-
6A new user group has now been created. You may start to add individual users to the new group.

How to Create a User
-
1Log in as an administrator and go to the Admin Dashboard.
Learn how to log in here → -
2Under 'User Management', choose 'Users'
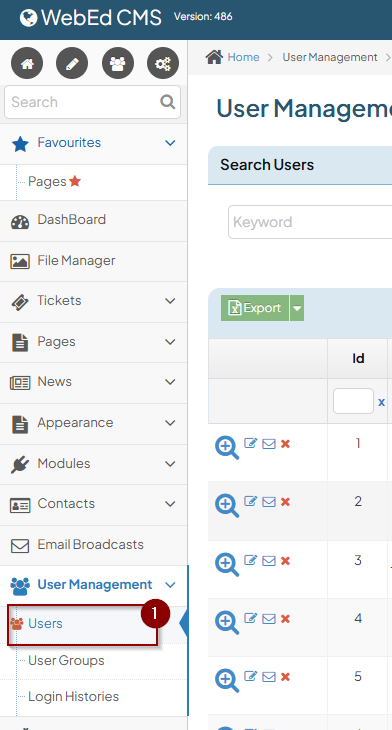
-
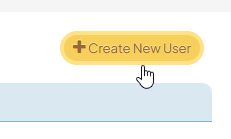
3Then click the 'Create New User' button
-
4
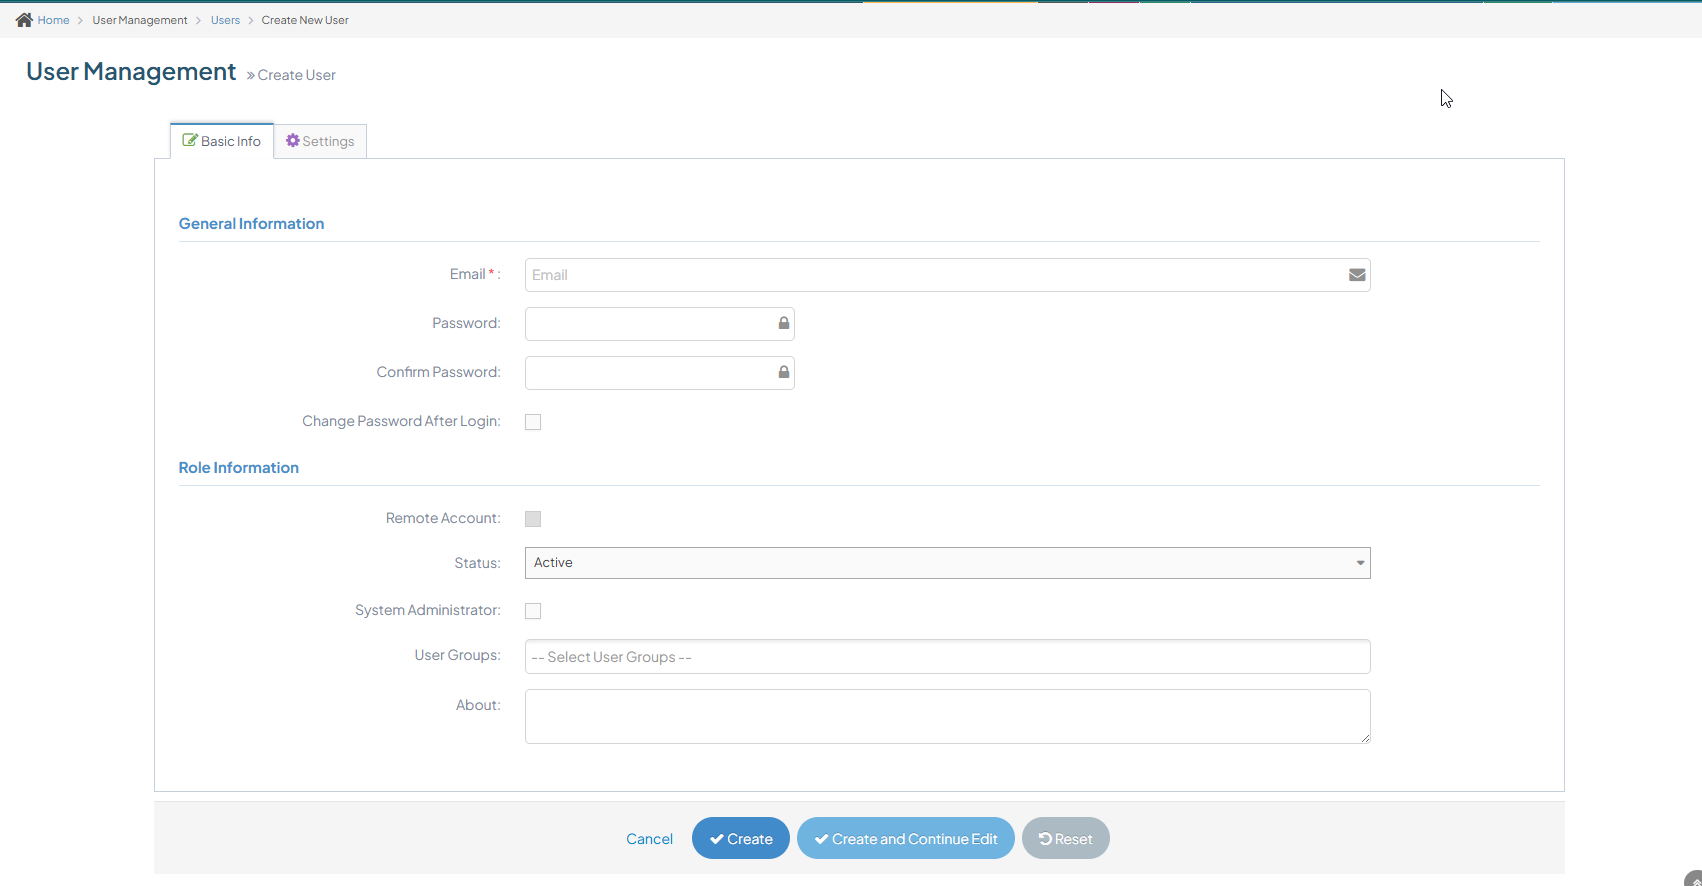
Fill in the details to create a new user:
-
Email: Enter the new user's email address for login purposes. It must be valid.
-
Password: Set a password for the new user.
-
Confirm Password: Re-enter the password to confirm it.
-
Change Password After Login: Enable this option if you want the new user to create a new password when they log in for the first time.
-
Status: Choose whether the user should be active or inactive.
-
System Administrator: Tick this box only if you want the new user to have Administrator access to your website.
-
User Groups: Assign the new user to a group by ticking the box next to an existing user group.
-
-
5Click the 'Create' button below to create the account
Managing User Administrator
Creating a New User
-
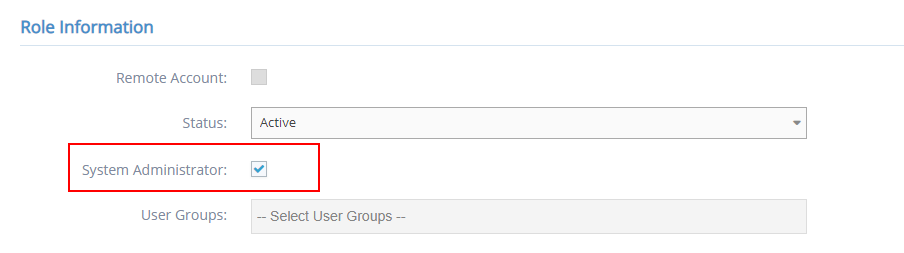
1When filling in the user details, you will see a section 'Role Information'
-
2Under it, tick the box next to 'System Administrator'
-
3There will be no need to select user groups below it because the administrator would be able to access all groups
-
4Click the 'Create' button at the bottom to save the update

Updating an Existing User
-
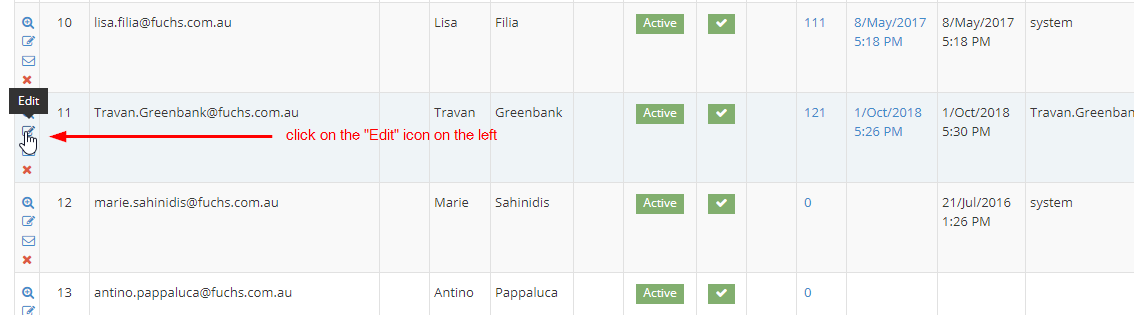
1Look for the user account you want to edit'
-
2Click on the 'Edit' icon on the left
-
3Under 'Role Information', tick the box next to 'System Administrator'
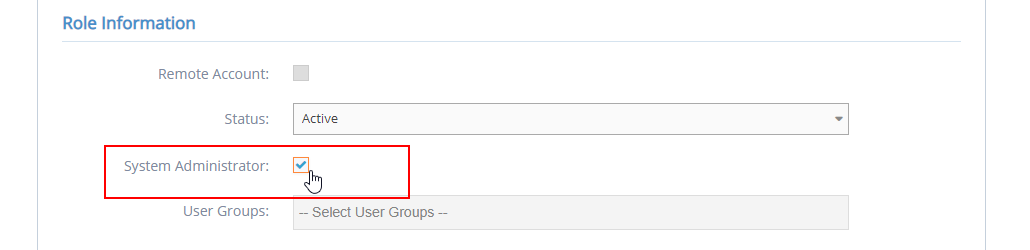
-
4Click the 'Save' button at the bottom to save the update

How to Remove a User
-
1Look for the user account you want to remove'
-
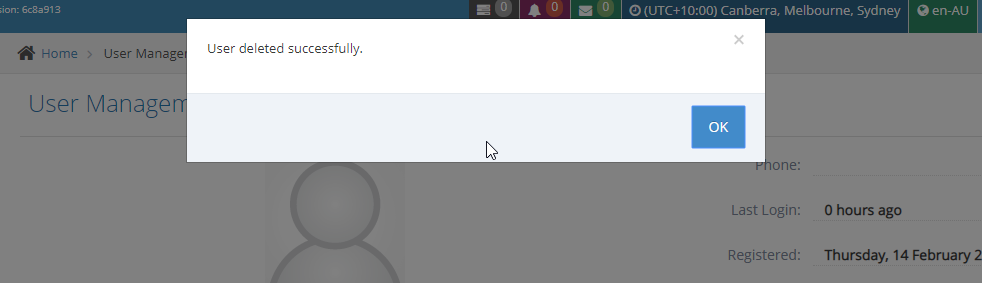
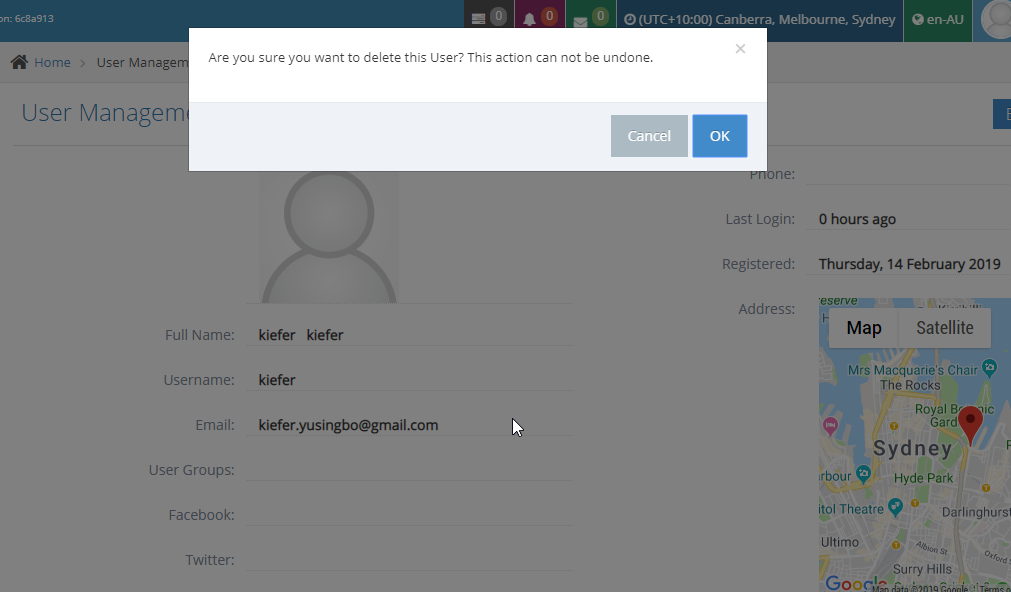
2Click on the 'Delete' icon on the left

-
3A popup message for confirmation will appear on top
-
4Click 'OK' if you wish to continue the removal, or 'Cancel' to cancel the action
-
5A popup message will appear that you have successfully removed the user