What is Syndicated Content?
A is a type of curly bracket used to display the same page content to all the websites under a central site.
Why you would use a syndicated content?
- It's easy to manage pages in one place and display them on many sites
- Edit page content once in the central site instead of editing each site
Setting Up a Central Site
What is a Central Site
A Central Site is a website where you can place a piece of content and have it displayed on several sites. This is the first thing you need to set up before you can use the Syndicated Content curly bracket.
In an automotive industry, usually, the same information for one model car is used for all its dealerships. By using a Syndicated Content curly bracket, you can get page contents from a central site and display them to multiple dealership sites without having to recreate the content on each site—just put it on a central site, and all pages using that syndicated content gets updated. We talk more about the Syndicated Content here.
Setting up a Central Site for your WebEd sites
-
1Get the URL of the Central Site and Database Name. Make sure you have this information ready.
-
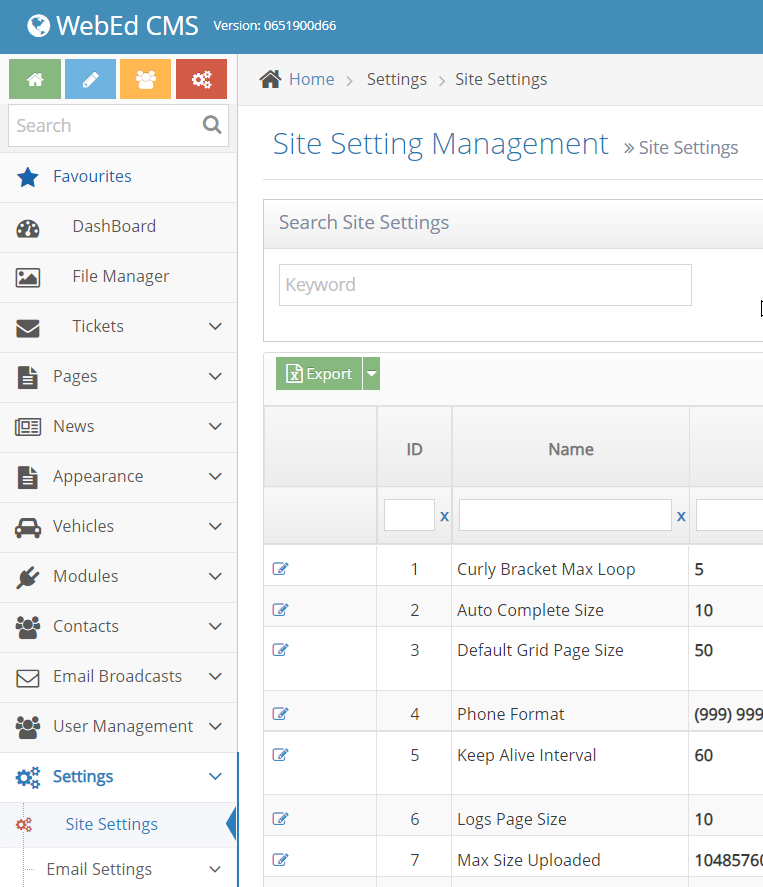
2Go to WebEd Dashboard → Settings → Site Settings
-
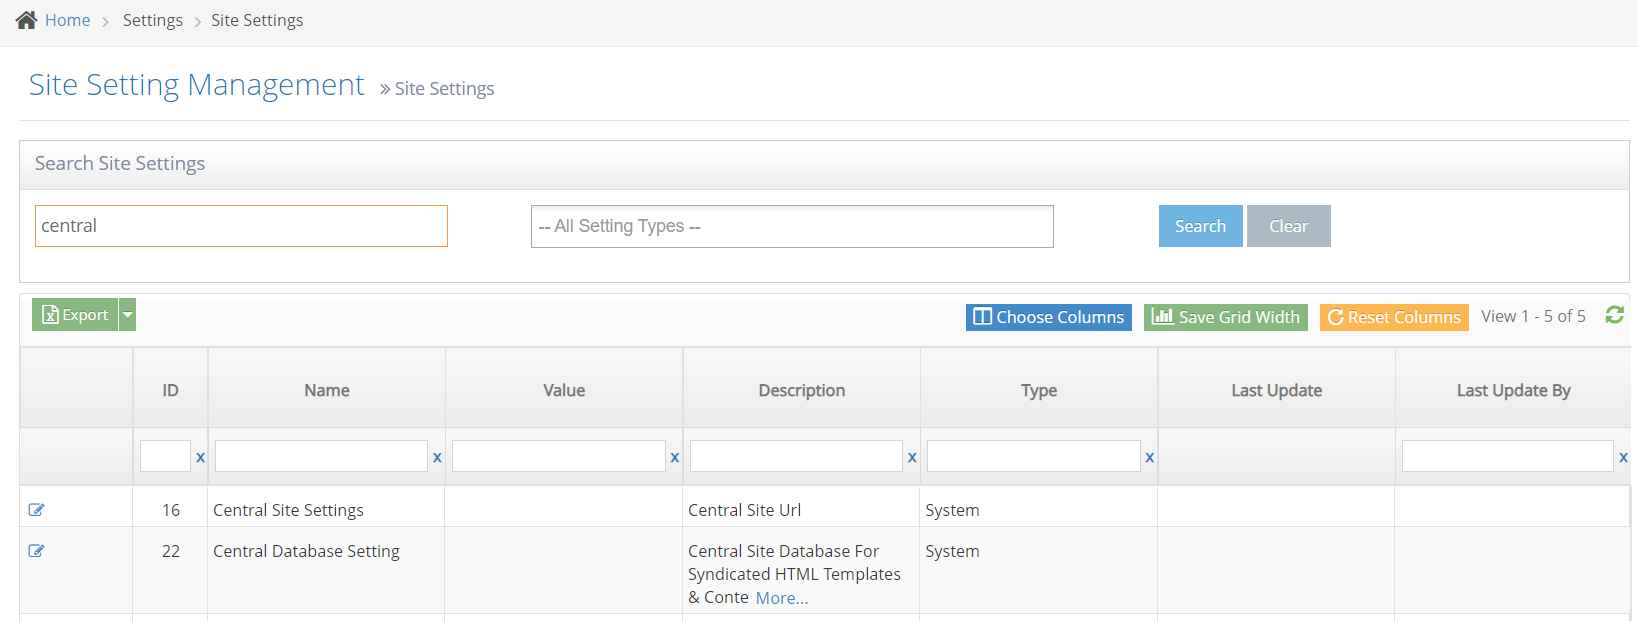
3Enter "central" as the keyword to find Central Site Settings and Central Database Setting
-
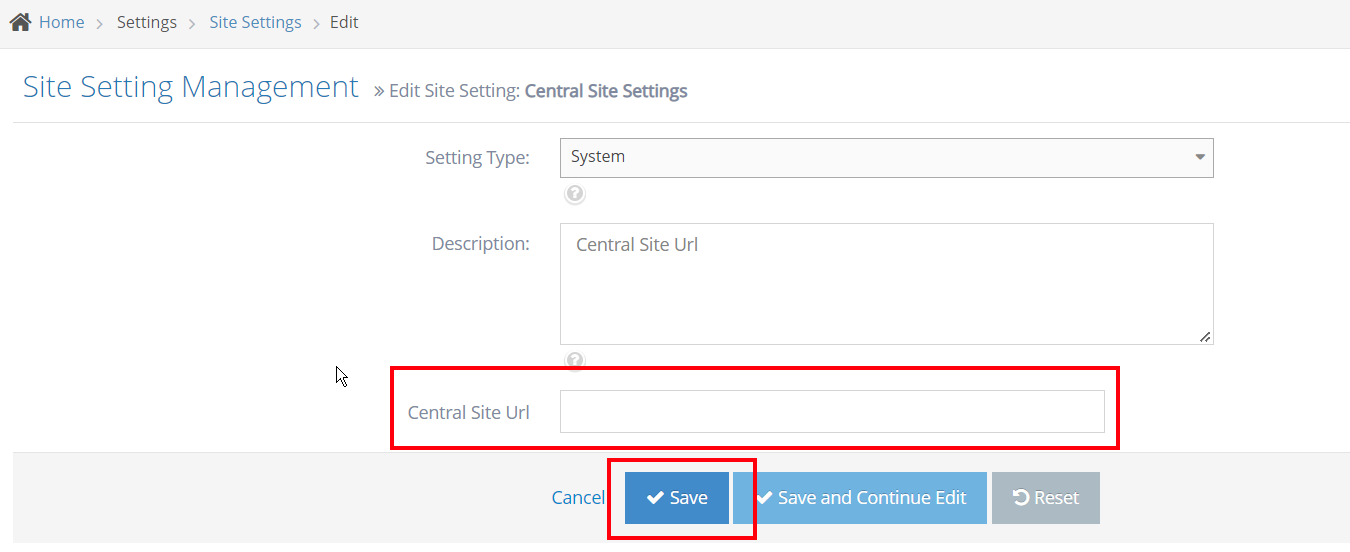
4Go to Central Site Settings and enter the Central Site URL → Save
-
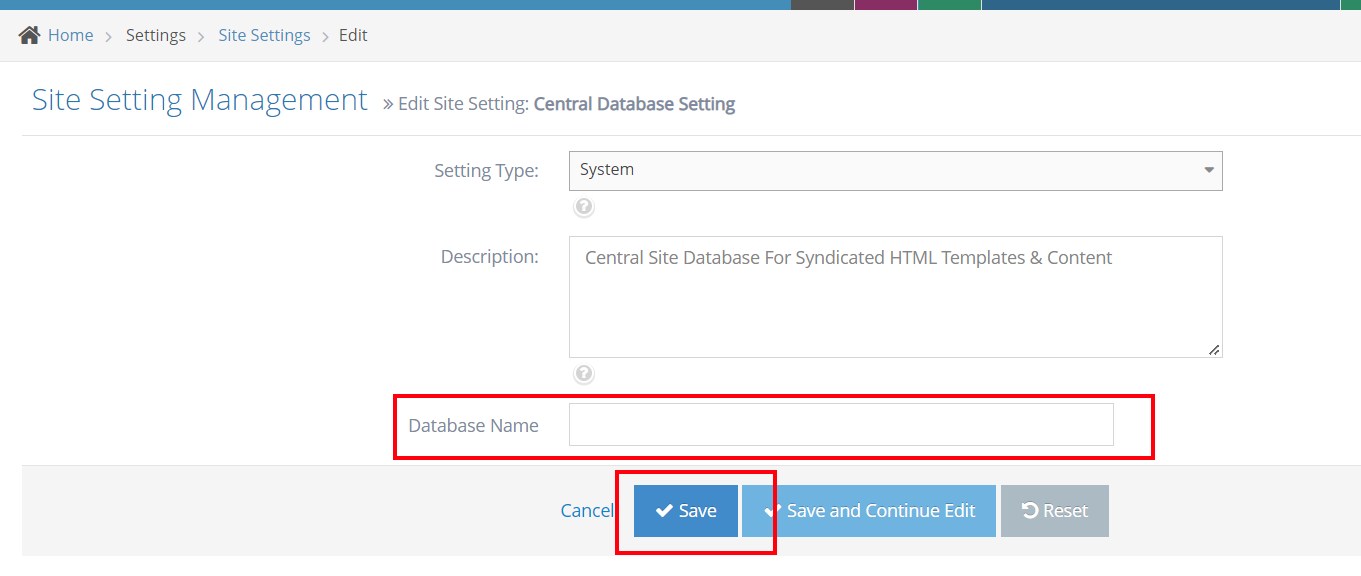
5Go to Central Database Setting and enter the Database Name → Save
-
6You can now use the module in your page contents.
How to Add Syndicated Content?
Set up the content on the central site
-
1Log in as an administrator and go to the Admin Dashboard.
Learn how to log in here → -
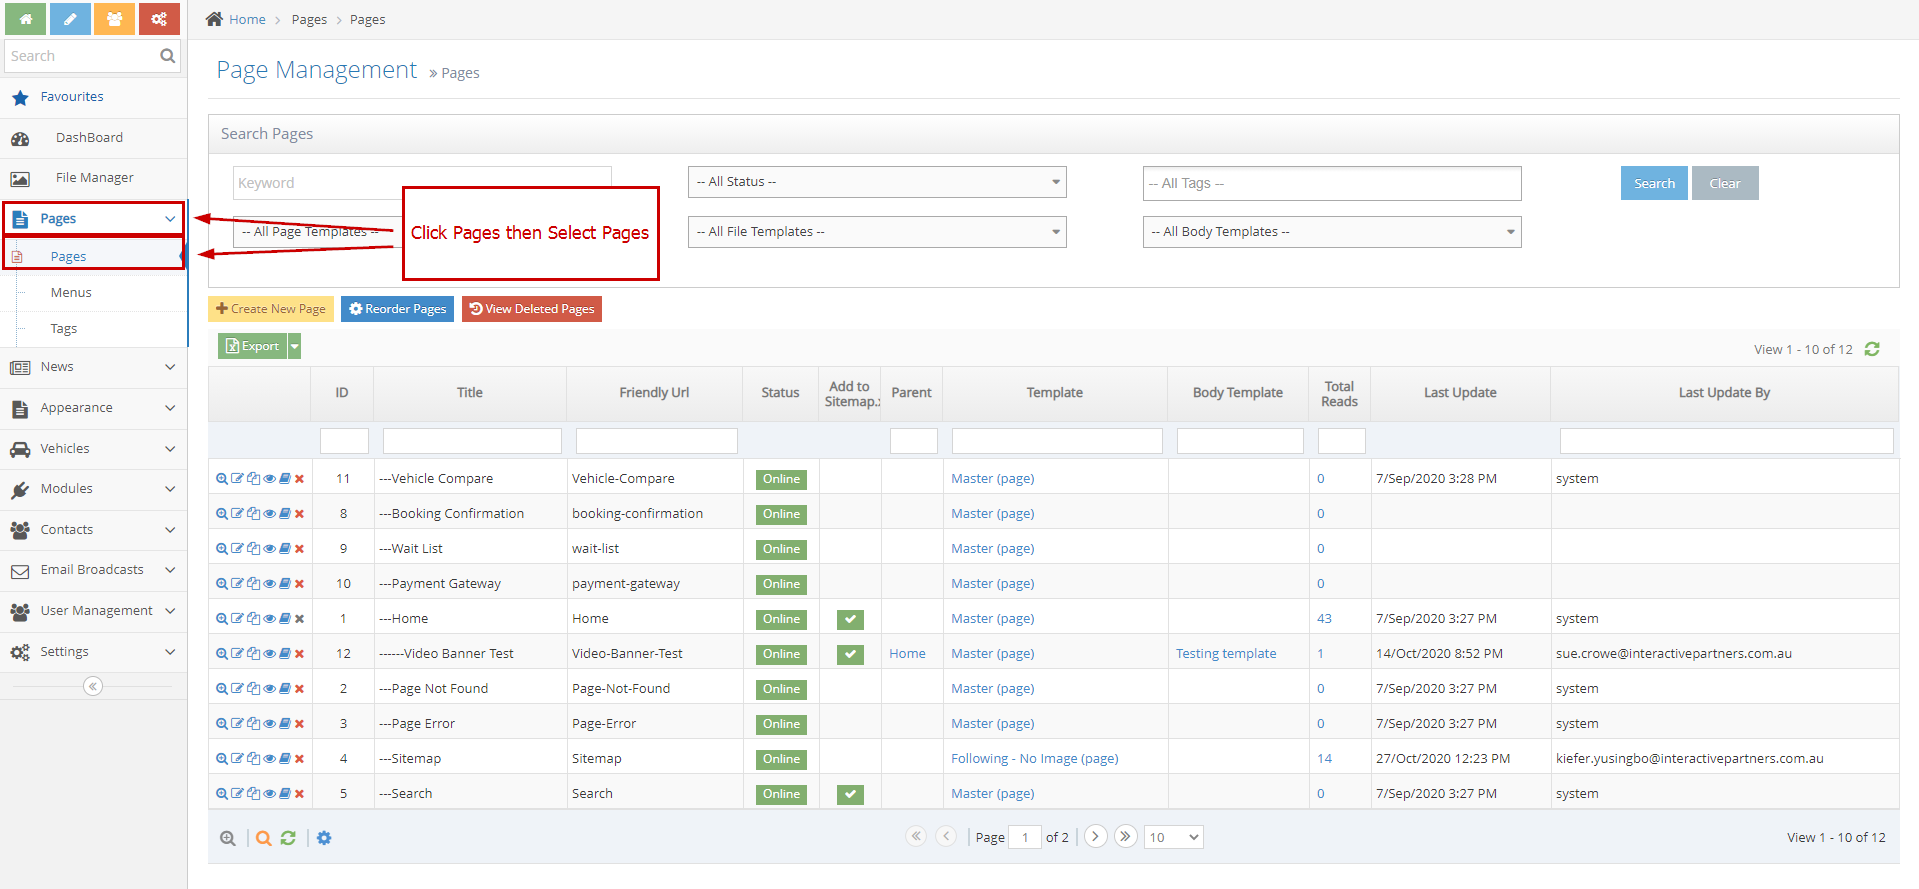
2Once you're in the dashboard, in the left navigation, click Pages > Pages
-
3On the Page Management, all the pages will be displayed in the grid as shown below
-
4Look for the page you want to display and take note of the Page ID
- If it is a new page, create a new page first using this guide, take note of the Page ID, you will need this in the next steps
-
5Once you have your page ready, log out from the central site
Display the syndicated content on your websites
-
1Log in as an administrator and go to the Admin Dashboard.
Learn how to log in here → -
2Edit the page where you want to display your syndicated content
-
3Click on the curly bracket icon on the page editor toolbar

-
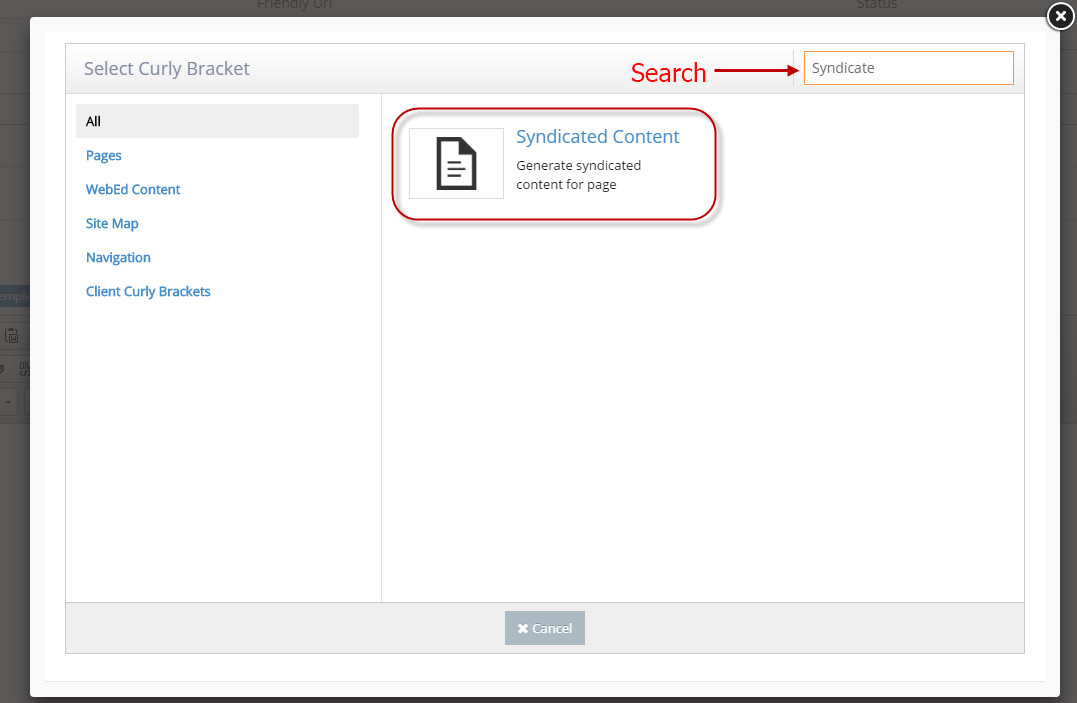
4Search for Syndicated Content curly bracket
-
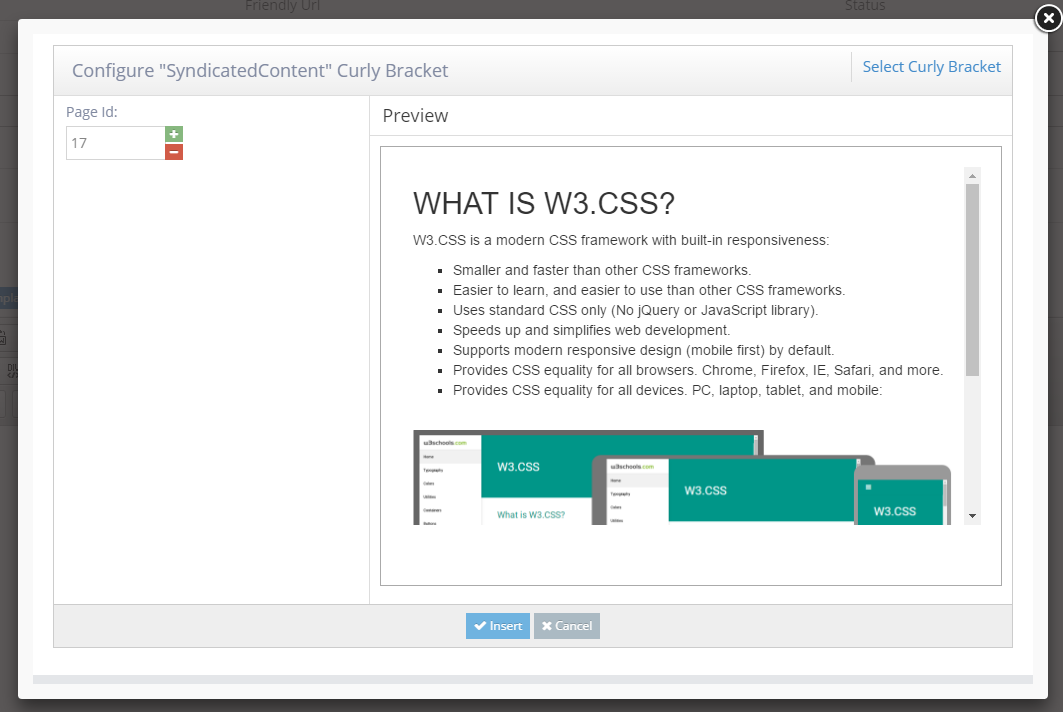
5On the configuration window, enter the Page ID of your syndicated page (you can check this on the central site)
-
6Wait for the preview to load
-
7Once you're certain that this is the page, click on the Insert button at the bottom of the window
-
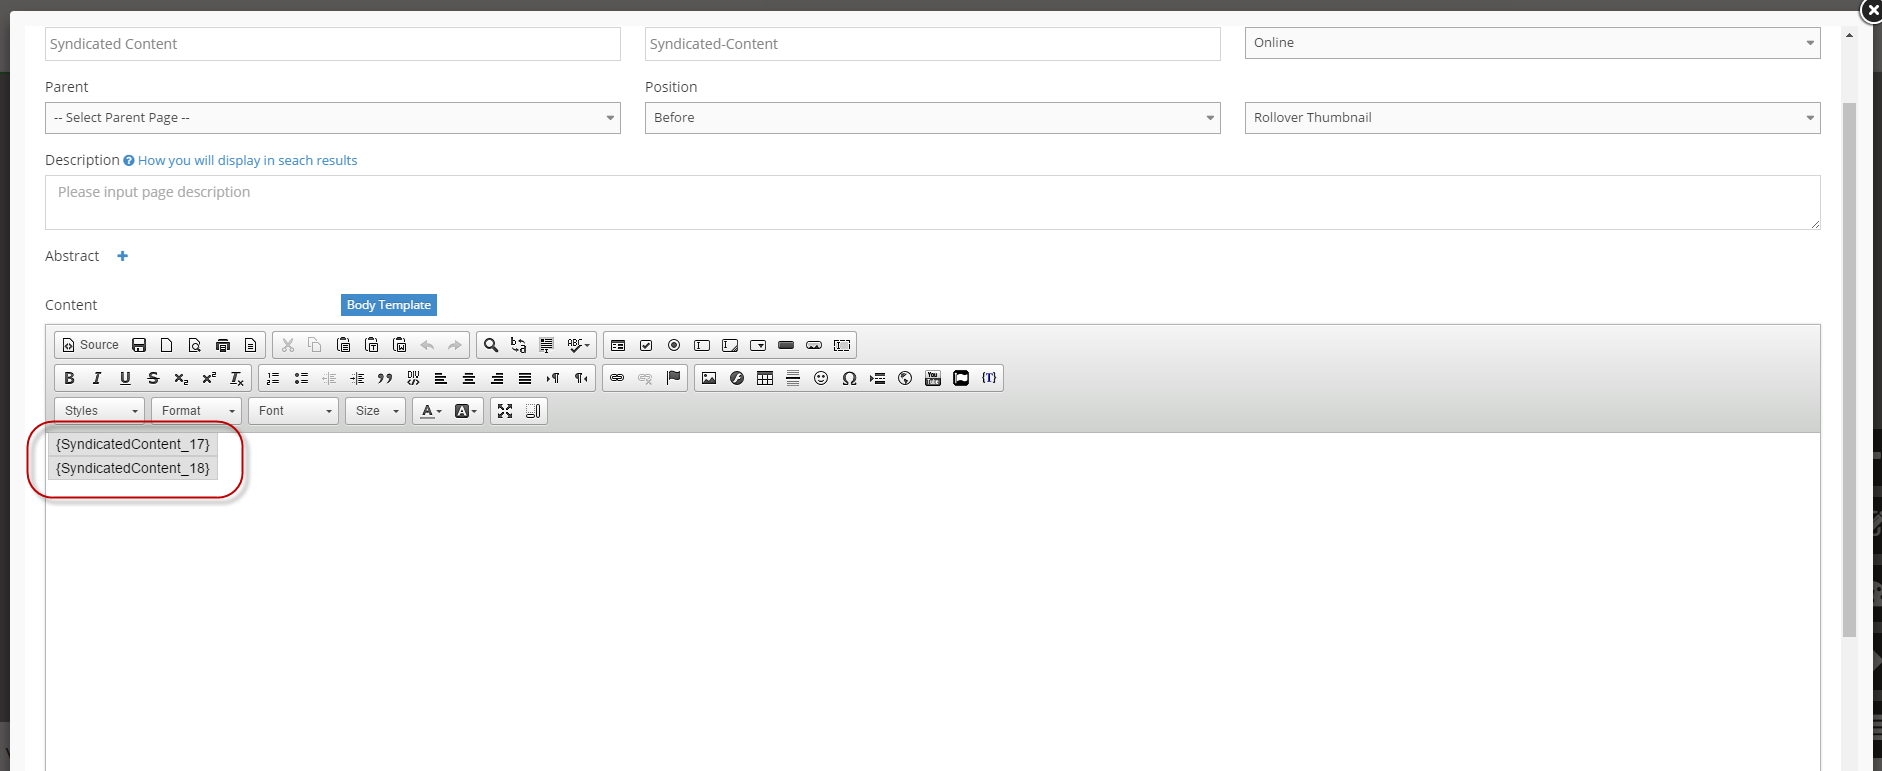
8On your Page editor, you will notice that the curly bracket(s) have been added
-
9Save the page as usual
-
10Let the page reload and check the update
Setup Syndicated content template (Developers view)
-
1Log in as an administrator and go to the Admin Dashboard.
Learn how to log in here → -
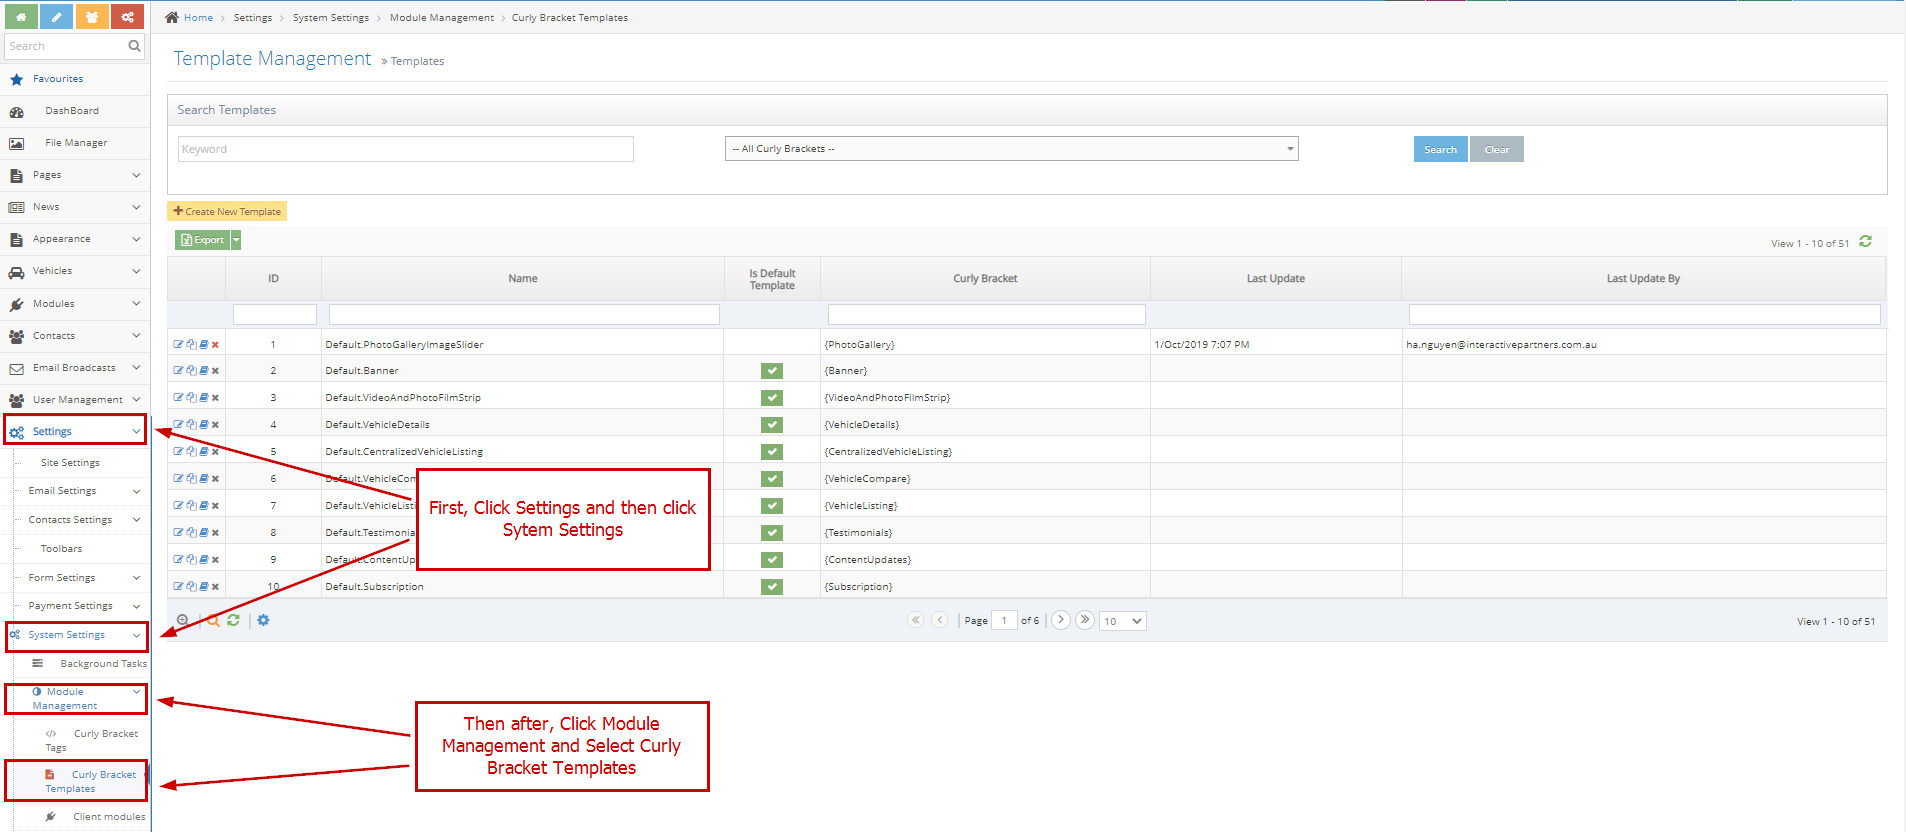
2Select navigation items: Settings > System Settings > Module Management > Curly Bracket Templates
-
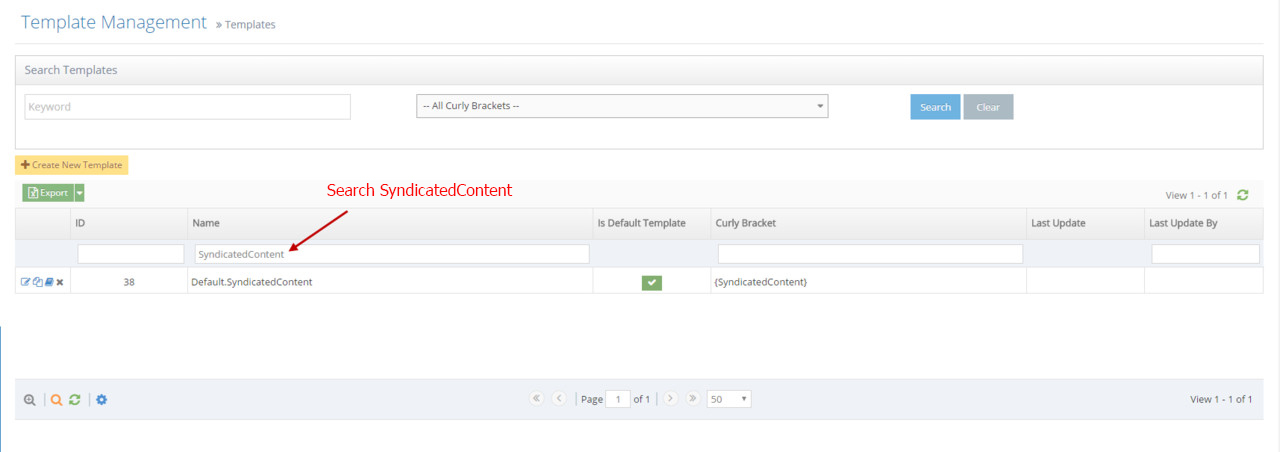
3Search field Name in grid header with keyword is Syndicated Content
-
4Click the edit icon, go to the edit page
-
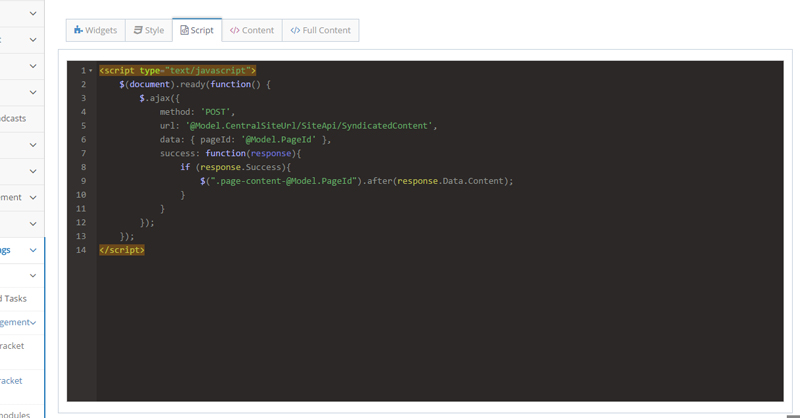
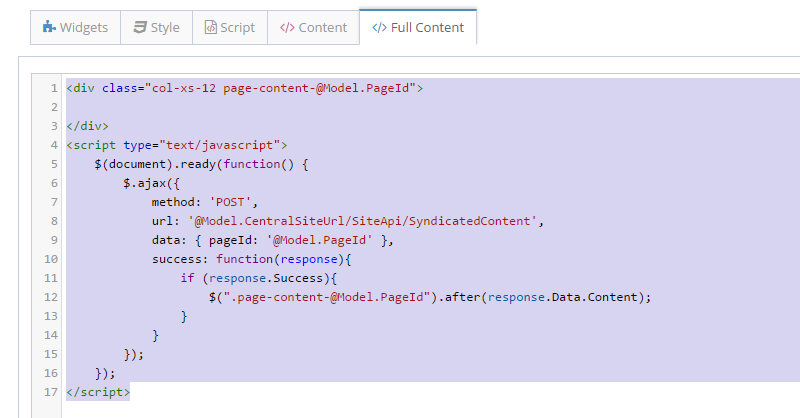
5Select the Script tab to see the code
-
6Select the Full Content tab to see the full code used in syndicated content curly bracket
How to Edit Syndicated Content?
-
1Log in as an administrator and go to the Admin Dashboard.
Learn how to log in here → -
2Manage your website or Launch the Admin Module then search and edit the page you wish to edit
-
3Open the content editor and click the Syndicated Content
-
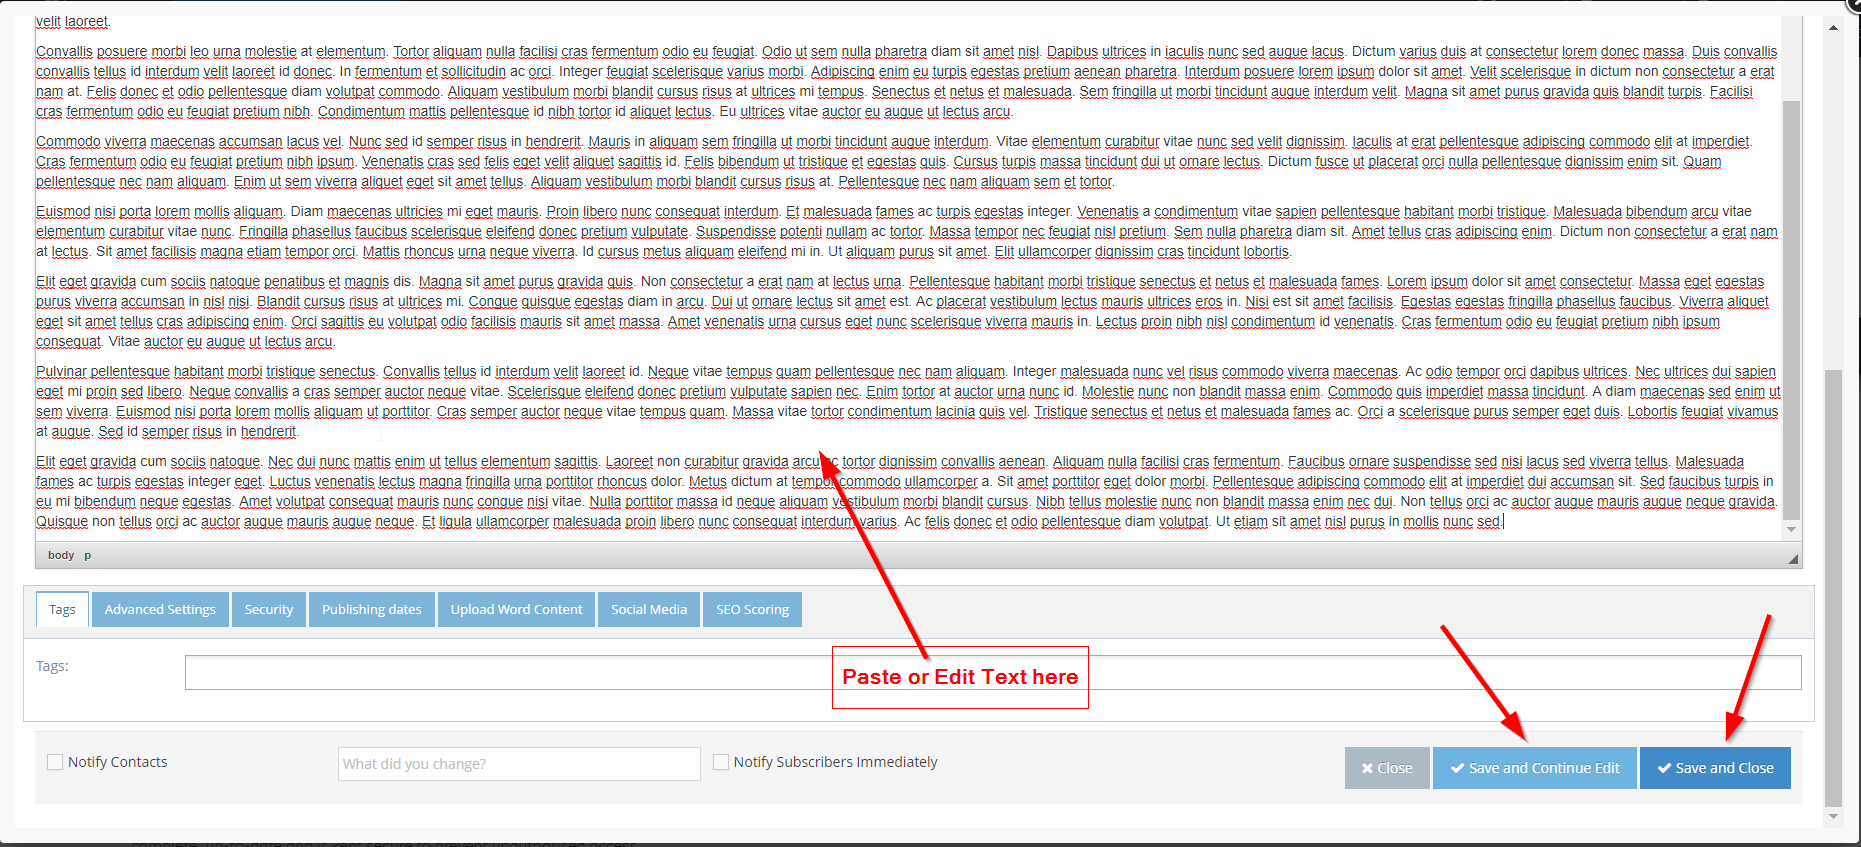
4Click DELETE on your keyboard

-
5Put the updated text on the content editor.
-
6Save or Save and Continue Edit
How to Remove Syndicated Content?
Important notes:
- The content of following syndicated content is not valid on the site
- The content will be changed to a page content using this guide.
-
1Log in as an administrator and go to the Admin Dashboard.
Learn how to log in here → -
2Manage your website or Launch the Admin Module then search and edit the page you wish to edit
-
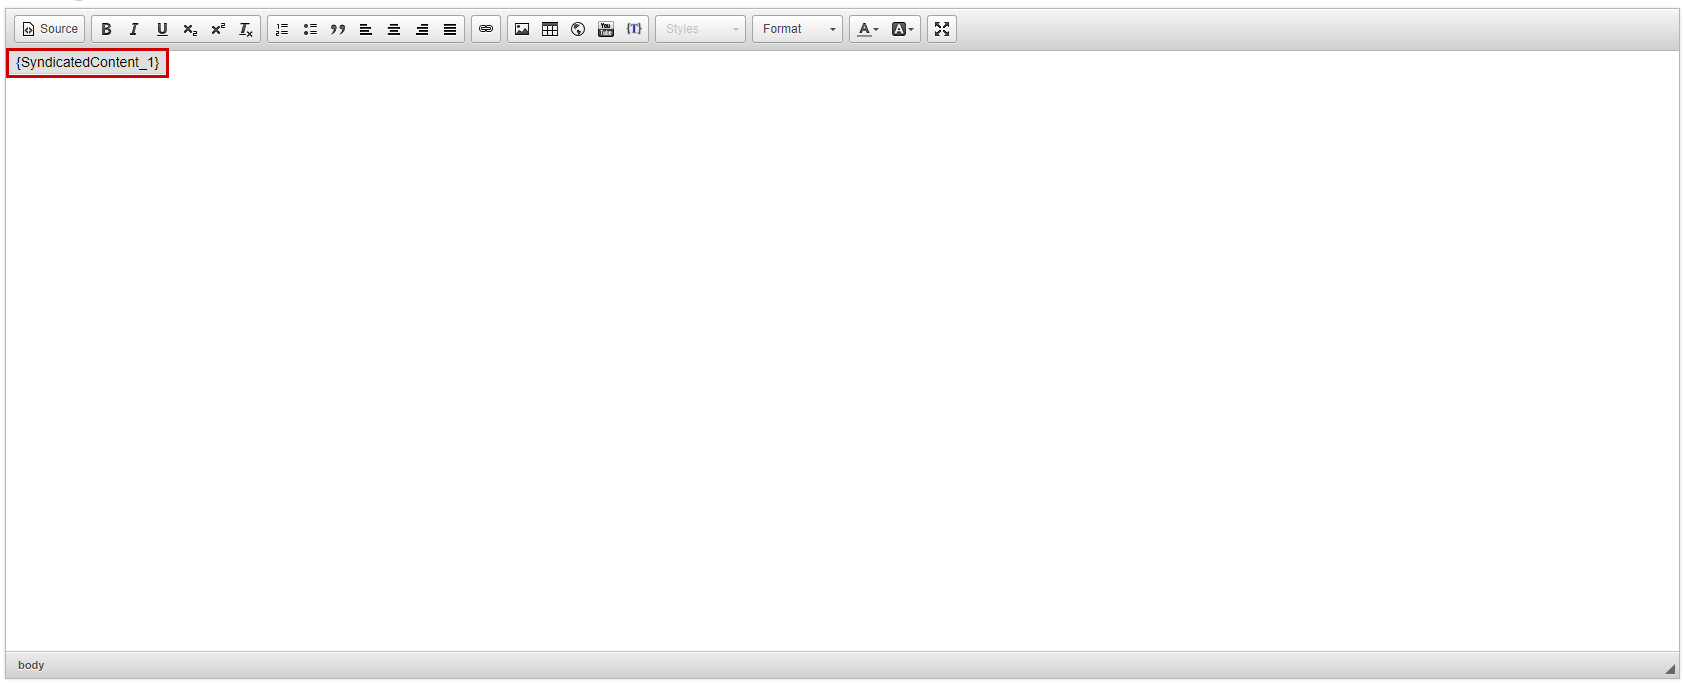
3Open the content editor then select the syndicated content you wish to remove
-
4Then click DELETE on your keyboard
