Canonical Tags Overview
This documentation shows how to edit the Canonical tag in the Site Settings and how to search for it on the page.
See it in action, watch the demo here.
Why you would use a site setting for the canonical tag?
Using a canonical tag ( rel="canonical" ) prevents problems caused by identical or "duplicate" content appearing on multiple URLs. There is a site setting in WebEd that you can update to set the URL for the site's canonical tag.
How to search for the canonical tag on a page
STEP-BY-STEP
-
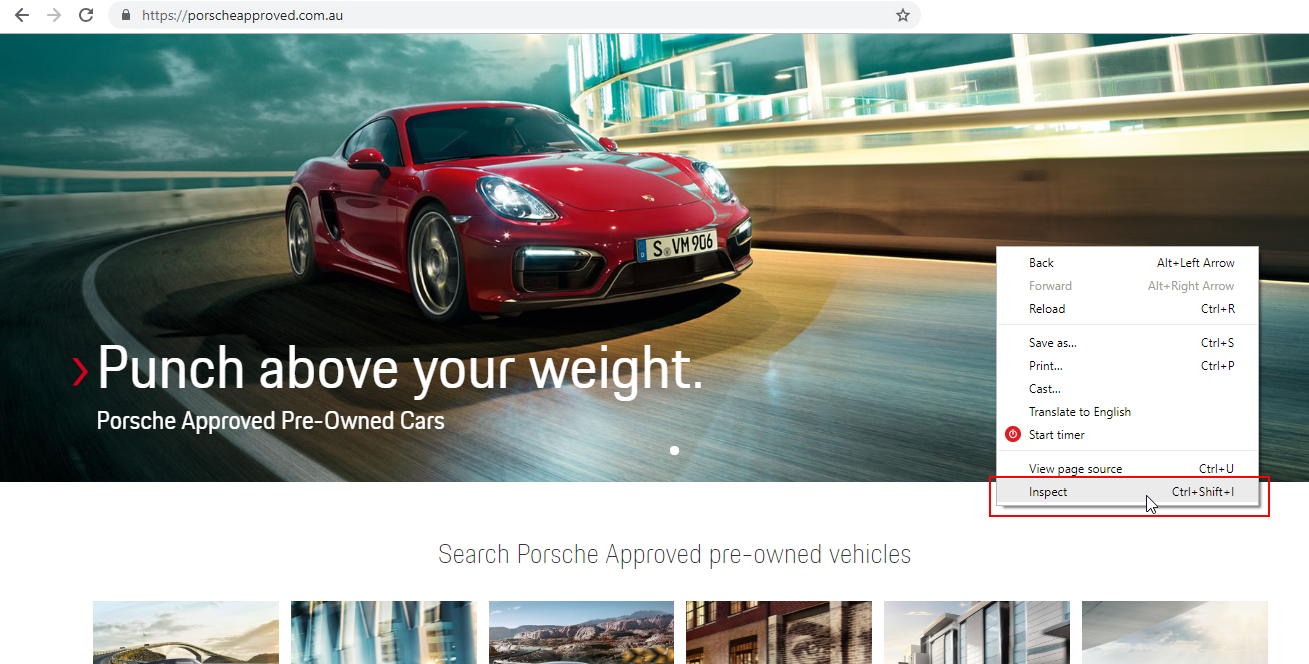
1Load the page where you want to check the canonical tag
-
2Right-click on the page and select "Inspect"
-
3Click Site Settings
-
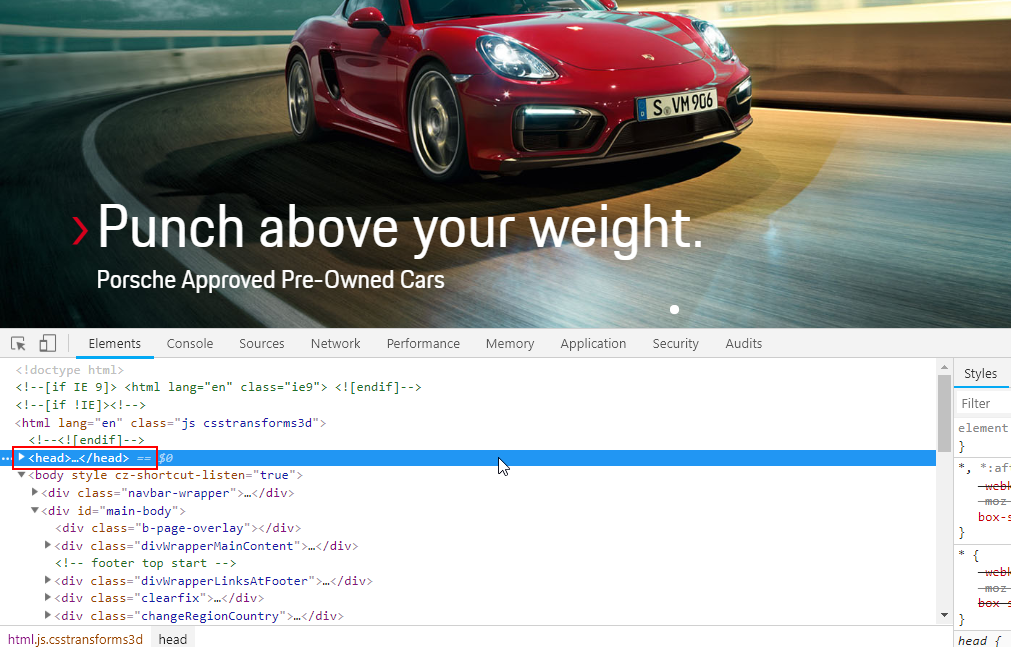
4Check the head tag of the page
-
5Go to the head tag; the canonical tag is found on the of the page
-
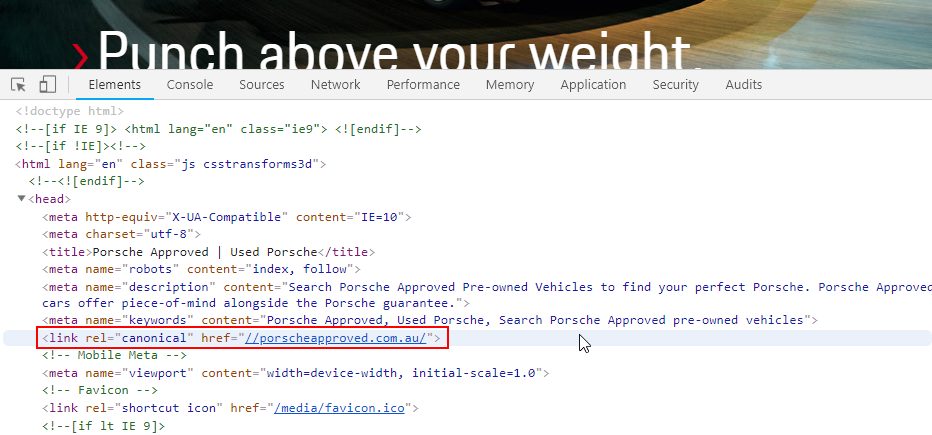
6Expand the head tags and look for the canonical tag
-
7Inside the attribute href, you will see the URL that is currently used for the page
How to update a Canonical Tag
STEP-BY-STEP
-
1Log in as an administrator and go to the Admin Dashboard.
Learn how to log in here → -
2Go to Admin > Settings
-
3Select "Site Settings"
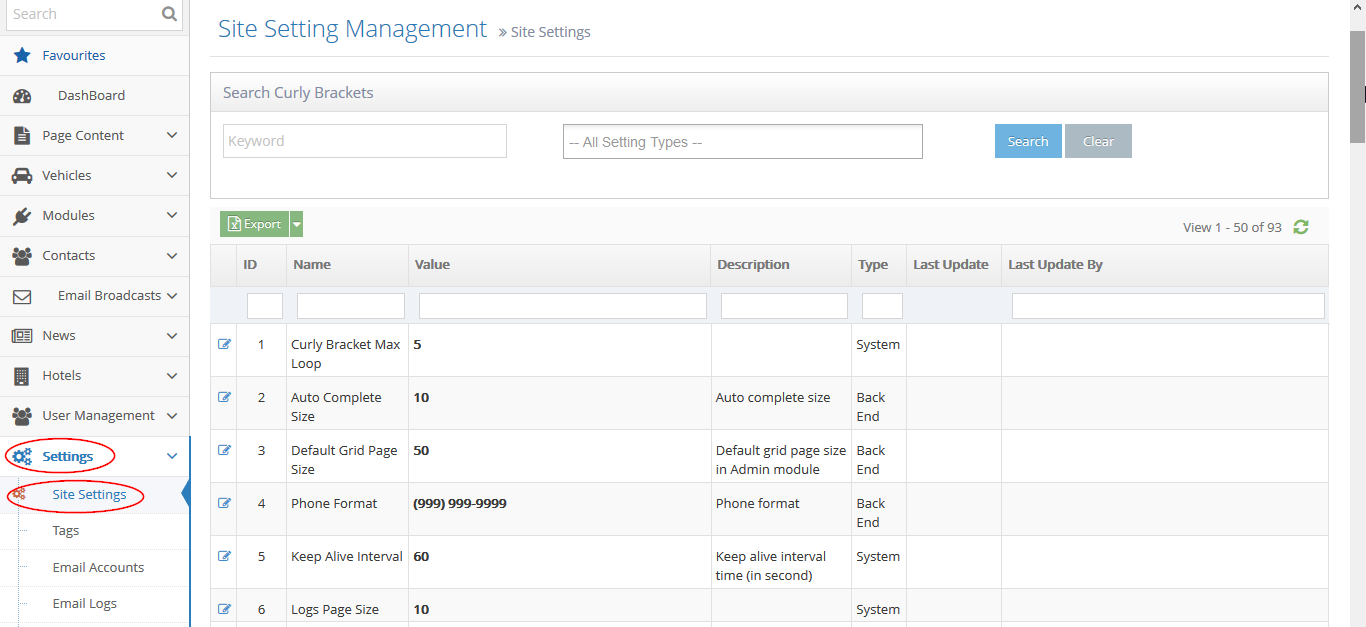
-
4Search for the canonical site setting
-
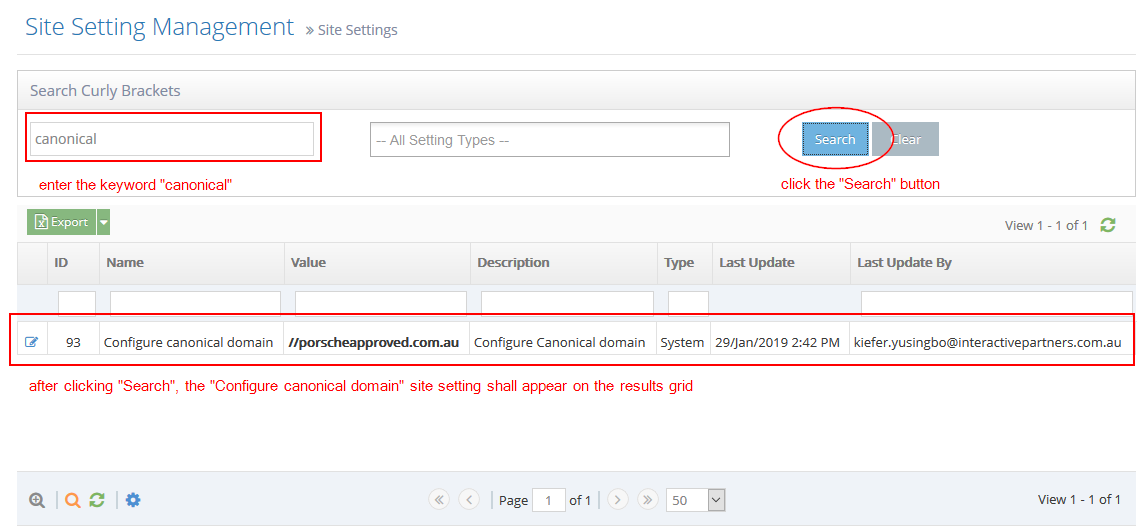
5Under the "Search Curly Brackets" section on top, enter the keyword "canonical" on the first input field
-
6Click the "Search" button on the right
-
7After clicking the "Search" button, the "Configure canonical domain" site setting shall appear on the results grid
-
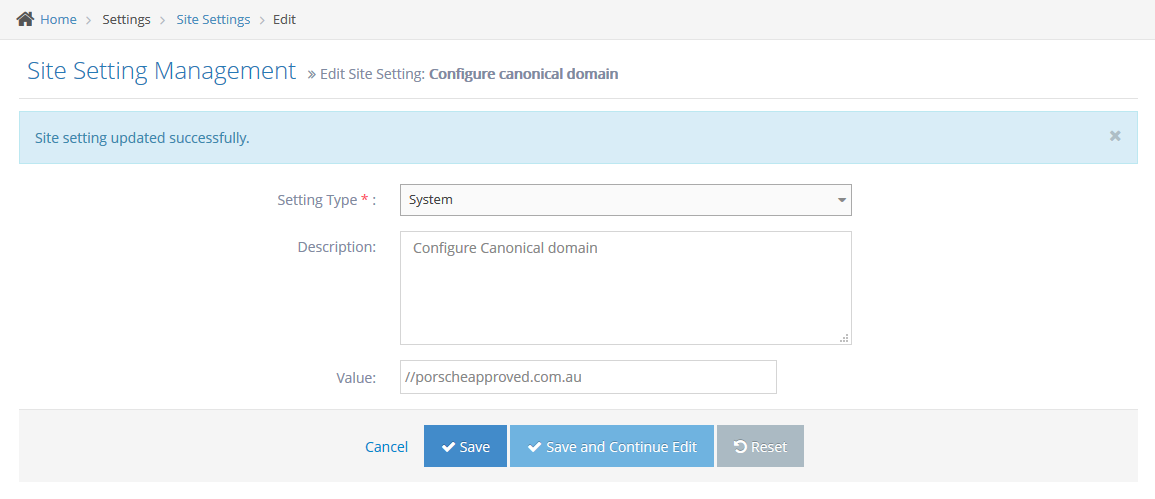
8Update the canonical site setting
-
9Click the "Edit" icon on the left


-
10On the "Value" field, enter the URL for the canonical tag
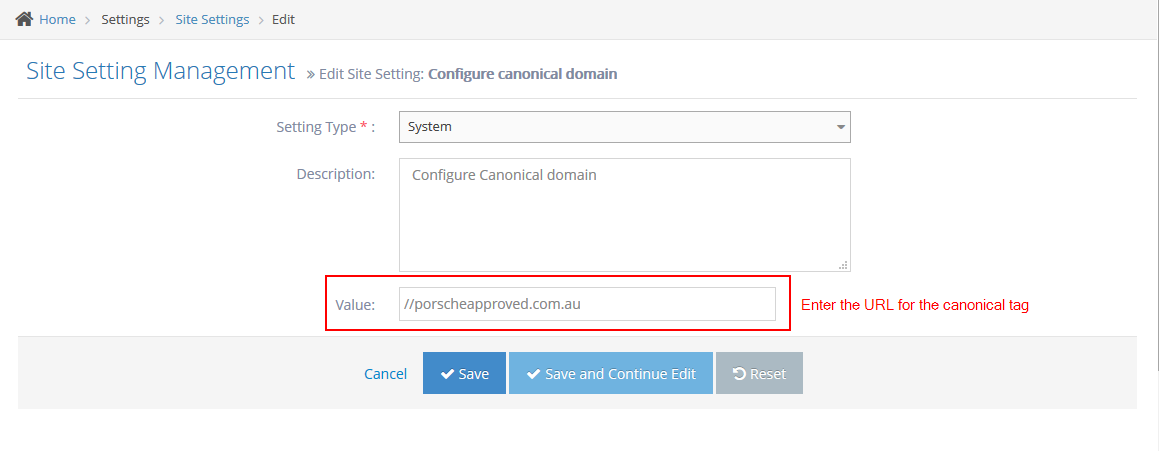
-
11Click the "Save" button to save the update. This change shall be applied to all pages.
-
12There will be a notification on top that says "Site setting updated successfully".