Vehicle Request Info Setting
After the user submits the form, the system needs to send information to the email addresses set up in this setting.
STEP-BY-STEP
-
1Log in as an administrator and go to the Admin Dashboard.
Learn how to log in here → -
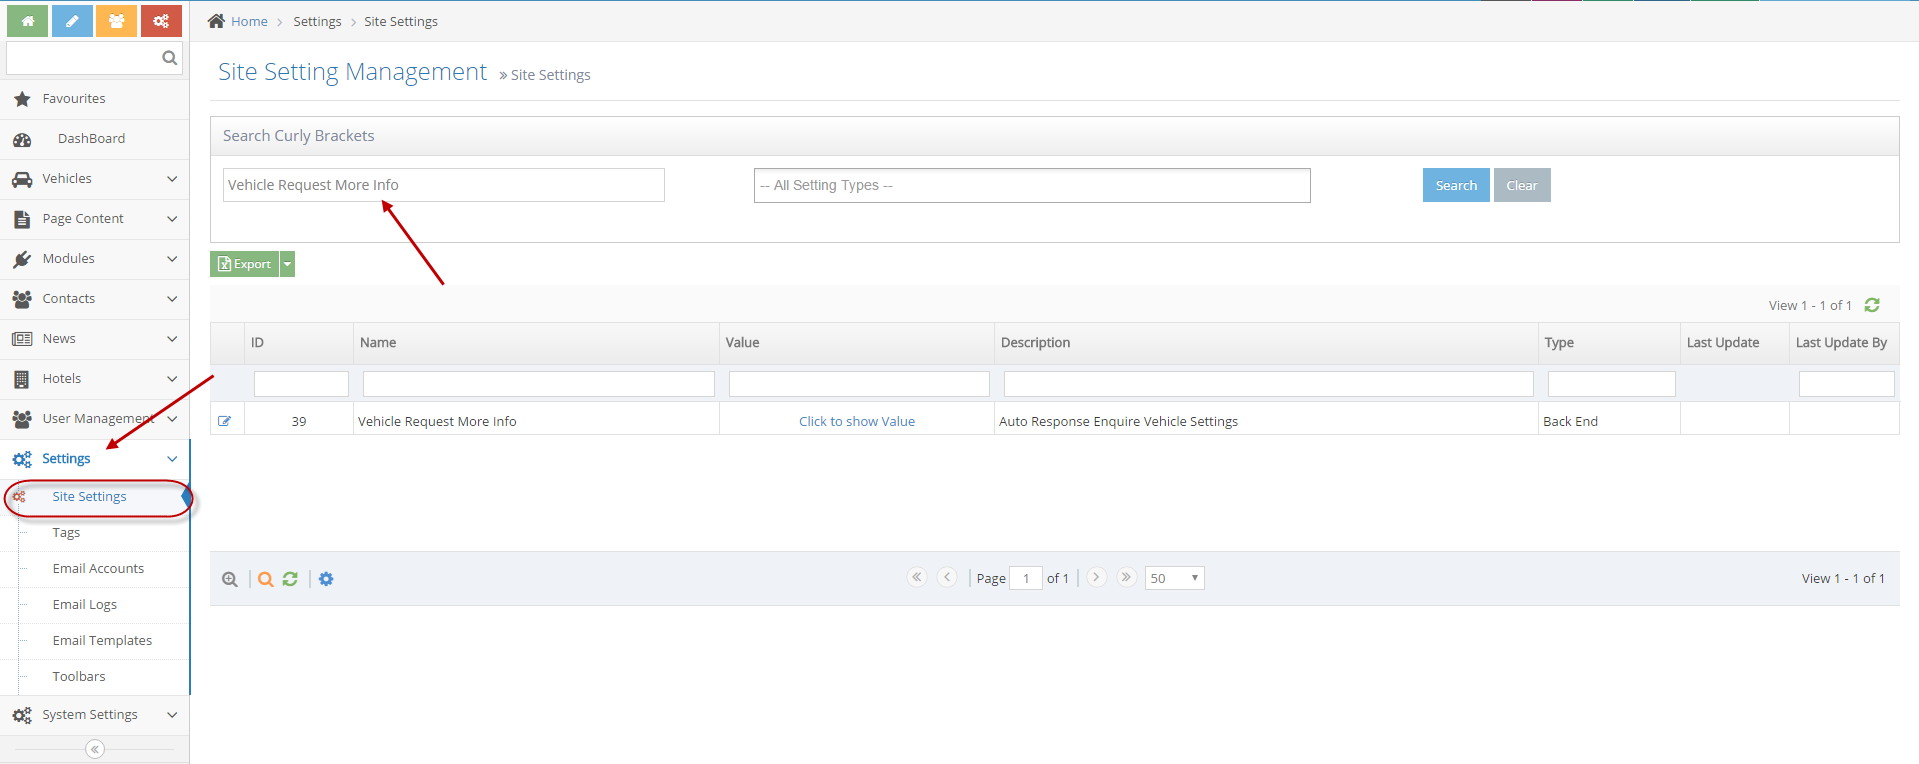
2Go to Site settings by selecting: Settings > Site Settings, then search for Vehicle Request More Info
-
3Click the Edit icon to edit the settings
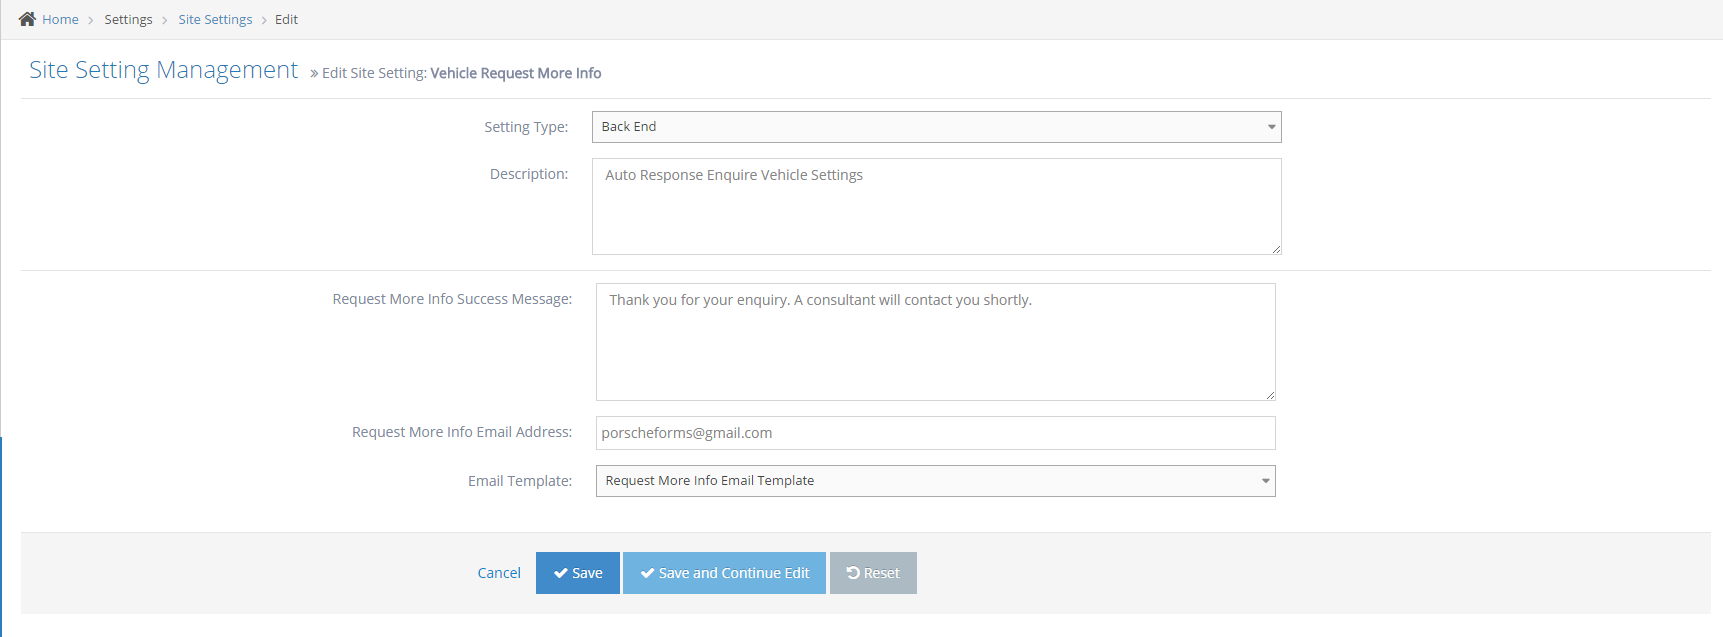
- Description: the description of the setting
- Request More Info Success Message: This text will display after the form submit
- Request More Info Email Address: List email addresses will receive form information, each email separate by comma or semicolon
- Email Template: The template will send to a list of Email Addresses
-
4Press Save or Save And Continue Edit to save
Configurating an Email Template
STEP-BY-STEP
-
1Log in as an administrator and go to the Admin Dashboard.
Learn how to log in here → -
2Edit email template
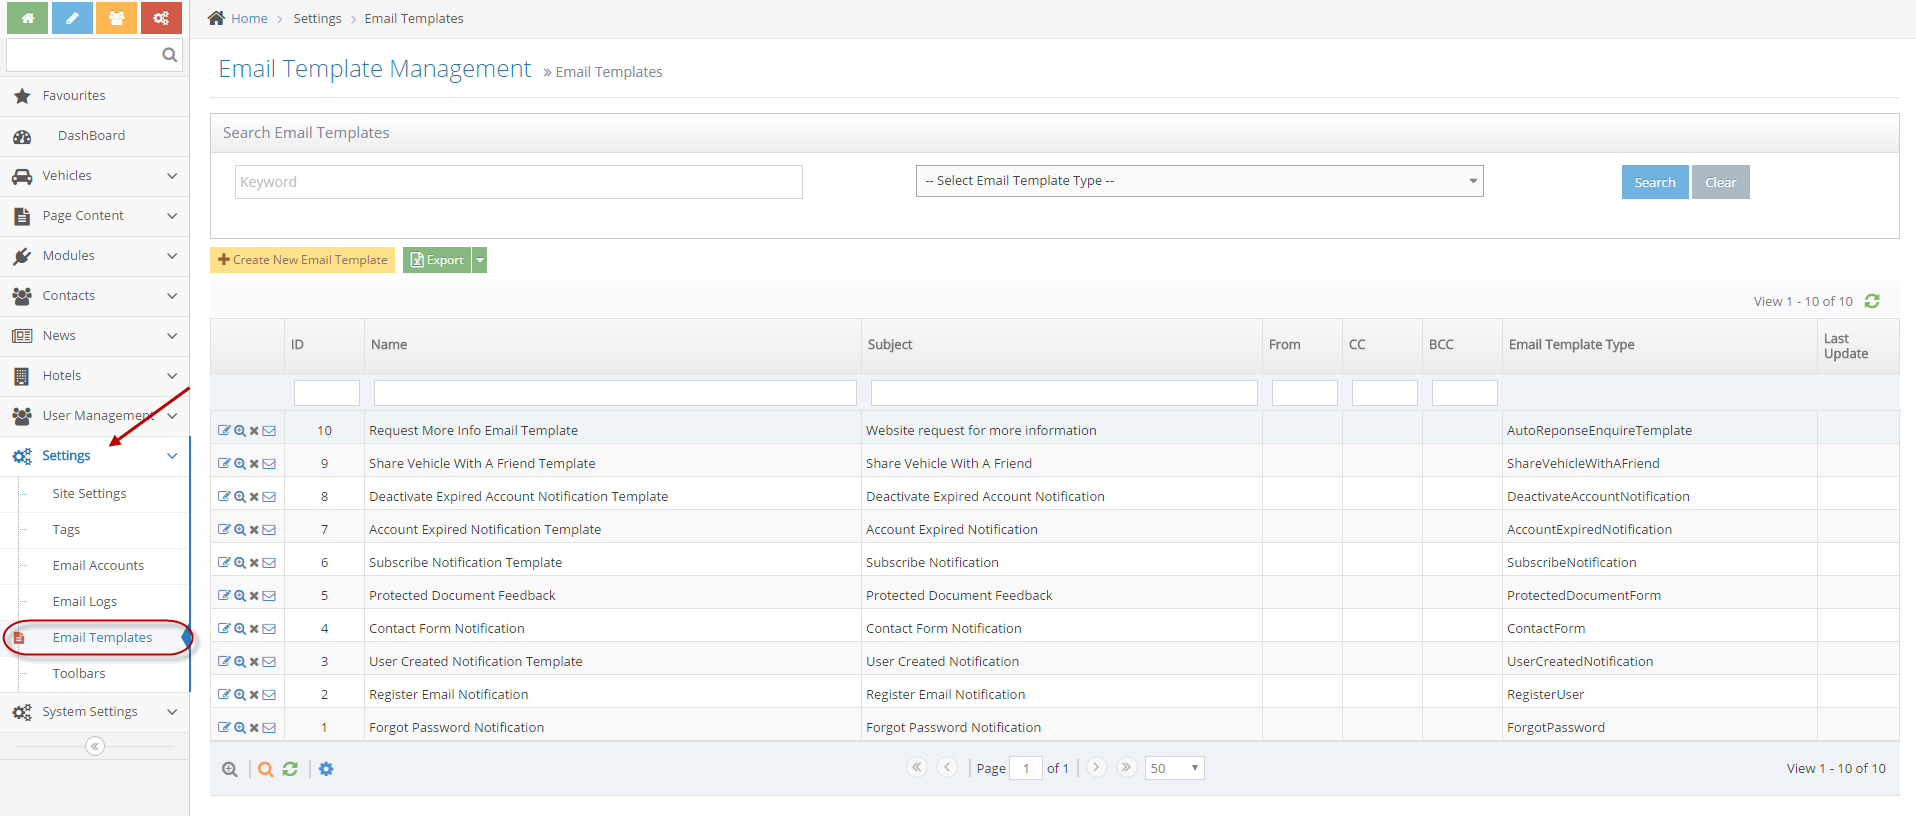
- In the left menu, select Settings > Email Templates
- List email templates will list in the grid
-
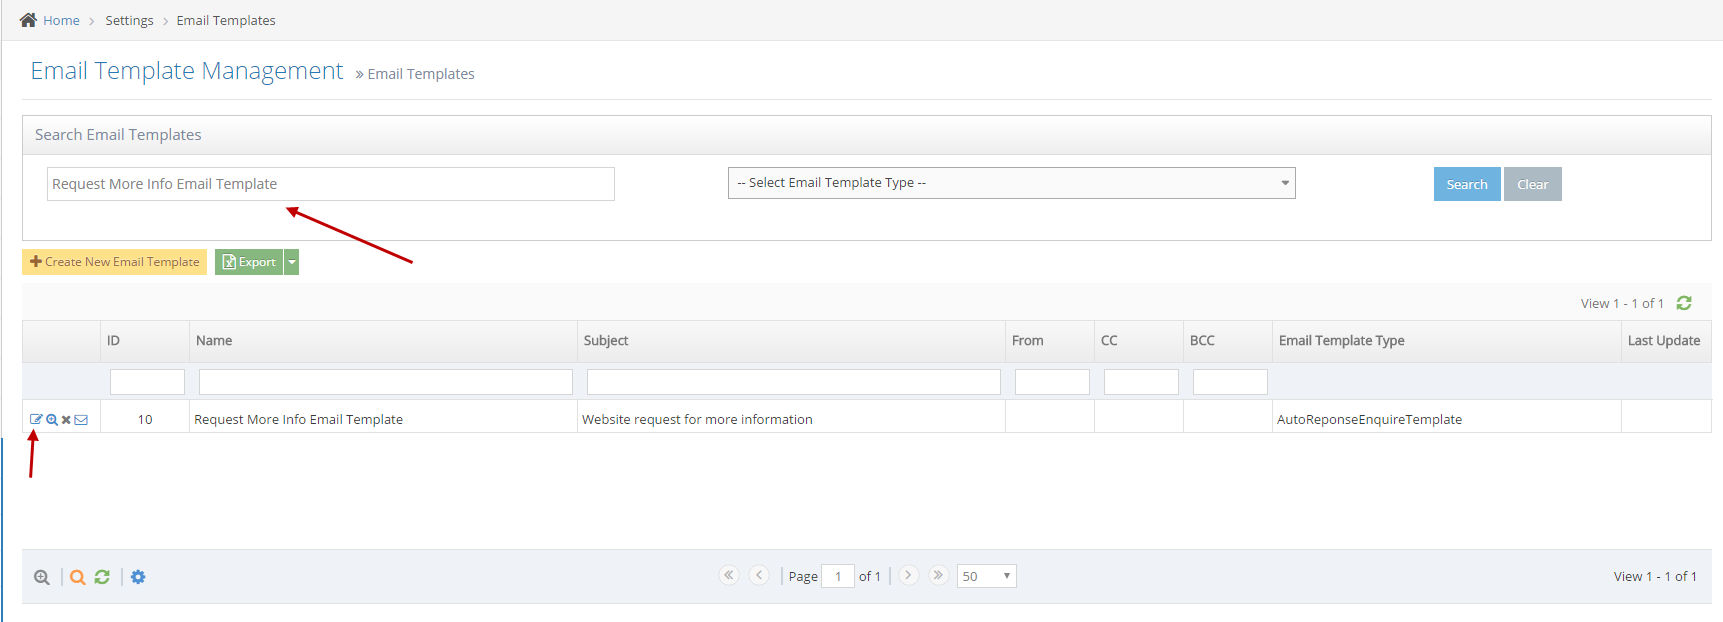
3Find Request More Info Email Template
-
4Click the icon to edit the email template

- Name: Name of email template
- Subject: The subject of the email will send to list emails in Request More Info Email Address in site settings.
- From: Send From Email address
- From Name: The name to be displayed in the From field in the email
- CC, BCC: The list of the email address/es that also needs to receive the Request More Info email and separate them by comma or semicolon
- Body: Content of email template. Admin can be added more fields by clicking on Add Property button
-
5Create a new email template
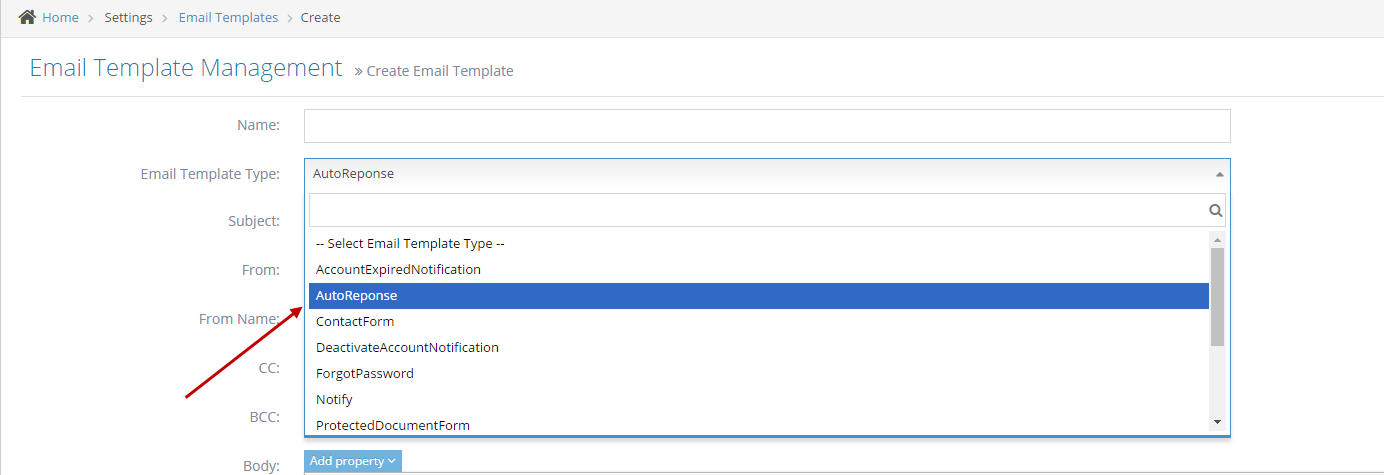
- Click Add New Email Template button to create
- Choose Email Template Type is AutoResponse in the select box
-
6Enter other information then press Create or Create And Continue Edit button to save.
-
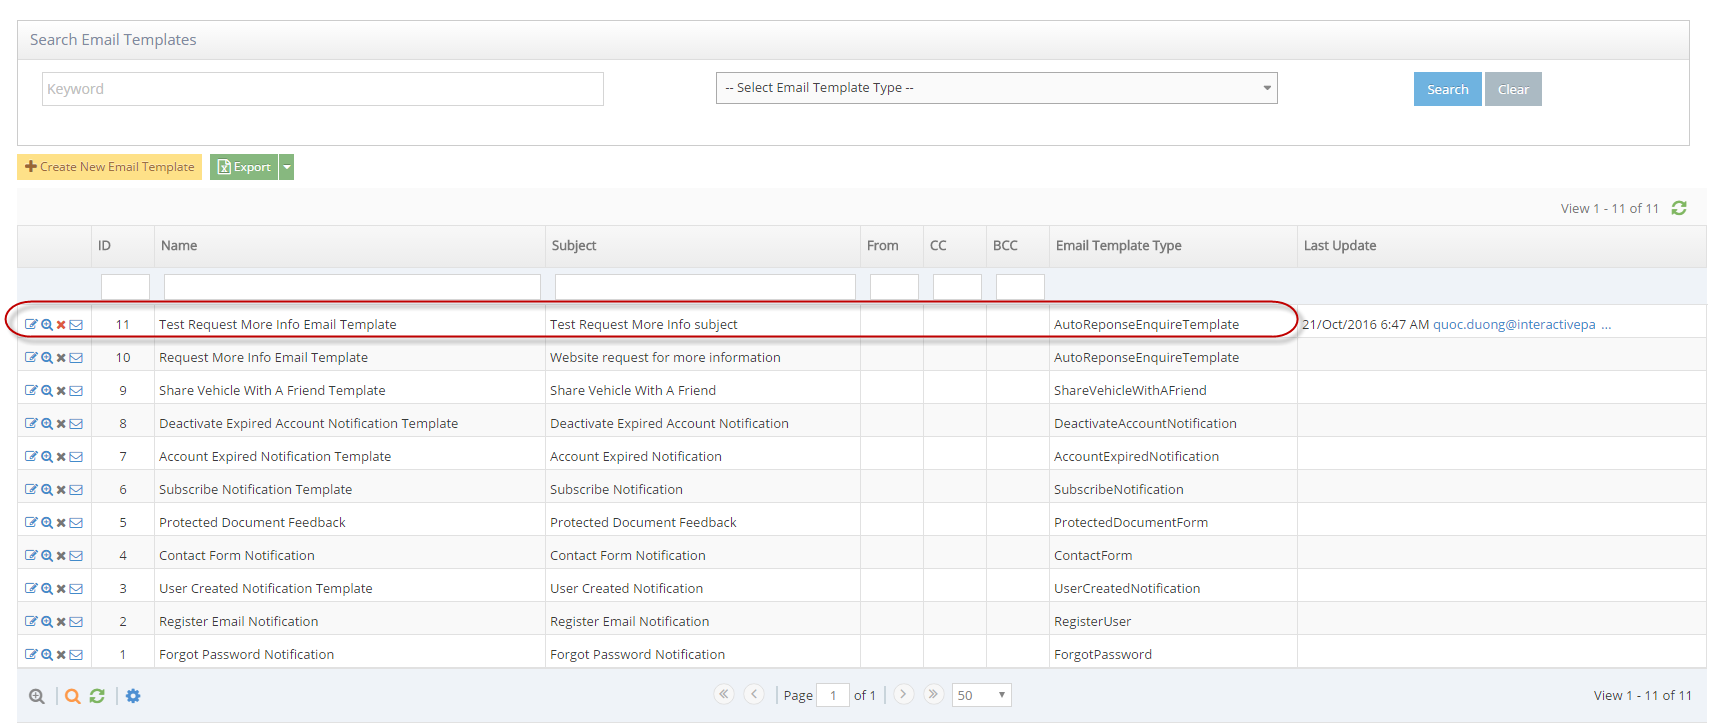
7A new email template will display in the grid
-
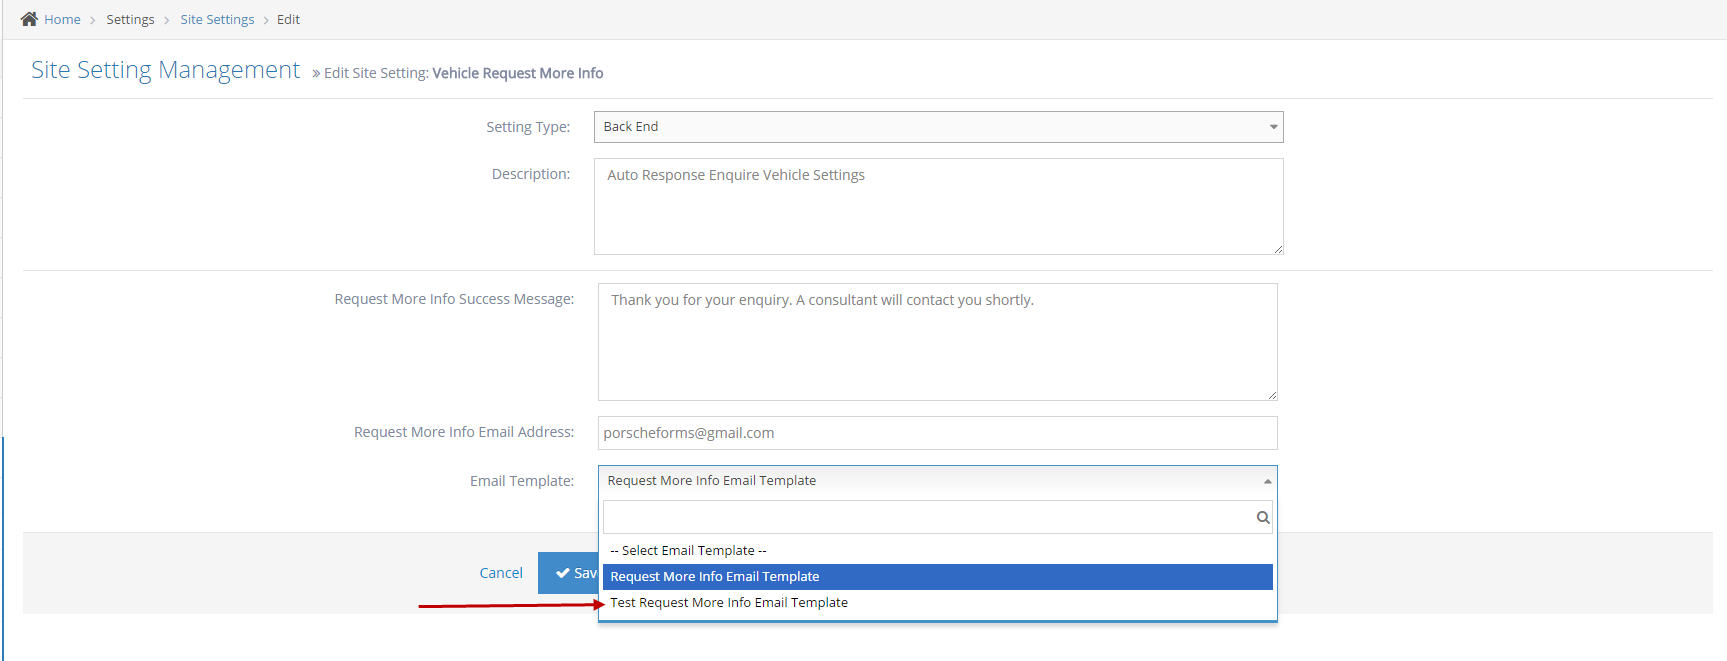
8Now, go back to Site Settings and then edit the Vehicle Request More Info setting.
-
9In the Email Template dropdown will display the new email template just created from the previous step
