- Google Analytics Overview
- Adding Analytics to your Site Dashboard
- Register for the Google OAuth Client
- Add to the Google Analytics Site Setting to your Website Admin Dashboard
- Add the OAuth details to your website
- Adding Analytics Tracking to your site
- Editing the Analytics code on your site
- Adding Google Analytics Tracking Code into your Master Template
- Managing your Analytics Account
- Setup Automated Google Analytics Reports
Google Analytics
Google Analytics Overview
Google Analytics allows you to track your visitors counts, time on site and pages viewed along with a wide range of other traffic statistics. WebEd fully supports Google Analytics and provides easy-to-use tools for integrating Google Analytics
Adding Analytics to your Site Dashboard
Requirement: You will need a Google Account that owns the property (the website)
Full details are below, but this step-by-step guide will outline the process. This is an optional step if only the client requests to display the Google Analytics overview on the Dashboard.
Register for the Google OAuth Client
-
1Browse the URL https://console.developers.google.com
-
2Sign in with your Google account
-
3Click on the Create Project button to create a new project
-
4In the pop-up window which appears, enter your project name as desired and click on Create button. Let this process run, it may take a few seconds
-
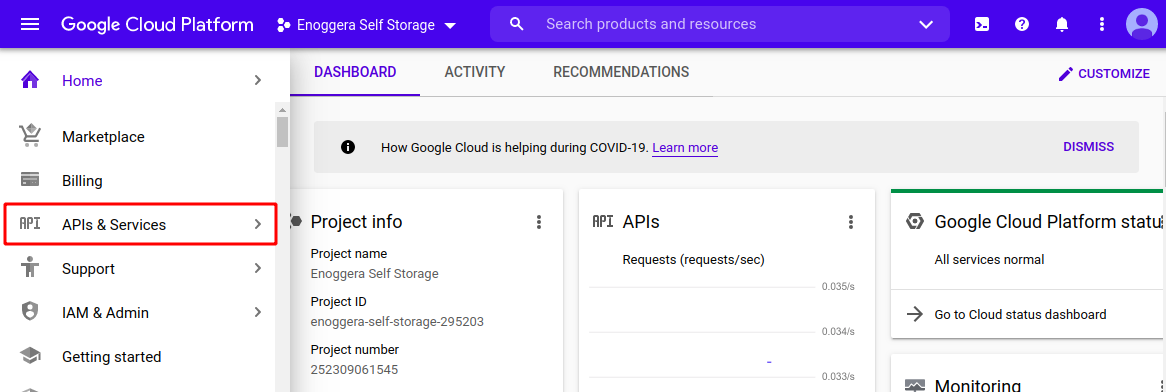
5After the project is created successfully, the page reloads with some options on the left menu: Home, Marketplace, Billing, APIs & Services, Support, etc.
-
6Click on the APIs & Services
-
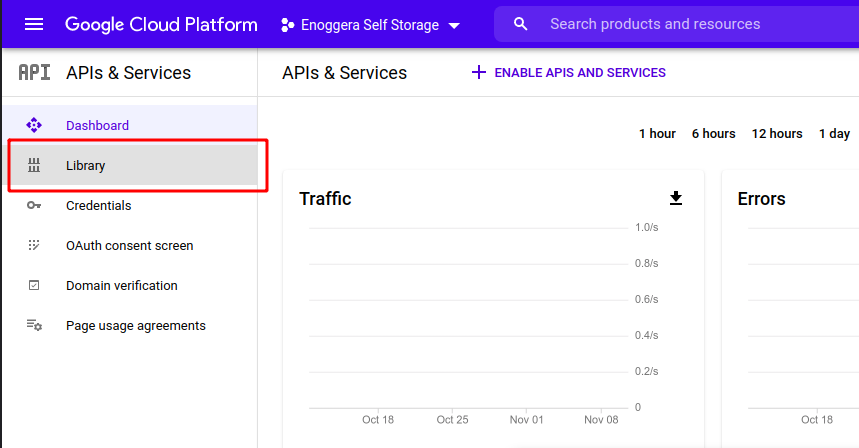
7Choose the Library tab.
-
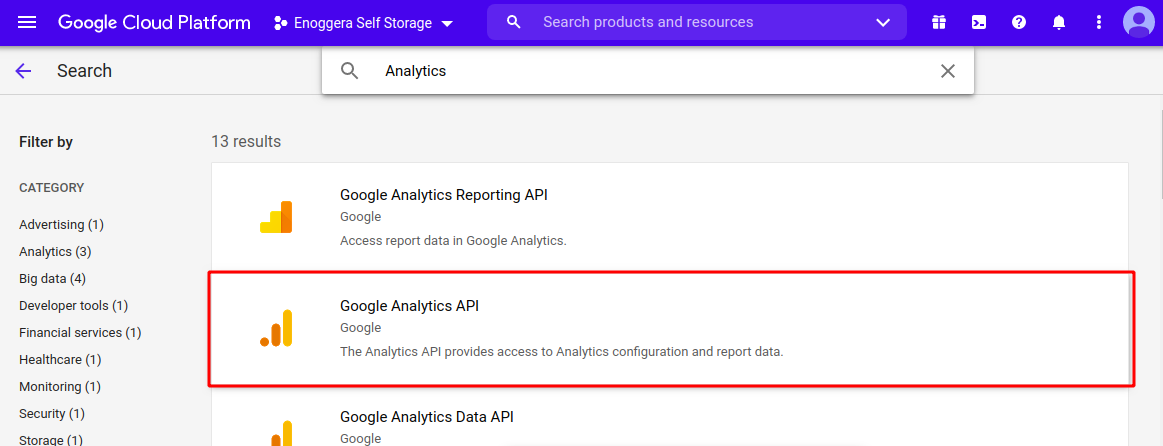
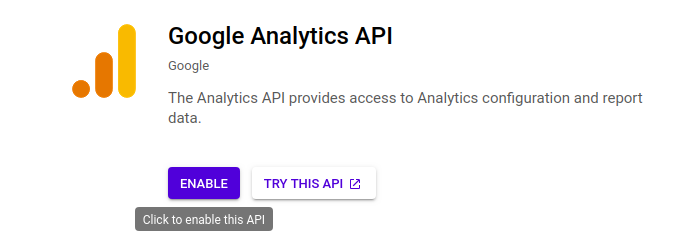
8In the search box on the top search "Analytics API", then click on "Google Analytics API".
-
9Once you're on the Google Analytics API, click the "Enable" button
-
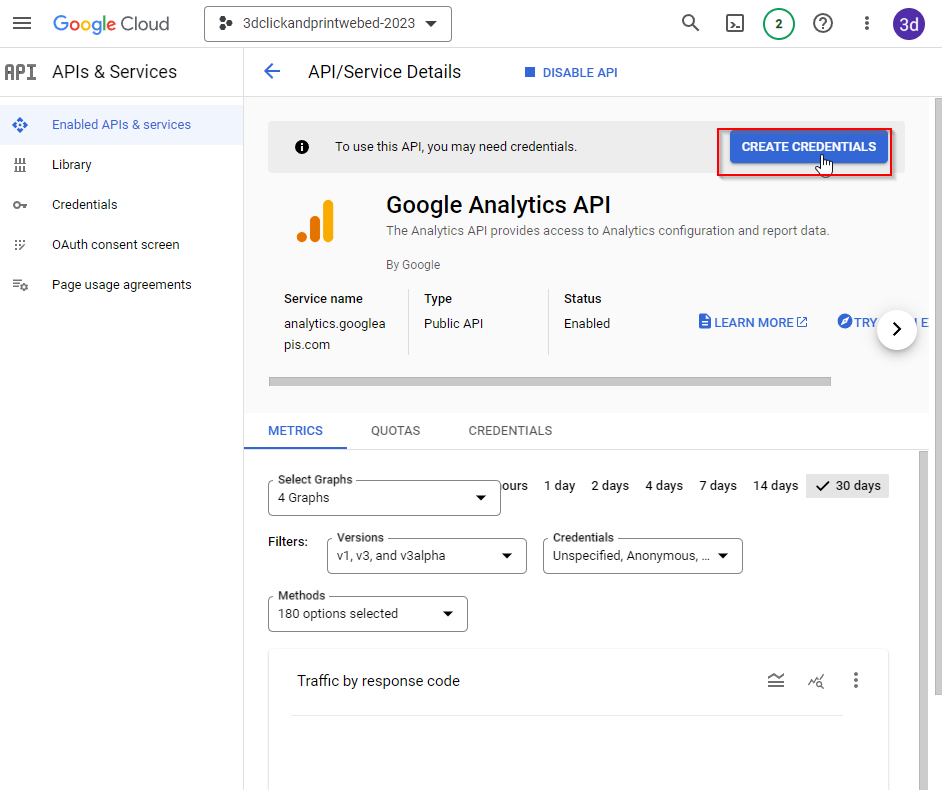
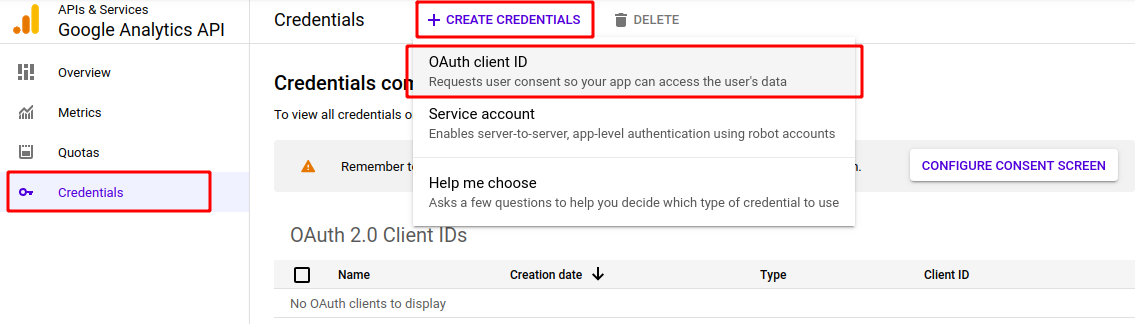
10Now on the left menu, click the Credentials tab, then click Create Credentials on top, and choose OAuth Client ID.
-
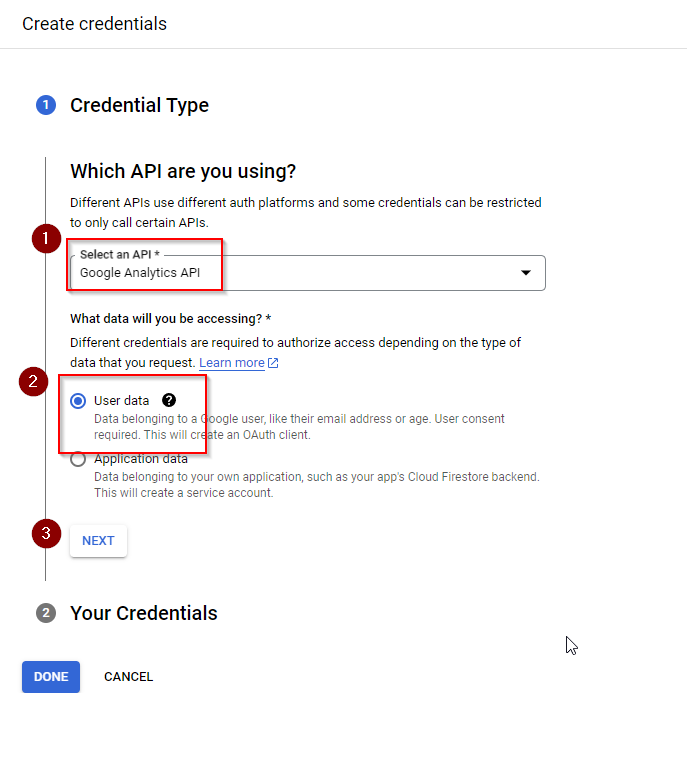
11Follow the details for the Credential Type form
-
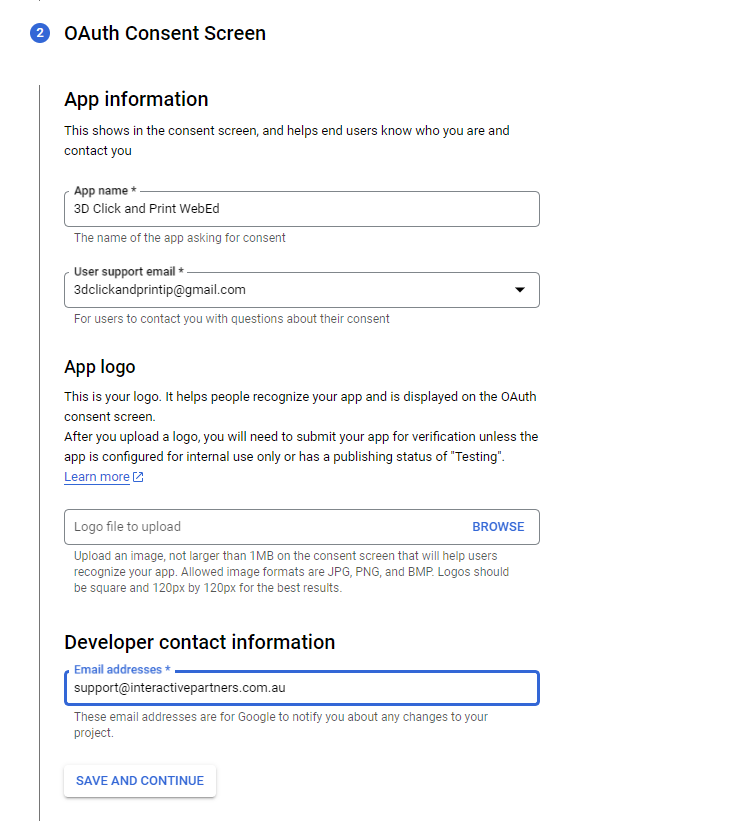
12OAuth Screen form details:
-
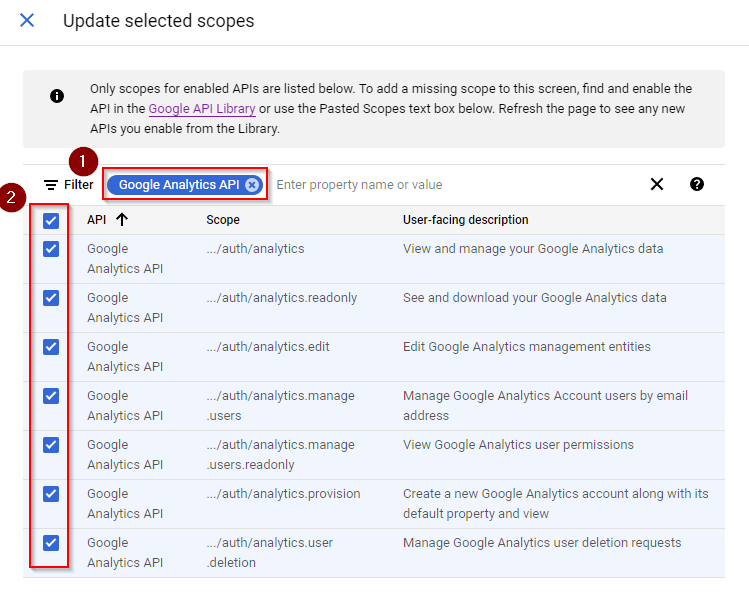
13Update selected Scopes, search for the "Google Analytics API" on the filter section and select all the scopes from the results
-
14If you are not on the Google Analytics API screen anymore, on the left menu, click the Credentials tab, then click Create Credentials on top, and choose OAuth Client ID.
-
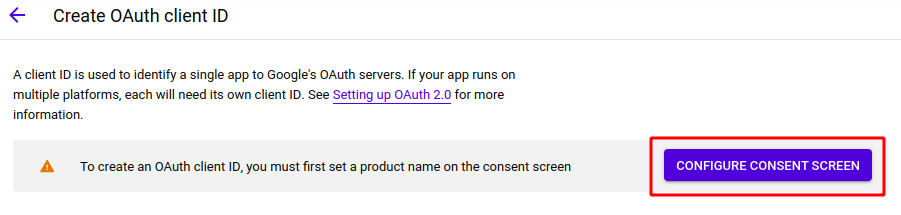
15Once you're on the "Create OAuth client ID" page, click the Configure Consent Screen button
-
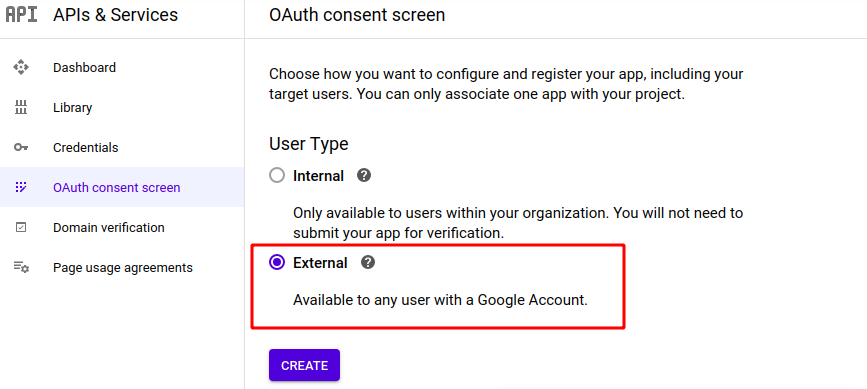
16On the OAuth Consent Screen, choose "External", then click the Create button
-
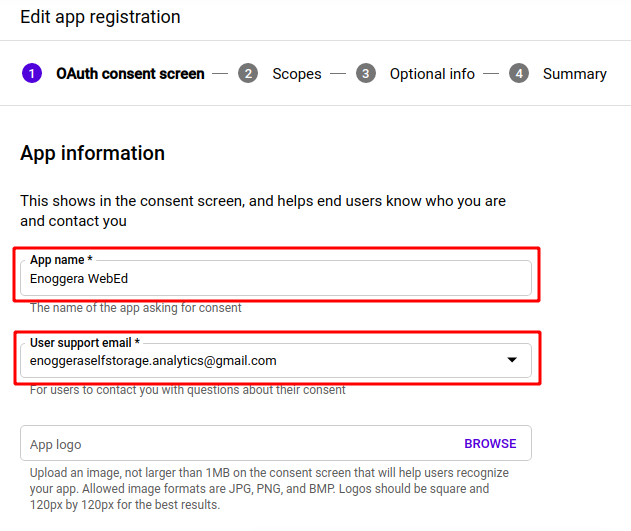
17You will now be taken to the Edit App Registration page > OAuth Consent Screen
-
18For the App Information, enter the following:
- App Name - enter a name, which can be company name + "WebEd"
- User Support Email - use the email address you created for the API (Gmail)
-
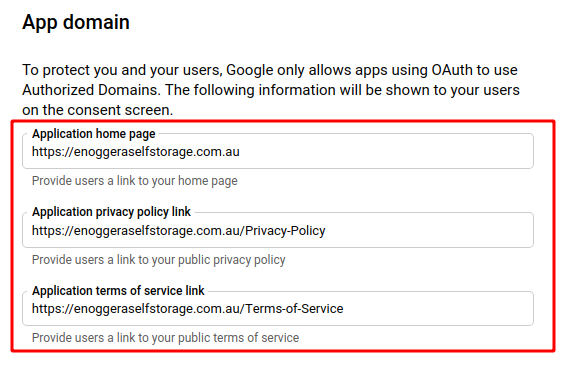
19Under App Domain, enter the following:
- Application home page
- Application Privacy Policy link
- Application Terms of Service link
-
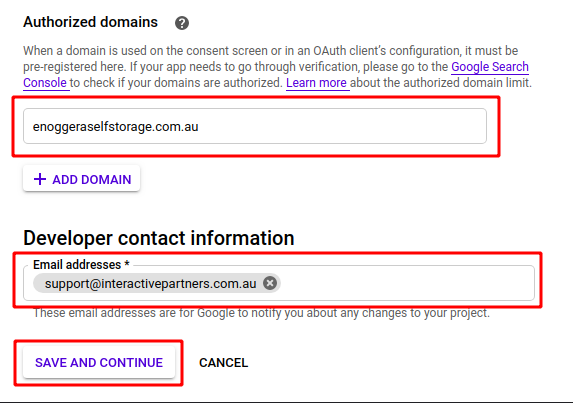
20Under Authorized Domains, enter the following:
- Domain - add the domain of your site
- Developer Contact Information - enter and add [email protected]
- Then click the Save and Continue button
-
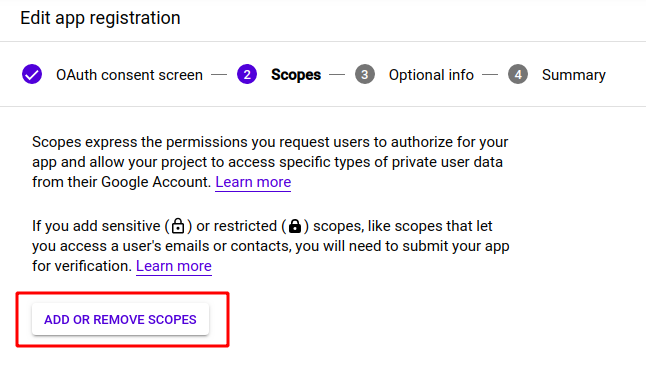
21You will now be taken to the Edit App Registration page > Scopes
- Click the Add or Remove Scopes button
-
22A window "Update Selected Scopes" will pop up on the right
-
23Click through the table rows and look for "Google Analytics API" without a lock icon
-
24Once you find it, tick the box beside it, then click the Update button at the bottom of the window
-
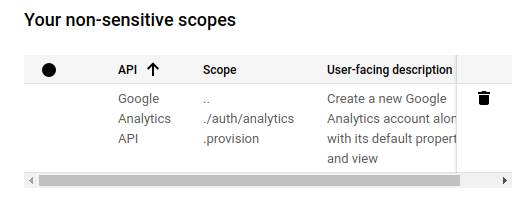
25Upon doing this, the window should close, and the Google Analytics API should now be added under "Your non-sensitive scopes"
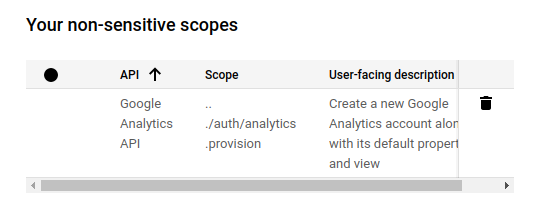
-
26Ignore "Your sensitive scopes" and " Your restricted scopes", and scroll to the bottom, click the Save and Continue button
-
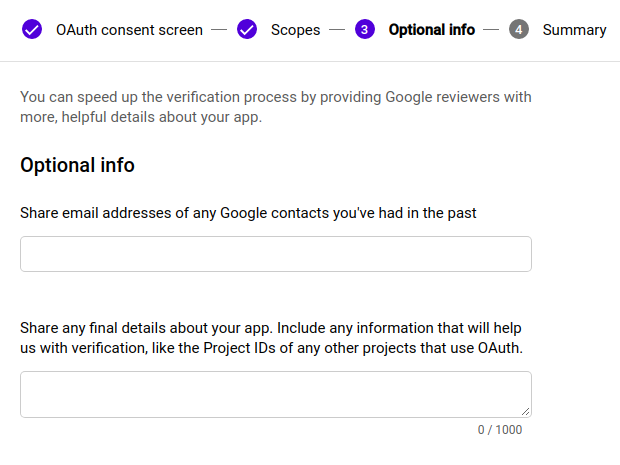
27You will now be taken to the Edit App Registration page > Optional Info
-
28Ignore all fields here. Scroll to the bottom and click the Save and Continue button
-
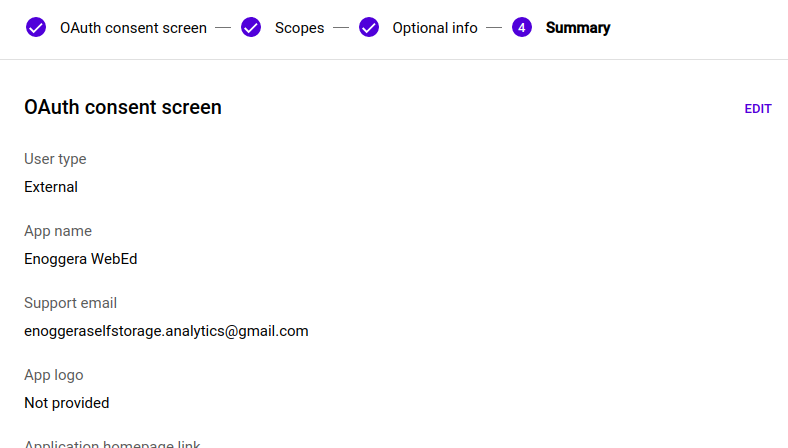
29You will now be taken to the Edit App Registration page > Summary screen
-
30Check everything, then click the button "Back to Dashboard" at the bottom
-
31Now, go back to the Credentials page, click Create Credentials, choose OAuth Client ID
-
32You will now be taken to the Create OAuth client ID page
-
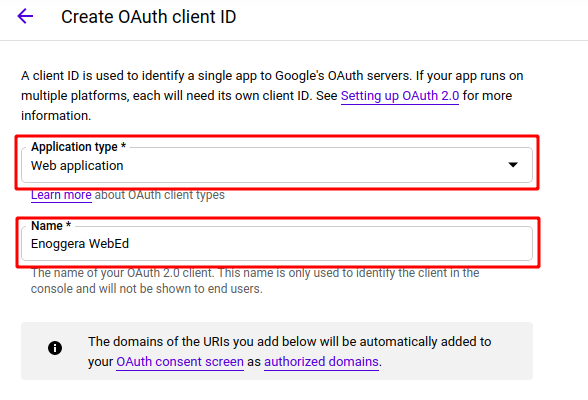
33Enter the following information:
- Application type - select Web application
- Name - enter the name of the site or any preferred
-
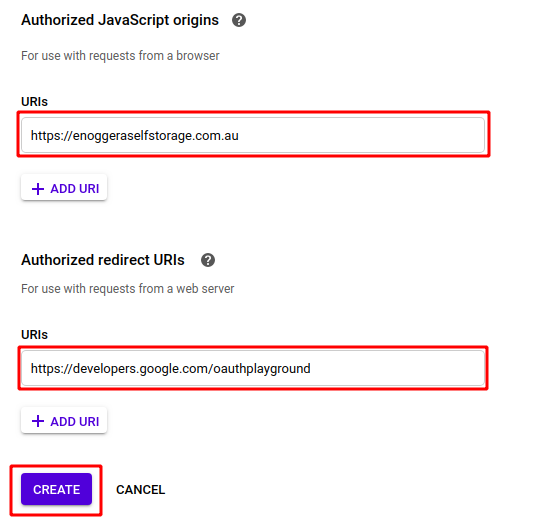
34Under Authorized JavaScript origins, add your website URL in the URIs field
-
35Under Authorized redirect URIs, enter "https://developers.google.com/oauthplayground"
-
36Click on the Create button. This will generate your Client ID and Client Secret
-
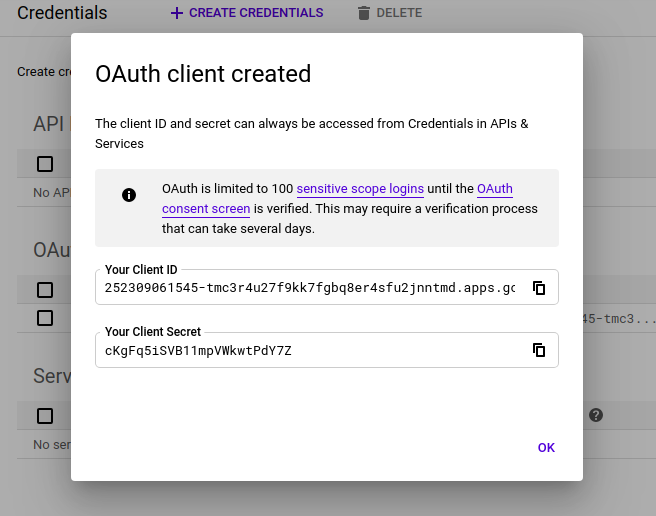
37Once you click the Create button, the page reloads and a window with your Client ID and Client Secret information appears
-
38Copy both Client ID and Client Secret and paste them into Notepad, you will need it in a minute
Add to the Google Analytics Site Setting to your Website Admin Dashboard
-
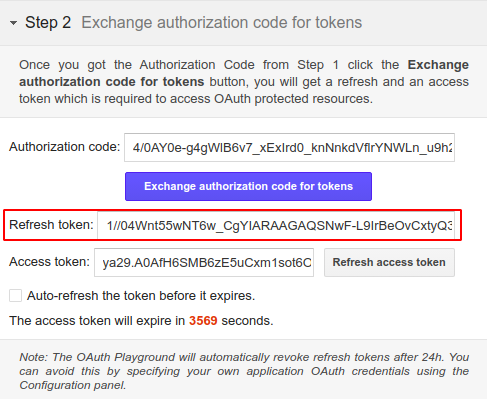
1Enter the Client ID, Client Secret and Refresh Token in the Settings
-
2Click Save Settings.
-
3Your dashboard will load.
Add the OAuth details to your website
-
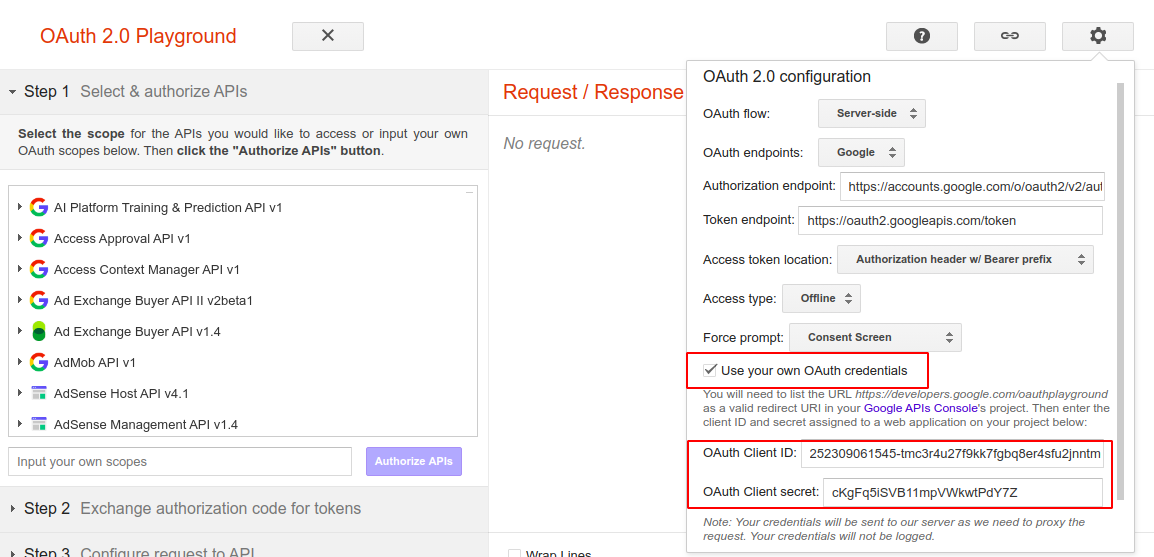
1Now browse the URL https://developers.google.com/oauthplayground/.
-
2On the right side of the window, click the Settings icon
-
3Tick the box for Use your own OAuth credentials
-
4In the pop-up window which appears, enter your project name as desired and click on Create button. Let this process run, it may take a few seconds
-
5Enter the copied Client ID and Client Secret in the corresponding fields, then click Close at the bottom
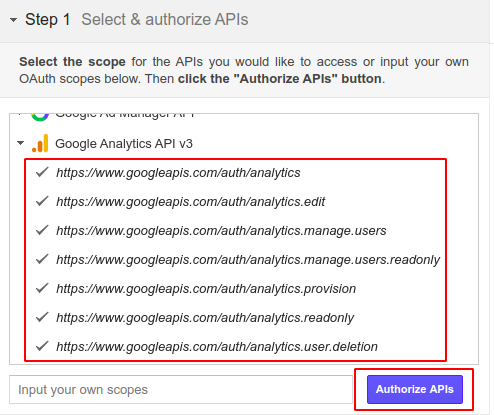
Step 1: Select and Authorize APIs
-
1Search for "Google Analytics API v3" using the scroll. Click all the options under it, then click on the Authorize APIs button after the selection
-
2Accept all the permissions asked by Google
-
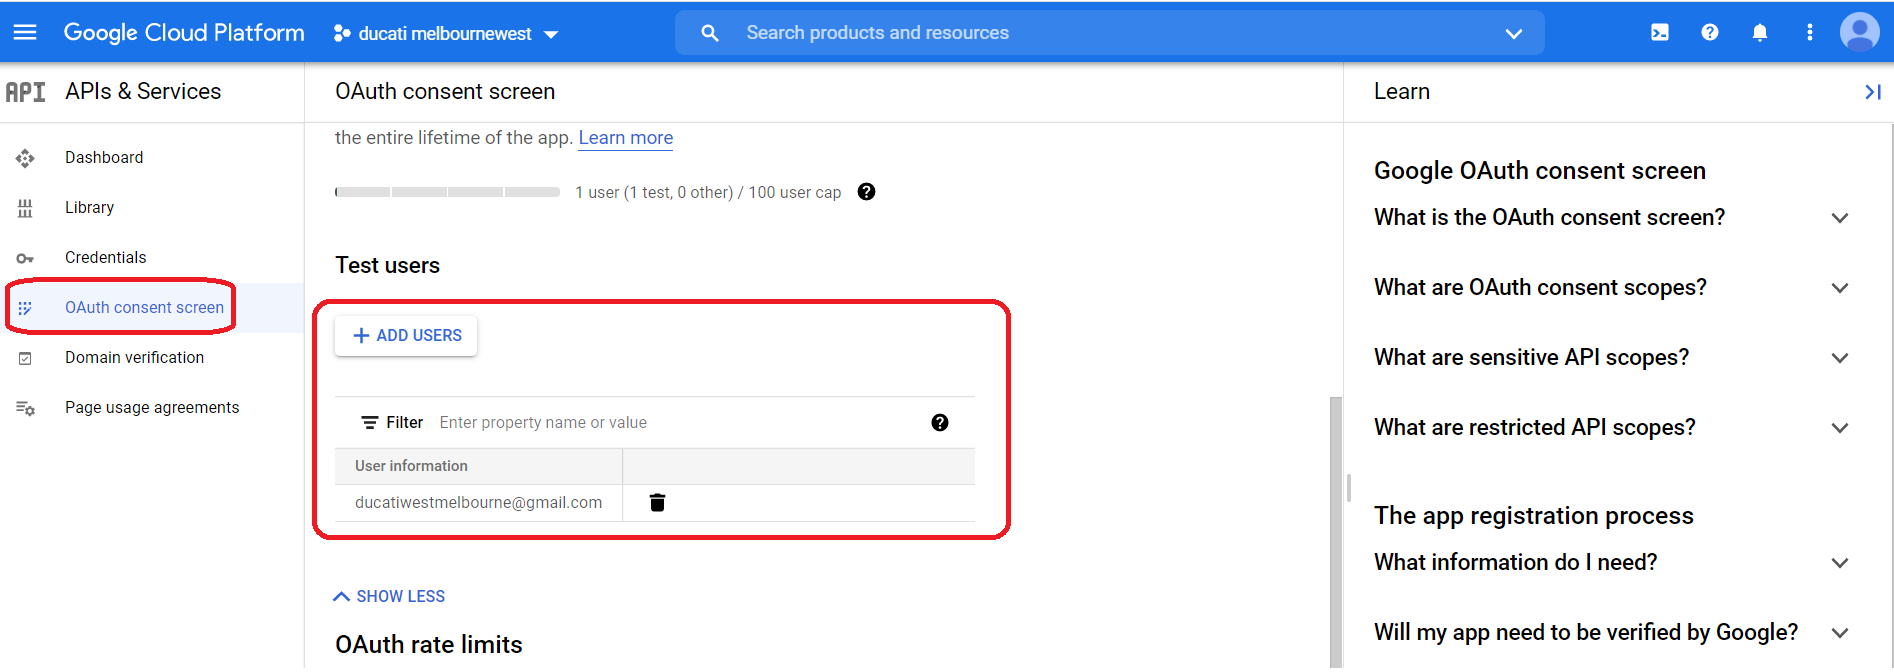
3If you get any Authorisation Errors, please make sure your Gmail account has been added to Test users
Adding Analytics Tracking to your site
Get Your Analytics Code from Google
The first step is to get the tracking code for your site. You get this from your analytics account.
If you don't have an analytics account you can create one here - https://www.google.com/analytics.
-
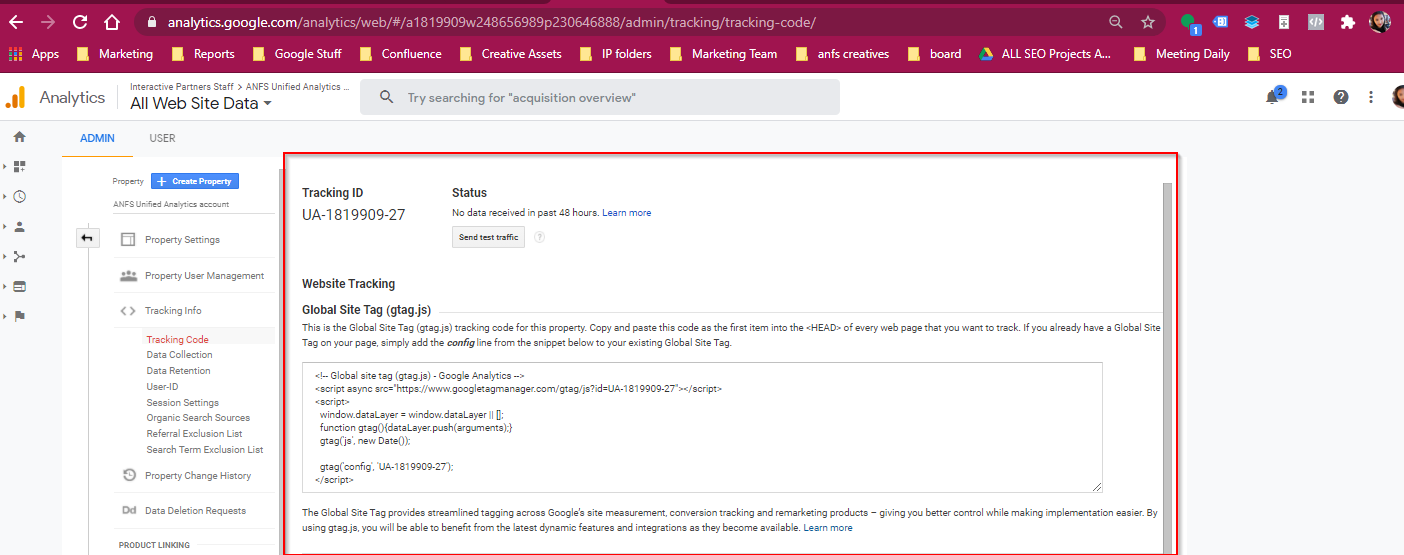
1Login to https://analytics.google.com
-
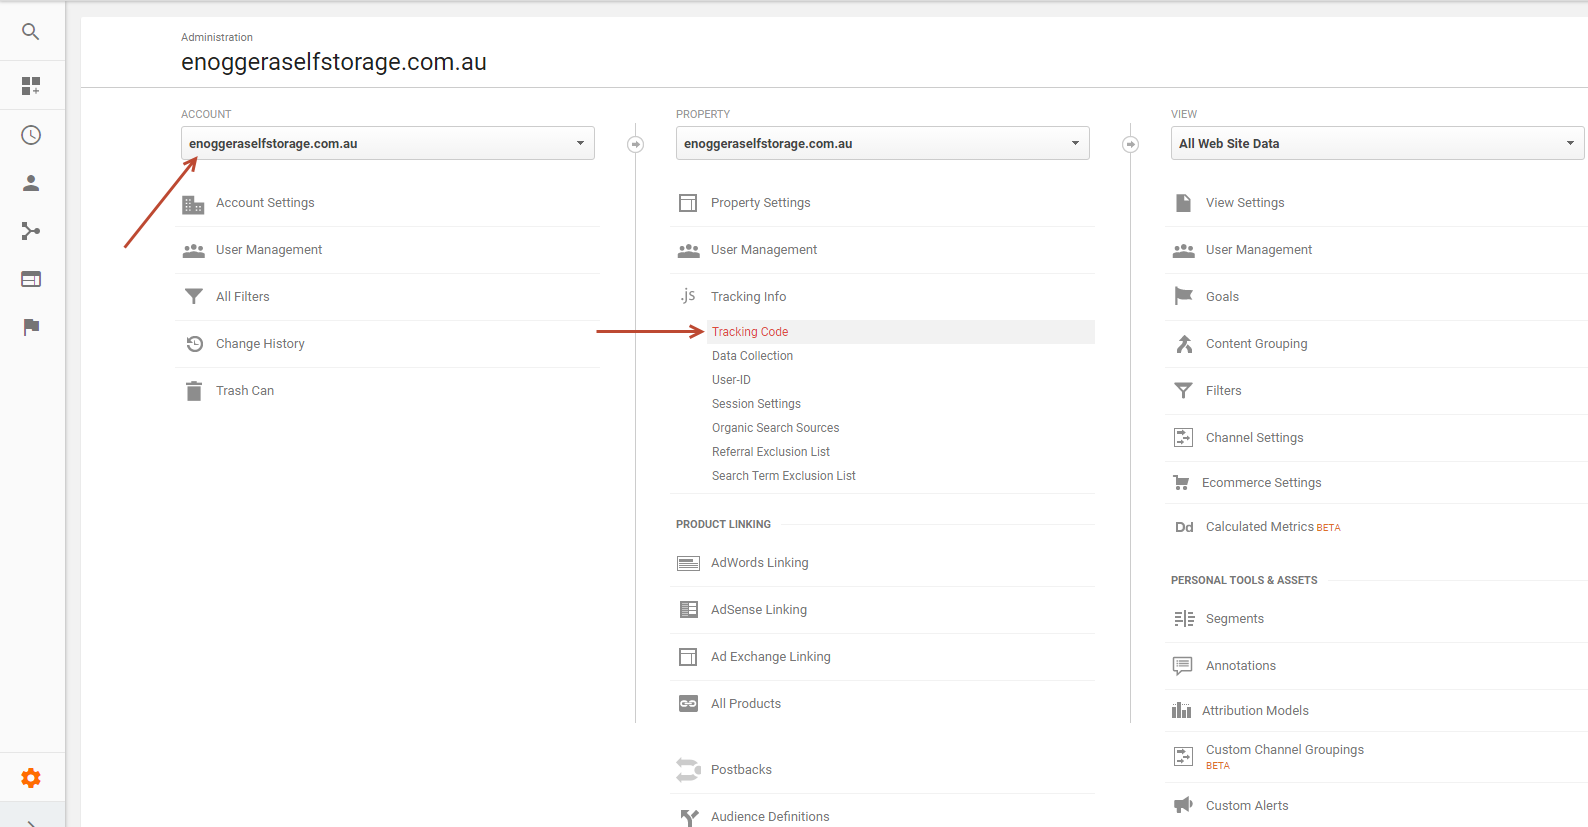
2Go to the admin panel
-
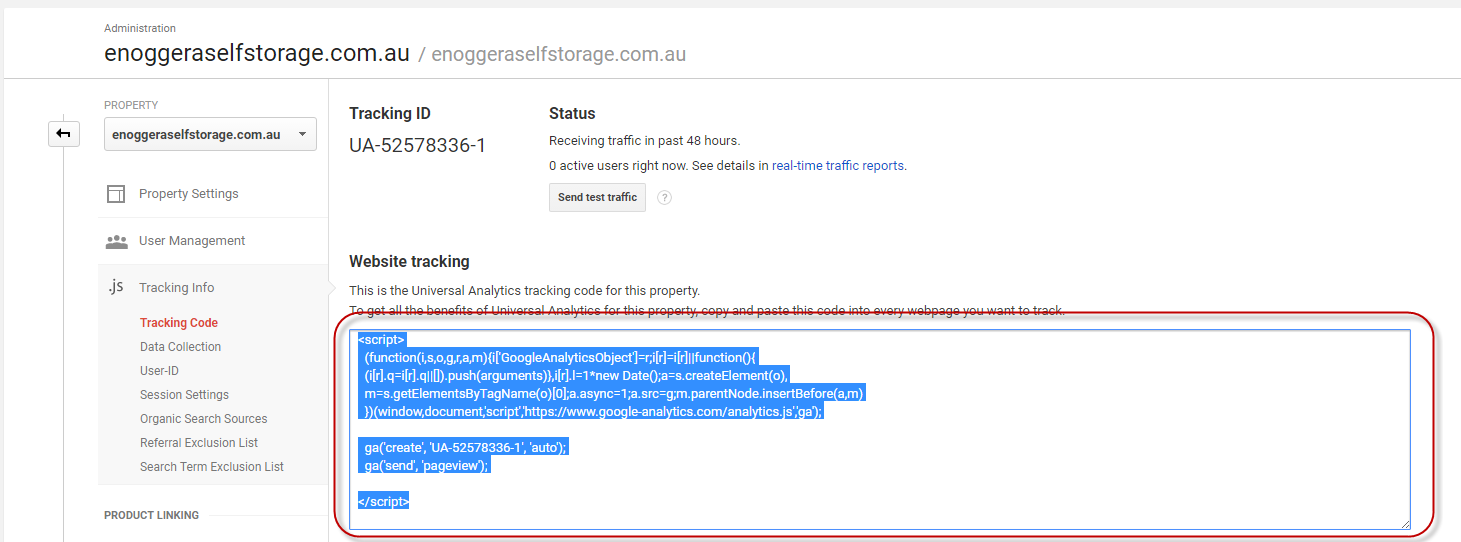
3Go to the tracking code window
-
4Copy the tracking code
-
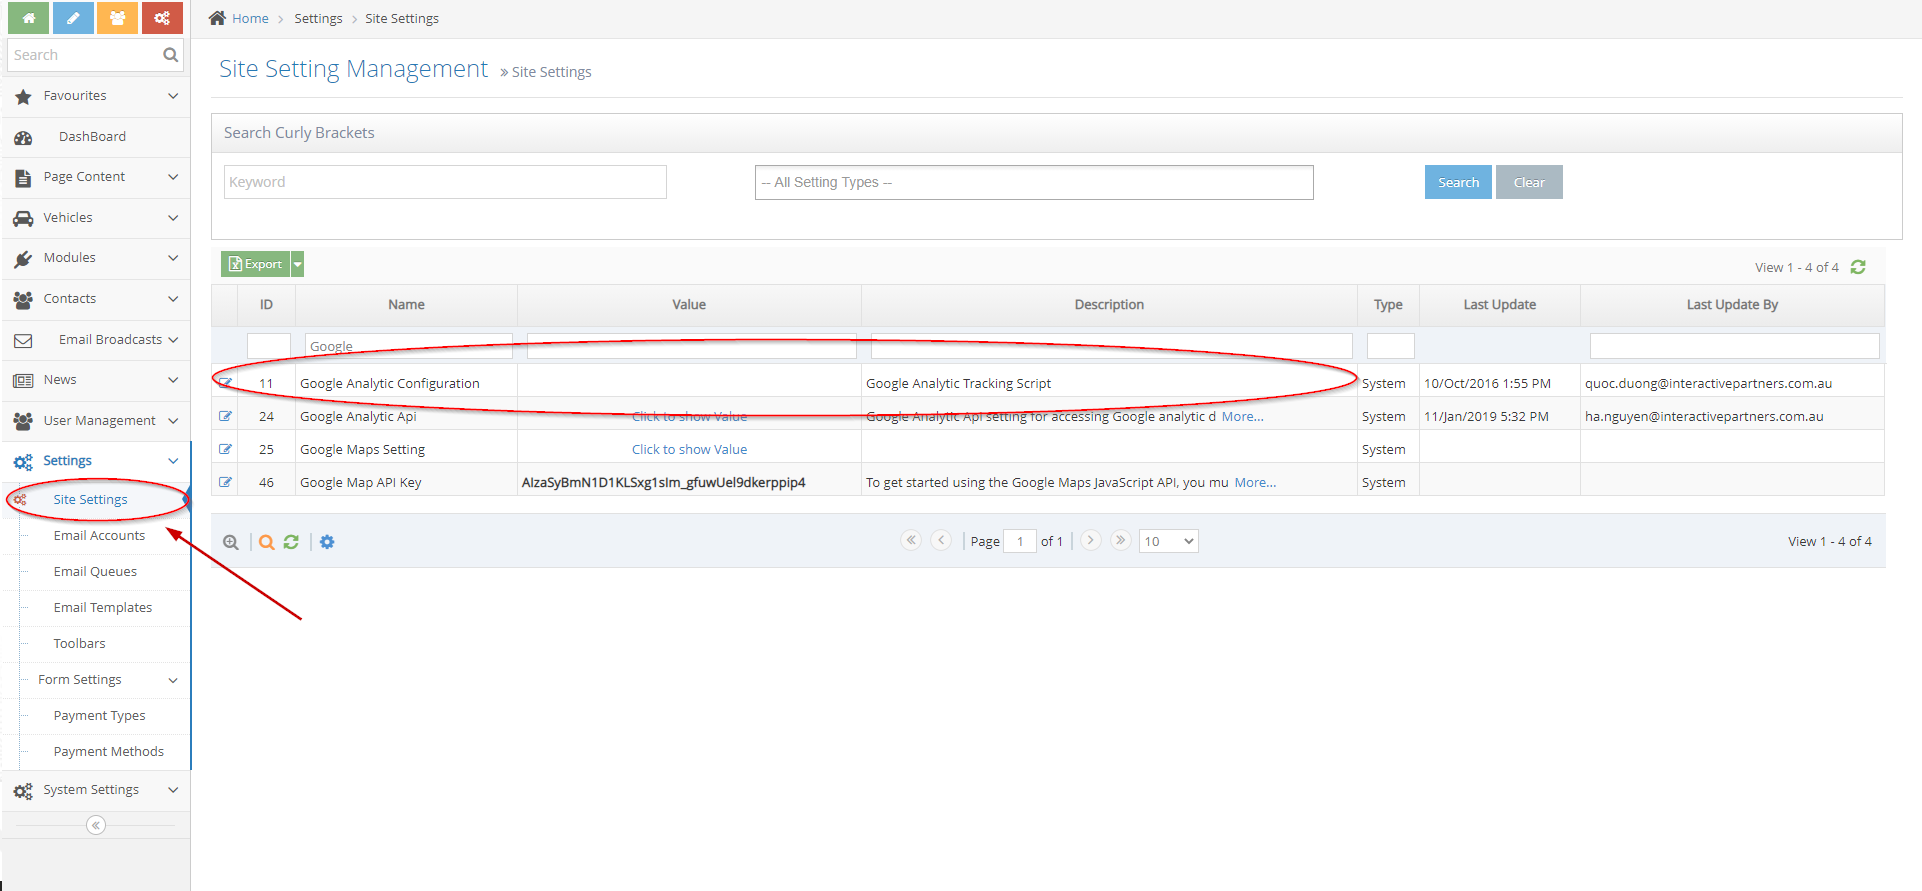
5Go to the website and access admin management, in the left menu select Settings > Site Settings then search Google Analytic Configuration key
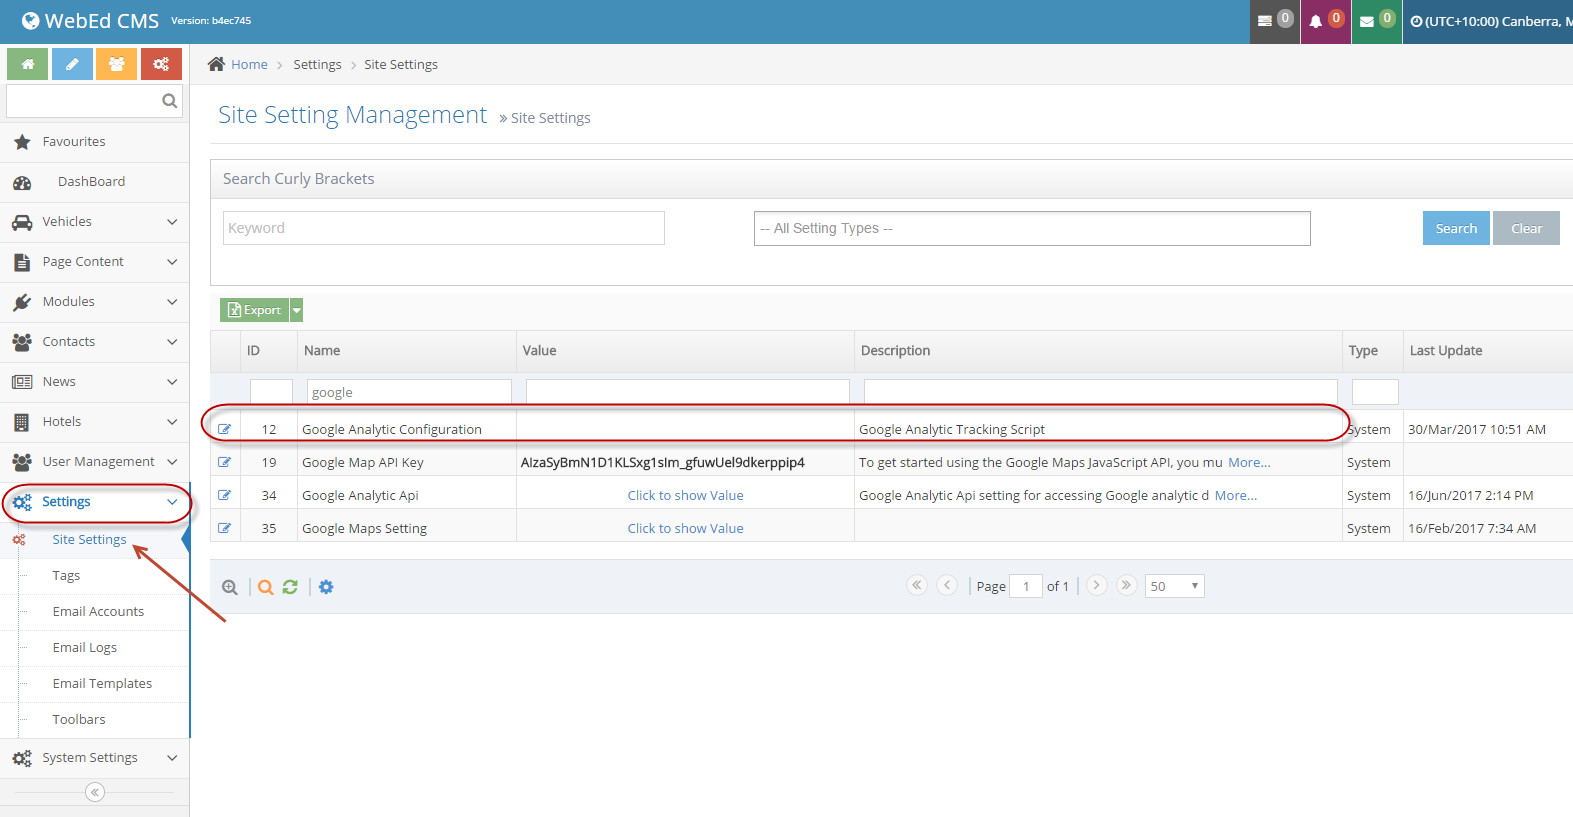
-
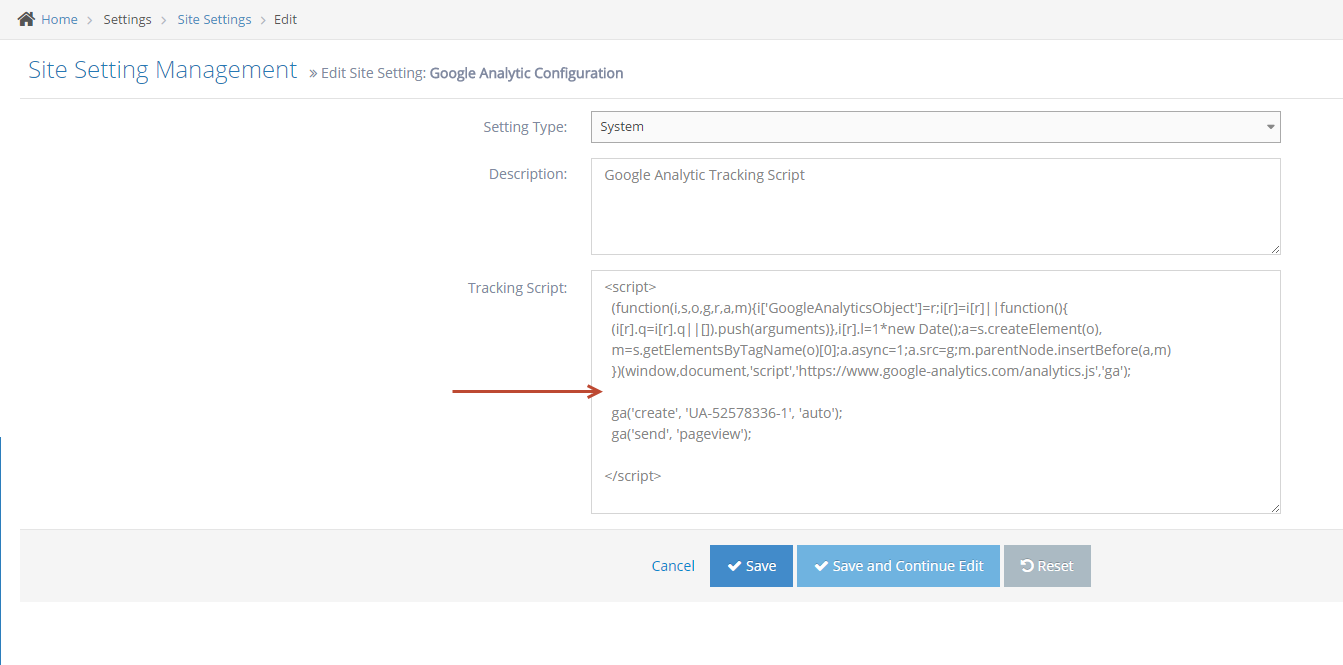
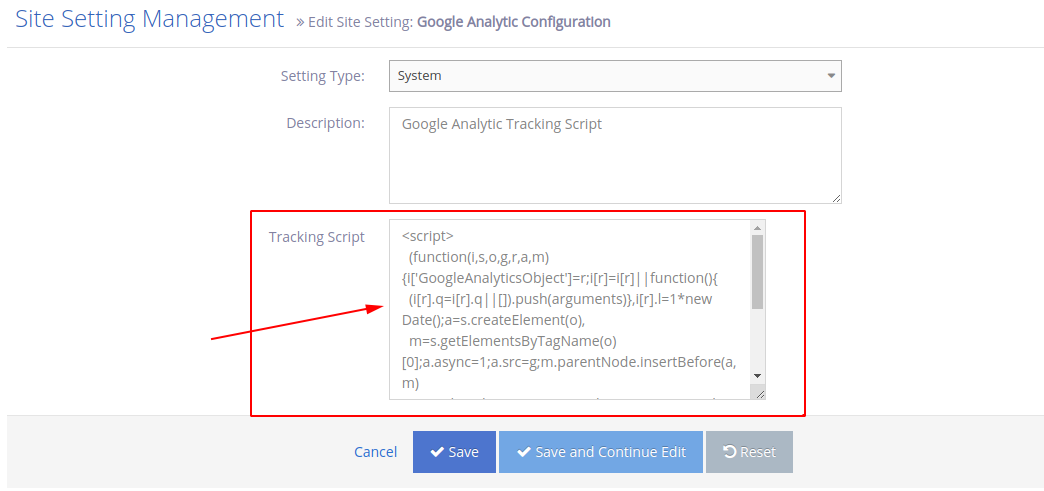
6Click on the Edit icon then in the edit site settings page, paste the Google Analytics tracking code to the Tracking Script field.
Editing the Analytics code on your site
Get Your Analytics Code from Google
The first step is to get the tracking code for your site. You get this from your analytics account.
If you don't have an analytics account you can create one here - https://www.google.com/analytics.
-
1Go to the website and access admin management, in the left menu select Settings > Site Settings then search Google Analytic Configuration key
-
2Click on the Edit icon then in the edit site settings page, paste the Google Analytics tracking code to the Tracking Script field
-
3Click Save to apply changes
Adding Google Analytics Tracking Code into your Master Template
This step will already have been done for you by the WebEd team. It is added here for reference only and should not generally be required.
-
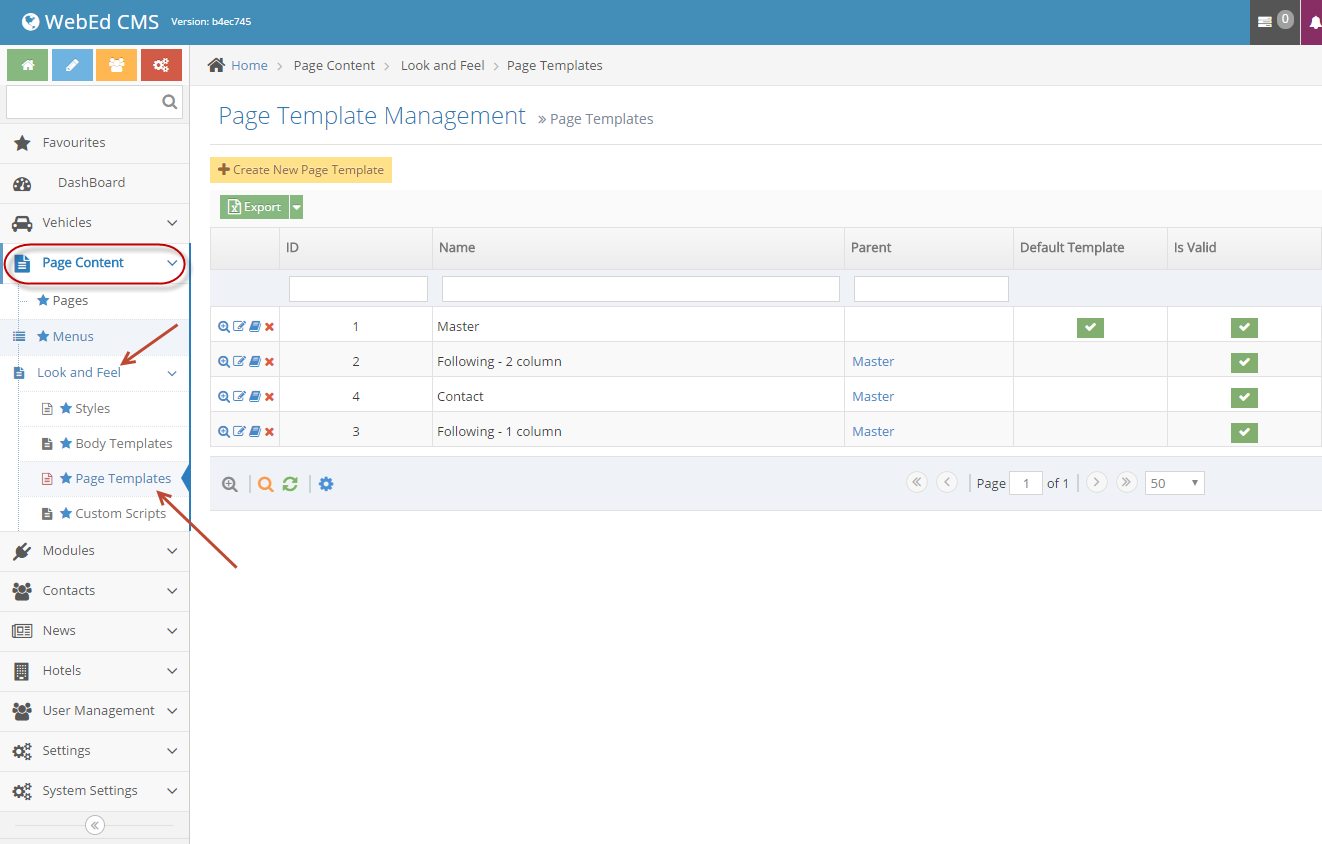
1In the left menu, select Page Content > Look And Feel > Page Templates
-
2Edit the default template, add Google Analytics curly bracket by clicking on Add curly bracket button then search Google Tracking Code
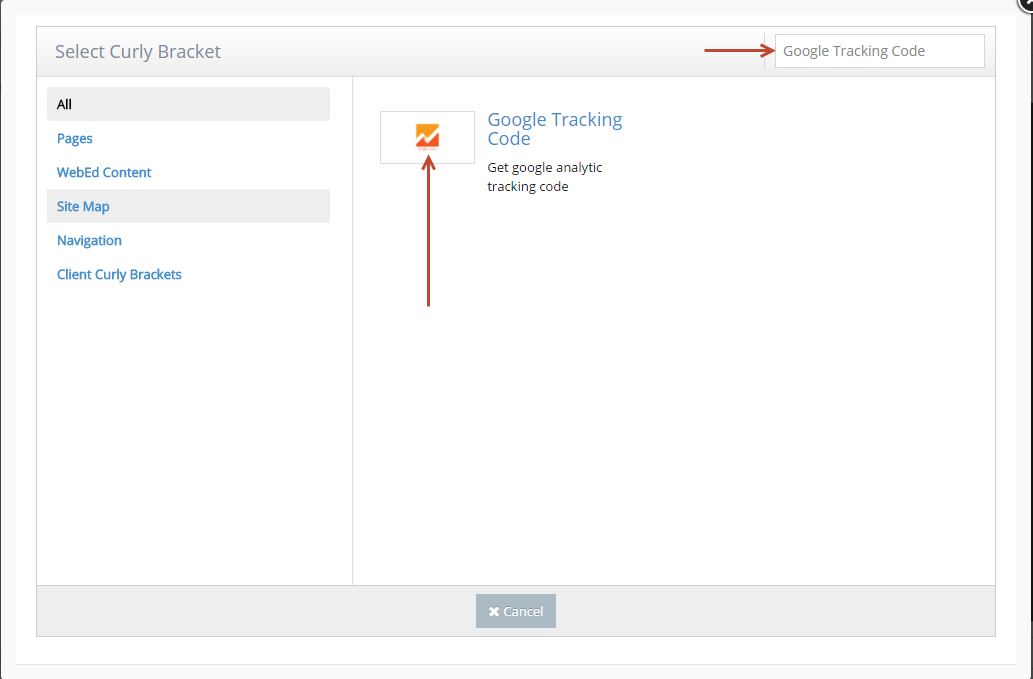
-
3The curly bracket code will be added as shown below:
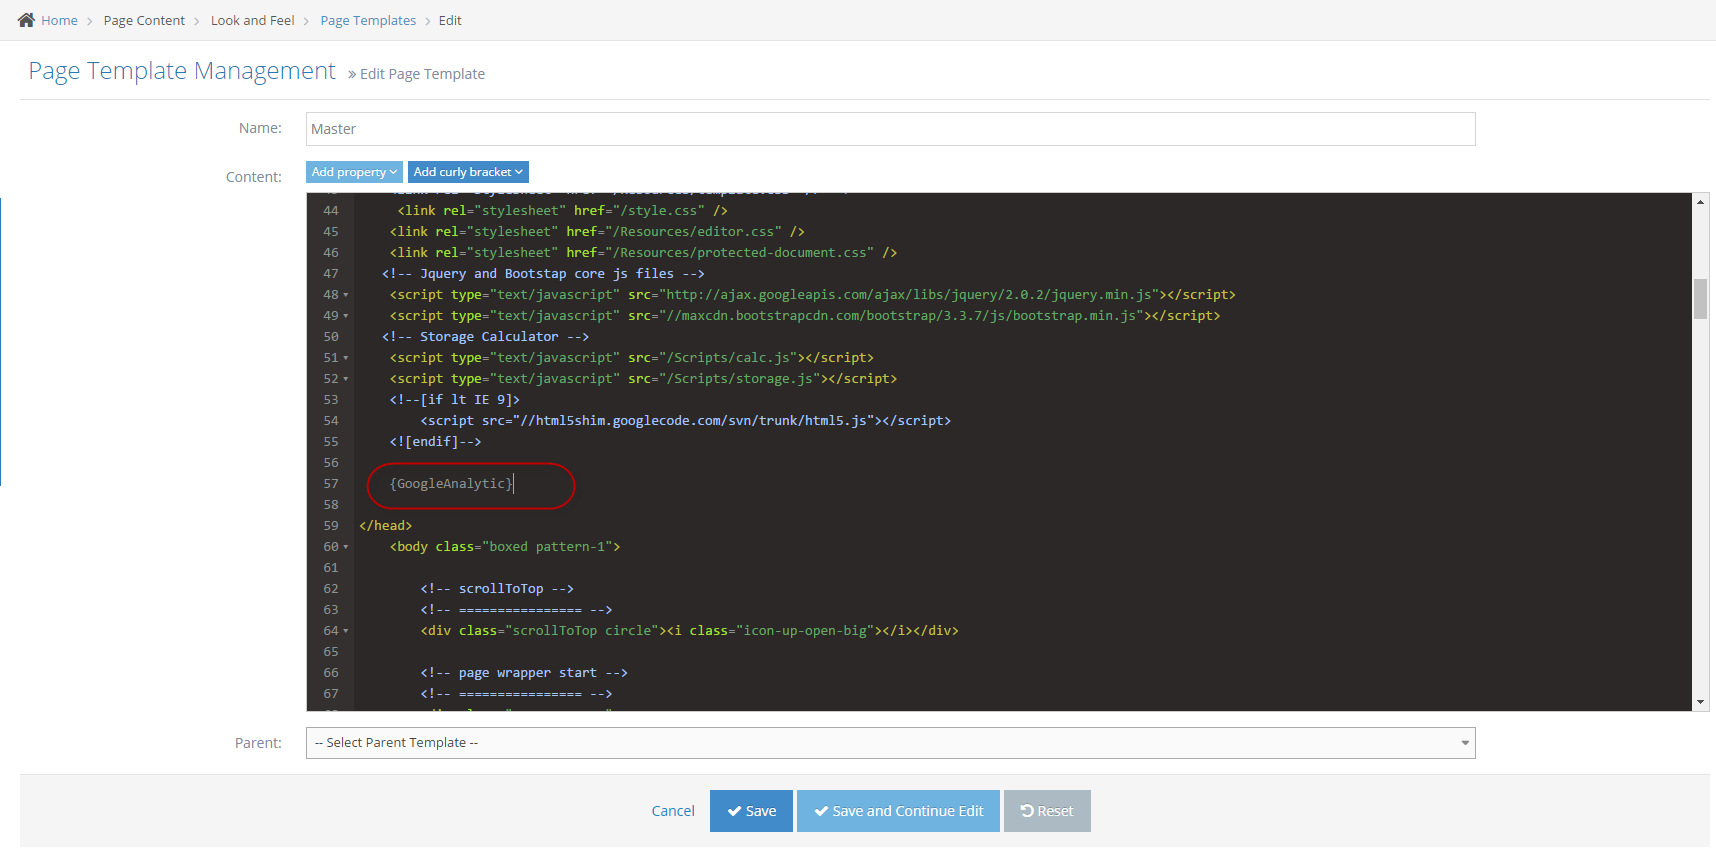
Managing your Analytics Account
How to Set Up Set User Permission on Google Analytics
-
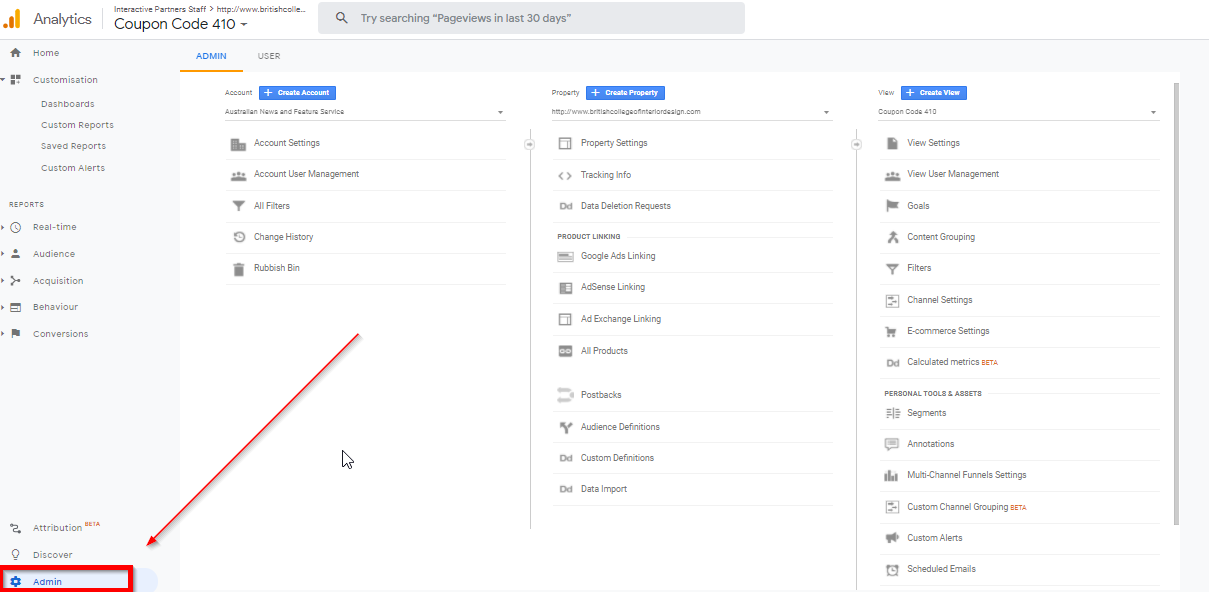
1Go to Analytics Account if you want to add permissions
-
2On the left- side menu, click Admin
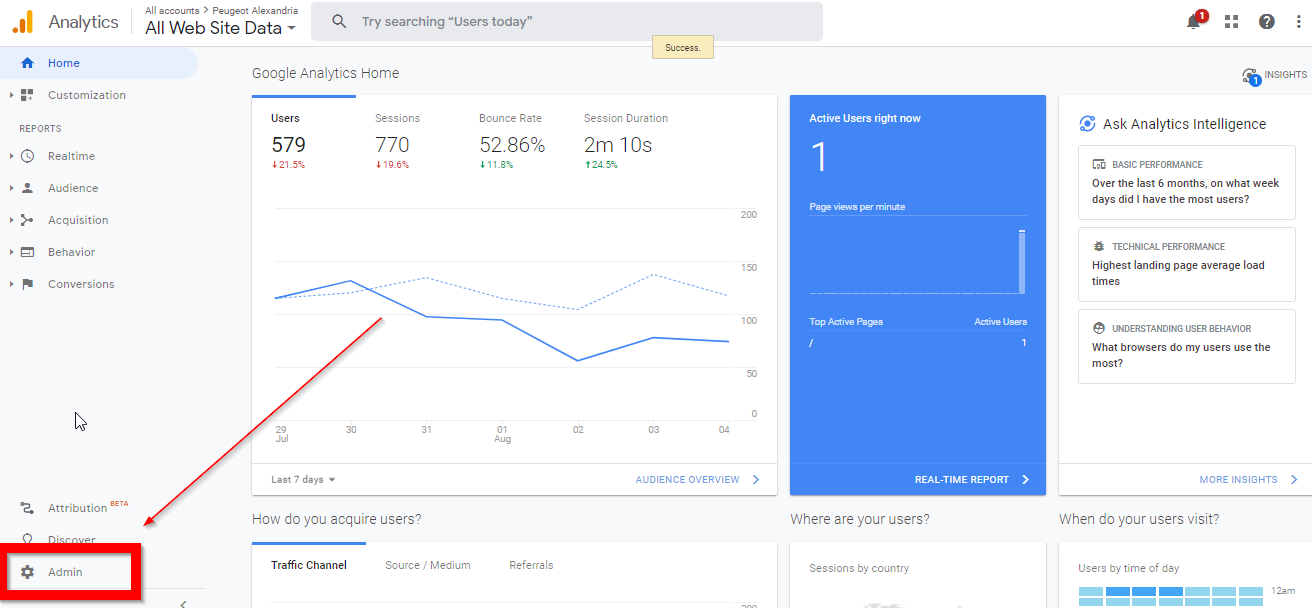
-
3Under Admin Section, select Account User Management
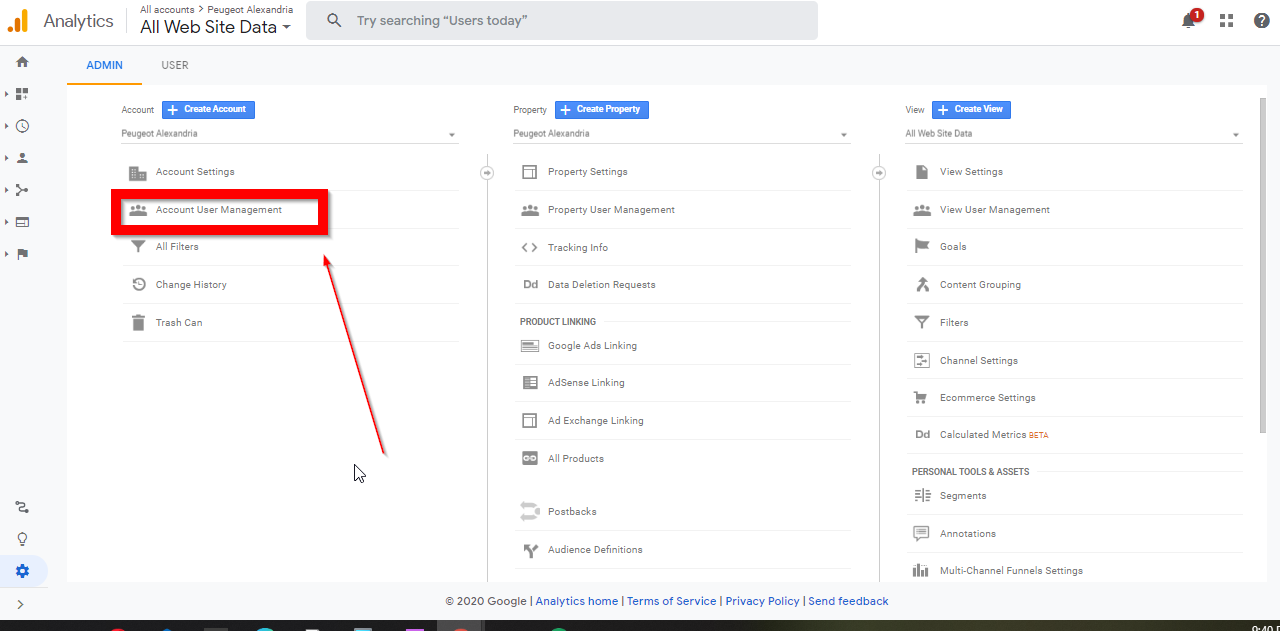
-
4The account permissions window will appear. Click the Add (blue plus button) on the upper right corner of the page.
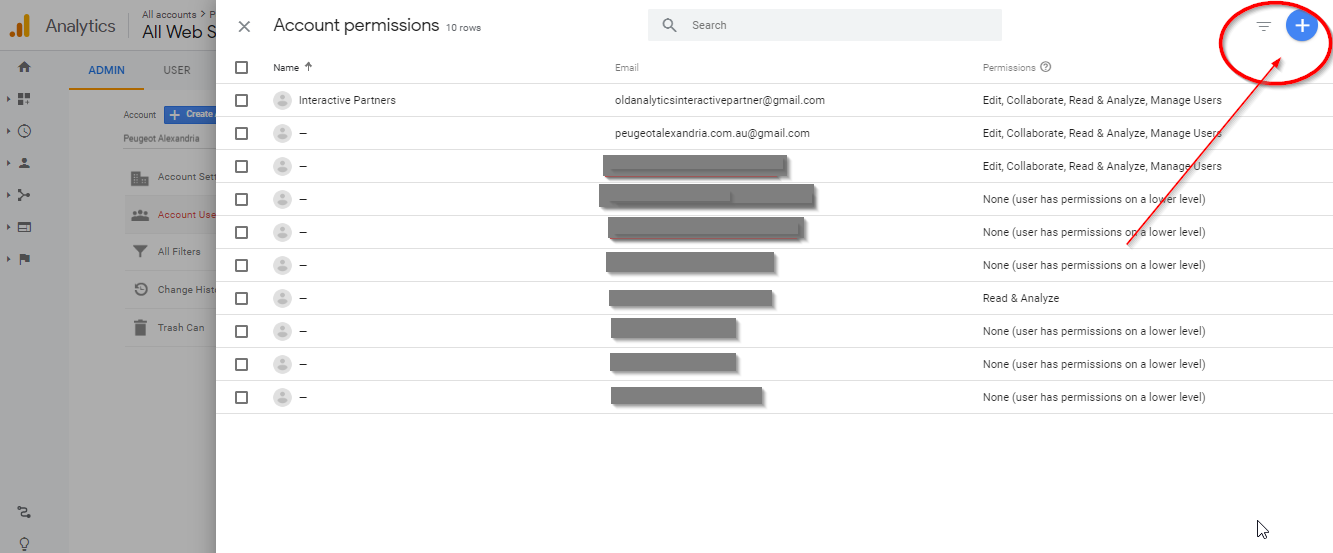
-
5A tiny pop-up will appear. Choose Add Users
-
6The Add Permissions Window will appear. Add the email of the account you want to add and the necessary permissions
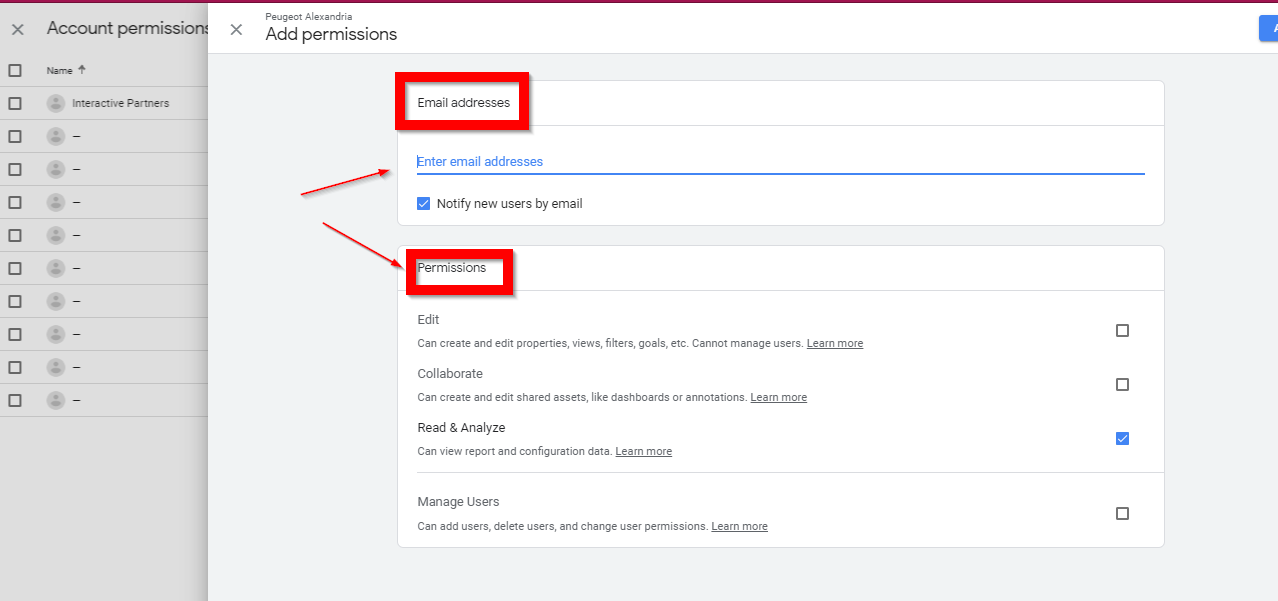
Note on Adding Permissions
Be careful adding Edit permissions to anyone since they may mess up some reporting.
How to Get Tracking ID and Tracking Code from Google Analytics
-
1Go to Admin
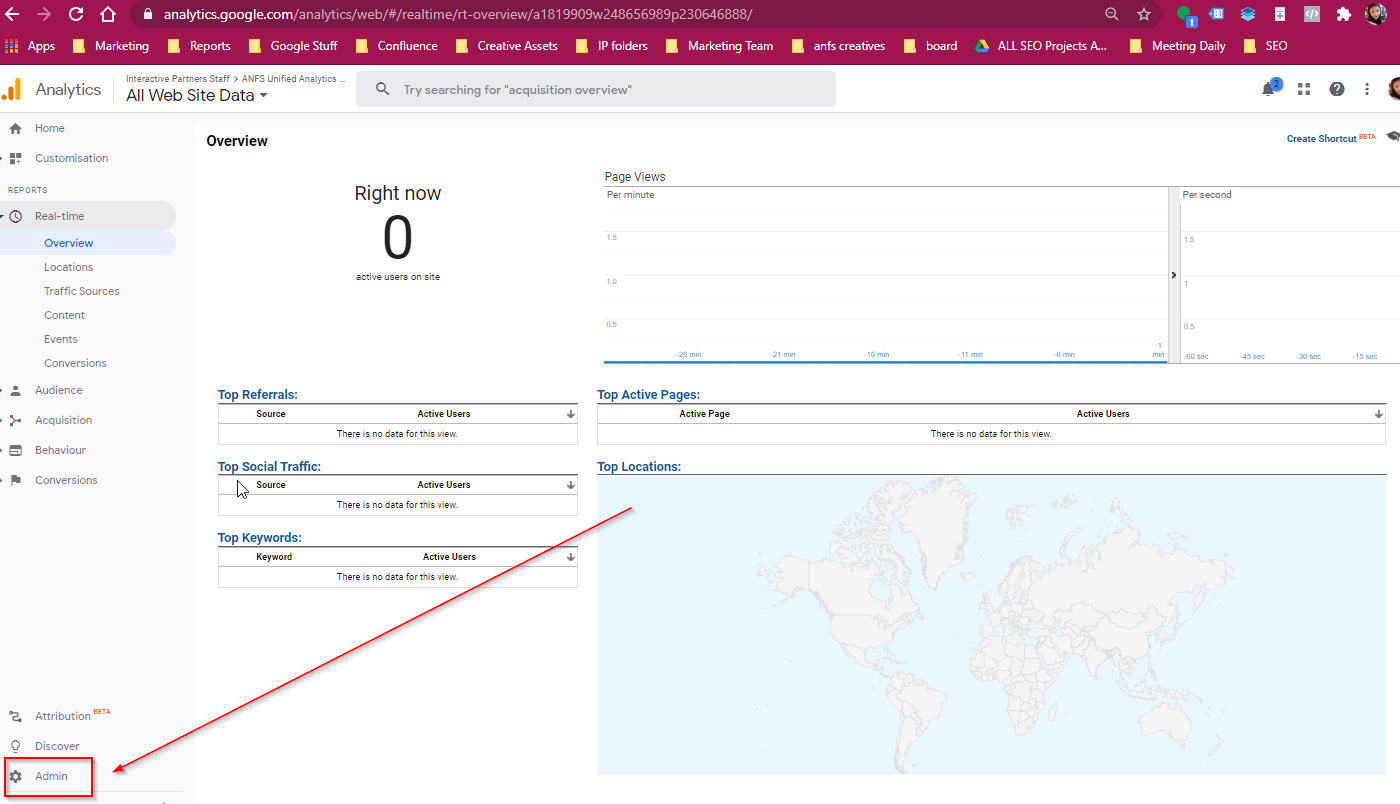
-
2Under Property Column, Click on Tracking Info
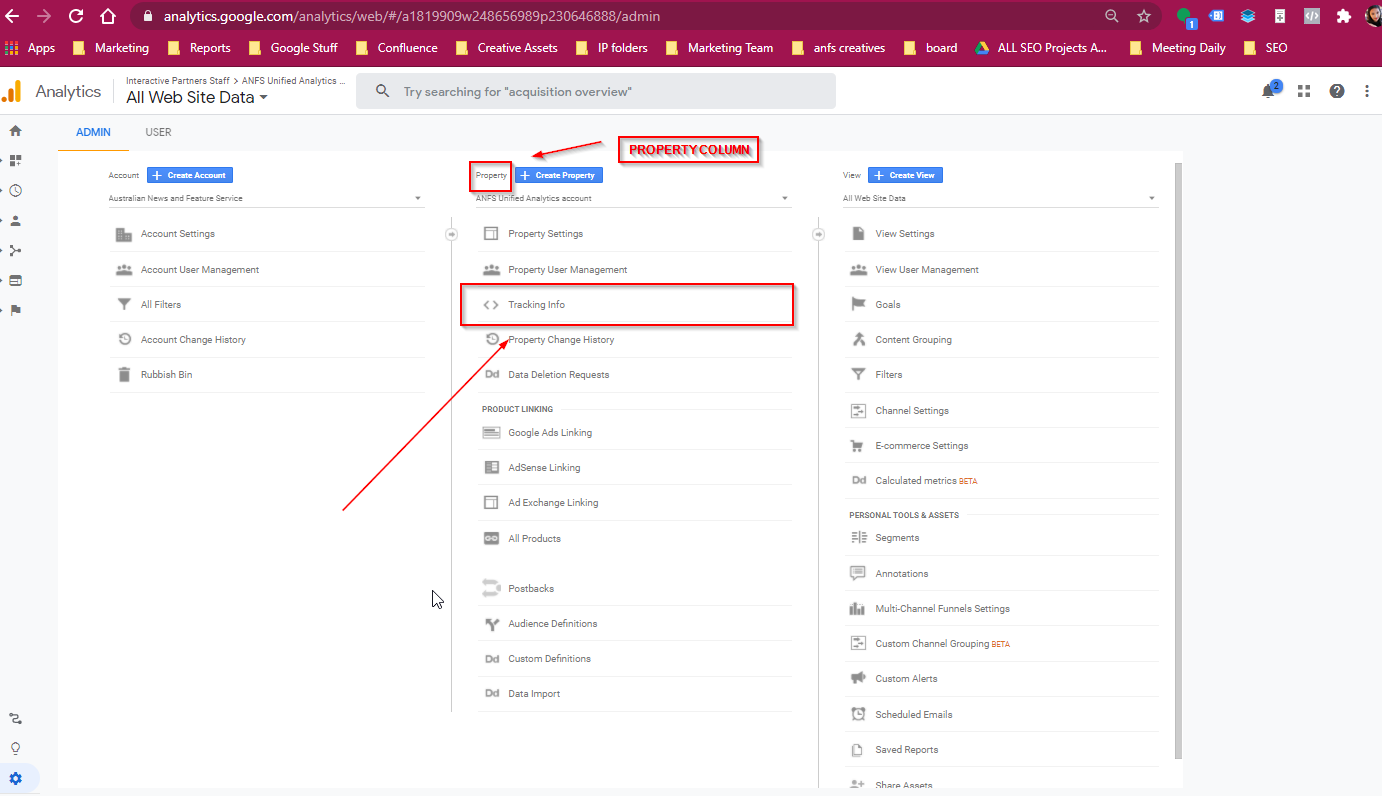
-
3A dropdown menu will appear, choose Tracking Code
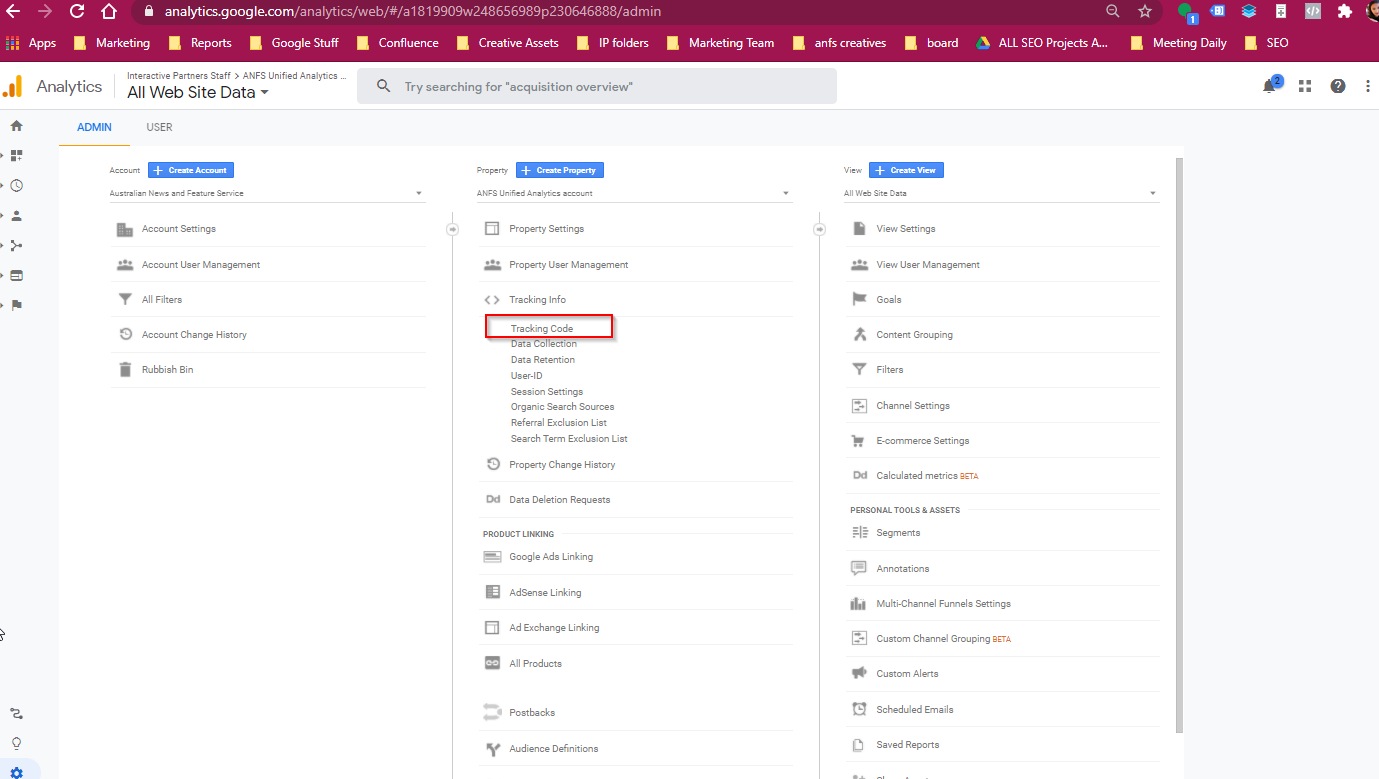
-
4A Section will appear and show the Tracking Info and Tracking Code
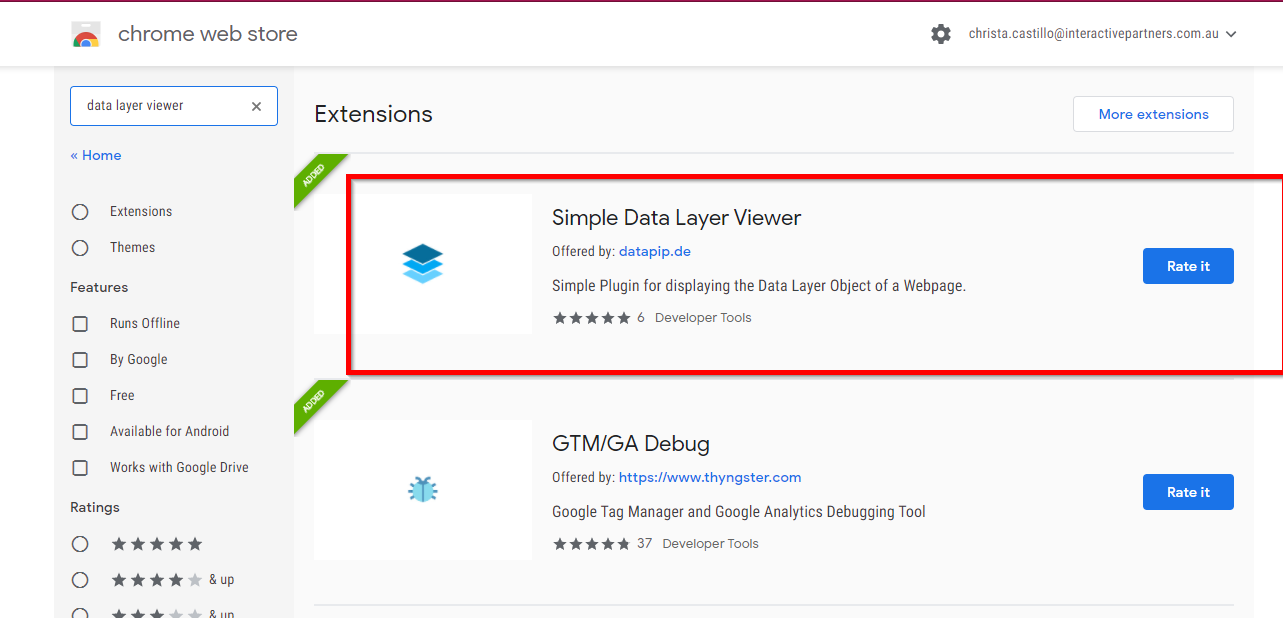
Test Events via Data Layer Push
Be careful adding Edit permissions to anyone since they may mess up some reporting.
How to Get Tracking ID and Tracking Code from Google Analytics
-
1Install Simple Data Layer Push on Chrome Store
-
2Pin the extension to the taskbar
-
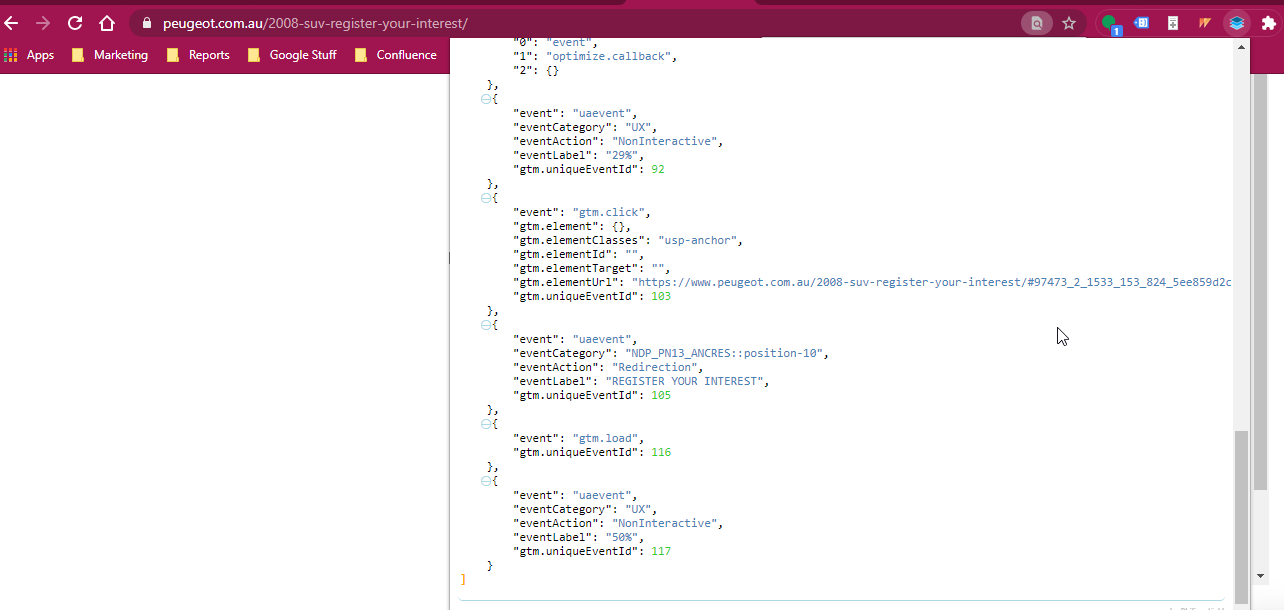
3Go to the webpage where the event should be tracked
-
4Perform the action for the event based on the request
-
5Click on the extension
-
6A pop-up will appear and show you the list of events on the page
-
7Search for the event to see if it is working. If it's there, then it means the event is successfully added.
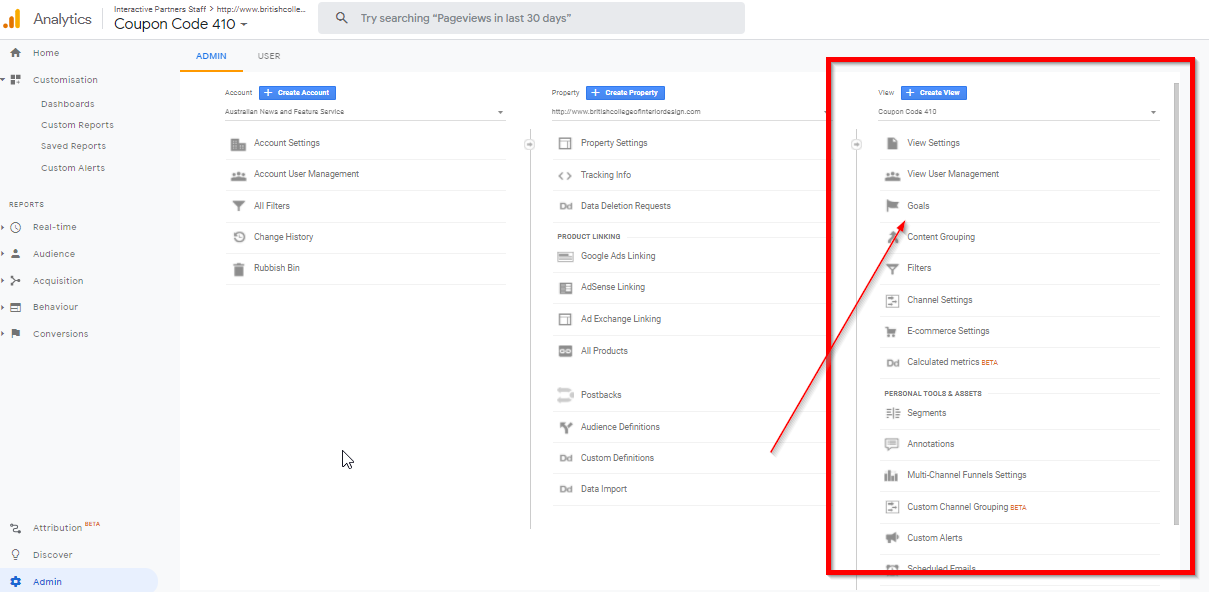
Adding Goals Directly on Google Analytics for Page View/ Thank You Page
-
1Go to Admin
-
2Go to View tab and click on Goals.
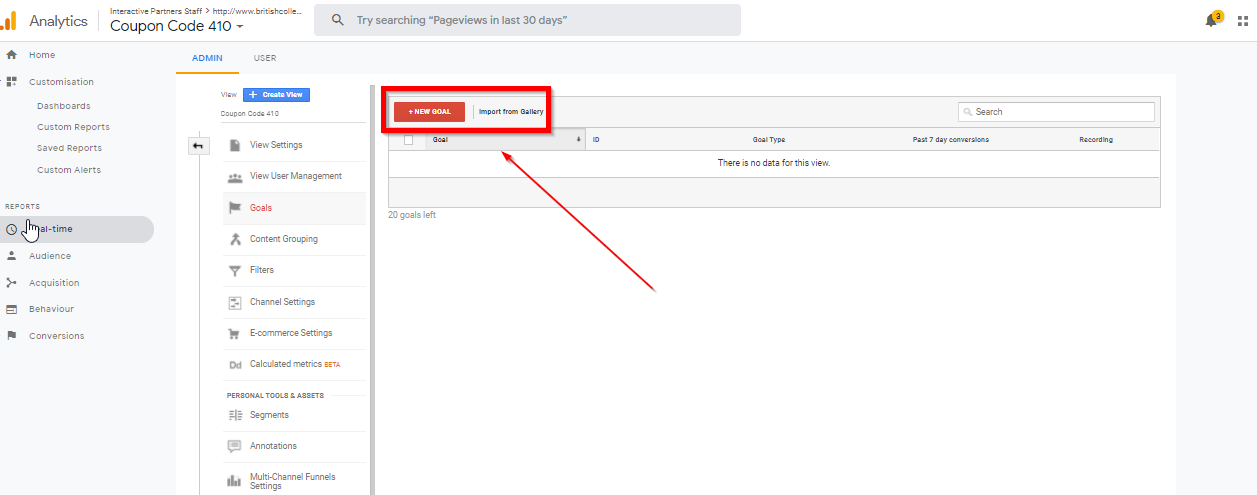
-
3Click Create Goal
-
4Fill out the name of the goal and click the Destination radio button
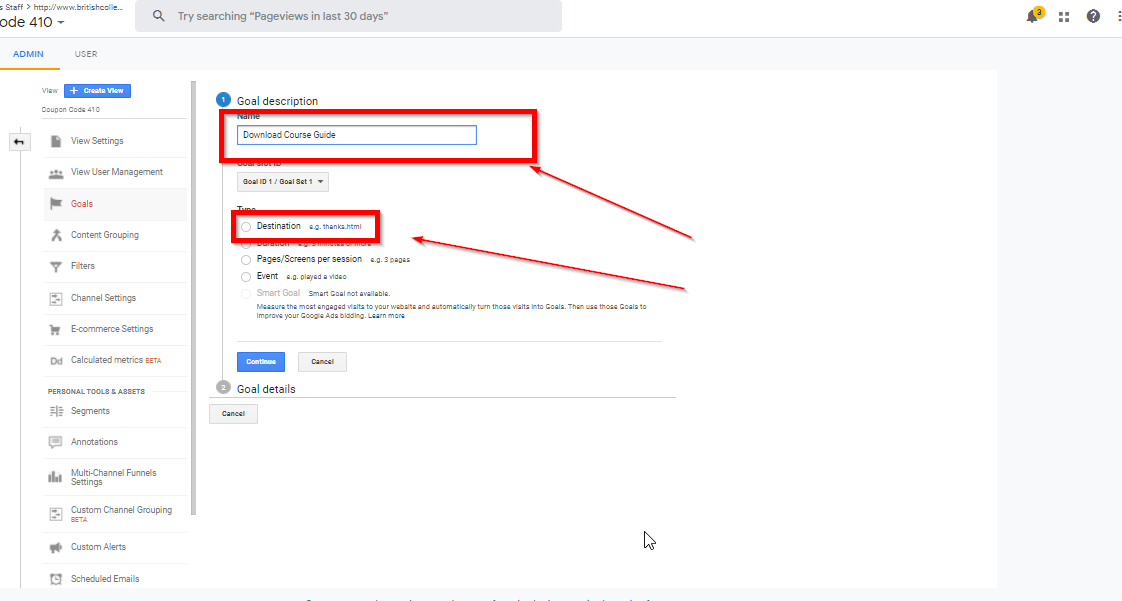
-
5Click Continue
-
6Add the URL of the Page to track
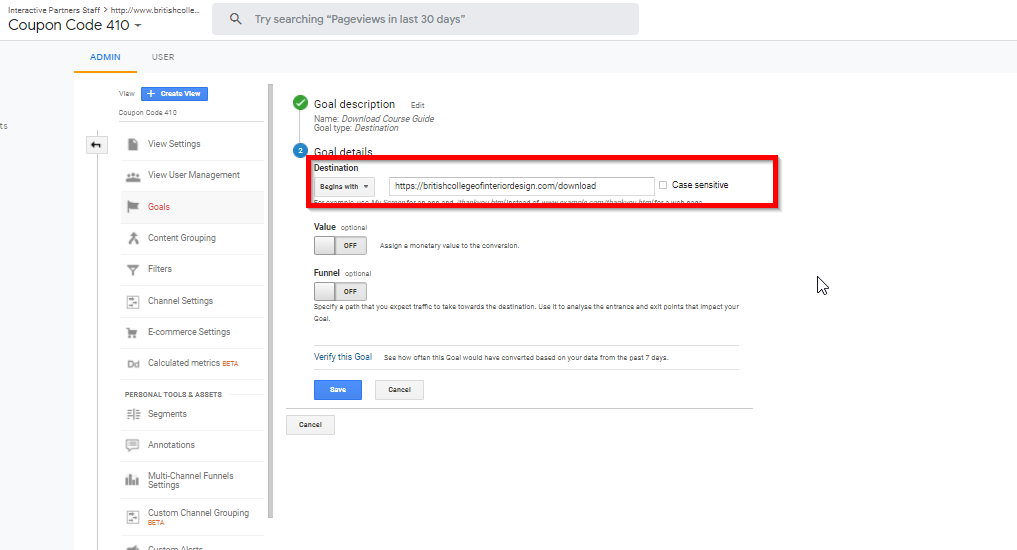
-
7Click Save
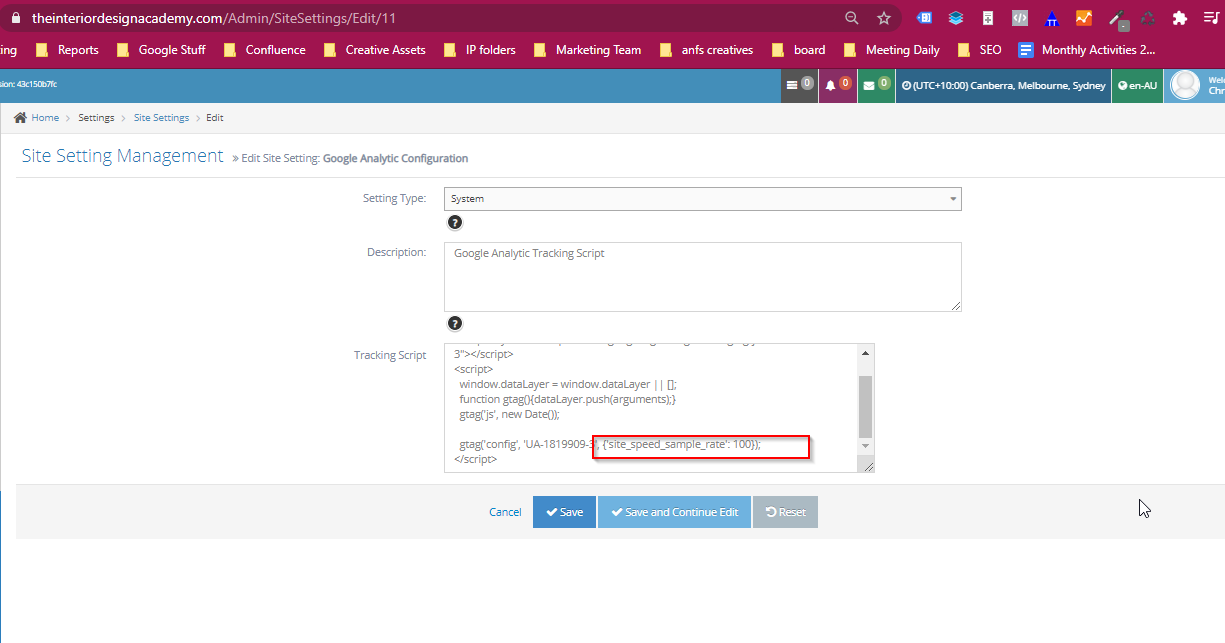
How to Set Up to Capture 100% Visitor tracking for Page Speed Rate
-
1Log in to Admin Module
-
2Go to Site Settings
-
3Search Google Analytic API
-
4Insert this code: {'site_speed_sample_rate': 100}); within the Google Analytics tracking code beside the tracking numb
-
5Click Save
Exporting Google Analytics Data to Google Sheets
-
1Access the Google Analytics Accounts
-
2Add Google Analytics Ad on Google Sheet
-
3Go to the folder under shared folders where the sheet will be saved
-
4Click the New button
-
5Click Google Sheets and choose Spreadsheet
-
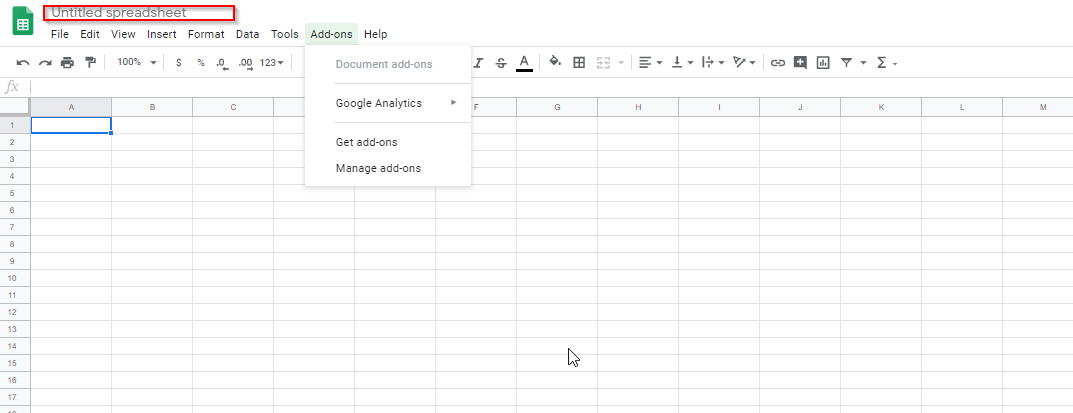
6Create the title of the report
-
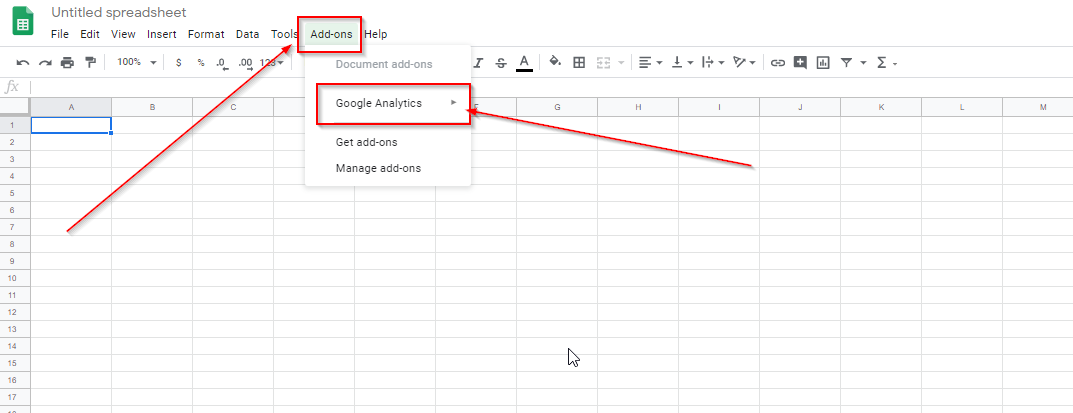
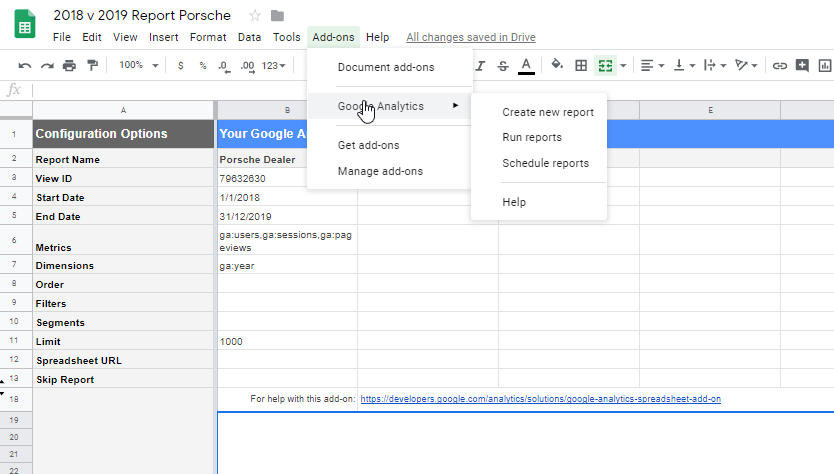
7Click Add-ons from the Menu. A dropdown will appear and click on Google Analytics
-
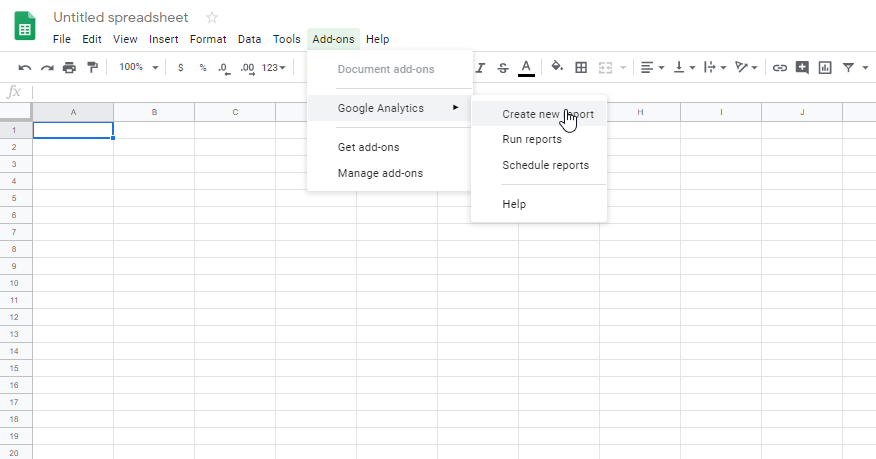
8Another dropdown menu will appear. Click on Create New Report.
-
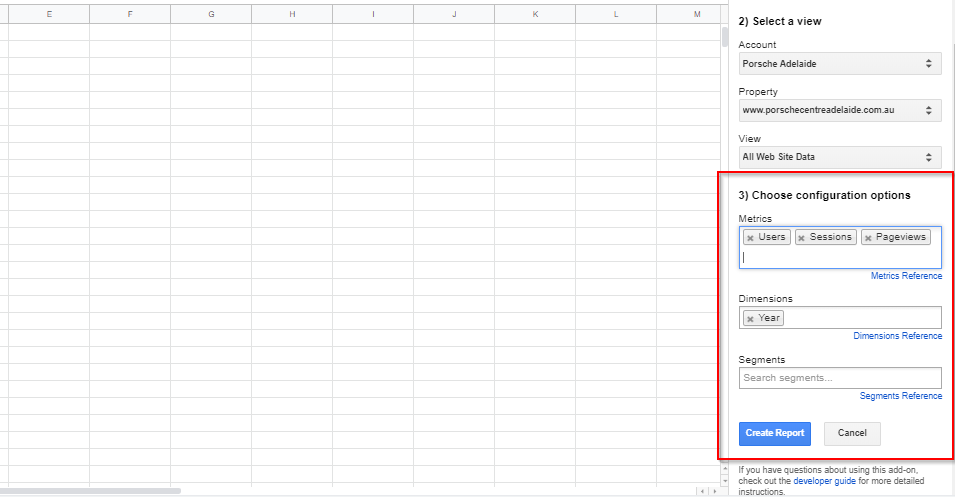
9A small window will appear on the left of the screen. Input the data needed which includes the Name of the Report, select a View which requires the Google Analytics Account and its View settings.

-
10Under the third columns, choose the necessary metrics, dimensions and segments needed. Click Create Report when done.
-
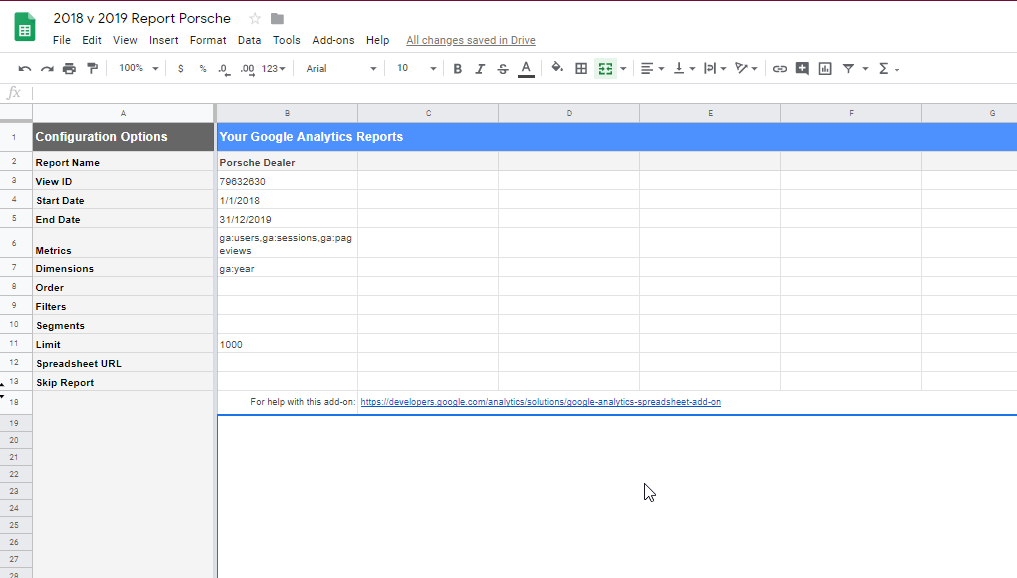
11Name Report Configuration. Add the necessary data needed
-
12Go back to the Google Analytics add on and Click Run Report from the dropdown menu to generate report.
Setup Automated Google Analytics Reports
Outlines how to manage scheduled Google Analytics email reporting
What is a Google Analytics Reports
Provides a snapshot of your google analytics emailed to you as required.
How to set up scheduled emails
-
1Go to https://www.google.com/analytics/ and log in to google analytics
-
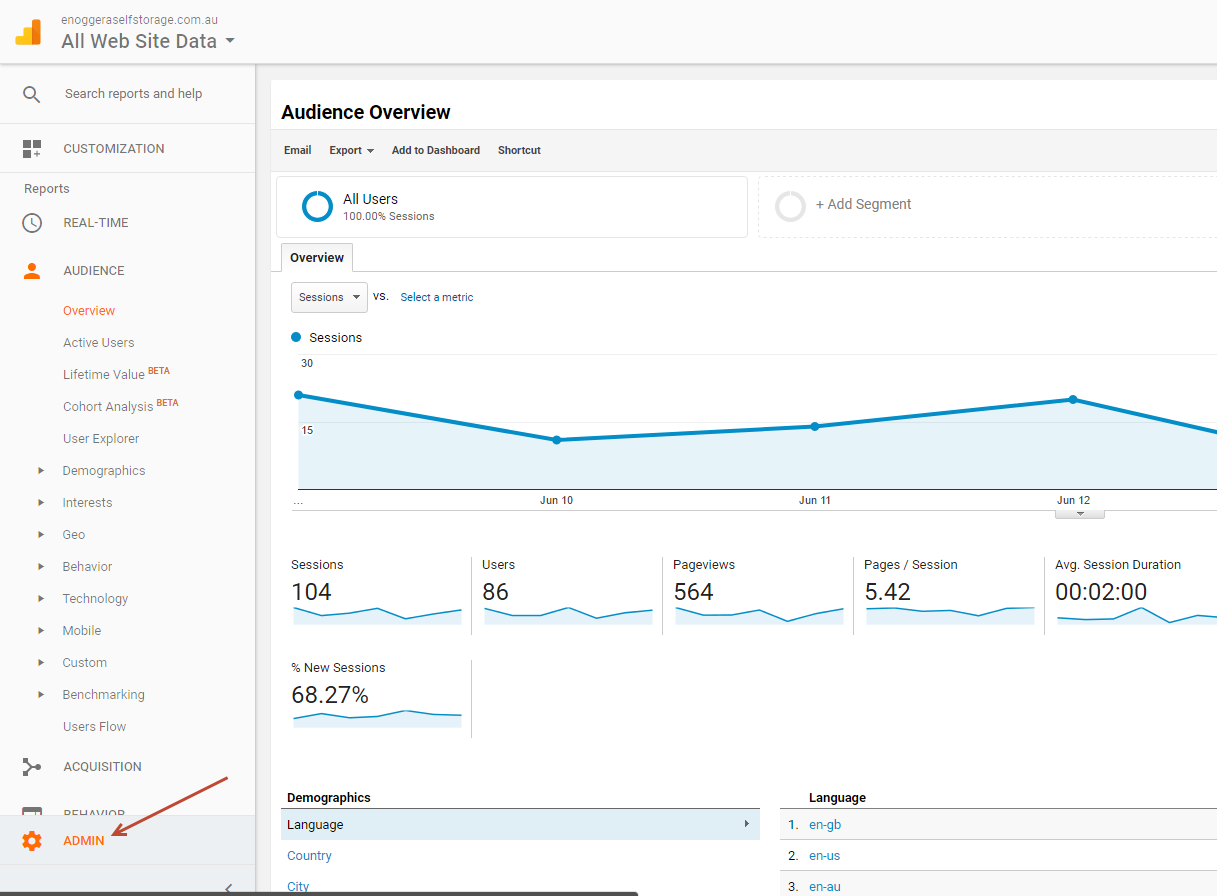
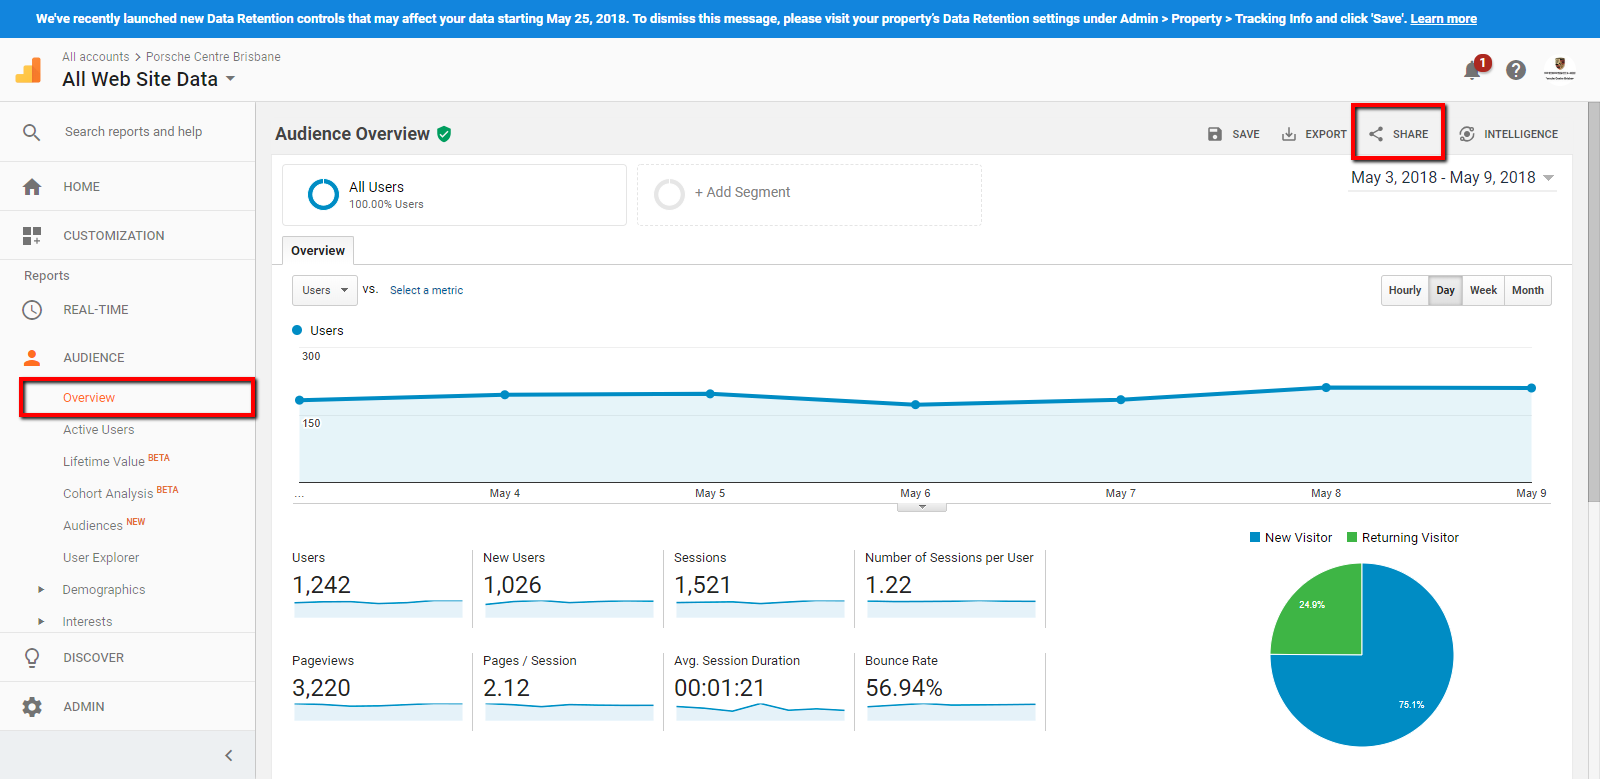
2Choose "Audience" >> Click "Overview"
-
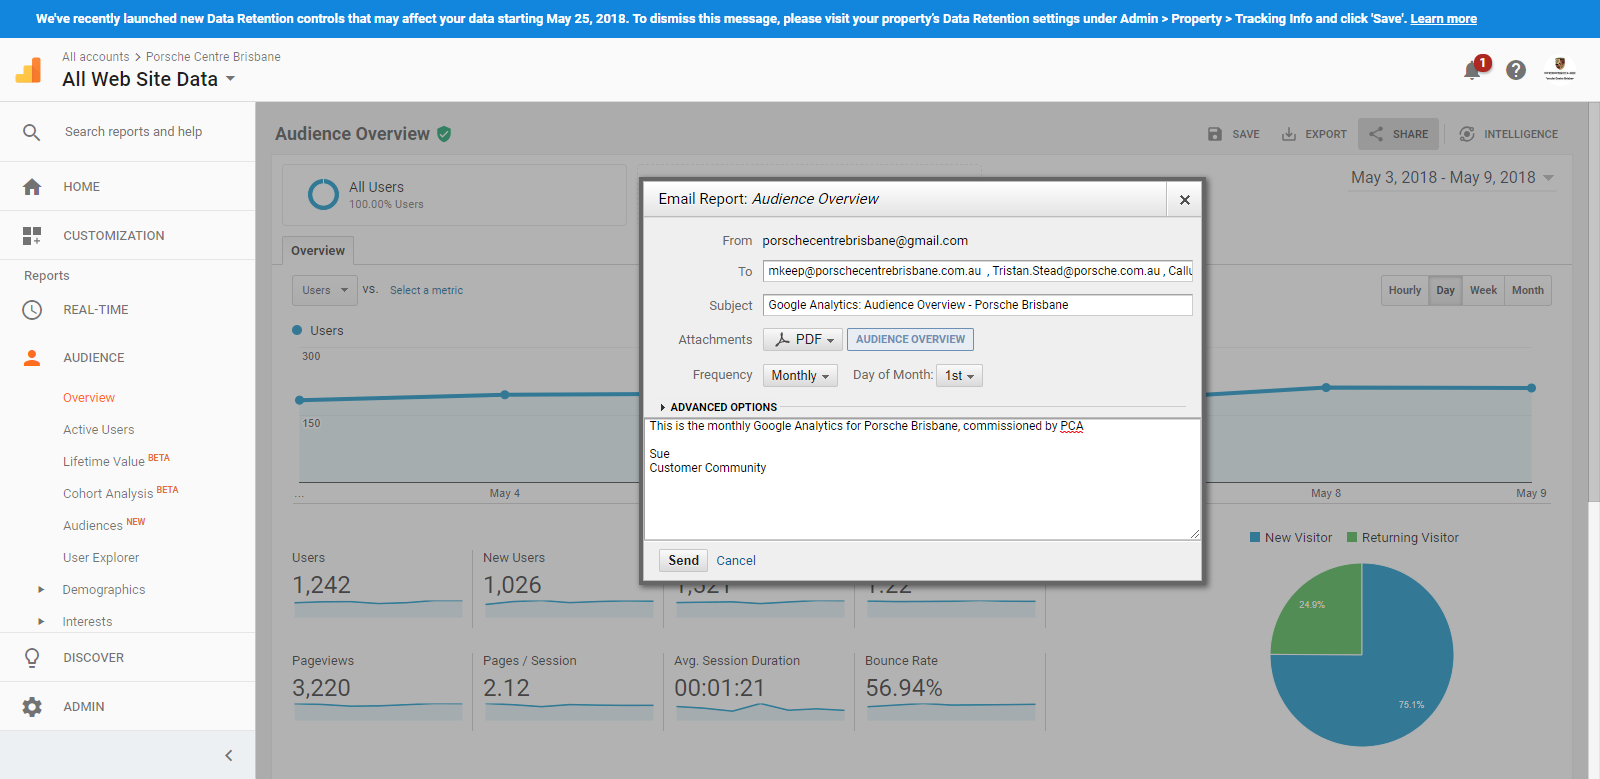
3On Audience Overview, click the "Share" button
-
4A popup setup scheduled email will be shown
-
5Add emails that will be received, choose Frequency, add content for email
-
6Click "Send" to save
-
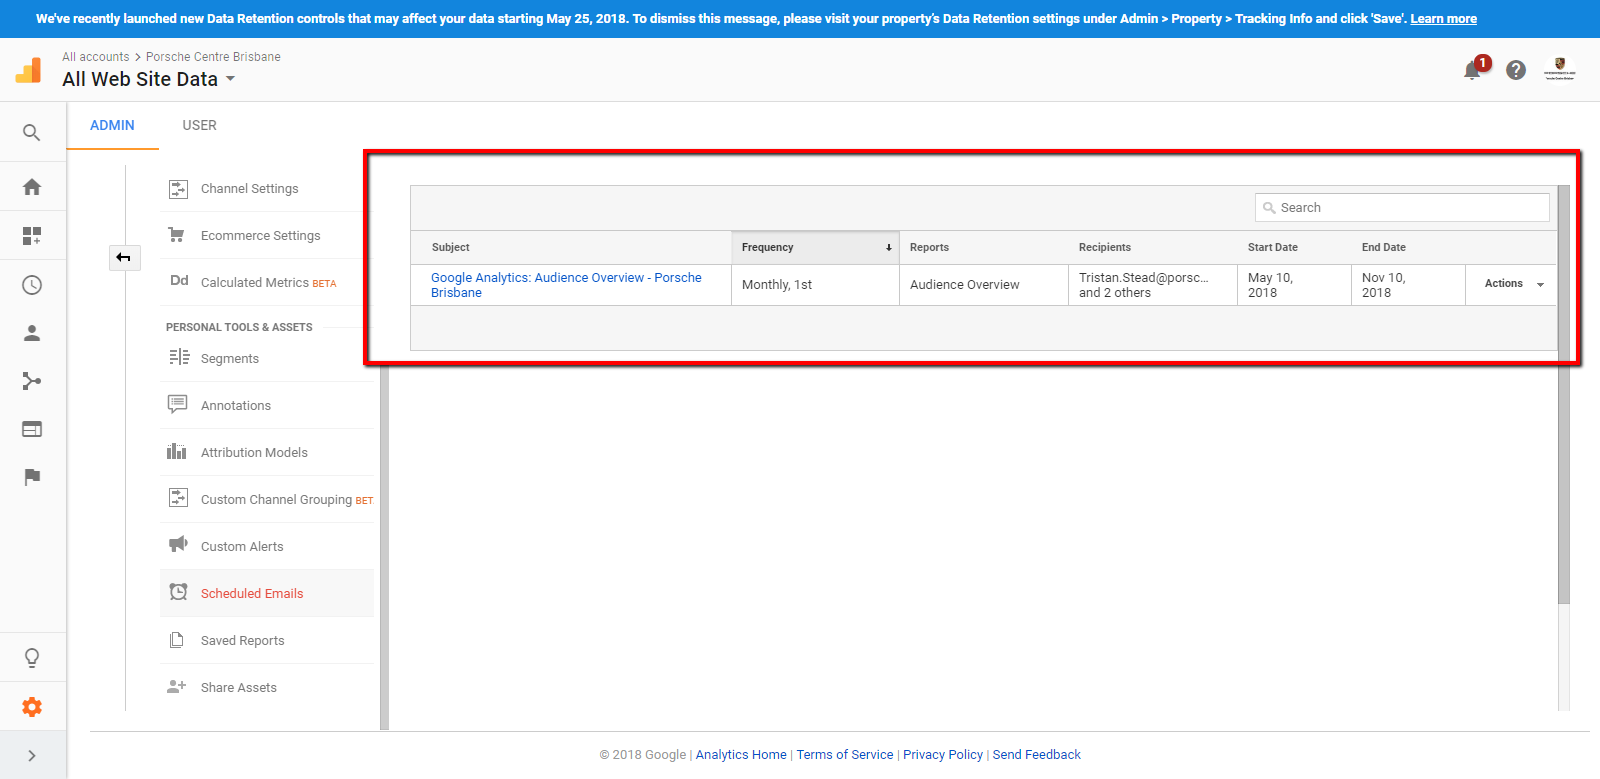
7Go to Scheduled emails to check that exits
How to extend the time of scheduled emails
Email reports are configured for some time. This may need to be extended as time progresses.
-
1Go to https://www.google.com/analytics/ and log in to google analytics
-
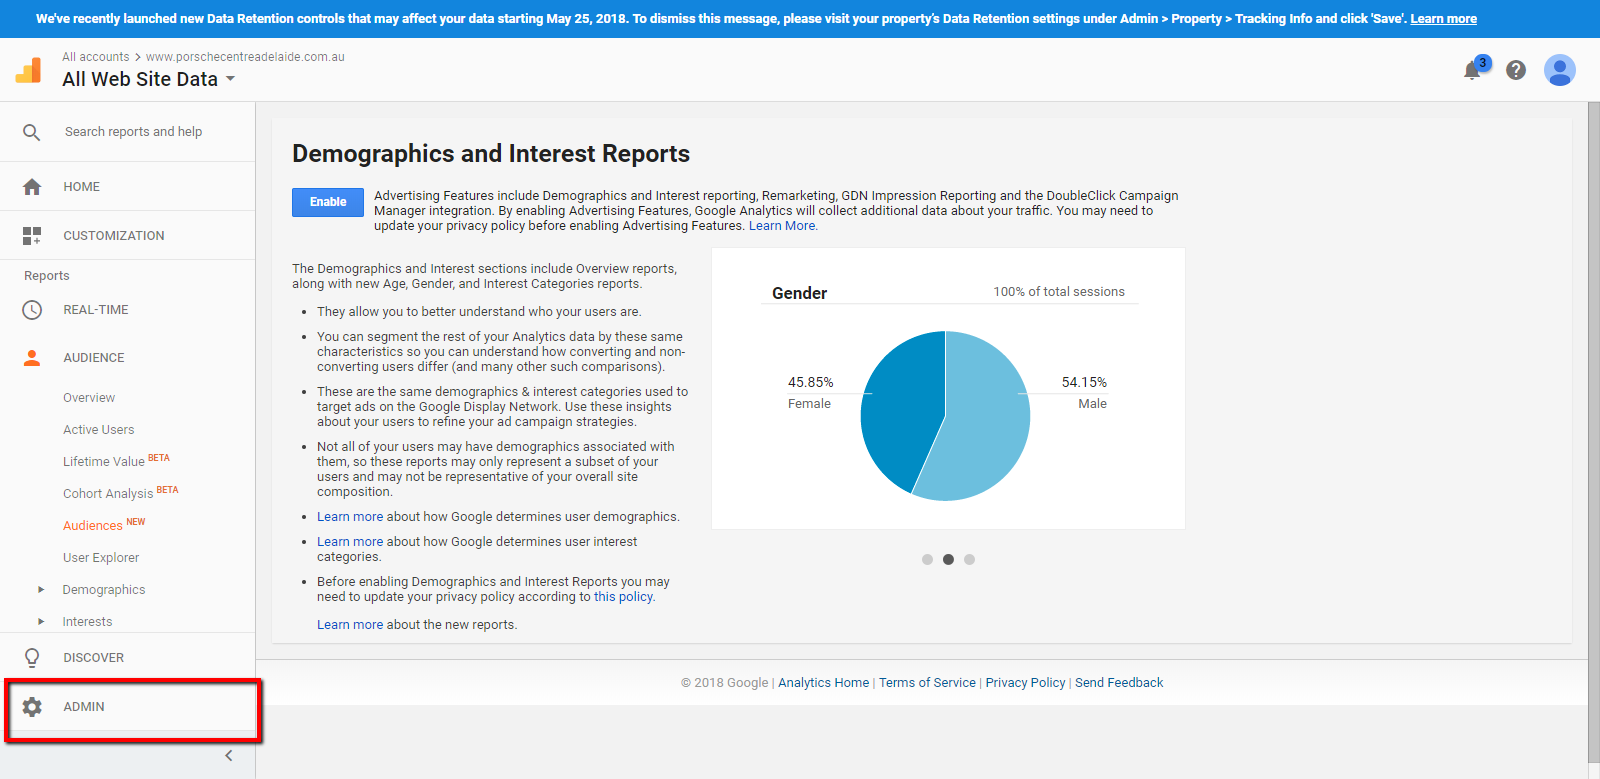
2Click "Admin"
-
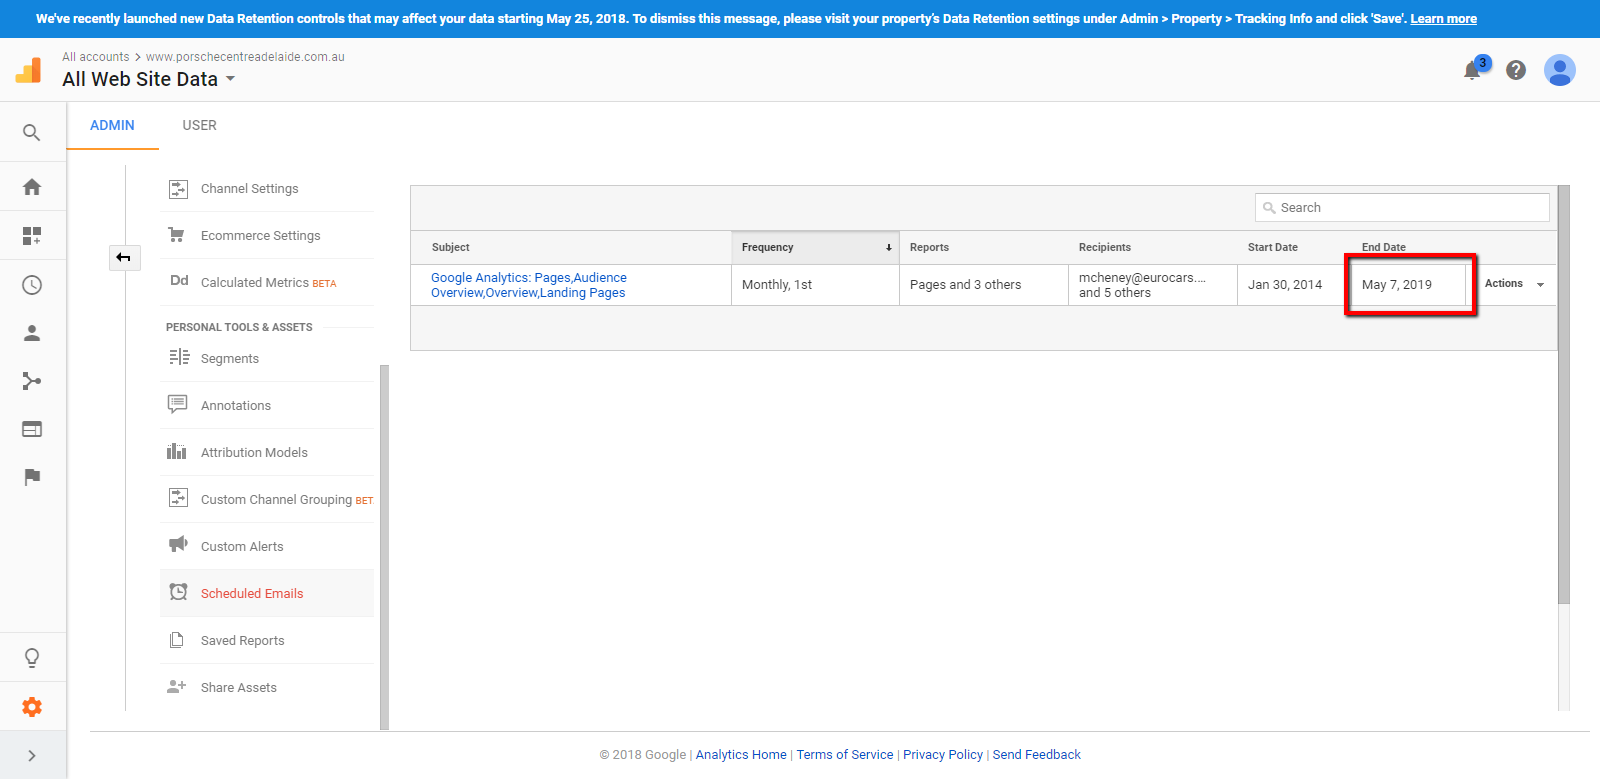
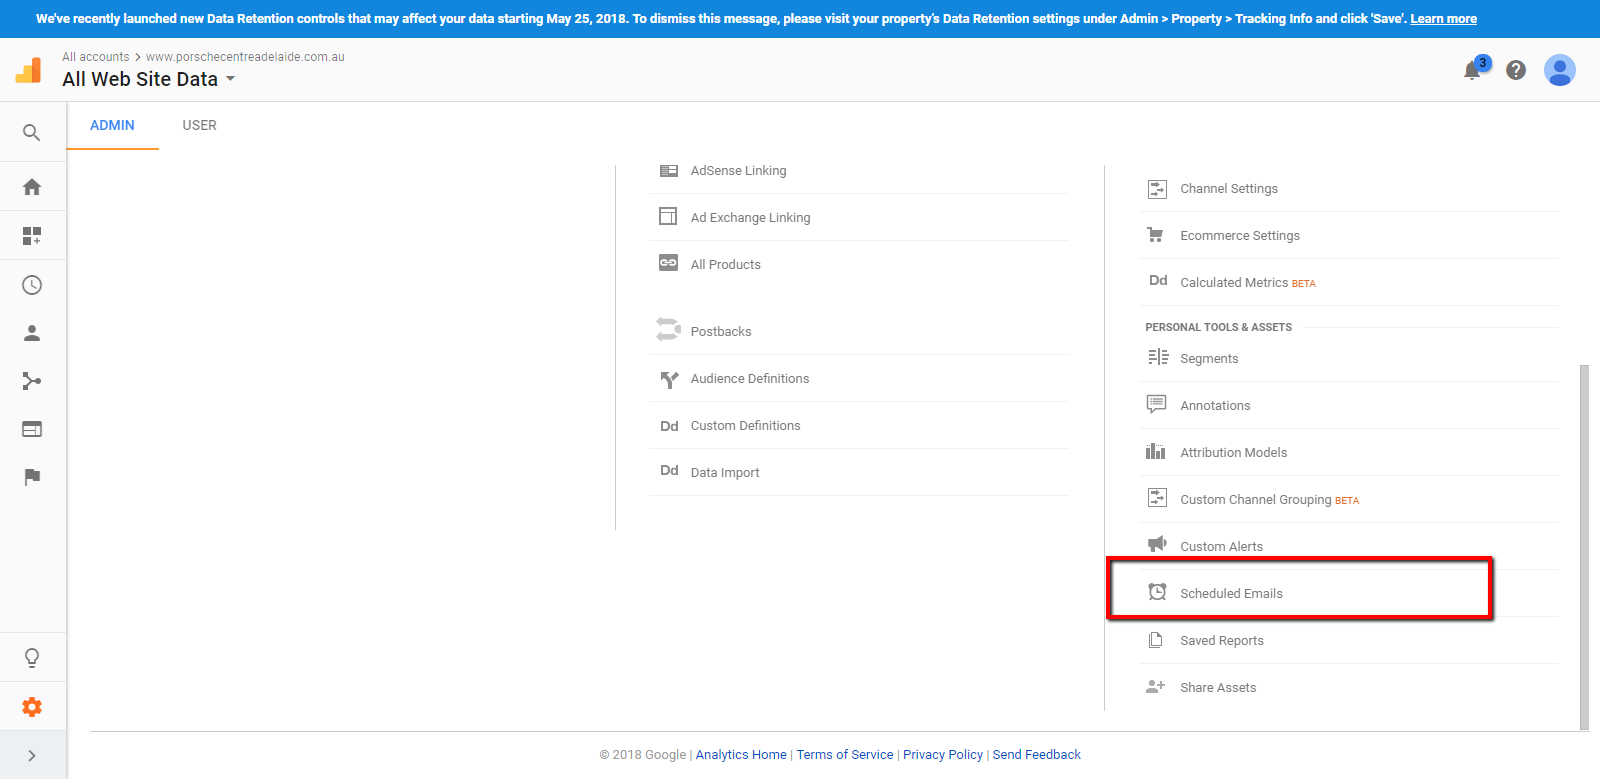
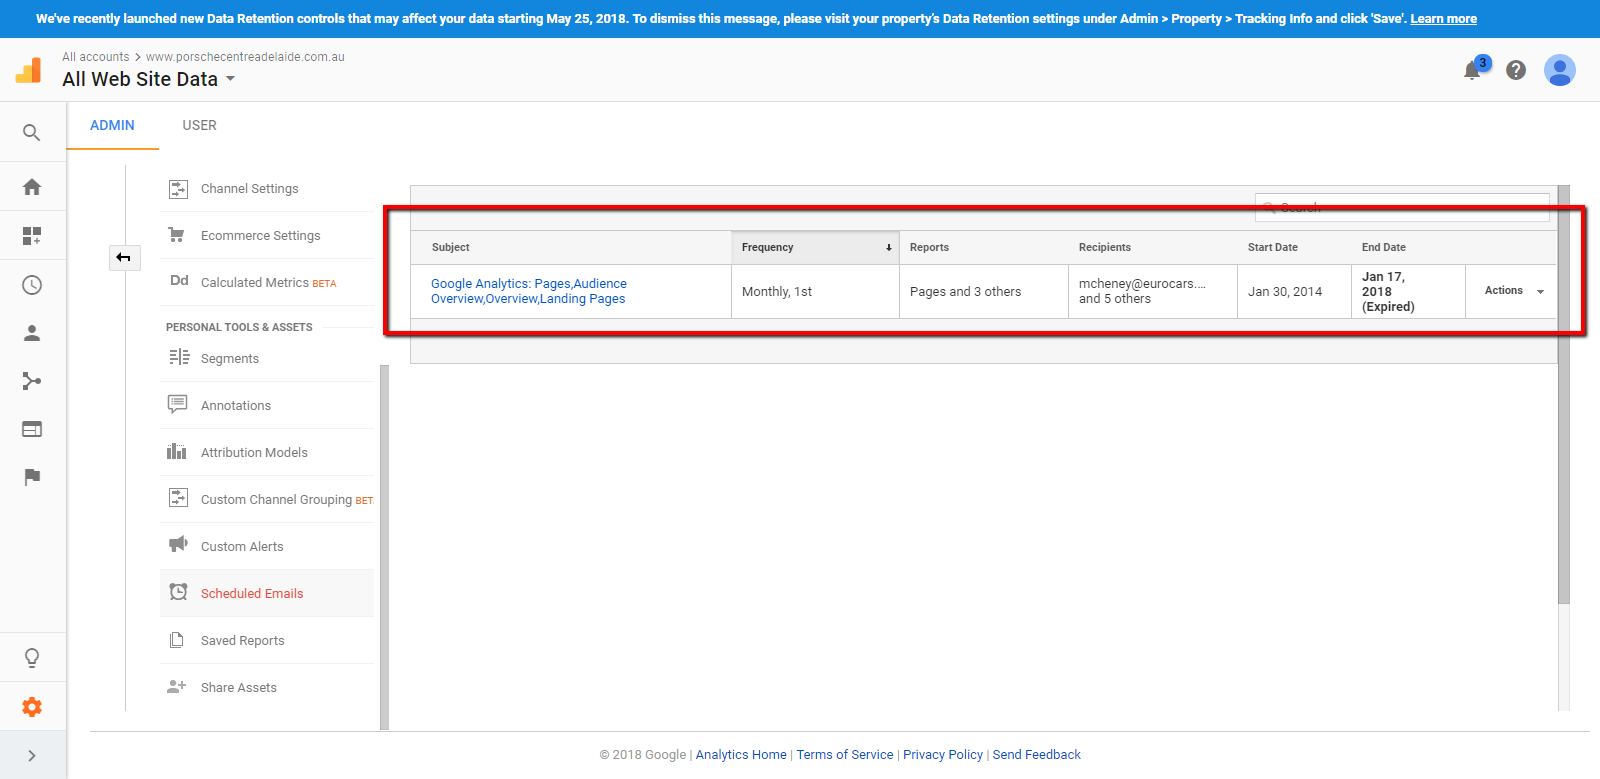
3On admin page, Select "Scheduled emails"
-
4Select the email that you want to extend the time
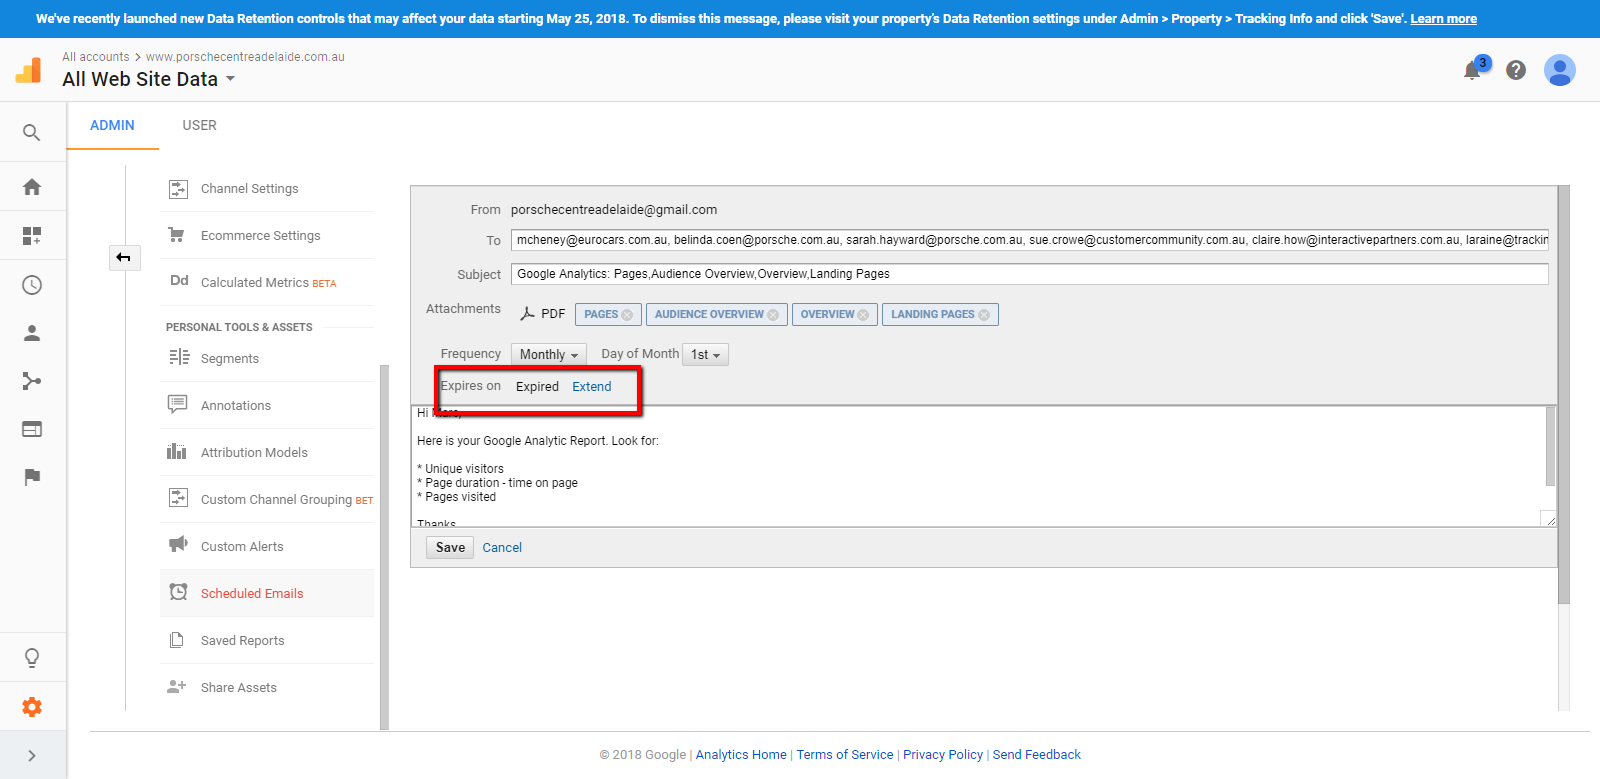
-
5Click "Extend"
-
6The expiration date will be changed. Click "Save"
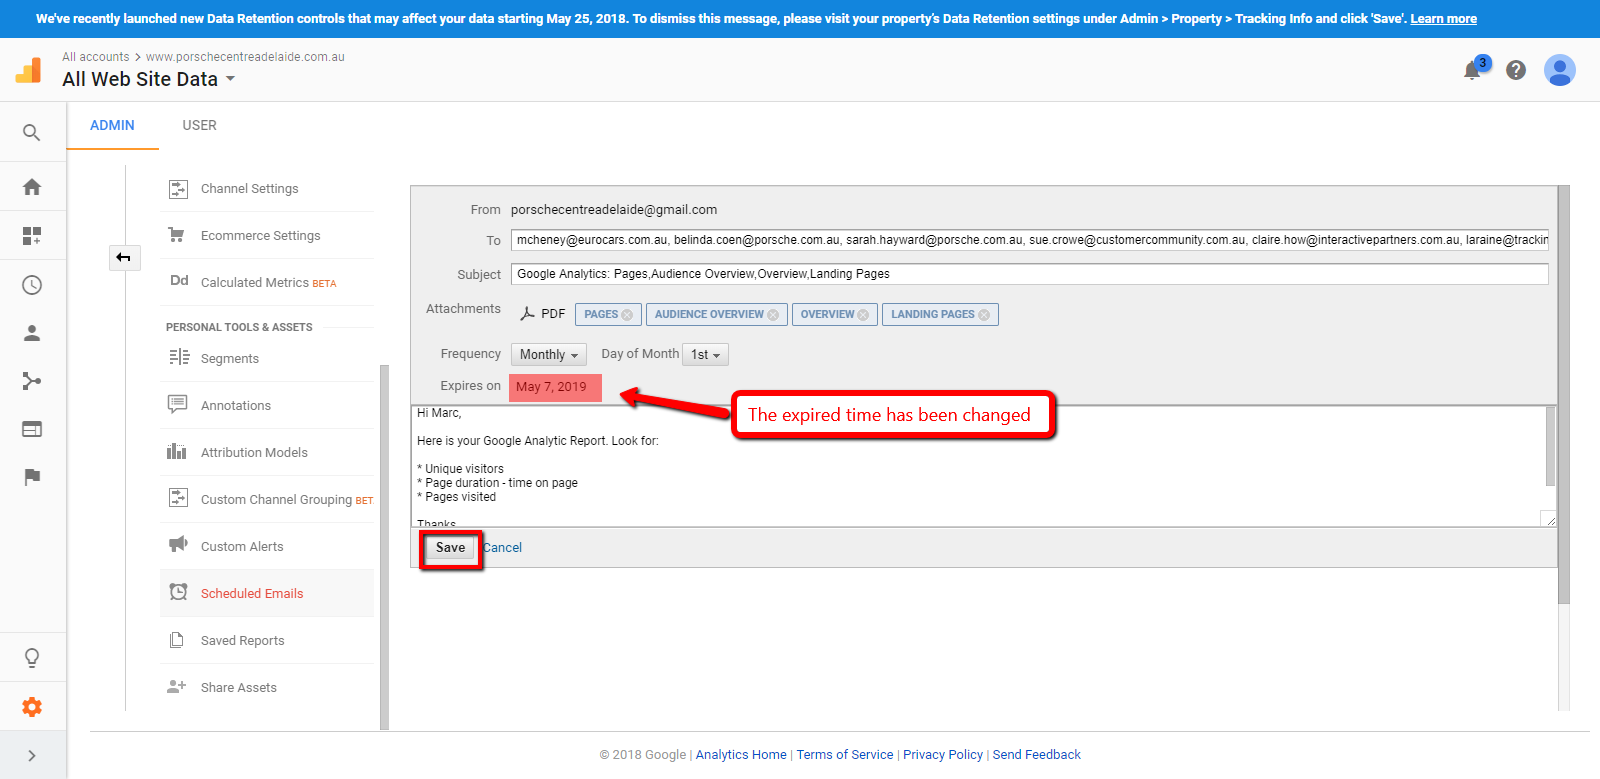
-
7The scheduled email will be updated.