WebEd Cloud requires to write permissions for IIS user account (IUSR) for the directories and files described below:
- \App_Data\
- \Logs\
- \Media\
Before installing WebEd Cloud, ensure you have one of the following databases installed on your system:
- SQL Server 2008 or higher
- SQL Server Express
If you are using SQL Server 2008 or higher, you can use any of the following authentication methods to connect to the server:
- SQL Server Account: When connecting using this method, logins are created in the SQL Server that is not based on the Windows user accounts. Both the user name and the password are created using the SQL Server and are stored in SQL Server. When using this method you must enter your login and password.
- Integrated Windows Authentication: When connecting using this method, the SQL Server validates the account name and password using the Windows principal token in the operating system. This means the user identity is confirmed by Windows. The SQL Server does not request a password and does not perform identity validation. Windows Authentication is the default authentication mode and is much more secure than SQL Server Authentication. Windows Authentication uses Kerberos security protocol, provides password policy enforcement with regard to complexity validation for strong passwords, provides support for account lockout, and supports password expiration. A connection made using Windows Authentication is sometimes called a trusted connection, because SQL Server trusts the credentials provided by Windows.
-
1Once you open the site for the first time, you’ll be redirected to the installation page, as follows:
-
1Read the Welcome file/text
-
2Click Let's get started to go to the Licence screen
-
3Read the licence
-
3You need to open SQL Server Management Studio first and create a blank database (with or without credentials)
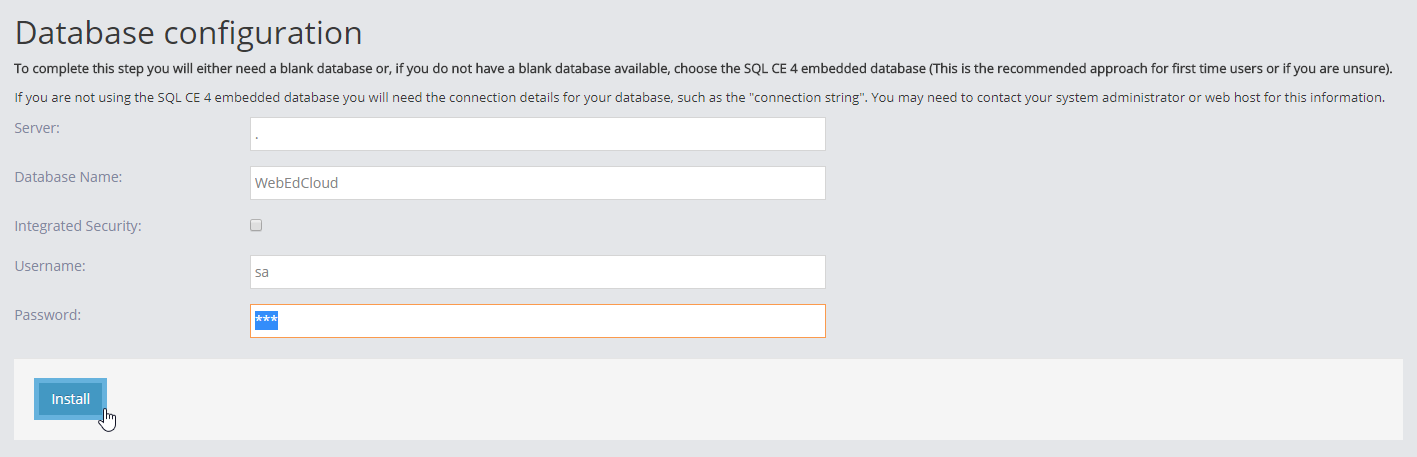
-
3In the Server field, enter the required server name
-
3In the Database name field, enter your database name. This database can be:
- New empty database
- If not created yet, the installation will generate it
-
3Select the Integrated Security option if your SQL Server uses Integrated Windows Authentication and the database you created does not require credentials. Username and Password fields can be ignored.
-
3If your database requires credentials (SQL Server Authentication), enter your login and password
-
3Click Install and wait for the database generated
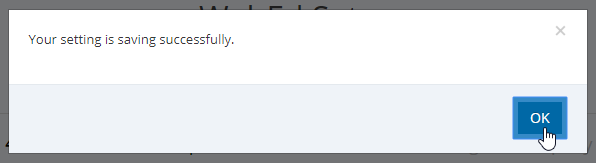
-
3When the database is created successfully, click on Ok button to go to setup Email Account
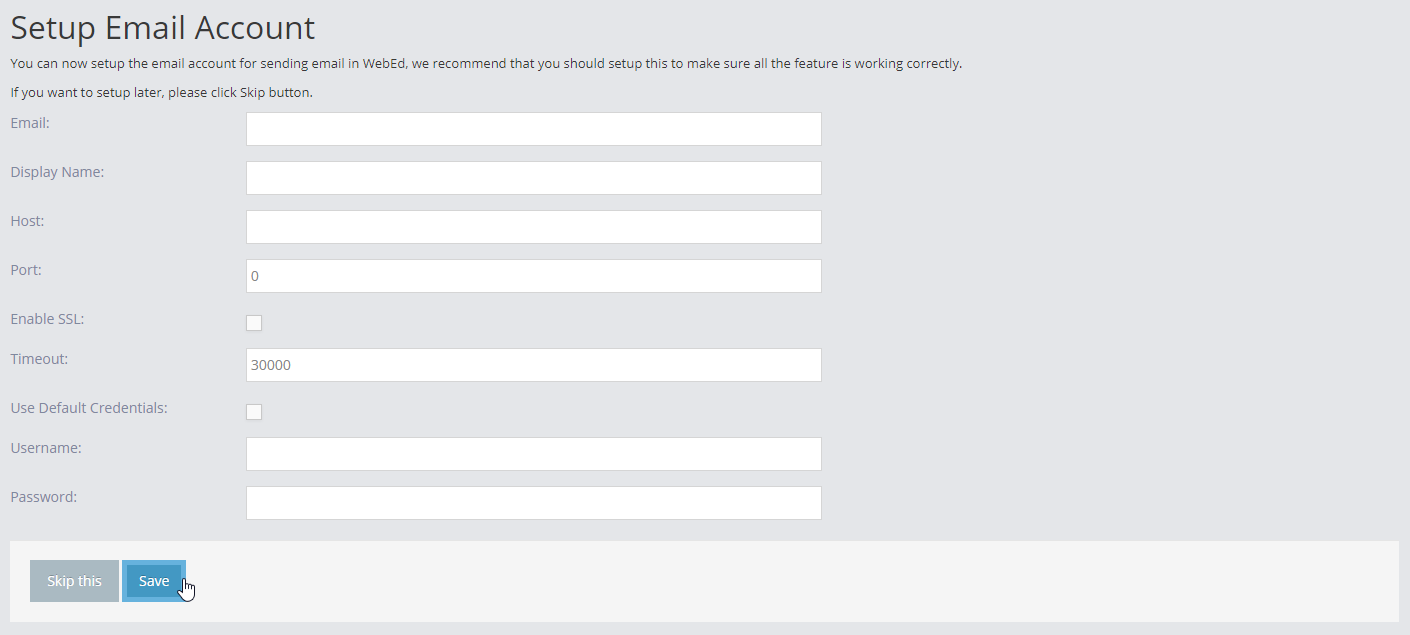
-
3Enter the information for Email Account. This step is optional and you can skip it but the system cannot send emails. You can update it later in Admin/Email Accounts
-
3Click Skip this (a default email account will be created) or Save to go to Create User step
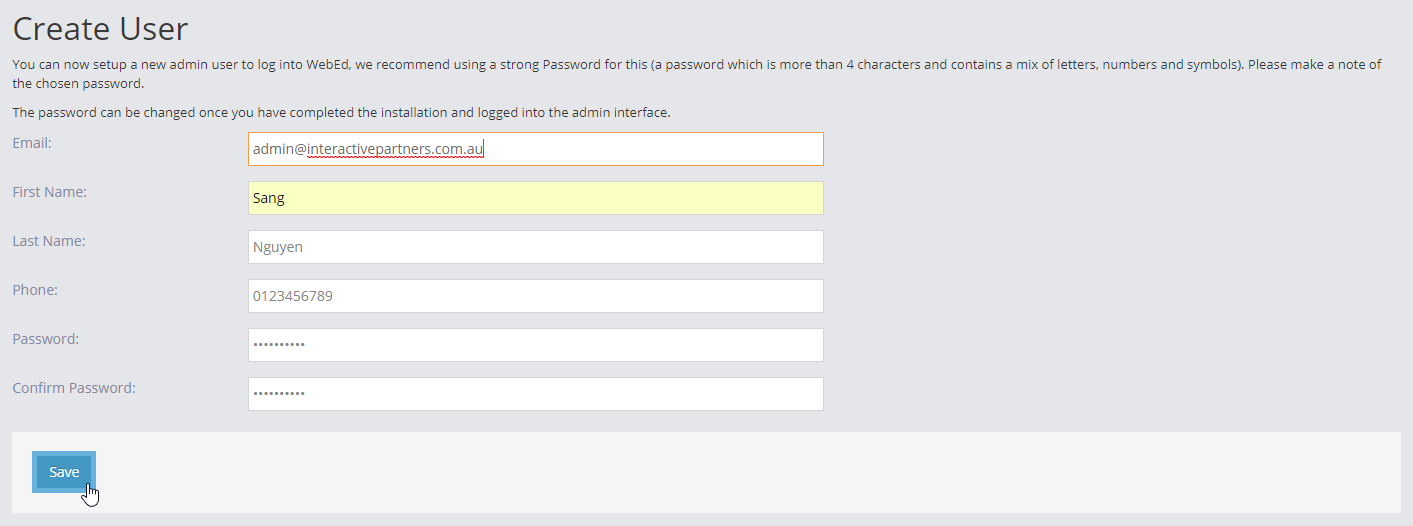
- In the Email field, enter your email (also username)
- In the First Name field, enter your first name
- In the Last Name field, enter your last name
- In the Phone field, enter your phone number
- In the Password field, enter your password
- In the Confirm Password field, enter your password again
- Click Save to go to Setup company
- Enter your company information. You can skip this step and update it later in the site settings
- Click Skip this or Save to go to the next step
-
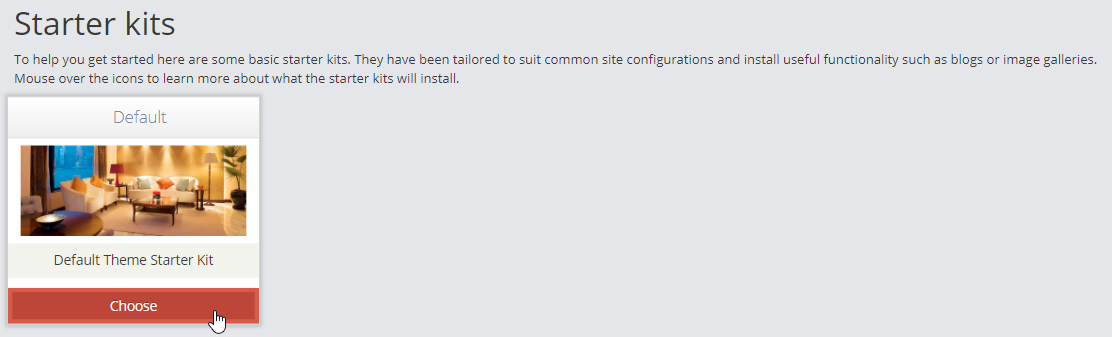
3Starter Kit step:
- This step is for generating some default templates for your CMS
- The idea is that we will build up some default kit for you so that you can generate the site with CSS, script, template and HTML
- Select a theme. There is only a default theme now
-
3Congrats! You have finished the installation. Now you can:
- Click Preview your new website to go Home page
- Click Set up your new website to go to the Admin module
Note 1
Ensure that your application pool is set to Integrated mode
Note 2
If you want to completely reset a WebEd Cloud site to its default settings, you can delete the Site.config file from the App_Data directory. When using IIS you might want to read this article.
Note 3
There is a folder called Copy2Bin in WebEd.Web project that contains some bin files that need for the application to run correctly. These bin files are copied to the bin folder automatically at the build or publish time. But please check it, if they are not please copy these files to the bin folder
Note 4
When building/debugging WebEd Cloud with Visual Studio we use a Git command to get the version from the repository, so please make sure that you have Git installed and configured the environment variable for Git