Ticket Engines Workflow Overview
Ticket Engine is the module that manages support requests from basic users to admins. Basic users can send a request by email and the system will automatically convert it to a ticket on our website.
Admins can manage tickets directly like a reply, forward, etc. without going through each email address.
The Ticket Engine also supports admins better with additional toolkits, for example, logging, time tracking, and more.
Setting up the Ticket Engine
Step 1: Setting up the Ticket Engine
-
1Log in as an administrator and go to the Admin Dashboard.
Learn how to log in here → -
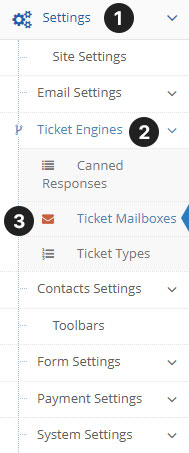
21 Settings > 2 Ticket Engines > 3 Ticket Mailboxes
-
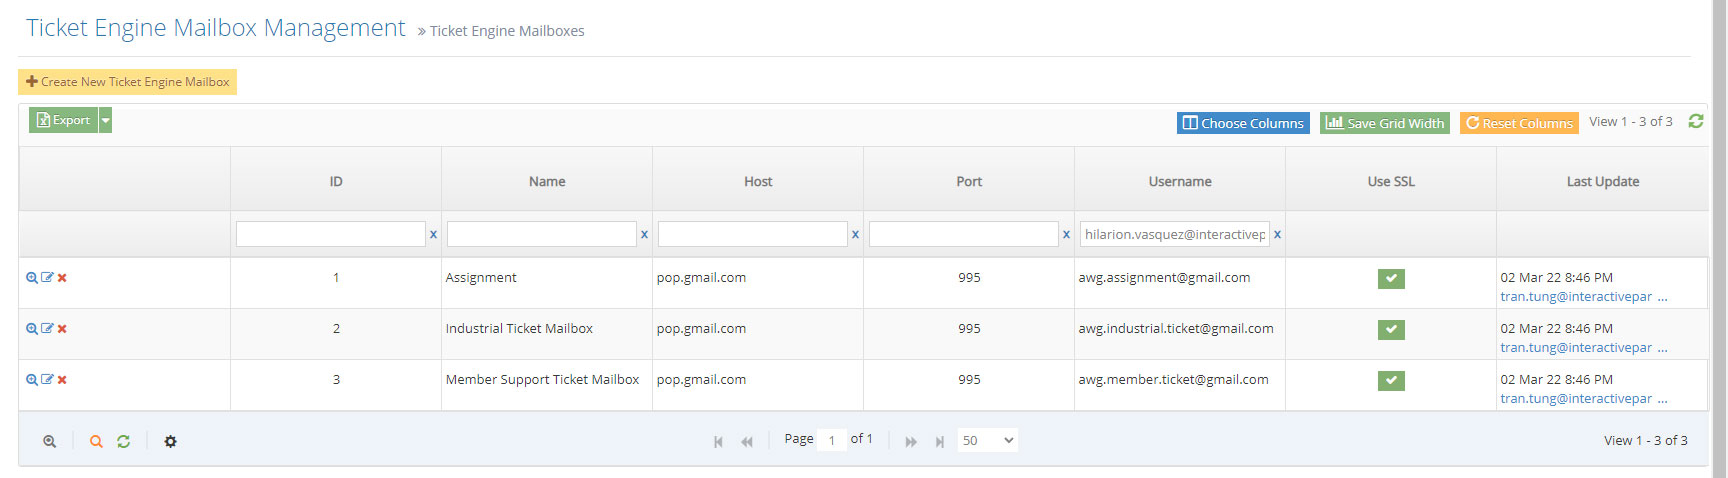
3To edit the ticket mailbox, click on the edit button but if you want to remove it click the delete button. To add a new ticket type click the "Create New Ticket Engine Mailbox" Button.
-
4Then proceed in creating a new ticket-type mailbox management take note of these field descriptions:
- Name - Name of the ticket engine type
- Type - The version of the connection type of the email forwarding to our system
- Host - The host of the SMTP server to connect to our system
- Port - This is depending on the email you are using that wants to connect to the server. The default is 993 for Gmail and Outlook
- Use SSL - If you want this to connect to a secured network we need to check this
- Username - Username to access the mailbox
- Password - Password needed to access the mailbox.
-
5Once finished setting up and filling in everything above click the "Create" button
Definition of Terms for Ticket Engine
- Name - Name of the ticket engine type
- Type - The version of the connection type of the email forwarding to our system
- Host - The host of the SMTP server to connect to our system
- Port - This is depending on the email you are using that wants to connect to the server. The default is 993 for Gmail and Outlook
- Use SSL - If you want this to connect to a secured network we need to check this
- Username - Username to access the mailbox
- Password - Password needed to access the mailbox.
Create Ticket Engine Type
Step 2: Create Ticket Engine Type
Ticket Type reads the email queue from the mailbox and converts the email to a ticket under it.
-
1Log in as an administrator and go to the Admin Dashboard.
Learn how to log in here → -
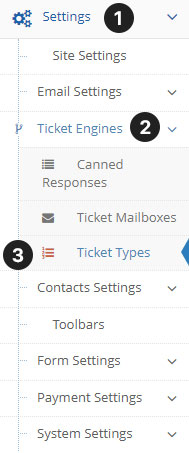
21 Settings > 2 Ticket Engines > 3 Ticket Types
-
3This is the Ticket Type management screen
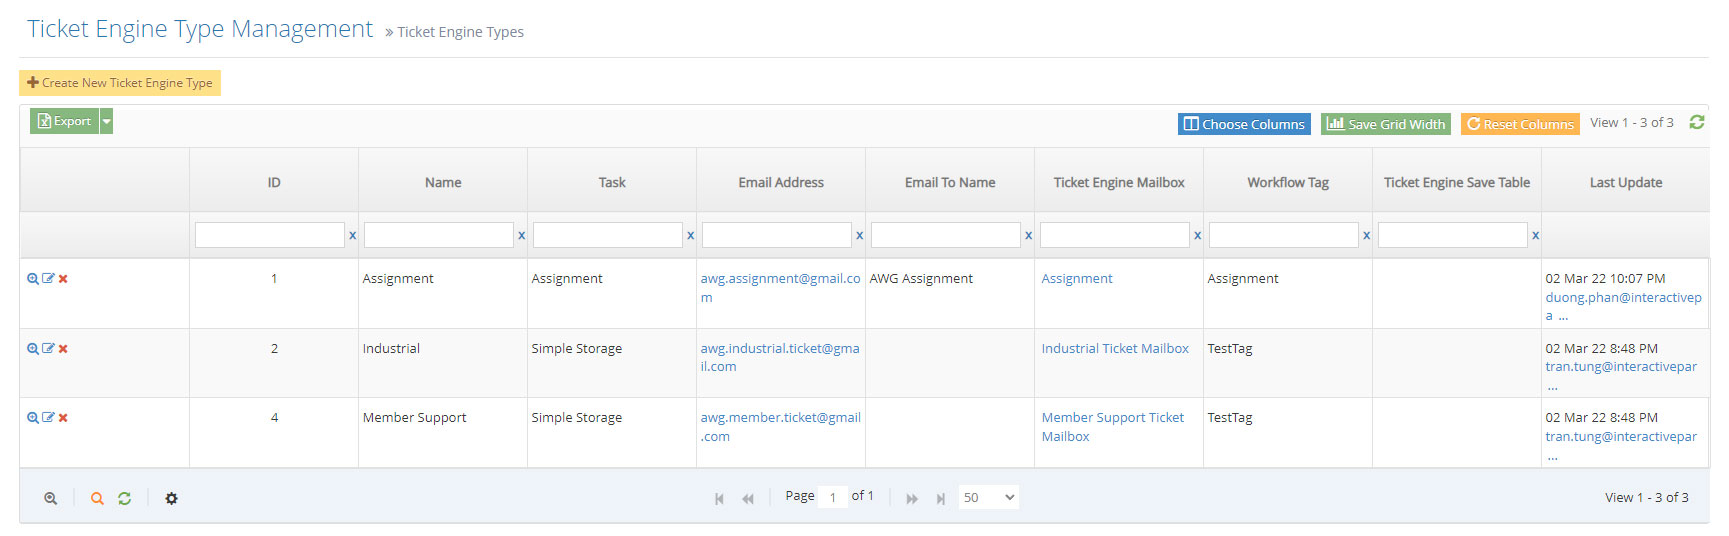
-
4To create a new Ticket Engine Type click the "Create New Ticket Engine Type" Button
We will create/edit the Ticket Engine Type and fill up the necessary fields below:- Task - should be Simple Storage for simple requests.
- Name - Any name of the category you like (e.g. Industrial)
- Email Address - should be the same as the mailbox email address
- Workflow Tag - When the ticket is generated, it will automatically assign to the ticket
- Ticket Engine Mailbox - Mailbox we created in Step 1
- Admin Email - If a user responds, This will be the selected email
-
5Once finished creating the ticketing engine, users can send emails to support email then email can be converted to tickets.
Working with Tickets
Step 3: Working with Tickets
The Ticket Engine module will check each mailbox every 10 minutes then an email will be converted to a ticket under Ticket Types. The admin can work with a ticket by following:
-
1Log in as an administrator and go to the Admin Dashboard.
Learn how to log in here → -
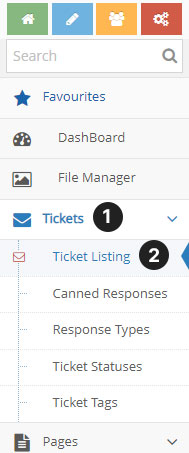
2Tickets > Ticket Listing
-
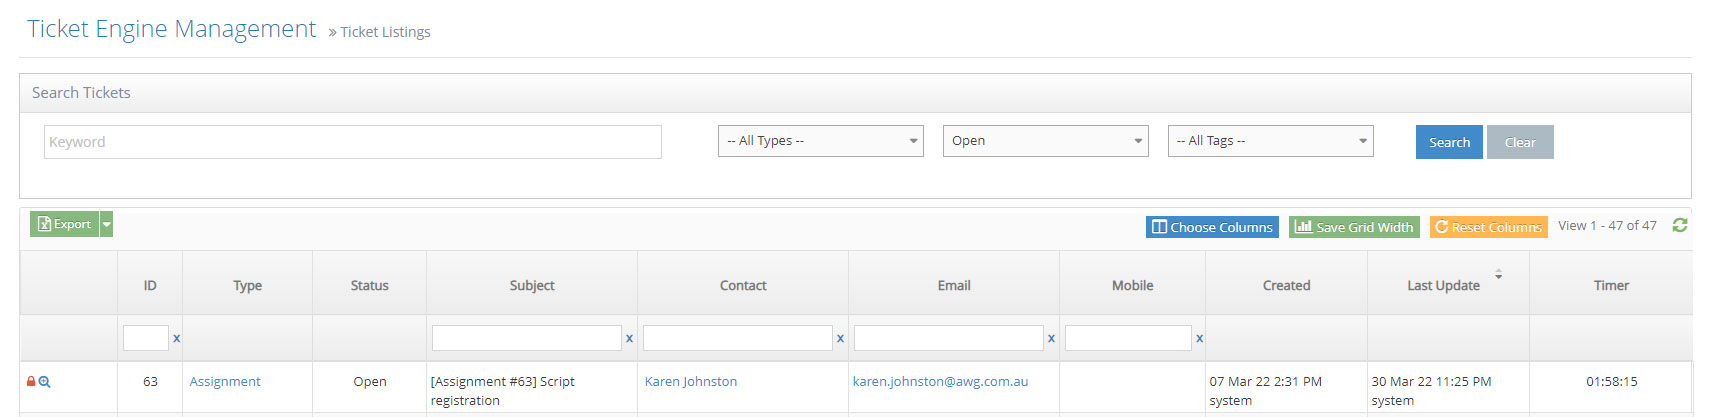
3Each Ticket will be under types that we configured in Step 2, we can search, and sort tickets for each filter.
-
4From the ticket list screen, the admin can work with each ticket via the action icon:

From left to right, they are:
- View Detail - Click to go to the detail screen of each Ticket
- Re-assign - Change the Type of ticket
- Merge - Combine ticket with existing one
- Delete - Delete the ticket
-
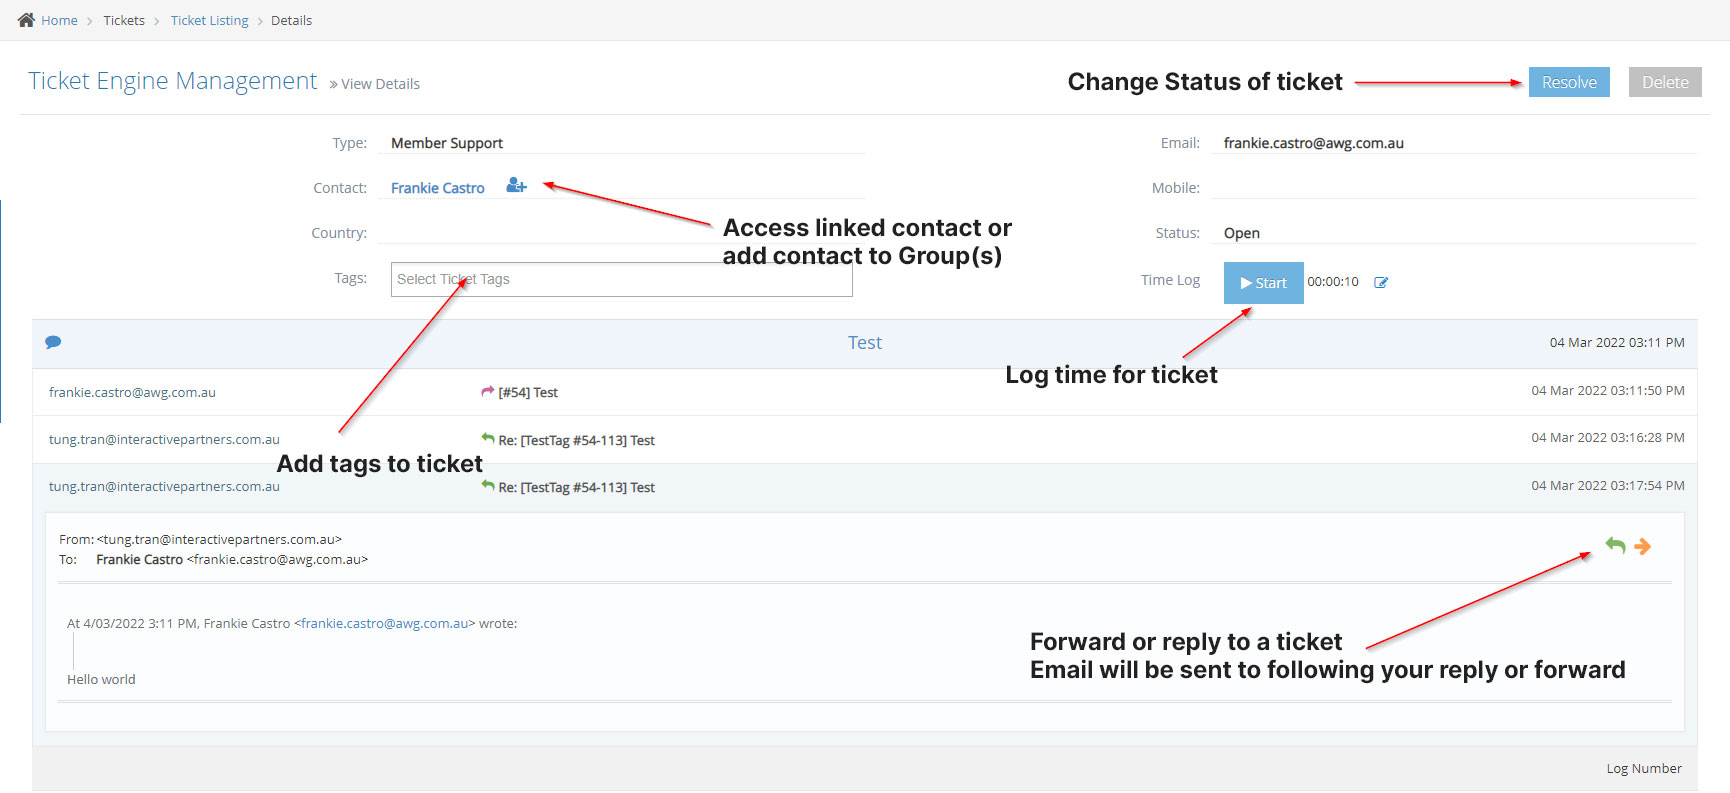
5When accessing the detail page of the Ticket, an Admin can
Other Ticket Engine Settings
Like other modules, the Ticket Engine Module Setting can be found in the:
-
1Log in as an administrator and go to the Admin Dashboard.
Learn how to log in here → -
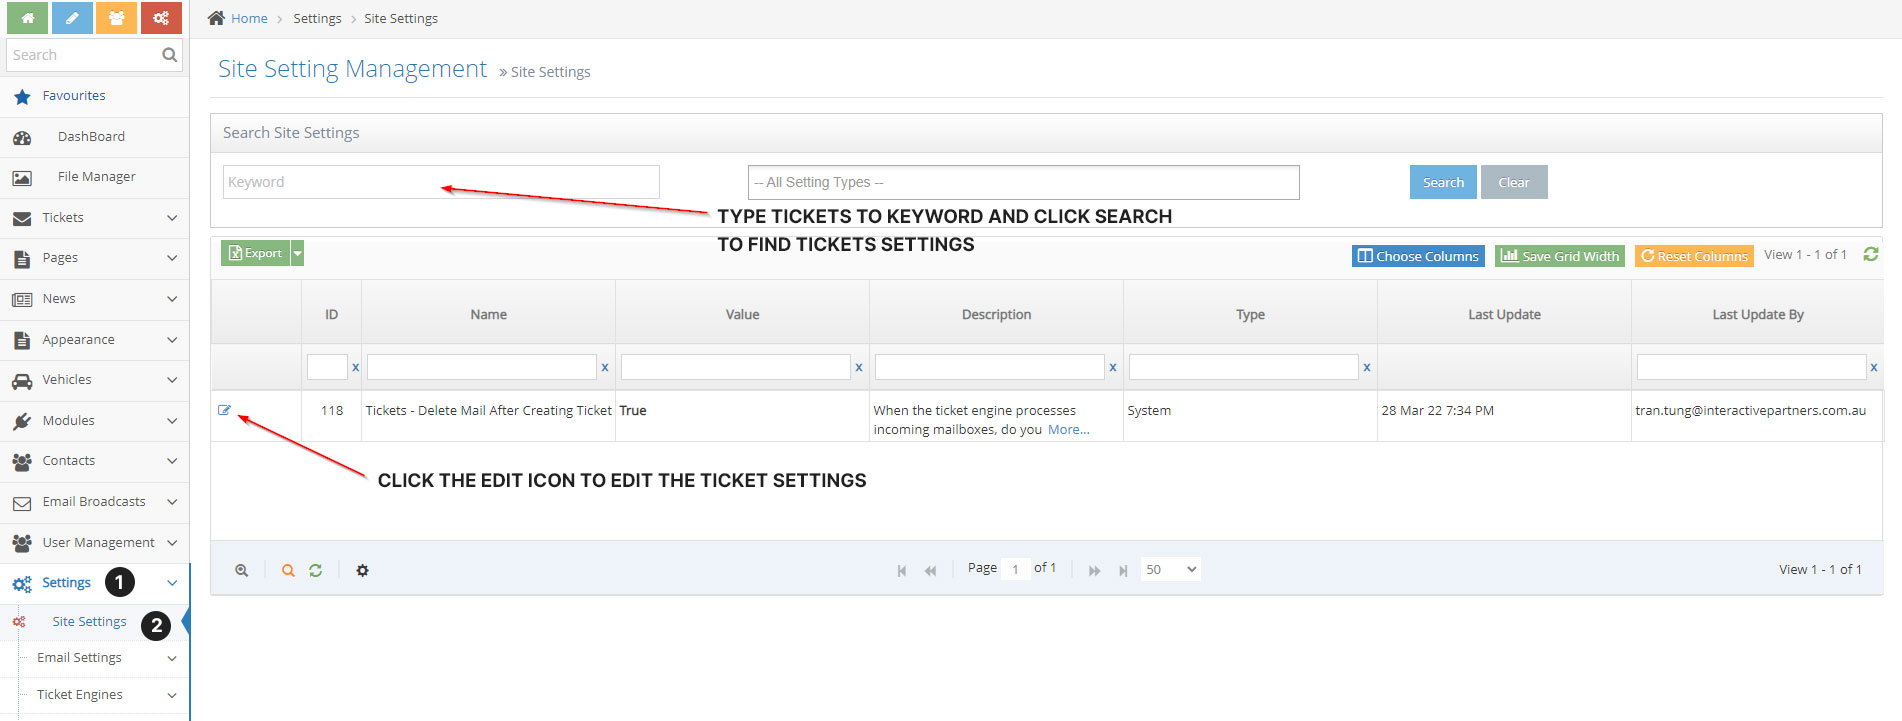
2Settings > Site Settings
-
3To find the Ticket Engine Module Setting, Click the keyword, type the word "tickets" and click the search button
-
4To edit the setting of the ticket engine module click the edit icon
Delete Mail After Creating Ticket
-
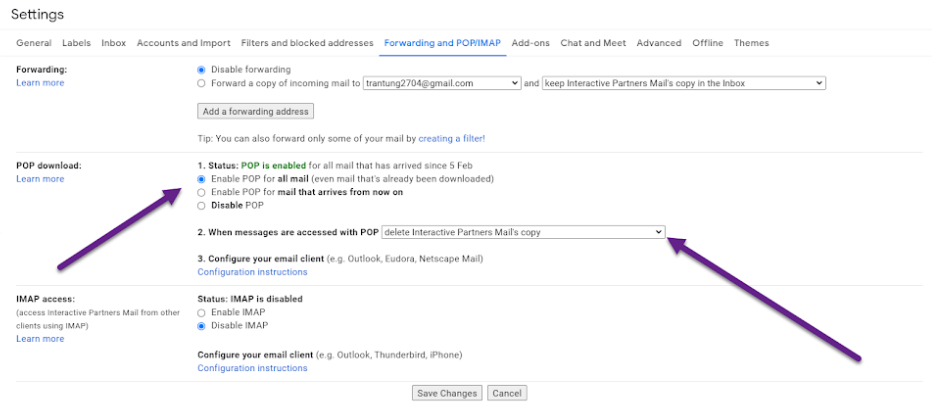
1For standard POP3 mail servers like Yahoo Mail and POP 3 private domain email if this setting is set to true, the email will be auto-deleted after being converted to a ticket.
-
2For non-standard POP3 mail servers like Gmail or Zoho, this behaviour will be configured in each mail server setting for POP3: