Set up the content on the central site
STEP-BY-STEP
-
1Log in as an administrator and go to the Admin Dashboard.
Learn how to log in here → -
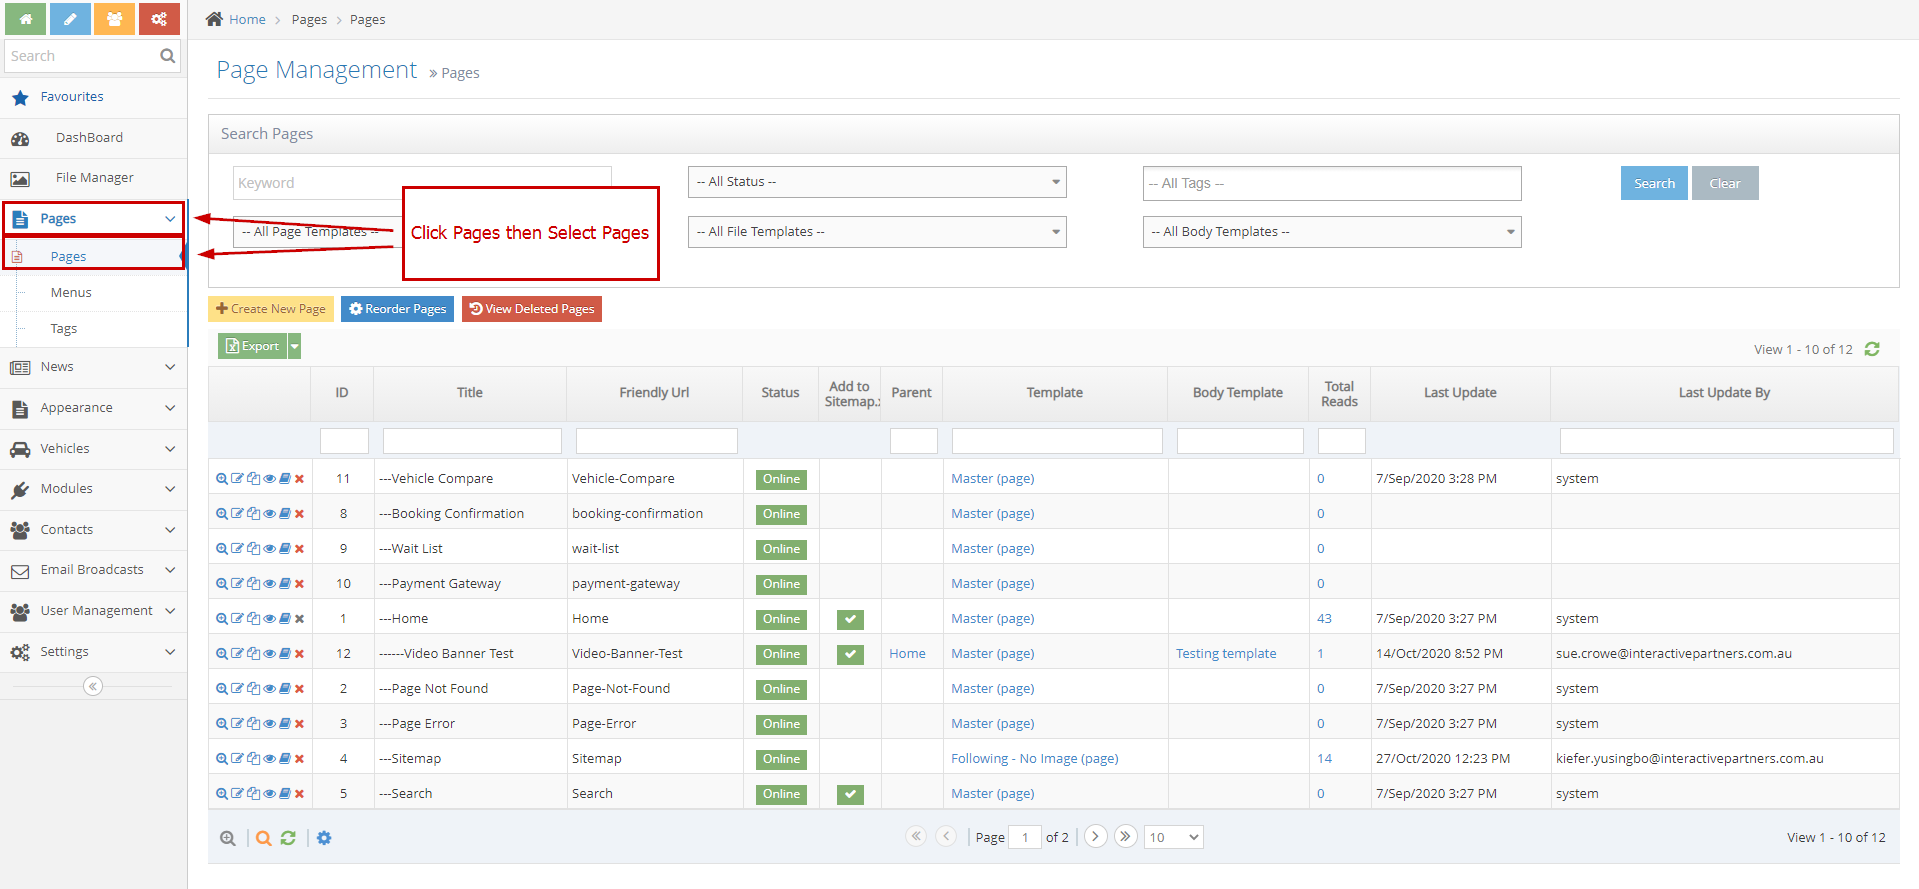
2Once you're in the dashboard, in the left navigation, click Pages > Pages
-
3On the Page Management, all the pages will be displayed in the grid as shown below
-
4Look for the page you want to display and take note of the Page ID
- If it is a new page, create a new page first using this guide, take note of the Page ID, you will need this in the next steps
-
5Once you have your page ready, log out from the central site
Display the syndicated content on your websites
STEP-BY-STEP
-
1Log in as an administrator and go to the Admin Dashboard.
Learn how to log in here → -
2Edit the page where you want to display your syndicated content
-
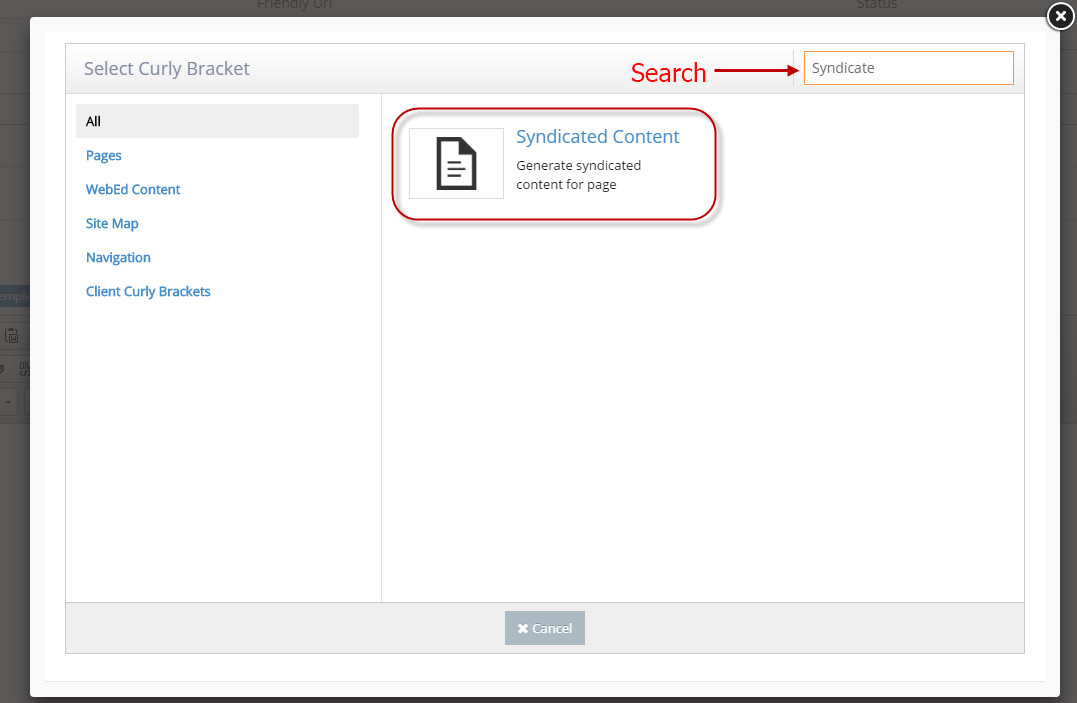
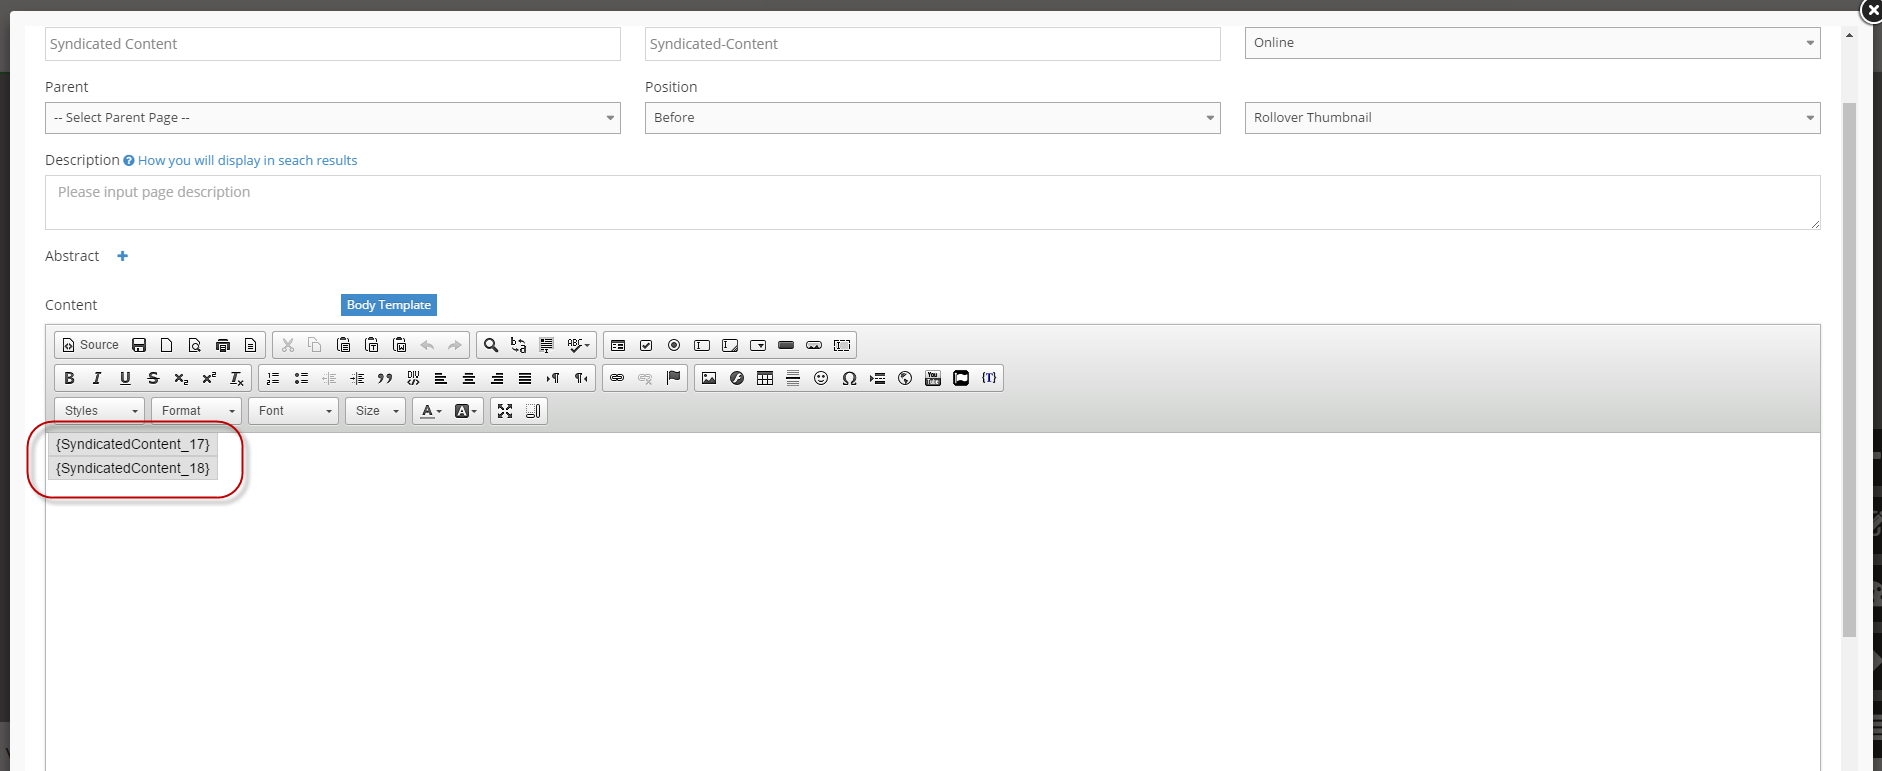
3Click on the curly bracket icon on the page editor toolbar

-
4Search for Syndicated Content curly bracket
-
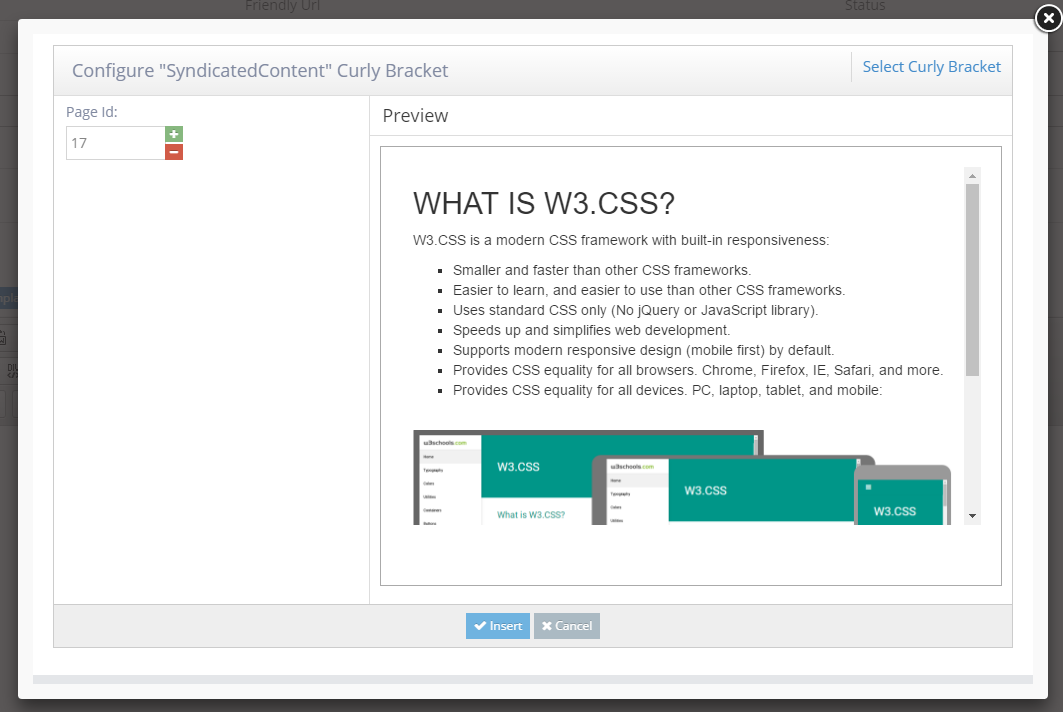
5On the configuration window, enter the Page ID of your syndicated page (you can check this on the central site)
-
6Wait for the preview to load
-
7Once you're certain that this is the page, click on the Insert button at the bottom of the window
-
8On your Page editor, you will notice that the curly bracket(s) have been added
-
9Save the page as usual
-
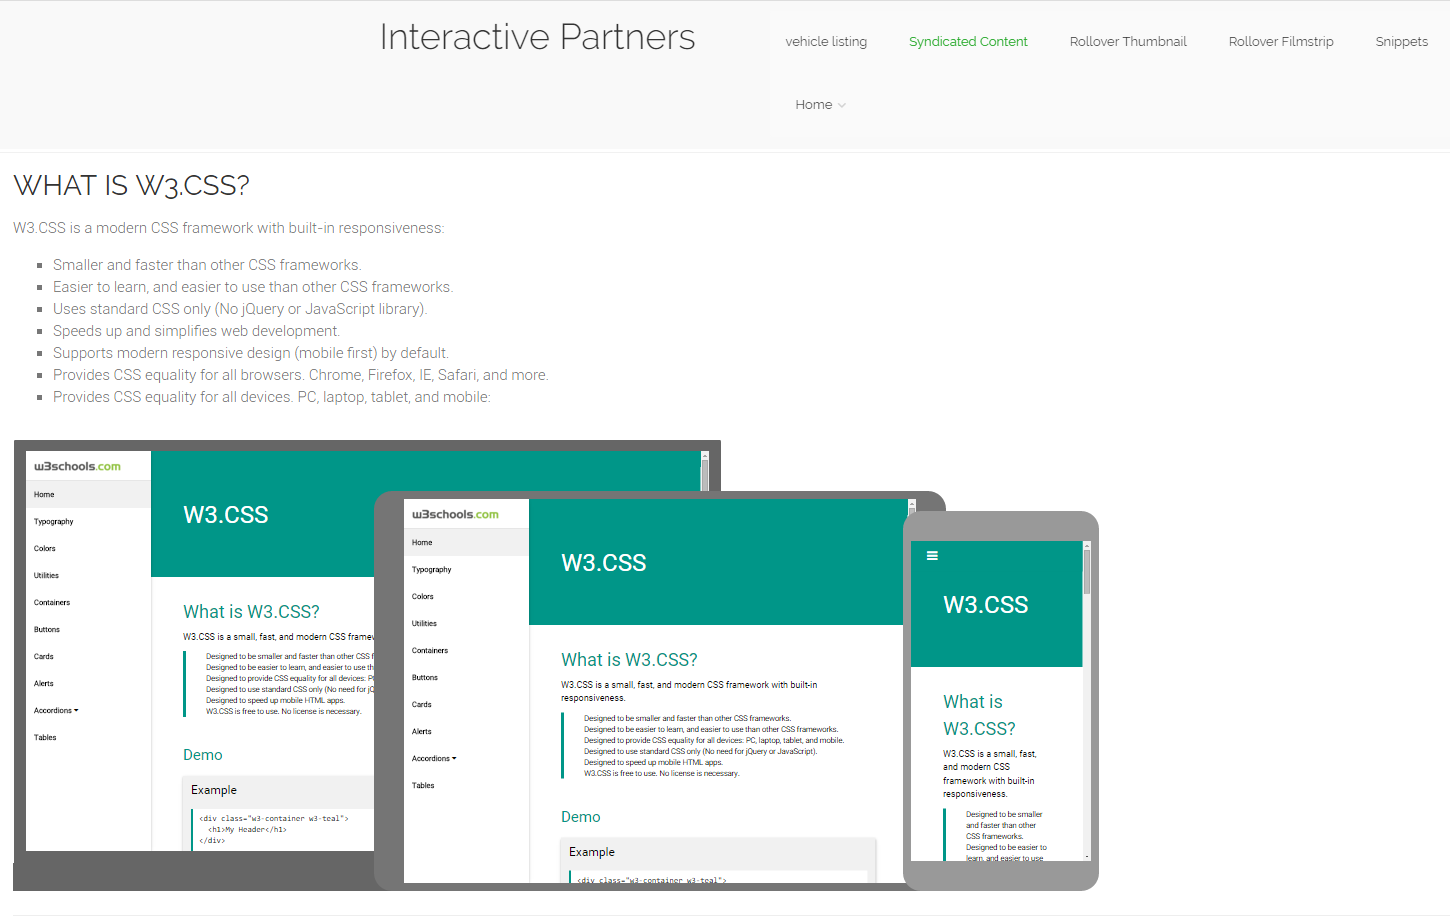
10Let the page reload and check the update
Setup Syndicated content template (Developers view)
STEP-BY-STEP
-
1Log in as an administrator and go to the Admin Dashboard.
Learn how to log in here → -
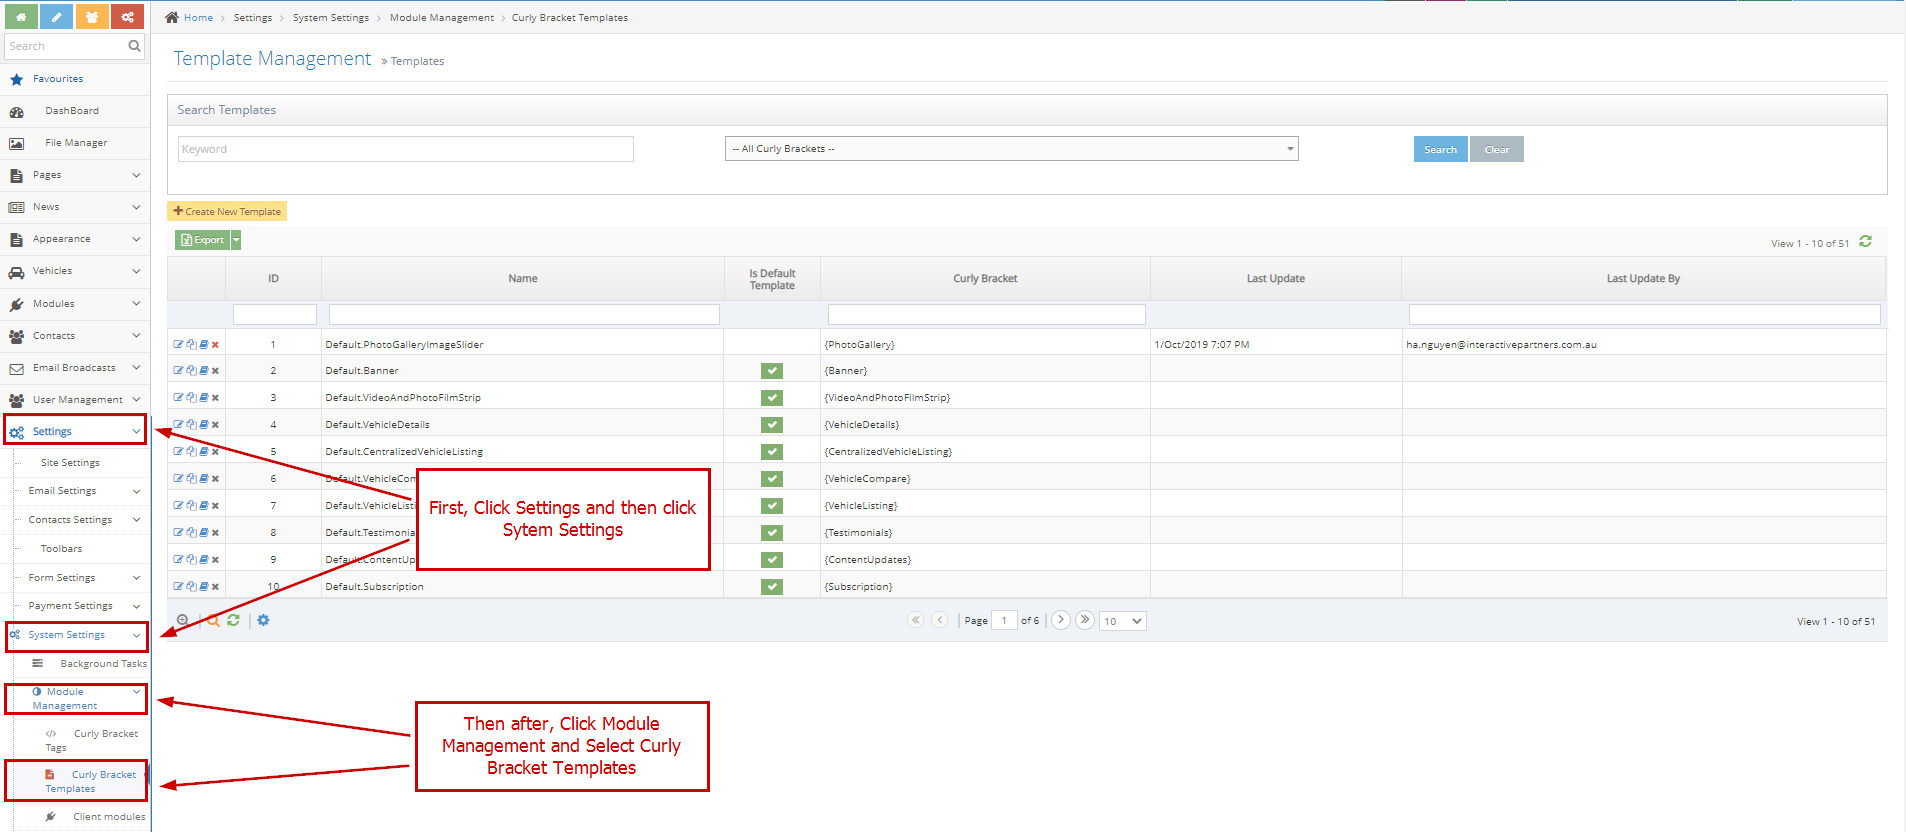
2Select navigation items: Settings > System Settings > Module Management > Curly Bracket Templates
-
3Search field Name in grid header with keyword is Syndicated Content

-
4Click the edit icon, go to the edit page
-
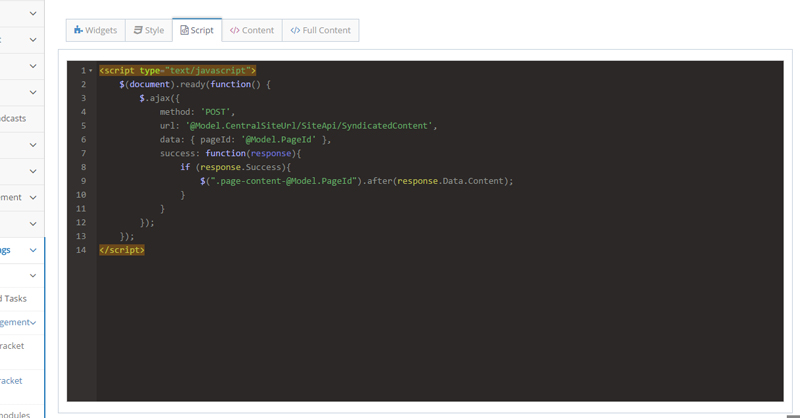
5Select the Script tab to see the code
-
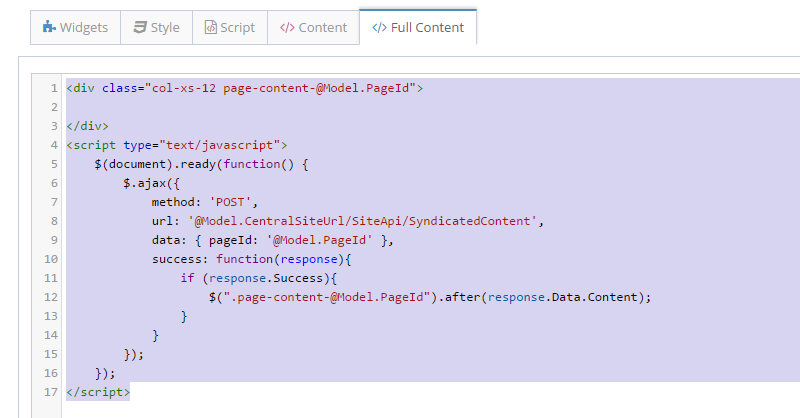
6Select the Full Content tab to see the full code used in syndicated content curly bracket