Step 1 - Creating Your Content
STEP-BY-STEP
-
1Log in as an administrator and go to the Admin Dashboard.
Learn how to log in here → -
2Click Pages > Pages
-
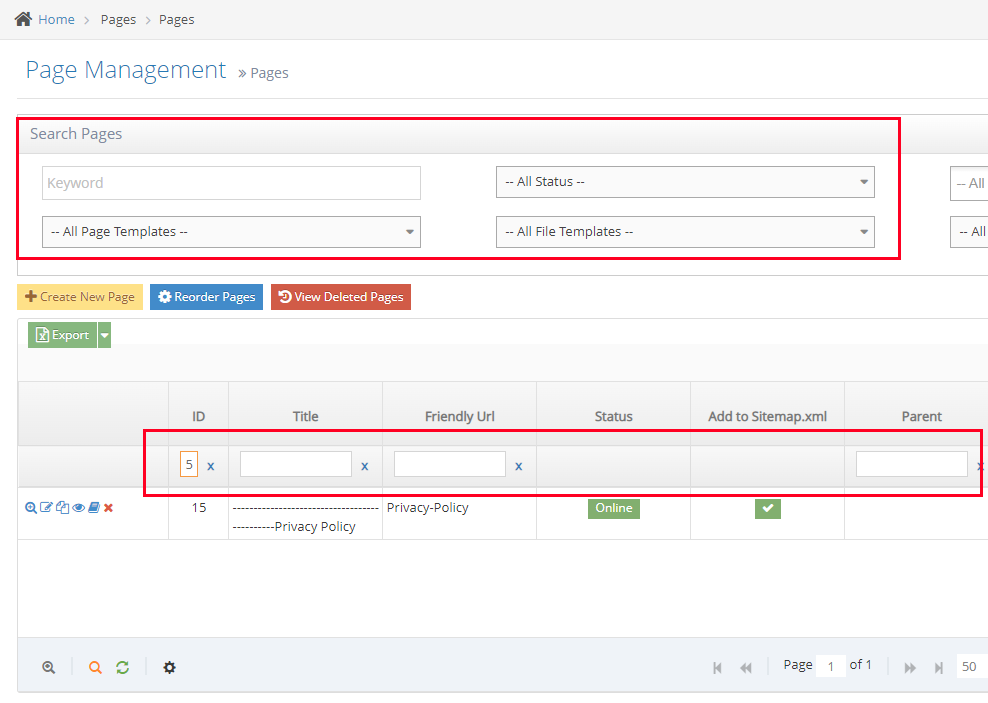
3I suggest finding a page that is similar to copy
e.g.: page ID 15. So put 15 in the search space and hit enter (see below)

I would suggest taking a look at how this content was created - look at all the elements of the content you want to re-create e.g. get your image ready to be the same size (456x256px in this instance) & prepare what you want the new content to say etc. -
4Edit the Page content you want to COPY
-
5Hit the ‘source button’ and copy all the code in the Page Content you want to copy - then close the item down
-
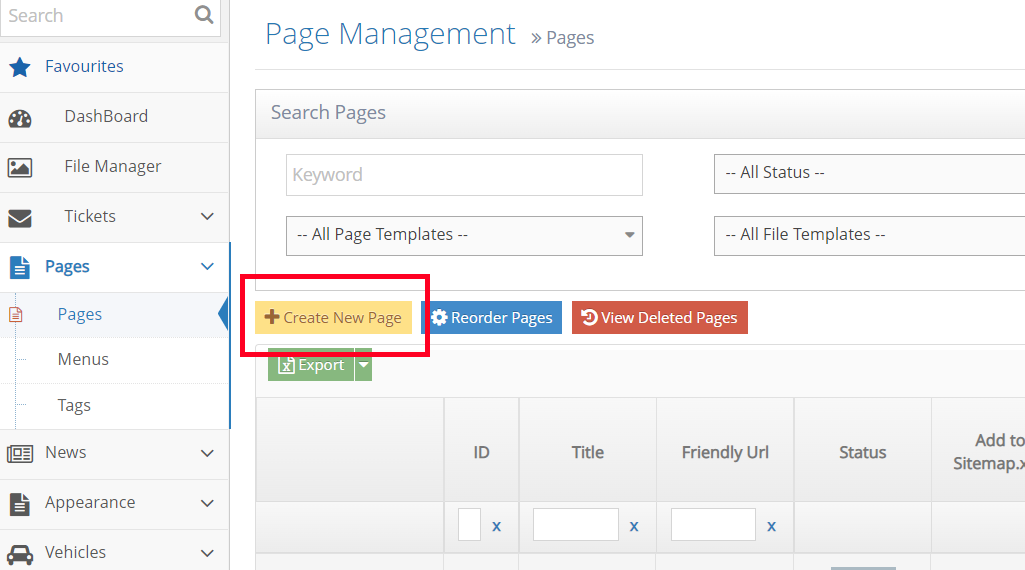
6Return to the Pages index and create your new Page Content by clicking on the yellow square as shown

-
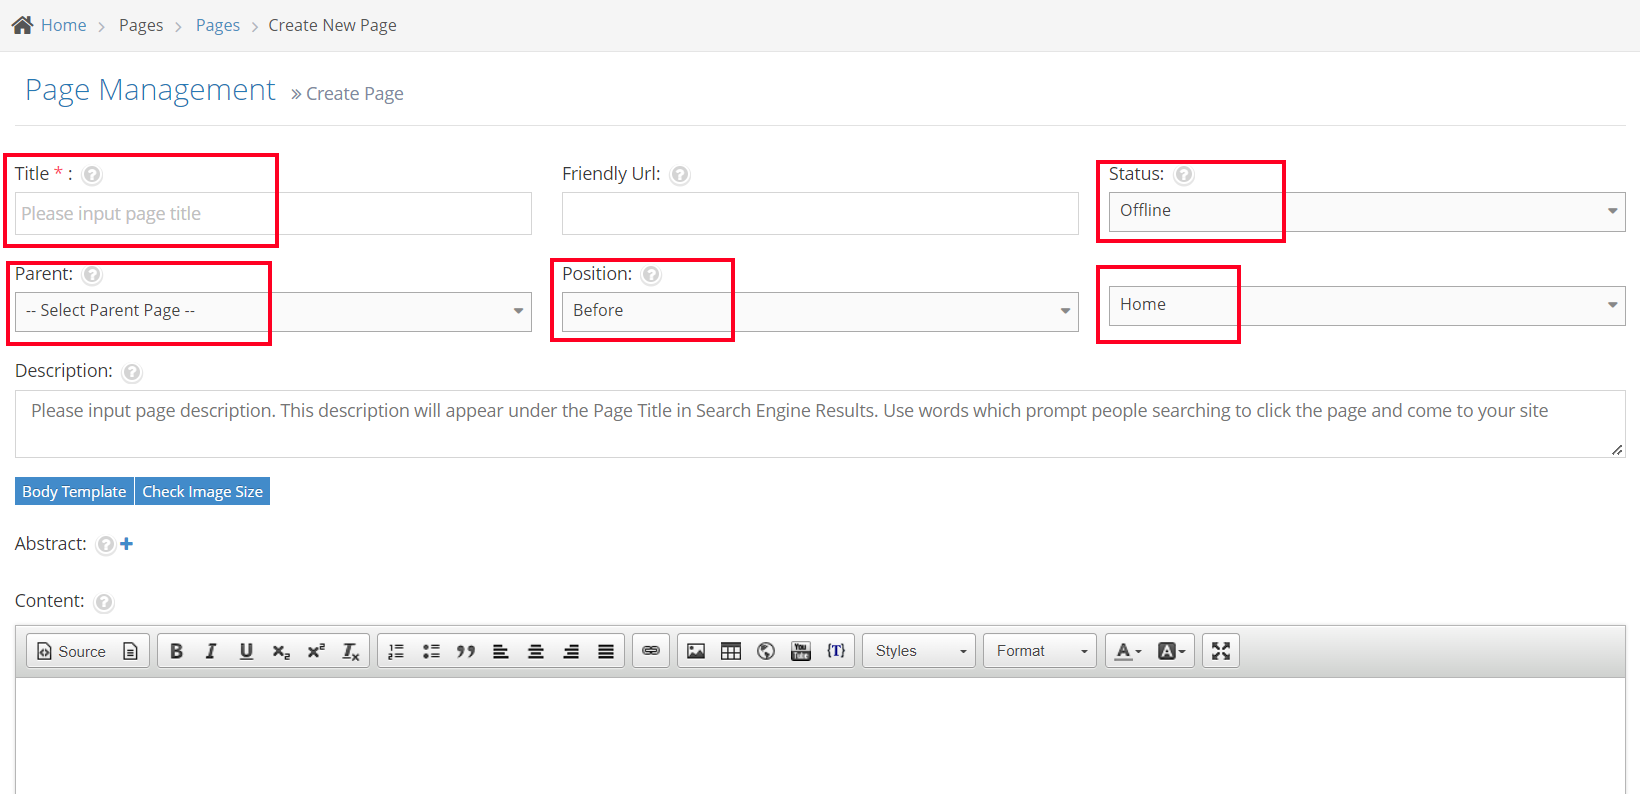
7Your new page is the same as any other at this stage
-
8Add your new page title
-
9Put in the page description (for SEO) etc
-
10Set the page status as online
-
11When using the curly bracket Page content, you do not need to fill out the position on the page because you will be putting the item directly onto your chosen page using the curly brackets
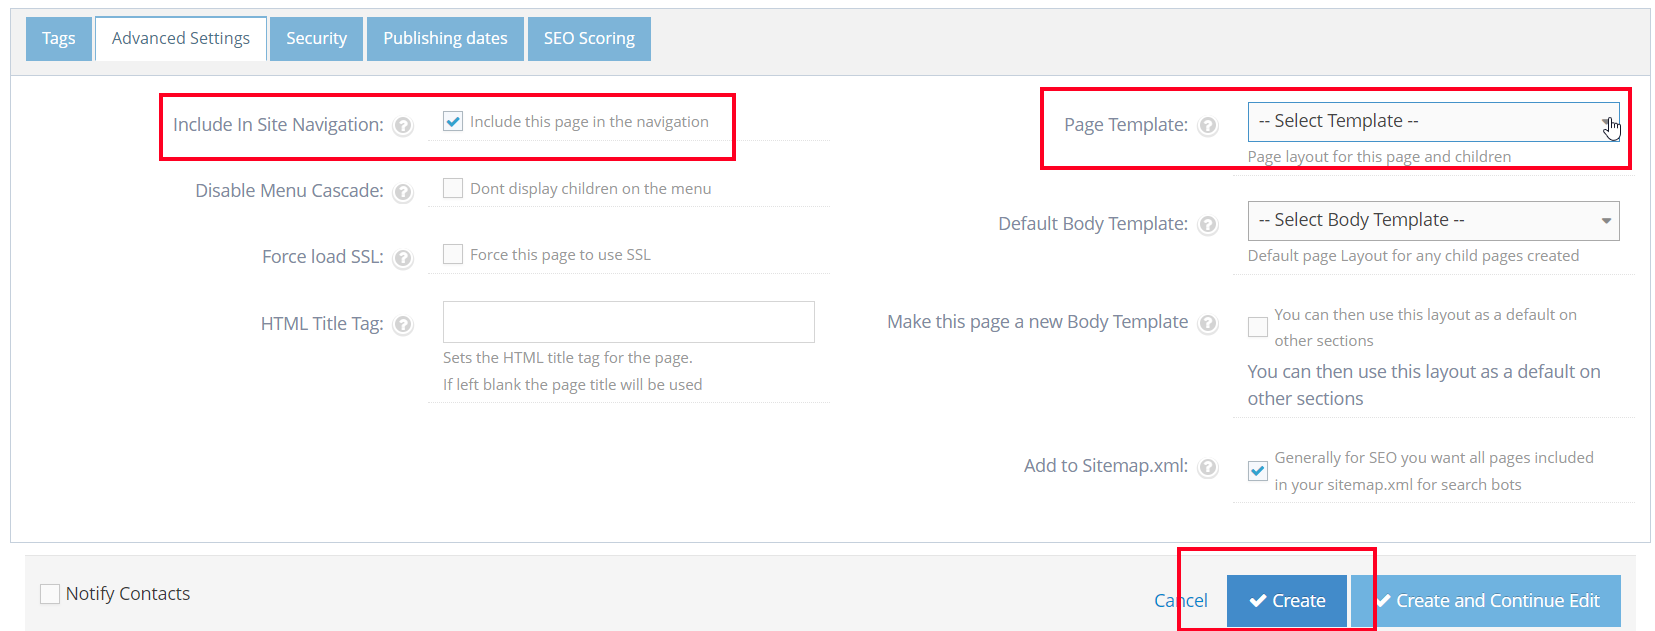
Important: Remove the page from site navigation by going to Advanced Settings at eh bottom of the page and un-checking or removing the arrow from site navigation - see image
-
12Include Site Navigation box needs to be blank


-
12Click the Insert button to complete the config step, then click the OK button to finish.
Your new page content
STEP-BY-STEP
-
1Go to the content editor window
-
2Hit ‘Source’, put your cursor inside the edit window and paste your saved code into the box.
-
3Hit Source again to see your copied content
-
4Now you can edit over this copied content with your new image/words etc.
-
5Once contented - hit Create or Create and Continue to Edit
Step 2 - Putting your new content on the actual web page
STEP-BY-STEP
-
1Log in as an administrator and go to the Admin Dashboard.
Learn how to log in here → -
2Go to the page you want to add your new content and edit
-
3Decide where you want the content to go - use the red line to create a space - look for the "Enter" sign on the right-hand side of the red line
-
4Once you are in the correct position, put your cursor in the gap and go to the Curly bracket icon
-
5Choose configure and search for Page Content
-
6Once open, use the 'Page ID' drop-down to choose your page content
* If you cannot find it,pick a page and change the id numberlater - Hit Insert
-
7Once you hit insert this is what appears - here you can change the ID number
-
8Once you are happy with the page ID - hit OK and your new curly bracket (with new page content) will be inserted on the page
-
9Save and close the page - check the content is what you expected