- Curly Bracket Overview
- Why you would use Curly Bracket Function
- How to add a Curly Bracket to Page Content
- Using Templates to Format the Output
- List of Curly Bracket Modules
- Menus Module
- Pages Module
- PageContent Module
- RSS Feeds Module
- List of Curly Bracket Functions
Using Templates to Format the Output
NB! Default Curly Brackets shouldn't be edited and/or updated as the default ones will be updated by the system to defaults. To make a custom template, first, copy the Default Curly Bracket and rename it. You can then edit as needed.
via Admin Panel
STEP-BY-STEP
-
1Log in as an administrator and go to the Admin Dashboard.
Learn how to log in here → -
2In the left menu, select: System Settings > Module Management > Curly Bracket Tags

-
3In the grid, the list Curly Bracket will be displayed with Name, Curly Bracket, Template Name, and Description. Also, allow a quick search for a Curly Bracket.
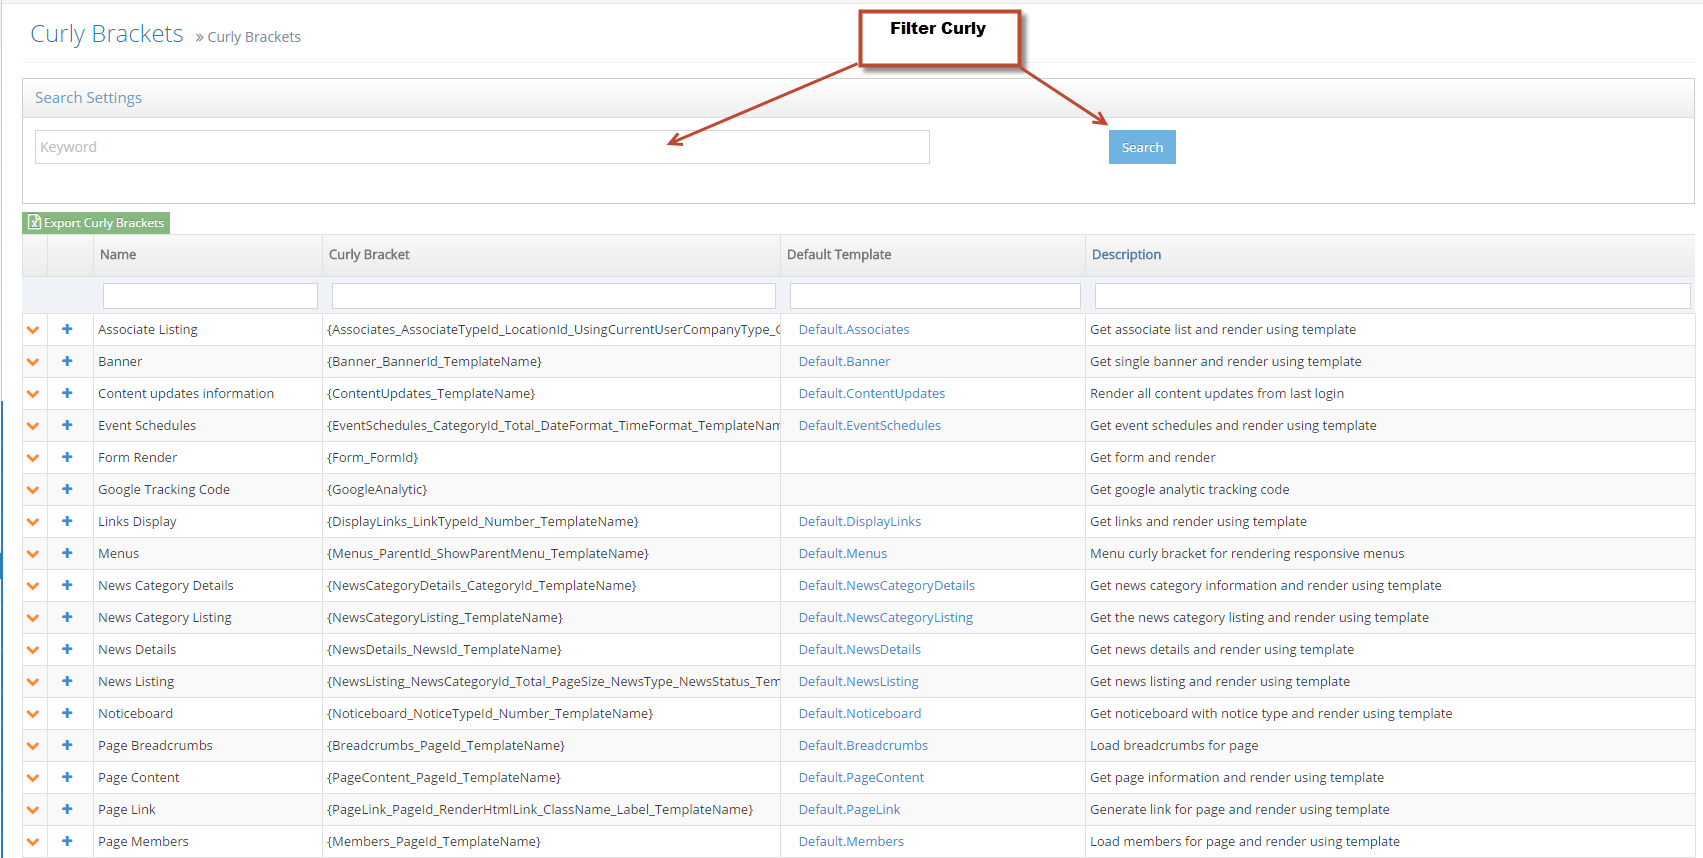
-
4Add a new Template for Curly Bracket by clicking the

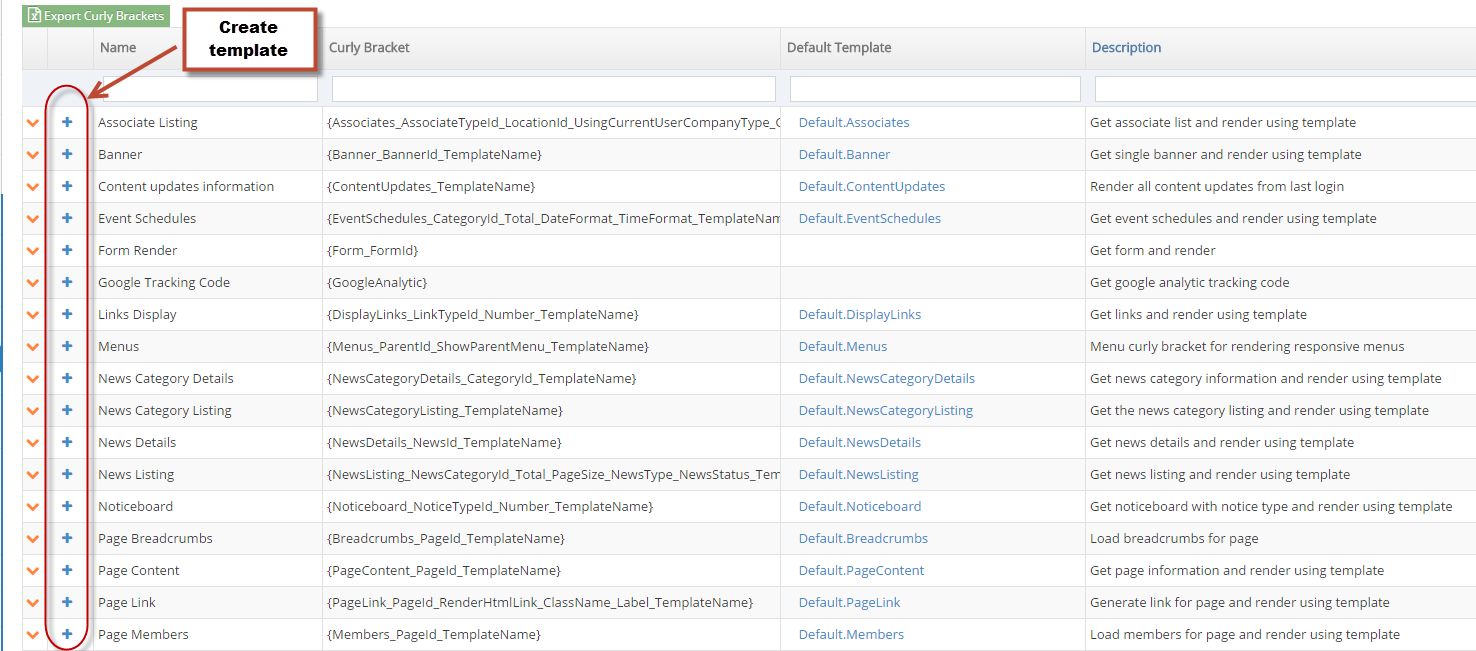
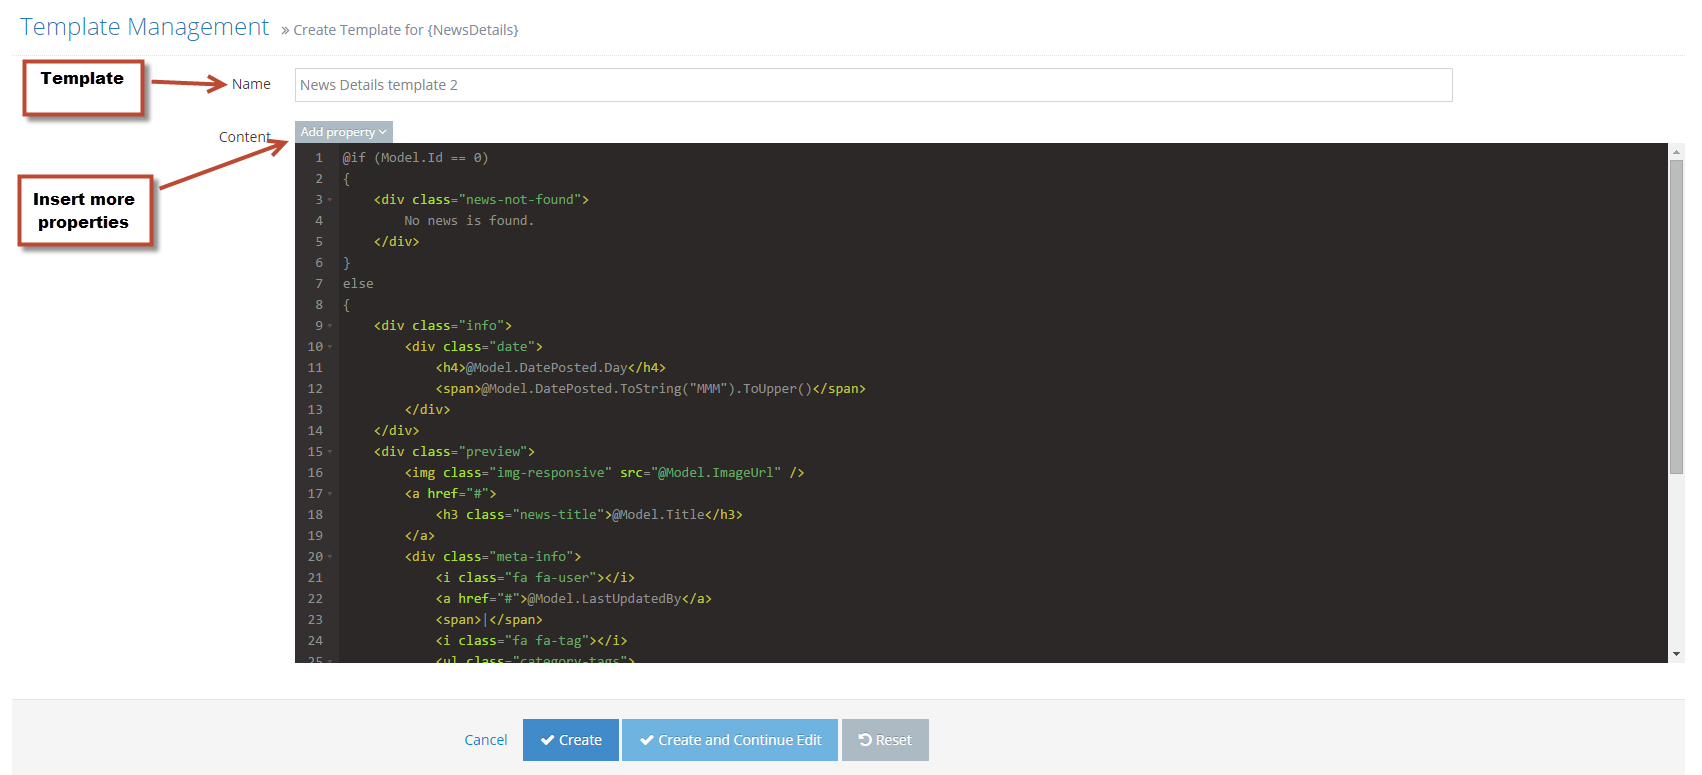
- Name: Template name is required and not allow duplicate.
- Content: A default content will be displayed, Admin should be added more properties by clicking on Add Property select-box.
-
5Click Create or Create and Continue Edit to save the template.
- Edit Curly Bracket template:
- In the left menu, select: System Settings > Module Management > Curly Bracket Templates
- Search for a template to modify
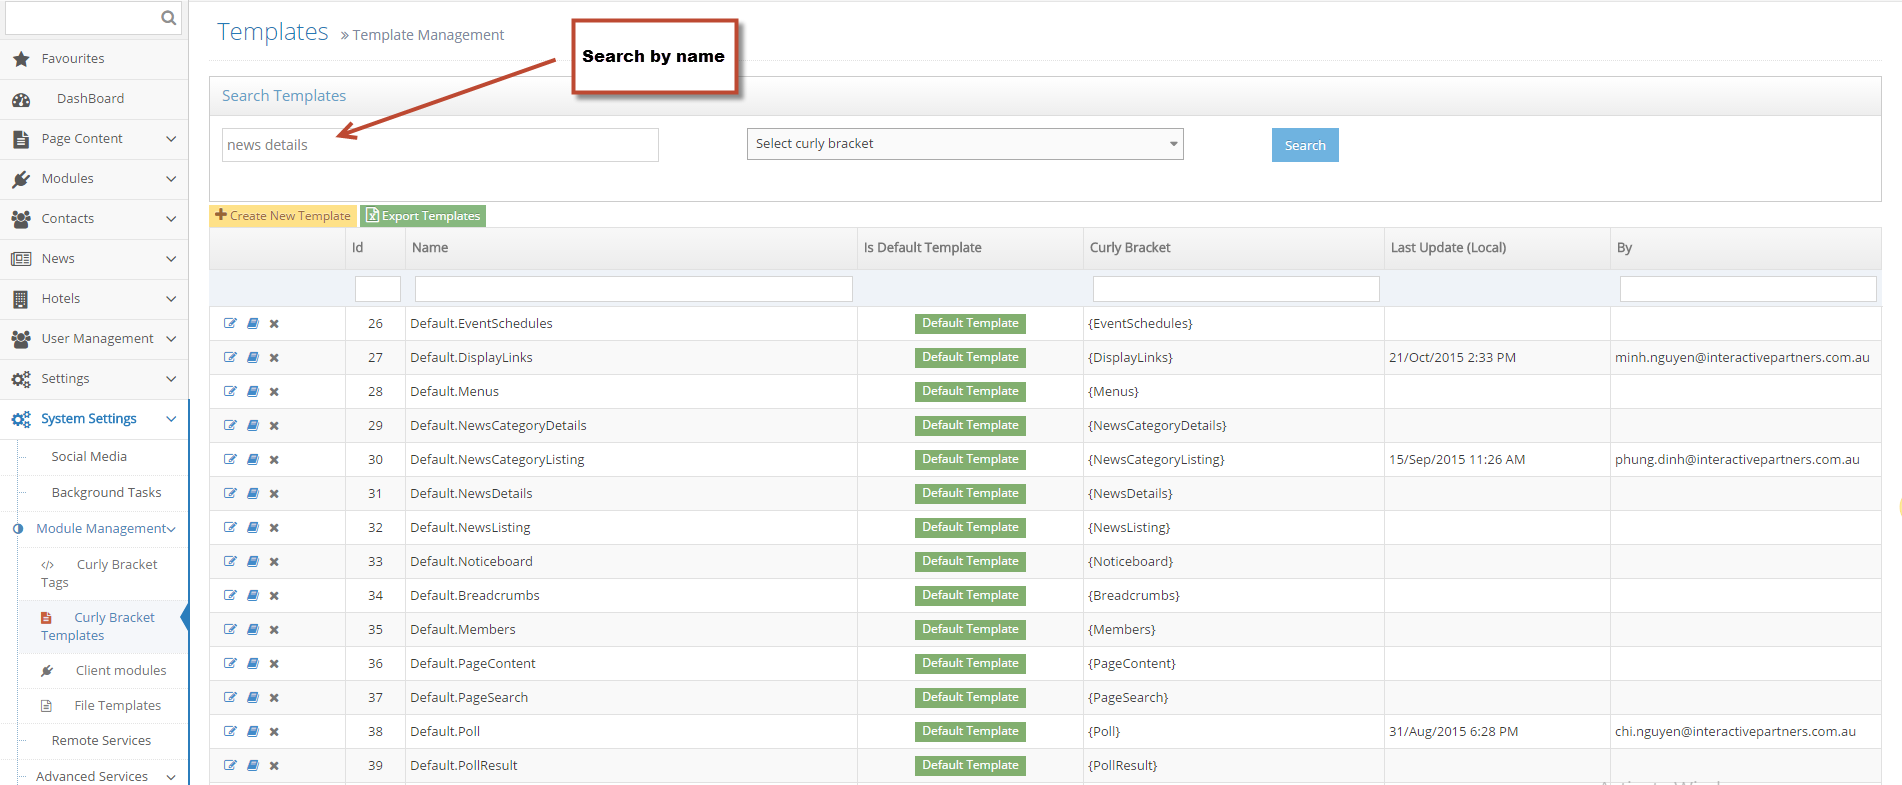
- Edit Curly Bracket template:
-
6Click the icon to edit, click Save or Save and Continue Edit to save changes.

-
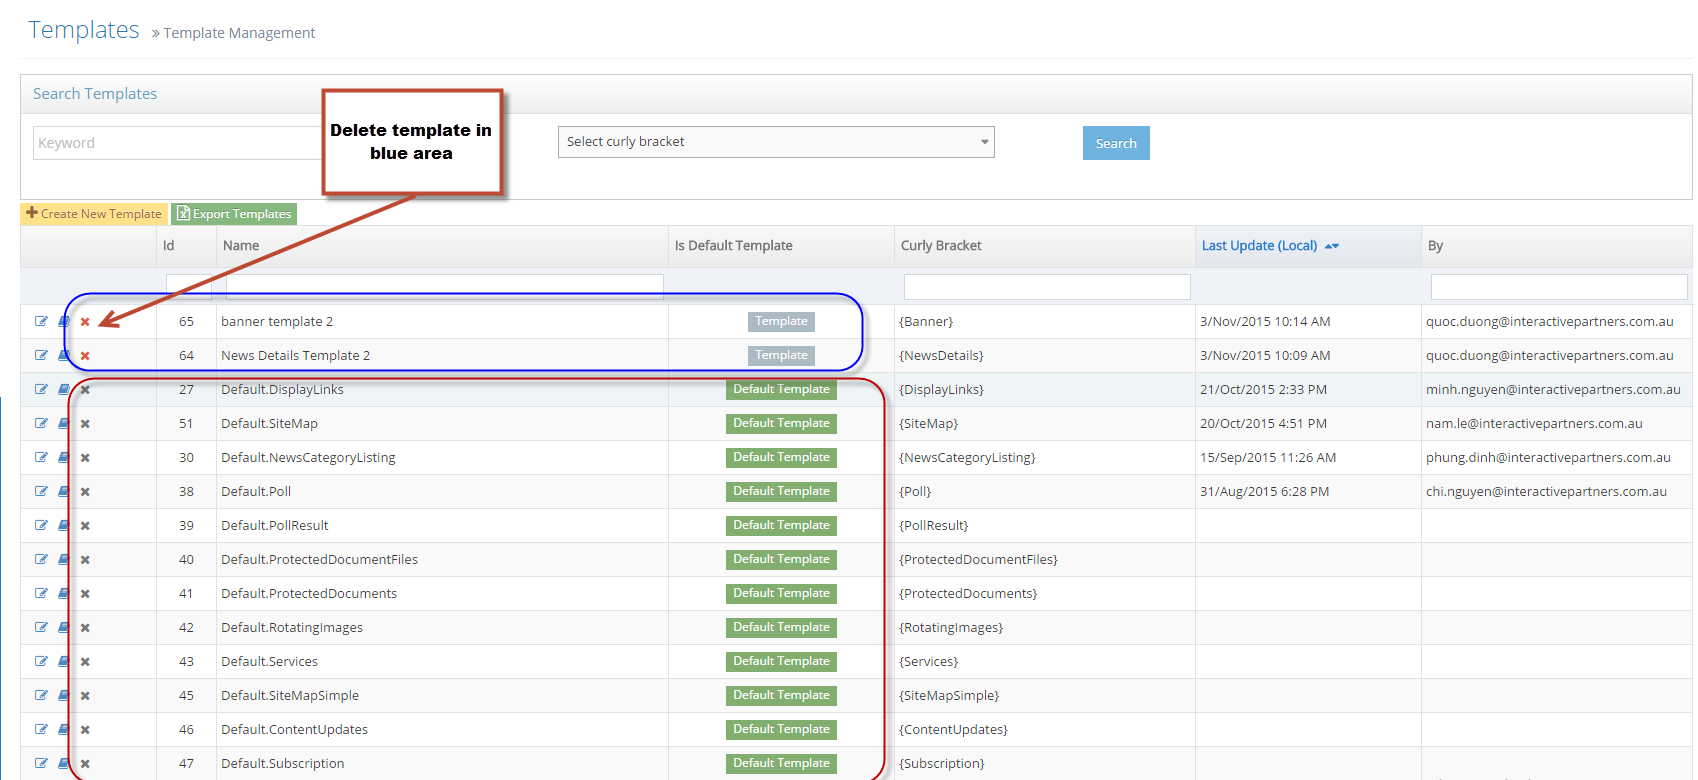
7Delete Curly Bracket Template.
-
8The Template had been marked as Is default template can not be deleted.
-
9Click the icon to delete a Curly Bracket Template

