How to Merge Contacts
-
1
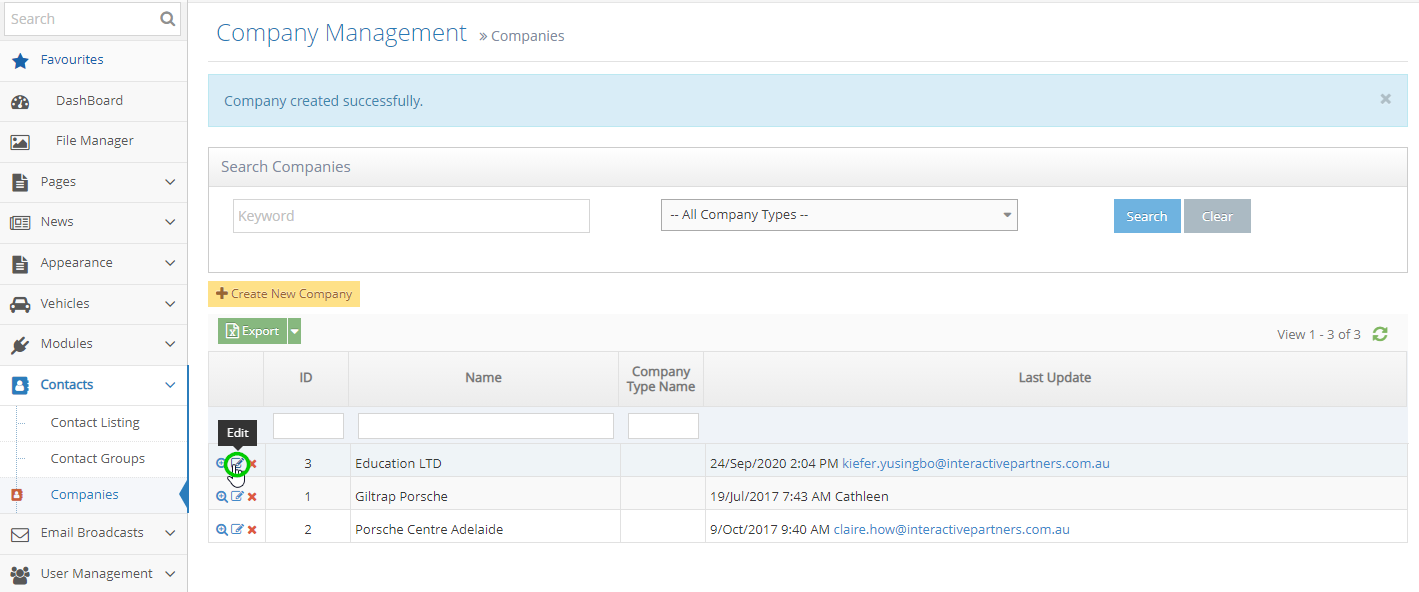
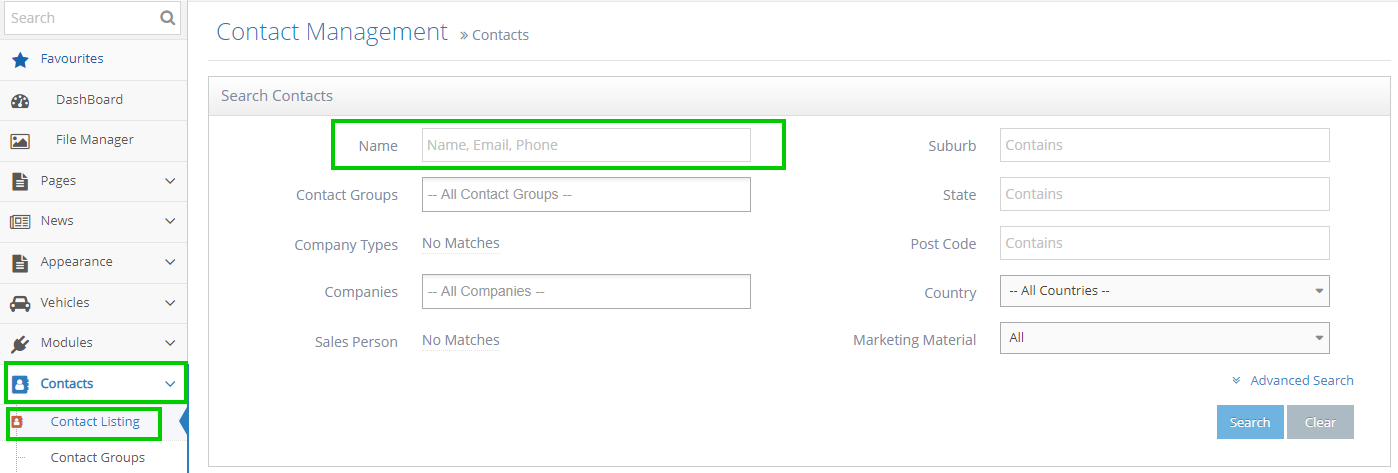
Go to Admin Dashboard > Contacts > Contact Listing
-
2
Search Contacts need to be merged, click Search

-
3
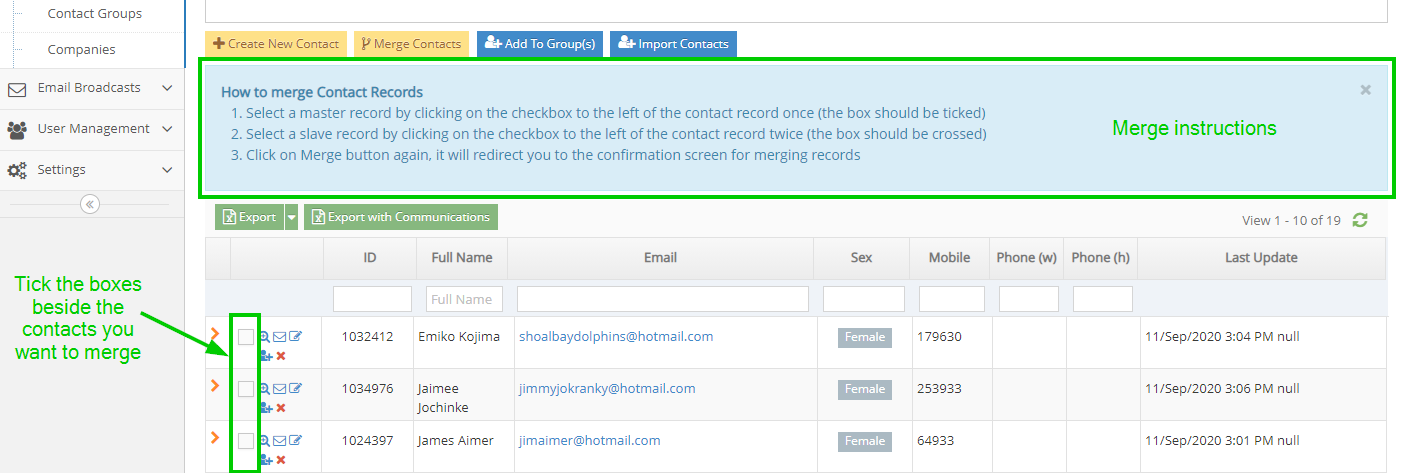
Click on the Merge Contacts button to begin merging
-
4
Read the instruction below the button
-
5
Checkboxes to the left of each contact will appear
-
6
Tick the boxes beside the contacts you want to merge
-
7
Select the Master Contact by clicking once on the check box
-
8
Select the Slave Contact by clicking twice on the check box

-
9
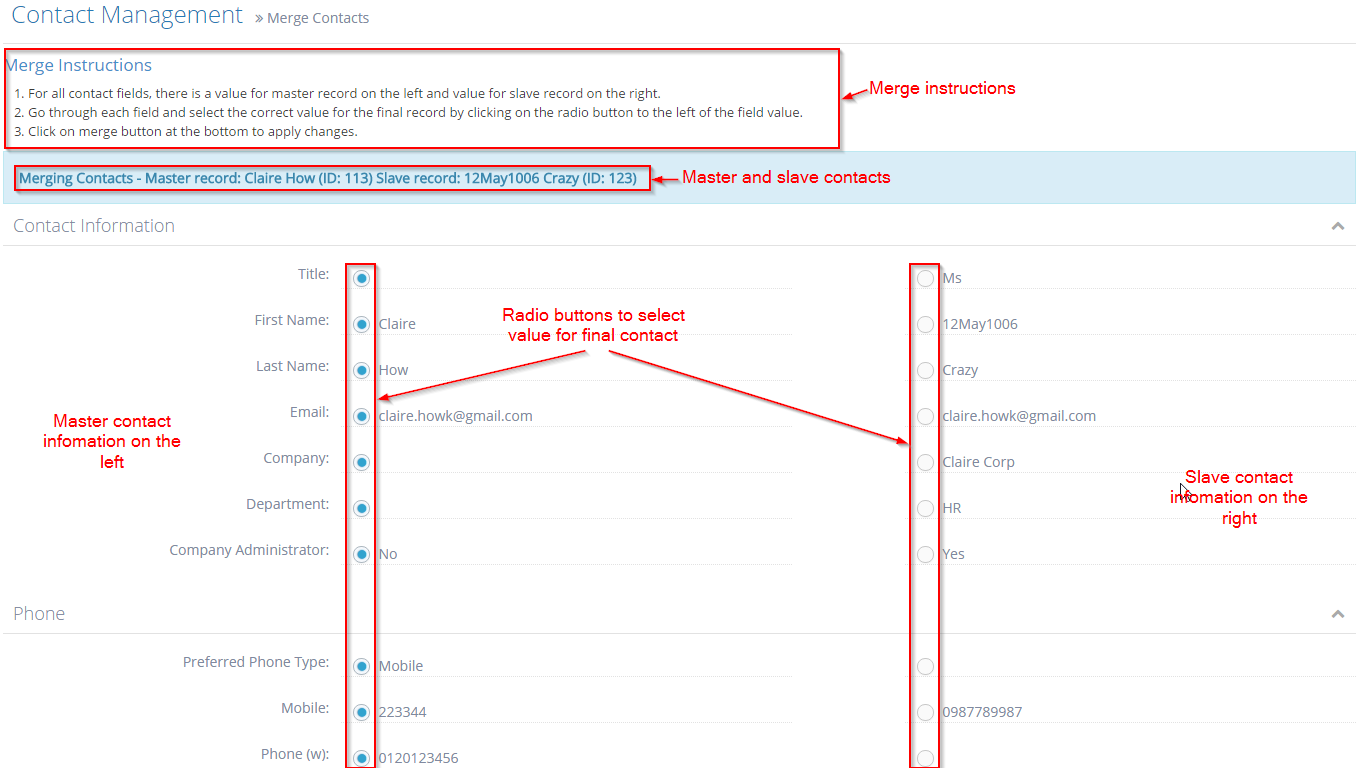
Click on the Merge Contacts button again >> redirect to the merging confirmation screen

-
10
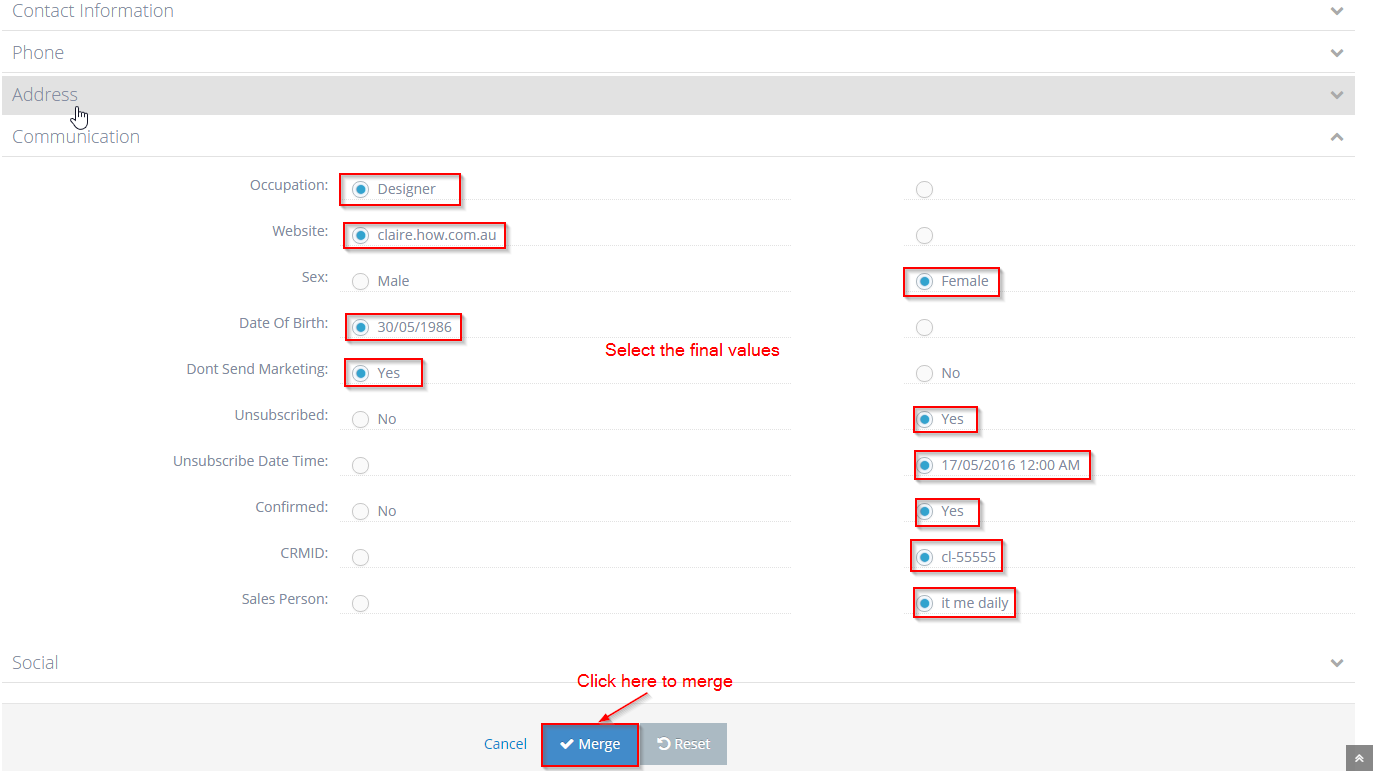
Go through each field and select the correct value for the final contact

-
11
Click on the Merge button
-
12
Redirect to contact detail pages of the Master Contact
-
13
A successful message is displayed
-
14
Slave Contact is deleted

Video for reference:
Company Set Up Site Setting Overview
This allows dealers to update and make changes on the company details of their website.
Updating the Company Set Up Site Setting
-
1
On the vehicle details, we can update the dealer contact information section (website, address, phone, email etc....) via the Company Setup page inside the admin panel.
-
2
Log in and go to the Admin dashboard
-
3
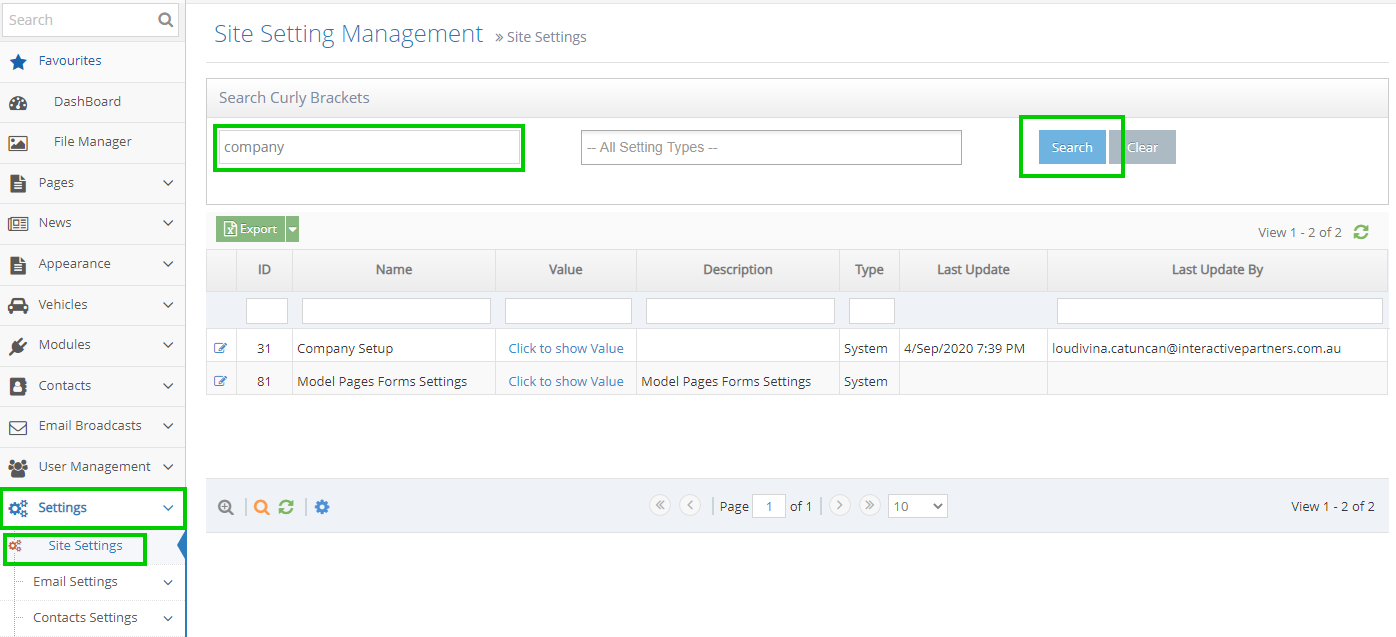
Click Settings → Site Settings
-
4
In the Site Setting Management page, under Search Curly Brackets, enter "company" and click Search
-
5
Click the Edit icon to the left of Company Setup

-
6
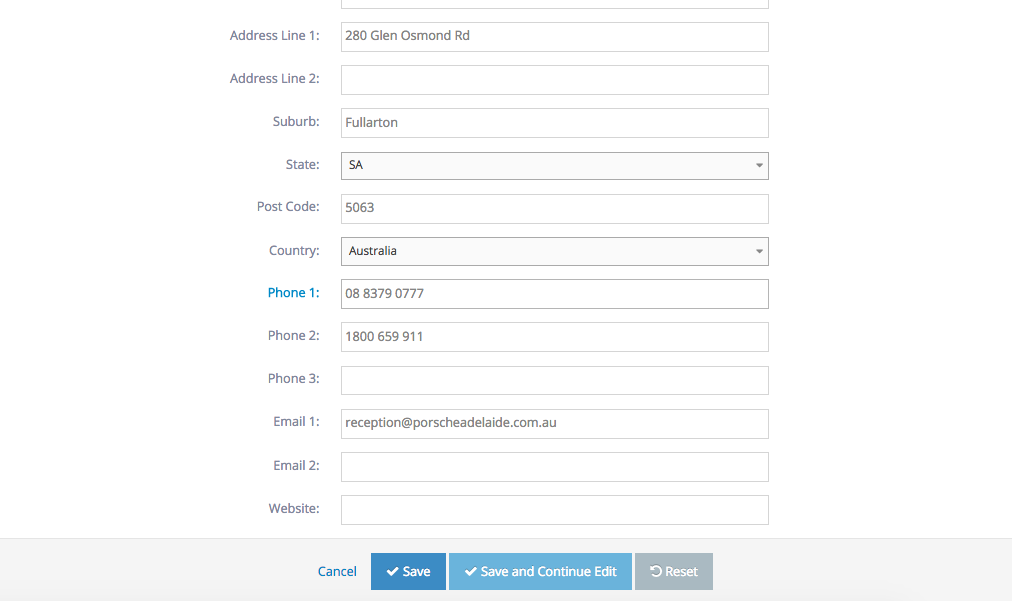
Make the necessary changes
-
7
Scroll down to the bottom of the page and click the Save button
-
8
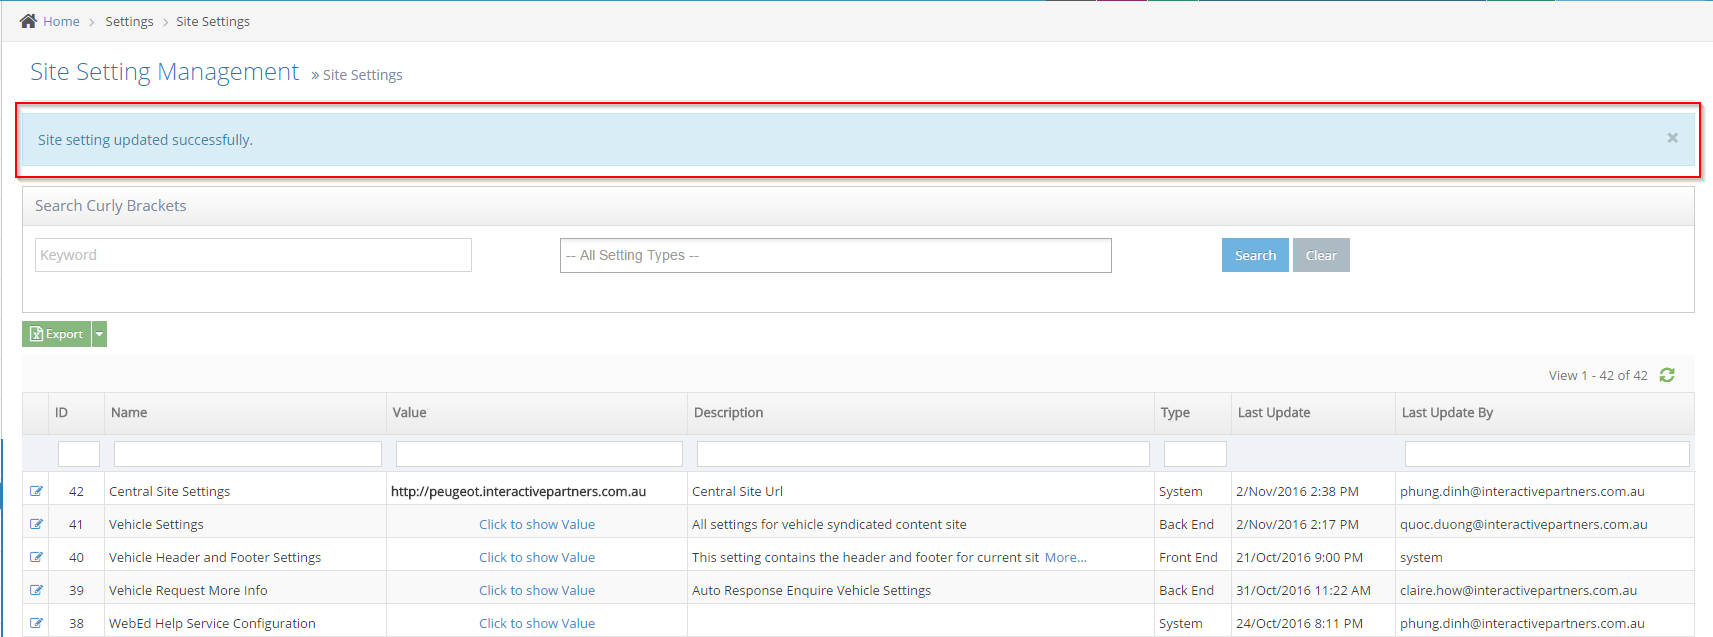
A notification on top will show that you've successfully updated the site setting
Company Module Overview
This module is designed to support managing contacts by company. You can create a company, and company types and then add contacts to the company. You can also set permissions for secure areas by company and company type similar to managing user groups.
Navigating to Contacts
-
1Log in as an administrator and go to the Admin Dashboard.
Learn how to log in here → -
2Go to Contacts
-
3When the listing appears, search for the contact you wish to link to a company
-
4Click the Edit icon
-
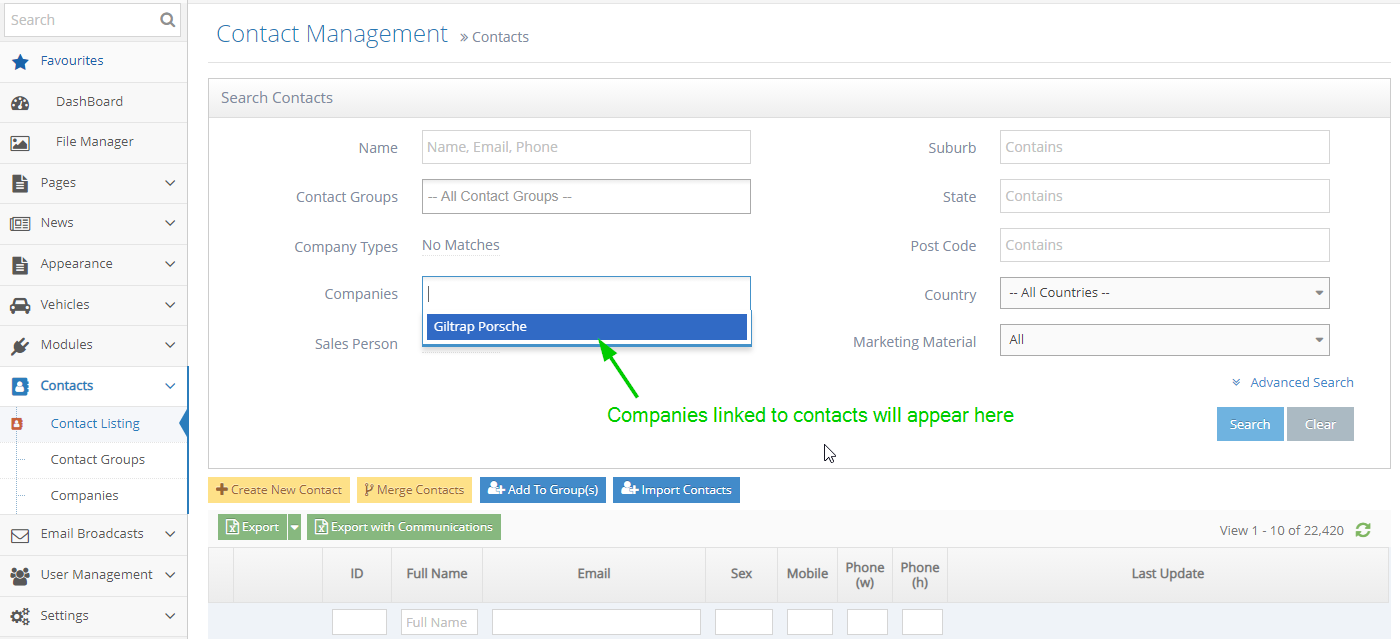
5Select the company for this contact by starting to type the company name
-
6If the company does not exist, you can create a new company
Managing Companies
Contacts are generally connected with Companies. See how to manage companies.
-
1Log in as an administrator and go to the Admin Dashboard.
Learn how to log in here → -
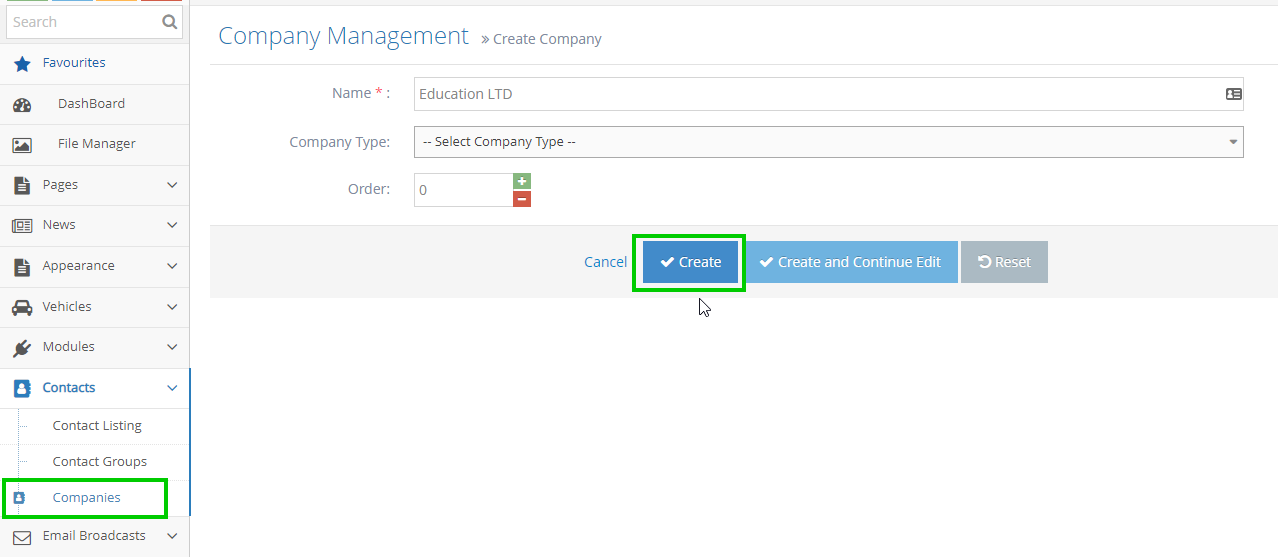
2You click on Contacts -> Companies and create a new Company.
-
3Input the Company Name in the textbox, choose Company Type in the drop-down list, and click the Create button.
-
4The company was created successfully.
-
5You can click on the Edit icon on the left to update the company.
