Why you would use an Event Add-On
Users can use Event Add-On in case there are additional packages or arrangements such as meals, seats, etc.
Create an Event Add-On Type
STEP-BY-STEP
-
1Log in as an administrator and go to the Admin Dashboard.
Learn how to log in here → -
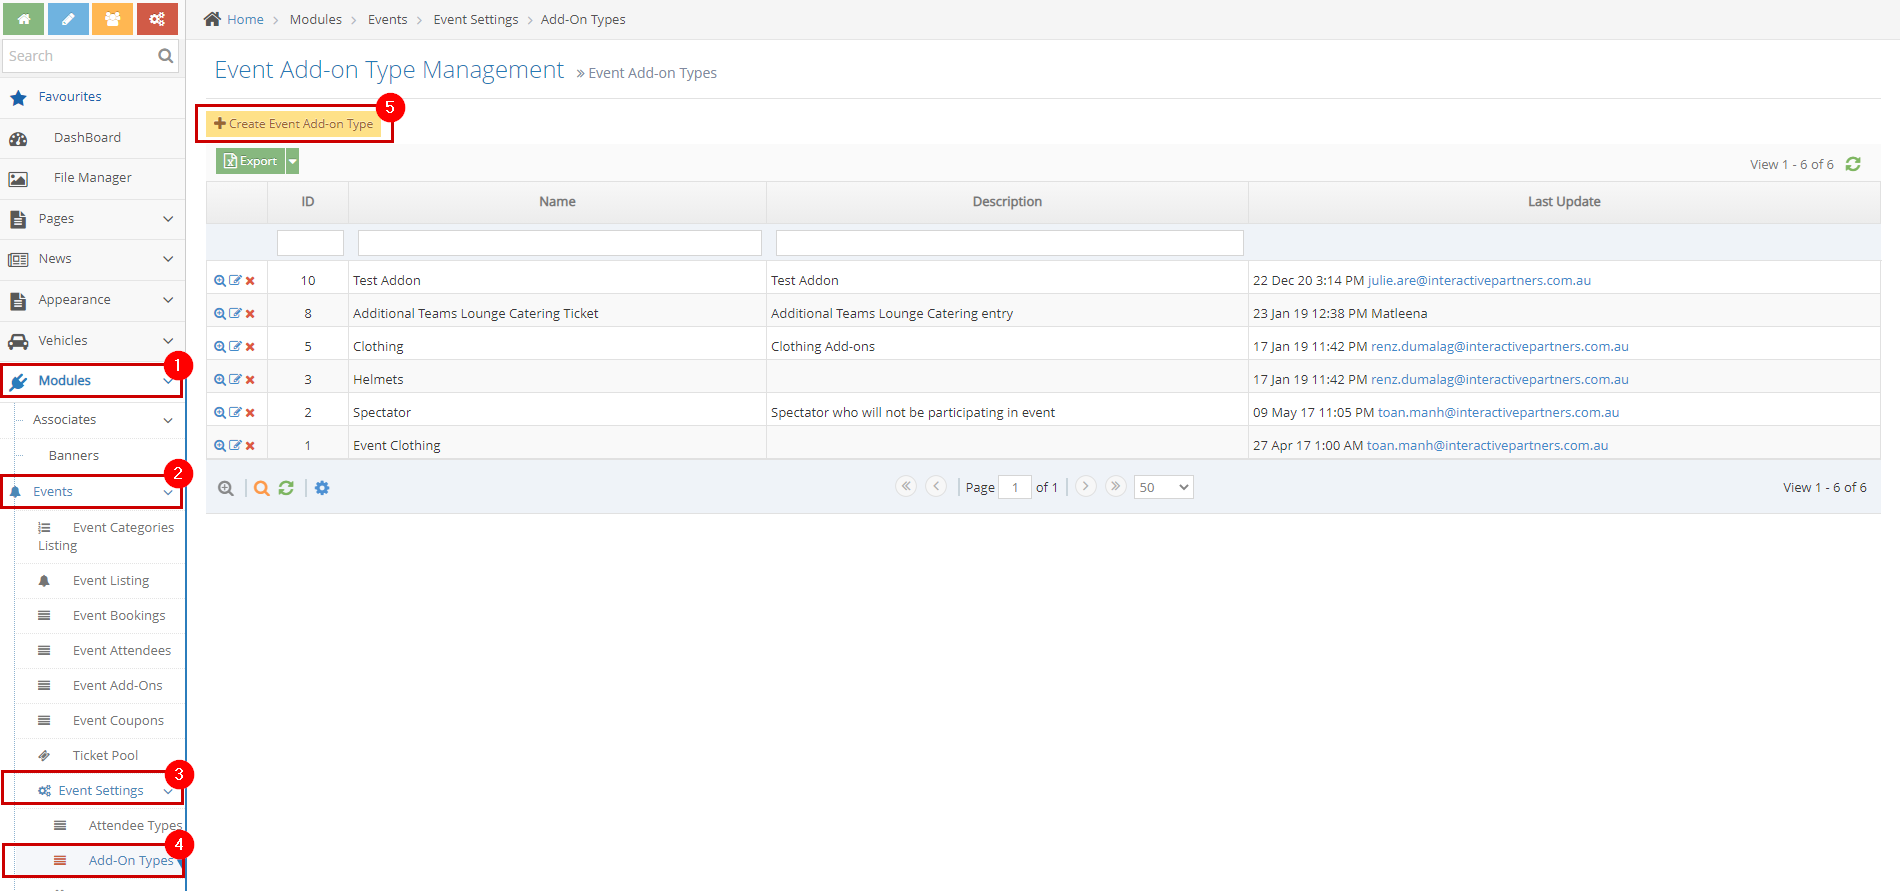
2Under Modules on the left menu, choose Events
-
3Click Event Settings
-
4Select Add-on Types
-
5Click the 'Create Event Add-on Type' button
-
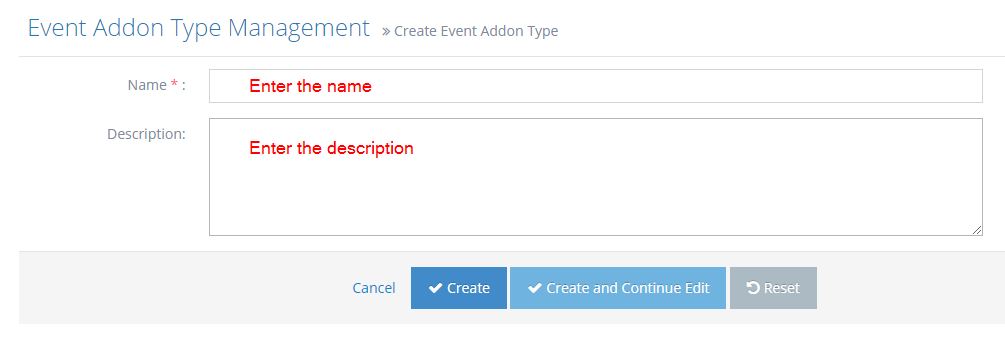
6Fill out the details:
- Name - enter the name of the add-on type.
- Description - a brief or short description of the add-on type.
-
7Click Create, Create and Continue Edit or Reset.
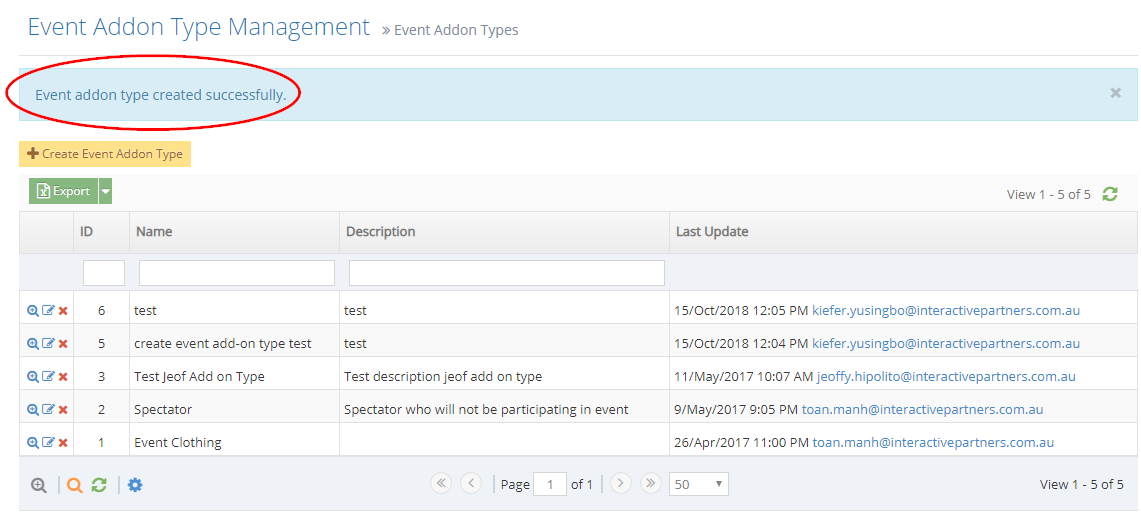
- Create - click the 'Create' button to submit the new add-on type. This action creates your add-on, closes the page and redirects you to the 'Event Add-on Type Management' page (see image below). On the Event Add-on Type Management, you will see a note "Event add-on type created successfully".
- Create and Continue Edit - Click the 'Create and Continue Edit' button to submit the new add-on type. This action creates your add-on type but lets you stay on the page.
- Reset - click the 'Reset' button to start over. This action refreshes the page and shows a blank 'Create Event Add-on Type' page. Your add-on type will not be saved/created.
Create an Event Add-On
STEP-BY-STEP
-
1Log in as an administrator and go to the Admin Dashboard.
Learn how to log in here → -
2Under Modules on the left menu, choose Events
-
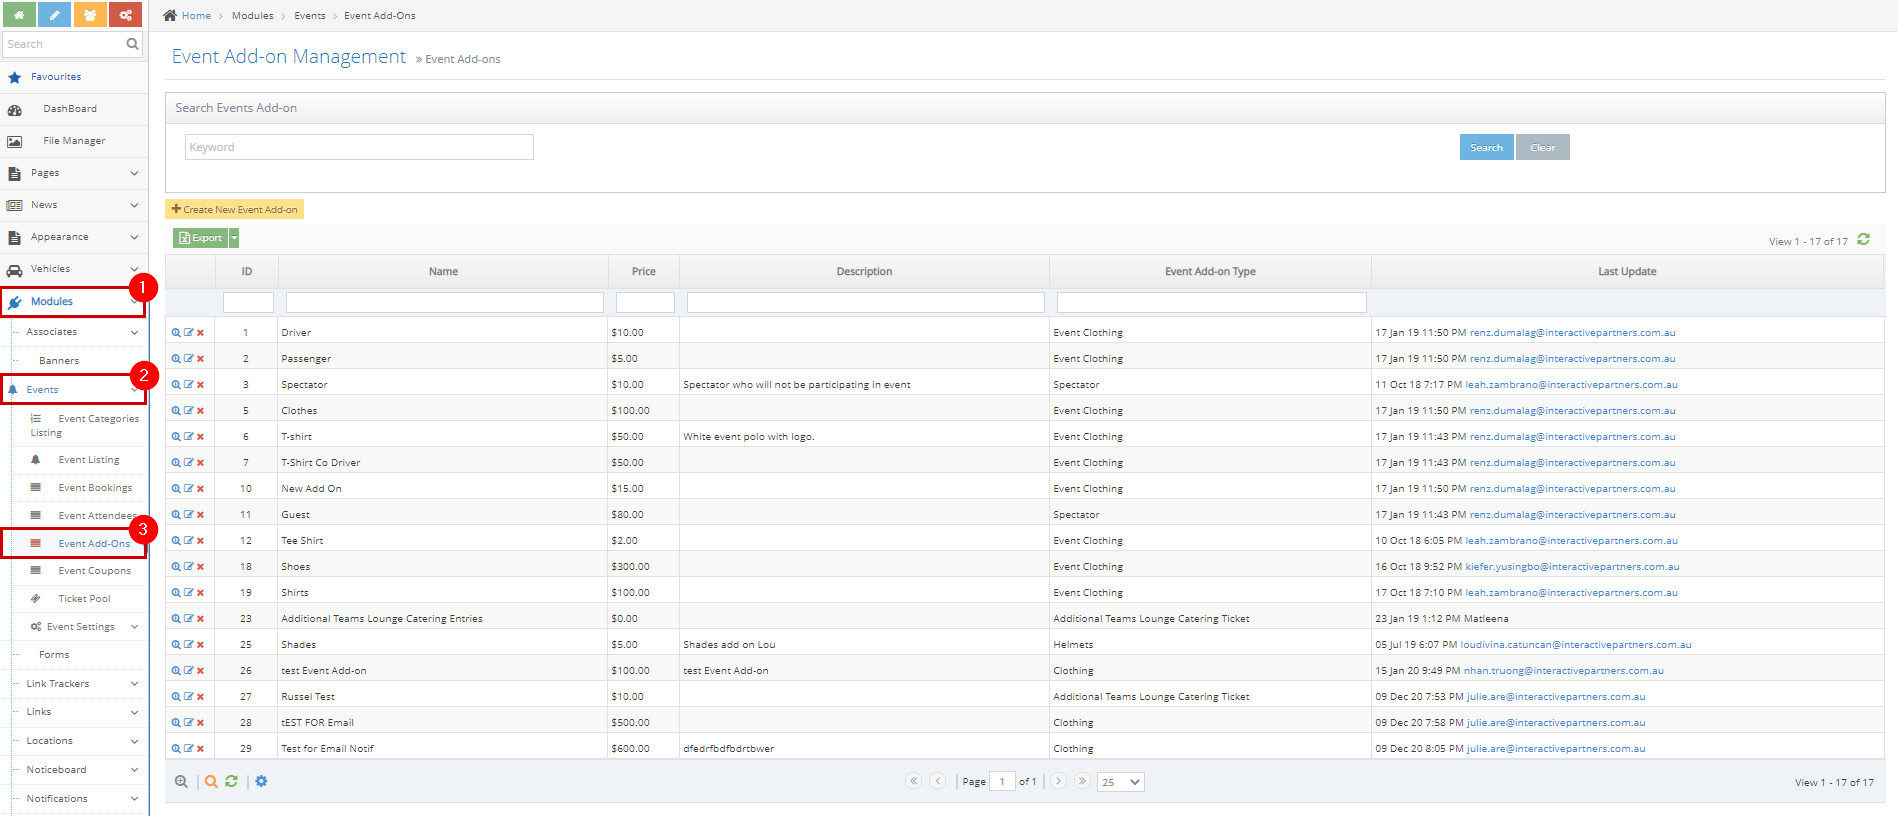
3Click Event Add-Ons
-
4Click the 'Create New Event Add-on' button
-
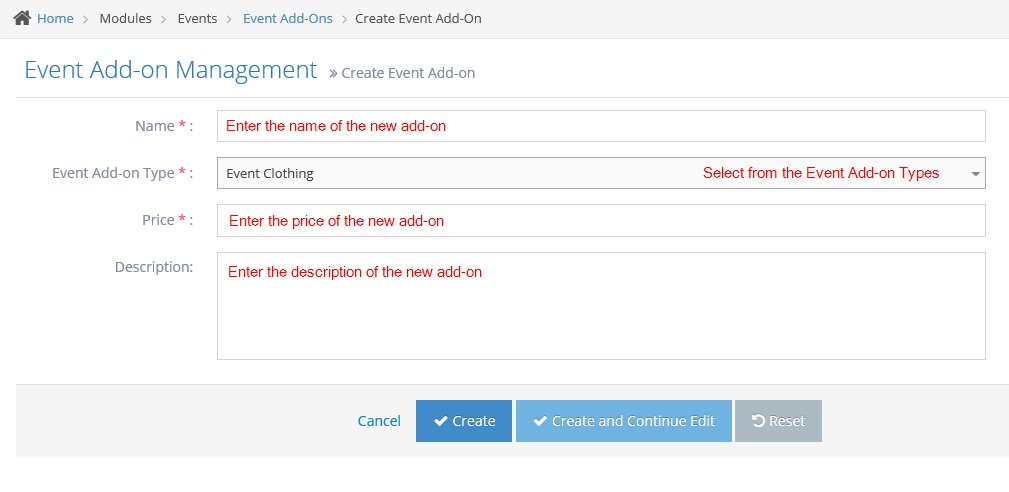
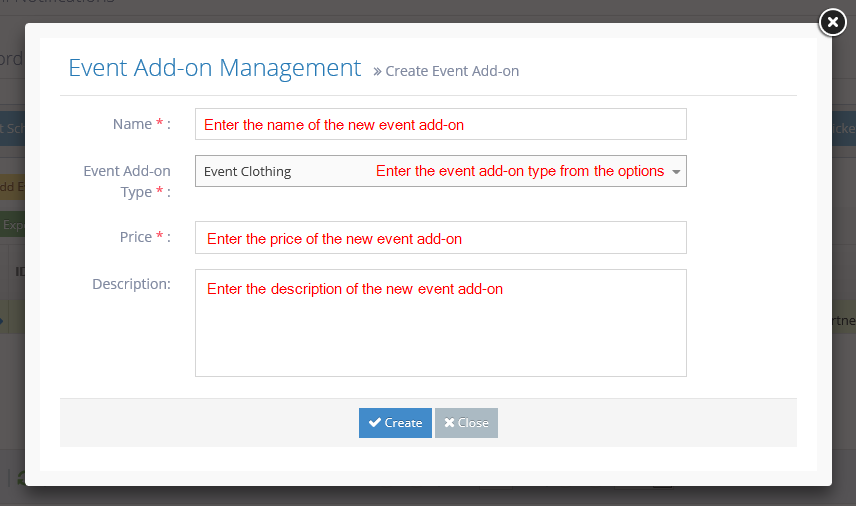
5Fill out the add-ons details:
- Name - enter the name of the new event add-on. This field is required.
- Event Add-on Type - select the add-on type from the options. This field is required.
- Learn how to create a new add-on type here.
- Price - enter the price for the new event add-on. This field is required.
- Description - enter the description of the new event add-on.
-
6Click Cancel, Create, Create and Continue Edit or Reset
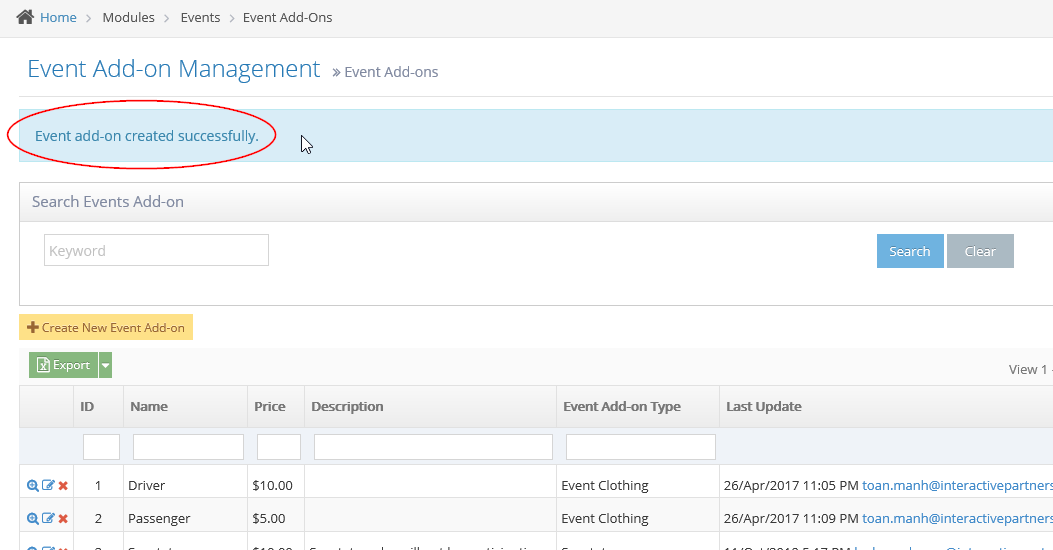
- Create - click the 'Create' button to submit the new add-on. This action creates your add-on, closes the page and redirects you to the Event Add-on Management (see image below). On the Event Add-on Management, you will see a note "Event add-on created successfully".
- Create and Continue Edit - Click the 'Create and Continue Edit' button to submit the new add-on. This action creates your add-on but lets you stay on the page.
- Reset - click the 'Reset' button to start over. This action refreshes the page and shows a blank 'Create Event Add-on' page. Your add-on will not be saved/created.
Add an Add-On to an Event
STEP-BY-STEP
-
1Log in as an administrator and go to the Admin Dashboard.
Learn how to log in here → -
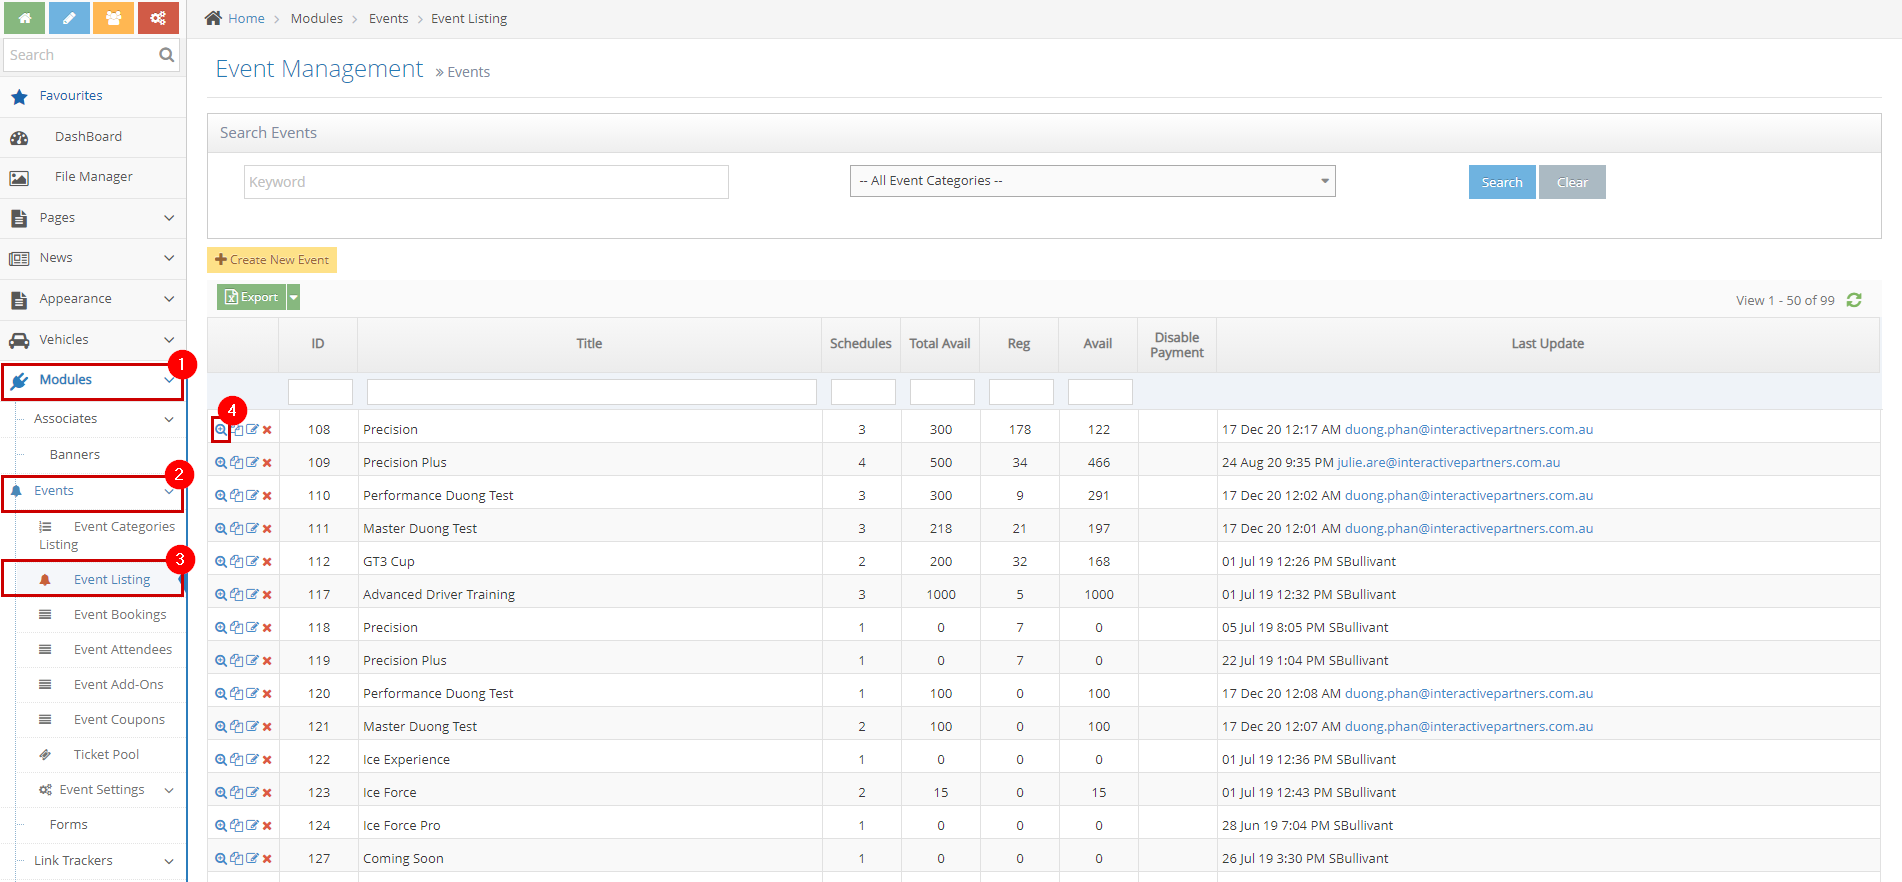
2Under Modules on the left menu, choose Events
-
3Click Event Listing
-
4Search for the Event you want to add an add-on
-
5Click the View Details icon

-
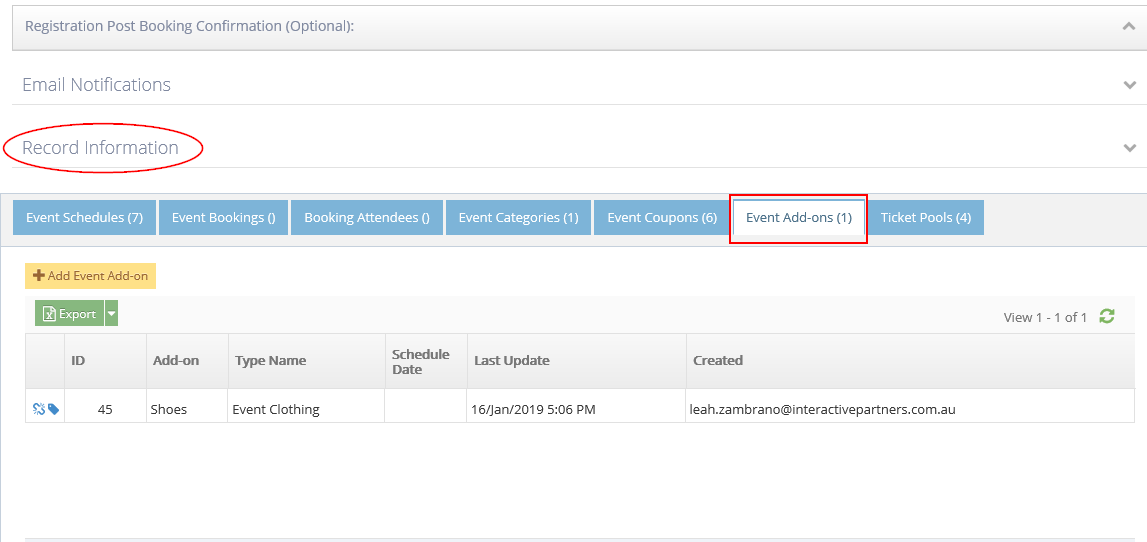
6Scroll down to see the tabs under the Record Information section
-
7Click the Event Add-ons tab
-
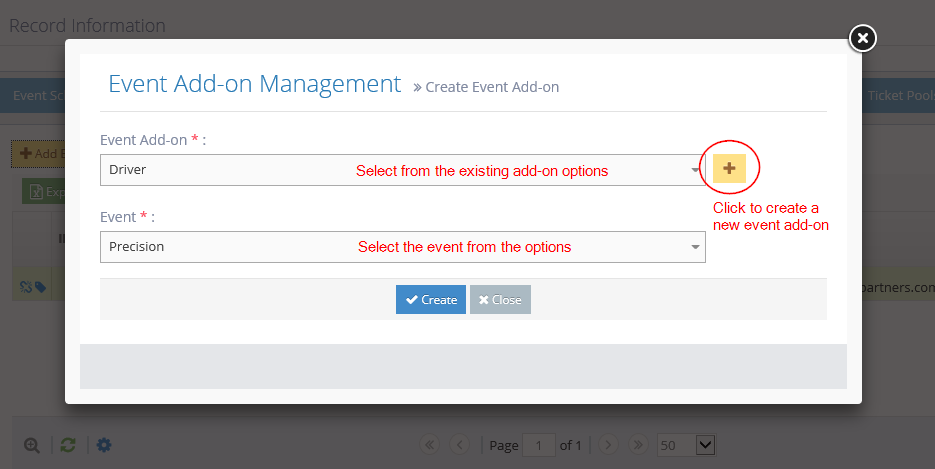
8Enter the Add-On information:
- Event Add-On - select an existing add-on from the options.
- Click the
 icon to the right of the Event Add-On field.
 - Enter the following information:
- Name - enter the name of the new add-on.
- Add-on Type - select the Add-on type from the options.
- Price - enter the price of the add-on.
- Description - enter a brief description of the add-on.
- Click "Create". You can also create a new Event Add-On from the Event Add-ons module here.
- Click the
- Event - by default, it is showing the event name you're into or you can select other events from the options.
 You should see the new add-on for the event on the listing under the "Event Add-Ons" tab now.
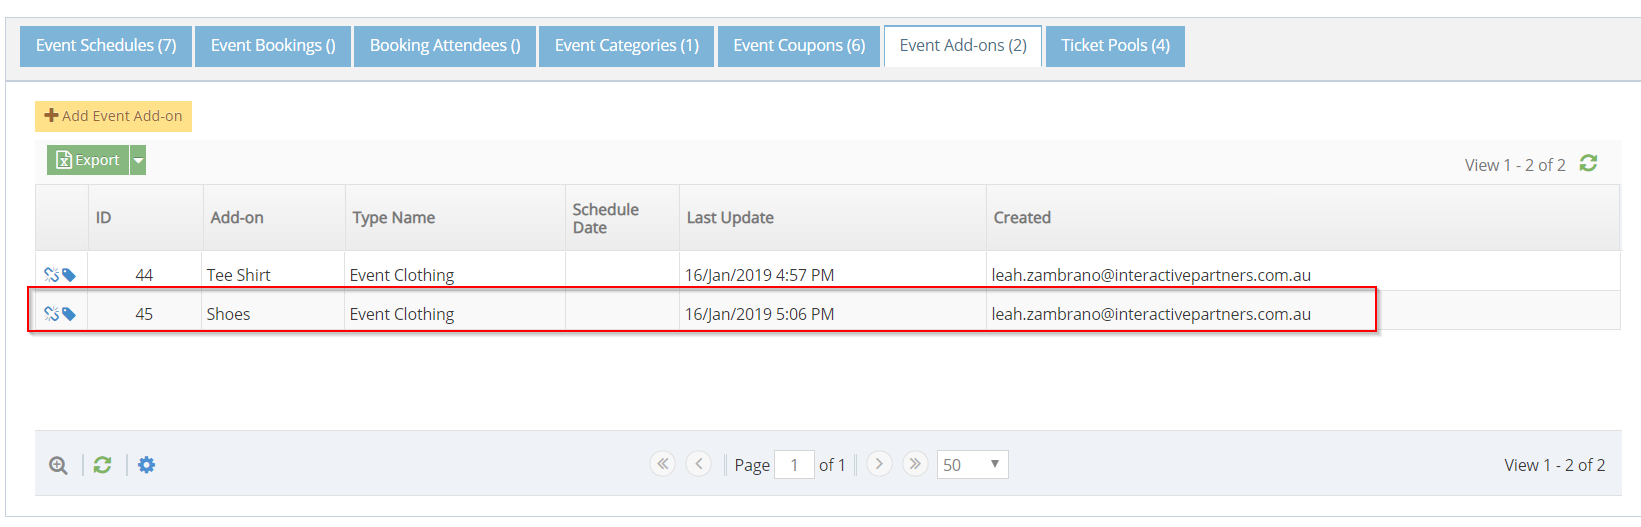
- Event Add-On - select an existing add-on from the options.
Place Add-Ons Anywhere in the Form
STEP-BY-STEP
-
1Log in as an administrator and go to the Admin Dashboard.
Learn how to log in here → -
2Under Modules on the left menu
-
3Find and choose Forms
-
4Click ‘Create New Form’ on the top left of Form Management.
-
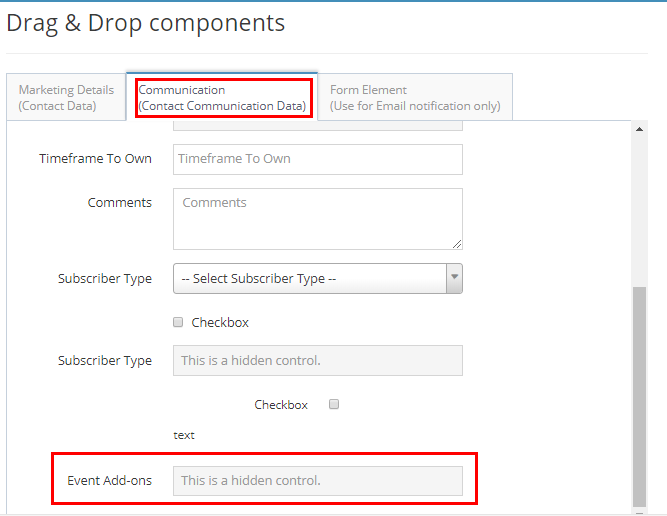
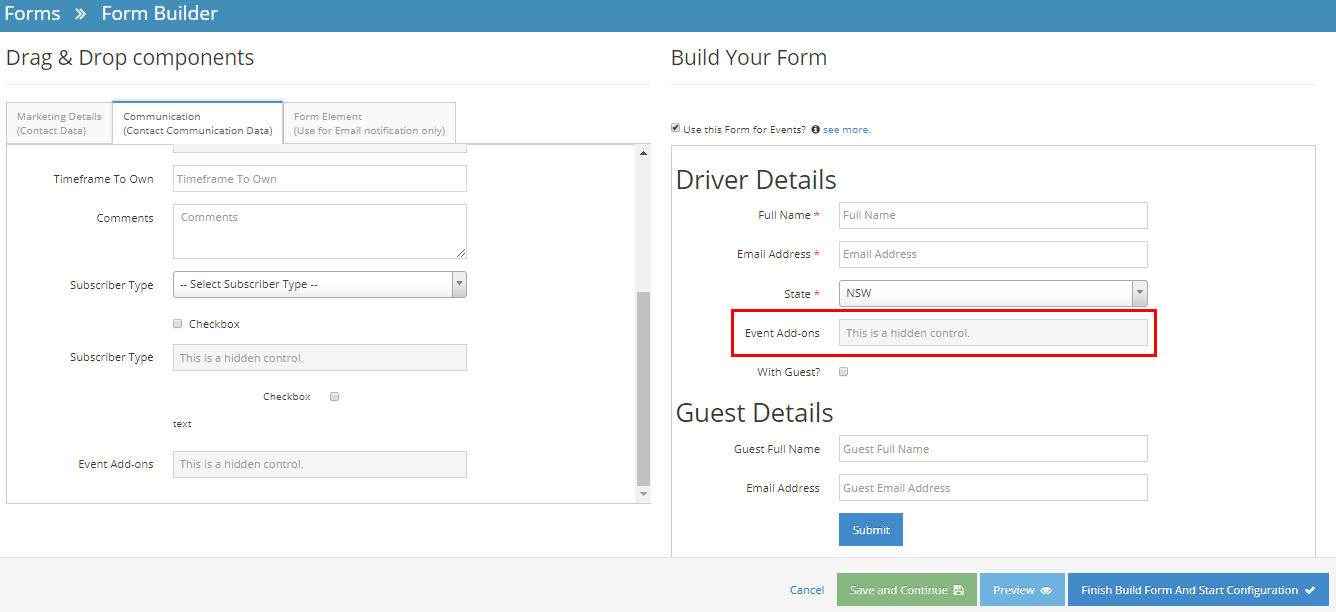
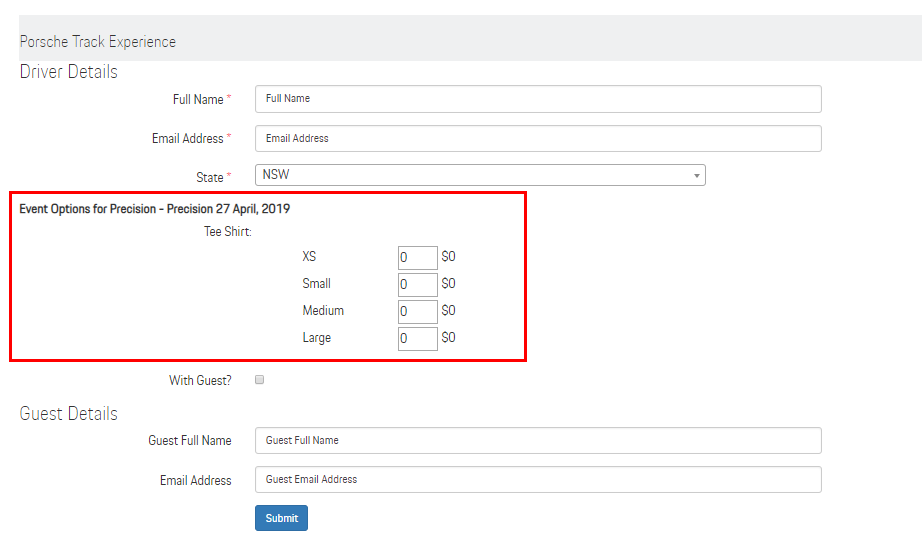
5Drag and drop the 'Event Add-Ons' field and place it anywhere you want it to display
-
6You can 'Preview' your form and once you're all set, click 'Finish Build Form and Start Configuration' and then click 'Finish'
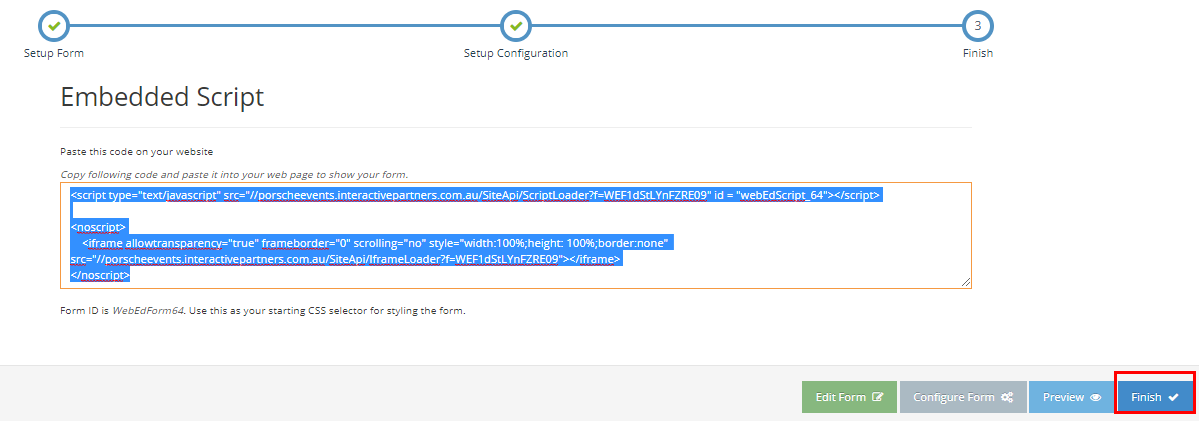
-
7You should now see the updated location of your event add-ons on the form.
-
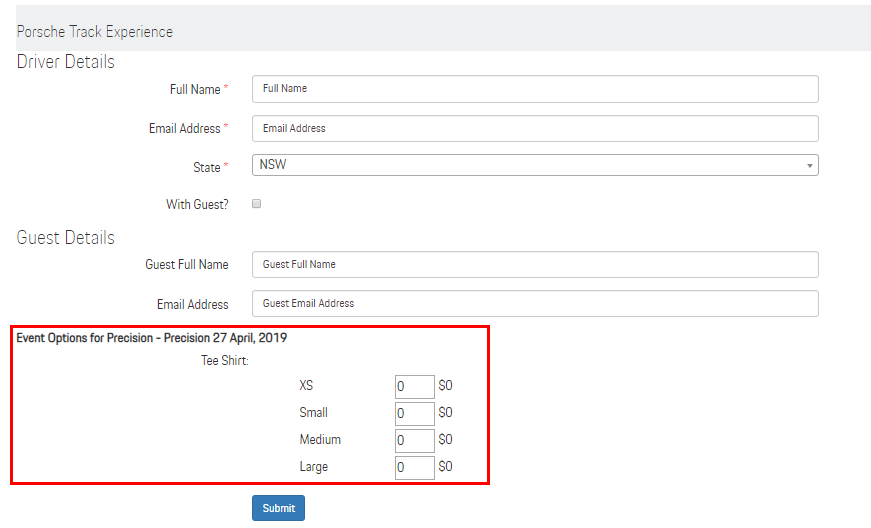
8If you have not set the 'Event Add-Ons' field on your form, the add-ons will still show but the location will be at the bottom of the form
-
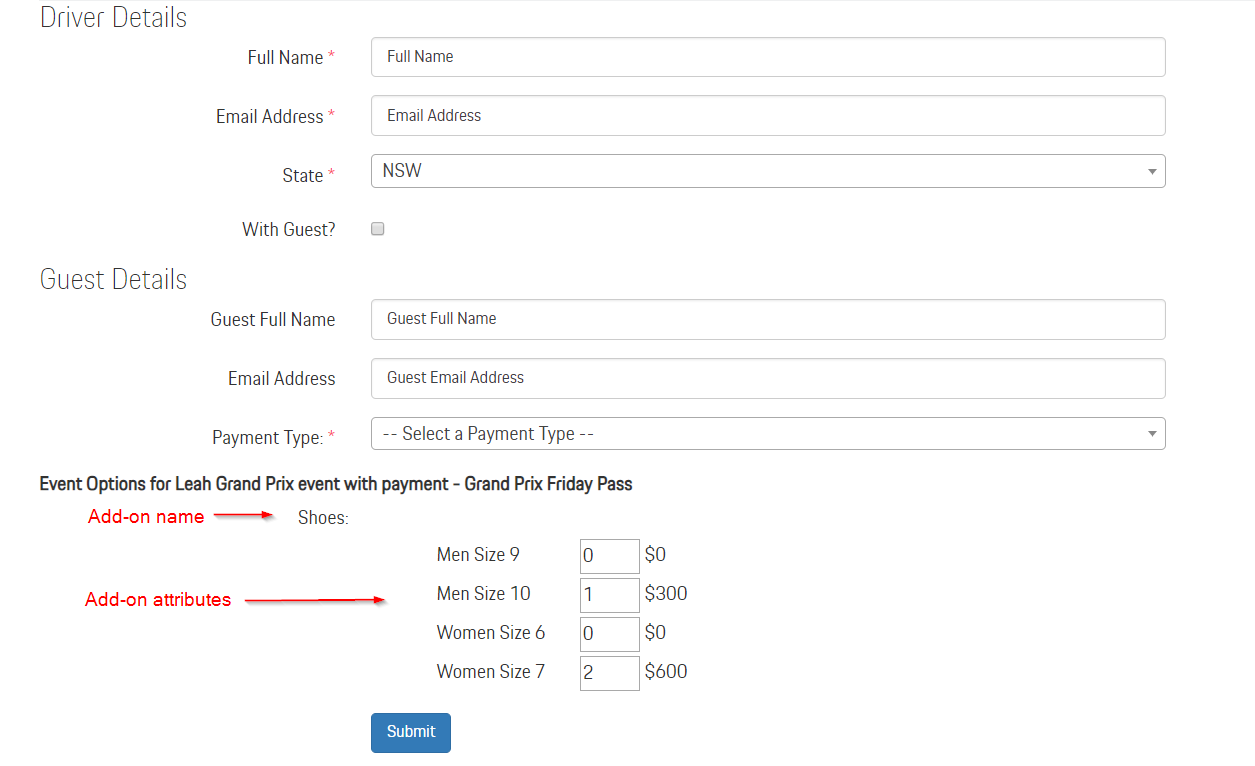
9Event Add-On on the Actual Event Page:
- By default, the add-on will be located at the bottom of your form (if you want to place it anywhere, click here)
- Users can input a quantity and will be calculated based on the price of the add-on
-
10Congratulations! You have successfully added Add-Ons to your Event.
Add Event Add-On Attribute to an Existing Event Add-On
STEP-BY-STEP
-
1Log in as an administrator and go to the Admin Dashboard.
Learn how to log in here → -
2Under Modules on the left menu, choose Events
-
3Click Event Listing
-
4Search for the Event you want to add an add on
-
5Click theView Details icon

-
6Scroll down to see the tabs under the Record Information section
-
7Click the Event Add-ons tab
-
7Click the
 (Manage the Add-on attribute) icon of the add-on
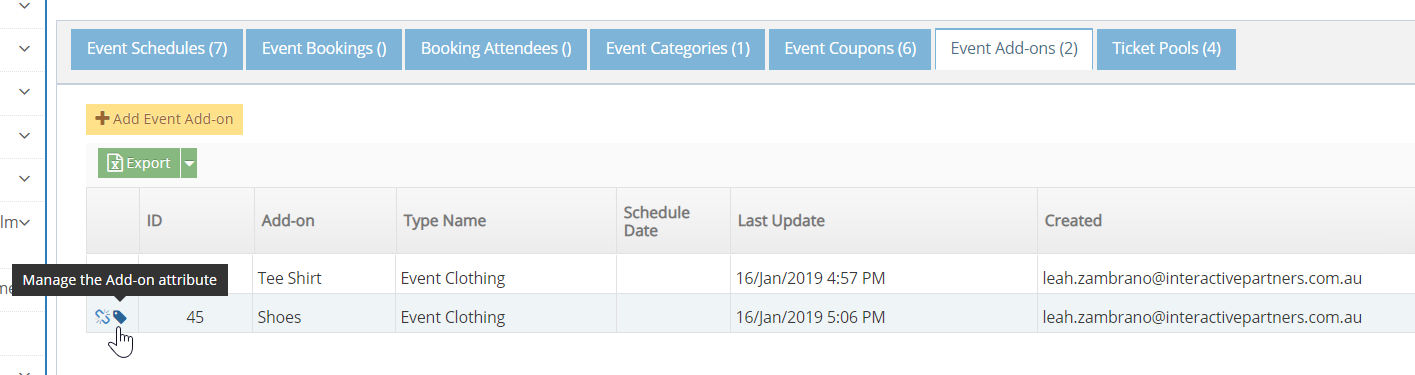
-
8Click 'Create Event Add-on Attribute'
-
9Input add-on attribute details, then click 'Create'.
-
10You should be able to see the new attribute for the add-on

Remove an Add-On from an Event
STEP-BY-STEP
-
1Log in as an administrator and go to the Admin Dashboard.
Learn how to log in here → -
2Under Modules on the left menu, choose Events
-
3Click Event Listing
-
4From the Events listing, search for the event you want to add an add-on to
-
5Click the
 "View Details" icon to see the event's details
-
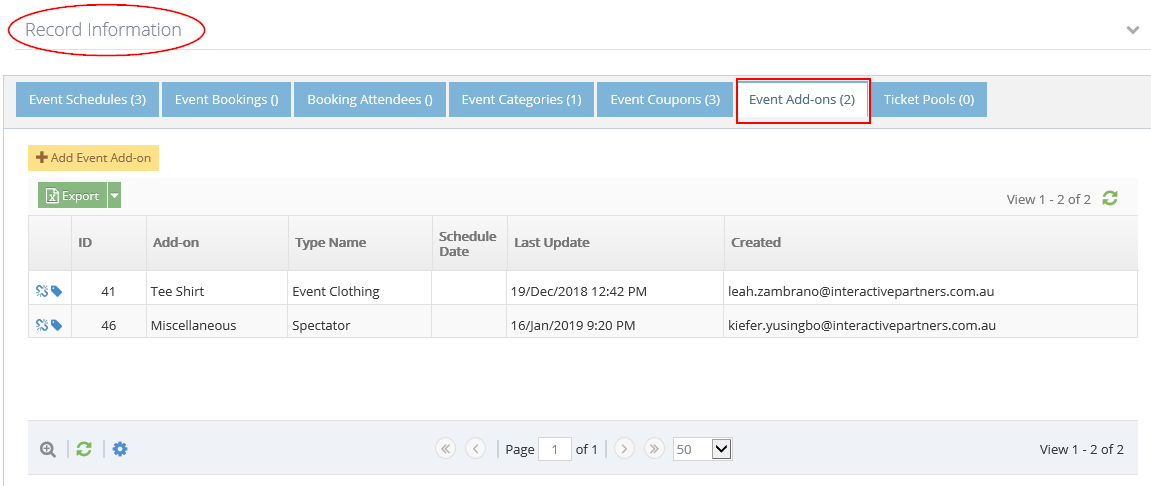
6Scroll down to see the tabs under the "Record Information" section
-
7Click the "Event Add-ons" tab
-
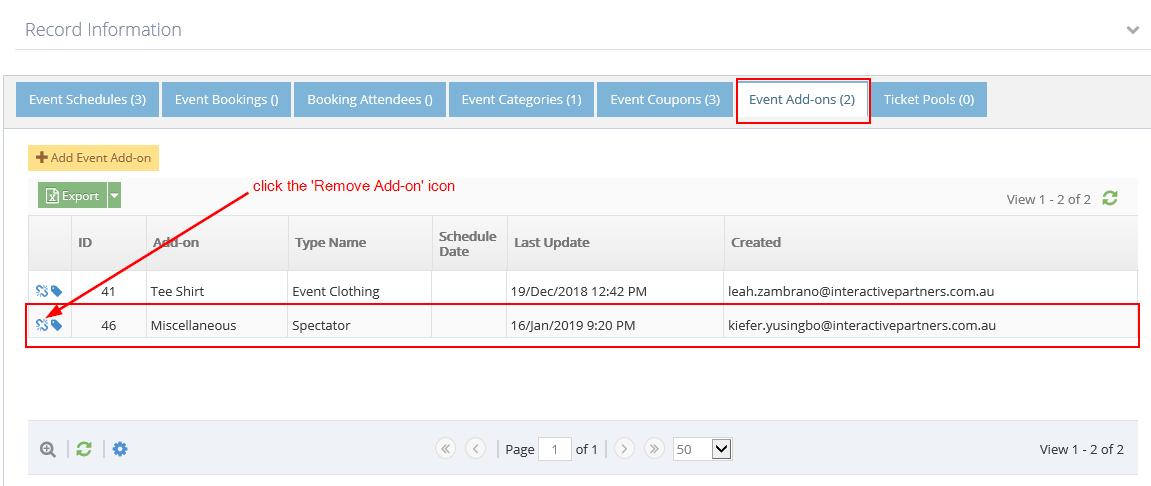
8Under the "Event Add-ons" tab, click the "Remove Add-on" icon.
-
9A popup will show for confirmation, click 'OK' if you want to continue removing the add-on from the event.
-
10Click 'Cancel' if you want to go back.
-
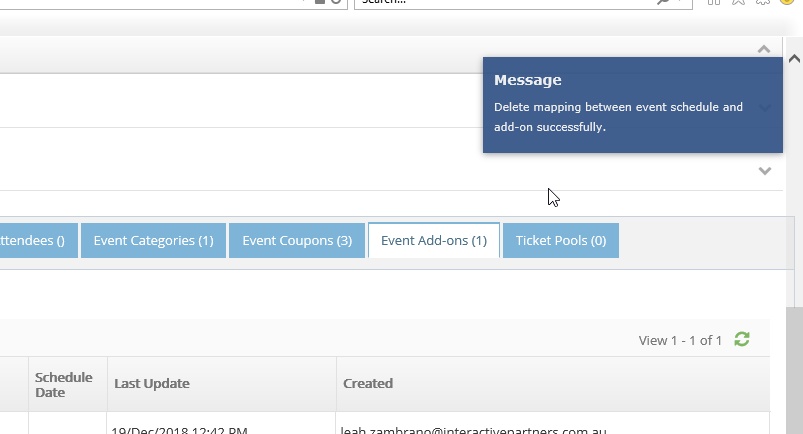
11You should be able to see a notification that you have successfully removed the add-on from the event.
Delete an Event Add-On
STEP-BY-STEP
-
1Log in as an administrator and go to the Admin Dashboard.
Learn how to log in here → -
2Under Modules on the left menu, choose Events
-
3Click Event Add-Ons
-
4From the Event Add-Ons listing, search for the event add-on you want to delete
-
5Click the
 "Delete" icon to delete the add-on
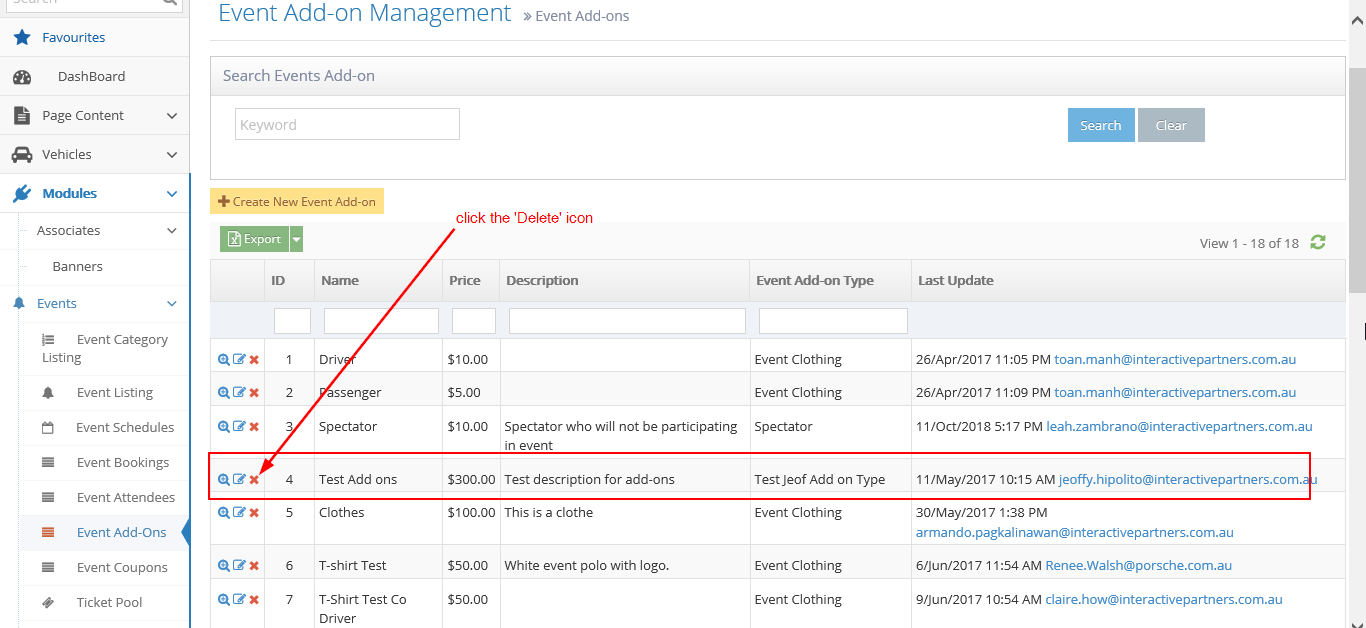
-
6A popup will appear to confirm deleting the event add-on.
-
7Click 'OK' if you want to continue deleting the add-on.
-
8Click 'Cancel' if you want to go back.
-
9You should be able to see a notification that you have deleted the add-on successfully.
-
10Congratulations! You have successfully managed the Event Add-Ons.