Why you would use a Banner Image
A Banner Image is commonly used on websites to capture attention, convey key messaging, and enhance the visual appeal of a page. It often appears at the top of a webpage or section, providing a strong visual hook. Using a banner image effectively can help establish a website's branding, communicate the page's theme, and engage visitors more effectively.
Banner images can support various content types, from promotional offers to seasonal messaging or product features. When chosen wisely, they set the tone for the rest of the content and improve user experience by drawing attention to the most important information. Additionally, responsive banner images adjust to different screen sizes, ensuring a seamless viewing experience on both desktop and mobile devices.
- If you want to showcase your page through photos or put an image on headers you can use this module.
- Simply rendering the banner and implementing it through different pages can be very easy to apply by using this module on WebEd 9 CMS.
How to manage default banner image
-
1Log in as an administrator and go to the Admin Dashboard.
Learn how to log in here → -
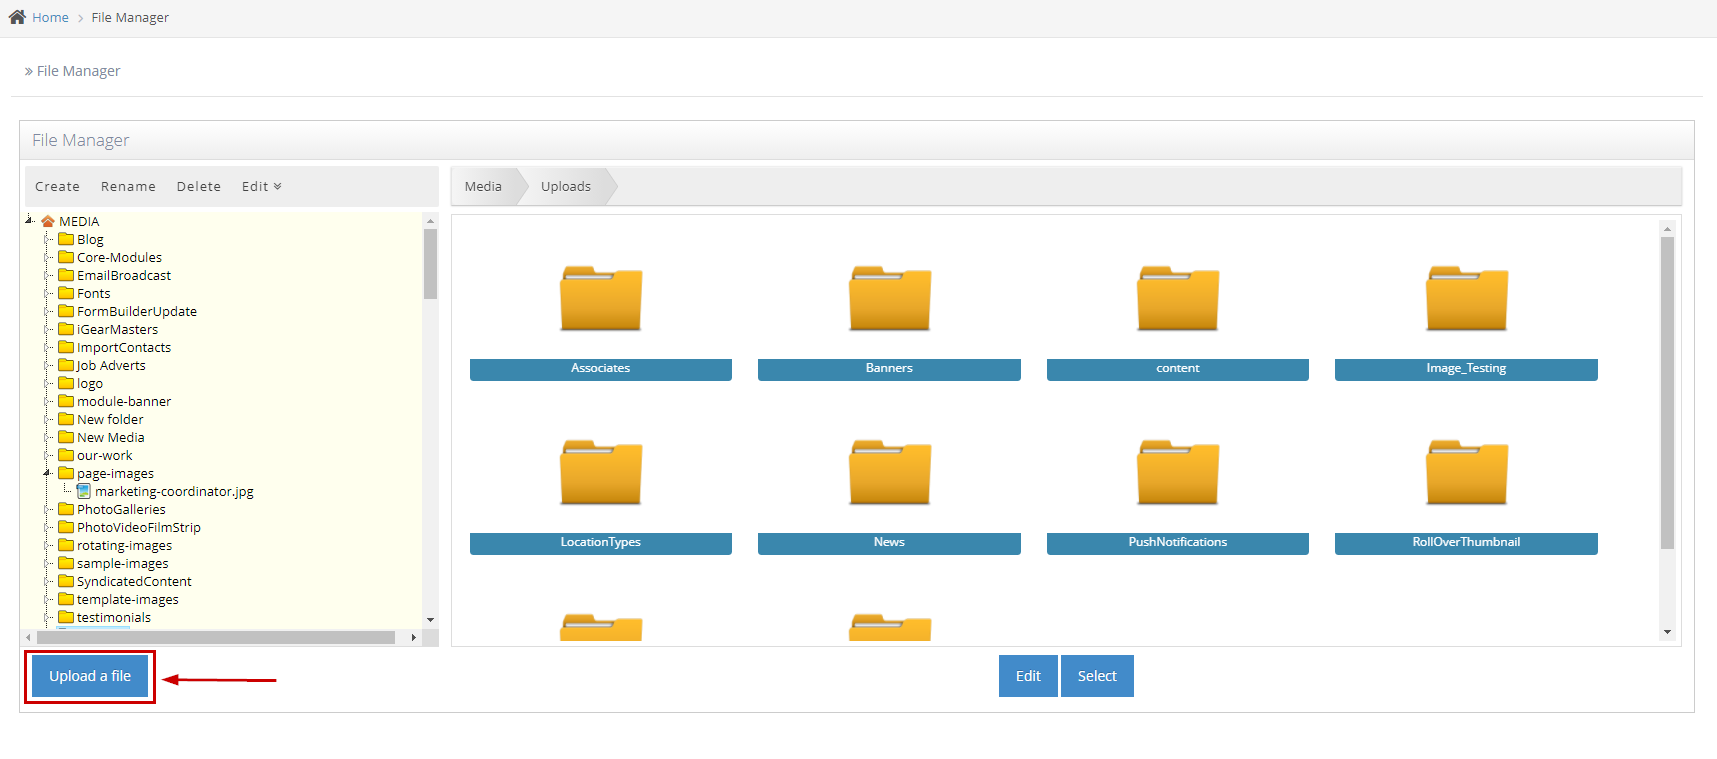
2Go to Admin → File Manager
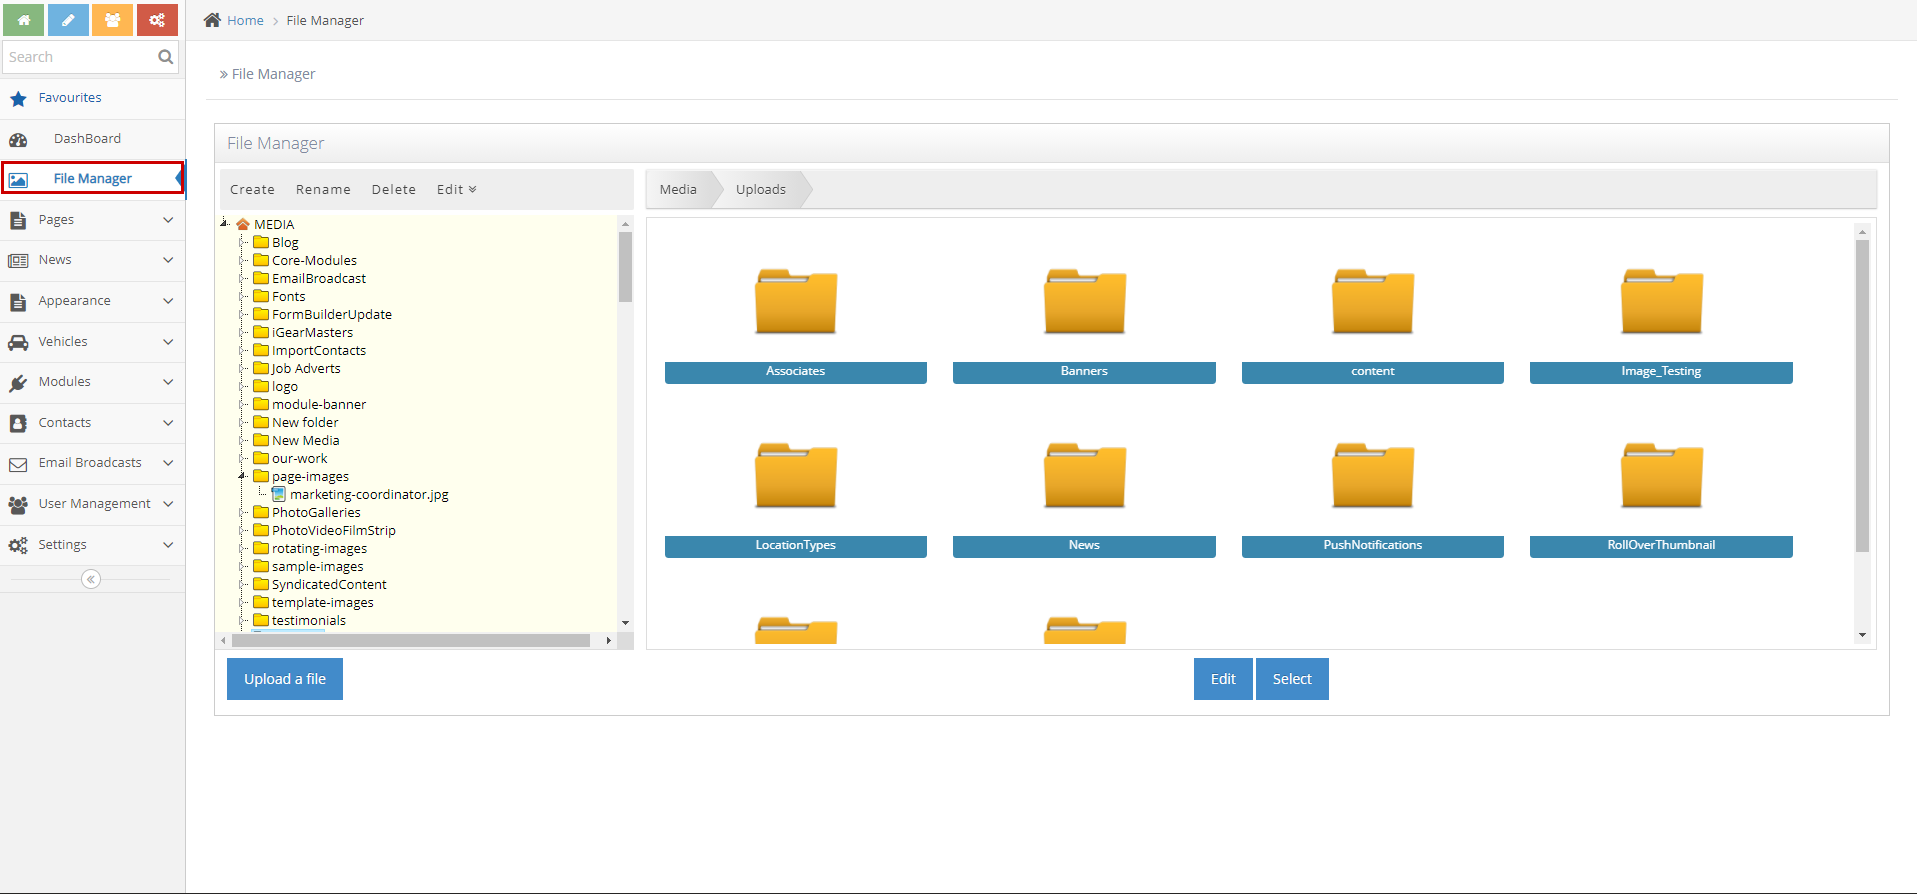
-
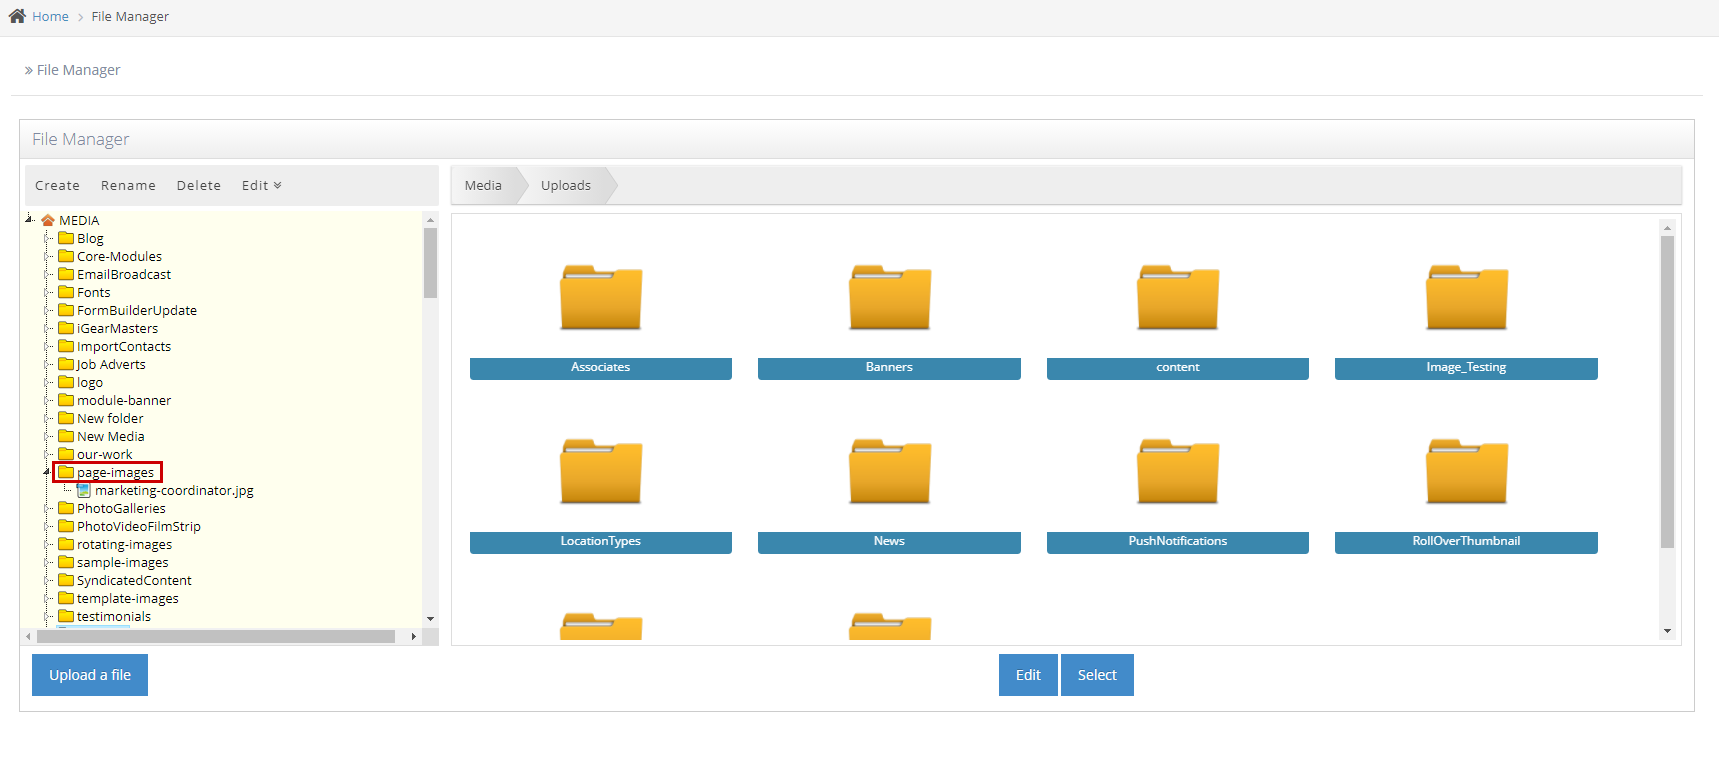
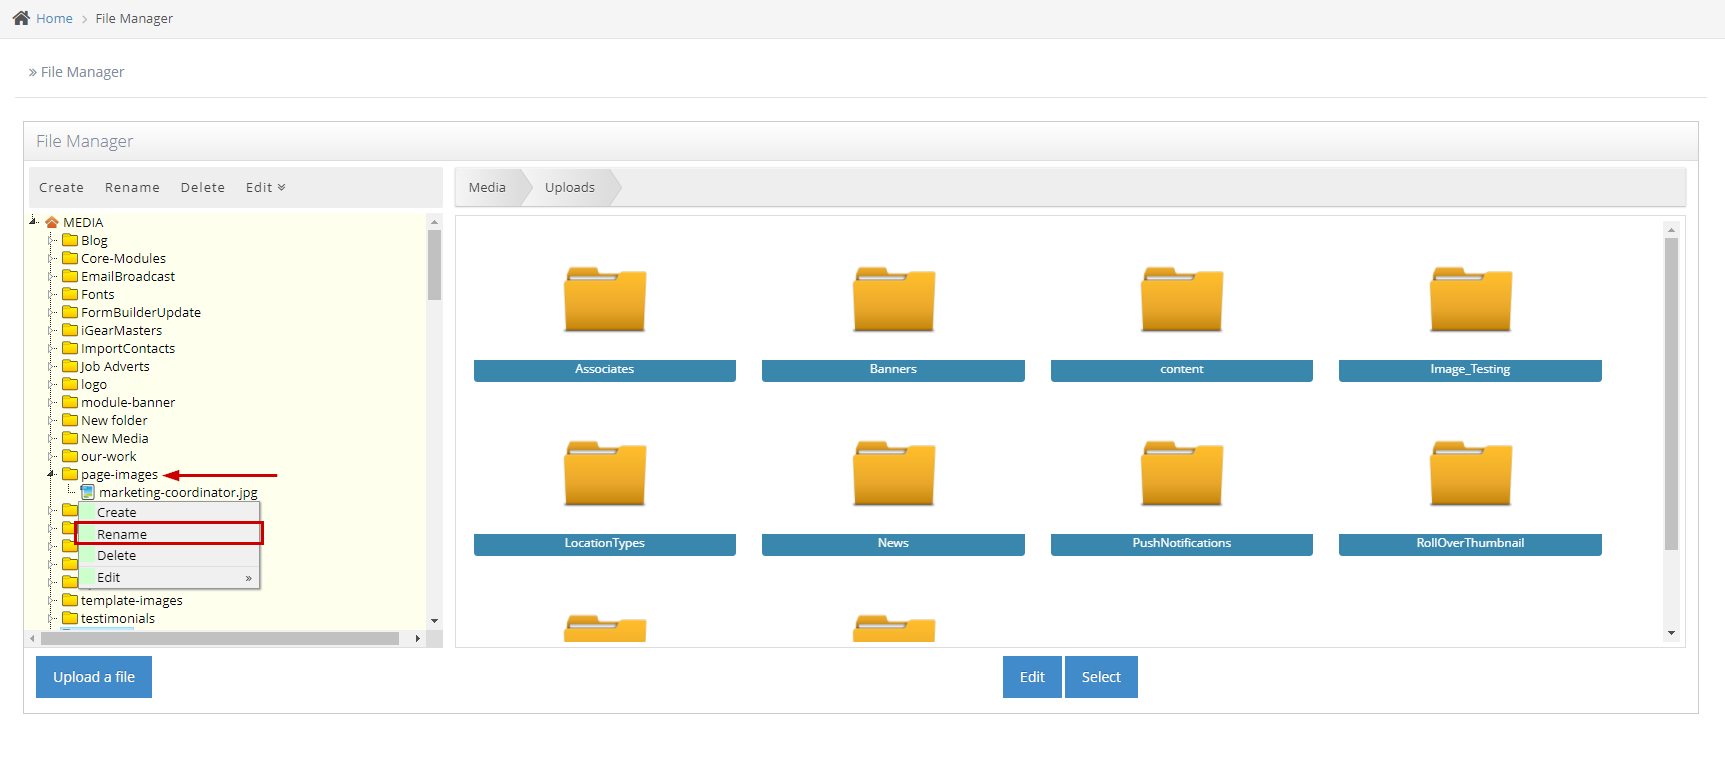
3Go to Page Images
-
4Look for default.jpg > Right click and rename to {filename}-backup.jpg
-
5Rename the image you will upload to "default.jpg"
-
6Go to Upload a File > Upload the updated default image
How to manage Header images on webpages
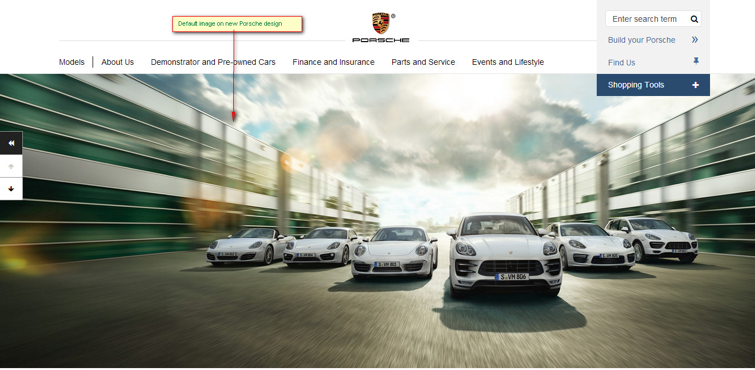
By default, all the Porsche sites have an default image header.
- If no specific header image is chosen, then the default image will appear
You can change the image header for any individual page by uploading your new replacement image to your Page Images folder.
This can be managed from the website front end.
Before you start it's a good idea to be prepared:
- Have your replacement image ready to upload. Make sure the image is the correct size and optimised for the website.
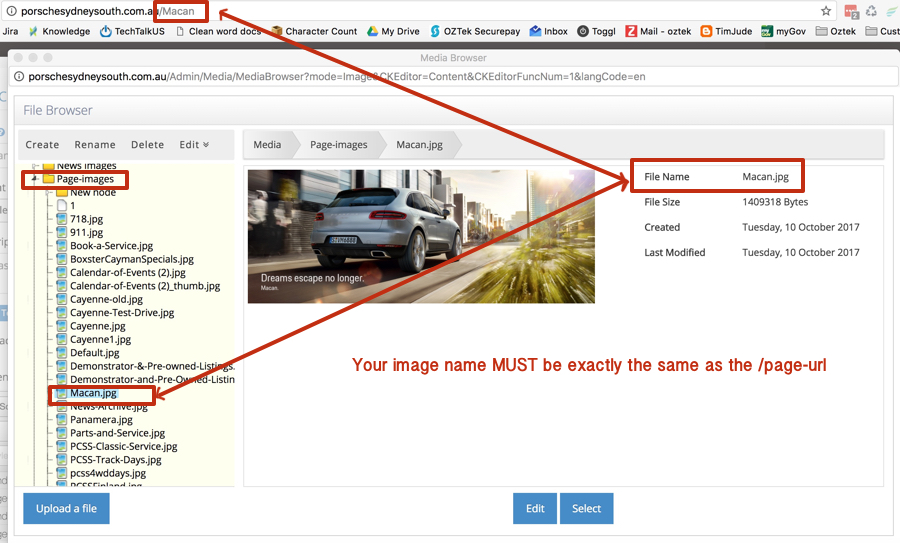
- Make sure the new image is named correctly, it needs to be the same as the page url.
- For example:
- Page URL - www.domain.name.com/Our-Team
- Image name - Our-Team.jpg
- For example:
- Make sure that the file format of the image is JPG (.jpg)
- Recommended image dimension is: 1920 x 738 px.
-
1Go to the page you wish to add the new header image
-
2
Edit the page - when the page opens
- Go to the image icon and open the File Browser
-
3
Within the File Browser, look for the Page-Images folder
IMPORTANT: Big Images can only work from this folder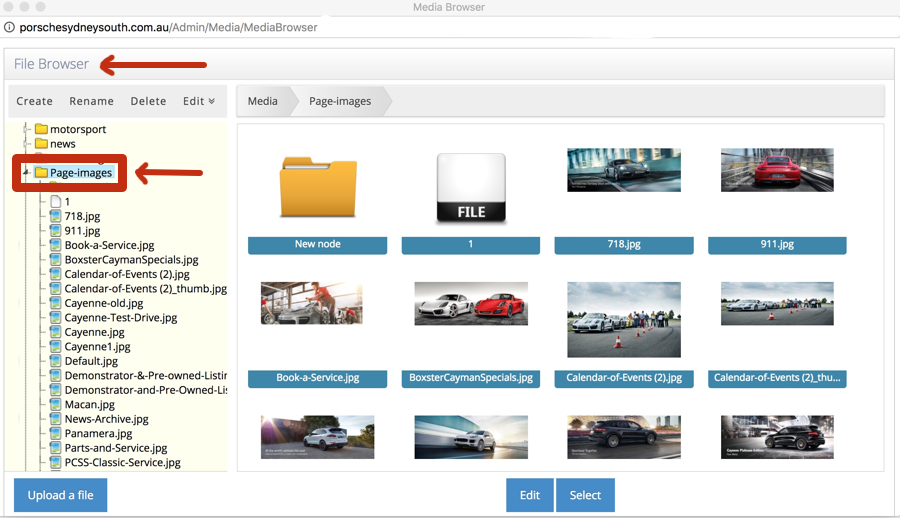
IMPORTANT: The name of your new image header has to be exactly the same as the url of the page BUT if you are replacing an existing image - you need to rename or delete the existing image first. The system does not like it when there are two images with the same name.
Naming Examples:
- Page URL - https://porschewilloughby.com.au/Book-a-Service
- Image name will be: /images/ContentHeaderImages/Book-a-Service.jpg
Make sure your image is named the same as the page on which you want it to appear
For example:
- Parts-and-Service.jpg / Calendar-of-Events.jpg etc.
- NB: also remember to include the dashes in between each word
- Once you have renamed or deleted the existed image - UPLOAD your new Header image
- When it is safely uploaded and named correctly - simply EXIT AWAY FROM THE FOLDER and DO NOT SELECT
NB: You do not need to select, simply exit out of the Browser and Image folder, SAVE the page you are working on and refresh
Your new image ought to appear - if it does not, clear your cache (Control + F5) and check again
If is still does not appear, check in the Page-images folder to ensure the image names matches the friendly URL exactly and adjust if required.
Create a Banner Image in Admin
-
1Log in as an administrator and go to the Admin Dashboard.
Learn how to log in here → -
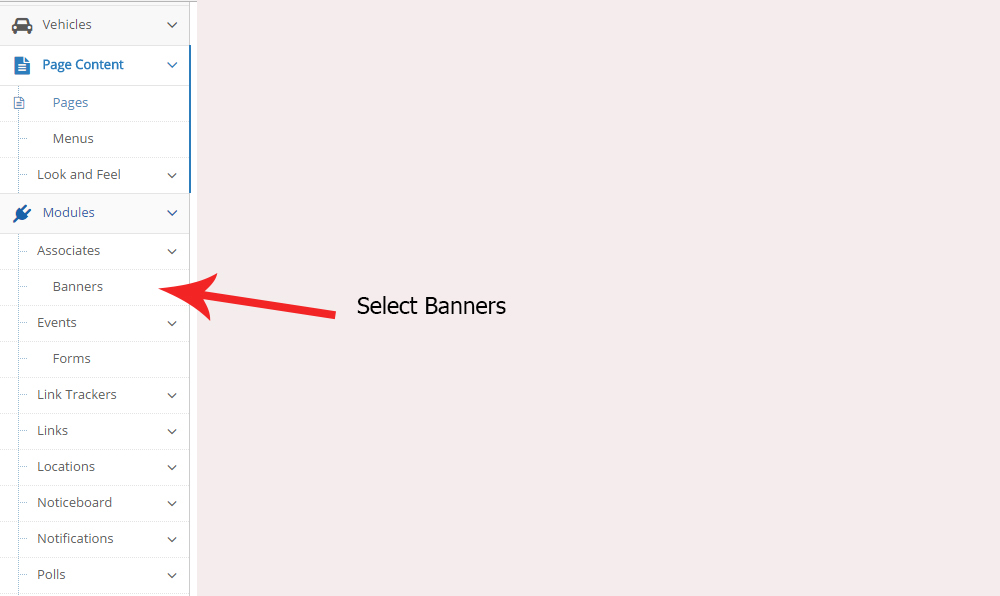
2On the left nav panel, select the Banners module
-
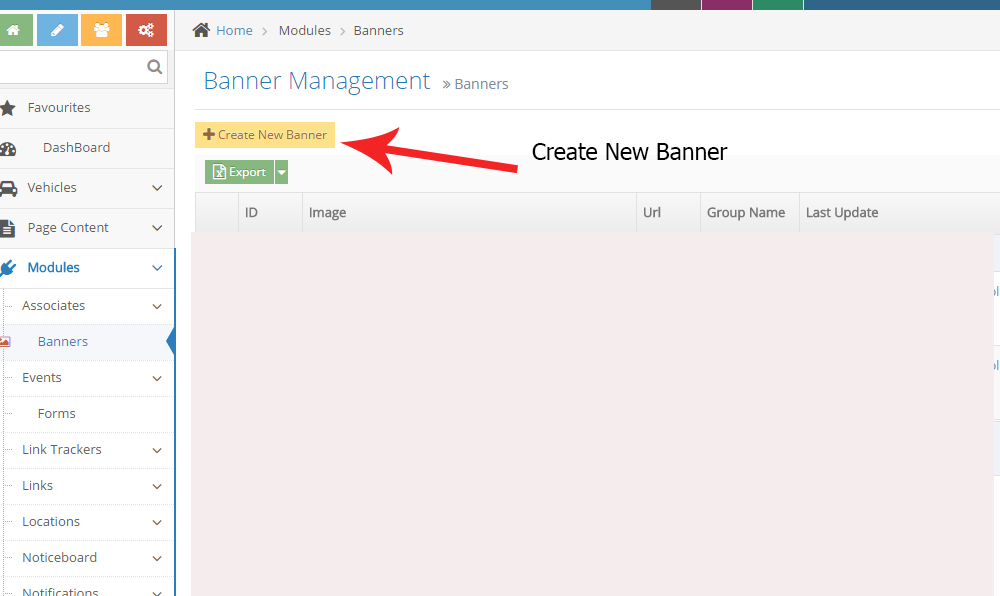
3Click "Create New" button
-
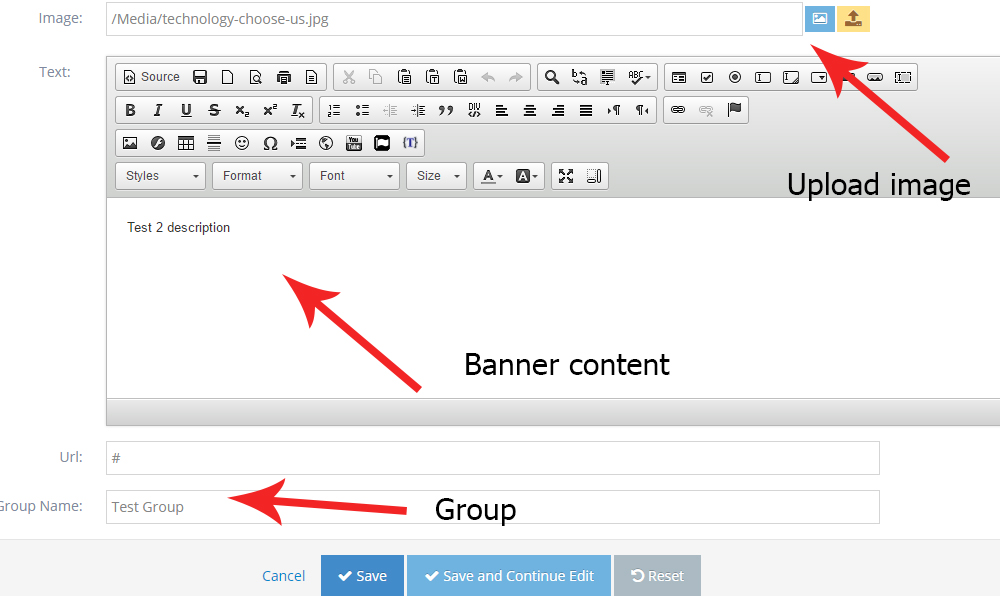
4Upload the image, text, URL and Banner Group name and click on the Save button to continue
-
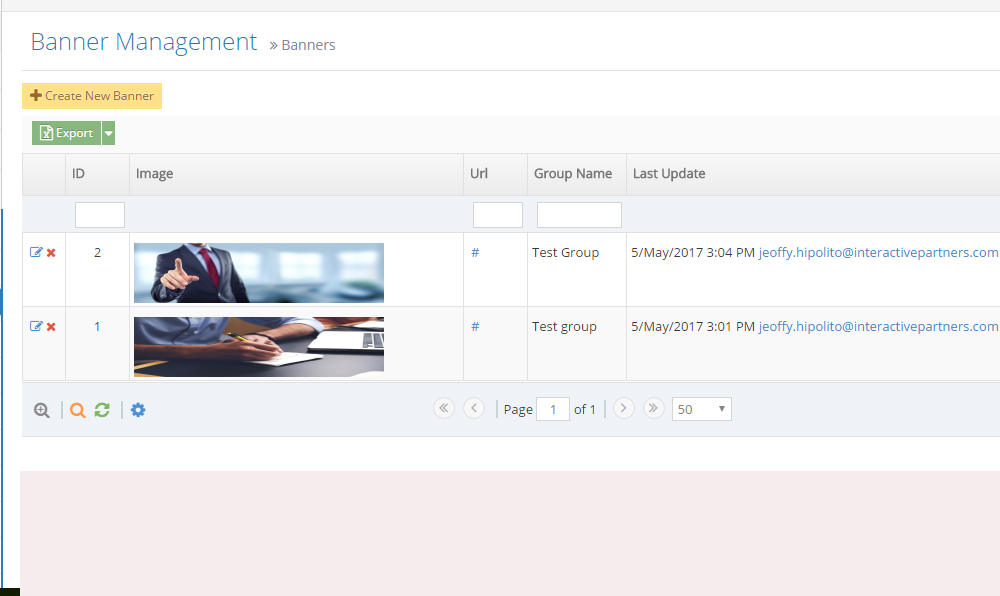
5You can see the list of banners now
How to insert Banner Images on the page
This can help in selling advertising space or promoting user products
-
1Log in as an administrator and go to the Admin Dashboard.
Learn how to log in here → -
2On the page editor, select the Curly Bracket icon and click the Configure button
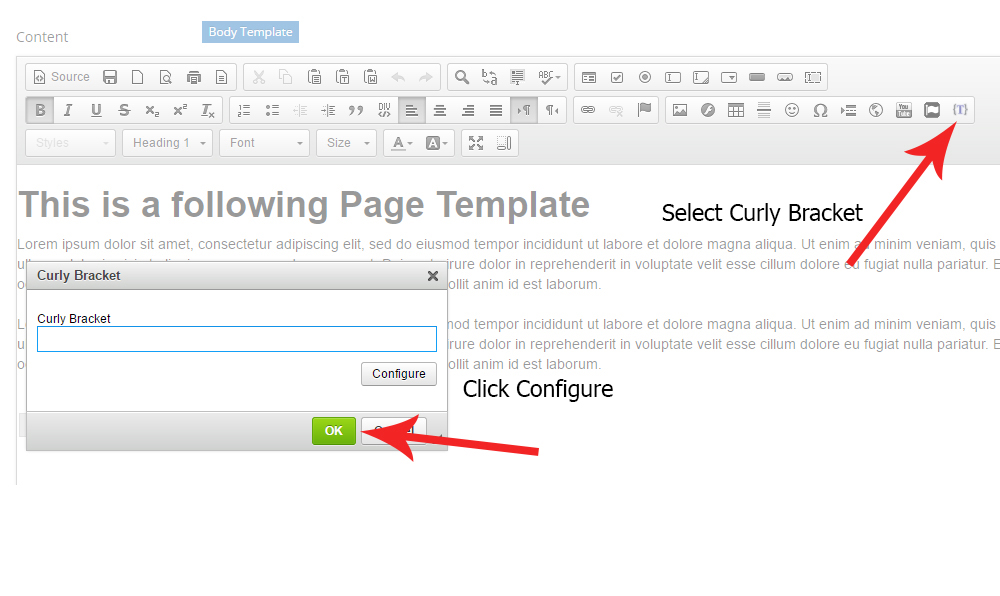
-
3Search for "Banner" and select the Banner module from the result
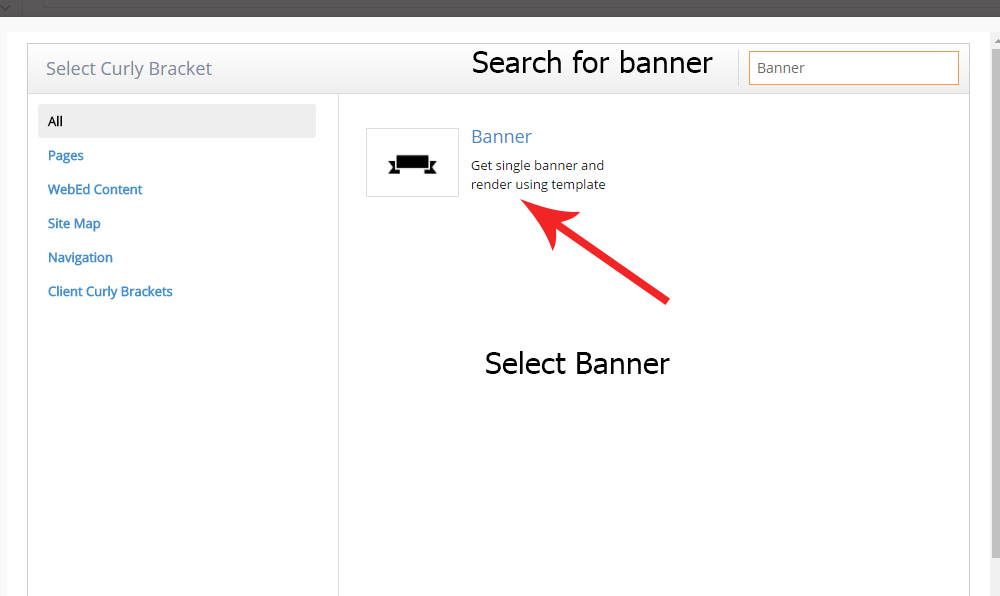
-
4Select the banner name on the left side of the modal box
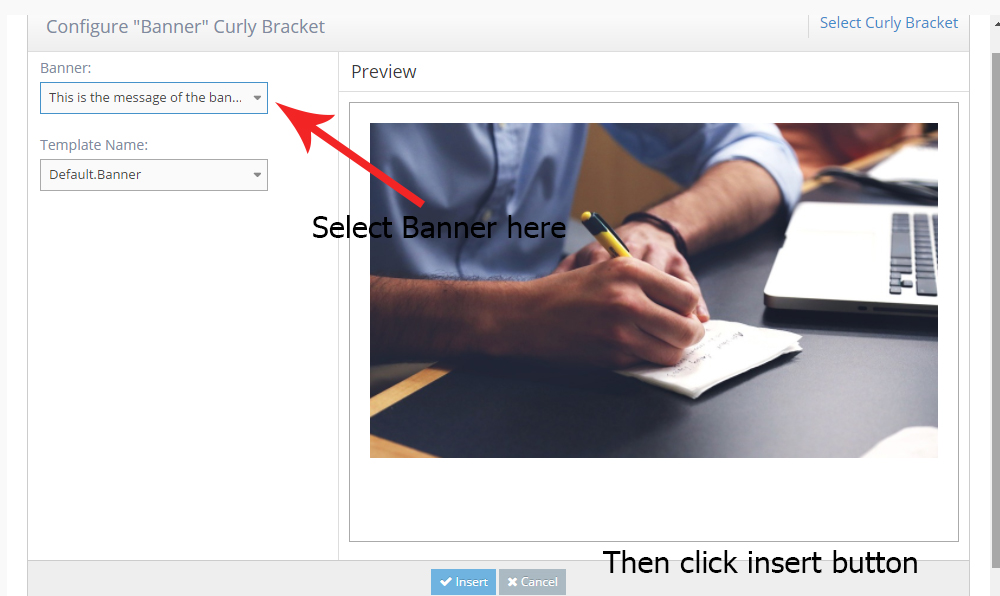
-
5Click OK in configure
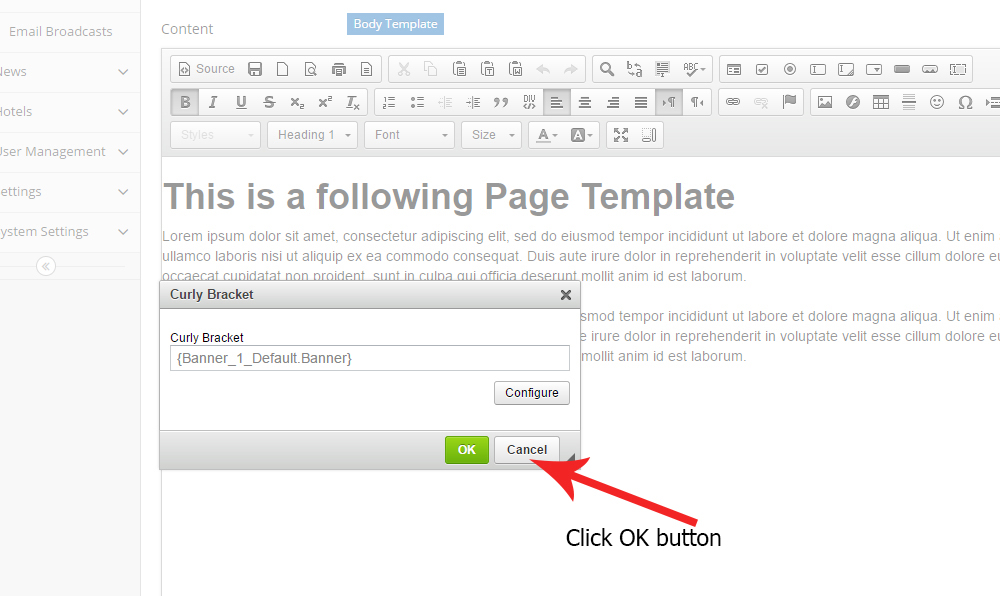
-
6click Save and see the result on the Frontend