STEP-BY-STEP
-
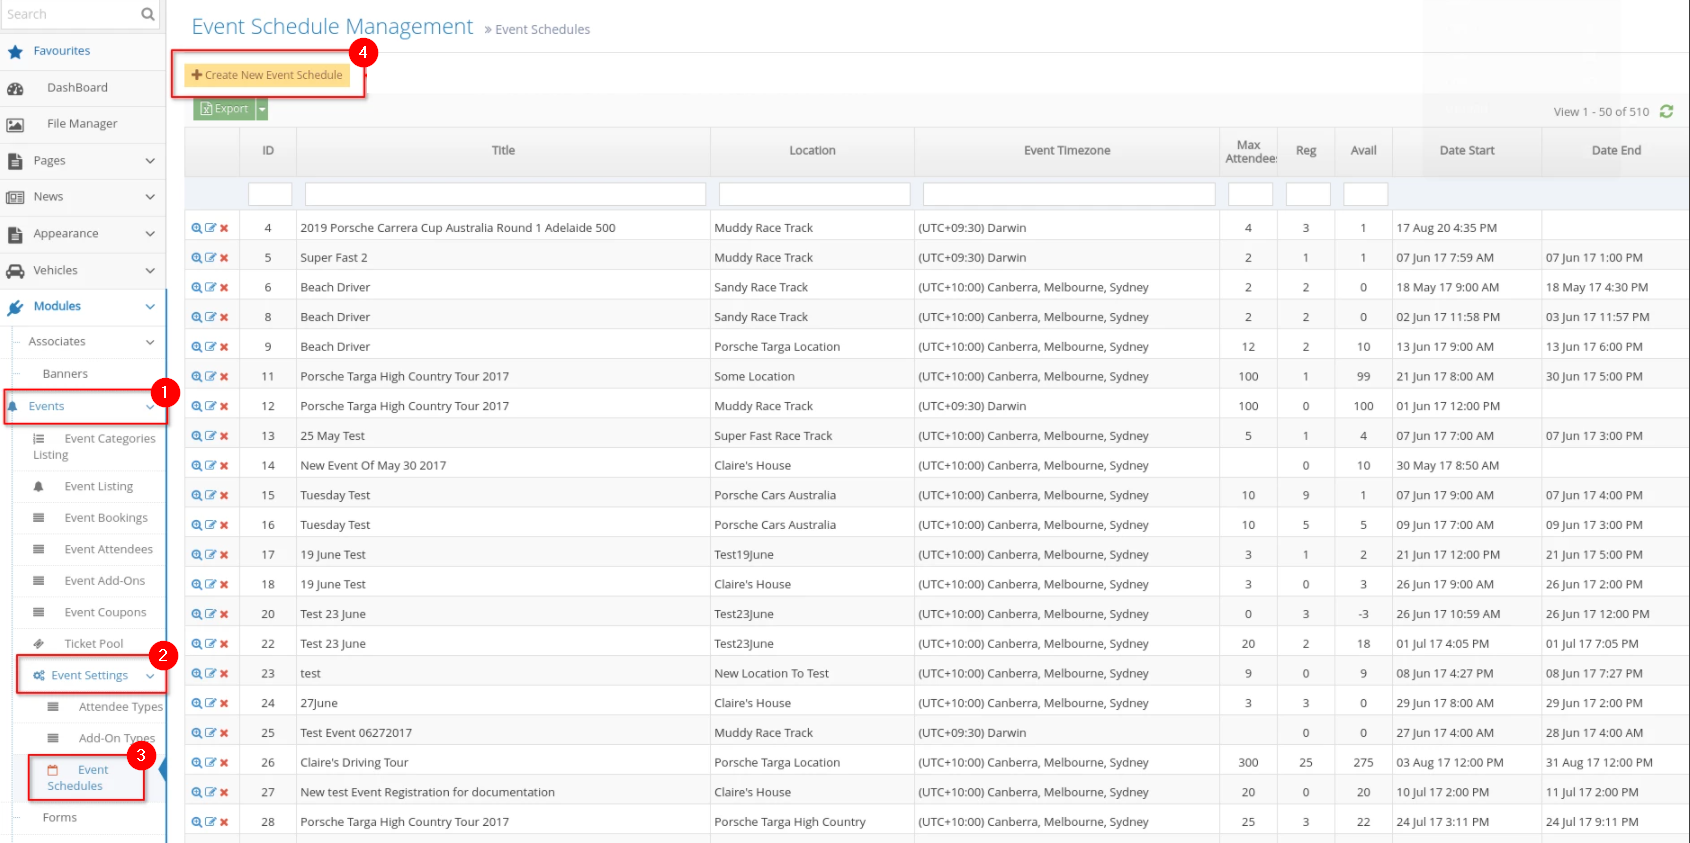
1Log in as an administrator and go to the Admin Dashboard.
Learn how to log in here → -
2Under Modules on the left menu, click the Events dropdown
-
3Select Event Schedules
-
4Click Create New Event Schedule
-
5Fill up the Event Schedule Information
- Event- select the event you are creating the schedule for - the event created above/recently - from the options.
- Title- enter the title of the event schedule.
- One-Day Event- put a check if the event is for one day only.
- Start Date- enter the first day of the event, including the start time and end time.
- End Date- enter the last day of the event, including the start time and end time.
- Event Timezone- select the correct time zone from the dropdown options, or you can tick the "Use Location Timezone" checkbox to have your event use the preferred location's timezone
- (Use Location TimeZone) - tick this (optional) if you wish to use the location timezone to create a new one.
-
6Click Create to create your new schedule
-
7A message will appear at the top of the dashboard saying ‘Event created successfully’ to confirm the updates are successful
