Why you would use an Event Schedule Module
This documentation is to show information on managing event schedules in the events module. An event schedule has a start date and end date with a start time and end time for each date.
An event schedule contains the exact date and time (month, day, year) of a specific event.
Create a new Event Schedule
STEP-BY-STEP
-
1Log in as an administrator and go to the Admin Dashboard.
Learn how to log in here → -
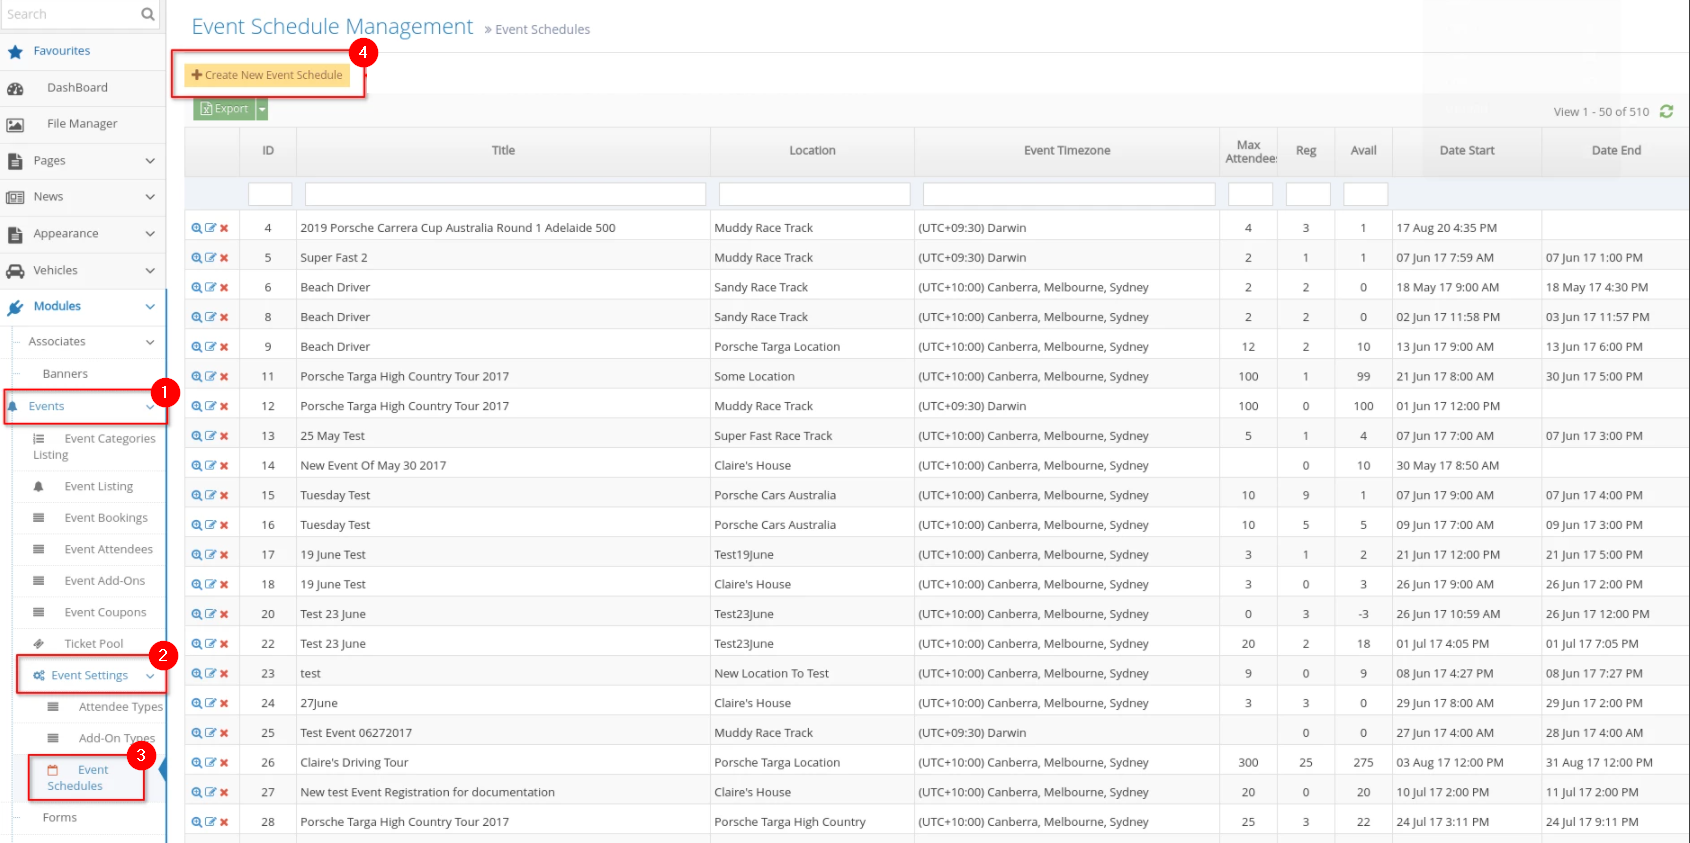
2Under Modules on the left menu, click the Events dropdown
-
3Select Event Schedules
-
4Click Create New Event Schedule
-
5Fill up the Event Schedule Information
- Event- select the event you are creating the schedule for - the event created above/recently - from the options.
- Title- enter the title of the event schedule.
- One-Day Event- put a check if the event is for one day only.
- Start Date- enter the first day of the event, including the start time and end time.
- End Date- enter the last day of the event, including the start time and end time.
- Event Timezone- select the correct time zone from the dropdown options, or you can tick the "Use Location Timezone" checkbox to have your event use the preferred location's timezone
- (Use Location TimeZone) - tick this (optional) if you wish to use the location timezone to create a new one.
-
6Click Create to create your new schedule
-
7A message will appear at the top of the dashboard saying ‘Event created successfully’ to confirm the updates are successful

Update the existing Event Schedules
STEP-BY-STEP
-
1Log in as an administrator and go to the Admin Dashboard.
Learn how to log in here → -
2Under Modules on the left menu, choose Events > Event Settings
-
3Click Event Schedules
-
4From the Event Schedule listing, search for the event schedule you want to edit
-
5Click the
 "Edit" icon to edit the event schedule
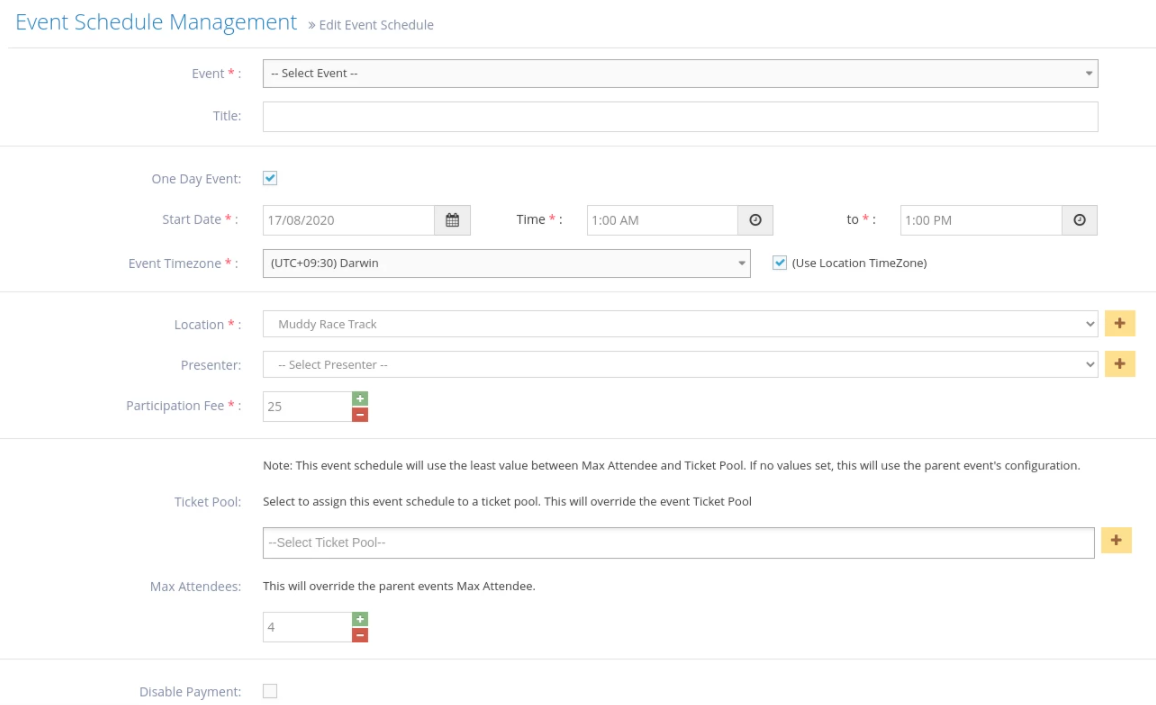

-
7Edit any or all items below:
- Event- select the event you are creating the schedule for - the event created above/recently - from the options.
- Title- enter the title of the event schedule.
- One-Day Event- put a check if the event is for one day only.
- Start Date- enter the first day of the event, including the start time and end time.
- End Date- enter the last day of the event, including the start time and end time.
- Event Timezone- select the correct time zone from the dropdown options, or you can tick the "Use Location Timezone" checkbox to have your event use the preferred location's timezone
- (Use Location TimeZone) - tick this (optional) if you wish to use the location
- Presenter - select the presenter of the event from the options or click the

- Participation Fee enter the price value for the event.
- Ticket Pool - select the ticket pool of the event from the options or click the to create a new one.
Learn how to create a new ticket pool here → - Max Attendees enter the maximum number of attendees for this event. If Max Attendees is set to 0, the max attendee is unlimited.
- Disable Payment put a check to disable payment for the event.
- Hide Schedule select to hide the event schedule if needed
-
8Once done, Save to update changes.
Delete An Event Schedule
STEP-BY-STEP
-
1Log in as an administrator and go to the Admin Dashboard.
Learn how to log in here → -
2Under Modules on the left menu, choose Events > Event Settings
-
3Click Event Schedules
-
4From the Event Schedule listing, search for the event schedule you want to delete
-
5Click the
 "Delete" icon to delete the event. A popup will appear to confirm deleting the event.
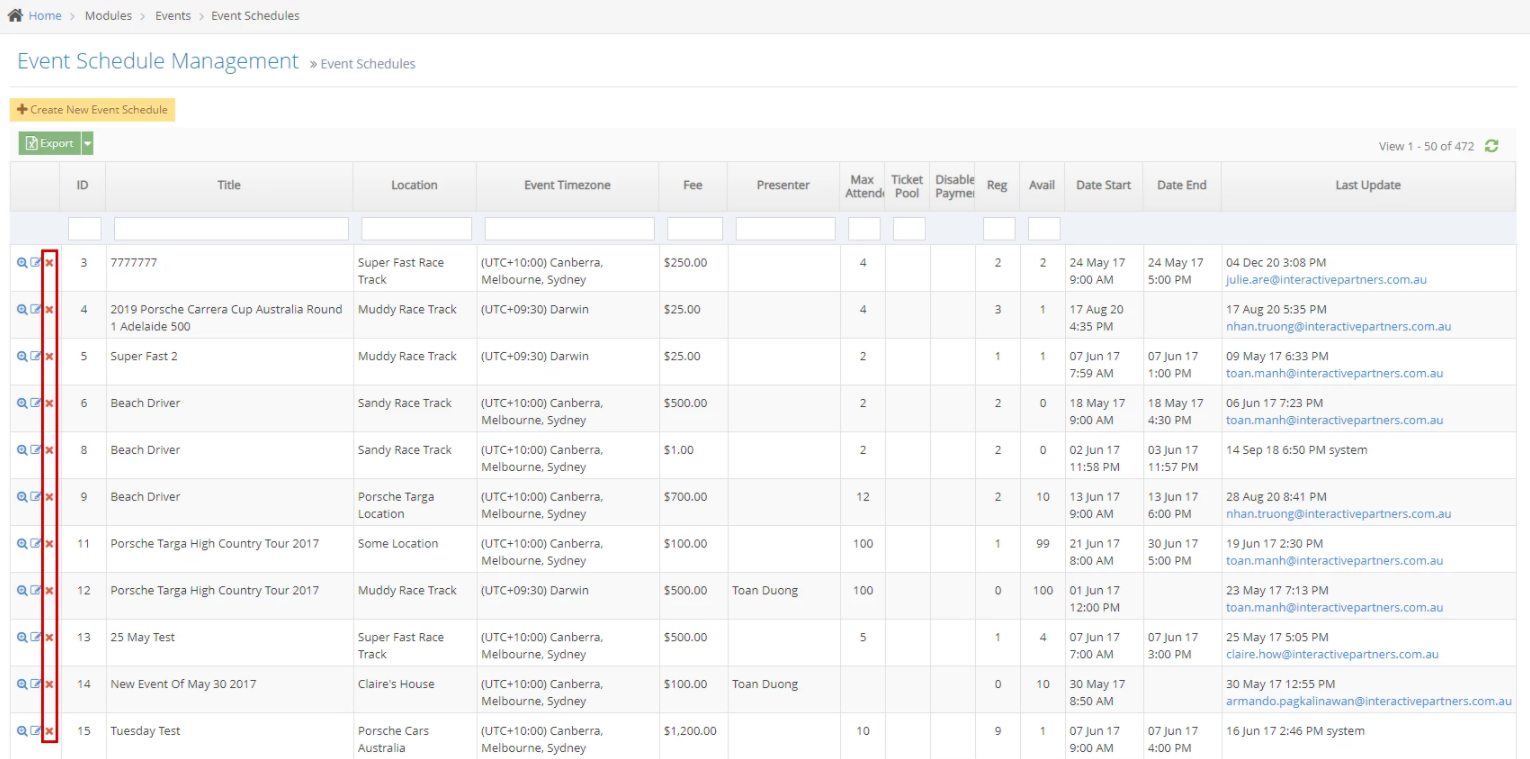
-
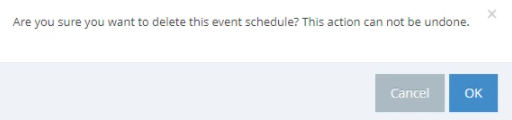
6Once clicked, a pop-up modal will show "Are you sure you want to delete this event schedule? This action can not be undone." with buttons.
- Cancel - clicking this button closes the pop-up and shows the event schedule details. You can still edit the event by clicking "Delete" on the top right corner of the page (shown below), and the same popup will appear for confirmation.
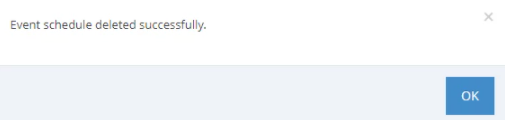
- OK - clicking this button deletes the event and shows a popup "Event schedule deleted successfully.". This action takes you back to the Event Listing.
Update An Event Schedule
-
Edit any or all items below:
- Event- select the event you are creating the schedule for - the event created above/recently - from the options.
- Title- enter the title of the event schedule.
- One-Day Event- put a check if the event is for one day only.
- Start Date- enter the first day of the event, including the start time and end time.
- End Date- enter the last day of the event, including the start time and end time.
- Event Timezone- select the correct time zone from the dropdown options, or you can tick the "Use Location Timezone" checkbox to have your event use the preferred location's timezone
- (Use Location TimeZone) - tick this (optional) if you wish to use the location timezone to create a new one. Learn how to create a new location here.
- Presenter - select the presenter of the event from the options or click the
- Participation Fee enter the price value for the event.
- Ticket Pool - select the ticket pool of the event from the options or click the to create a new one. Learn how to create a new ticket pool here.
- Max Attendees enter the maximum number of attendees for this event. If Max Attendees is set to 0, the max attendee is unlimited.
- Disable Payment put a check to disable payment for the event.
- Hide Schedule select to hide the event schedule if needed