- What is a Word Template
- What is a Curly Bracket
- Finding the Curly Bracket ID
- How to add the Curly Brackets on Word Template properly
How to add the Curly Brackets on Word Template properly
STEP-BY-STEP
-
1Open the word document
NB! Should be .doc or .docx -
2Add the copied ID/Name on the document
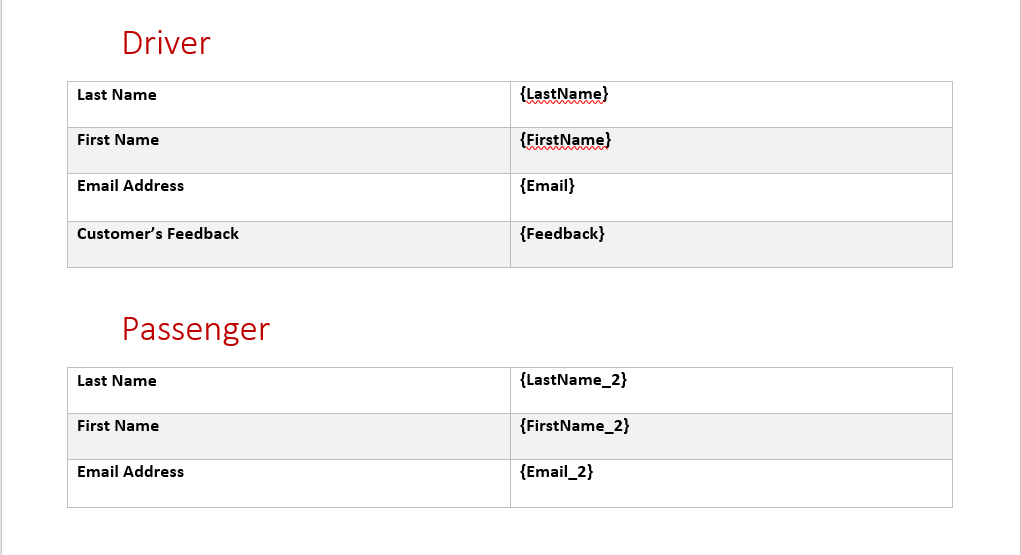
NB! Make sure you put it between the two Curly Brackets. For example below the ID/Name is FirstName, it should be added on the document like this - {FirstName}
-
3Save the changes on the word document and you are now ready to upload the template for the event using the guide on
How to Add Word Template of PDF form in Events link here → -
4
If there are fields that have the same ID/Name. Please follow the below:
- Get the duplicate fields ID in the Form then add an underscore and chronological order number after the field ID/Name - i.e Three FirstNames will have a record of FirstName_1(Can also be just FirstName), FirstName_2 and FirstName_3. We are using field_(index) format and not field(index) because there are fields with numbers in them like AddressLine1.
- When the admin wants to check the index or the chronological order of the duplicate fields, use the order of the Fields in the form builder to find the index
NB! To get correct results, make the duplicate fields required.
NB! The ID/Name of the form fields under the Marketing tab can't be renamed. However, some of the form fields on the Marketing tab are also on the Form Elements tab - there you can rename the ID/Name of the form fields. -
5Congratulations! - you have now finished creating a word template.