Snippets
What is a snippet?
- This allows a user to add a part or piece of the content to be displayed on pages in a faster way.
- The snippet can be placed anywhere on the site by using Curly Bracket, ex. {snippet_xx}
- Every snippet will link to an internal page, a PDF (or word document) or content for the full details.
Why you would use a snippet?
If you are not familiar with code or programming this is the best tool for you to use. Snippets provide a way for you to insert ready-made code into your pages using the curly bracket. A user can display a small piece of content that can be reused throughout the site. Snippet features can also be added which give a rich functionality or user experience and interface.
How to create a new Snippet
STEP-BY-STEP
-
1Log in as an administrator and go to the Admin Dashboard.
Learn how to log in here → -
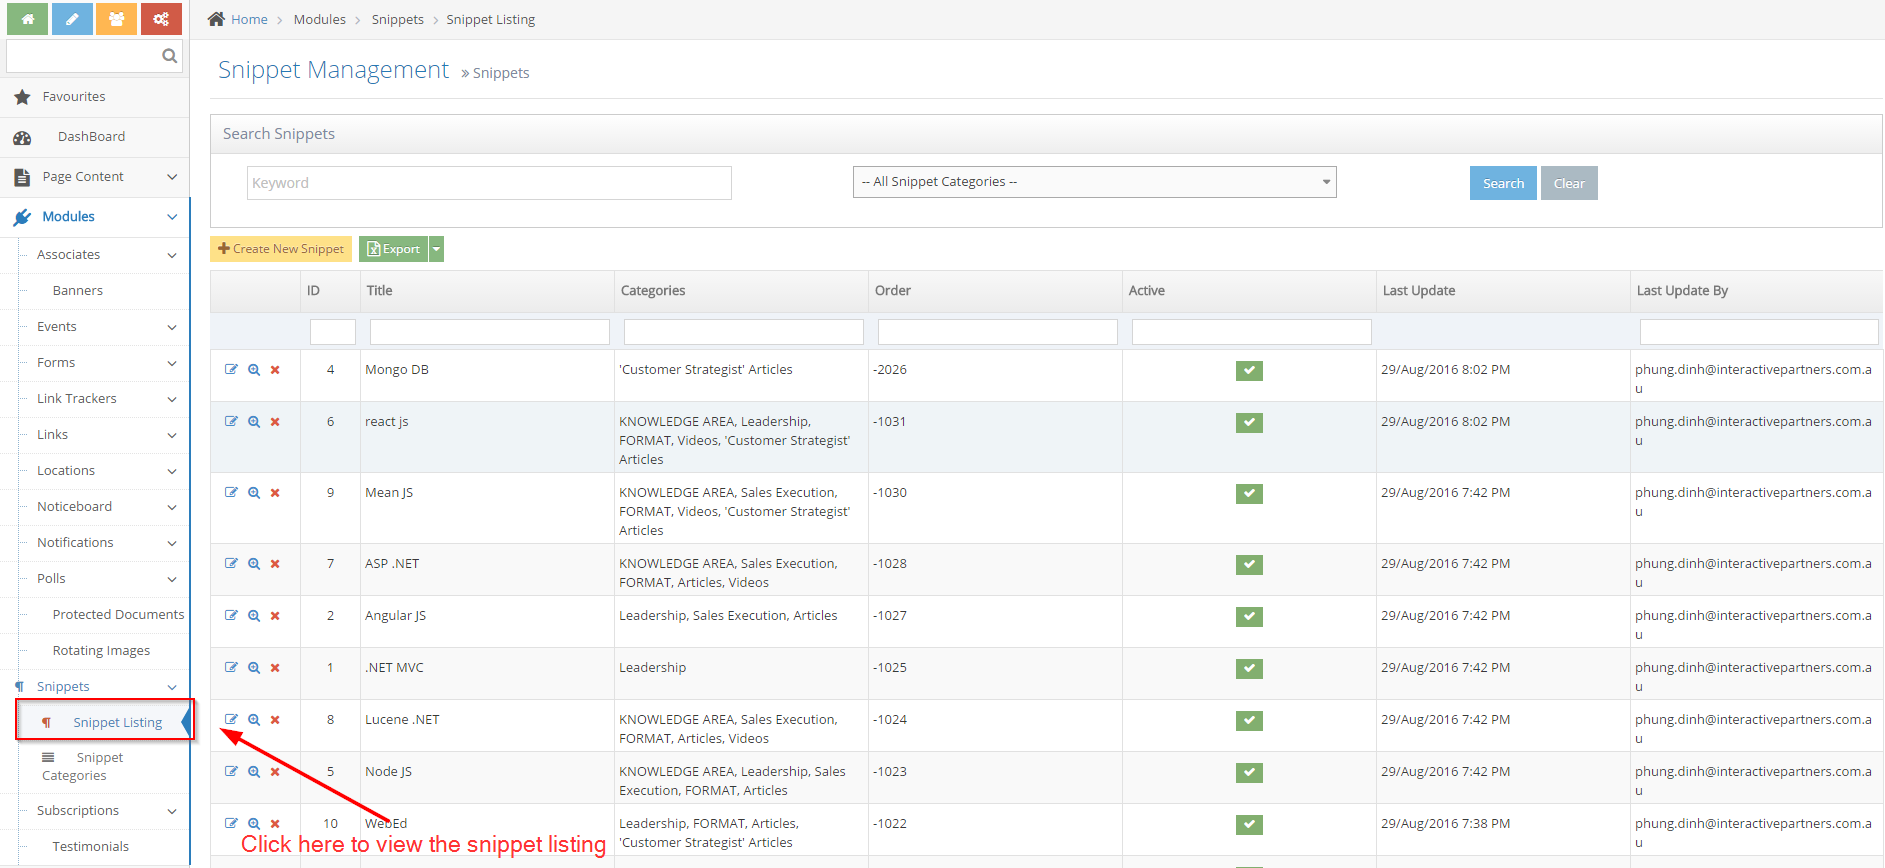
2Go to Admin Dashboard > Modules > Snippets > Snippet Listing
-
3Click Create New Snippet
-
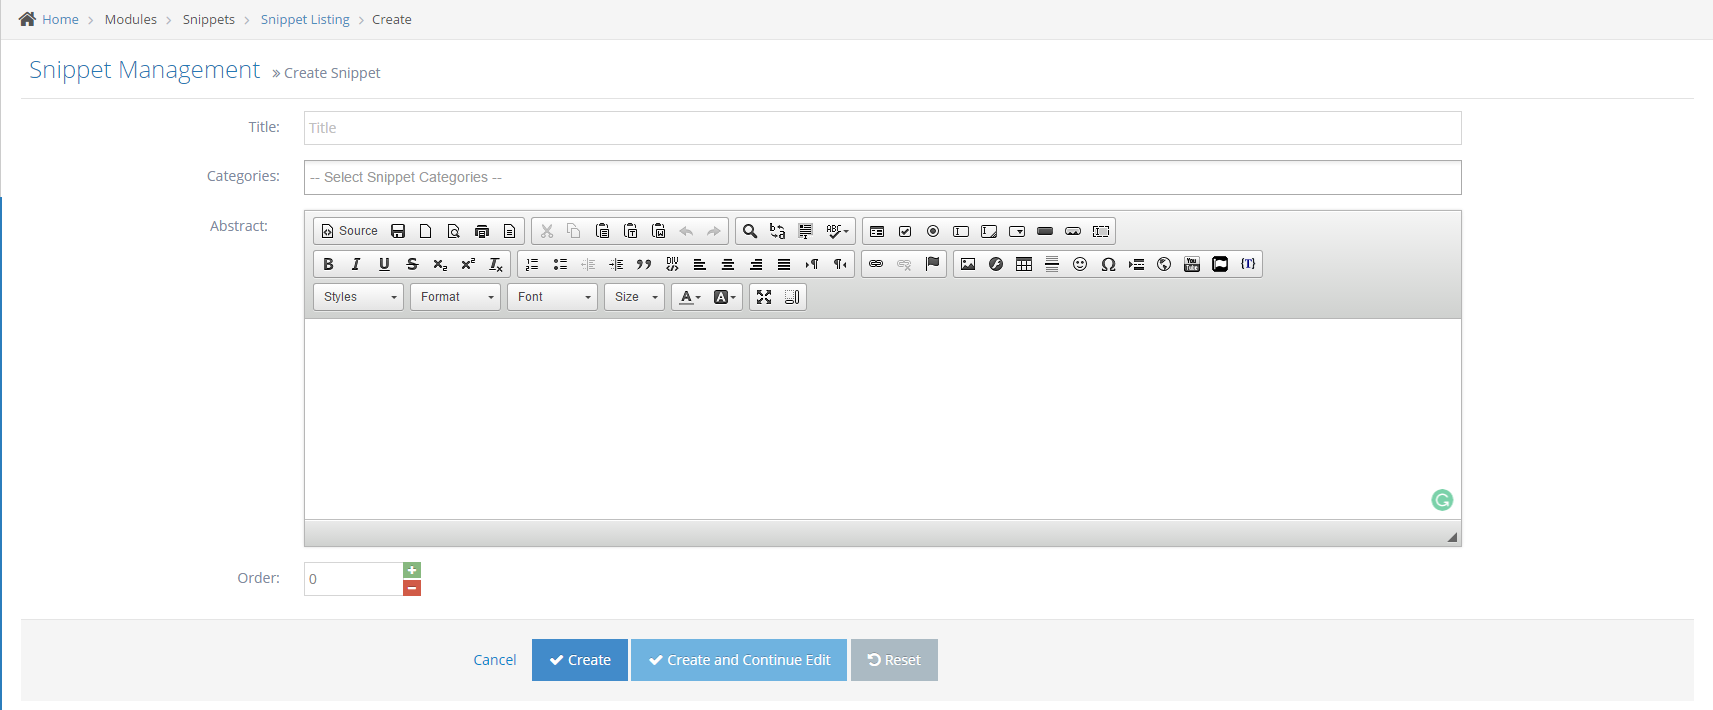
4Enter the title, select categories abstract and order
- Title - the title or name of your snippet
- Categories - select the category/categories where you want to include or group your snippet.
- Abstract - the content of your snippet
-
5Click the Create button
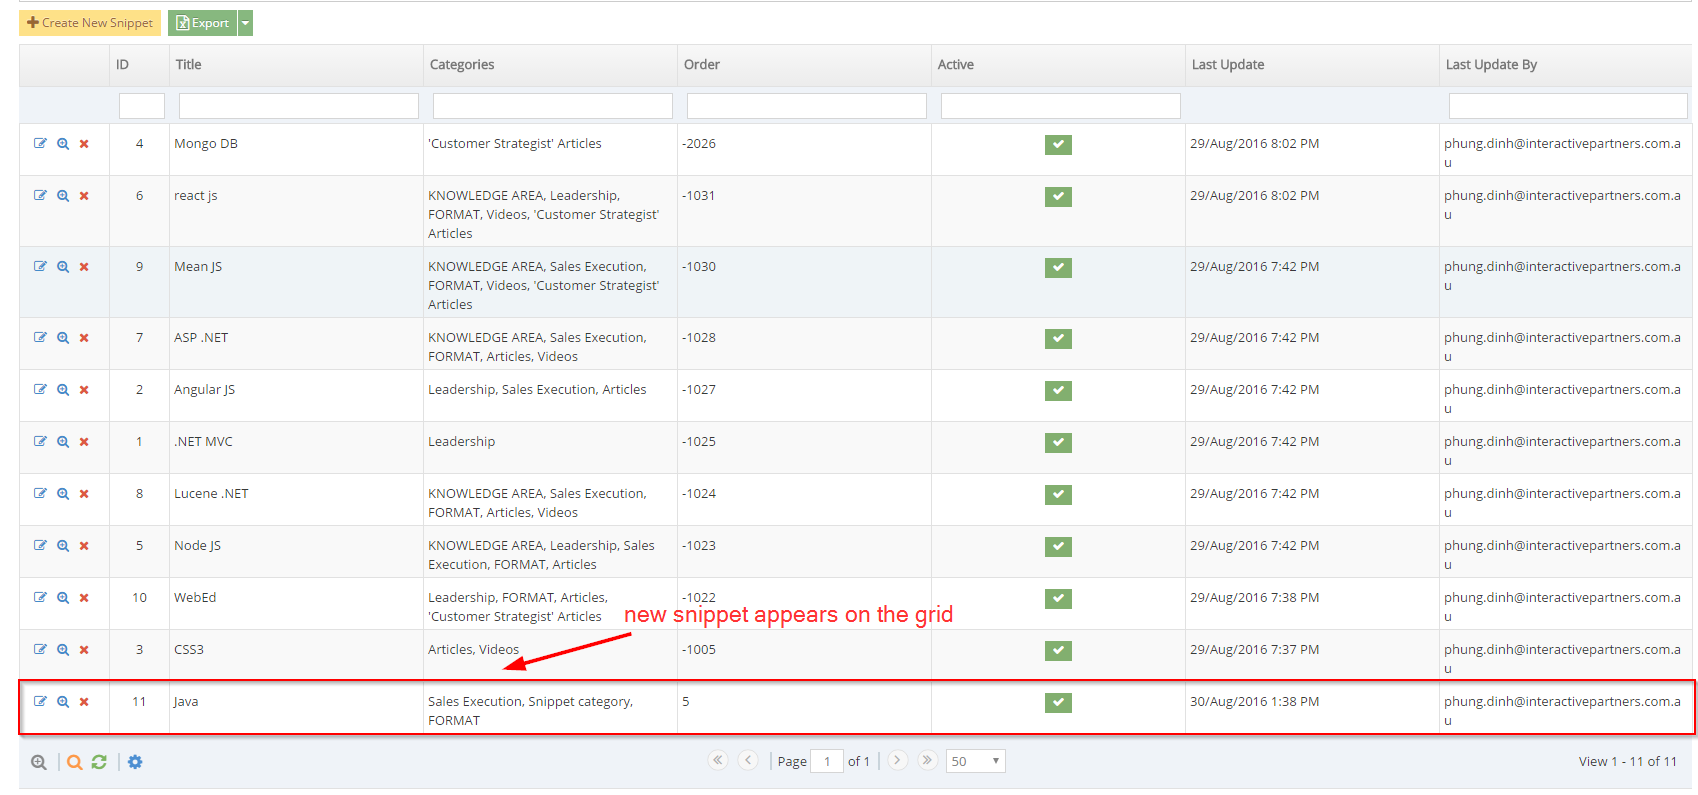
How to edit/view details/delete a snippet
STEP-BY-STEP
-
1Log in as an administrator and go to the Admin Dashboard.
Learn how to log in here → -
2Go to Admin Dashboard > Modules > Snippets > Snippet Listing

-
3Click the Edit/View Details/Delete icon on a snippet
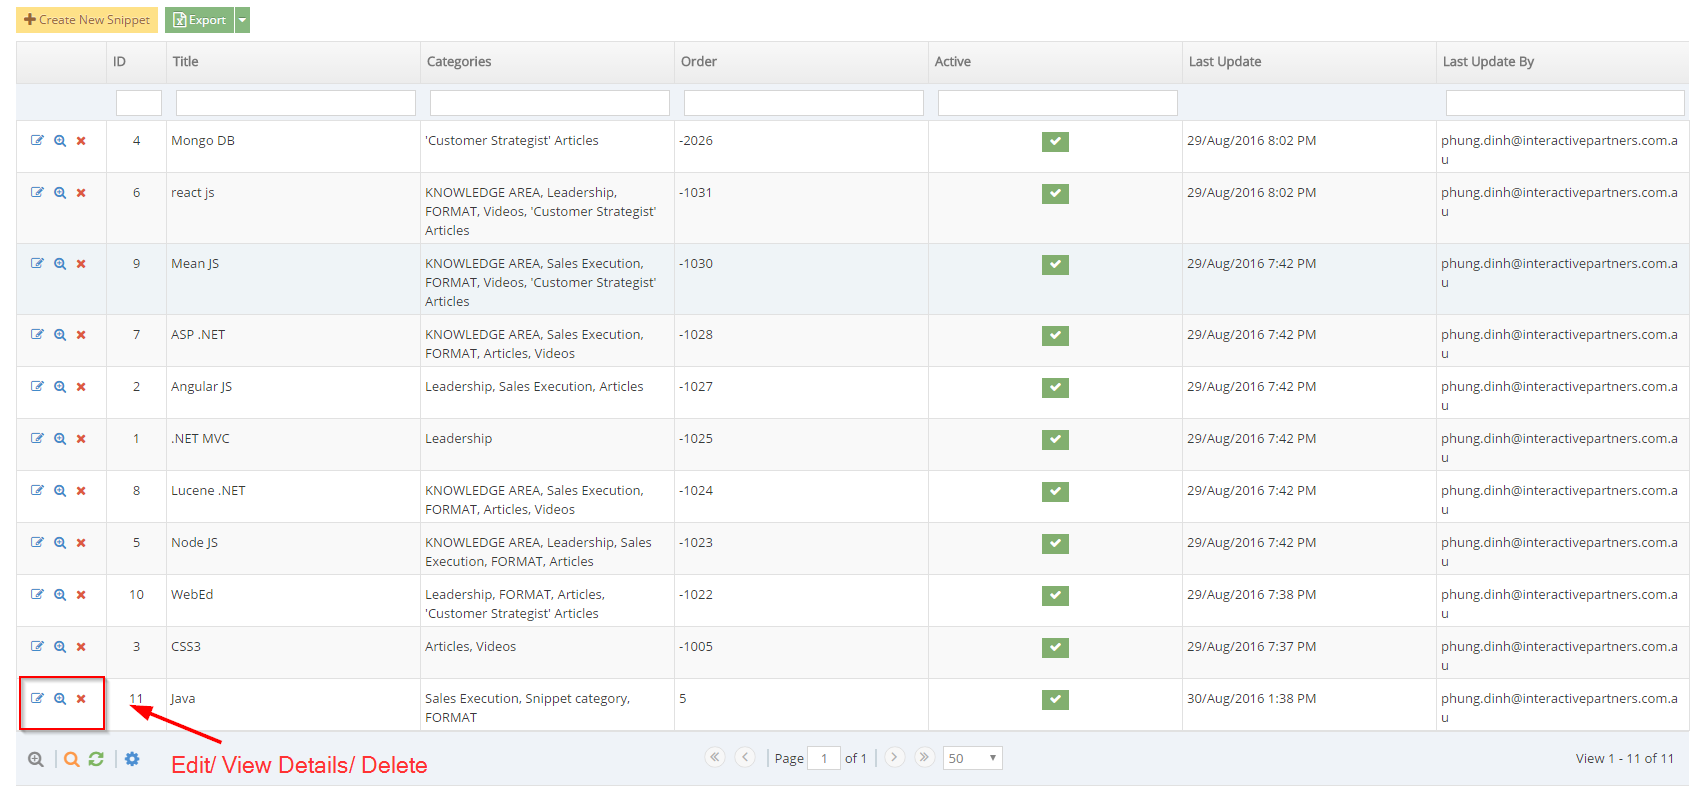
How to add display Snippet curly bracket to page
STEP-BY-STEP
-
1Log in as an administrator and go to the Admin Dashboard.
Learn how to log in here → -
2Select a page that you want to show the snippet and click Edit

-
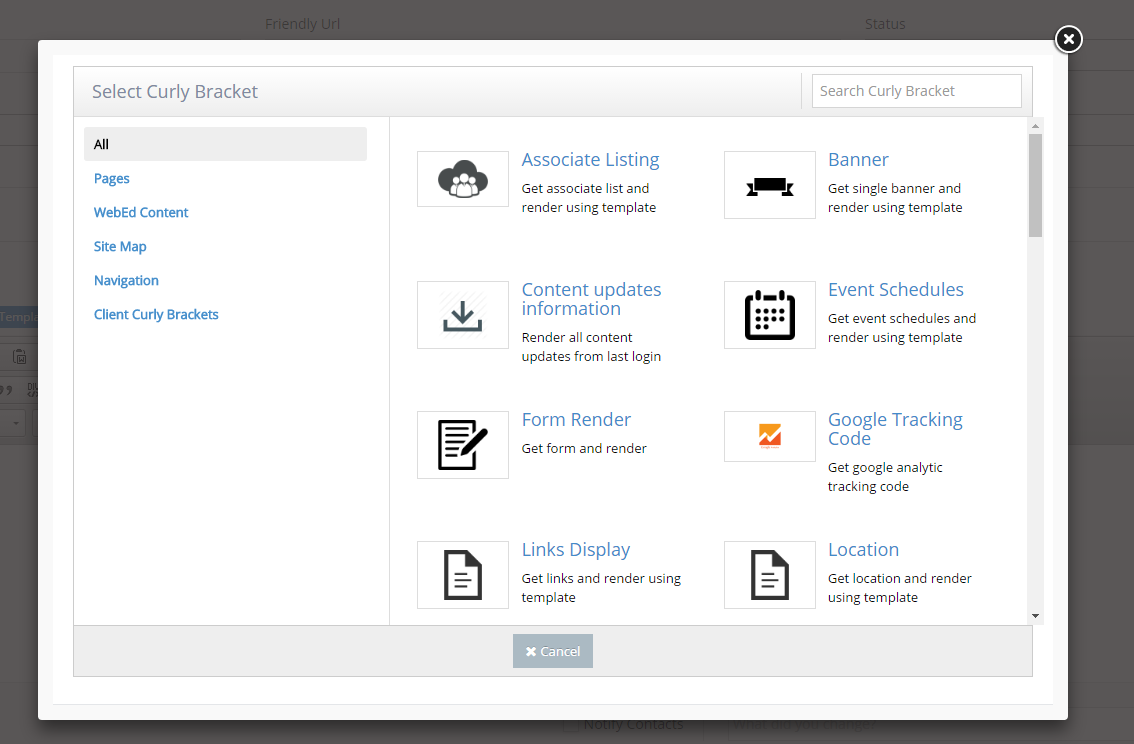
3In the editor, click the Curly Bracket button to open the configuration curly brackets

-
4Click the Configure button in the popup
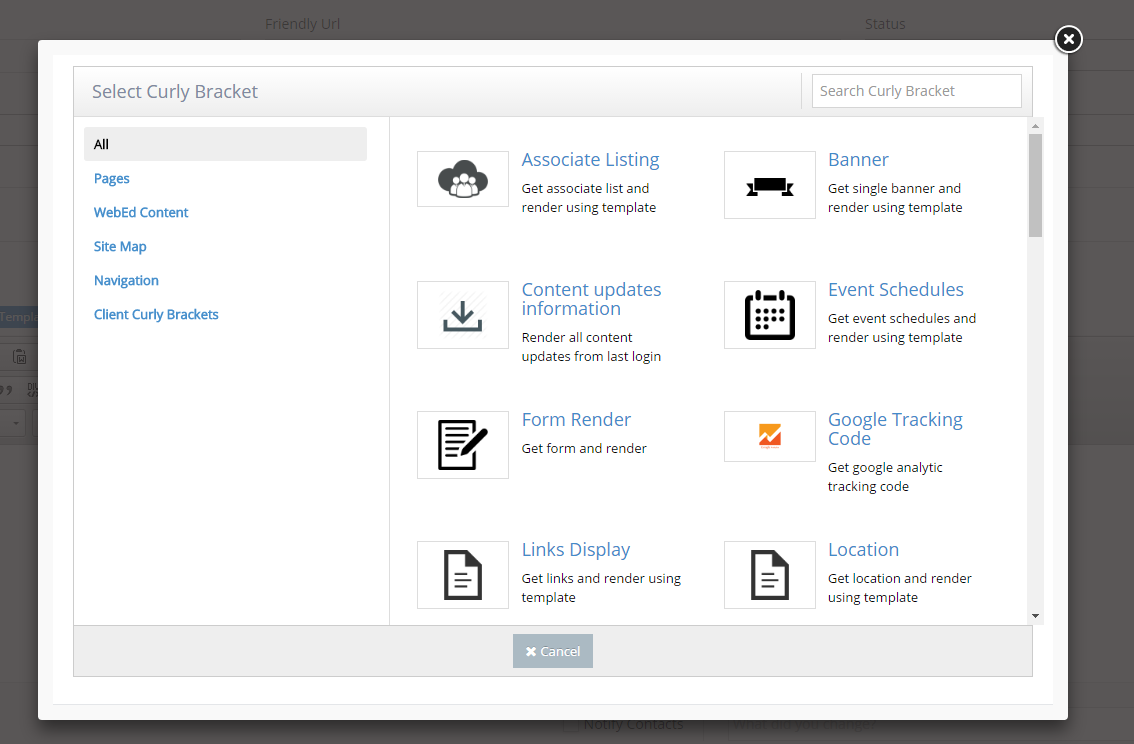
-
5Search for Snippet on the popup and click on the Snippet item in the resulting search
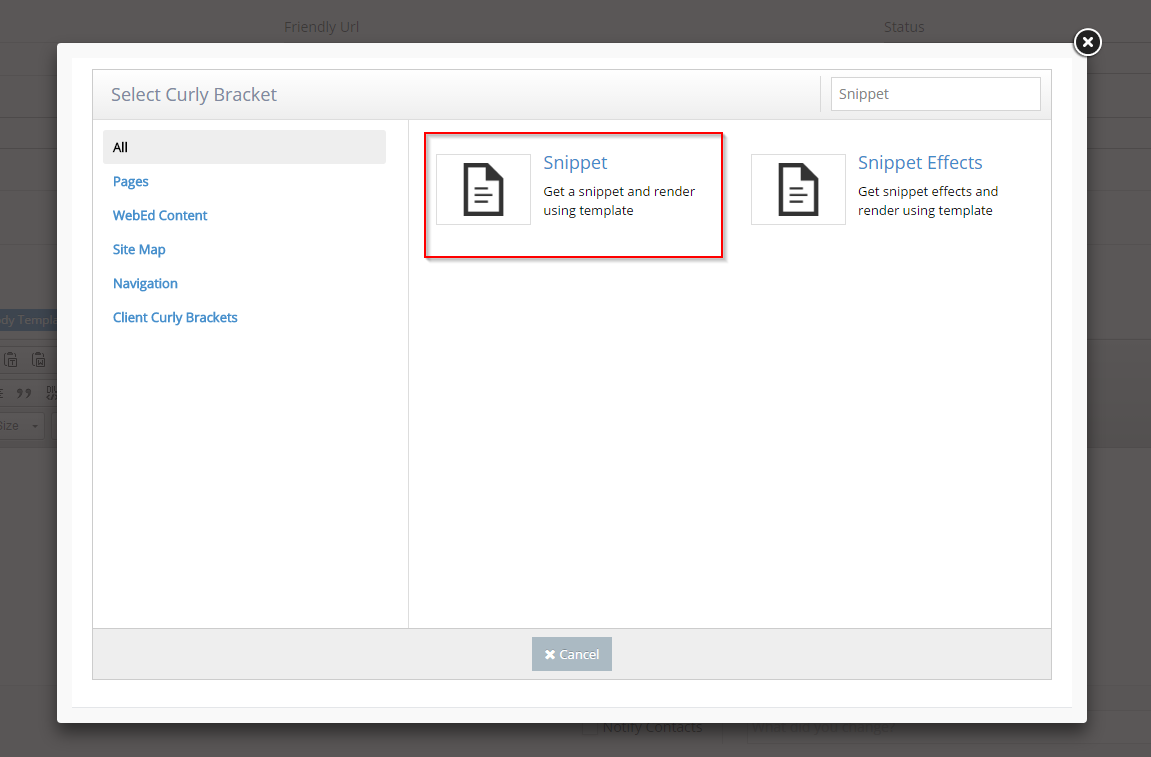
-
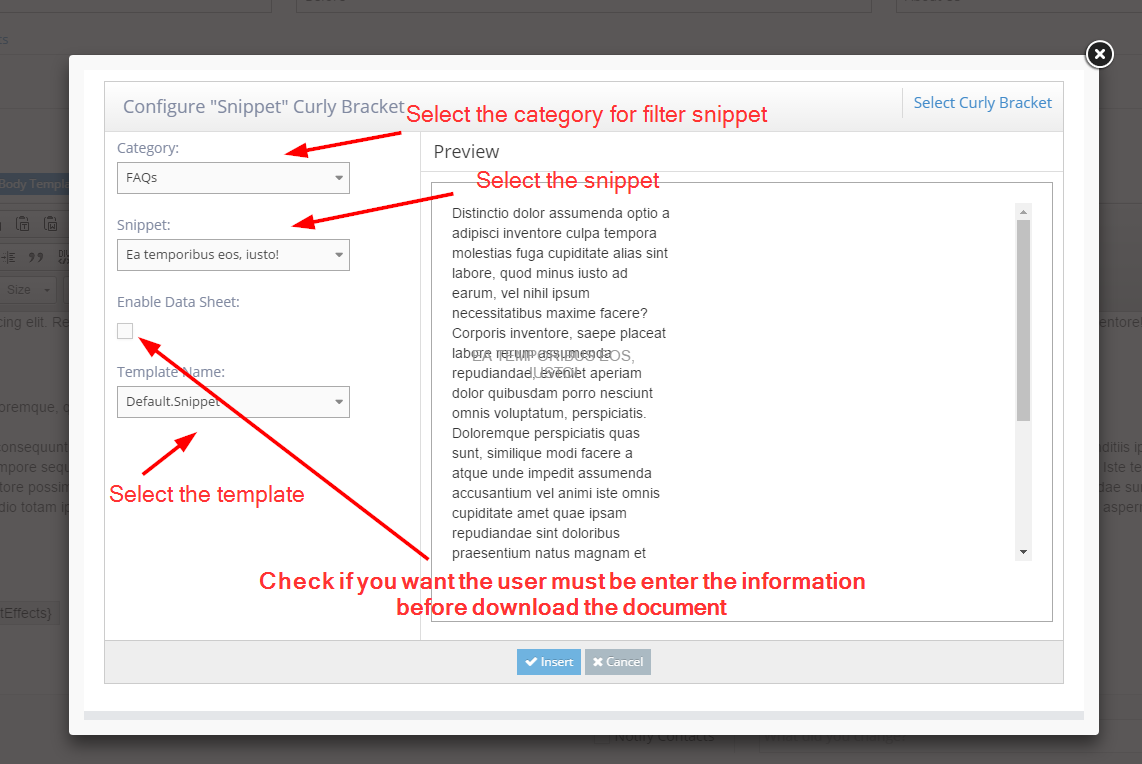
6The configuration popup will display. Setup configuration options on the left side and review the UI (User Interface) on the right side
- Category - select the category from the dropdown to filter the snippet
- Snippet - select the name of the snippet you want to display
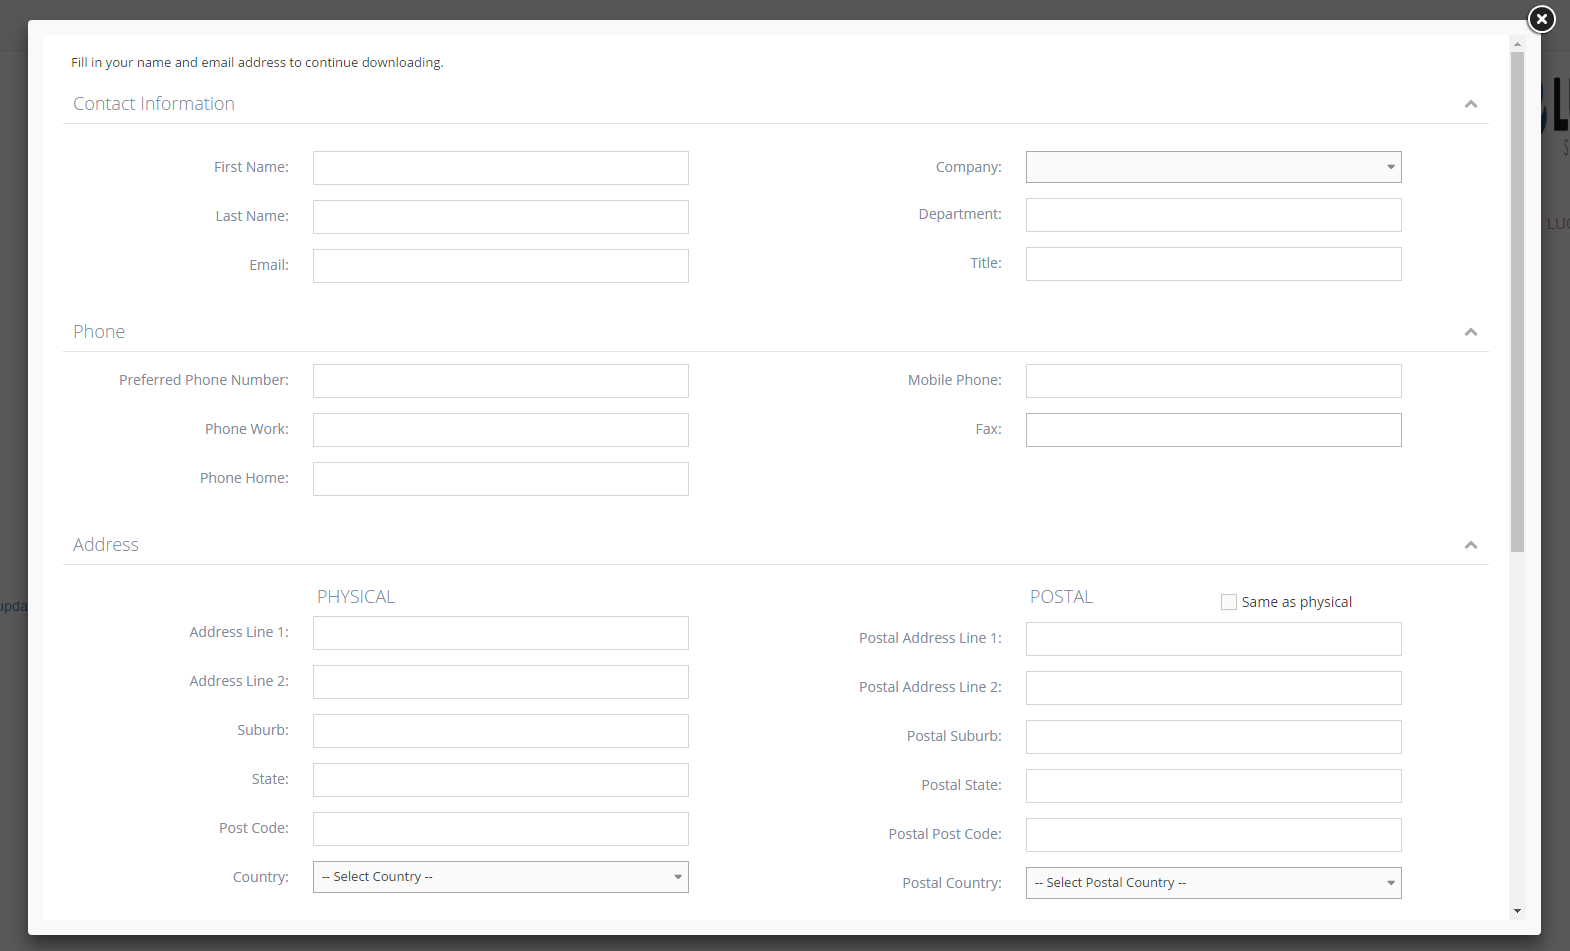
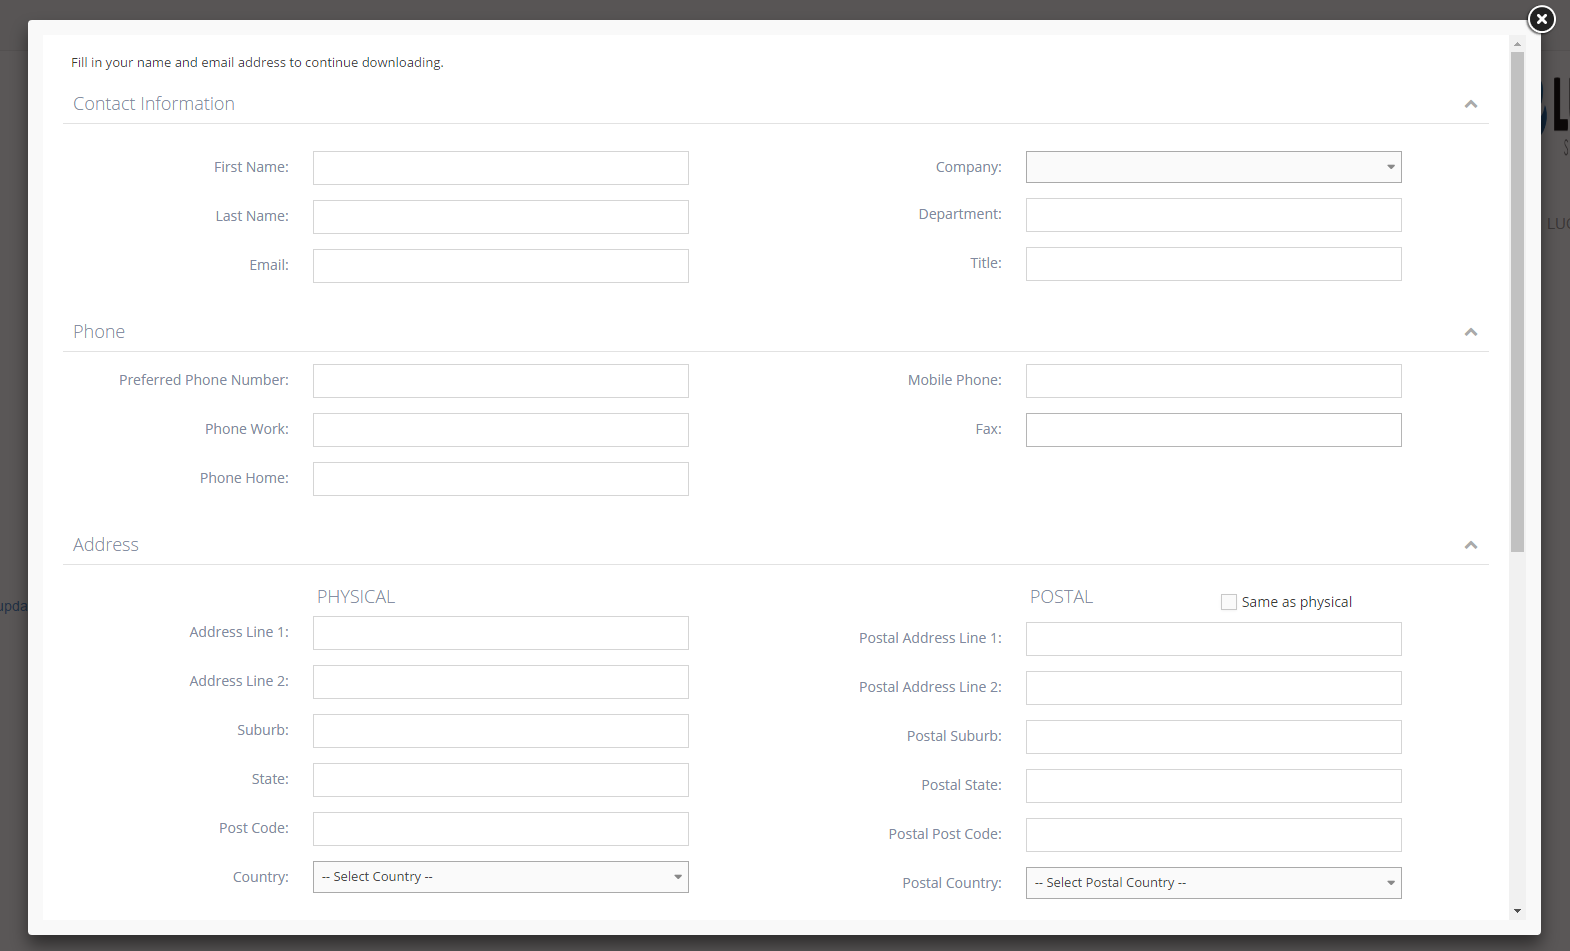
- Enable Data Sheet - a checkbox option where the user must enter first their information or details before they can download any document on the page.
- Template Name - select a template name from the select dropdown.
-
7Click the Insert button to save. Click the OK button in the next popup to complete.

-
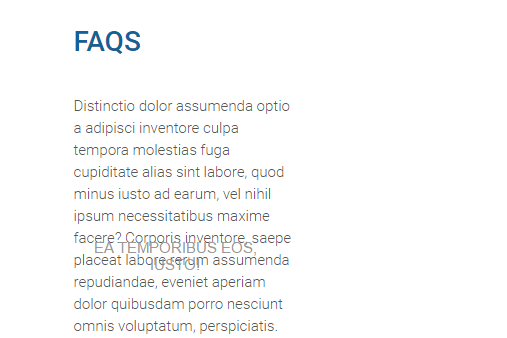
8Click Update And Close. Then you can see the snippet on the page
-
9Click on the snippet (has the document and enable data sheet from)
Snippets Effect
What is a snippet effect?
- The snippet effects are the list of the snippet by using {snippeteffects_xx}
- The snippet effects template has two places (one is the snippet category, and one is the snippet filter by snippet category)
Why you would use snippet effects?
- When you want to embed or include some content by using the snippet category into the site, you can use the {snippeteffects_xx} to implement.
How to create a new snippet category
STEP-BY-STEP
-
1Log in as an administrator and go to the Admin Dashboard.
Learn how to log in here → -
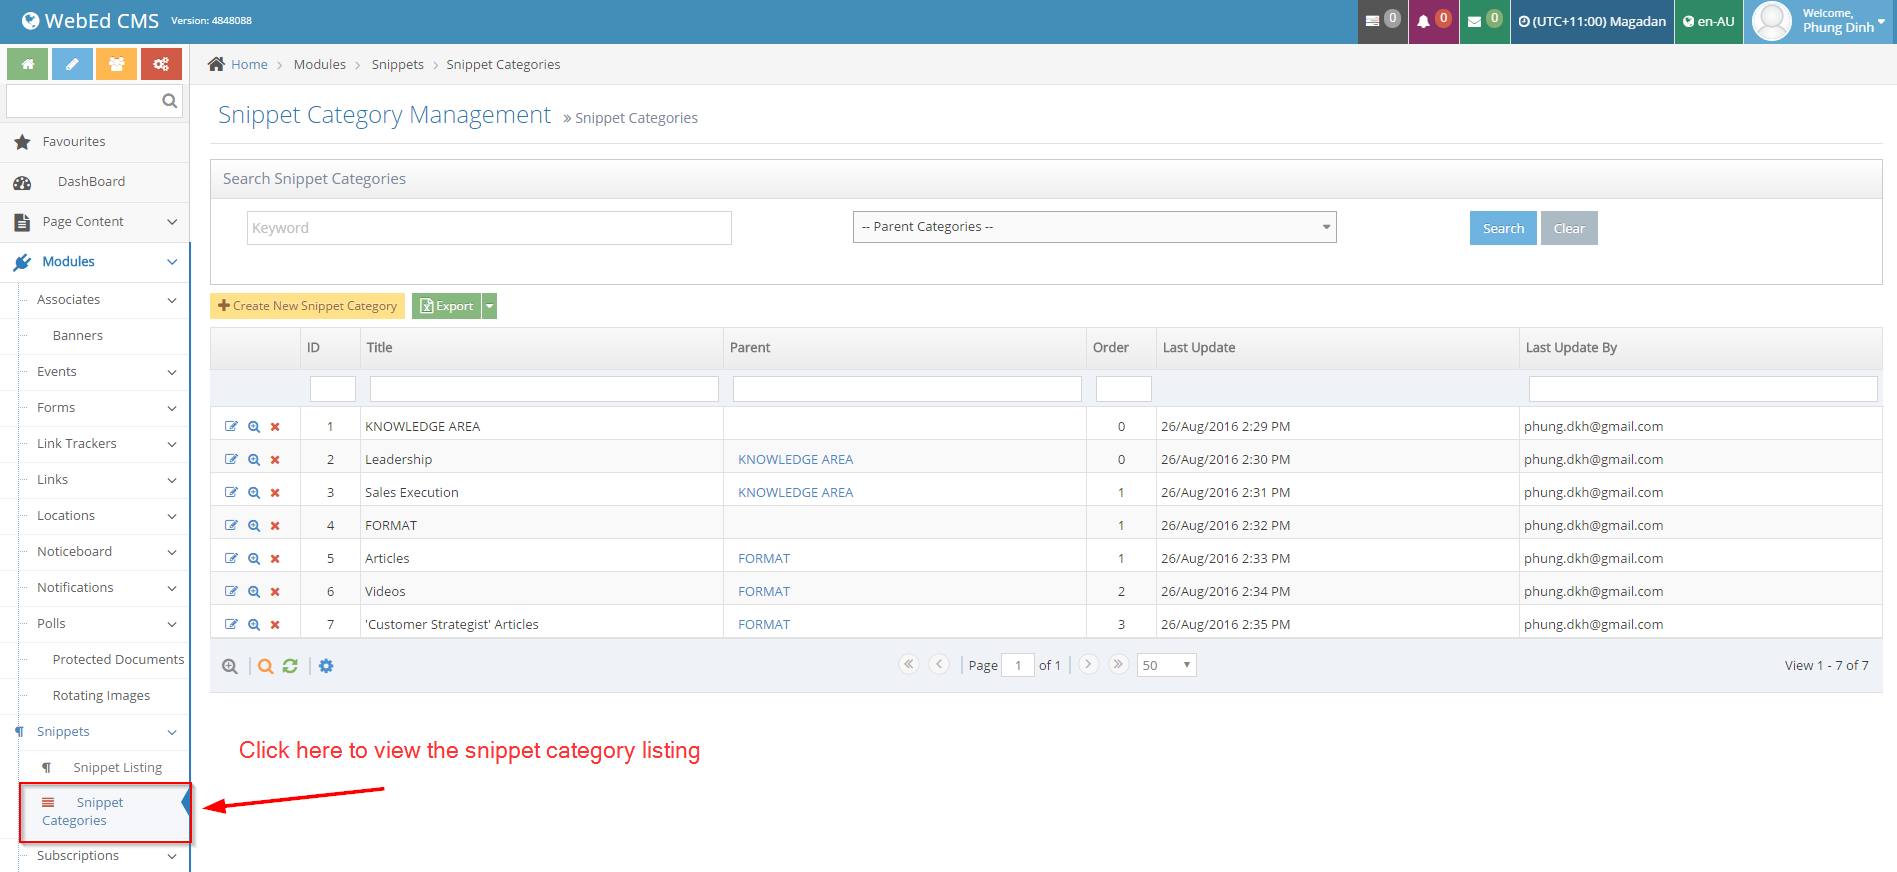
2Go to Admin Dashboard >> Modules >> Snippets >> Snippet Categories
-
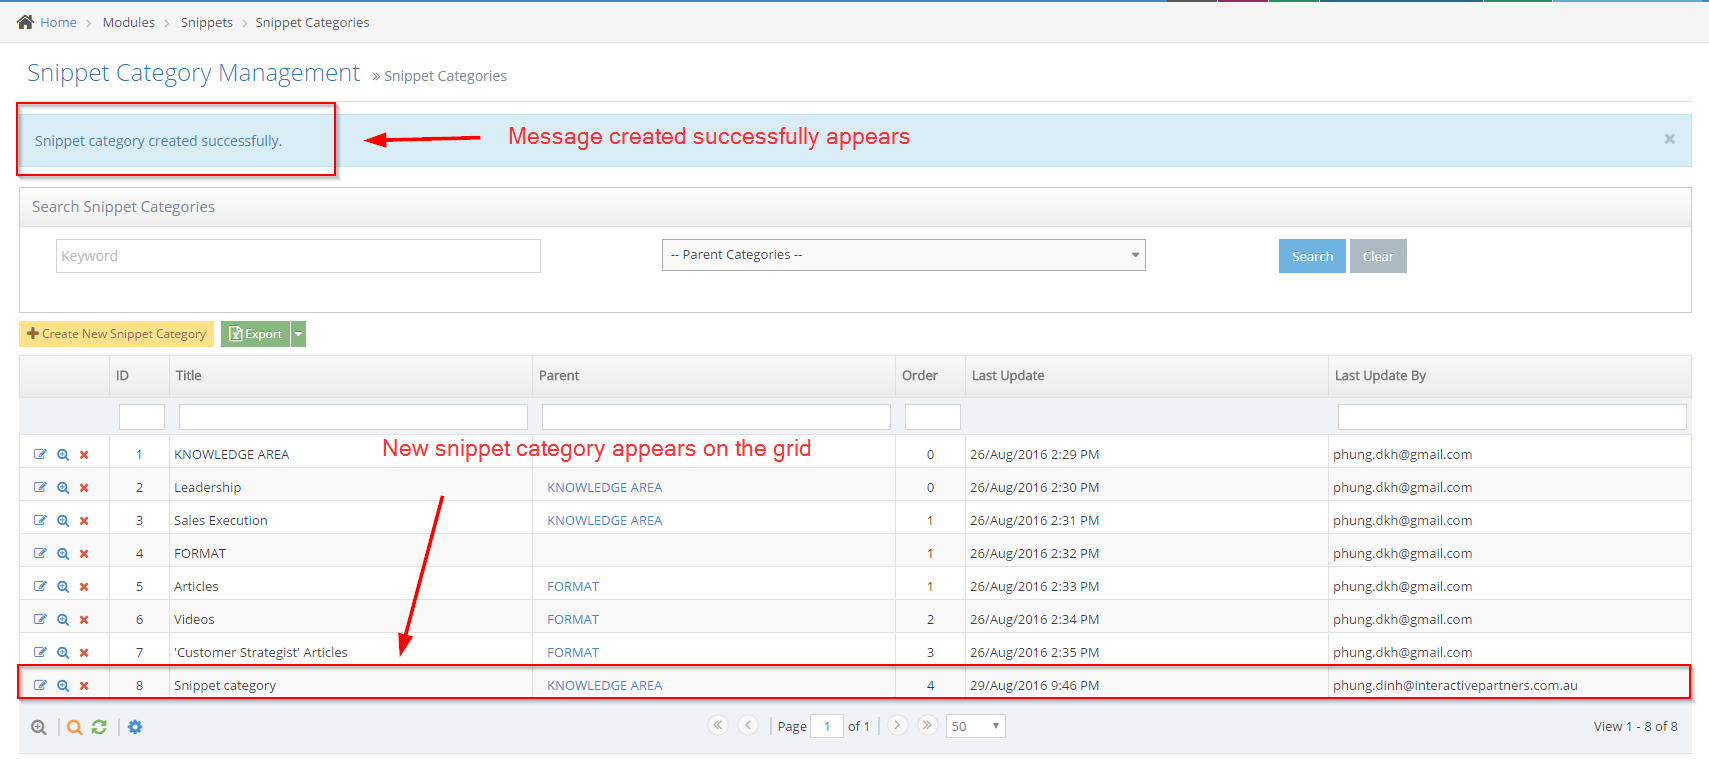
3Click Create New Snippet Category

-
4Enter Name, select Parent Category, enter the order

-
5Click Create
How to edit/view details/delete a snippet category
STEP-BY-STEP
-
1Log in as an administrator and go to the Admin Dashboard.
Learn how to log in here → -
2Go to Admin Dashboard >> Modules >> Snippets >> Snippet Categories

-
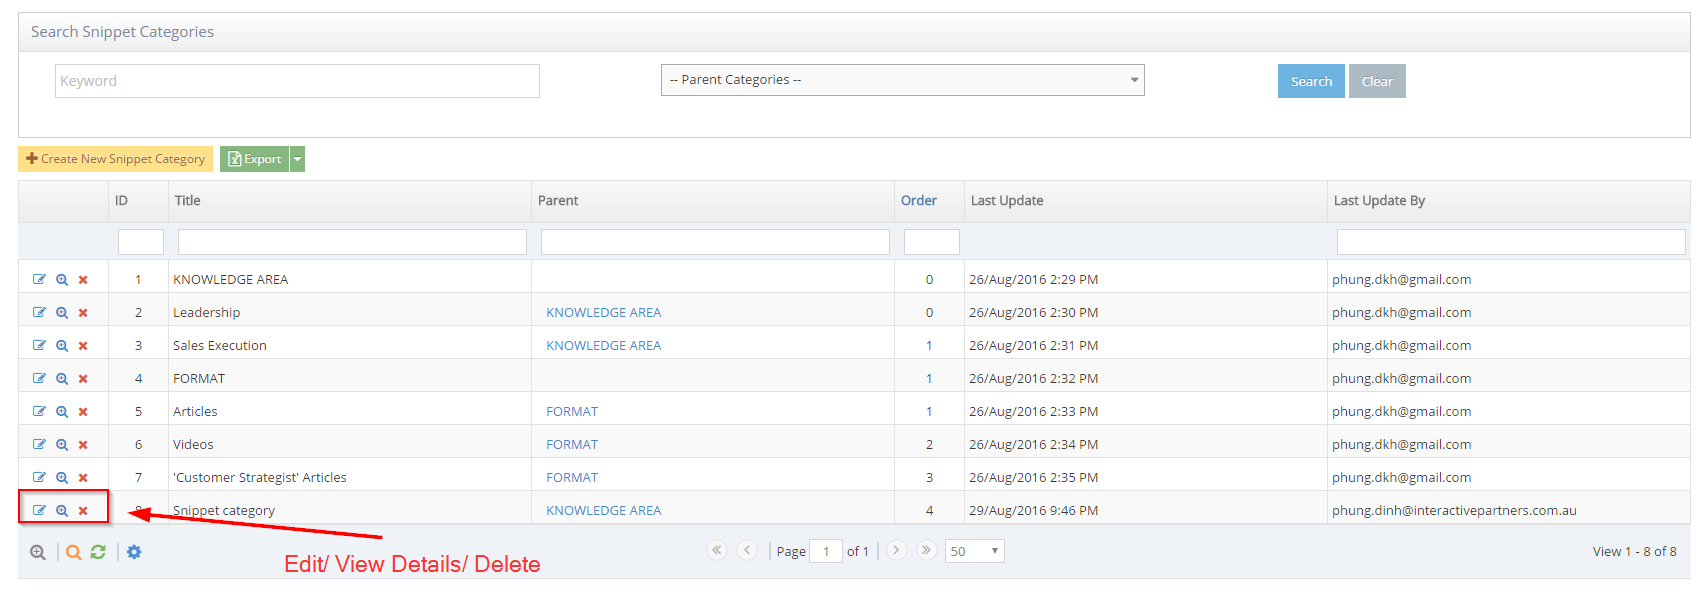
3Click the Edit/View Details/Delete icon on a snippet category
How to add display snippet effect curly bracket to page
STEP-BY-STEP
-
1Log in as an administrator and go to the Admin Dashboard.
Learn how to log in here → -
2Go to the page that you want to show the snippet and click Edit

-
3On the editor click the Curly Bracket button to open the configuration curly brackets

-
4Click the Configure button in the popup

-
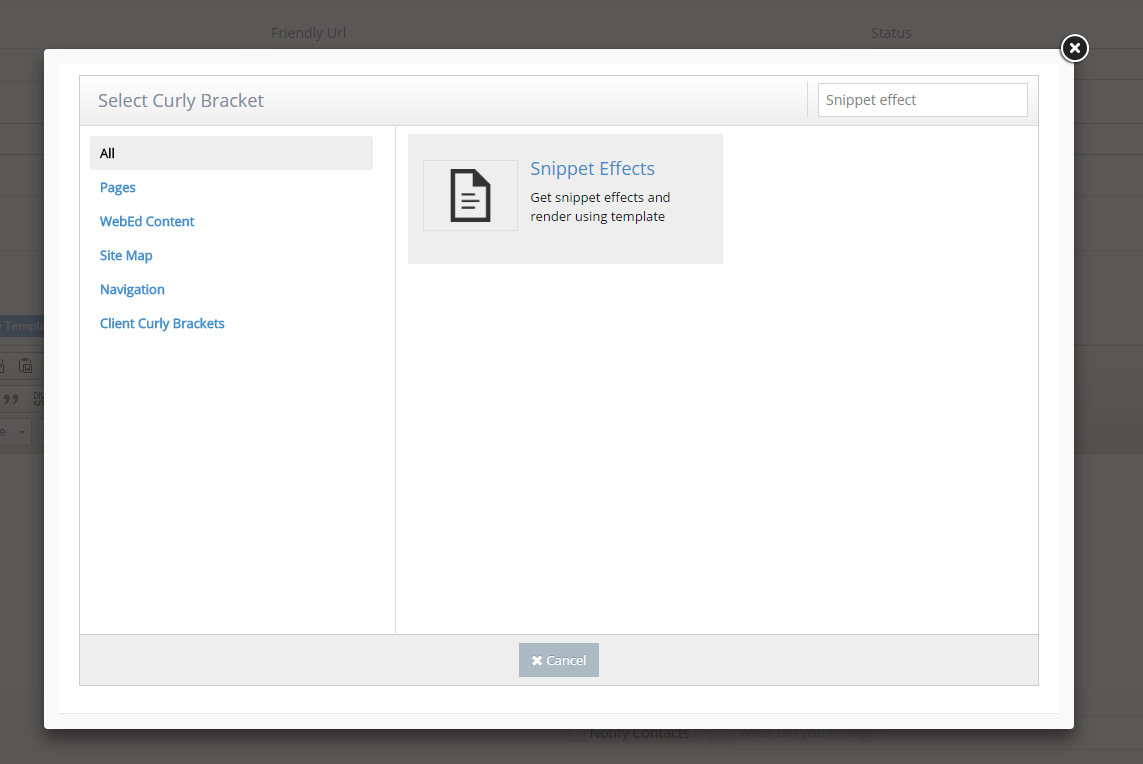
5Search Snippet Effects on the new popup and click the Snippet Effects item in the resulting search
-
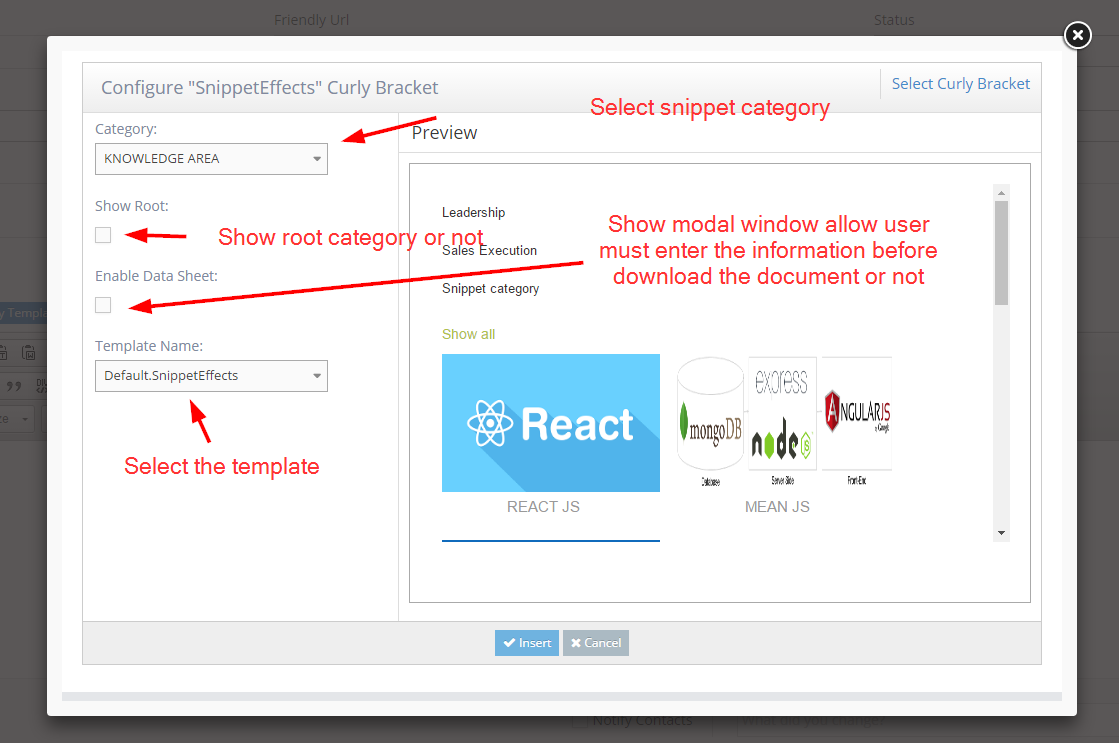
6A configuration popup will be shown. Config options on the left side and review the UI on the right side
-
7Click the Insert button to save. Click the OK button in the next popup to complete.

-
8Click the Update And Close button. Then you can see the snippet effect curly bracket on the page

-
9Click on the snippet (has the document and enable data sheet from)
