- Locations Module Overview
- How to Edit/View/Delete a location
- Searching Locations
- Location Types
- Managing Location Types
- How to Edit/View/Delete a Location Type
- Remove a Location from a Location type
- LocationsOnMapWithGeoCode Module
- How to Customize or Create a new TemplateName for LocationsOnMapWithGeoCode
- How to Create Locator Module
- How to Customize or Create new a TemplateName for Locator
Locations Module
Locations Module Overview
The locations module allows you to put a map of locations including driving directions on your website. Location can be any related entity such as branch offices, outlets, resellers, partners, suppliers or anything related to your website. The database of locations can be segmented by location type allowing you to have multiple maps of location types or different icons for say sales and service centres. Locations can be managed via a drag-and-drop interface to allow for precise positioning of any location.
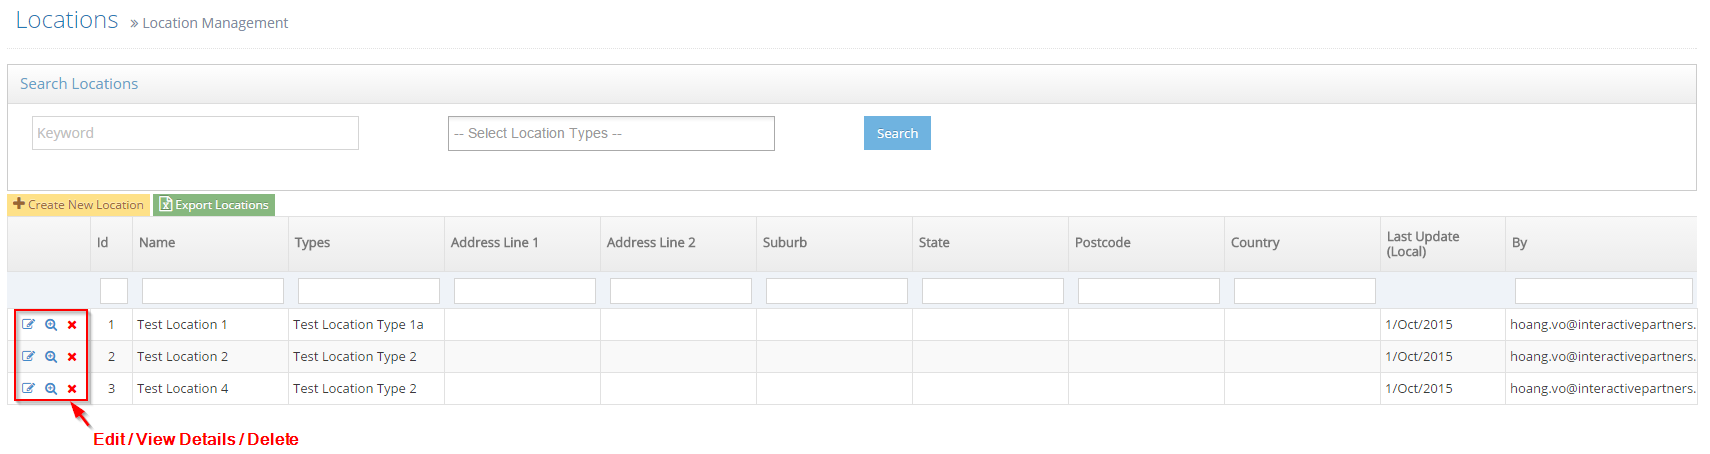
How to Edit/View/Delete a location
-
1Log in as an administrator and go to the Admin Dashboard.
Learn how to log in here → -
2Go to Admin Dashboard >> Modules >> Locations >> Location Listing
-
3Click Edit/View Details/Delete icon on a location
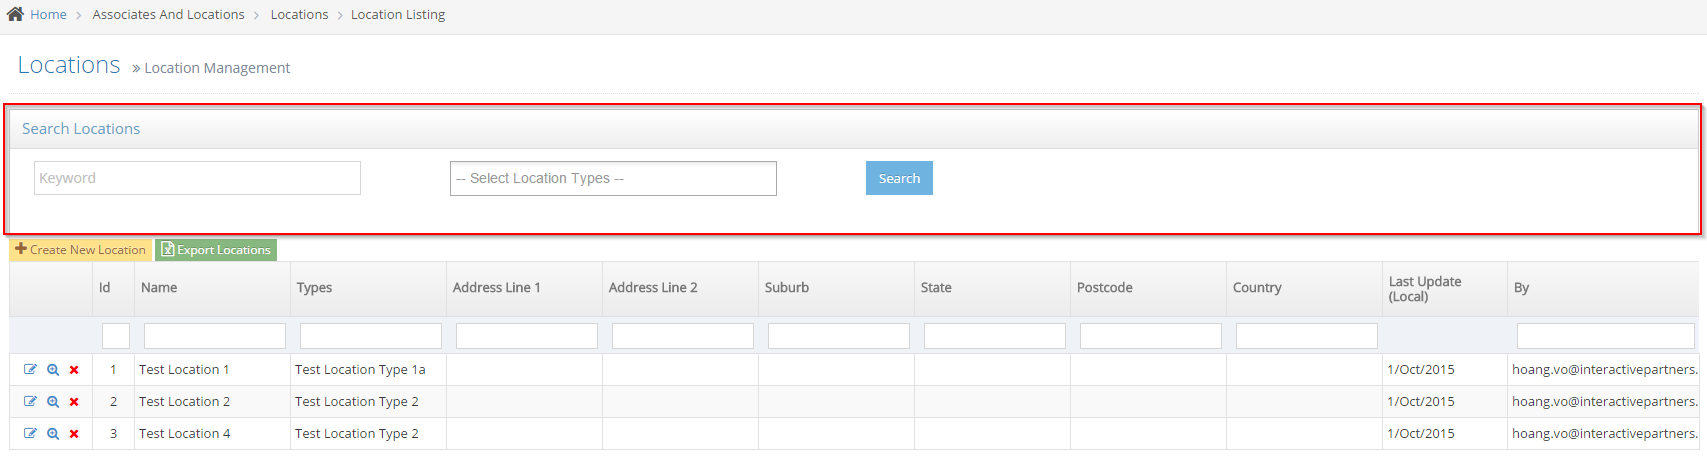
Searching Locations
-
1Log in as an administrator and go to the Admin Dashboard.
Learn how to log in here → -
2Go to Admin Dashboard >> Associates And Locations >> Locations >> Location Listing
-
3Users can use Search Locations to search locations by keyword and/or location types
-
4Input keyword to search for the location name
-
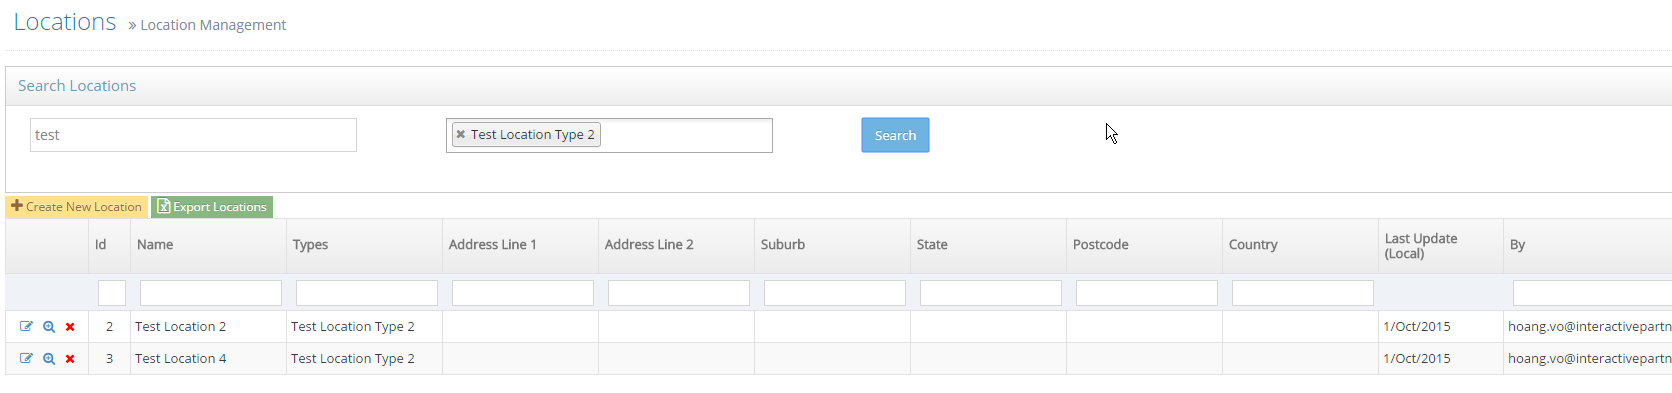
5Optionally select the location types
-
6Click Search
-
7List of locations that matched search information display.
Location Types
Grouping Locations by type gives you better control of your locations
You can then use only a specific location type on a map displayed on your site
Or display different location types with different icons to differentiate your visitors
Managing Location Types
-
1Log in as an administrator and go to the Admin Dashboard.
Learn how to log in here → -
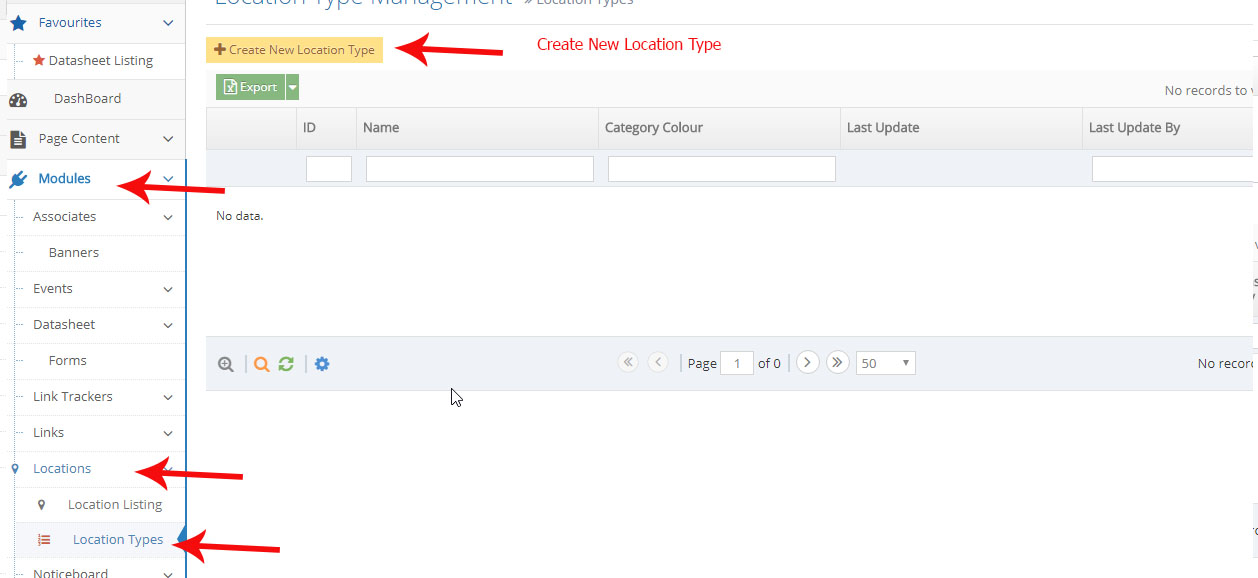
2Go to Admin Dashboard >> Modules >> Locations >> Location Types and click Create New Location Type
-
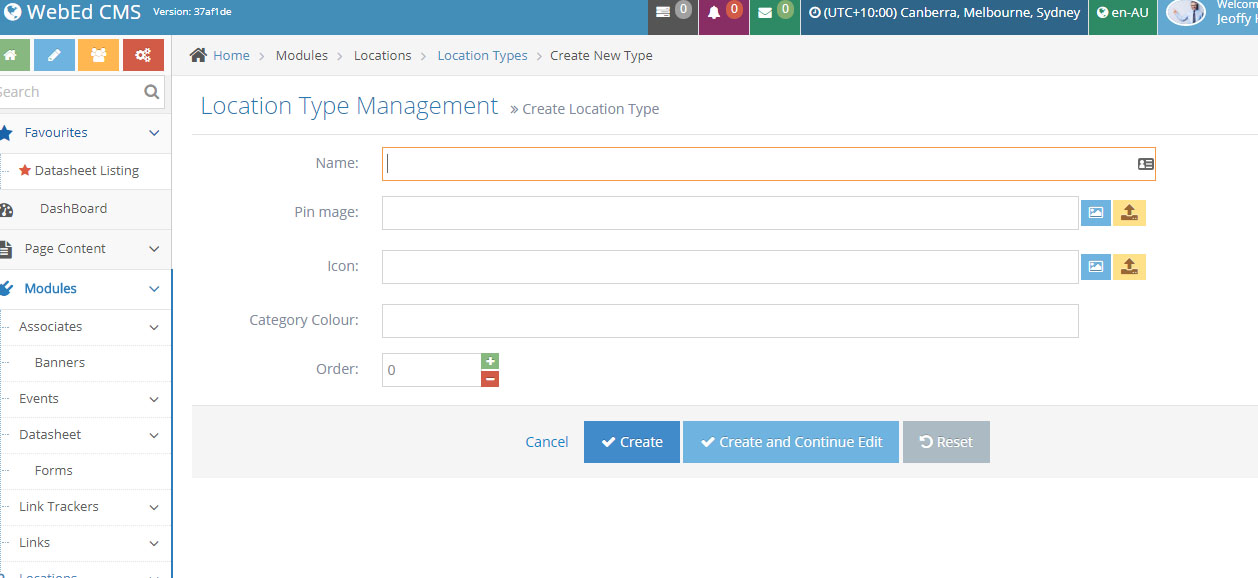
3Input information for new location type.
- Name - the name of the location type
- Pin Image: the pin image, or map pin that is used for all locations using this location type
- Icon - select existing or upload image icon
- Category Colour - an automated colour selection that can be used for identifying the category through colour code
- Order - the order number of your location type on the grid list
-
4Click Create
How to Edit/View/Delete a Location Type
These steps will guide you on how to create/customize the display and styles of your LocationsOnMapWithGeoCode curly bracket.
-
1Log in as an administrator and go to the Admin Dashboard.
Learn how to log in here → -
2Go to Admin Dashboard >> Modules >> Locations >> Location Types
-
3Click the Edit/View Details/Delete icon on a location type
-
4You cannot delete a location that is used by a location
-
5See below for how to remove a Location from a Location type before deleting

Remove a Location from a Location type
Notes:
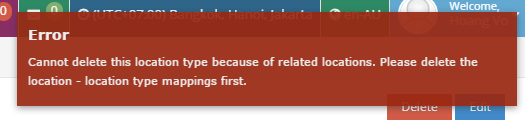
- Users cannot delete a location that is linked to a location type.
- If you are trying to delete a location with a location type, you will get the following message.
- Removing the mapping between the location and location type will allow you to delete the location
-
1Log in as an administrator and go to the Admin Dashboard.
Learn how to log in here → -
2Go to Admin Dashboard >> Modules >> Locations >> Location Types
-
3Click the View Details icon on a location type
-
4Click the Remove mapping icon to remove the Location from the Location Type

-
5Now you can delete the Location from the Locations listing.
LocationsOnMapWithGeoCode Module
-
1Log in as an administrator and go to the Admin Dashboard.
Learn how to log in here → -
2Make sure you added the Location Types before you can proceed to use the LocationsonMapWithGeoCode module.
-
3Go to Pages and open the page content editor where you want to add this curly bracket.
-
3In the editor, click the Curly Bracket icon to open the configuration curly brackets

-
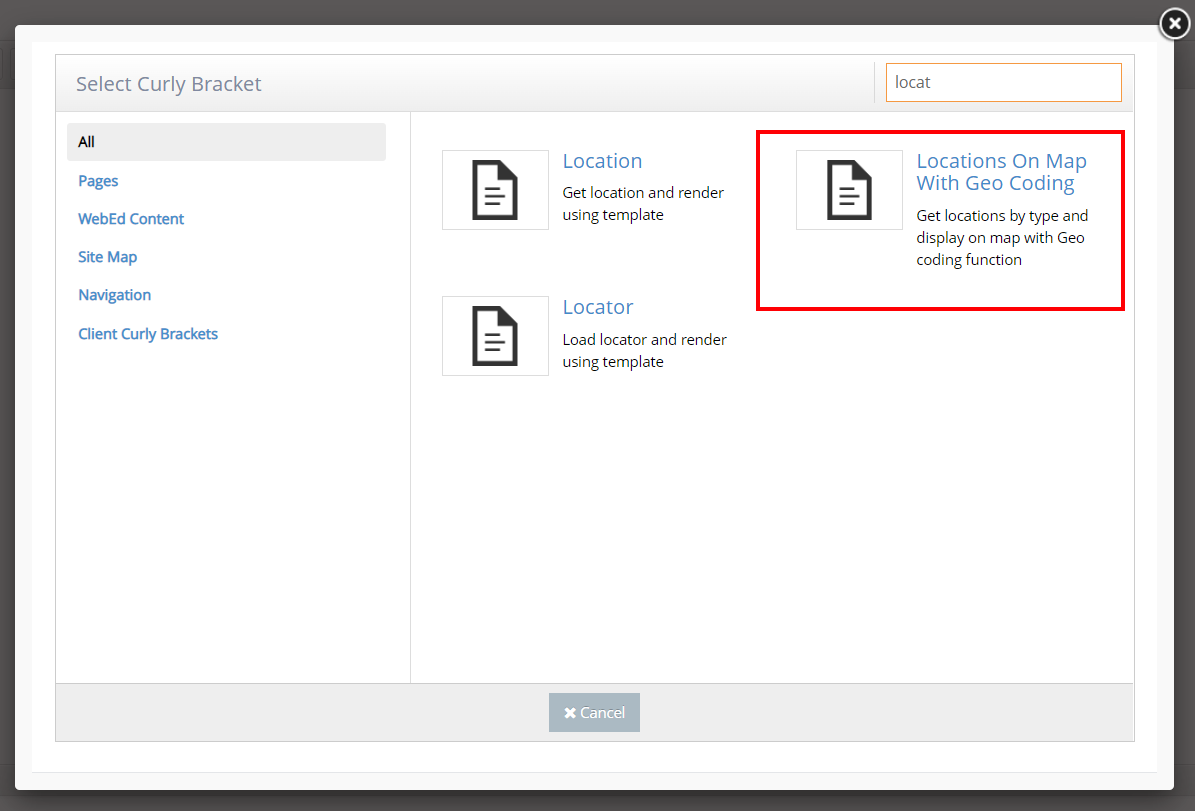
4Once clicked, the Curly Bracket box pops up and there you can see all the list of Curly Bracket modules

-
4In the Search box, you can put the specific name of the Curly Bracket that you want to create. Search for Locations and click on the LocationsOnMapWithGeoCode item in the search results box.
-
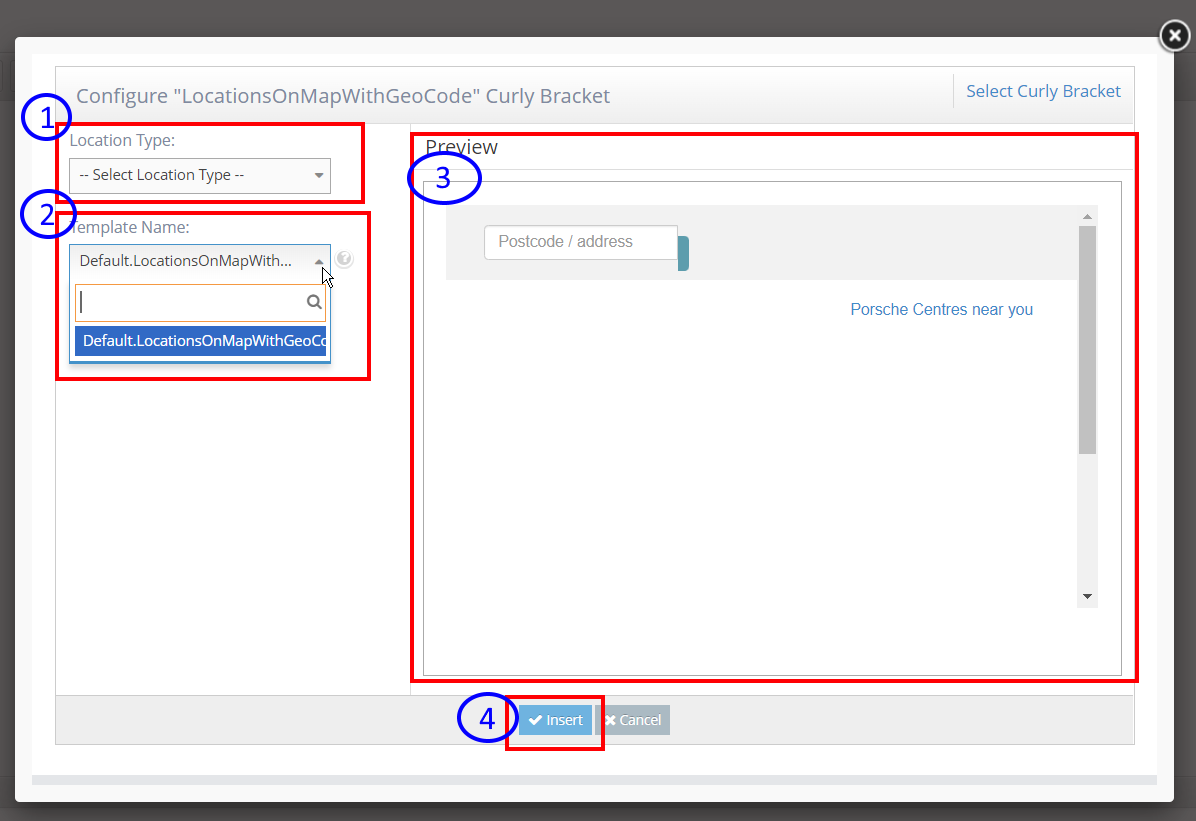
3The Configure "LocationsOnMapWithGeoCode" will display. Set up configuration options on the left side and review the UI (User Interface) on the right side.
- Location Type - Select the location type from the dropdown on which the locations are gotten based, if not defined all locations will be gotten.
- Template Name - select a template name from the dropdown. It is used for rendering, if not selected then the default template will be used.
- Preview - this is where to display the preview of your selected module.
- Insert - click this button to insert in your page content editor.
-
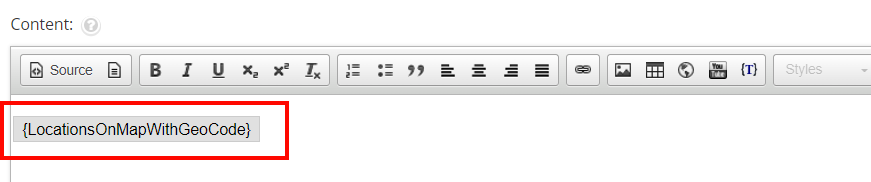
3Click Update And Close. Then you can see the LocationsOnMap on the page
How to Customize or Create a new TemplateName for LocationsOnMapWithGeoCode
These steps will guide you on how to create/customize the display and styles of your LocationsOnMapWithGeoCode curly bracket.
-
1Log in as an administrator and go to the Admin Dashboard.
Learn how to log in here → -
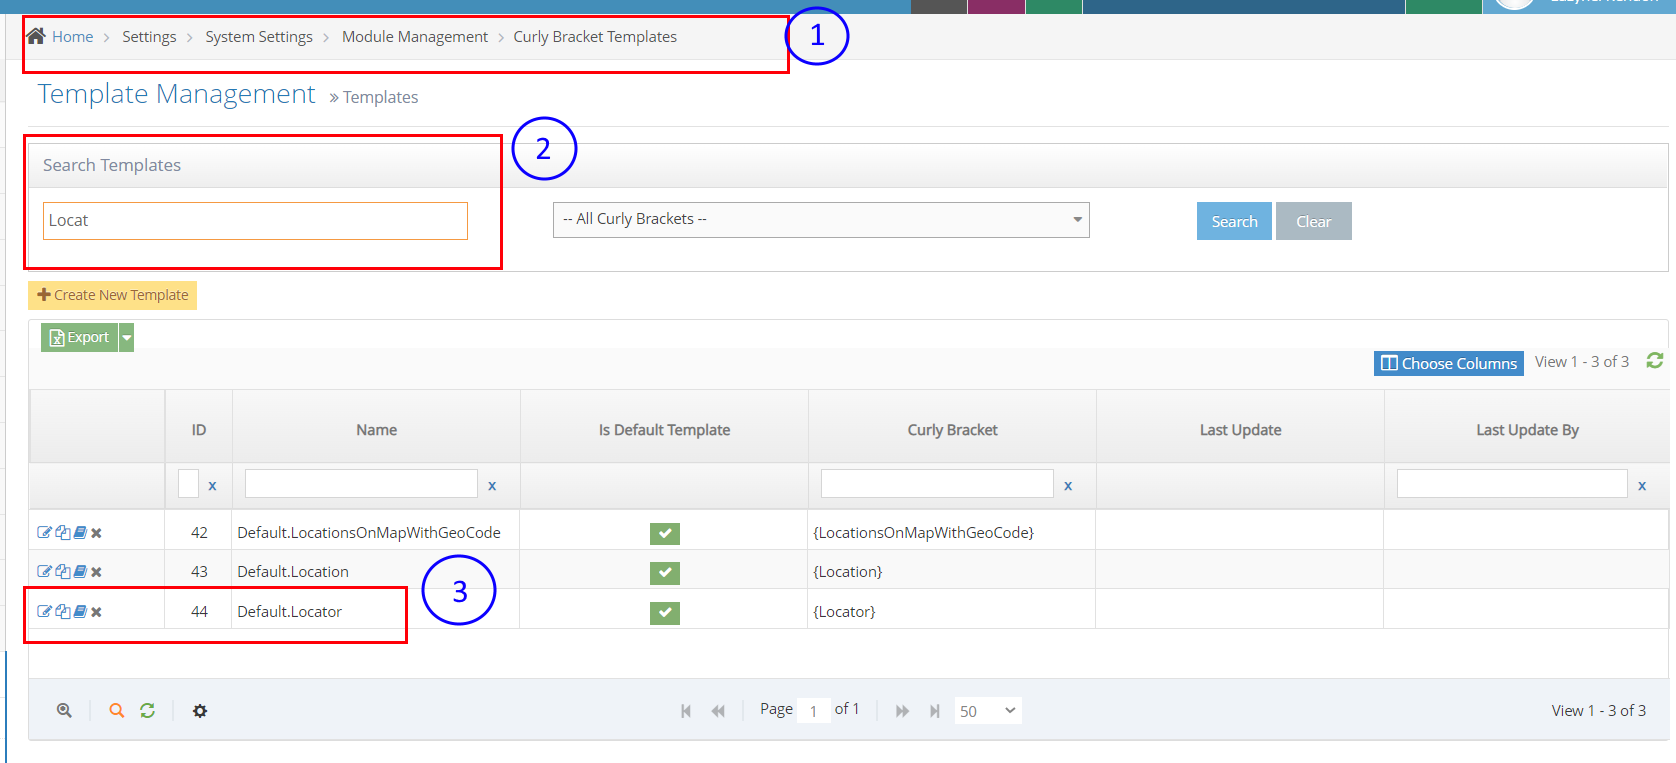
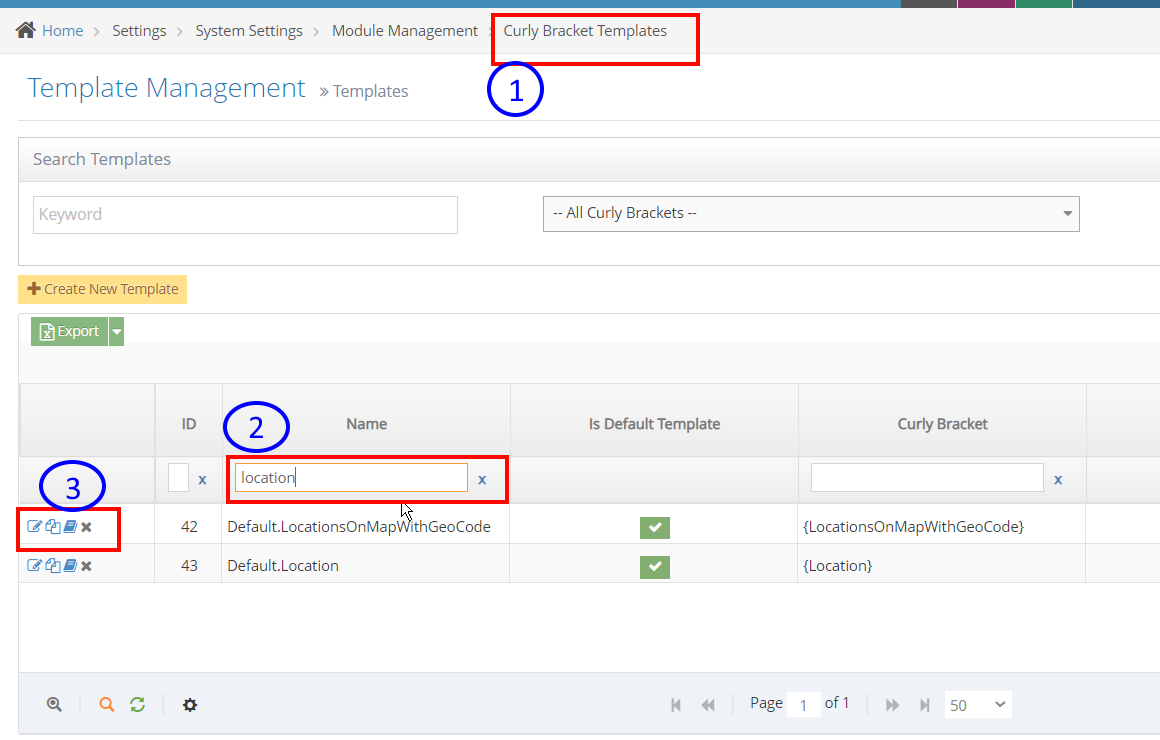
2Search for Curly Bracket Templates

-
3Or you may directly go to Home > Settings > System Settings > Module Management > Curly Bracket Templates
-
4Once you're on the Template Management page, you can search template name in the text fields.
-
5On the left side icons, there you can edit the Template or you can duplicate a template to create a new one.
How to Create Locator Module
-
1Log in as an administrator and go to the Admin Dashboard.
Learn how to log in here → -
2Make sure you added the Location Types before you can proceed to use the Locator module.
-
3Go to Pages and open the page content editor where you want to add this curly bracket.
-
4In the editor, click the Curly Bracket icon to open the configuration curly brackets
-
5Once clicked, the Curly Bracket box pops up and there you can see the list of Curly Bracket modules
-
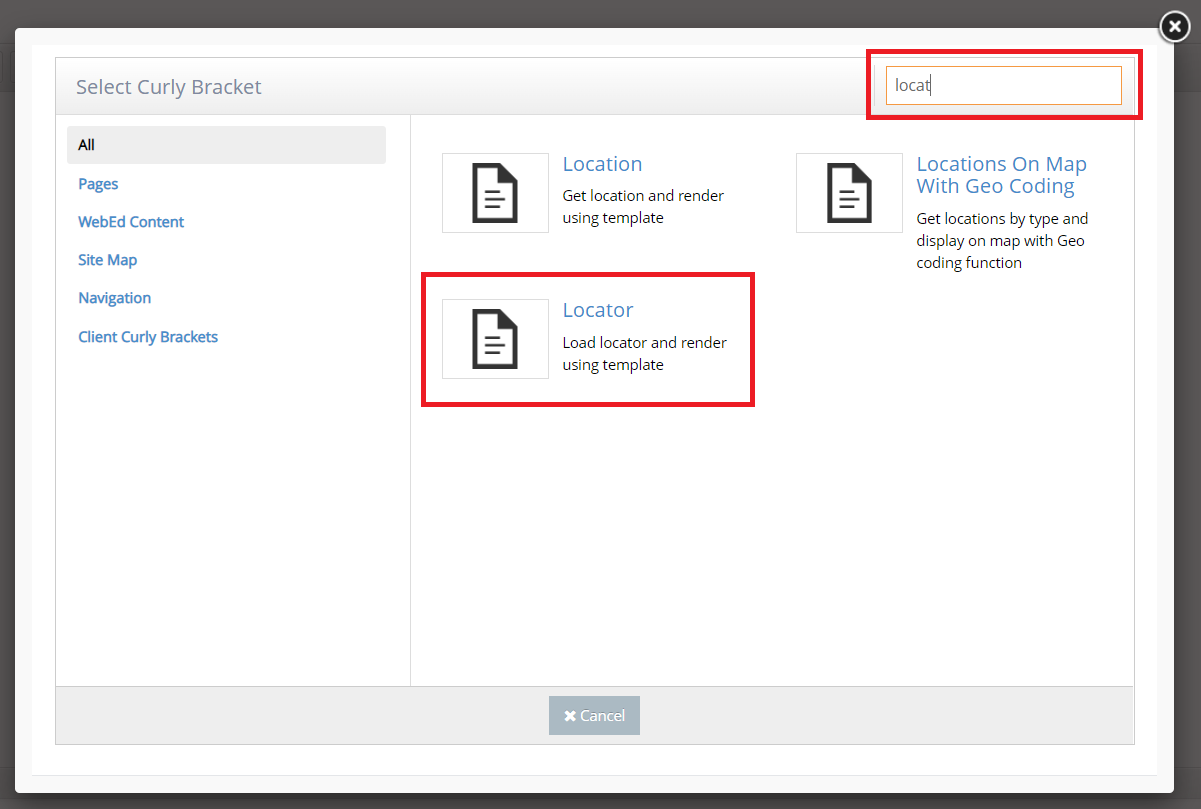
6In the Search box, you can put the specific name of the Curly Bracket that you want to create. Search for Locator and click on the Locator item in the search results box.
-
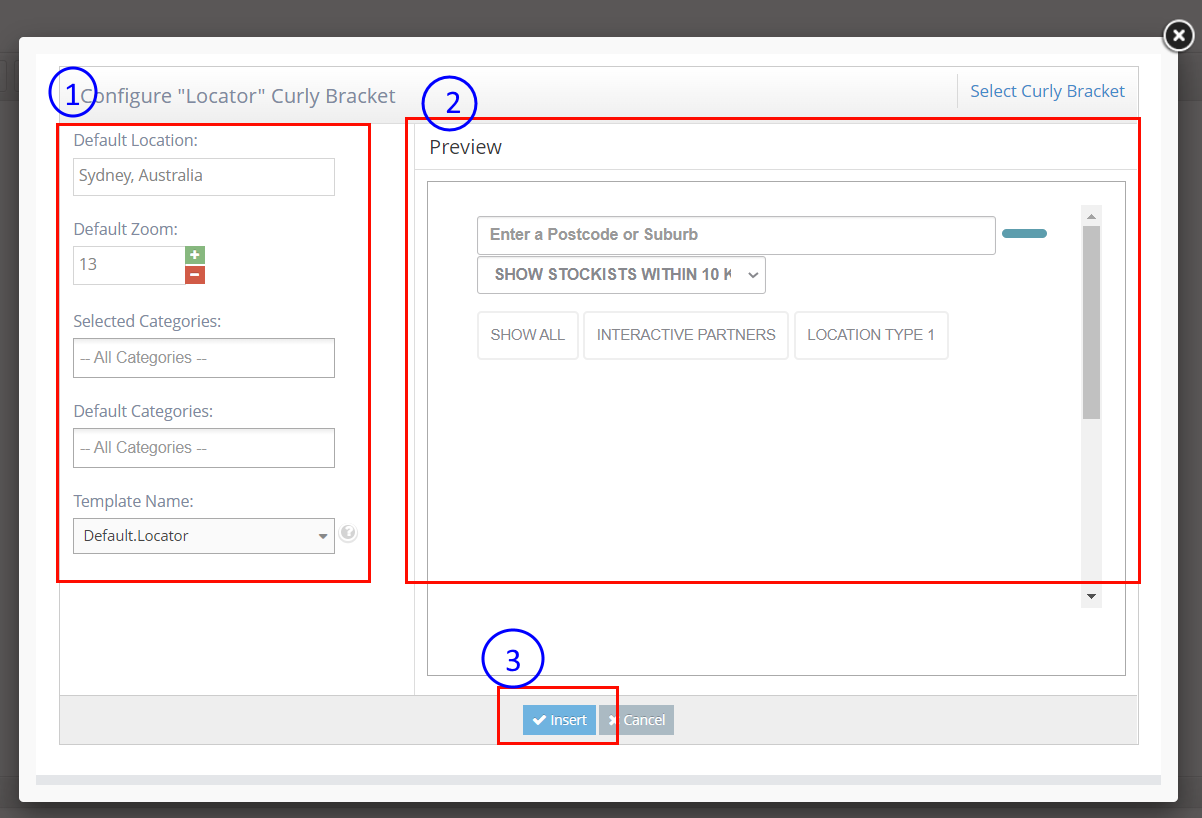
7The Configure "Locator" will display. Set up configuration options on the left side and review the UI (User Interface) on the right side.
- Parameter Names - this is where you can set the required value for your Locator module.
- Preview - this is where to display the preview of your selected module.
- Insert - click this button to insert in your page content editor.
-
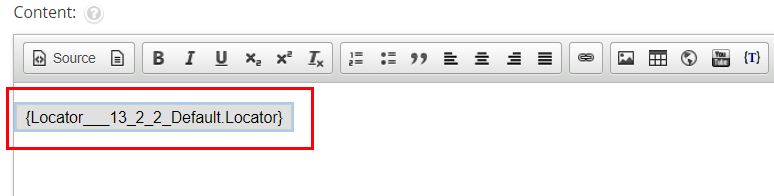
8Click Update And Close. Then you can see the Locator on the page.
How to Customize or Create new a TemplateName for Locator
These steps will guide you on how to create/customize the display and styles of your Locator curly bracket.
-
1Log in as an administrator and go to the Admin Dashboard.
Learn how to log in here → -
2Go to the Admin, search for Curly Bracket Templates. before you can proceed to use the Locator module.
-
3Or you may directly go to Home > Settings > System Settings > Module Management > Curly Bracket Templates
-
4Once you're on the Template Management page, you can search the template name of the curly bracket module in the text fields.
-
5On the left side icons, there you can edit the Template or you can duplicate a template to create a new one.