Testimonials Module Overview
WebEd Testimonial Module displays random customer testimonials throughout the website. Testimonials are a powerful tool for endorsing the virtues of your product or service and we recommend their use throughout your website, particularly on the home page and any page that references your products and services. This module allows for quick and easy adding and display of testimonials throughout your site.
What are the benefits?
- Add credibility to your website and company.
- As this module will randomly post different testimonials throughout the website the visitors will be viewing a range of different testimonials and this will ensure that the website remains fresh.
Adding a Testimonial
STEP-BY-STEP
-
1Log in as an administrator and go to the Admin Dashboard.
Learn how to log in here → -
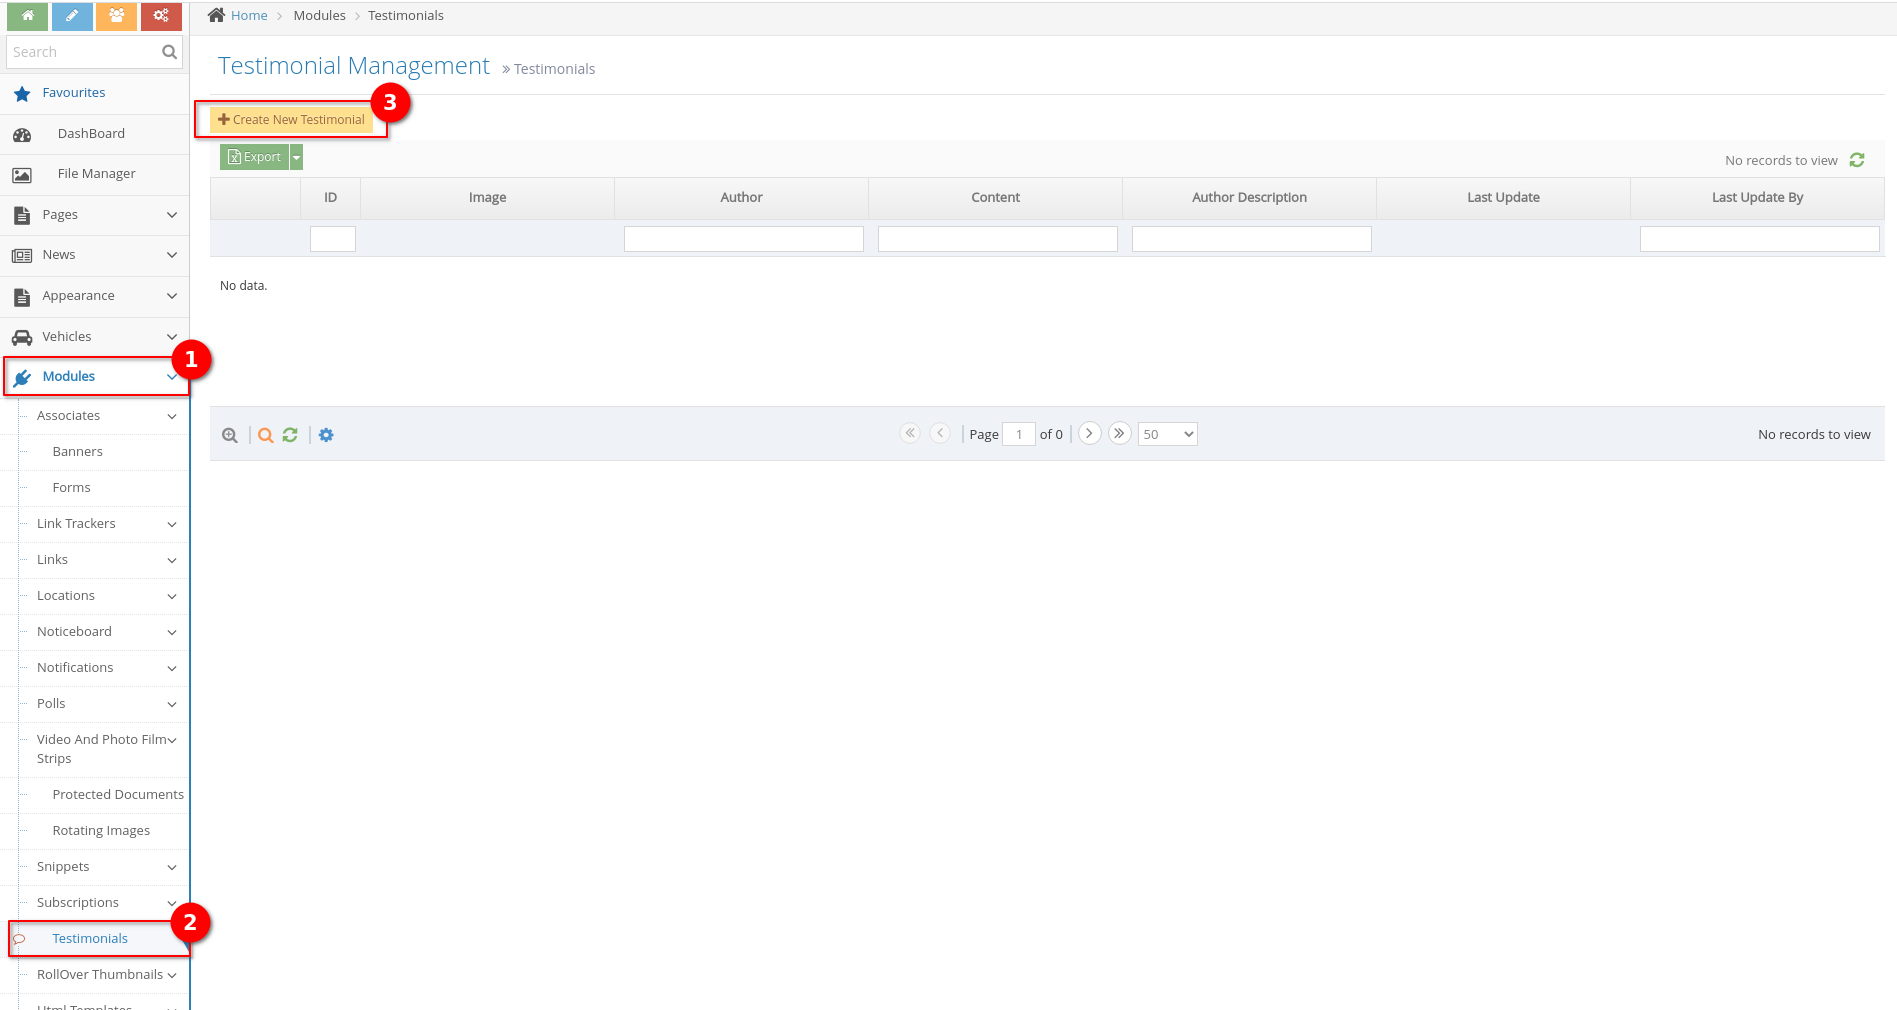
2In the left menu, select: Modules > Testimonials
-
3Click the Create New Testimonial button
-
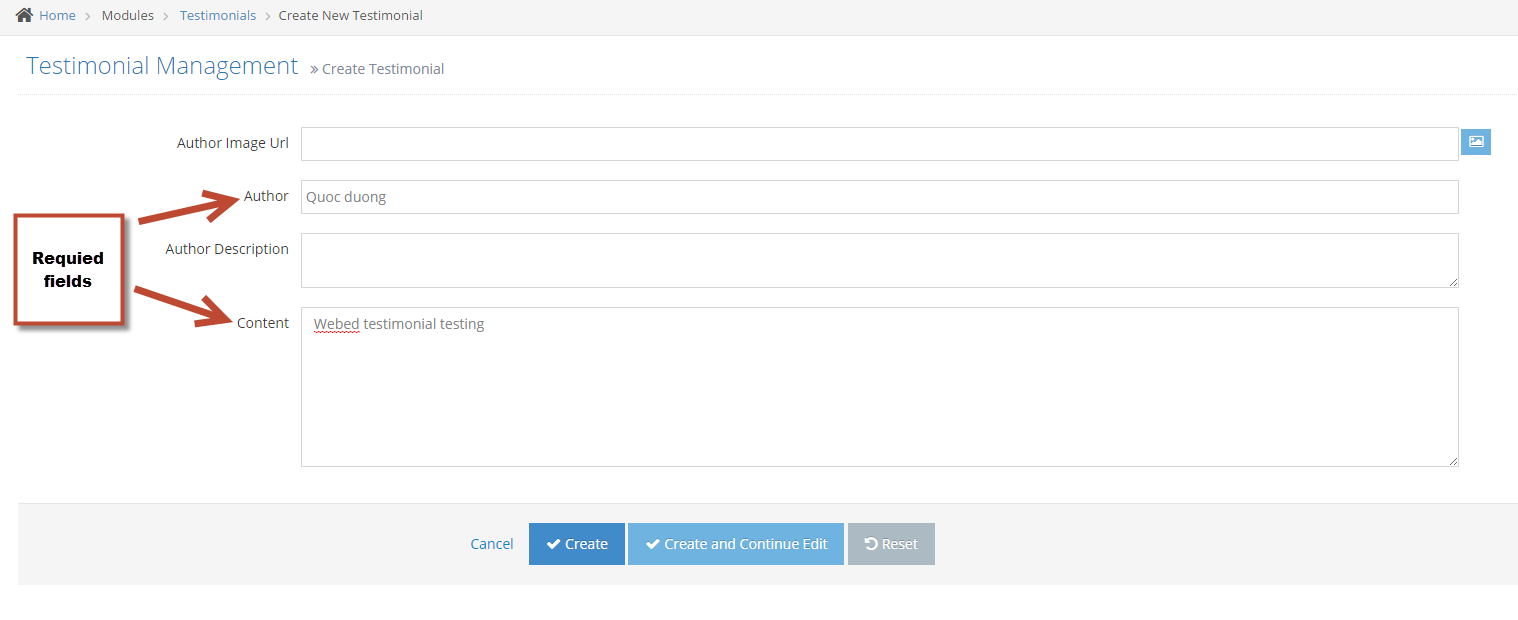
4You are now on the Create New Testimonial page
-
5Enter the information on the fields as needed, just remember that the Author and Content fields are required. Other fields are optional.
-
6Click Create and Continue Edit to create and stay on the page, or Create to create the testimonial and go back to the Testimonials page.
Optional Author Images
You may want to include an author image (or other) with the testimonial to give it more effect
STEP-BY-STEP
-
1Select Author Image: Click the Icon after the Author Image URL text box.

-
2In the new popup, select the image in the root or subfolder.

Note: If you don't insert an Author Image, the Testimonials will be displayed as a default image.
Editing a Testimonial
STEP-BY-STEP
-
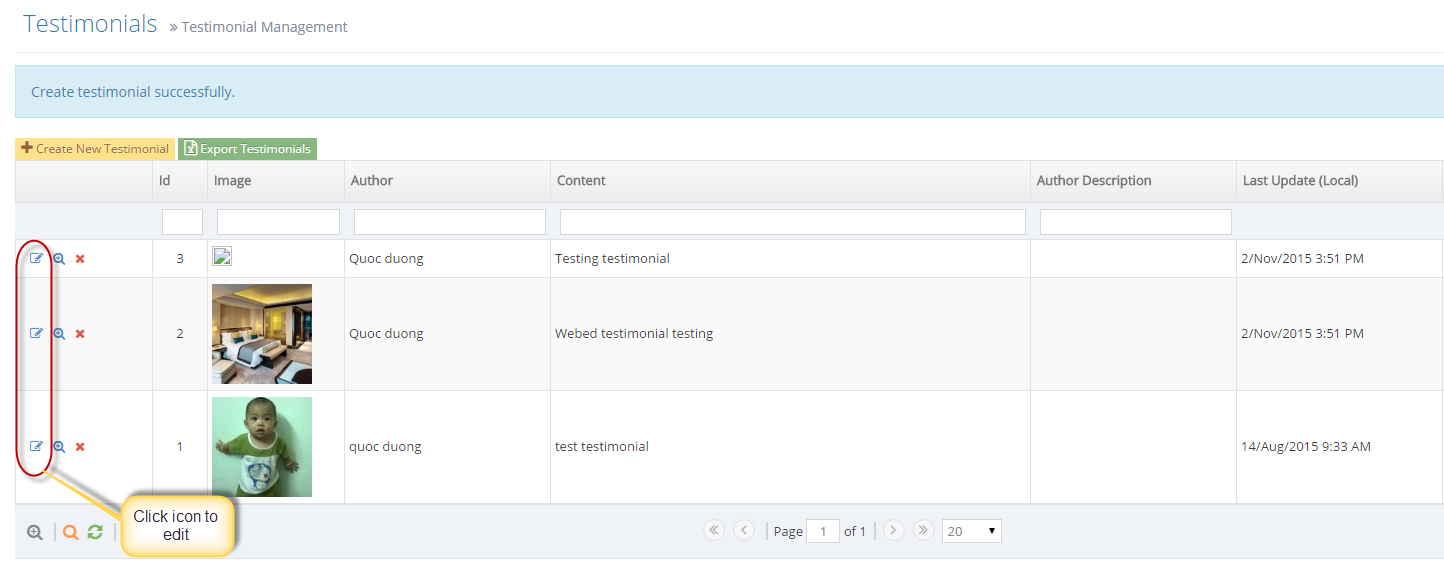
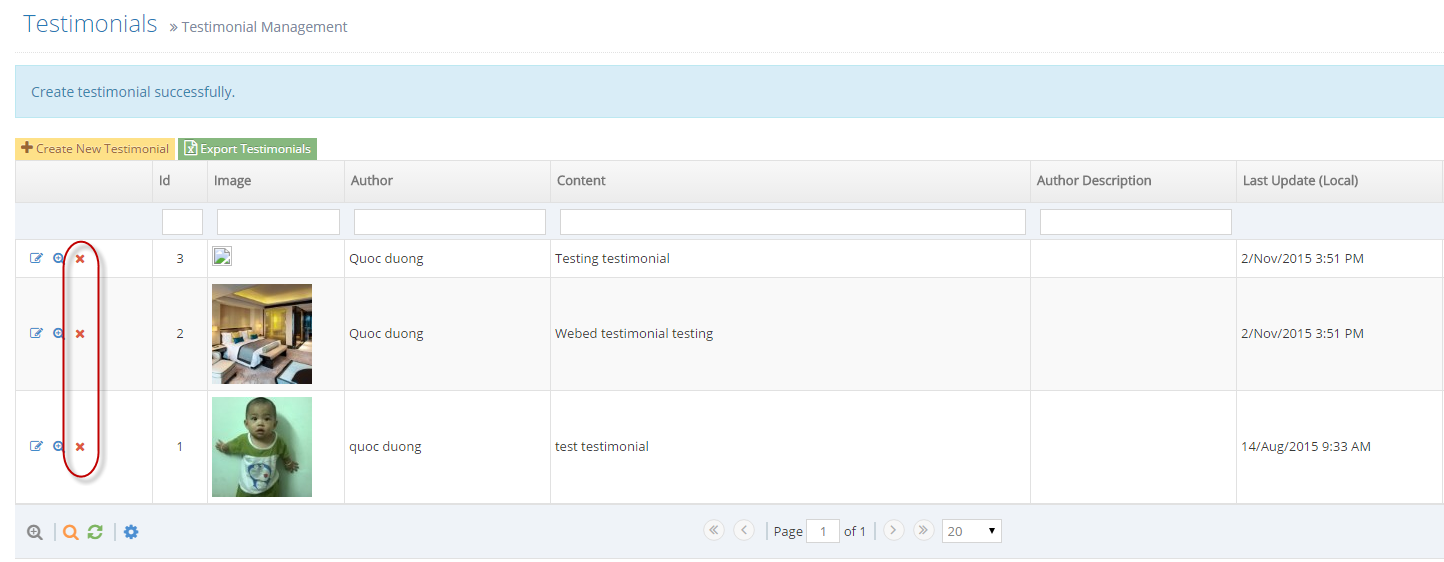
1To Edit a Testimonial: Click on the Edit icon to edit a Testimonial.
-
2To Delete Testimonial: Click the Delete icon to delete a Testimonial.
-
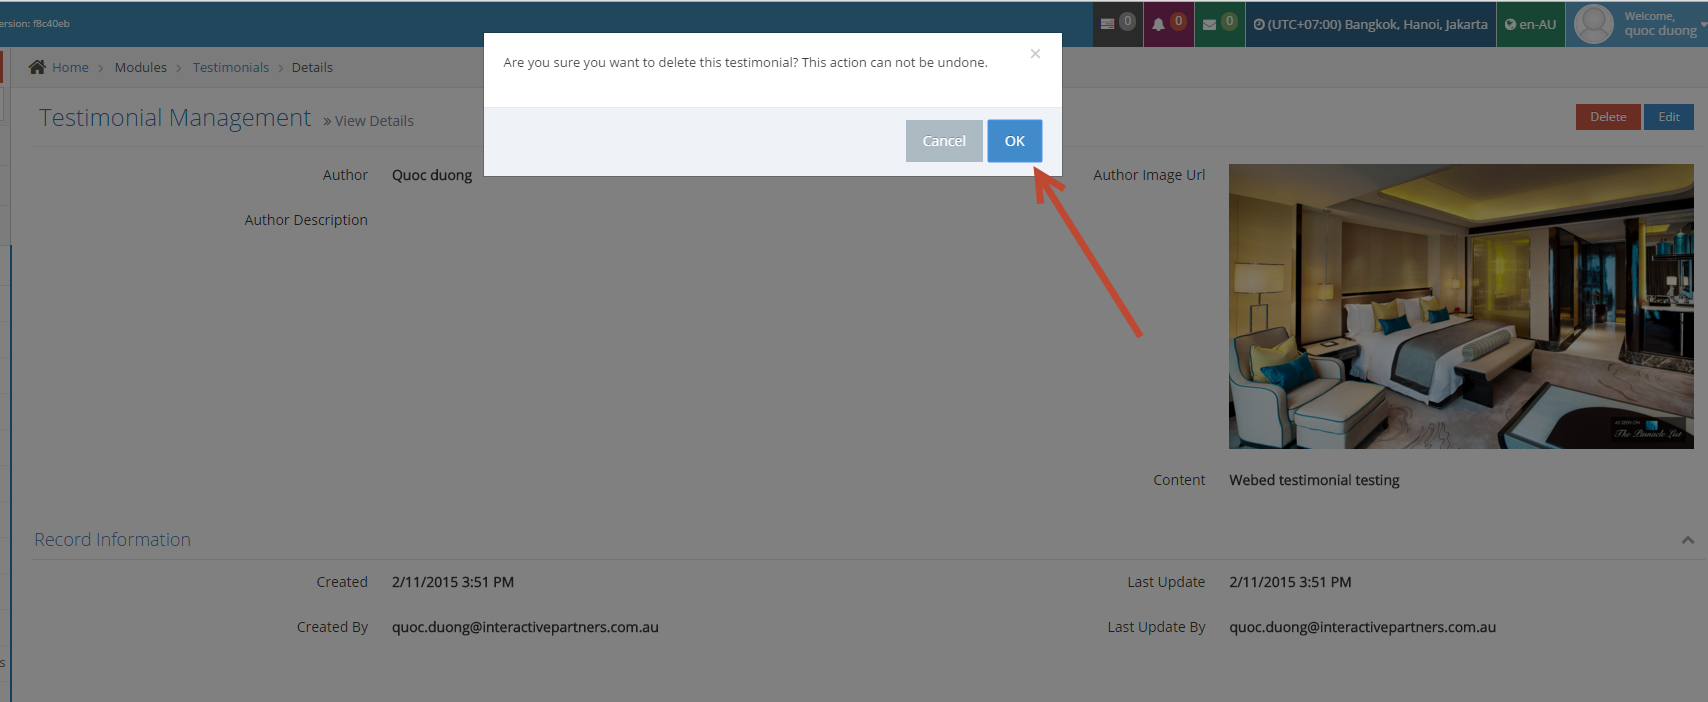
3The Webpage will redirect to the delete page, click the OK button to confirm.
Changing the way Testimonials are displayed
You may want to change the way testimonials are displayed
By default, the testimonials template will show the author's image
You can see the full guide on controlling curly bracket templates here
STEP-BY-STEP
-
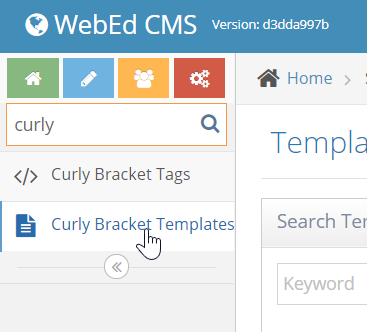
1Find the Curly bracket menu by using the search box at the top of the admin menu
-
2Click on Curly Bracket Templates
-
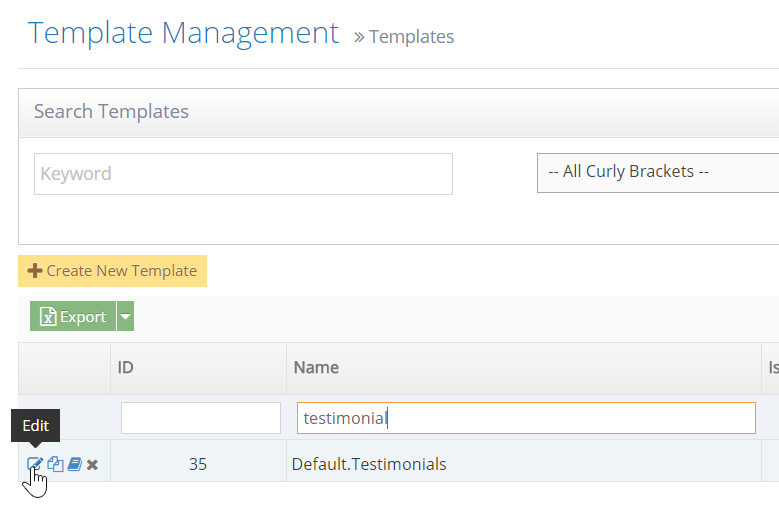
3Filter templates by searching for testimonials using the textbox under the Name heading
-
4Click Edit to edit the template
