- Company Module Overview
- Navigating to Contacts
- Managing Companies
- Managing Company Types
- Linking Users with Logins to Secure Portals to a Company
Connecting a Contact to a Company
Company Module Overview
This module is designed to support managing contacts by company. You can create a company, and company types and then add contacts to the company. You can also set permissions for secure areas by company and company type similar to managing user groups.
Navigating to Contacts
STEP-BY-STEP
-
1Log in as an administrator and go to the Admin Dashboard.
Learn how to log in here → -
2Go to Contacts
-
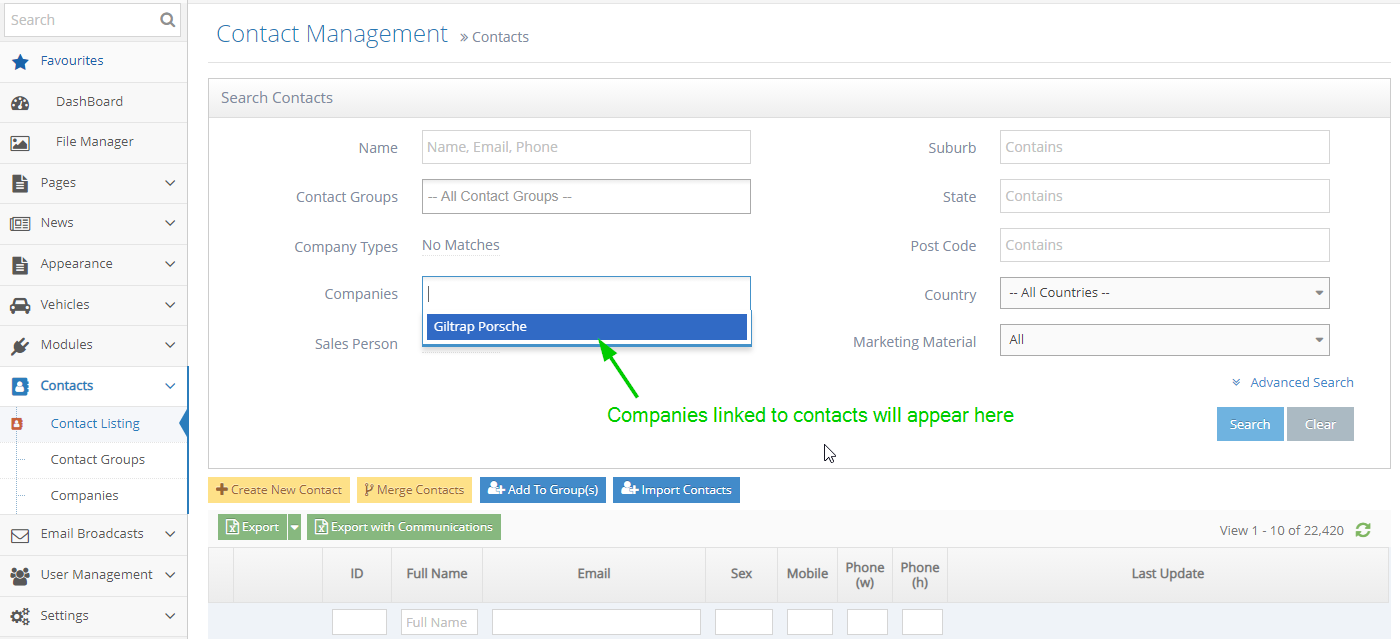
3When the listing appears, search for the contact you wish to link to a company
-
4Click the Edit icon
-
5Select the company for this contact by starting to type the company name
-
6If the company does not exist, you can create a new company
Managing Companies
Contacts are generally connected with Companies. See how to manage companies.
STEP-BY-STEP
-
1Log in as an administrator and go to the Admin Dashboard.
Learn how to log in here → -
2You click on Contacts -> Companies and create a new Company.
-
3Input the Company Name in the textbox, choose Company Type in the drop-down list, and click the Create button.

-
4The company was created successfully.
-
5You can click on the Edit icon on the left to update the company.

Managing Company Types
Contacts are generally connected with Companies. See how to manage companies.
STEP-BY-STEP
-
1Log in as an administrator and go to the Admin Dashboard.
Learn how to log in here → -
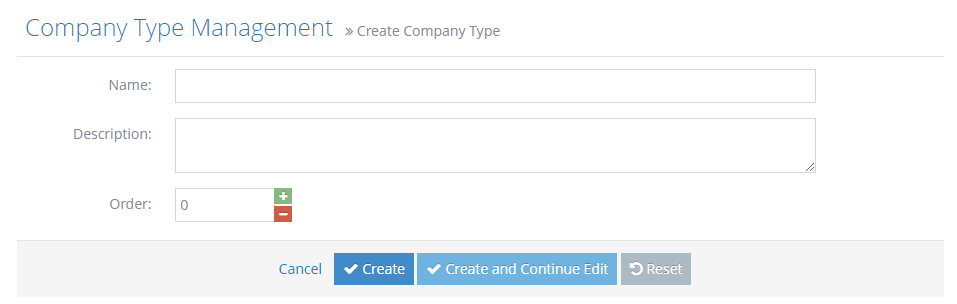
2On the admin dashboard, click on Settings > Contacts Settings > Company Type
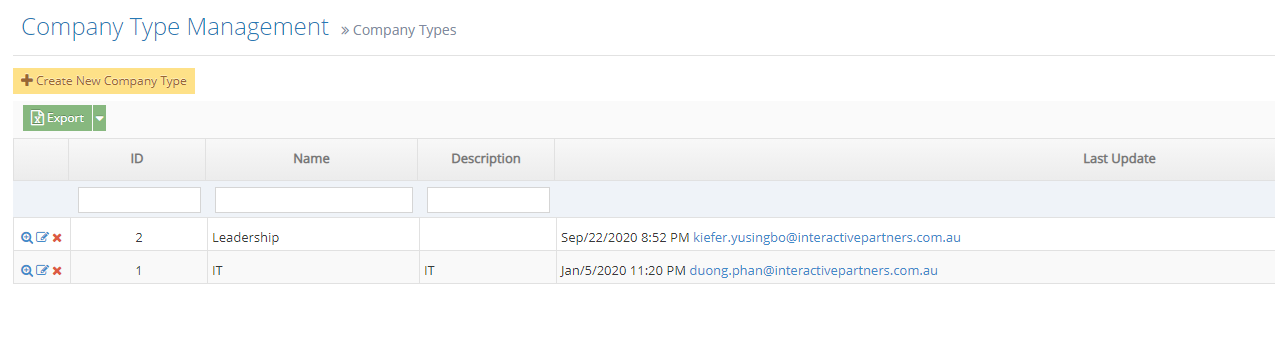
-
3Input the Name and Description
- Name - the name of company types
- Description - the description of what kind of company type you are adding on
-
4Order - the list and order from the grid display
-
5Click Create once done
Linking Users with Logins to Secure Portals to a Company
After creating the Company you may want to give them access to a secure portal, this is optional
STEP-BY-STEP
-
1Create the new User
-
2We recommend using User Groups and limiting the permissions of the User.
-
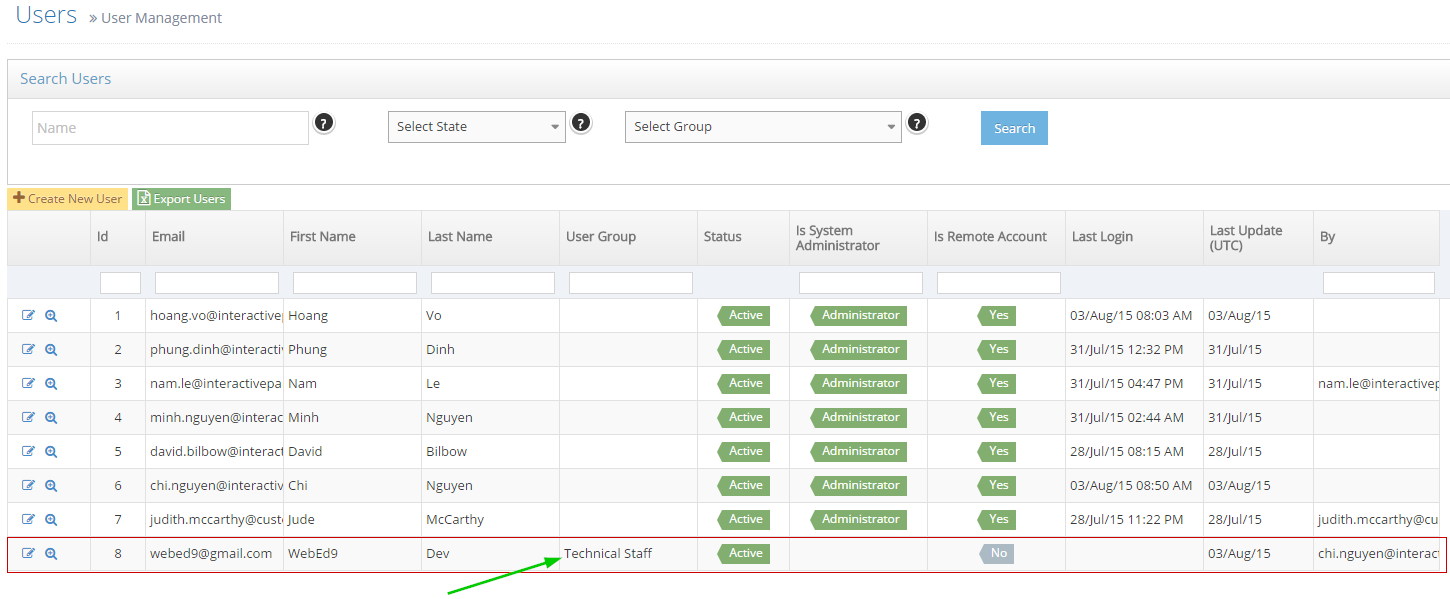
3On the left navigator, click on User Management > Users
-
4Click Create New User button and input user information
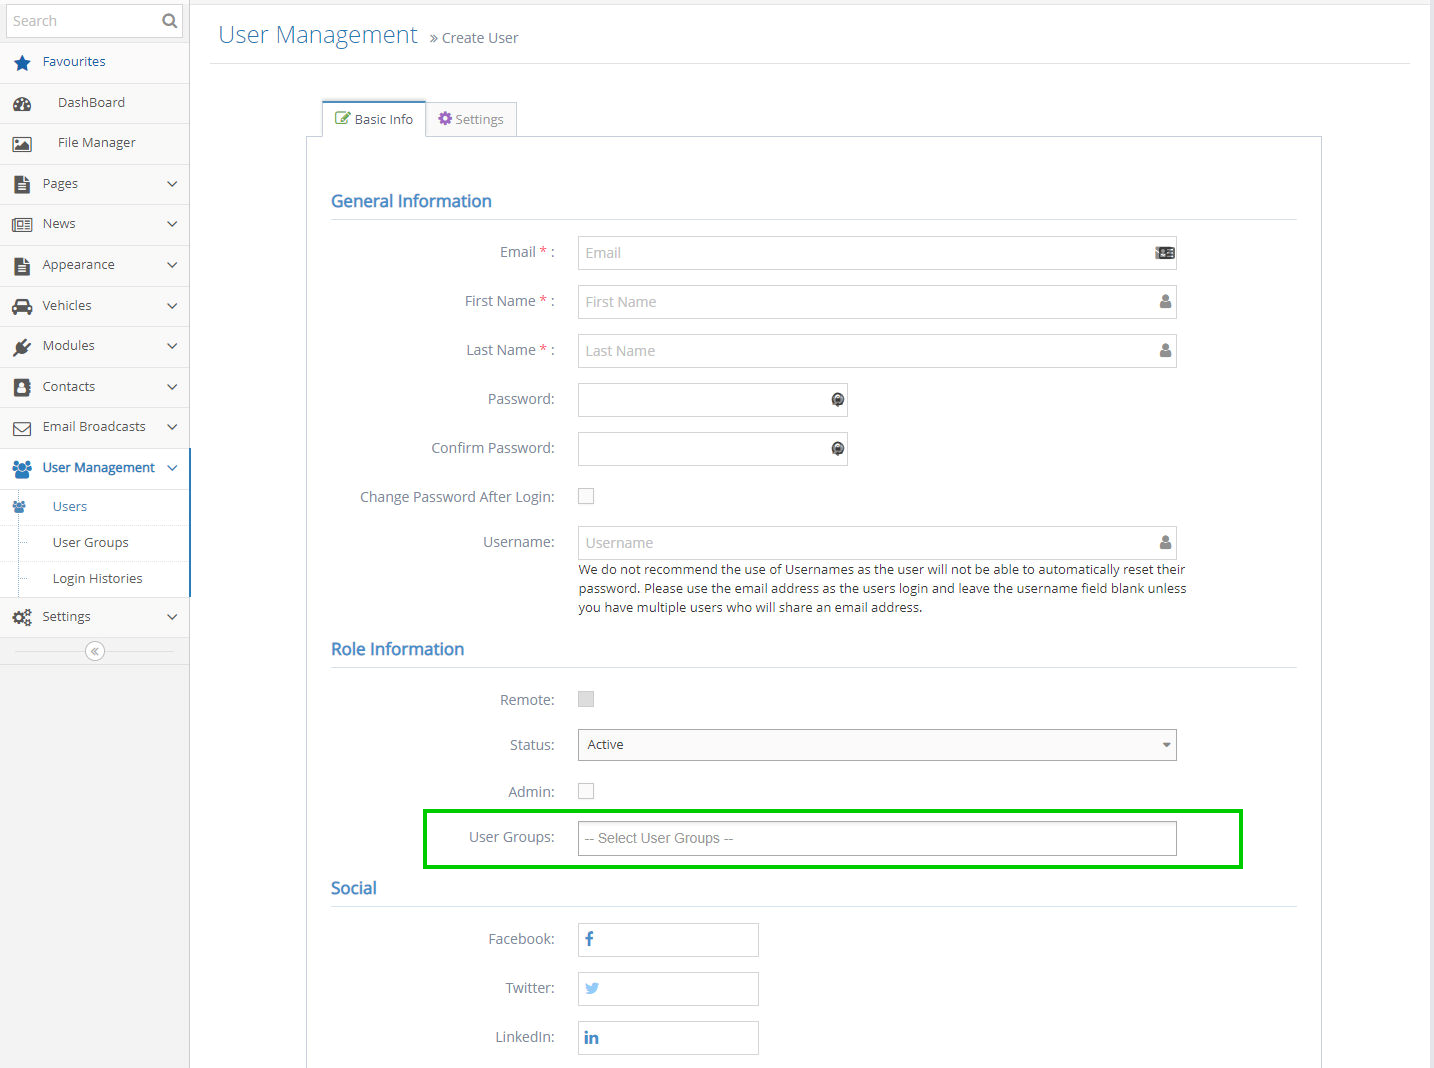
-
5Enter the user information under the Basic Info tab
-
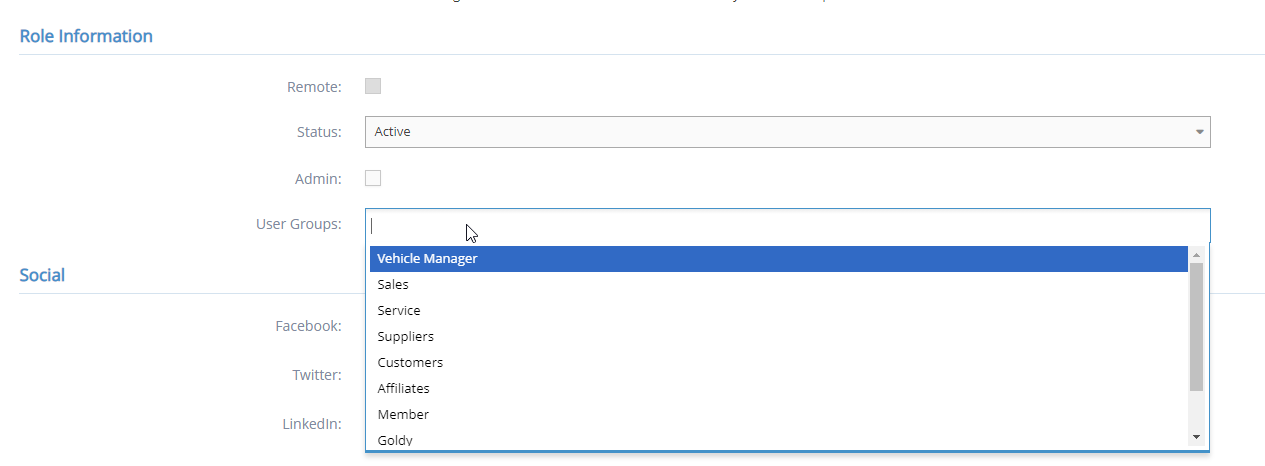
6Click the User Groups field and select the Group for this user in the options. The group controls the access for the user. Examples may be:
- Sales
- Service
- Suppliers
-
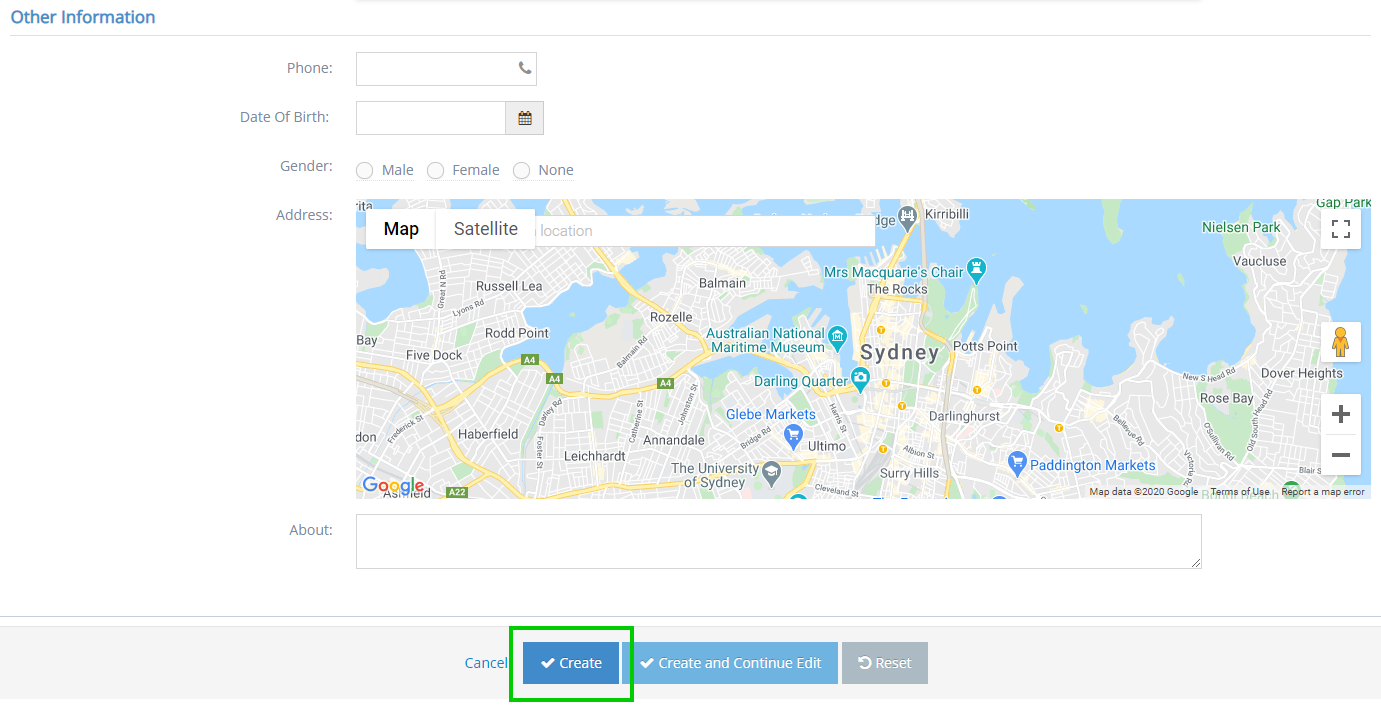
7Scroll down to the bottom then, click the Create button.
-
8You should be able to see the newly created user in the User Management.