Adding a Vehicle Listing via Edit Page
STEP-BY-STEP
-
1Log in as an administrator and go to the Admin Dashboard.
Learn how to log in here → -
2Go to the page you want to add the vehicle listing to
-
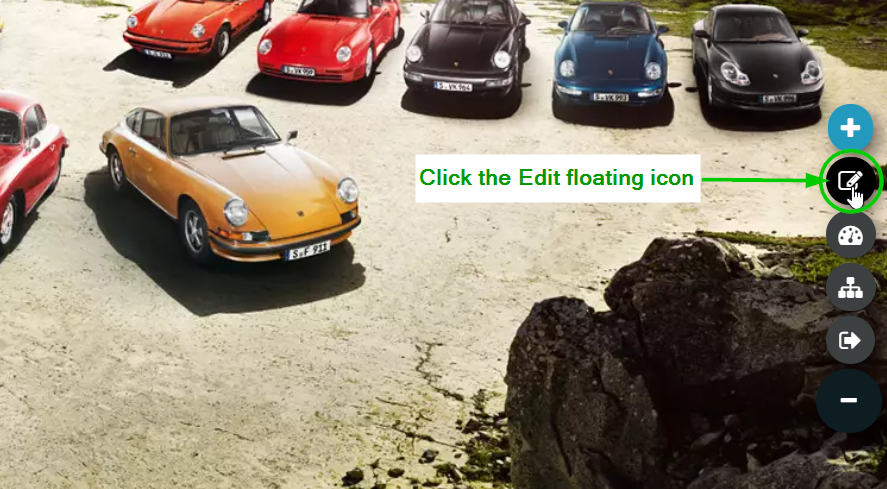
3Hover on the floating icons to the right of the page
-
4Click on the Edit floating icon
-
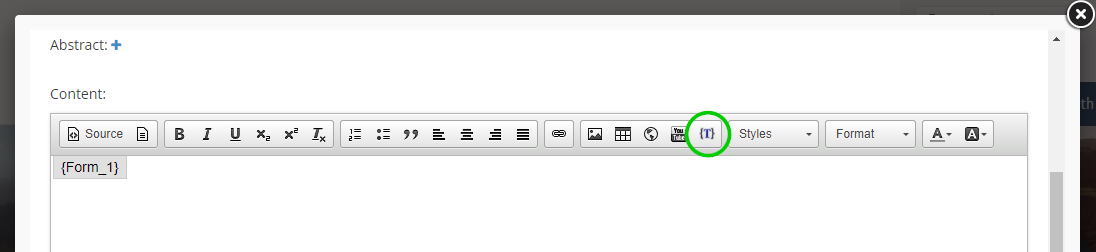
5In the content editor, choose icon "{T}" to add curly bracket
-
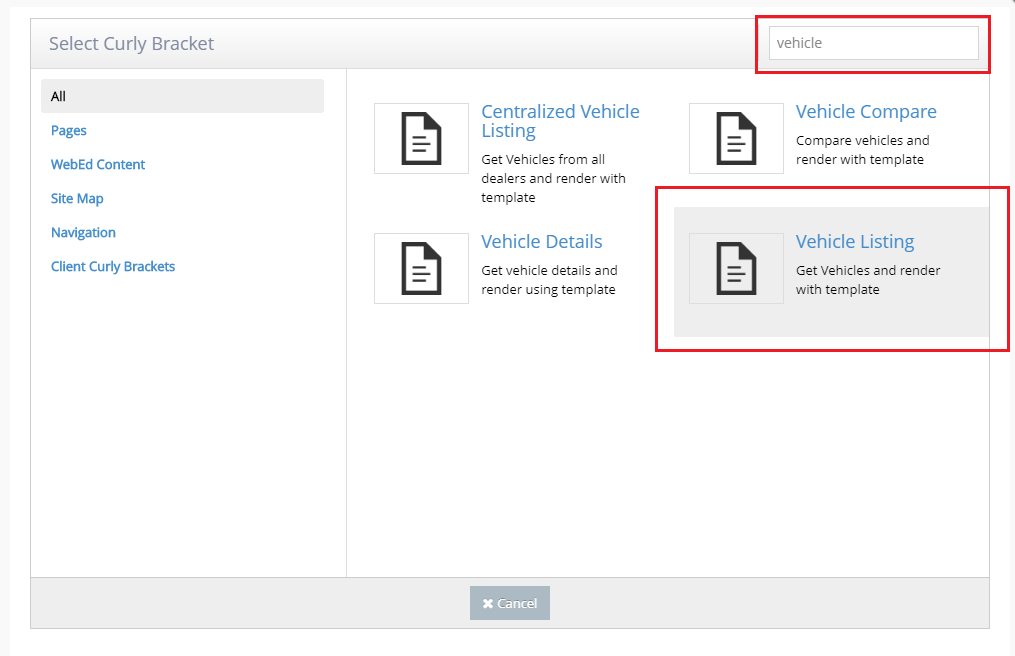
6The Select Curly Bracket window will appear
-
7Search for the vehicle listing curly bracket by entering "vehicle" on the search field
-
8Click on the Vehicle Listing curly bracket
-
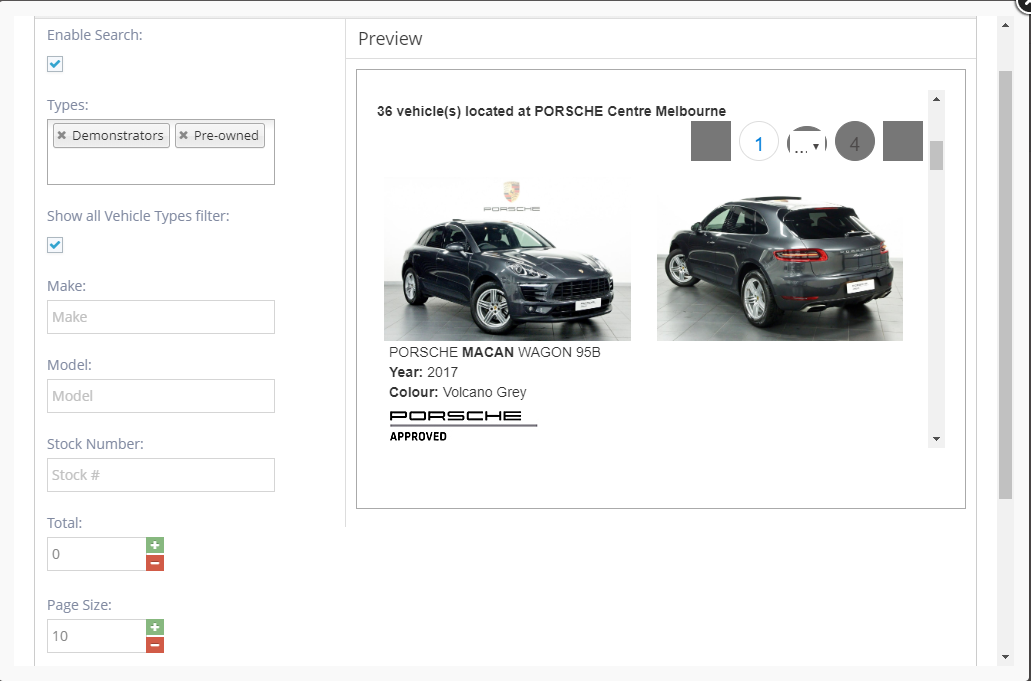
9Configure your Vehicle Listing curly bracket
- Enable search: Check = enable , uncheck = disable
- Types: choose the vehicle type you want to show
- Show All Vehicle type filter: Check = dropdown list vehicle type have all vehicle types
- Make: input the vehicle's make you want to show (allow empty)
- Model: input the vehicle's model you want to show (allow empty)
- Stock Number: input the vehicle's stock number you want to show (allow empty)
- Total: total vehicle shown in the listing (empty means show all)
- Page Size: number of the vehicle displayed on 1 page (we recommend 10)
- Template Name: select your preferred template for display
- Exclude Make-Model in Sort Options: Check = excludes Make and Model
-
10Preview is displayed on the right of the configuration fields
-
11If you are satisfied with the configuration, scroll down to the bottom of the window and click the Insert button
-
12Click Save or Save and Continue Edit on your page editor as usual
Adding a Vehicle Listing on a New Page
STEP-BY-STEP
-
1Log in as an administrator and go to the Admin Dashboard.
Learn how to log in here → -
2Go to the page you want to add the vehicle listing to
-
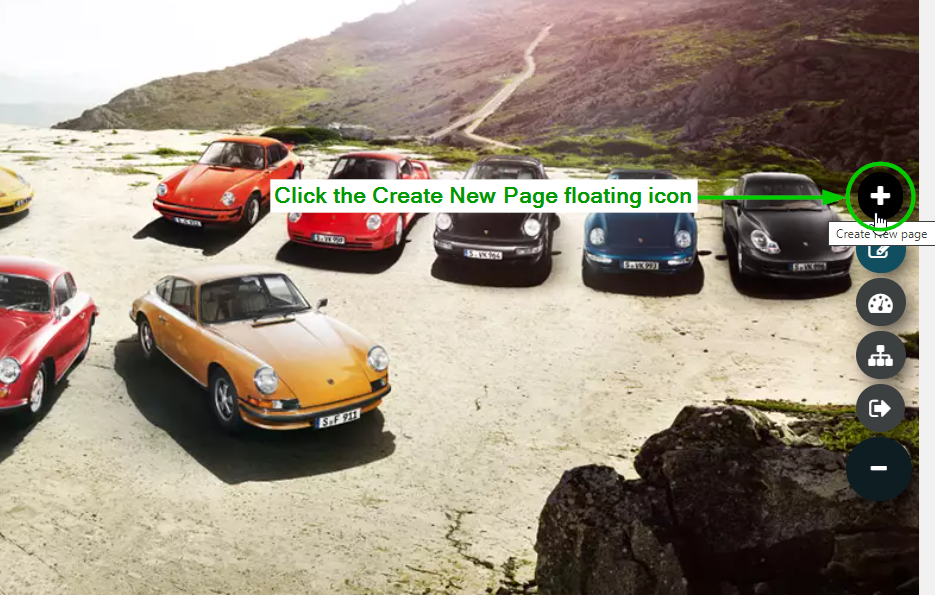
3Hover on the floating icons to the right of the page
-
4Click on the Create floating icon
-
5In the content editor, choose icon "{T}" to add curly bracket
-
6The Select Curly Bracket window will appear
-
7Search for the vehicle listing curly bracket by entering "vehicle" on the search field
-
8Click on the Vehicle Listing curly bracket
-
9Configure your Vehicle Listing curly bracket
- Enable search: Check = enable , uncheck = disable
- Types: choose the vehicle type you want to show
- Show All Vehicle type filter: Check = dropdown list vehicle type have all vehicle types
- Make: input the vehicle's make you want to show (allow empty)
- Model: input the vehicle's model you want to show (allow empty)
- Stock Number: input the vehicle's stock number you want to show (allow empty)
- Total: total vehicle shown in the listing (empty means show all)
- Page Size: number of the vehicle displayed on 1 page (we recommend 10)
- Template Name: select your preferred template for display
- Exclude Make-Model in Sort Options: Check = excludes Make and Model
-
10Preview is displayed on the right of the configuration fields
-
11If you are satisfied with the configuration, scroll down to the bottom of the window and click the Insert button
-
12Click Save or Save and Continue Edit on your page editor as usual