- Why you would use a ToolBars module
- When do you need a Toolbar
- How to Create a New Toolbar configuration
- How to Edit Toolbar configuration
- How to Delete Toolbar configuration
- Set Up Toolbar for New User Group
- Set Up a Toolbar for Existing User Group
- Setup User Group for New User
- Set Up a User Group for Existing User
- Loading Toolbar by User Login
Configuring Editor Toolbars
Why you would use a ToolBars module
Discover the benefits of using a Toolbars module to streamline website navigation, enhance user interaction, and improve accessibility with customisable tools.
How to Create a New Toolbar configuration
STEP-BY-STEP
-
1Log in as an administrator and go to the Admin Dashboard.
Learn how to log in here → -
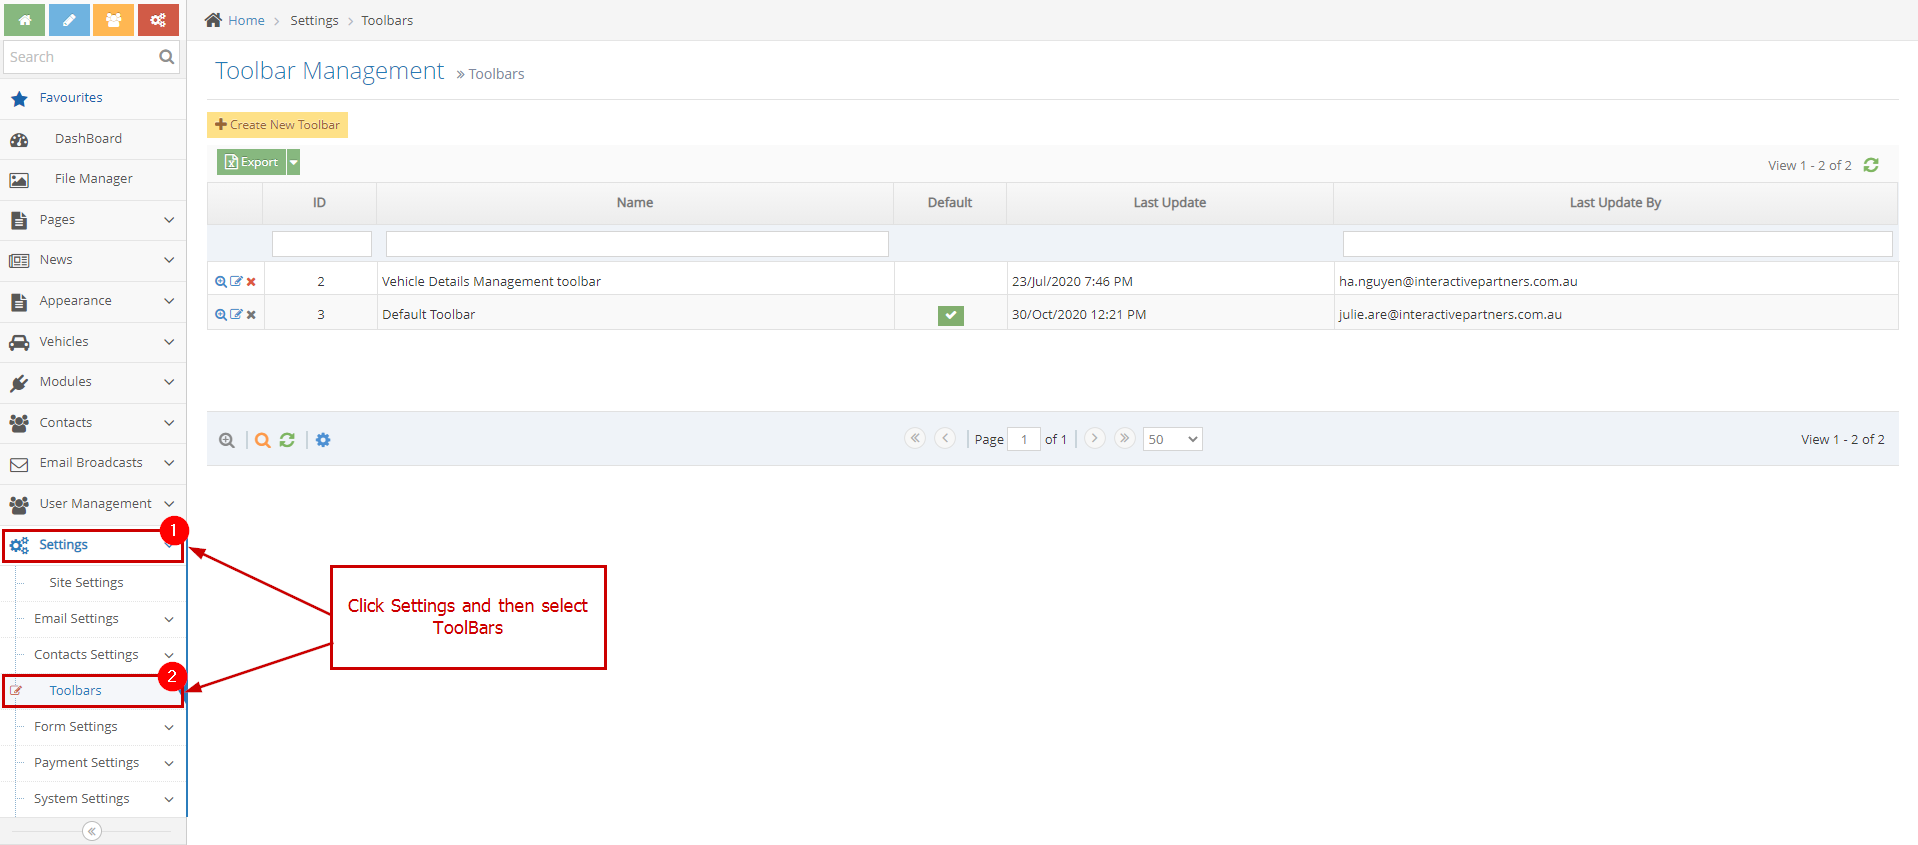
2Click Settings > ToolBars in the left navigation
-
3Click Create New Toolbar

-
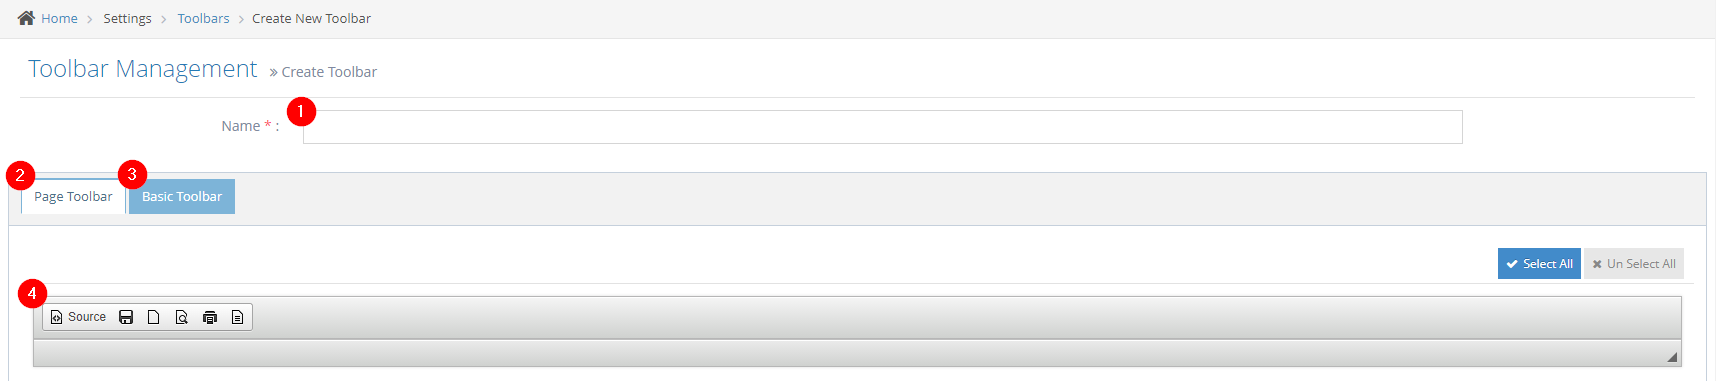
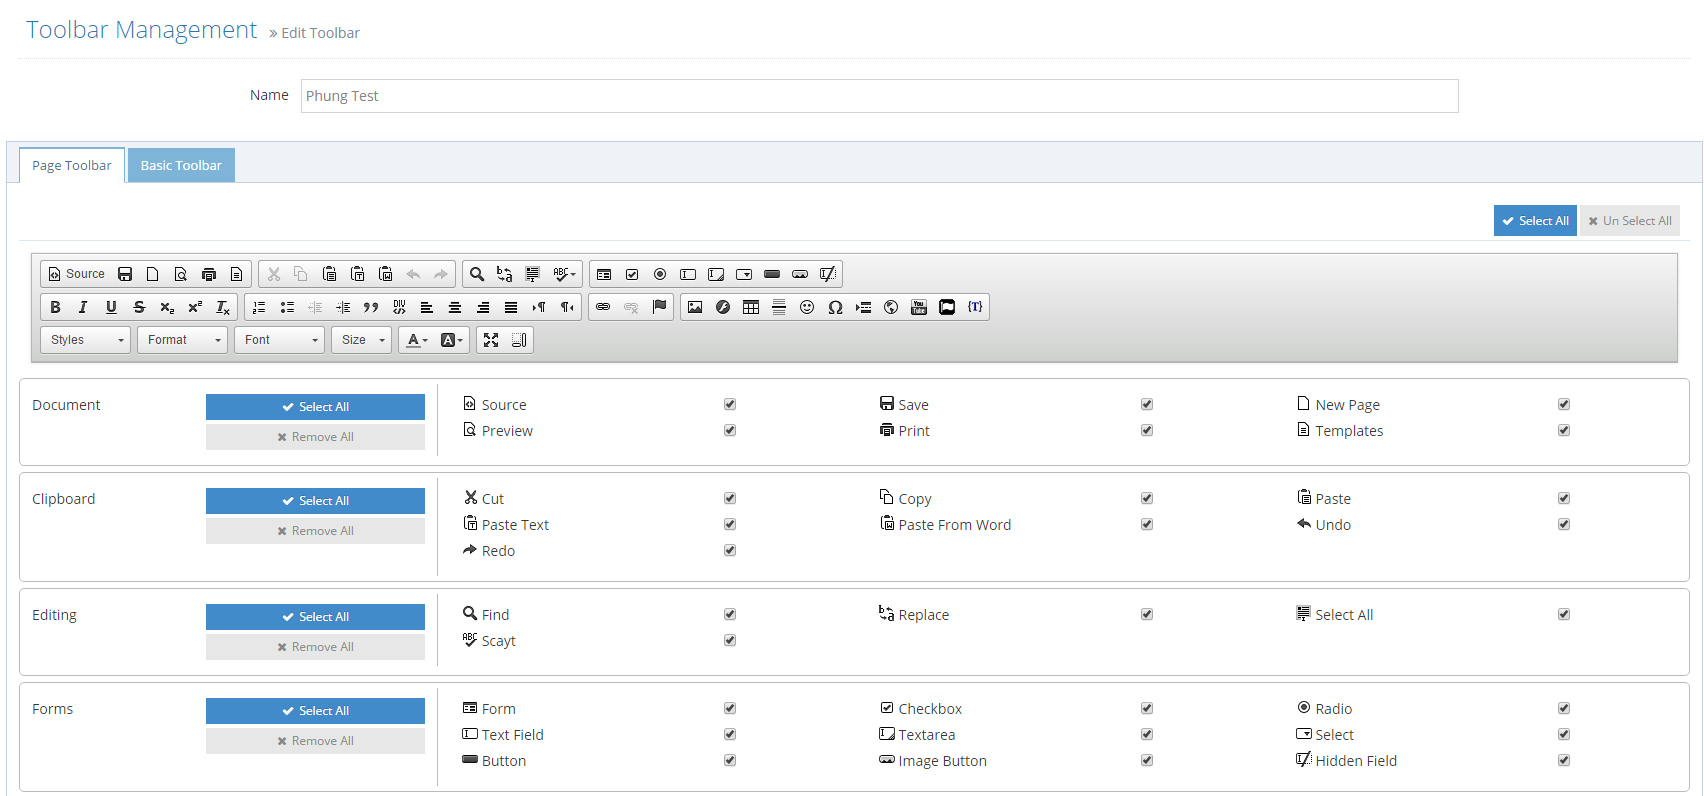
4Field Overview:
- Name (1): Toolbar configuration Name
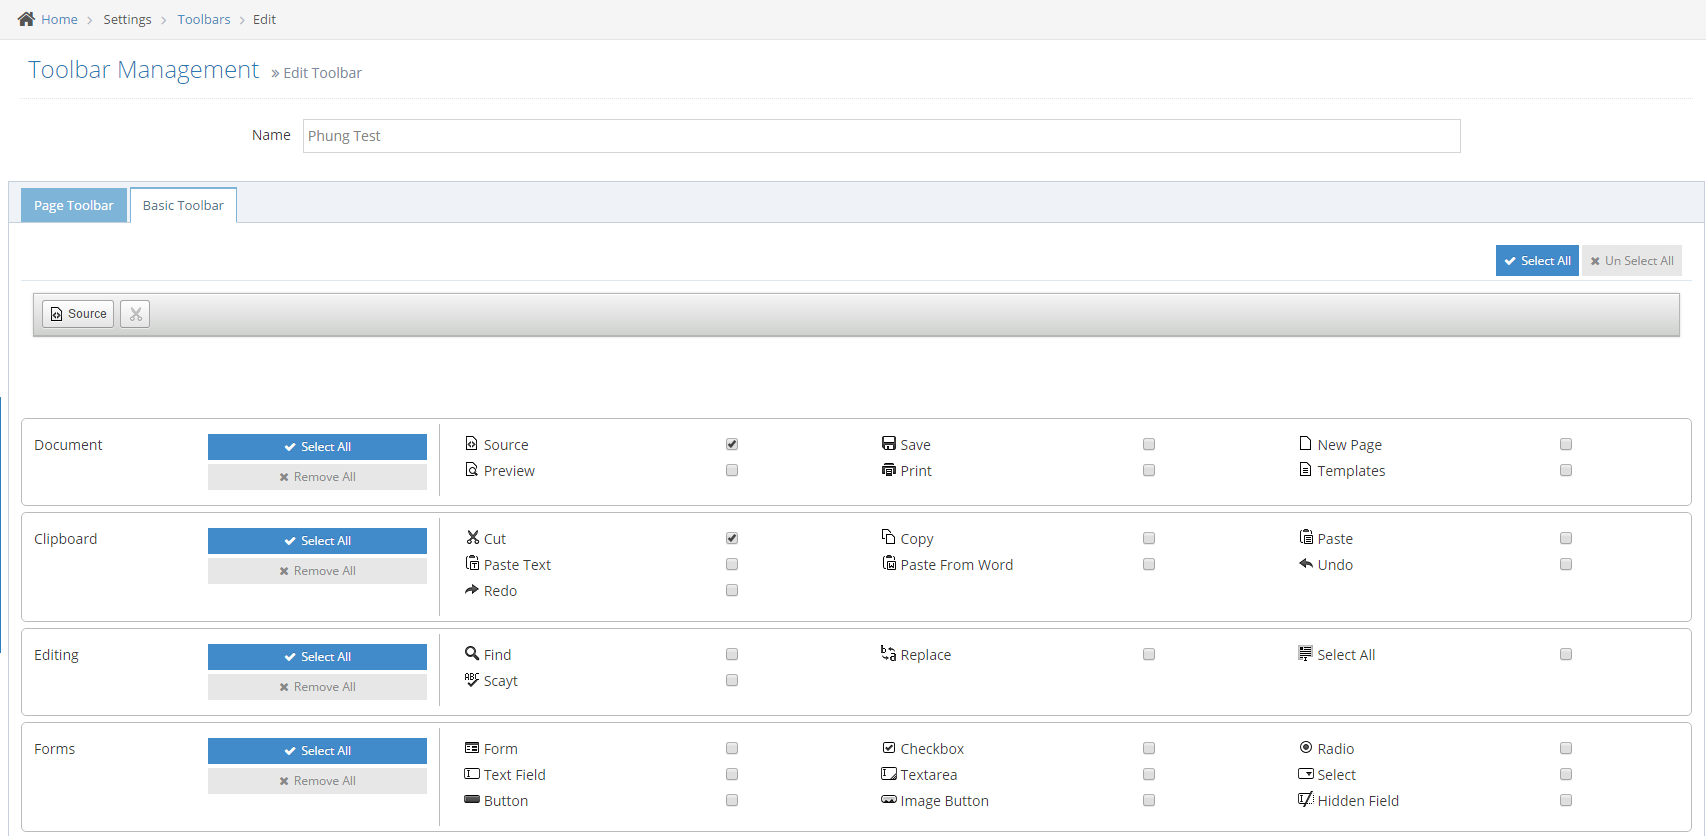
- Page Toolbar Setup (2): setup for page content editor
- Basic Toolbar Setup (3): setup for basic toolbar
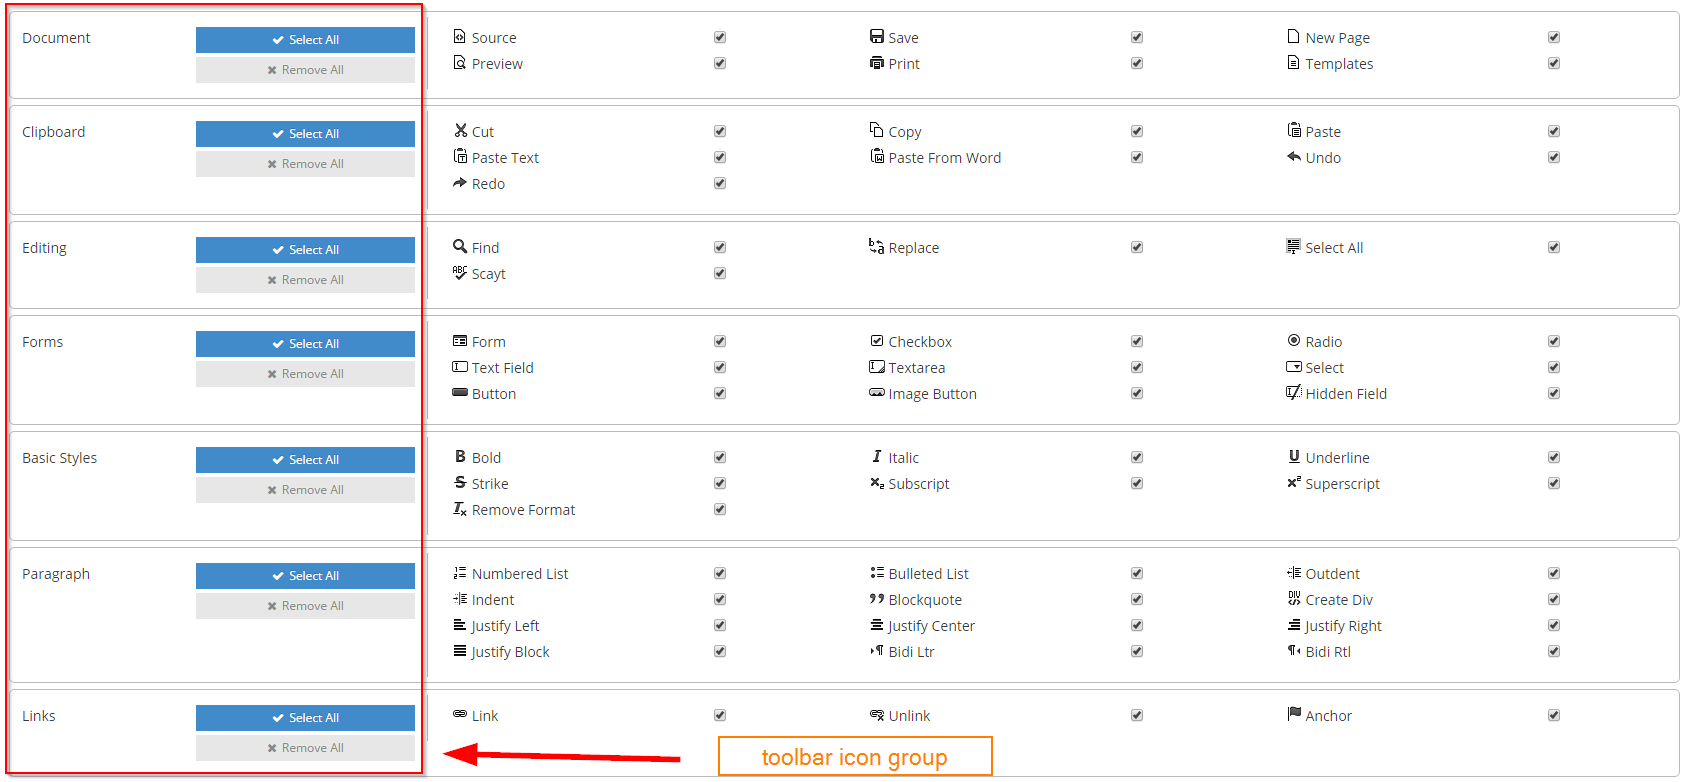
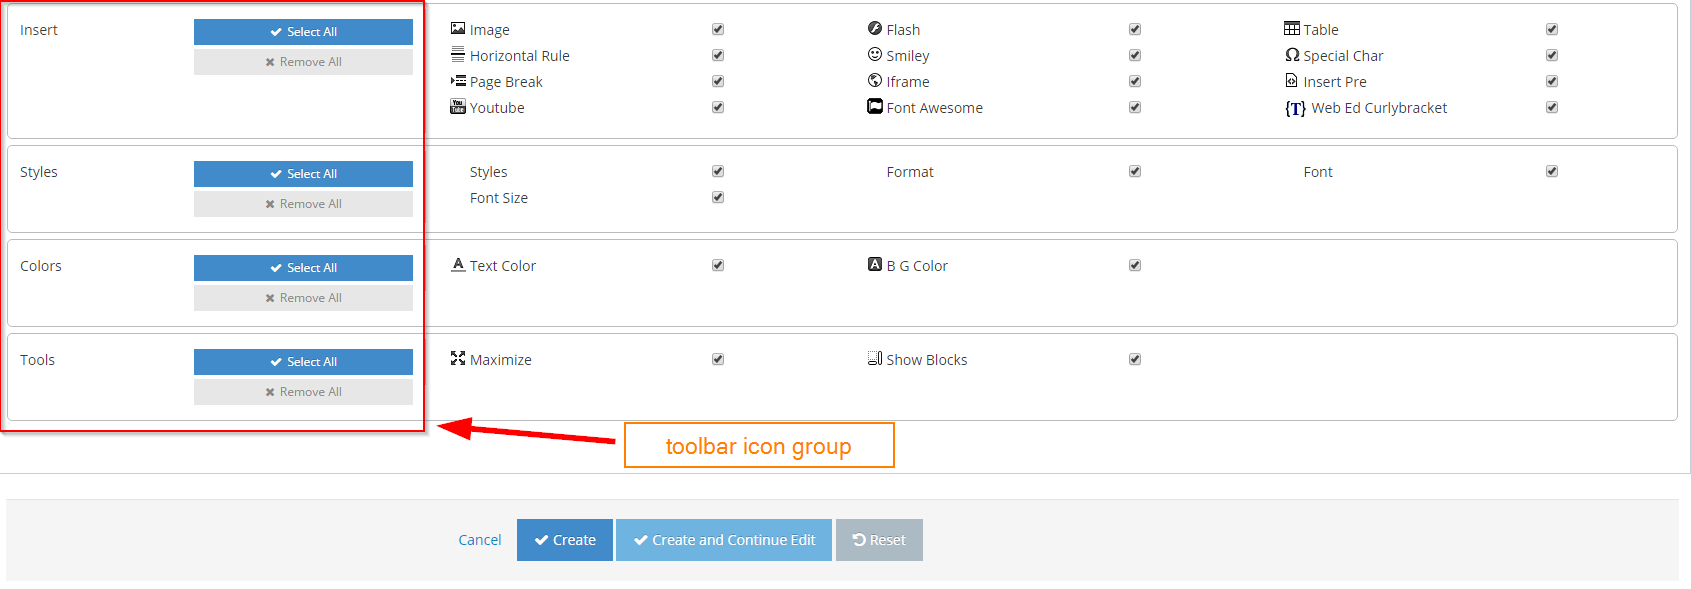
- Preview (4): preview icons on the toolbar to display
-
5Input the name required field, set up the page toolbar and basic toolbar then click Create button.
-
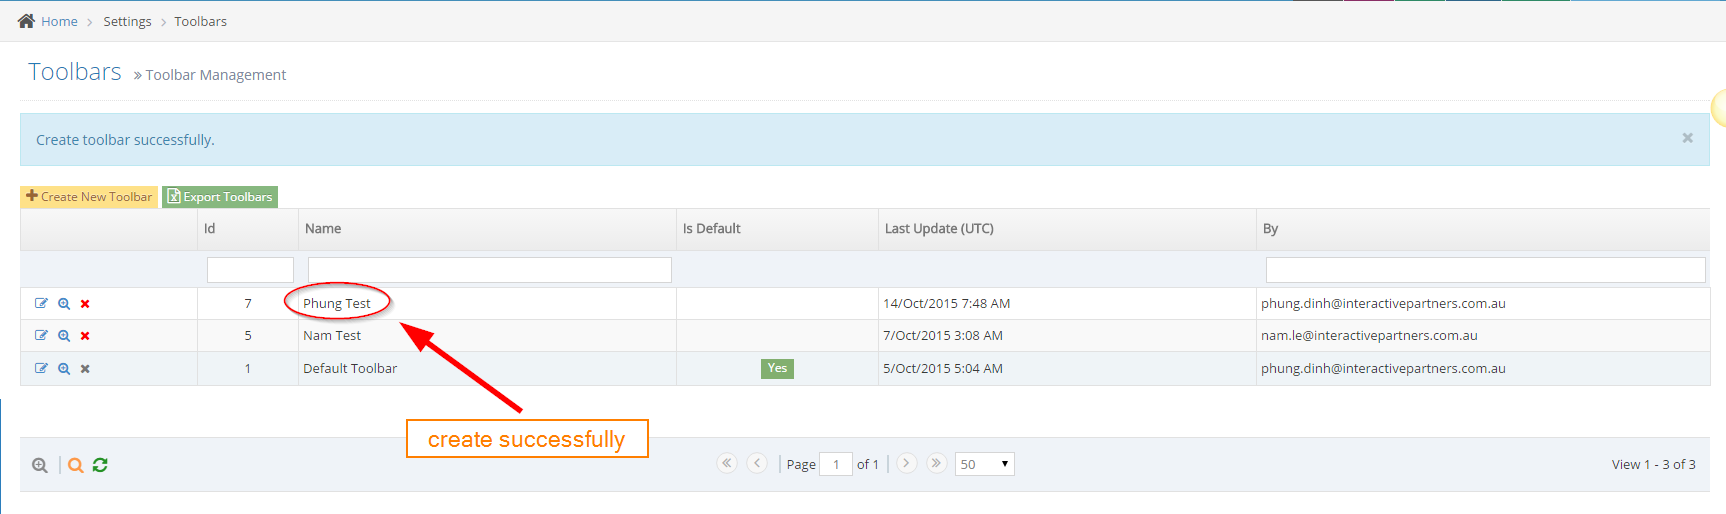
6View the Toolbar listing on the grid.
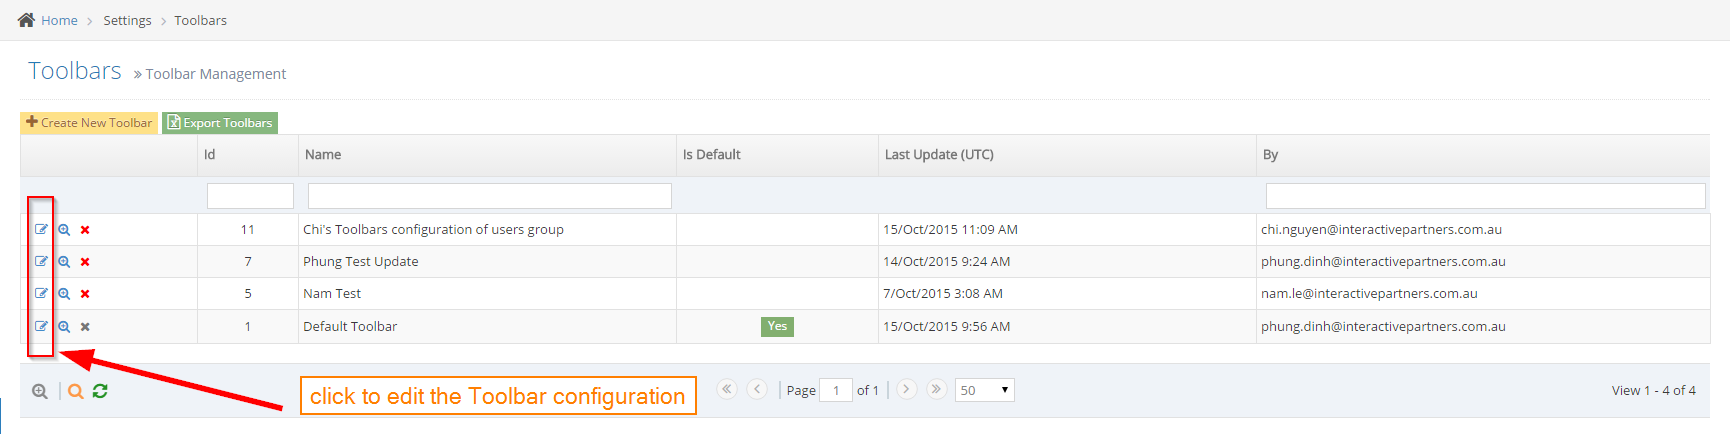
How to Edit Toolbar configuration
STEP-BY-STEP
-
1Log in as an administrator and go to the Admin Dashboard.
Learn how to log in here → -
2Click Settings > ToolBars in the left navigation

-
3Click the first icon per row on the grid.
-
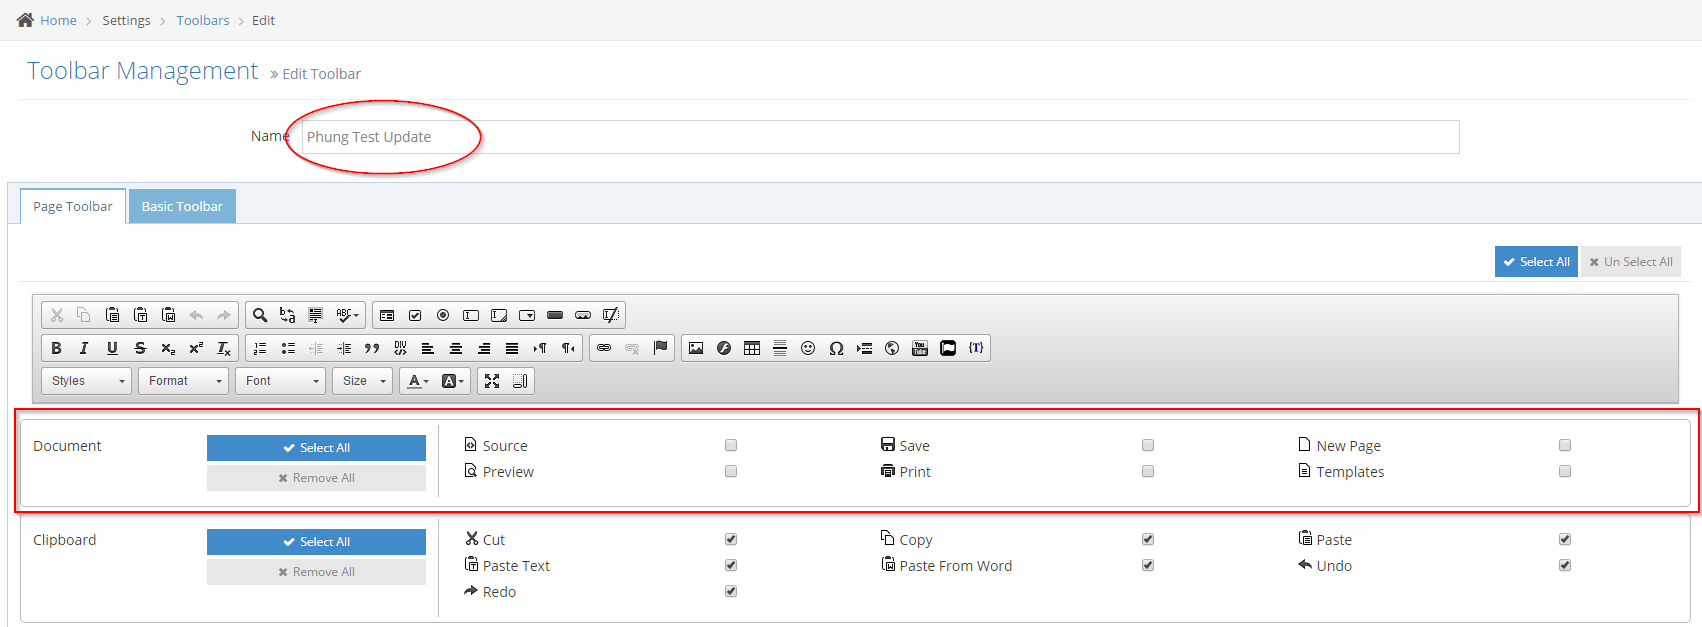
4Input information for update and click Save or Save And Continue Edit: need to pass the validation before the update.
-
5View the Toolbar Listing.
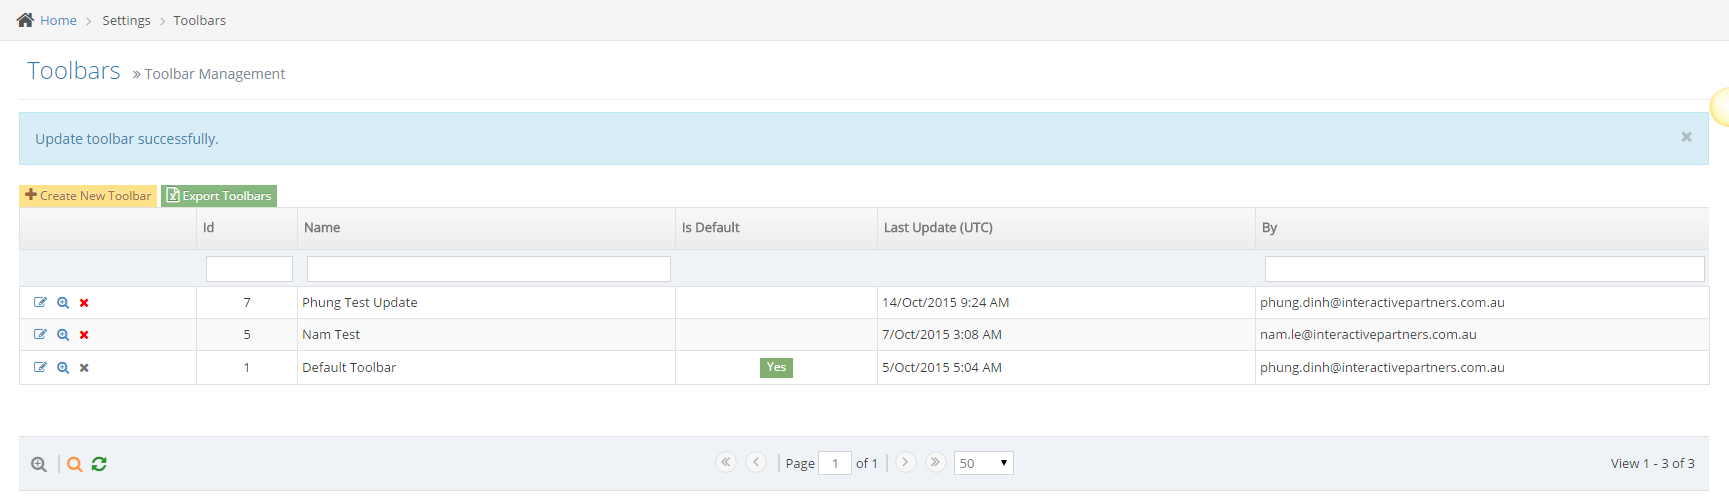
How to Delete Toolbar configuration
STEP-BY-STEP
-
1Log in as an administrator and go to the Admin Dashboard.
Learn how to log in here → -
2Click Settings > ToolBars in the left navigation
-
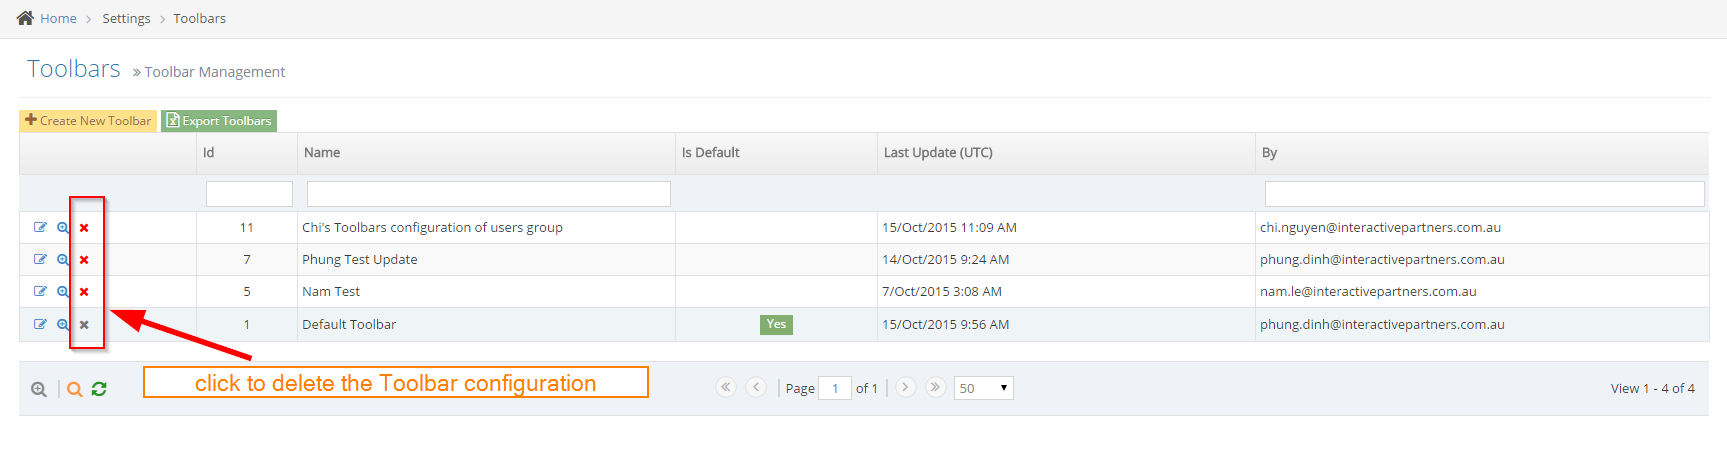
3Click the third icon per row on the grid.
-
4Click OK from confirm message: need to pass the validation before deleting a record.
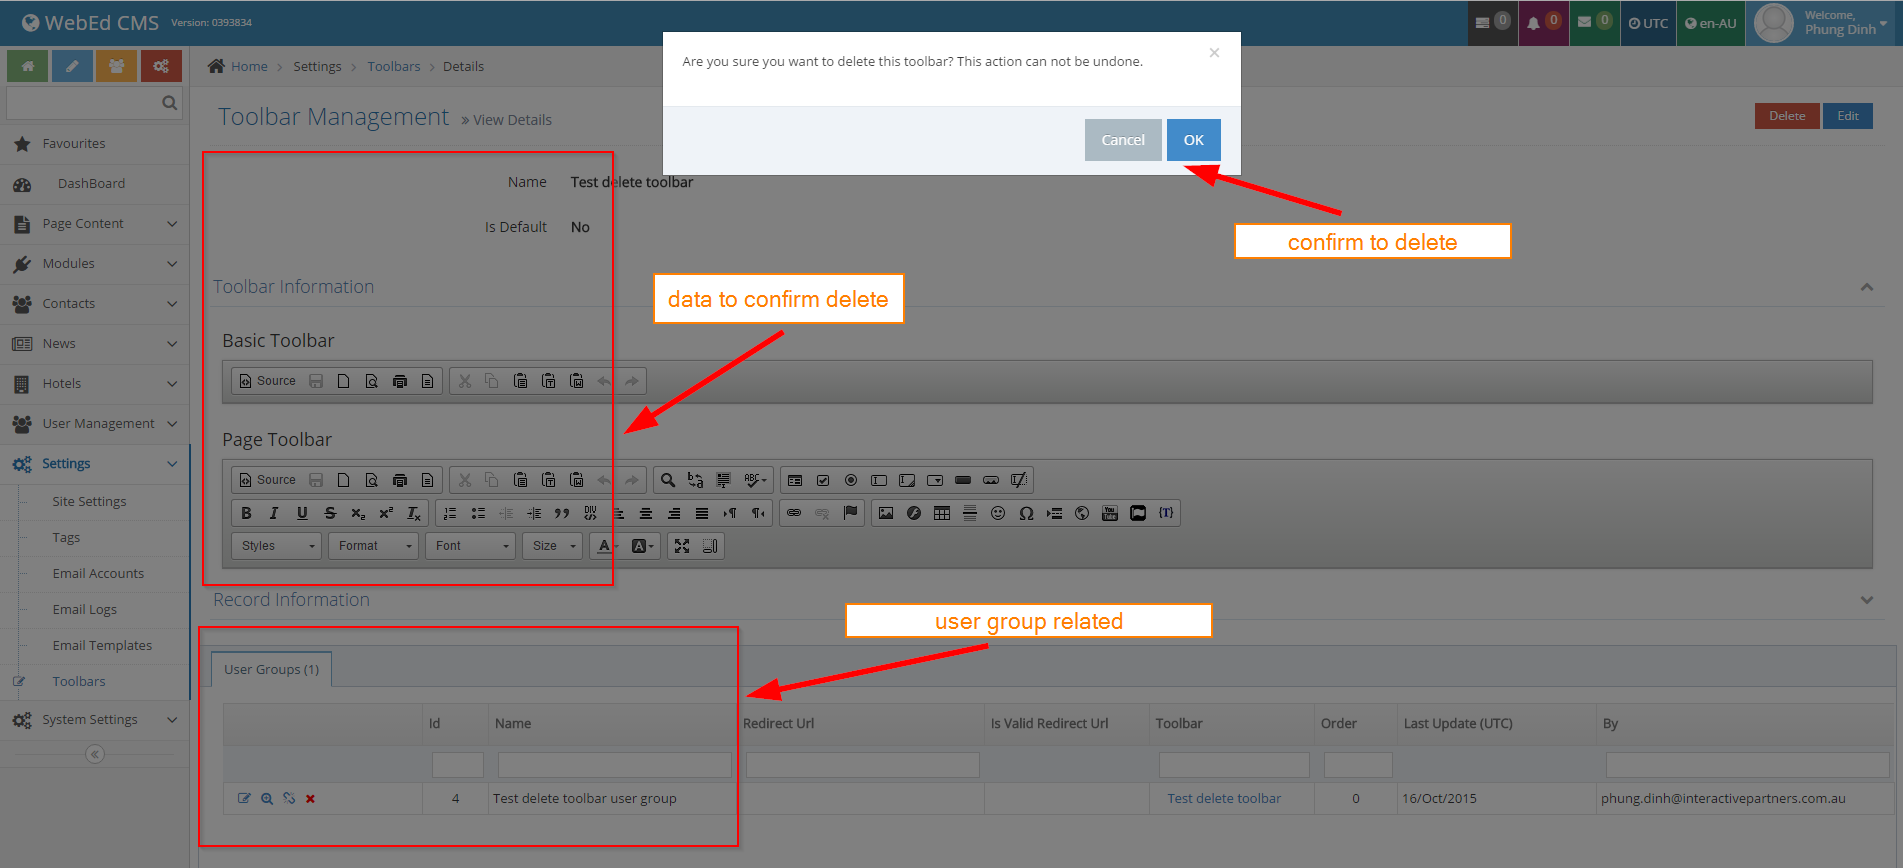
- If this toolbar is related to a user group.
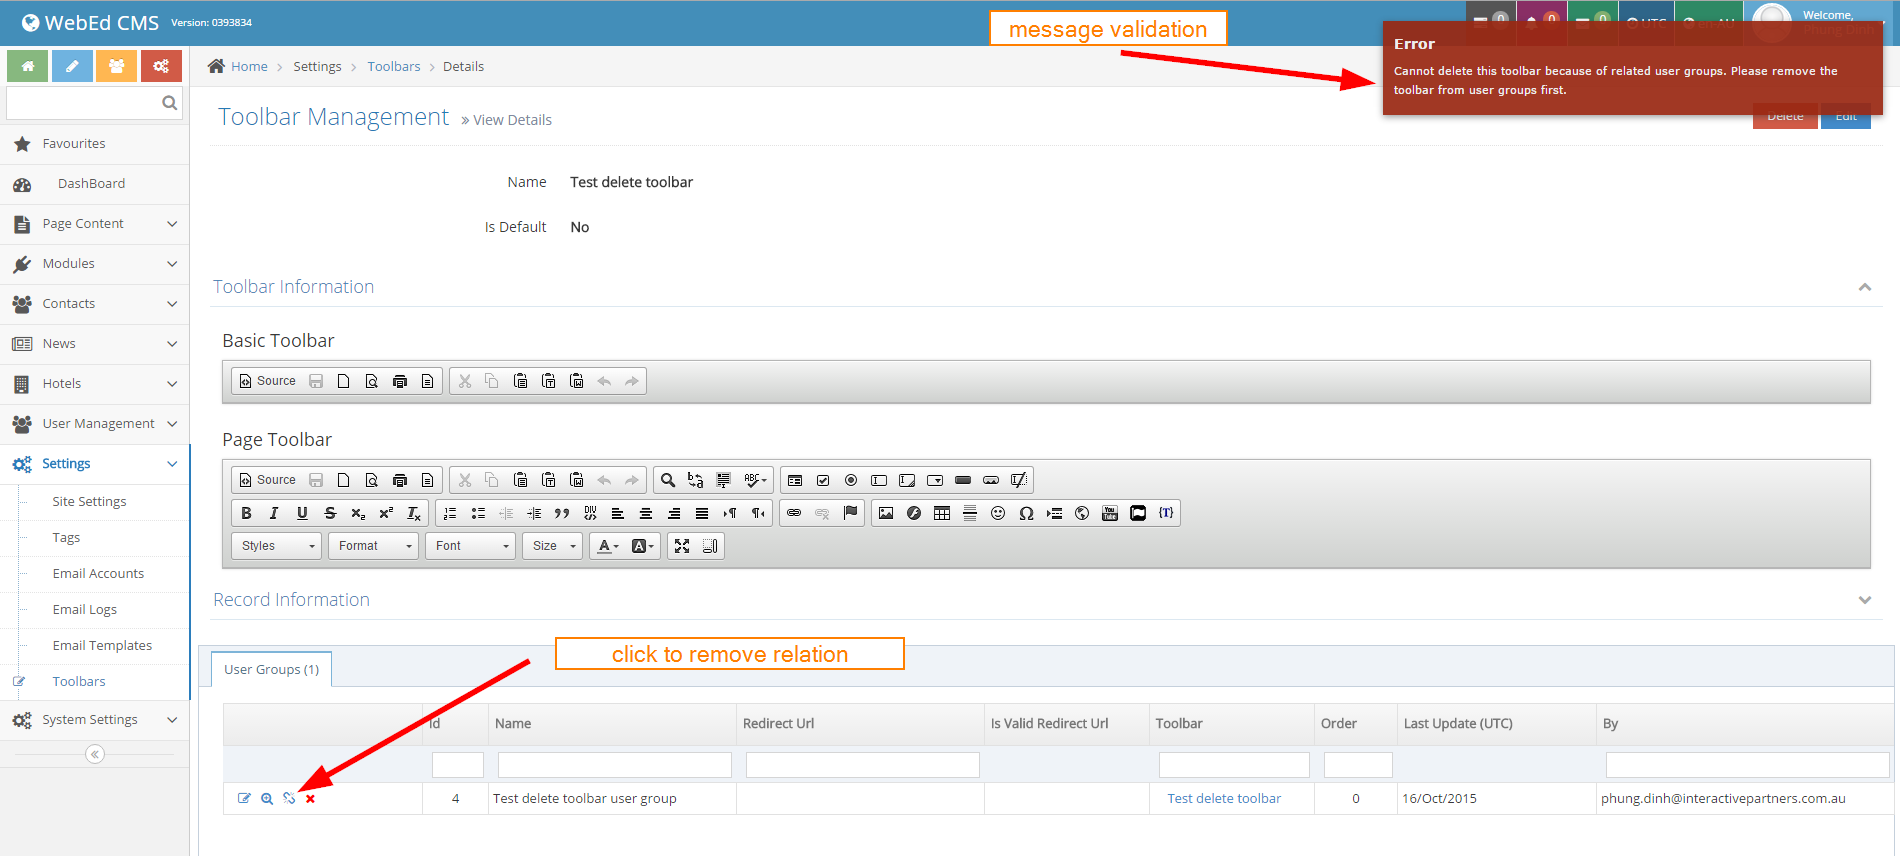
- - Click unlink before deleting the toolbar.
- - Click the delete button in top-right

- If this toolbar is related to a user group.
-
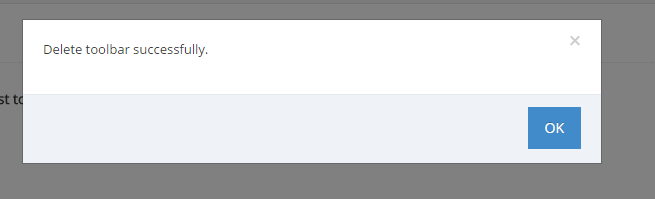
5Click OK from the successful message
-
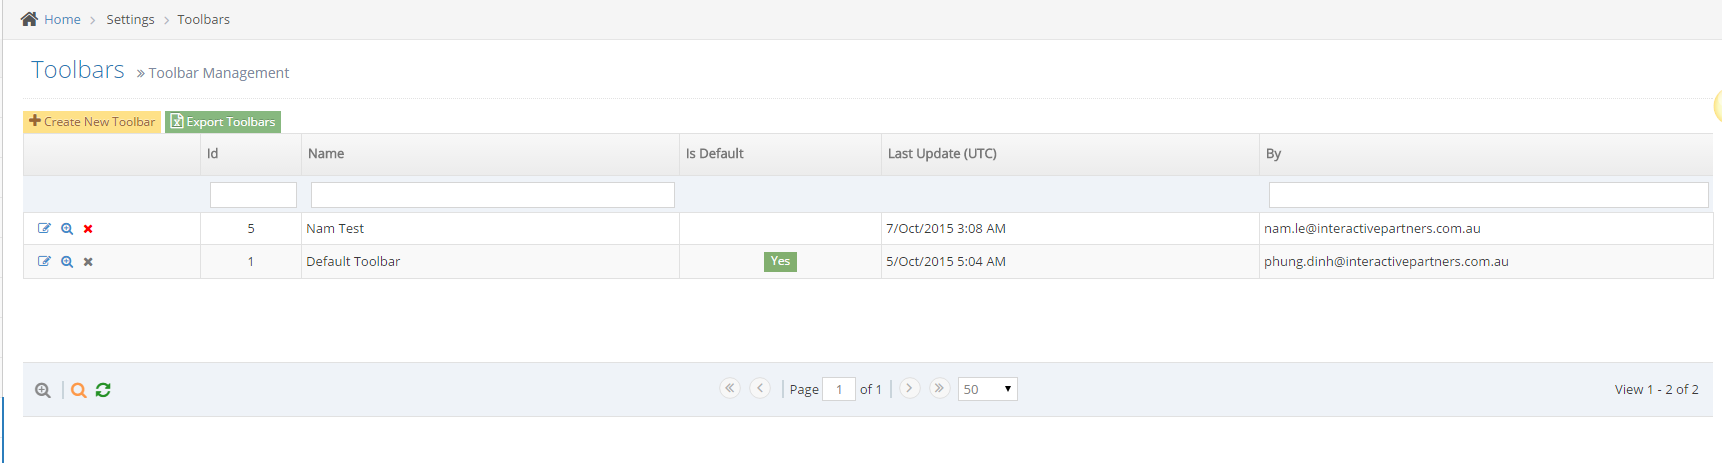
6Confirm from the list if toolbar is already deleted
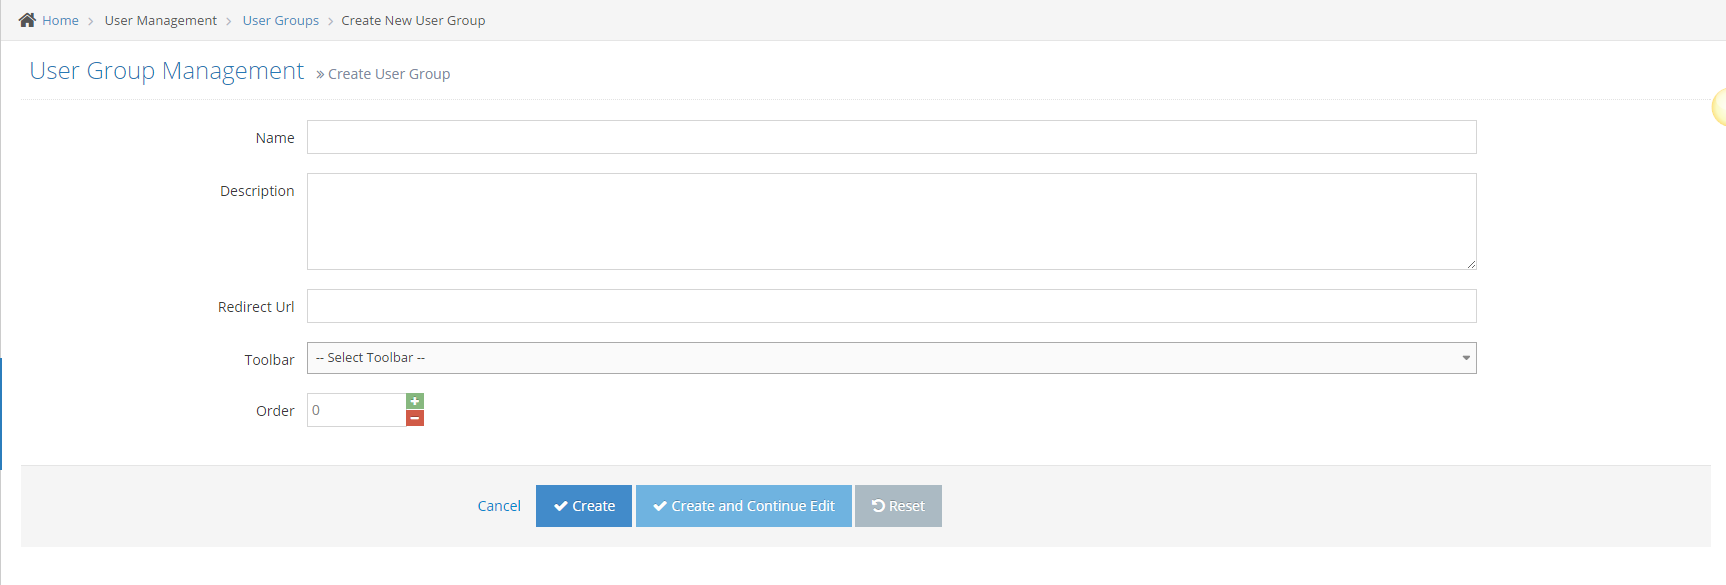
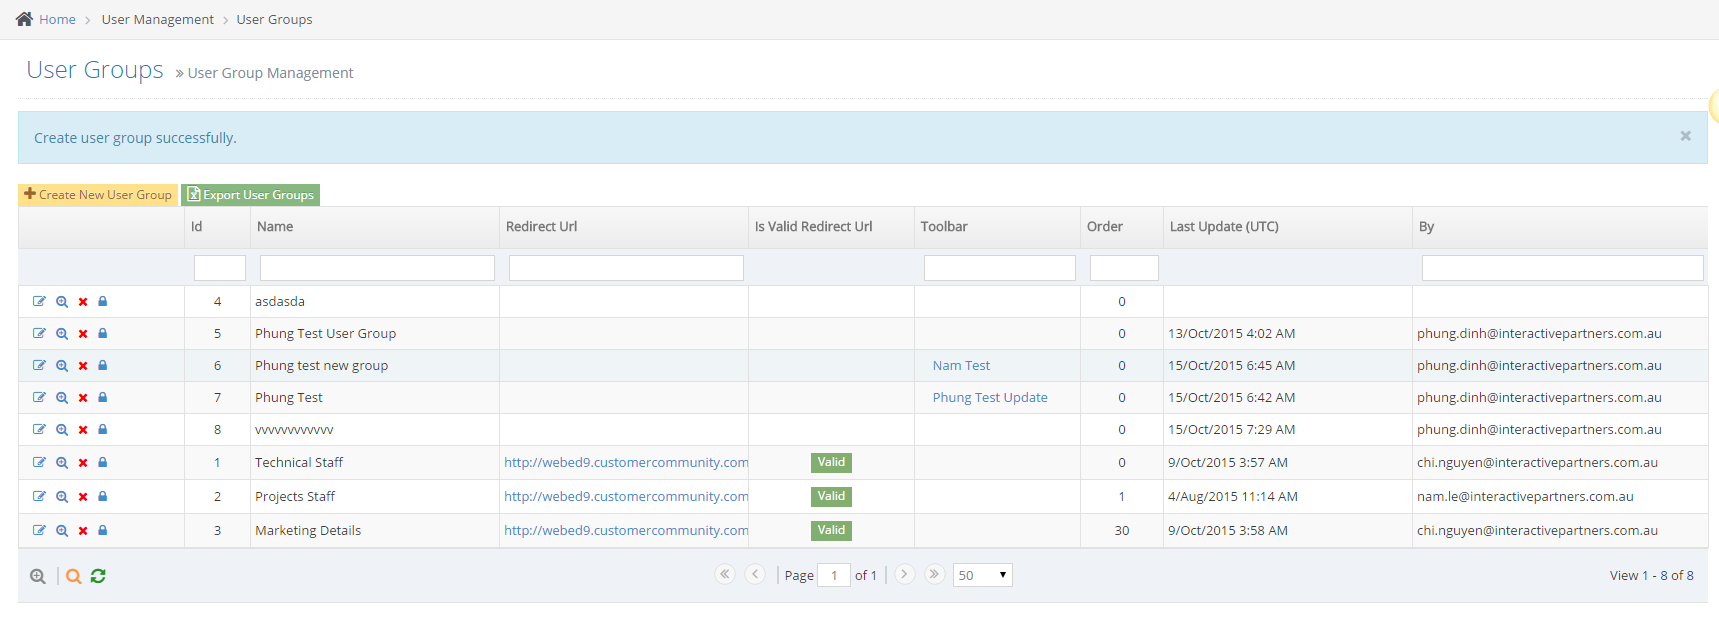
Set Up Toolbar for New User Group
STEP-BY-STEP
-
1Log in as an administrator and go to the Admin Dashboard.
Learn how to log in here → -
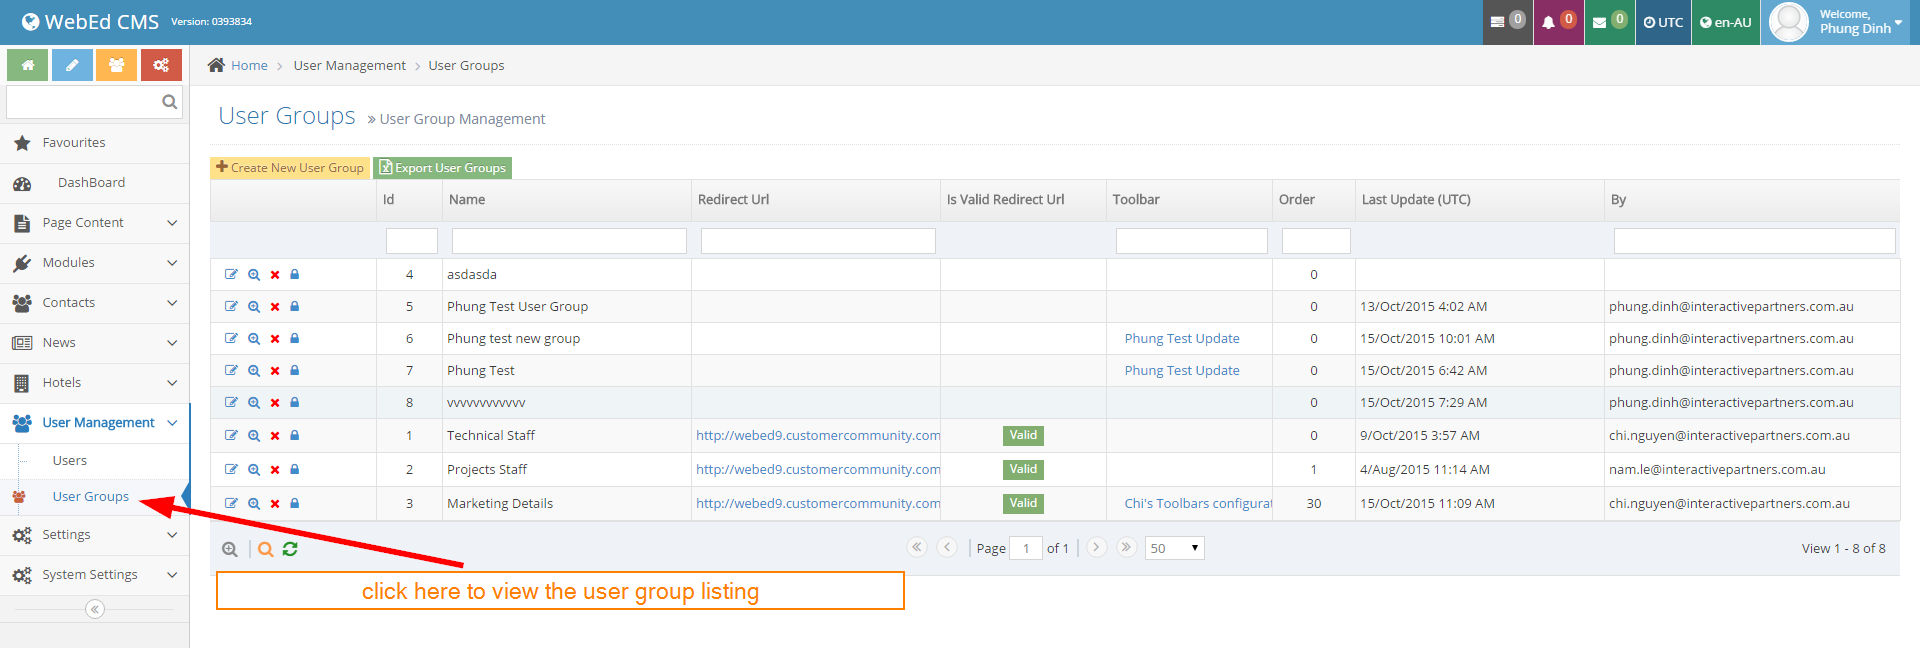
2Go to User Management > User Groups
-
3Click Create New User Group
-
4Input data must pass all failed cases

-
5Click Create or Create And Continue Edit
-
6Click Create: back to the User Group listing and show a message create successfully
-
7Click Create And Continue Edit: redirect to the edit user group page and show a message create successfully

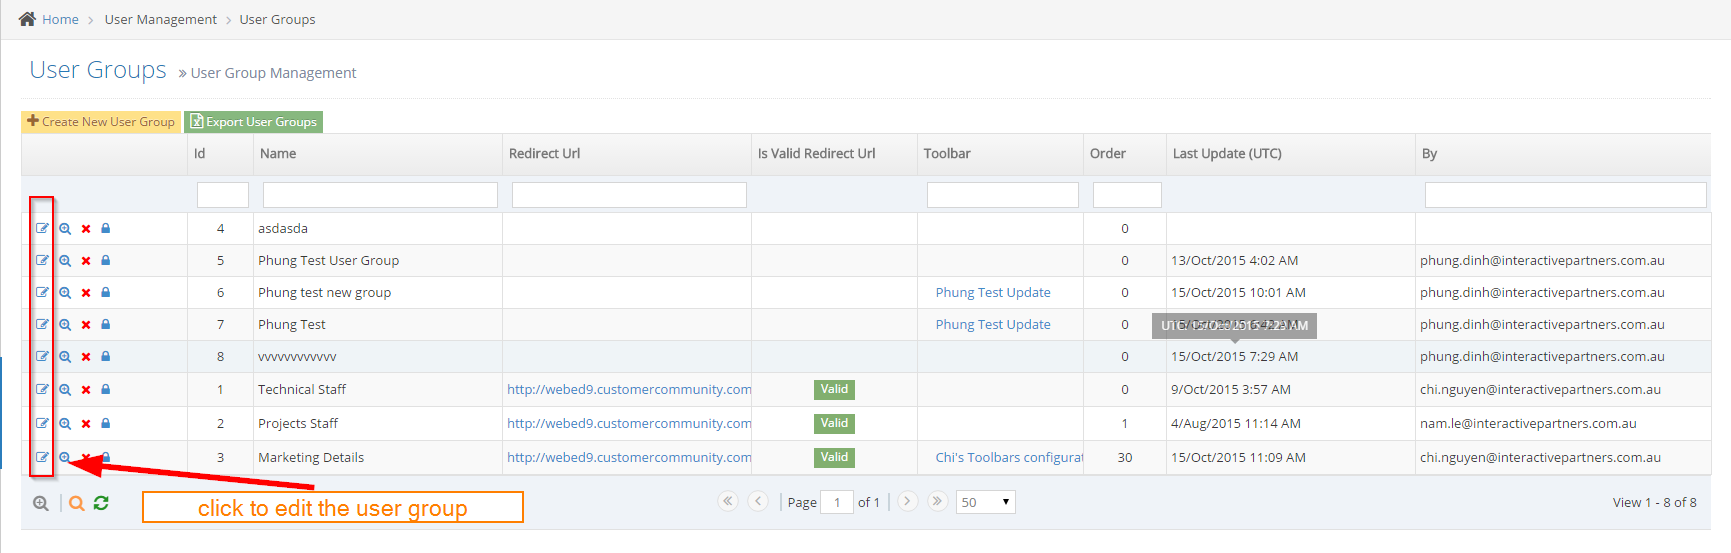
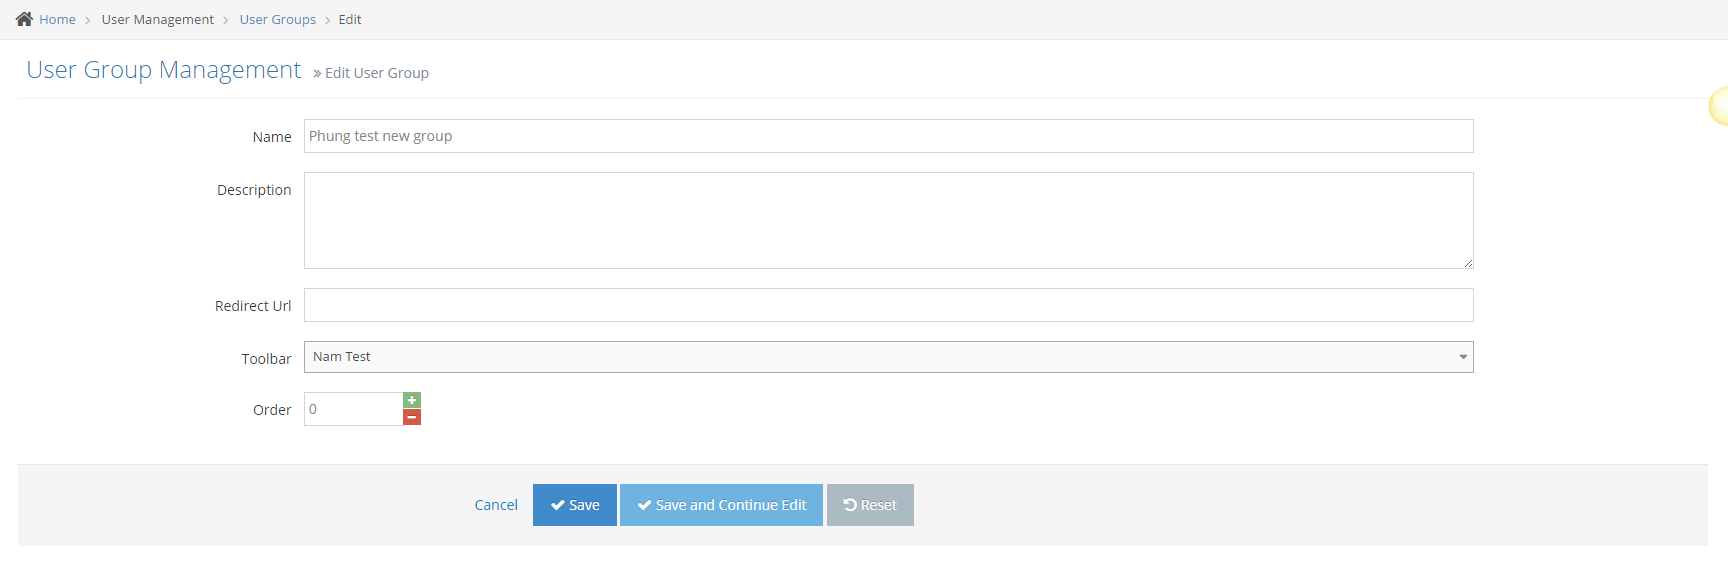
Set Up a Toolbar for Existing User Group
STEP-BY-STEP
-
1Log in as an administrator and go to the Admin Dashboard.
Learn how to log in here → -
2Go to User Management > User Groups
-
3In the User Group listing, click the first icon to go to the user group for the editing page.
-
4Update value, select toolbar for user group if any
-
5Click Save or Save And Continue Edit
- Click Save: back to User Group listing and show message edit successfully
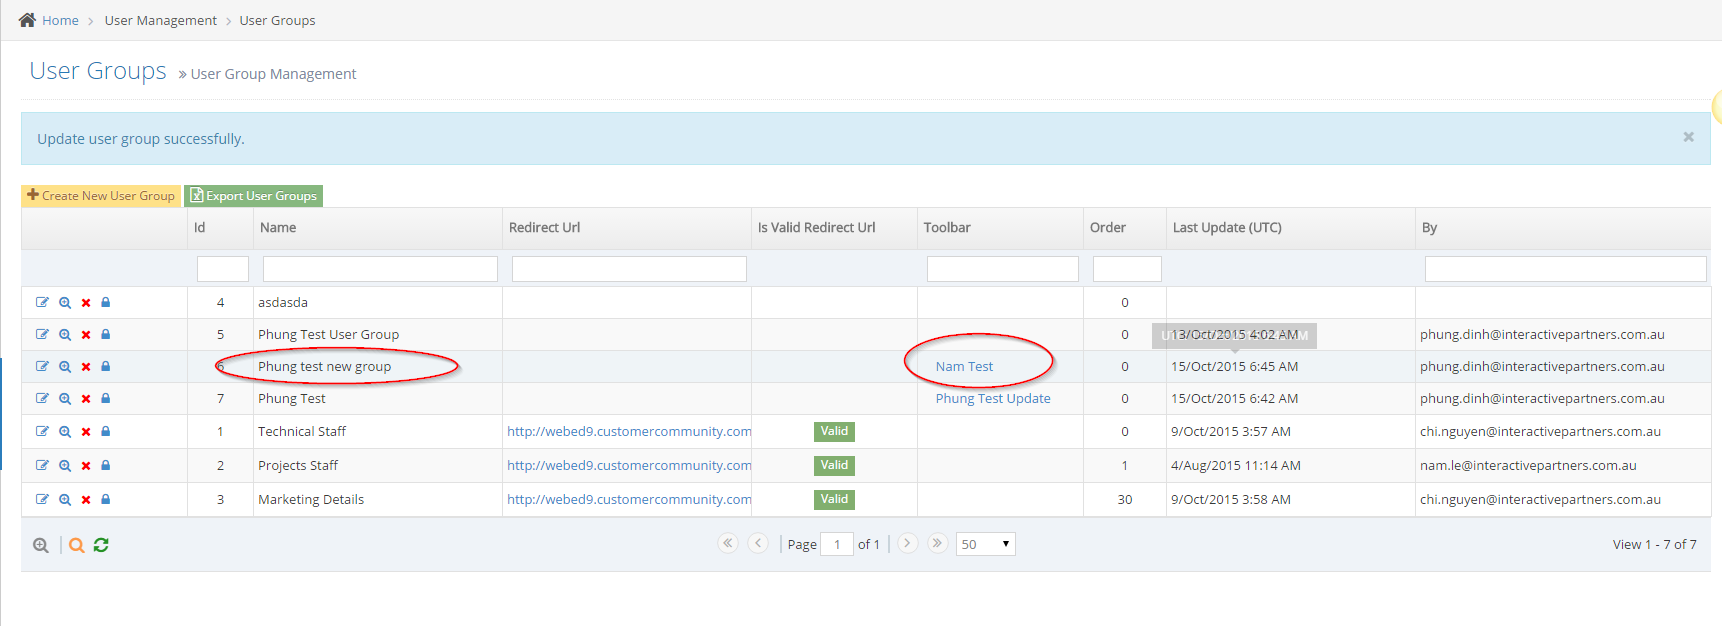
- Click Save And Continue Edit: keep going to the edit page and show a message edit successfully
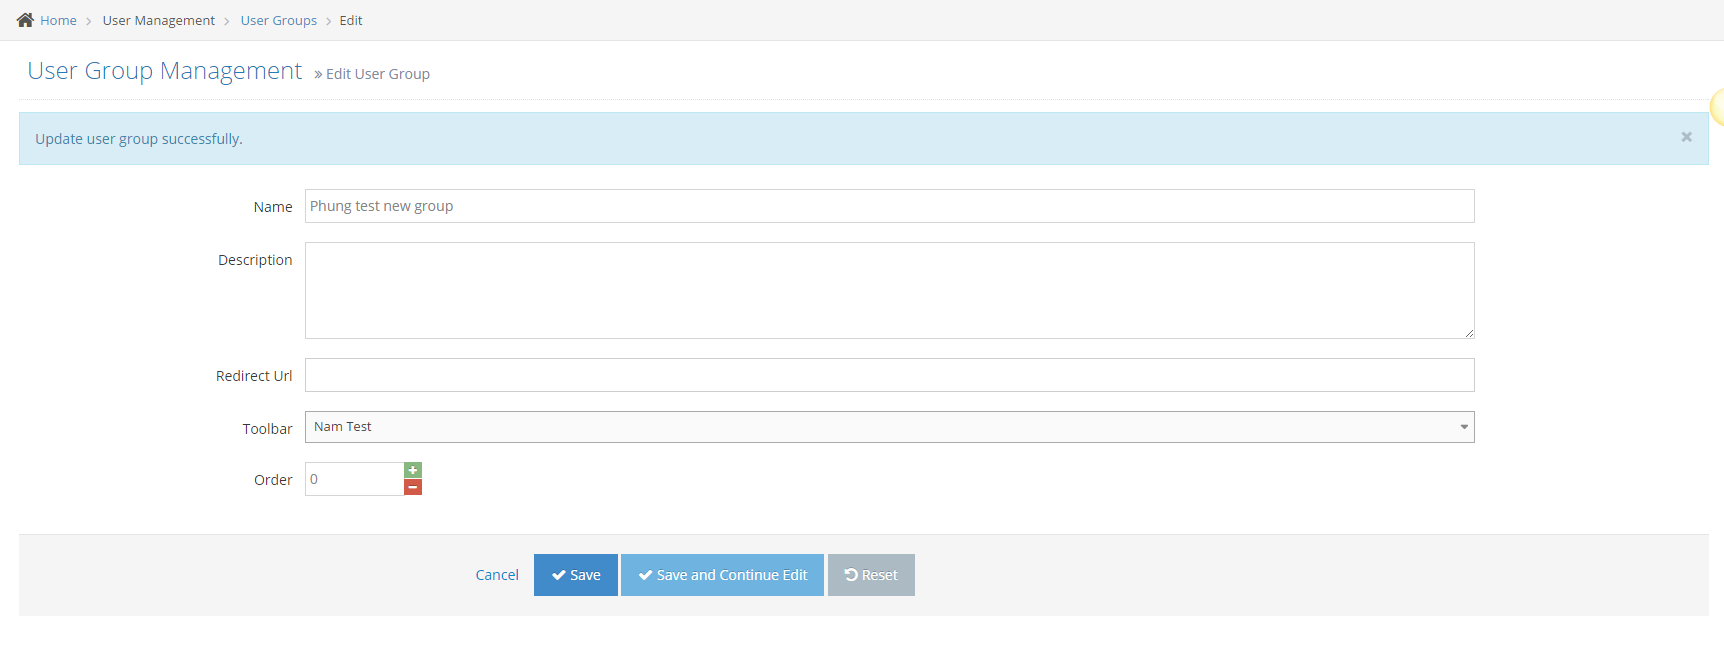
- Click Save: back to User Group listing and show message edit successfully
Setup User Group for New User
STEP-BY-STEP
-
1Log in as an administrator and go to the Admin Dashboard.
Learn how to log in here → -
2Go to User Management > Users
-
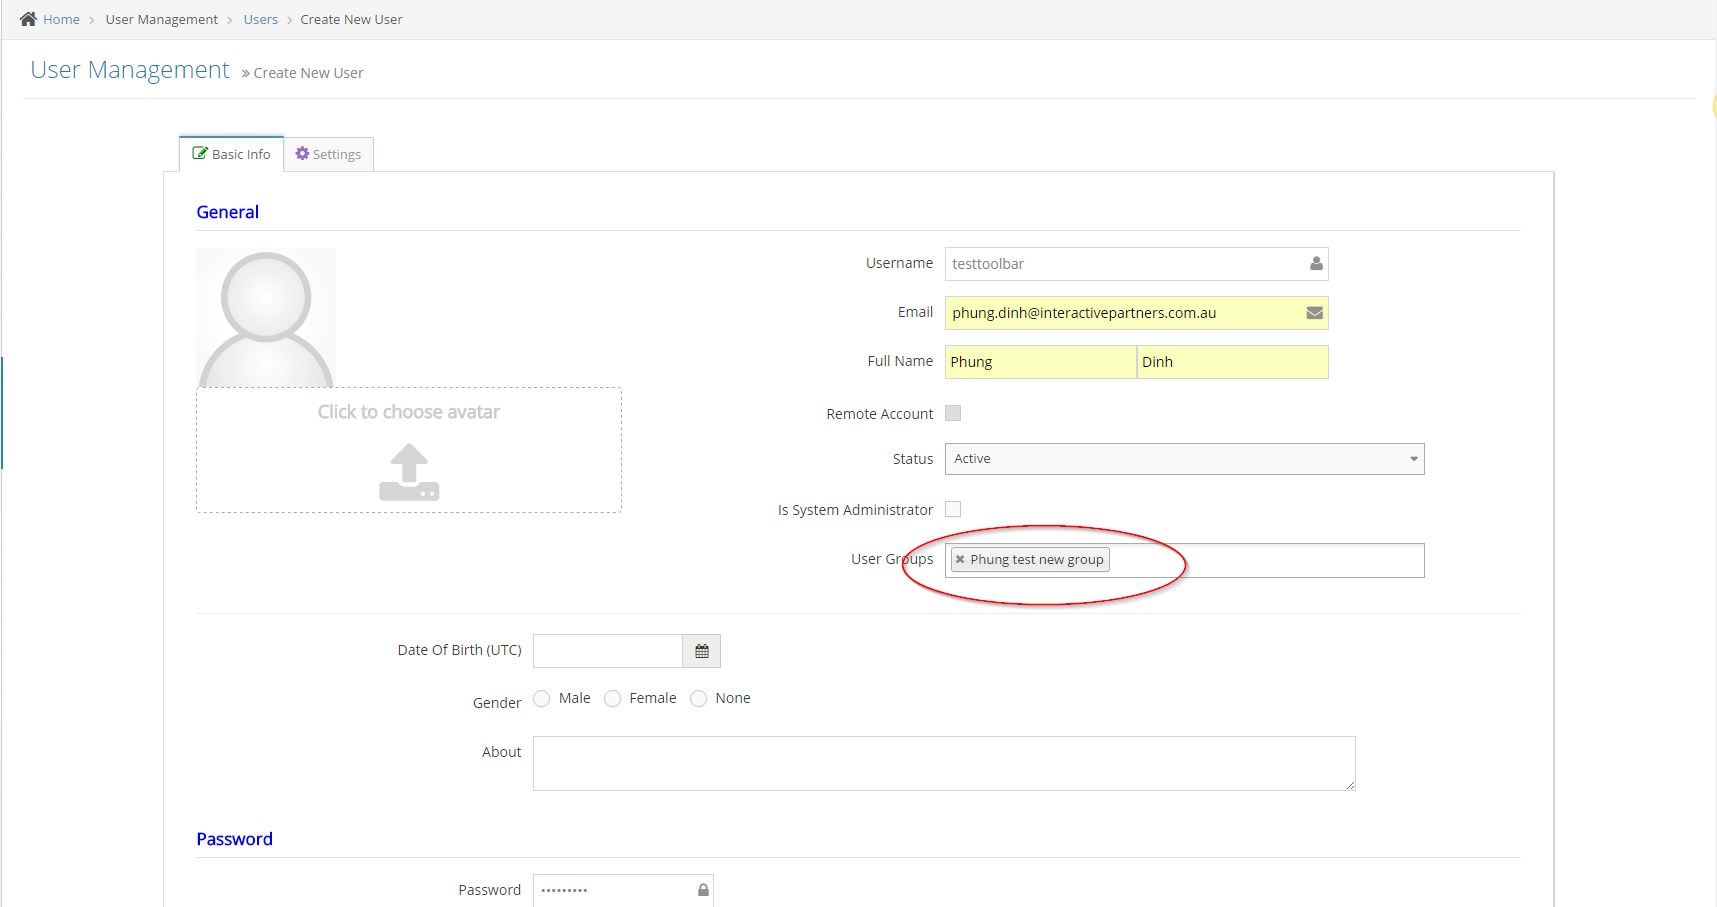
3Click Create New User
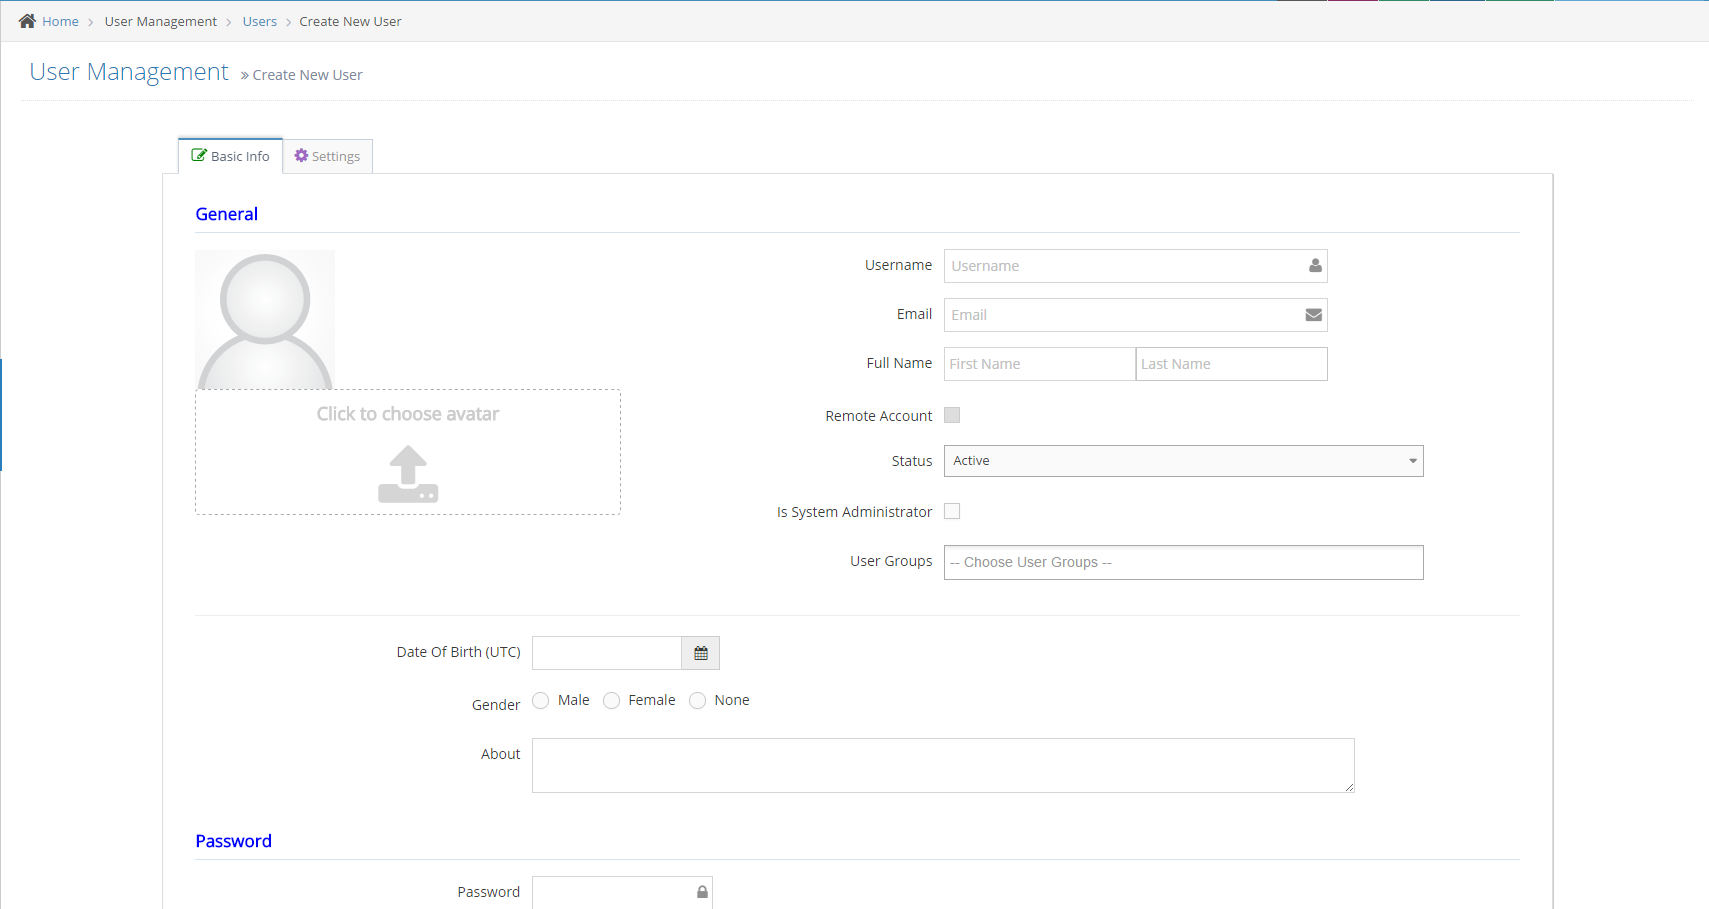
-
4Input information for the User
-
5Select User Group
-
6Click Create or Create And Continue Edit: must pass all failed cases
- If you click Create:
Create message successfully
Back to grid - If you click Create And Continue Edit:
Create message successfully
Redirect to form edit
- If you click Create:
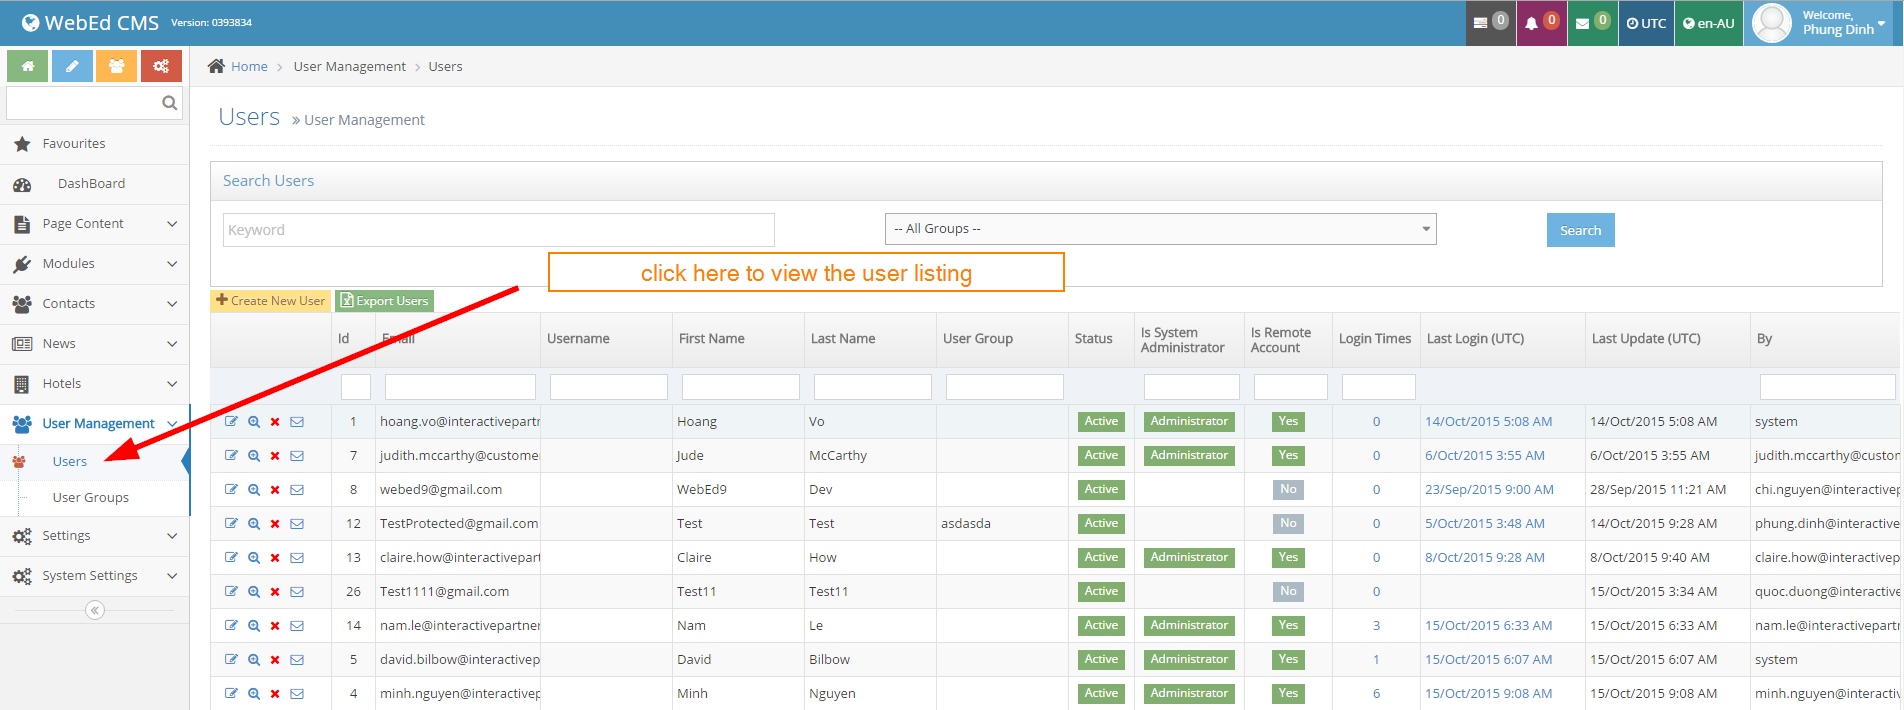
Set Up a User Group for Existing User
STEP-BY-STEP
-
1Log in as an administrator and go to the Admin Dashboard.
Learn how to log in here → -
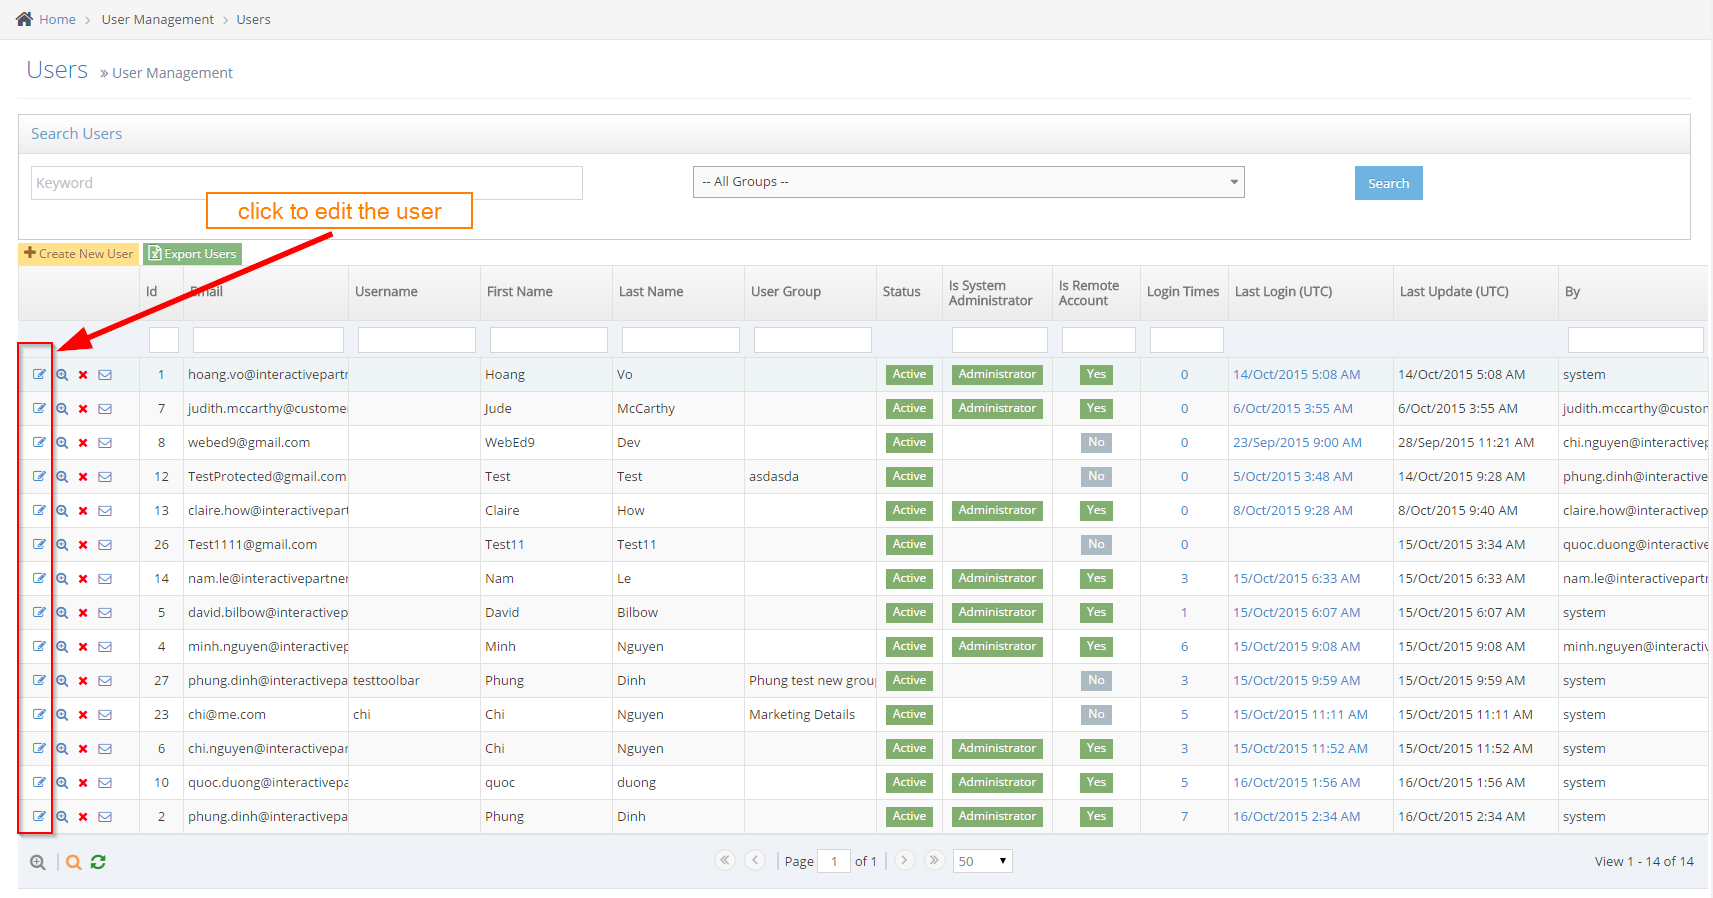
2Go to User Management > Users
-
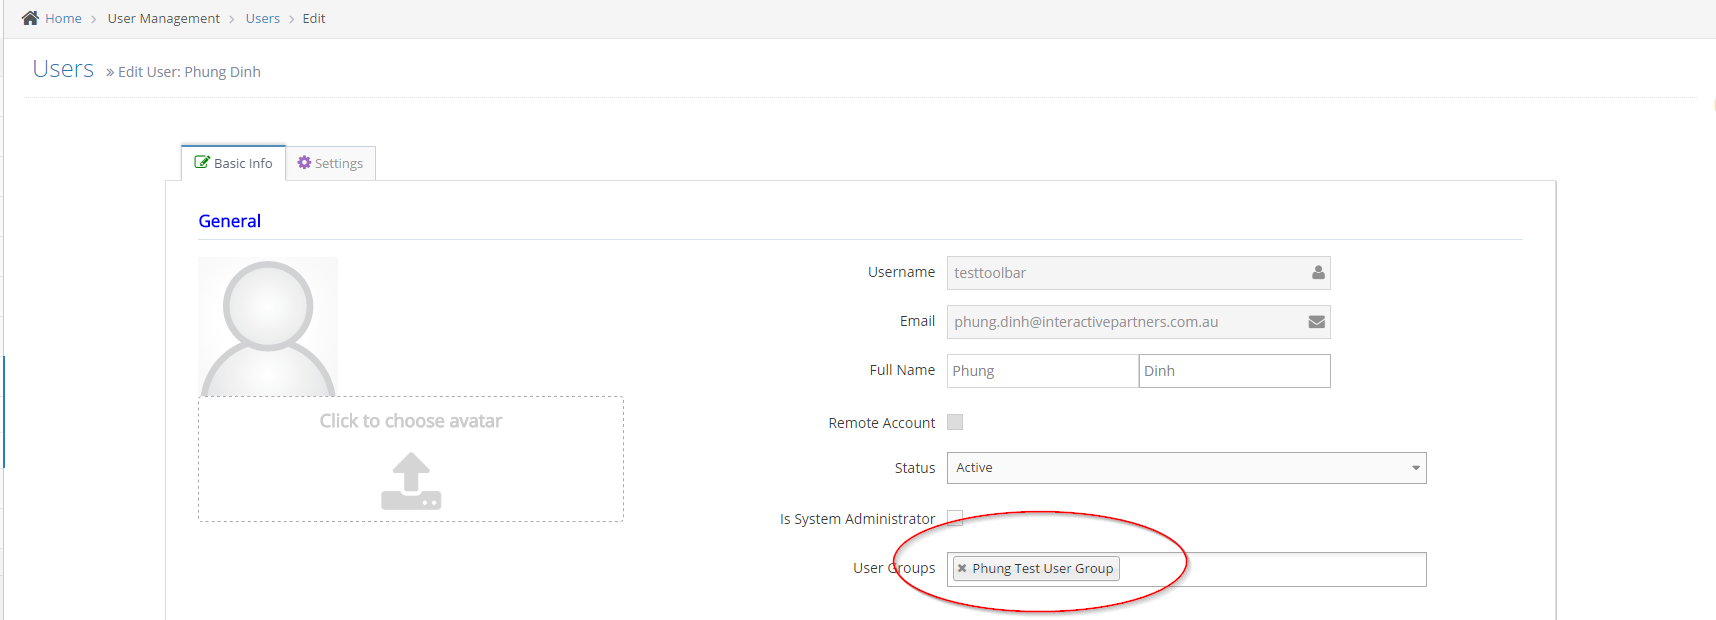
3From the User listing, click the first icon per row on the grid
-
4Setup User Group for User
-
5Select User Group
-
6Click Create or Create And Continue Edit: must pass all failed cases
- If Click Create
Create message successfully
Back to grid - If Click Create And Continue Edit
Create message successfully
Redirect to form edit
- If Click Create
Loading Toolbar by User Login
STEP-BY-STEP
-
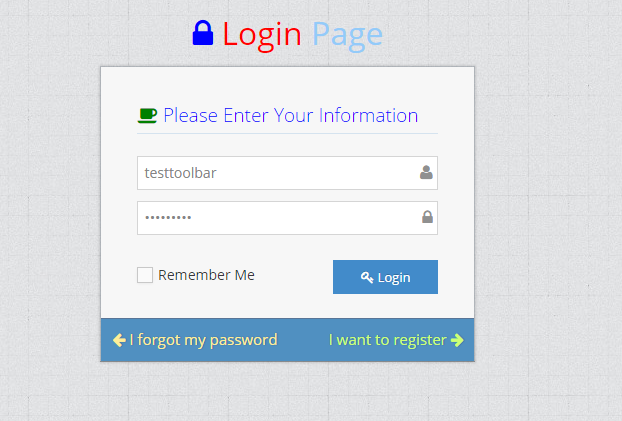
1Log in as an administrator and go to the Admin Dashboard.
Learn how to log in here → -
2Set user group that can edit the page

-
3Log in as the user that has the user group assigned toolbar access
-
4Go to the page to edit or create a page
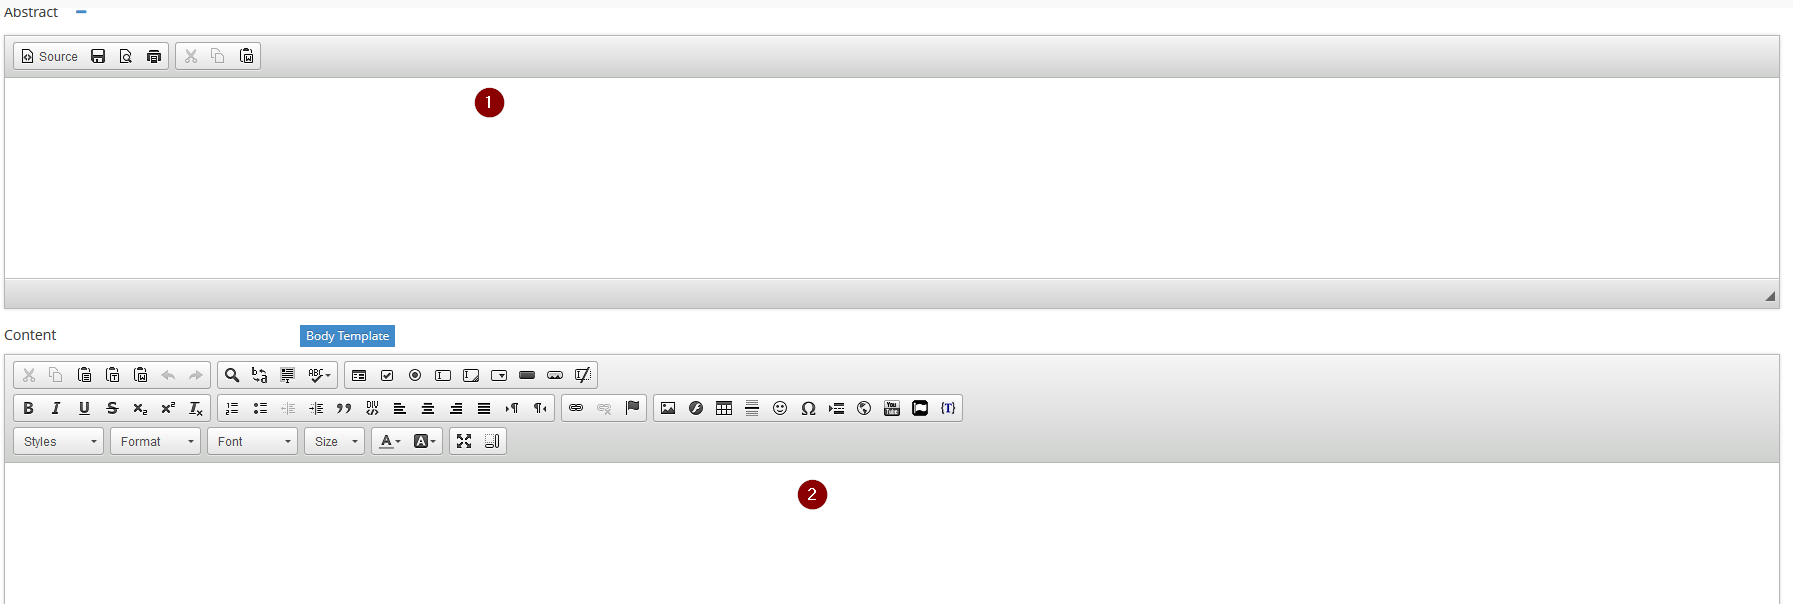
- (1) Basic Toolbar
- (2) Page Toolbar