Updating your Photo Gallery images
Checking the location of a photo gallery
STEP-BY-STEP
-
1Log in as an administrator and go to the Admin Dashboard.
Learn how to log in here → -
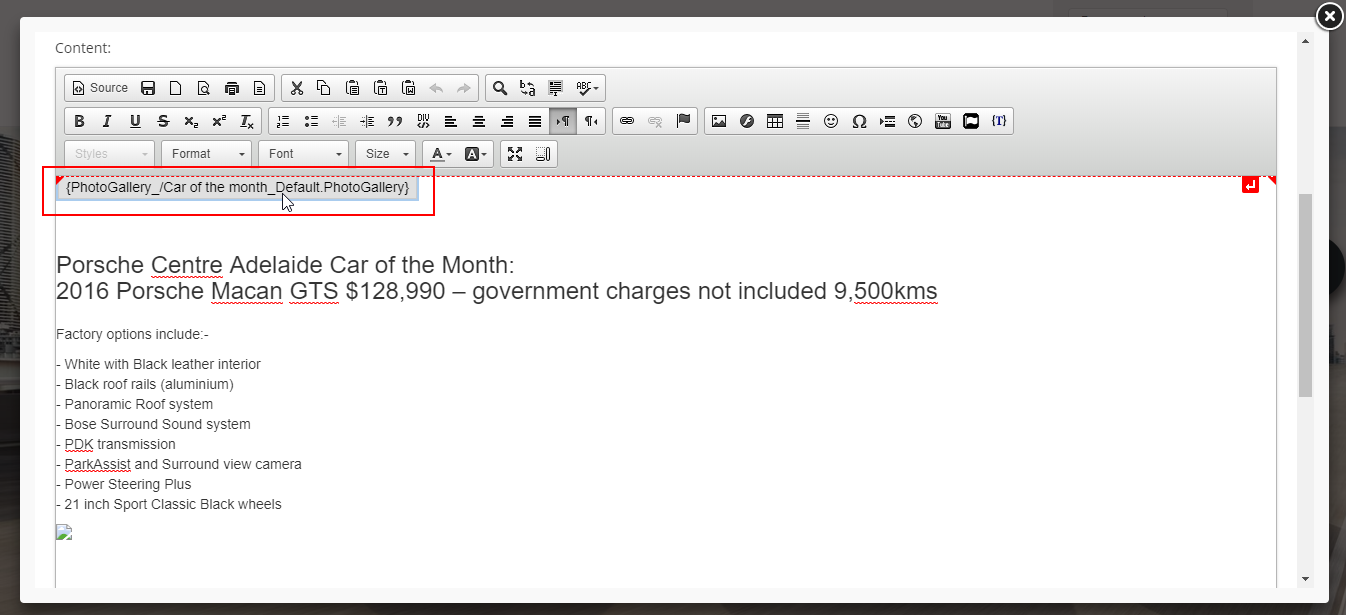
2Go to the page where the photo gallery is located
-
3Load the page editor: click the edit icon on the right
-
4Place your cursor over the photo gallery curly bracket
-
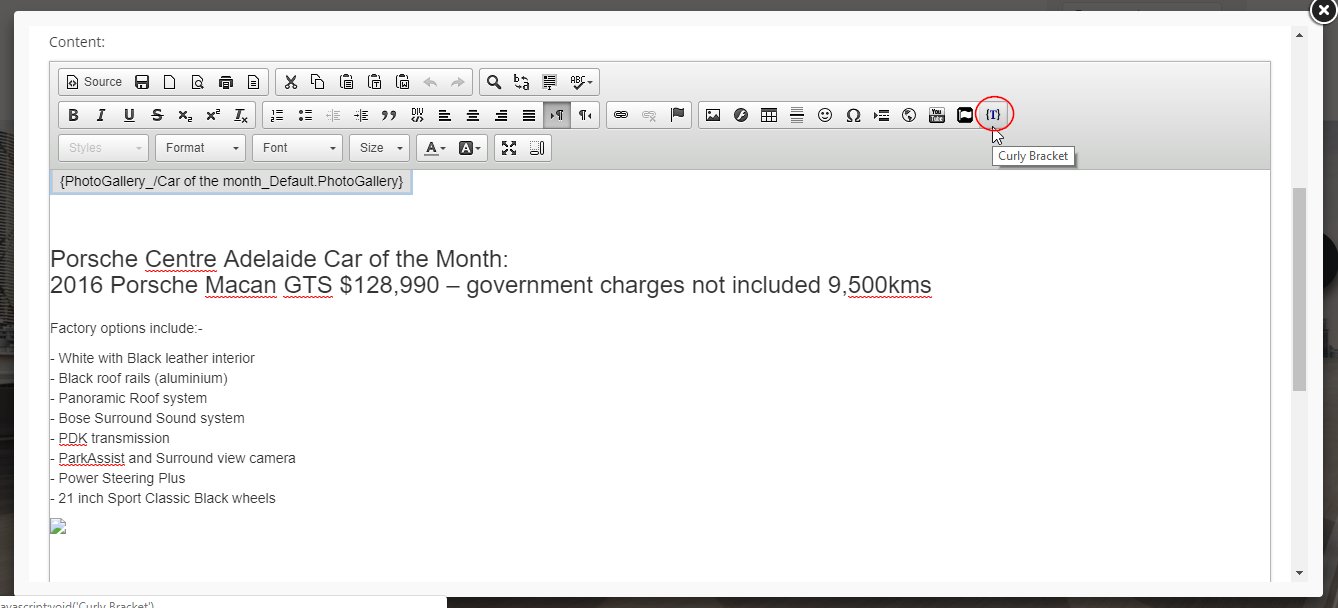
3Click the curly bracket icon
-
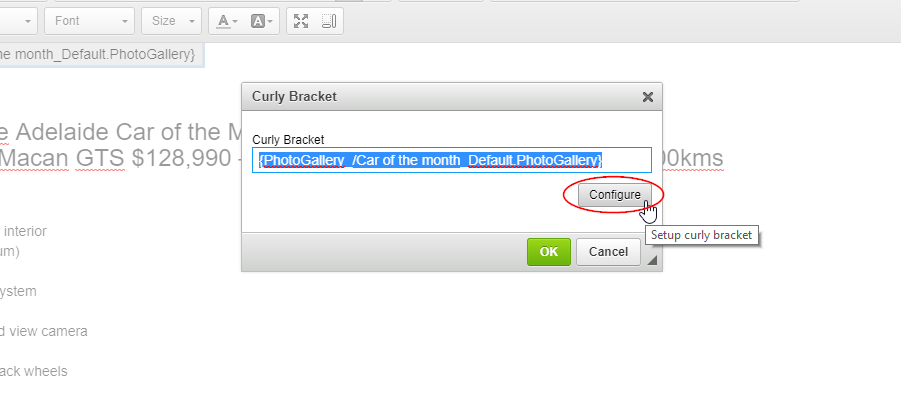
3Click "Configure"
-
4Under "Path" is the location of the images in your photo gallery
Updating the images in your photo gallery
STEP-BY-STEP
-
1Log in as an administrator and go to the Admin Dashboard.
Learn how to log in here → -
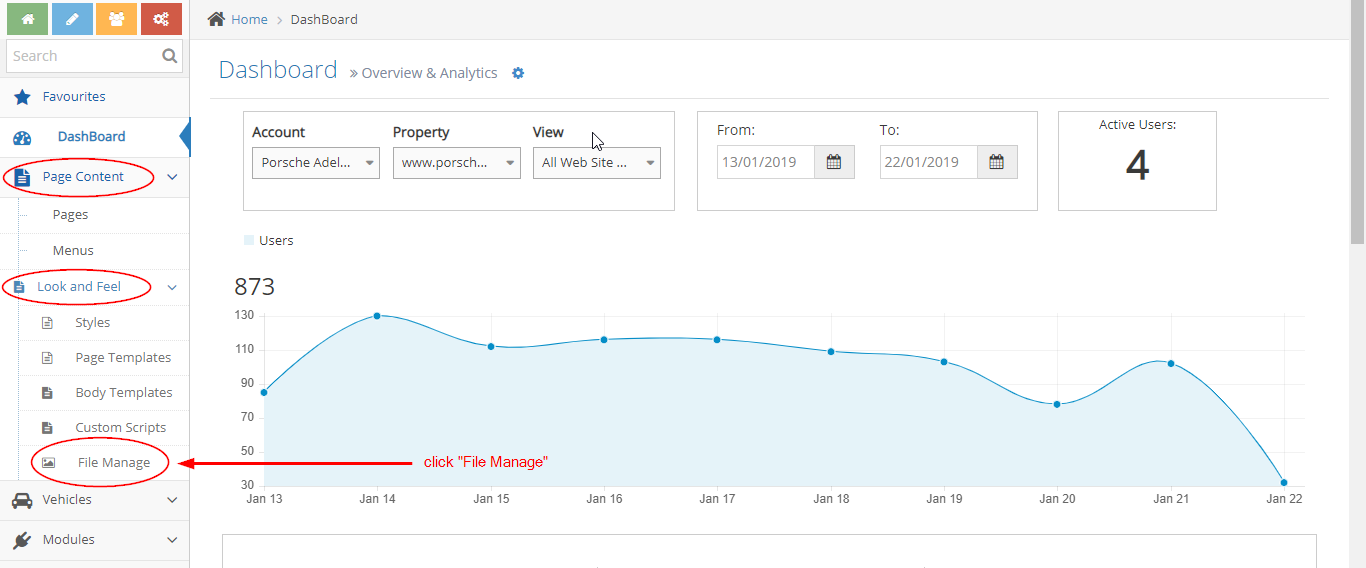
2On the left nav panel, go to Look and Feel >File Manage
-
3Under "MEDIA", open the "PhotoGalleries" folder
-
4Look for the folder of the photo gallery
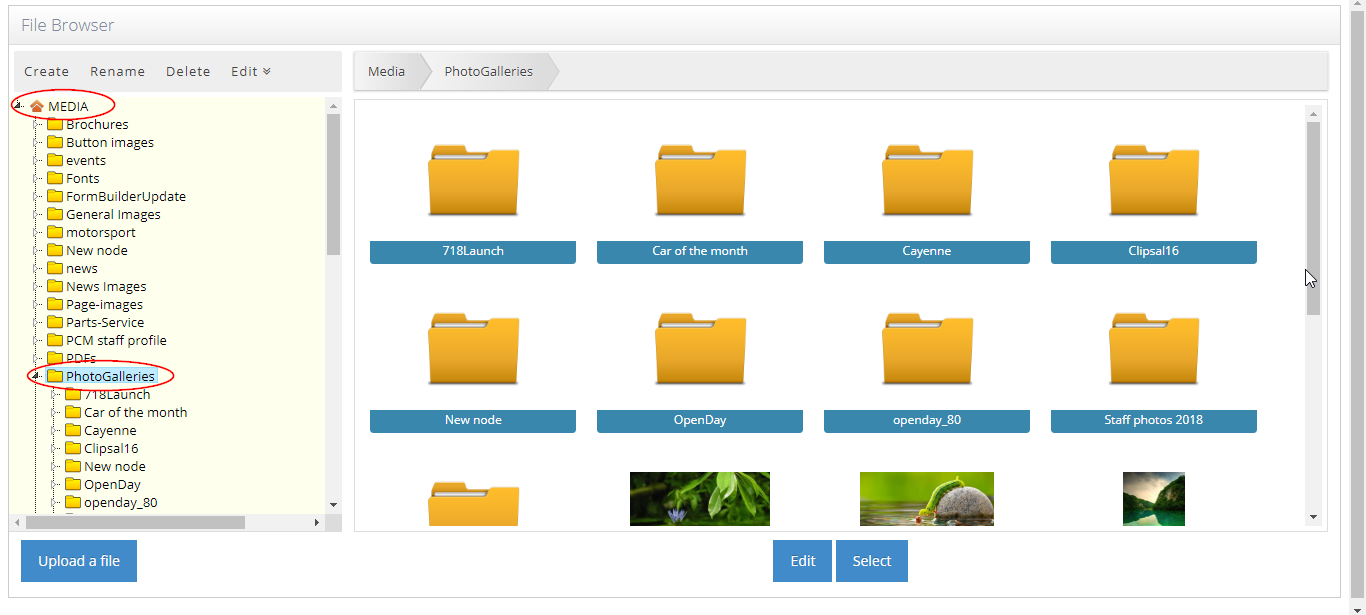

-
5Click the curly bracket icon
-
6Update images as needed (add, edit, delete)