What is Google Tag Manager?
Google Tag Manager is a tag management system (TMS) that allows you to quickly and easily update tracking codes and related code fragments collectively known as tags on your website or mobile app. Once the small segment of Tag Manager code has been added to your project, you can safely and easily deploy analytics and measurement tag configurations from a web-based user interface.
Benefits of using Google Tag Manager
Google Tag Manager allows small businesses to customize the placement of website tags based on specific pages, triggers, variables, and actions.
Adding Google Tag Manager to WebEd
Update the Google Analytics Configuration
-
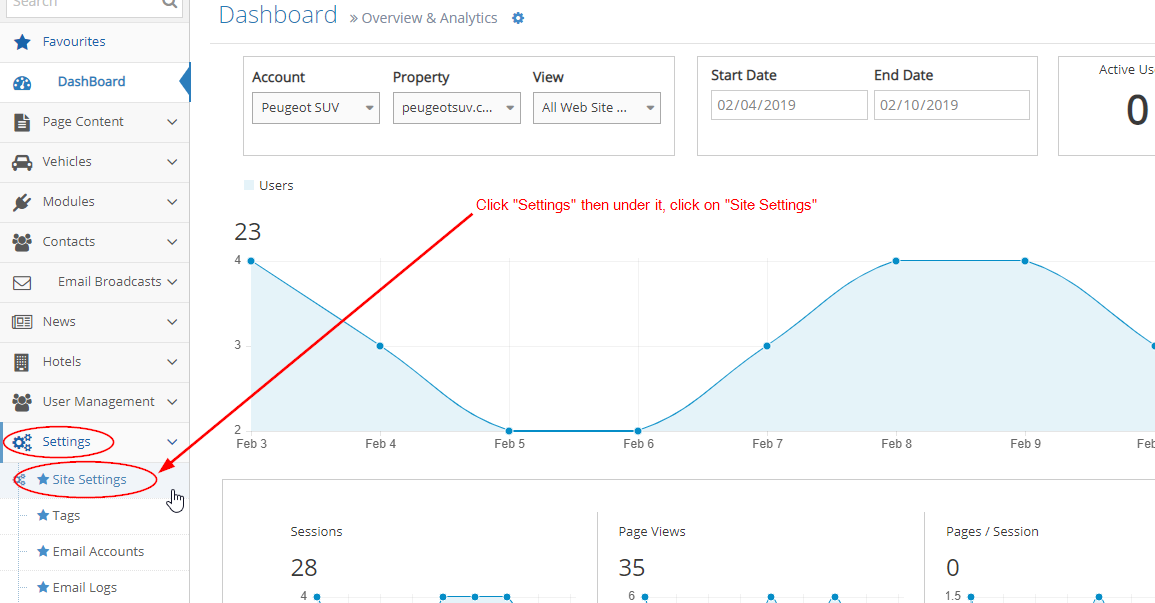
1Go to Admin > Site Settings > click 'Site Settings'
-
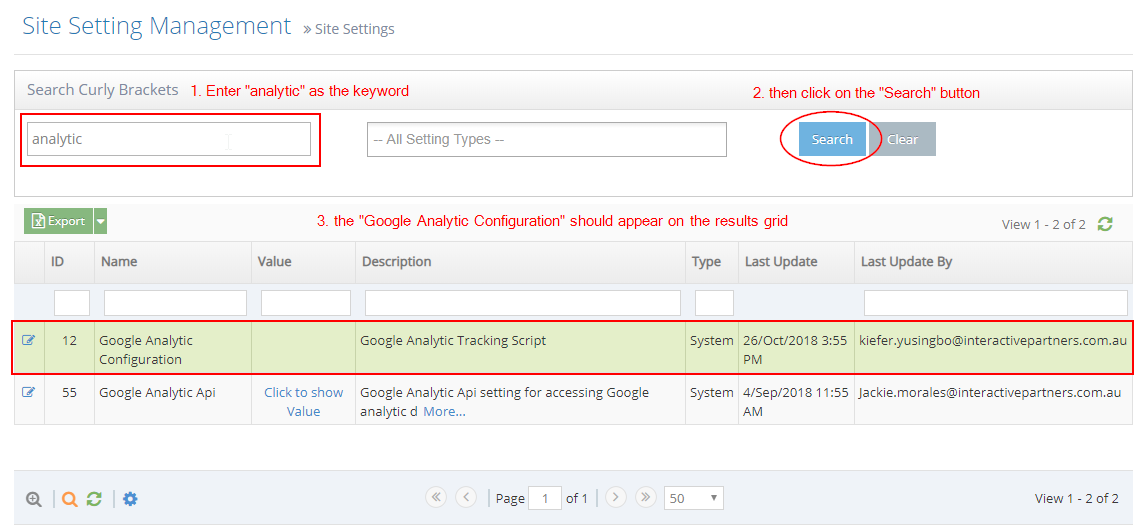
2Under the 'Search Curly Bracket' input field, enter "analytic" as the keyword
-
3Click on the 'Search' button on the right
-
4The 'Google Analytic Configuration' should appear on the results grid
-
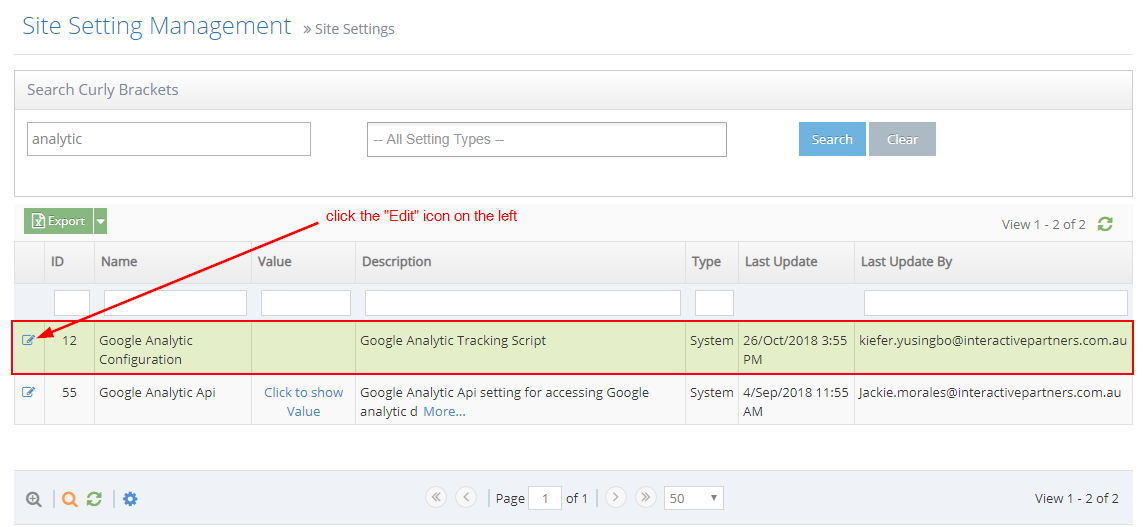
5On the grid results, click on the 'Edit' icon on the left.

-
6Log in to your Google Tag Manager account https://tagmanager.google.com
-
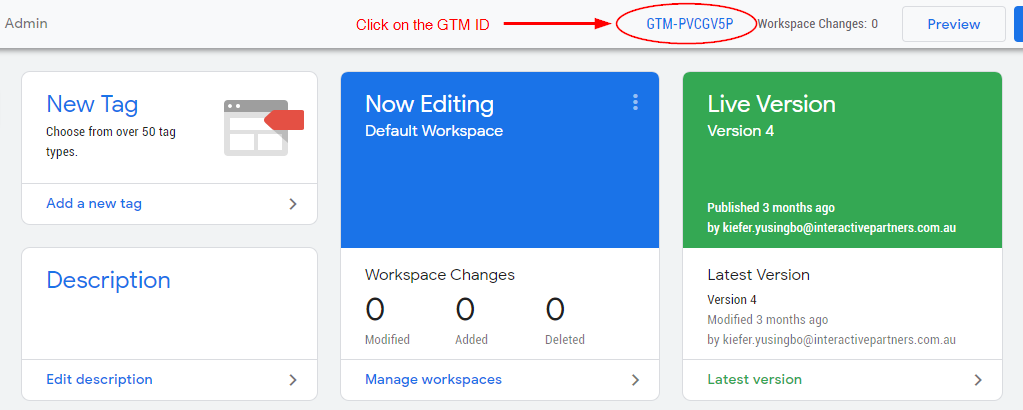
7Go to Google Tag Manager and click on the GTM ID at the top
-
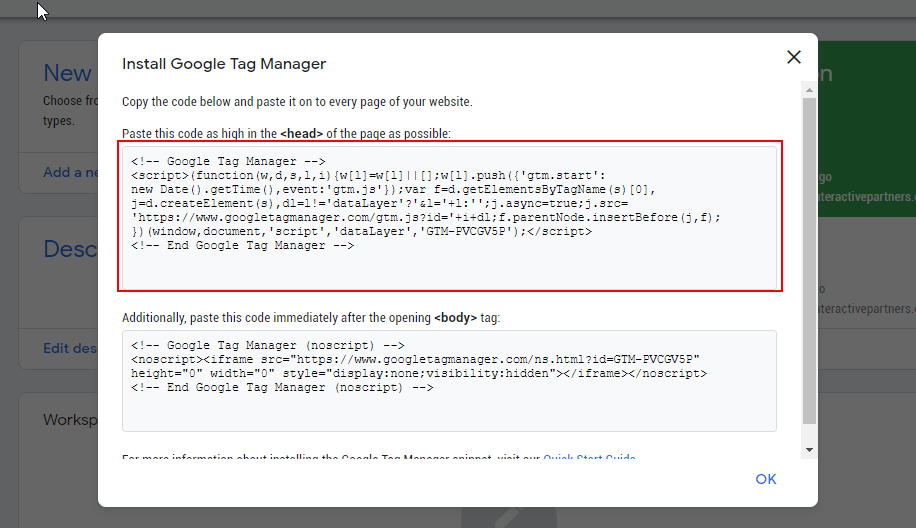
8You should be able to see the codes for the installation of Google Tag Manager
-
9Copy the code for the <head> (the first field)
-
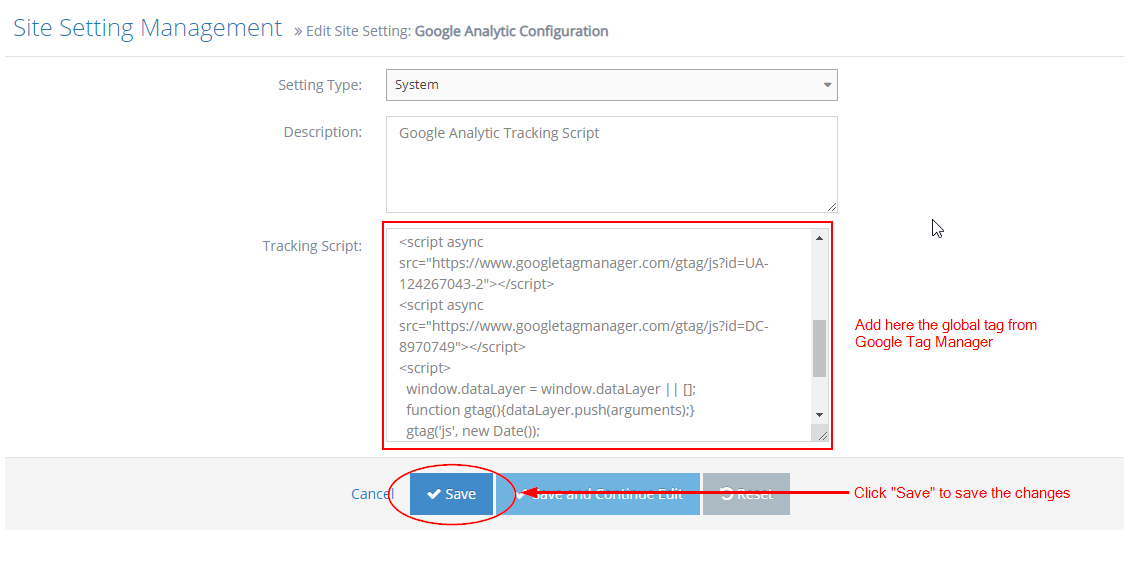
10Go back to your site and paste this on the 'Tracking Script' field.
-
11Click the 'Save' button below to save the changes.
Google Tag Manager Guide
How to Set Up Google Analytics on Google Tag Manager
Google Analytics should be set up as a variable
-
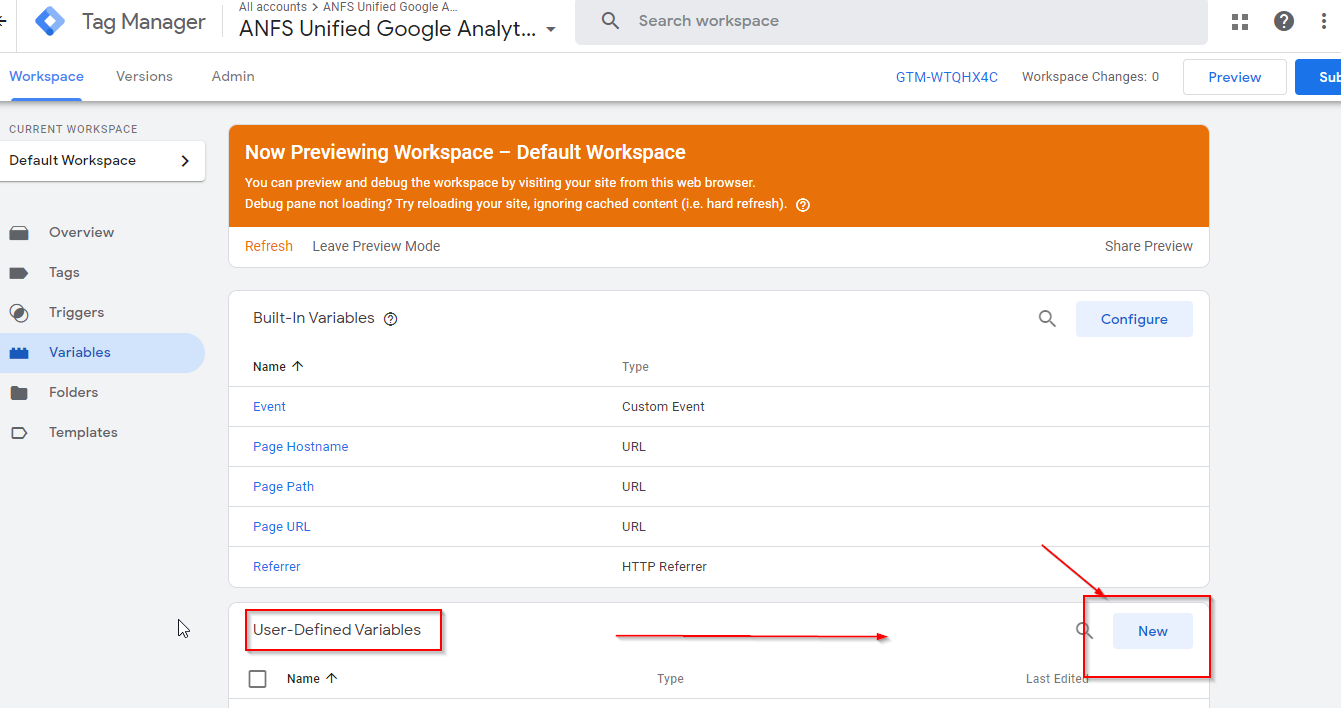
1Under the Workspace menu, go to Variables

-
2On User Defined Variables, click New
-
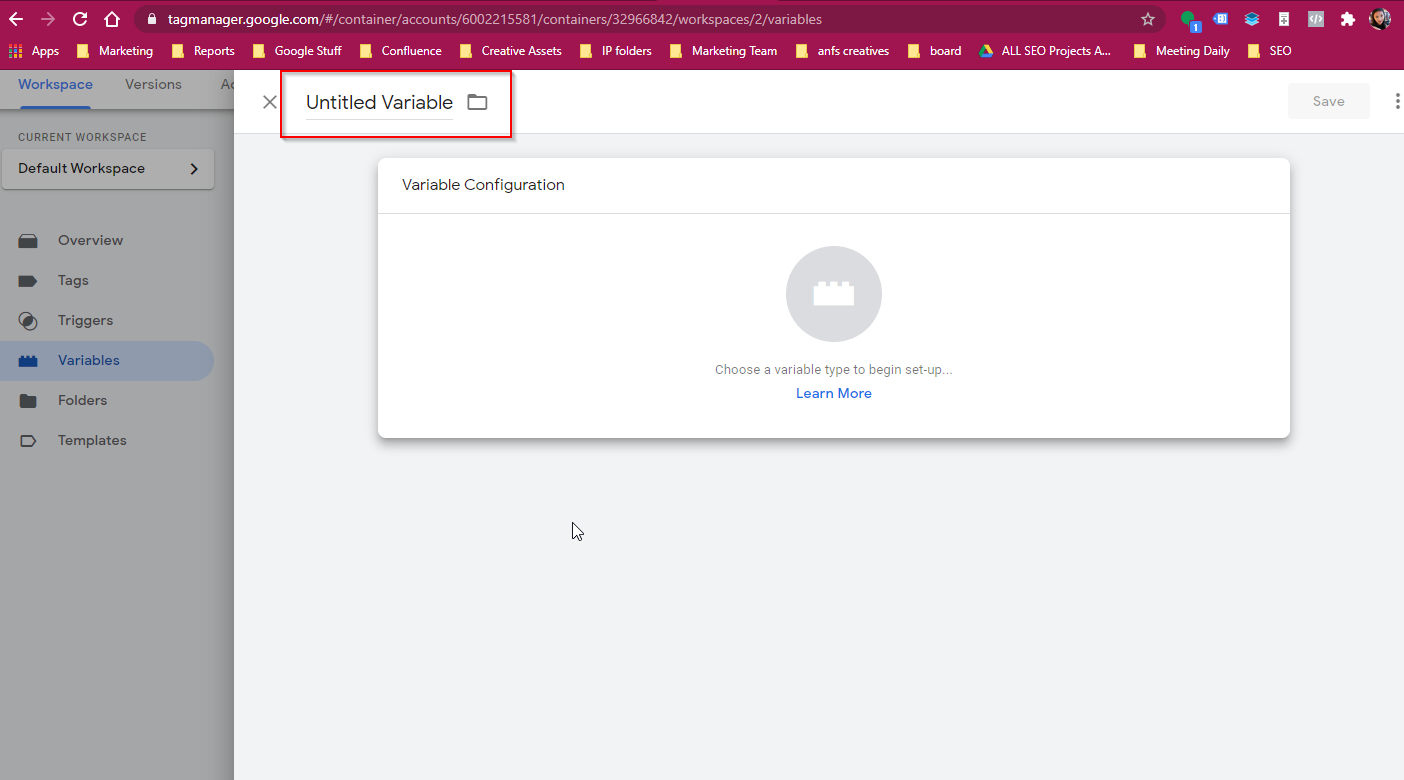
3Rename the Variable to indicate Google Analytics
-
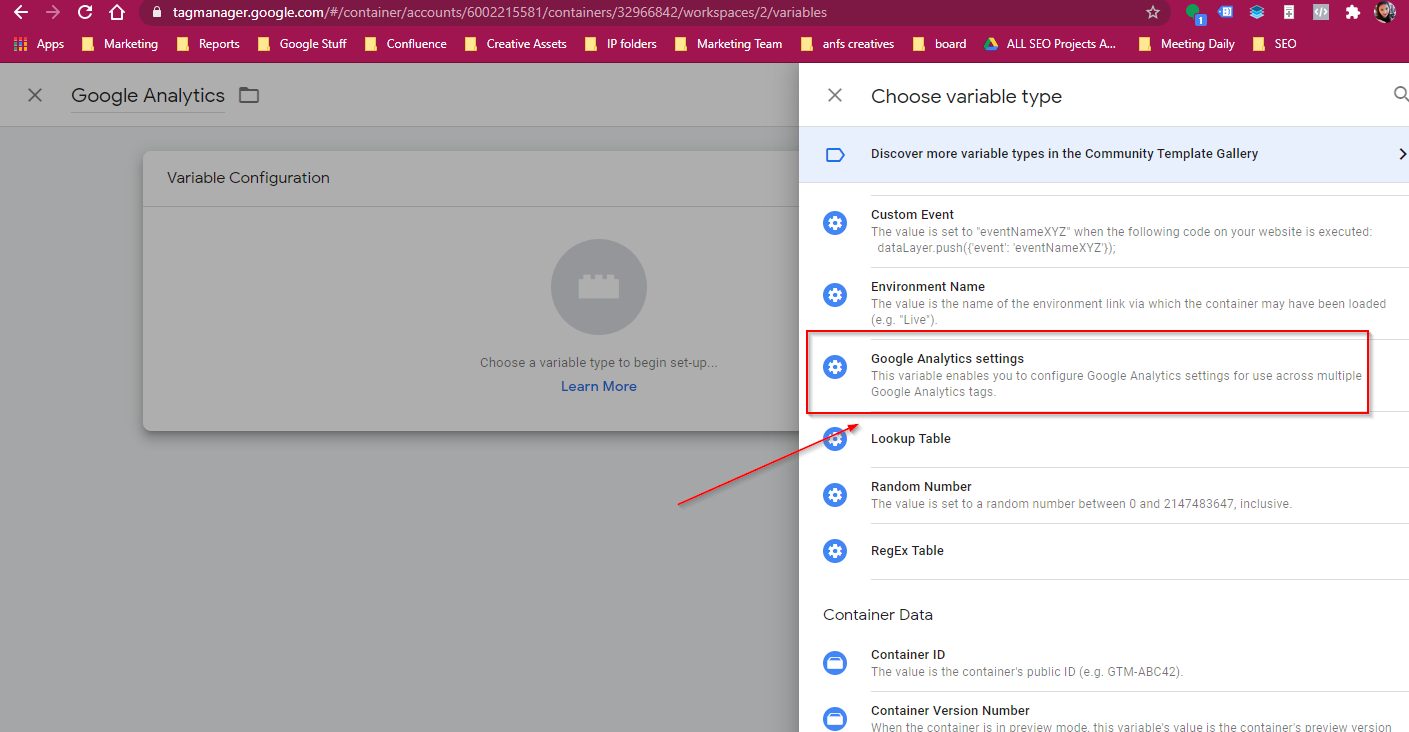
4Click the block icon

-
4Scroll through the Selection and choose Google Analytics Settings
-
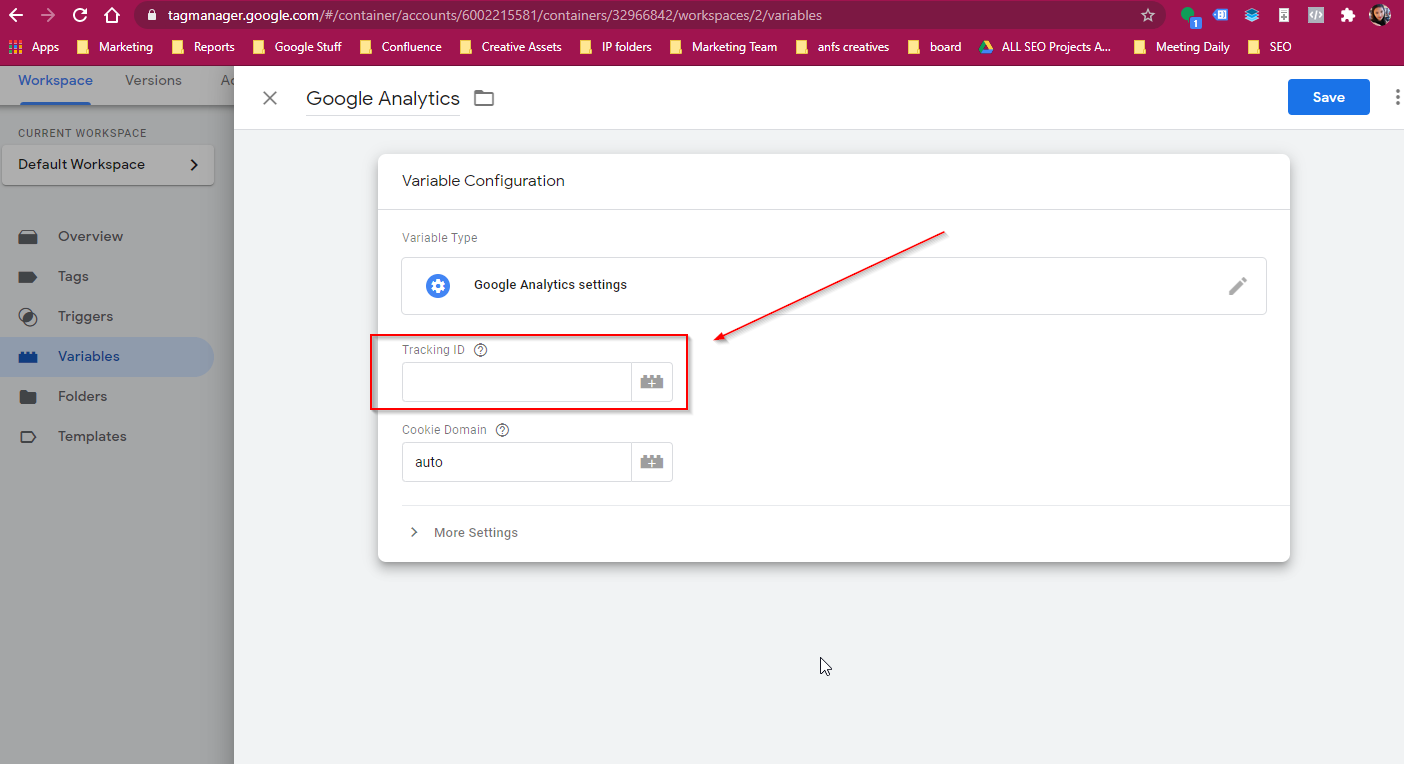
4Get the Tracking ID on Google Analytics and add it on the required fields
-
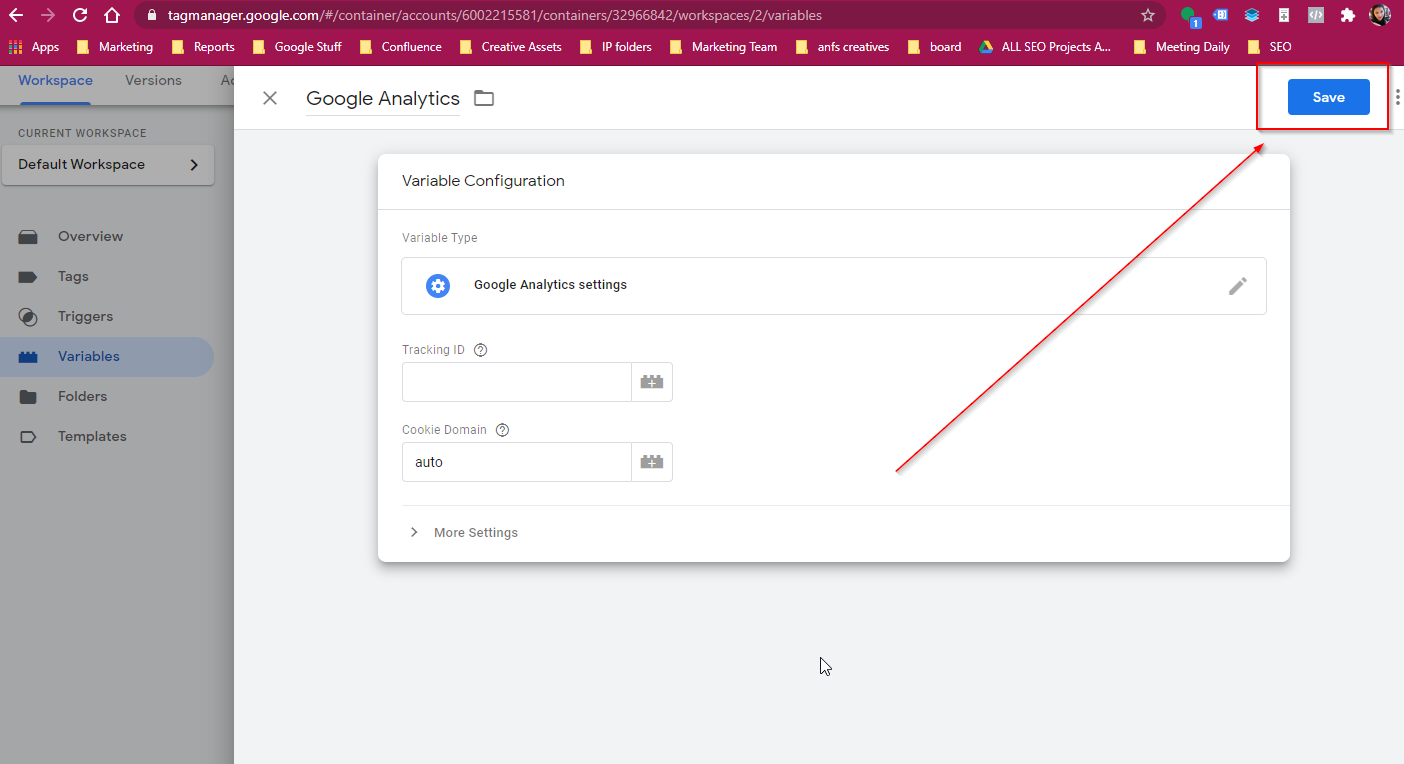
4Then click Save
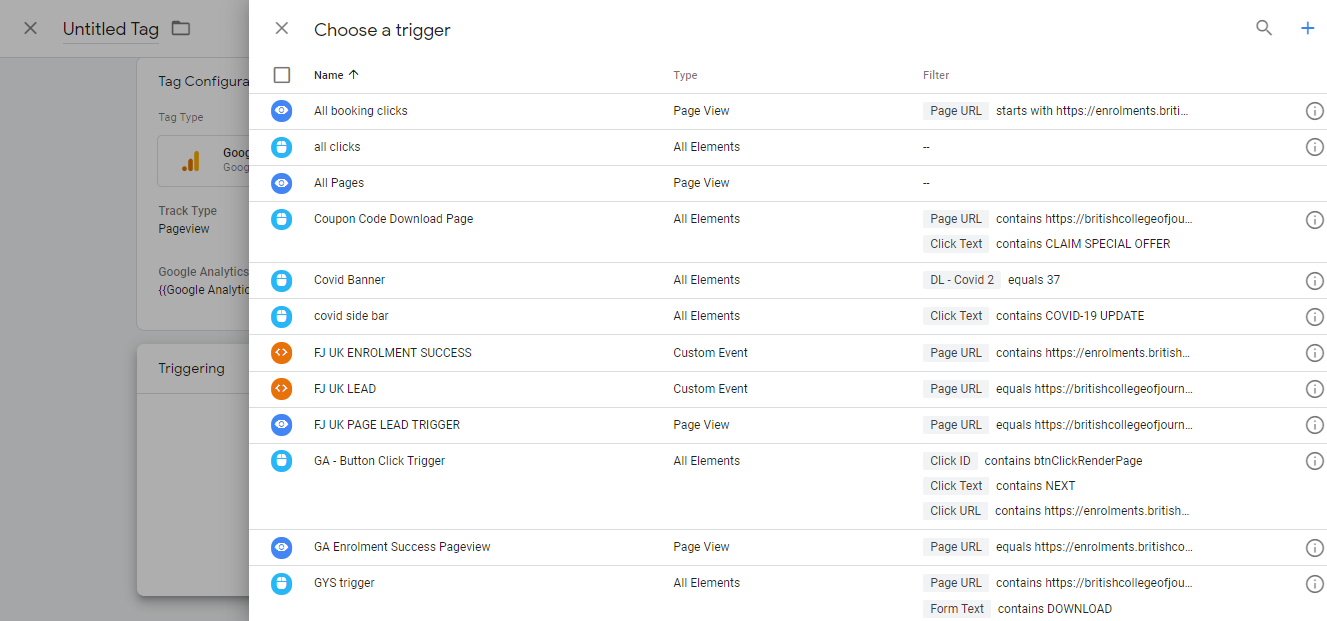
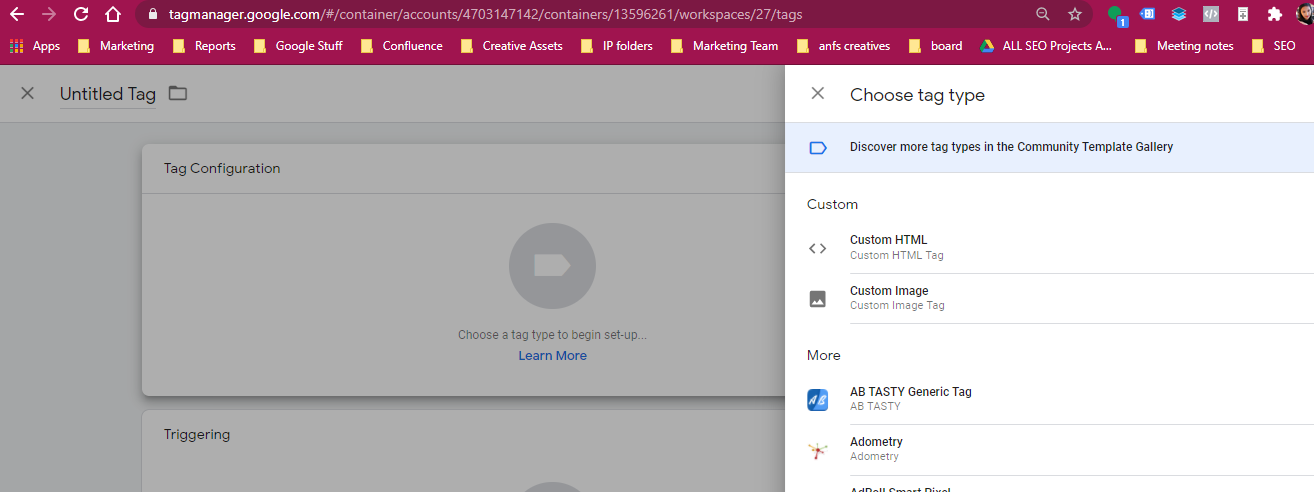
How to Create New Tag
-
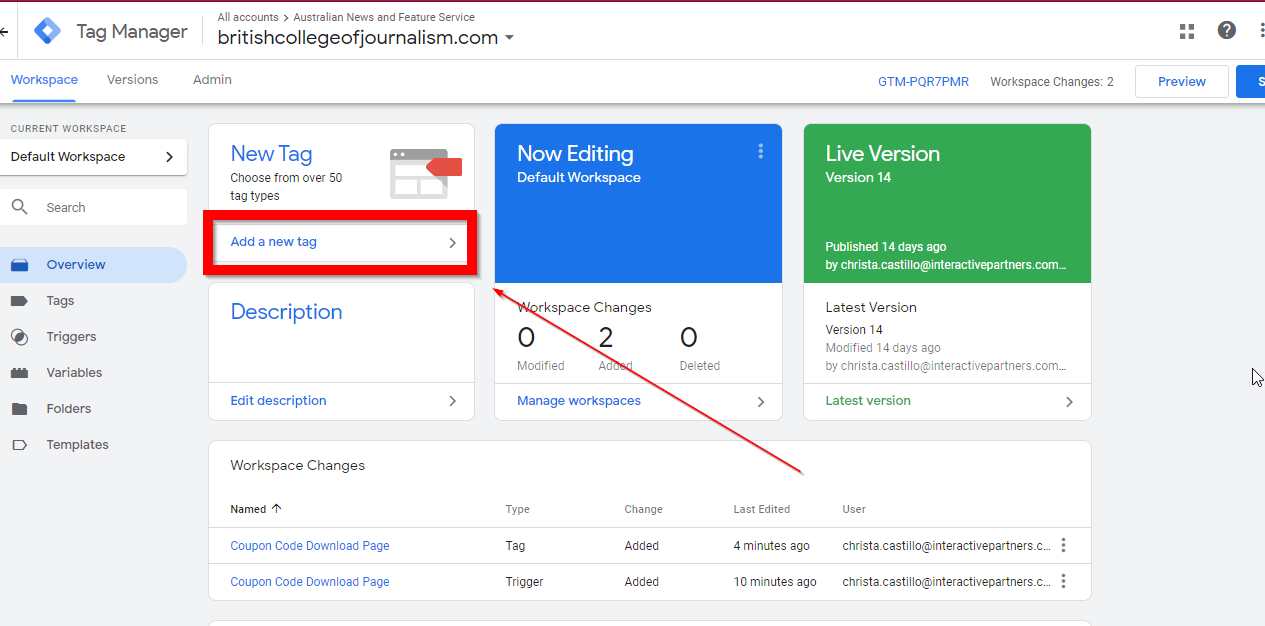
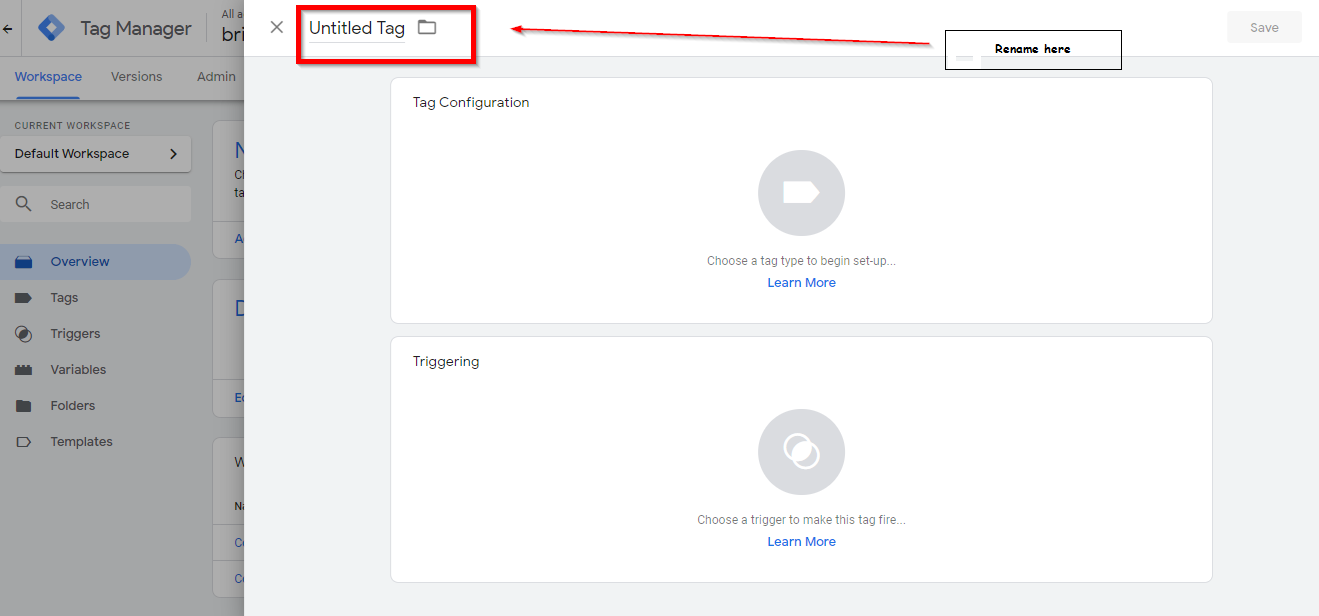
1On the Overview Page, click New Tag
-
2Create a name for the tag
-
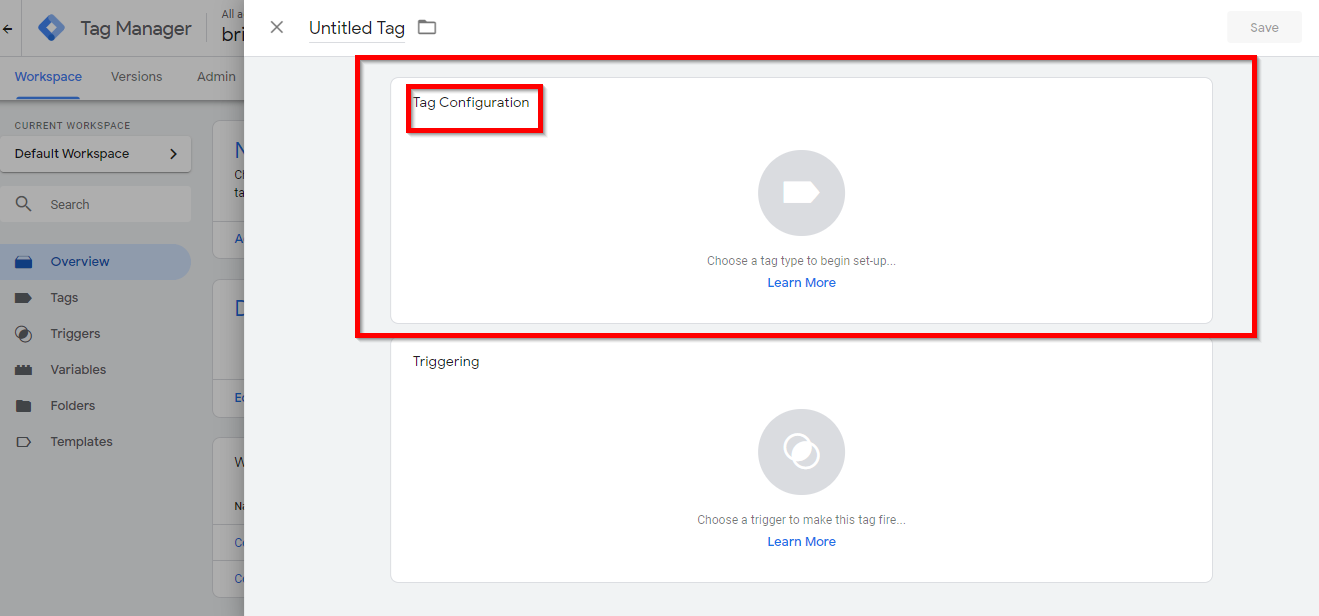
3Click on the Tag Configuration
-
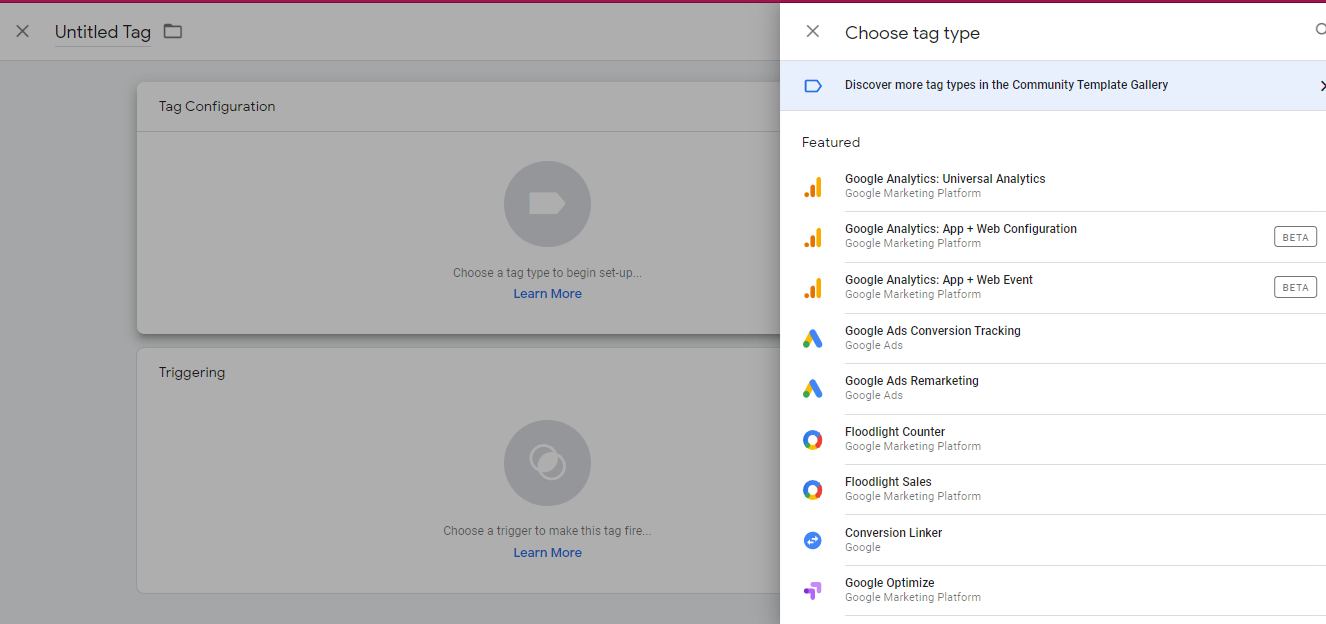
4Choose Tag Configuration to use
-
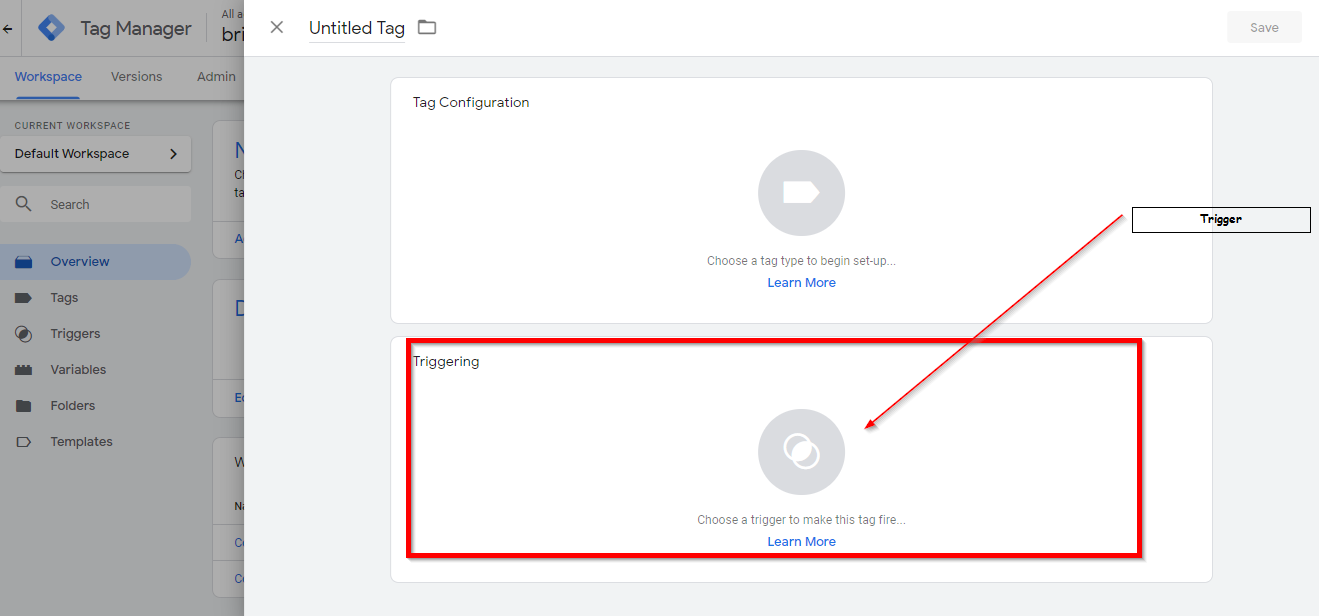
4Click on Trigger
-
4Choose which trigger best fits objective
-
4Click Save
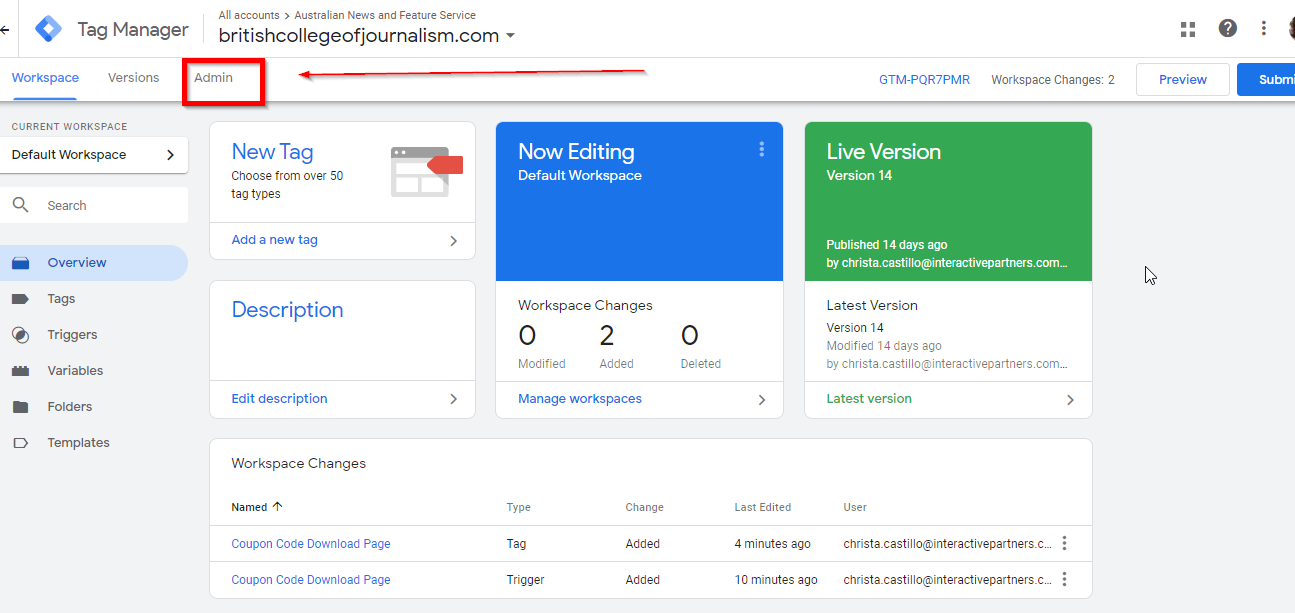
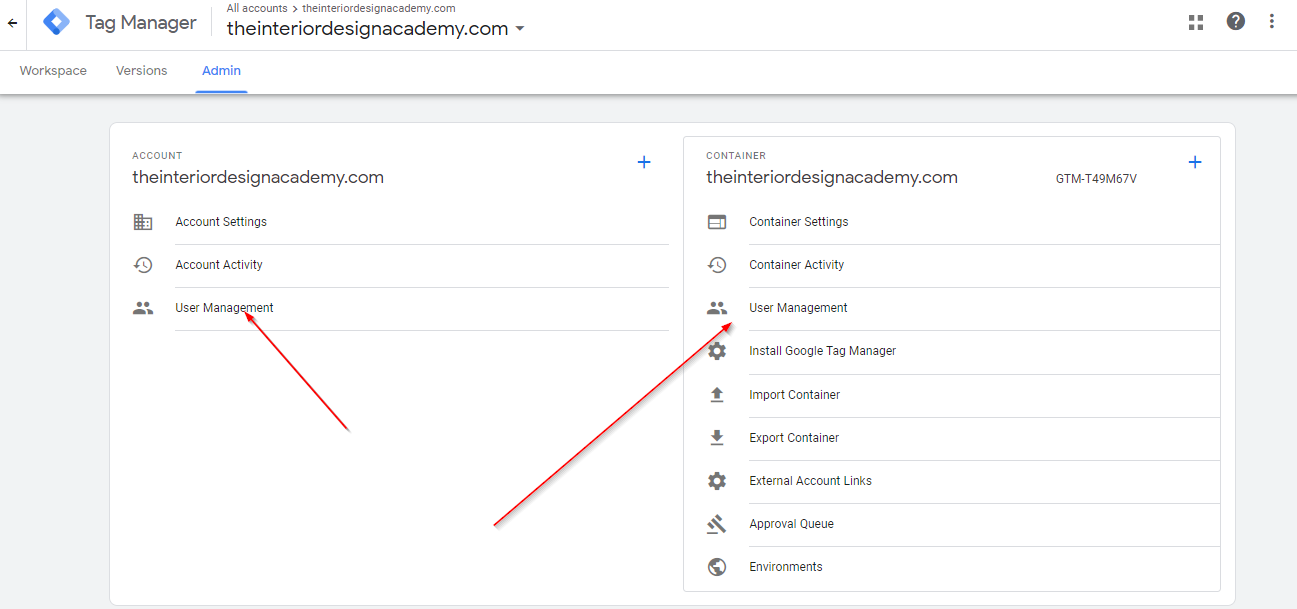
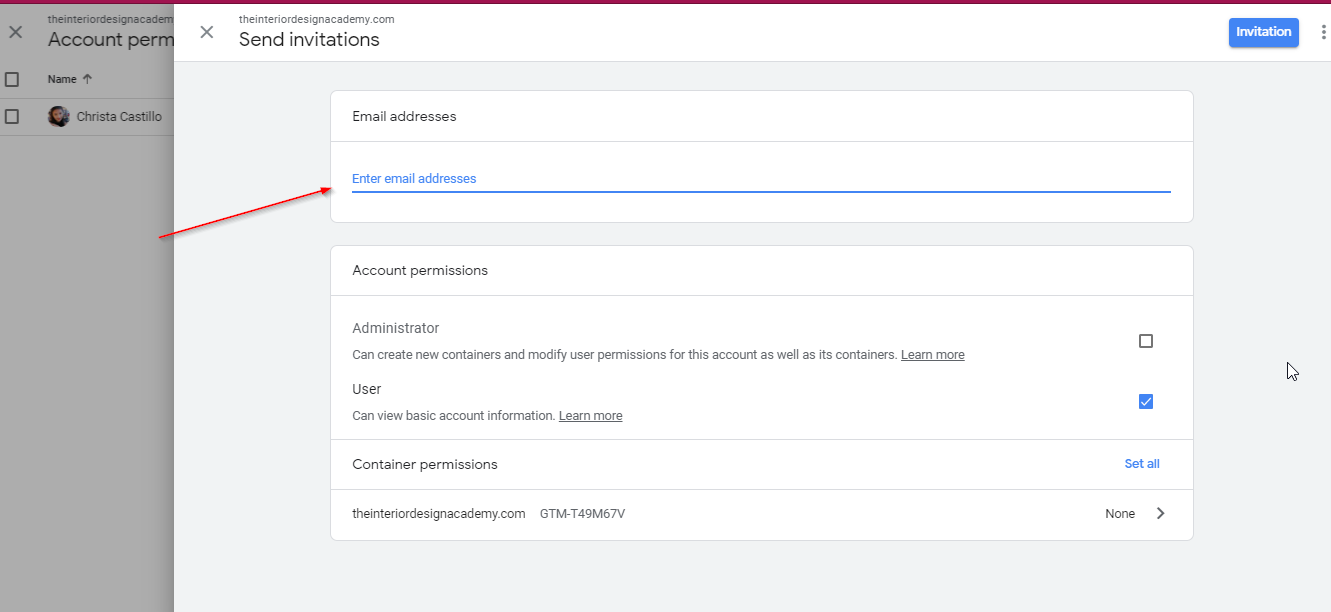
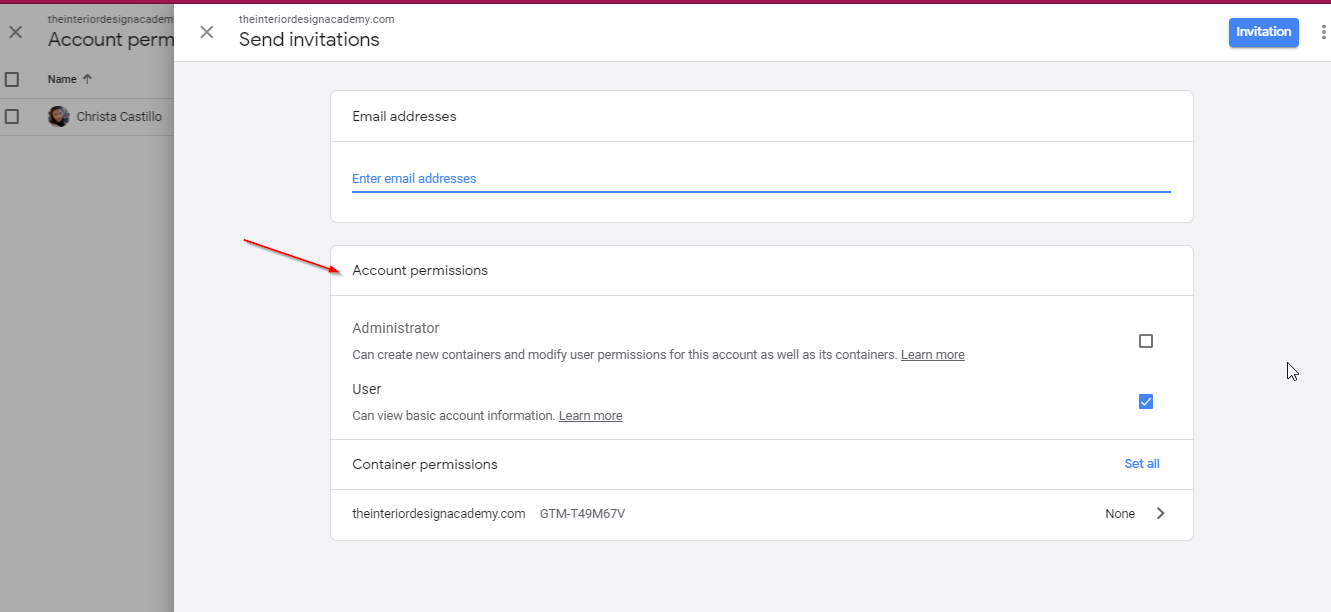
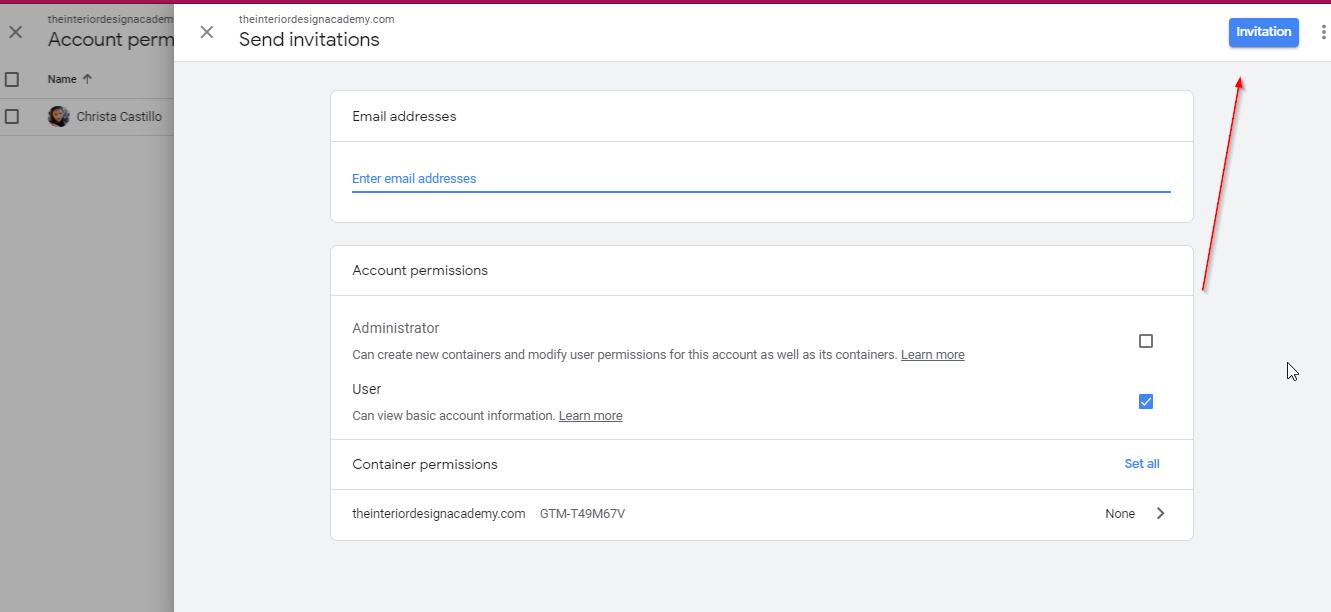
How to Add User Permission on Google Tag Manager
-
1Click the Admin tab on the menu
-
2Choose whether to add on Account or on Container. Best to add person to Account instead
-
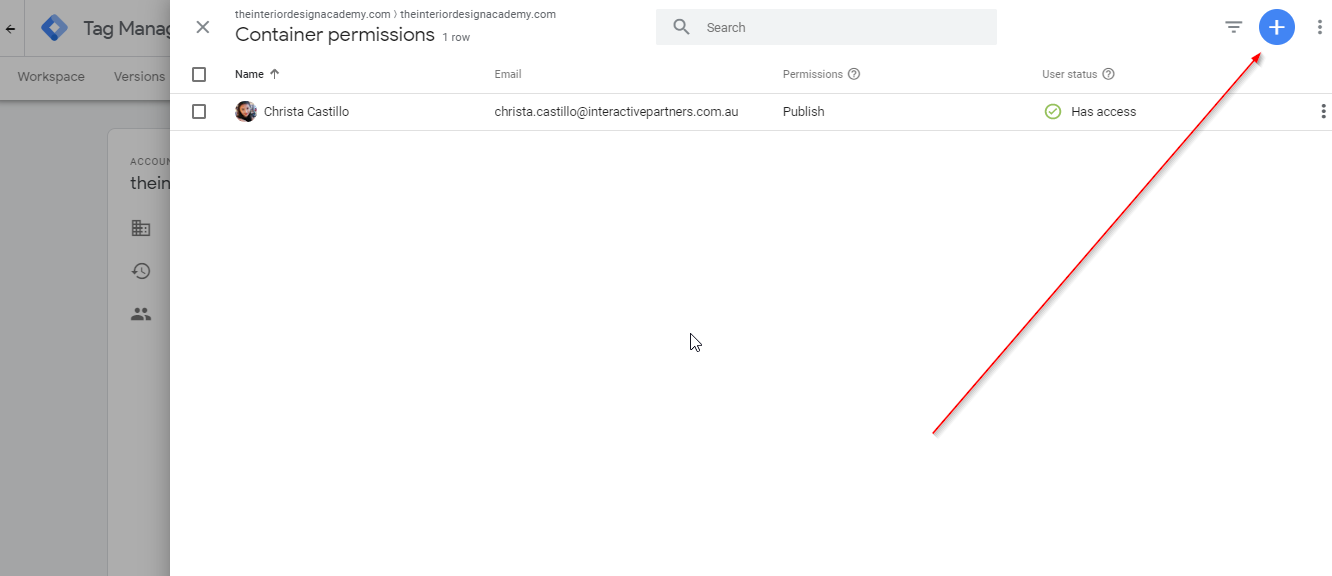
3Click the Blue Plus button and choose Add User
-
4Enter email address of the person to add
-
5Choose permission level
-
6Click Send Invitation
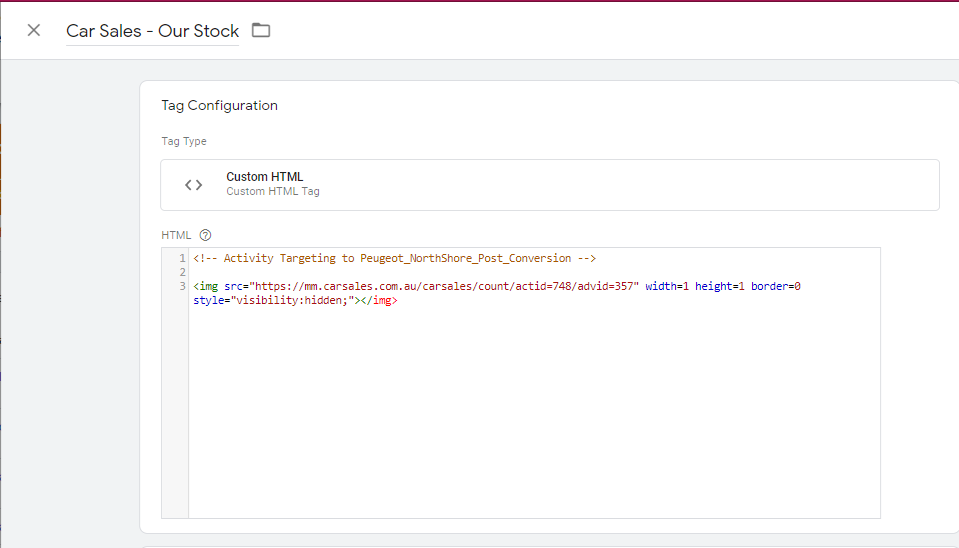
How to Install Car Sales Script using Google Tag Manager
-
1Create new tag and choose custom HTML for Tag Type
-
2Add the Script
-
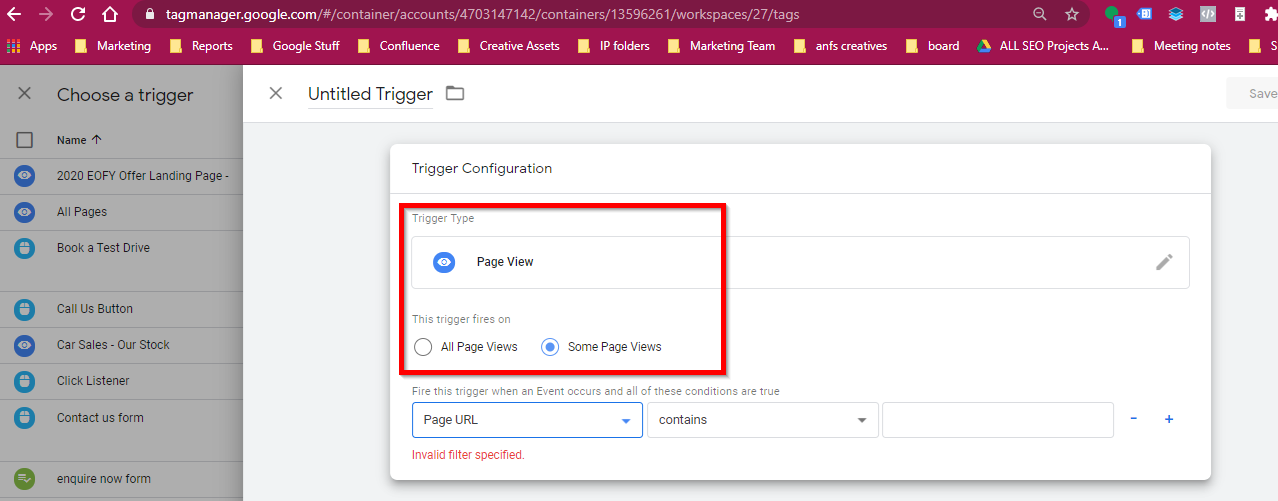
3Create a Page View Trigger by choosing Page View from the Selection
-
4Choose Some Page Views
-
5On dropdown menu, choose Page URL then set to Starts With.
-
6Click Save on the Page View Trigger Page
-
7Click Save on Tag
-
8Click Submit on workspace and skip all other process to publish the tag.
Best Practices for Google Tag Manager and Google Analytics
Elements of Google Tag Manager
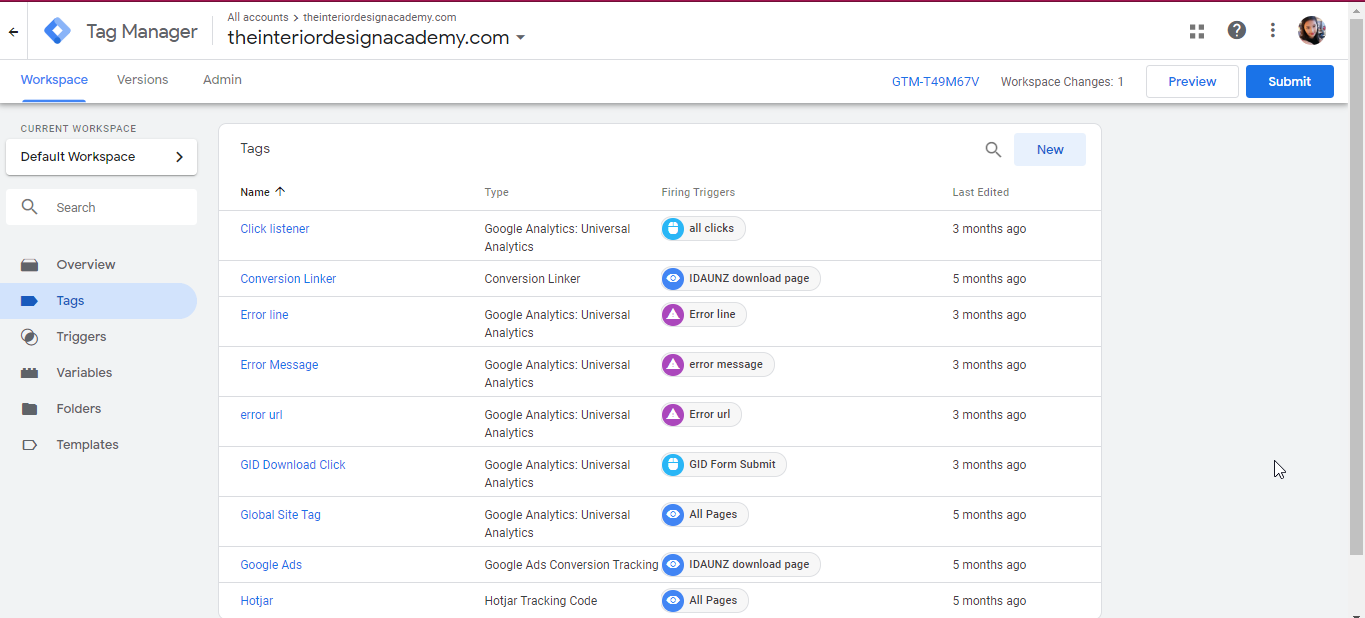
Tags
Tags are segments of code provided by analytics, marketing and support vendors to help integrate their products into your websites or mobile apps. There is no longer any need to add the tags directly on the website with Google tag manager since it is configured within the platform.
With Google Tag Manager, there is no need to install tags/tracking codes directly on the website.
Supported Platforms
Google Products
- Google Analytics
- Google Ads Remarketing
- Google Ads Conversion Tracking
- Floodlight Counter
- Floodlight Counter Sales
- Google Optimize
Non-Google Products
- AB Tasty Generic Tag
- Adometry
- Adrolll Smart Pixel
- Audience Center 360
- Awin Conversion
- Awin Journey
- Bizrate Buyer Survey Solution
- Bizrate Insights Site Abandonment Survey Solution
- Clicktale Standard Tracking
- comScore Unified Digital Measurements
- Crazy Egg
- Criteo One Tag
- Eulerian Analytics
- Hotjar Tracking Code
- Infinity Call Tracking Tag
- Intent Media
- LeadLab
- LinkedIn Insight
- Lytics JS Tag
- Marin Software
- Pinterest Tag
Added Via Custom HTML
- Facebook pixel
Trigger Types
- Page View Trigger
- Click Trigger
- Element Visibility Trigger
- Form Submission Trigger
- History Change Trigger
- JavaScript Error Trigger
- Scroll Depth Trigger
- Timer Trigger
- YouTube Video Trigger
- Custom Event Trigger
- Trigger Group
Google Tag Manager vs Direct Code: Key Benefits
Better Page Load Speed
Loading Marketing pixels and tracking codes on websites take time to time off load speed. When doing several marketing campaigns using different marketing platforms, it is highly advisable to implement these tags via Google Tag Manager.
Ease in Managing Multiple Tags and Tracking Pixel
Having too many tags installed on a website not only slows down page speed but causes a lot of confusion on the back end. It is not a simple task to find the right tag to remove tags when there are a lot of codes in there. On the other hand, Google Tag Manager
Cross-Domain Linking: Creating a Unified View in Google Analytics
Cross Domain Linking isn't a popular request and only a few agencies and experts know or have implemented such. However, this type of setup can be helpful for individuals managing several websites with almost the same products and services or managing domains copied from others.
It is impossible to track several domains just by adding Google Analytics tracking code on websites one wishes to track. Please note that this is also the reason why the Google Analytics code doesn't work once the domain name changes. Google uses the domain registered to the account for this. No data will be collected from other websites.
For this reason, Cross Domain Tracking/Linking is done using Google Tag Manager. The setup is done via Google Tag Manager and the Google Analytics Tracking code is added as a Tag on Tag Manager. This eliminates the need of adding a Google Analytics Consolidated View Tracking code on the website. Google Analytics code is already on Google Tag Manager so there is no need to add Google Analytics tracking code.
Best Practices for Implementing Google Tag Manager
Organize Tags using Google Tag Manager
Get all marketing, analytics and vendor tags on Google Tag Manager. Almost all tags are supported by Google Tag Manager given that it also allows the use of custom HTML where one can add the script.
Limit only Two Tag Managers per website
If possible, it is best practice to keep only one Google Tag Manager. However, some instances would require the use of Google Tag Manager such as having a consolidated view of several Domain's Google Analytics accounts. However, there are instances that digital agencies would request for their tags to be implemented on the website. The best approach to this is to give the agency access to the company's Google Tag Manager instead.
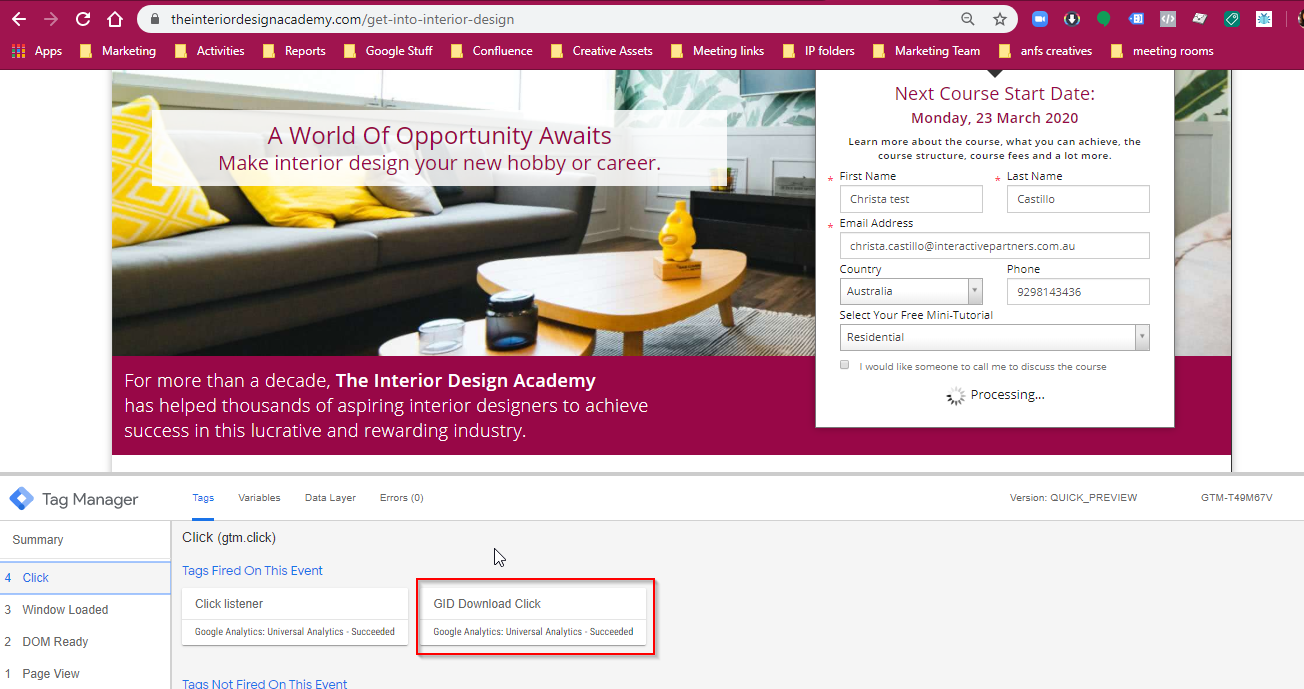
Test all Tags using Preview/Debug Mode
To make sure tags are firing correctly, use the Preview mode to show Debug window on the website. Simply do the action that requires a trigger and see if any Tags were triggered.
Updating the Master Template with Google Tag Manager Script
Update the Google Analytics Configuration
-
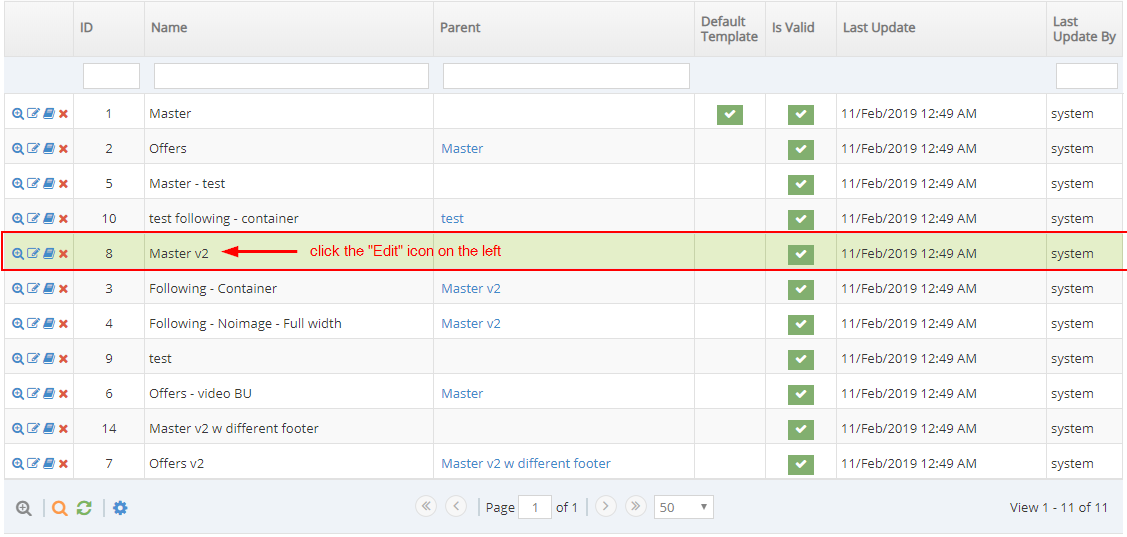
1Go to Admin > Page Content > Look and Feel > click 'Page Template'
-
2Look for the Master template that the site is using, click the 'Edit' icon on the left
-
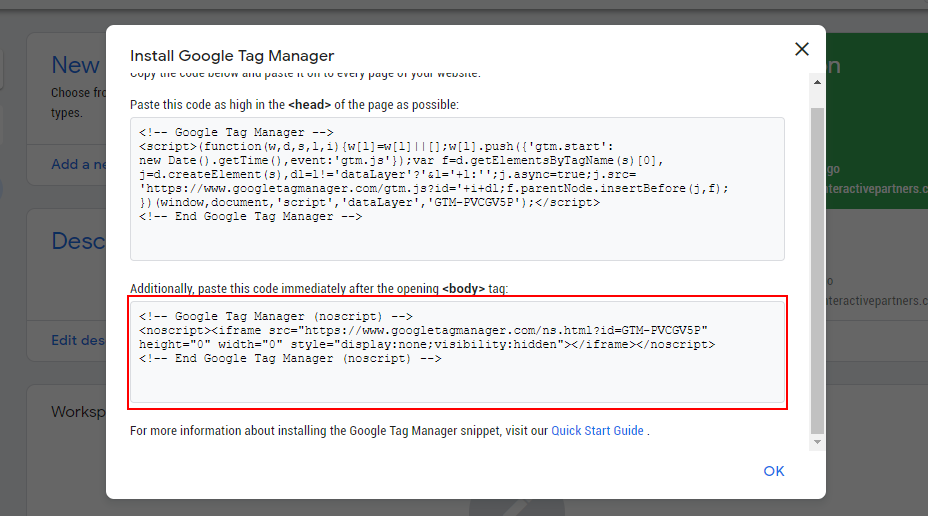
3Go to Google Tag Manager and copy the code for the <body>
-
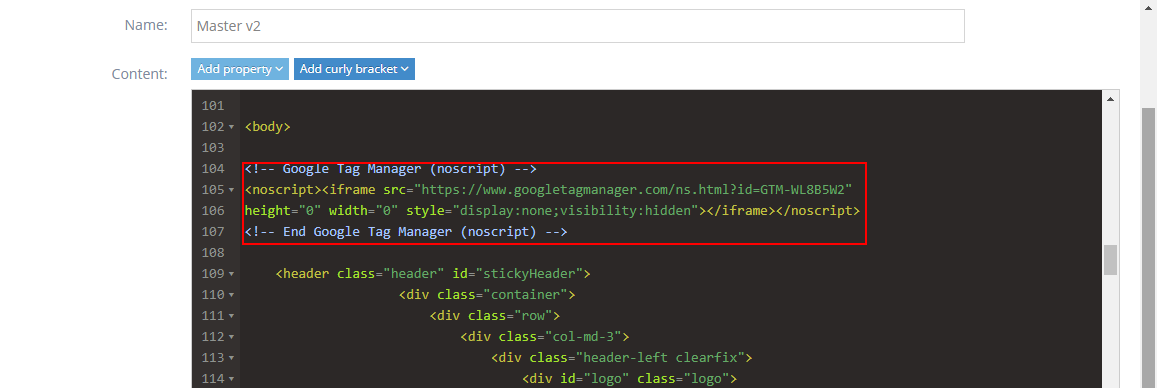
4Go back to your site and paste this code right after opening the <body> tag.
-
5Click the 'Save' button to save the changes

-
6You should see a notification saying that "The template has been saved successfully".