- See Event Add-Ons in Action
- Why you would use an Event Add-On
- Create an Event Add-On Type
- Create an Event Add-On
- Add an Add-On to an Event
- Place Add-Ons Anywhere in the Form
- Add Event Add-On Attribute to an Existing Event Add-On
- Remove an Add-On from an Event
- Delete an Event Add-On
Add an Add-On to an Event
STEP-BY-STEP
-
1Log in as an administrator and go to the Admin Dashboard.
Learn how to log in here → -
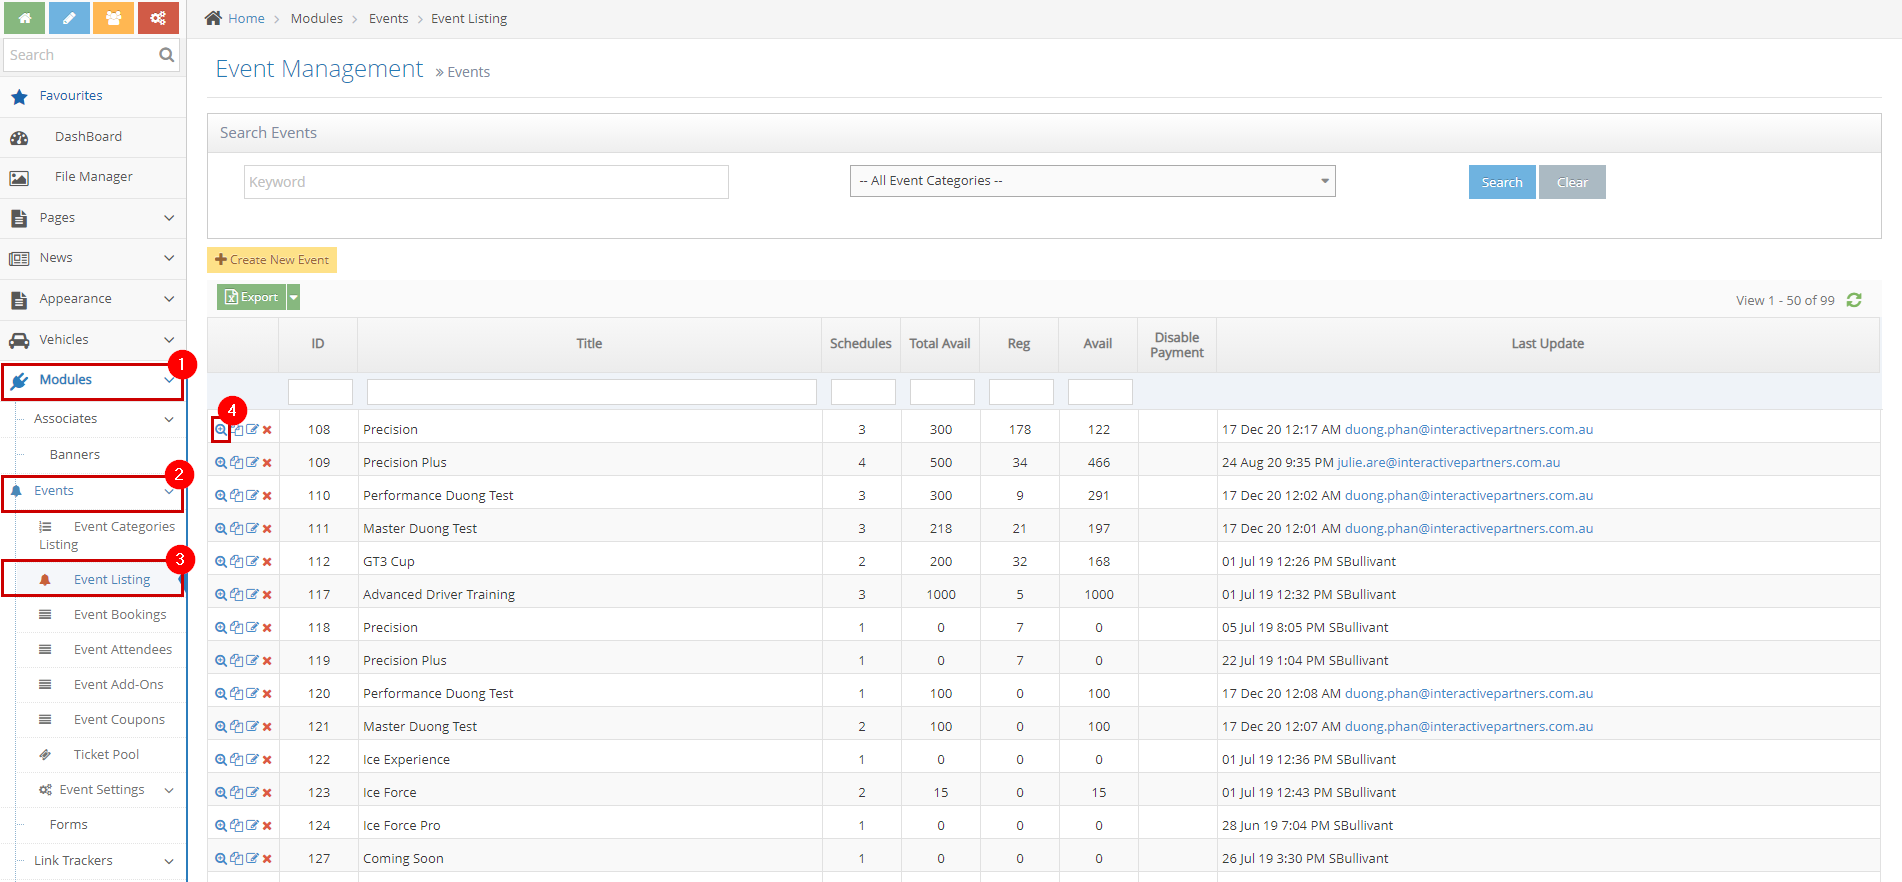
2Under Modules on the left menu, choose Events
-
3Click Event Listing

-
4Search for the Event you want to add an add-on
-
5Click the View Details icon

-
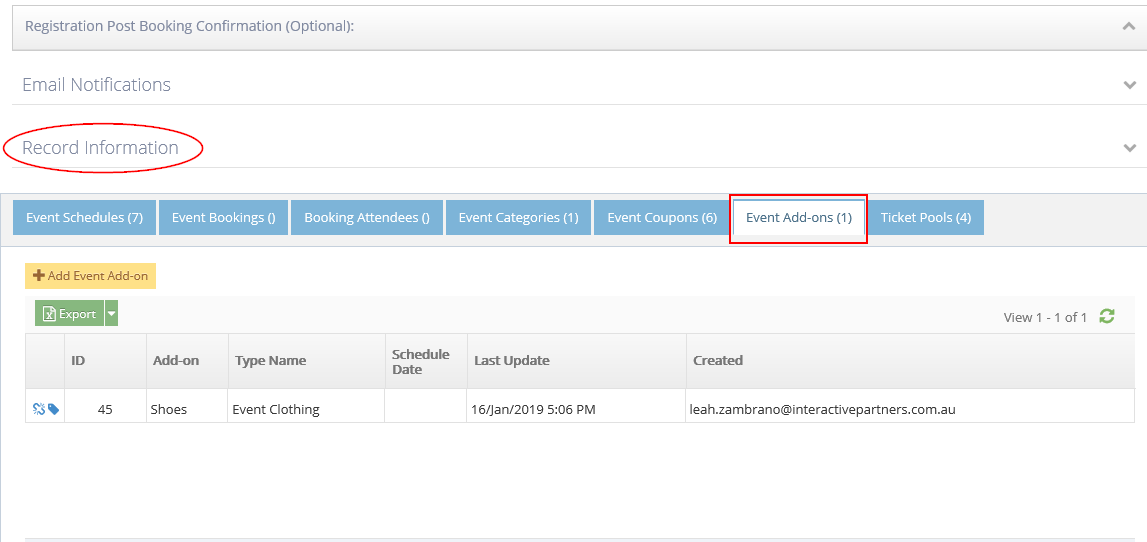
6Scroll down to see the tabs under the Record Information section
-
7Click the Event Add-ons tab

-
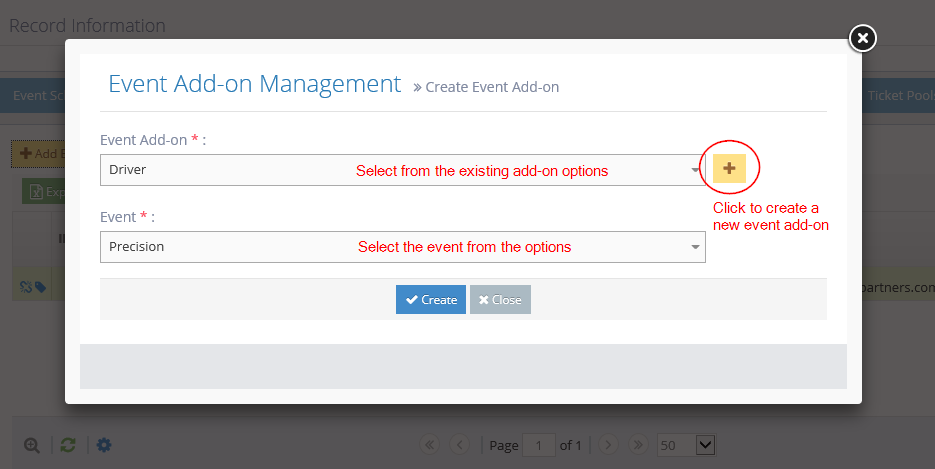
8Enter the Add-On information:
- Event Add-On - select an existing add-on from the options.
- Click the
 icon to the right of the Event Add-On field.
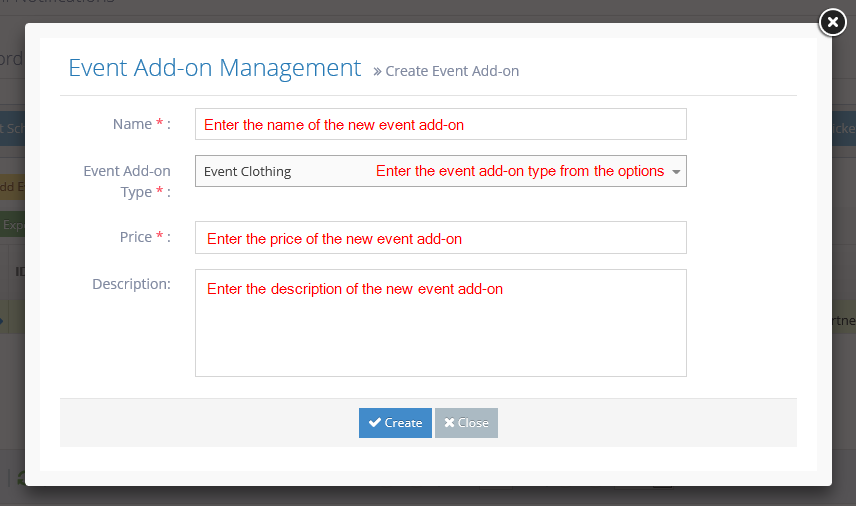
 - Enter the following information:
- Name - enter the name of the new add-on.
- Add-on Type - select the Add-on type from the options.
- Price - enter the price of the add-on.
- Description - enter a brief description of the add-on.
- Click "Create". You can also create a new Event Add-On from the Event Add-ons module here.
- Click the
- Event - by default, it is showing the event name you're into or you can select other events from the options.

 You should see the new add-on for the event on the listing under the "Event Add-Ons" tab now.
- Event Add-On - select an existing add-on from the options.