- Ticket Management Overview
- How to view the tickets list and search for tickets
- How to change the status of a ticket
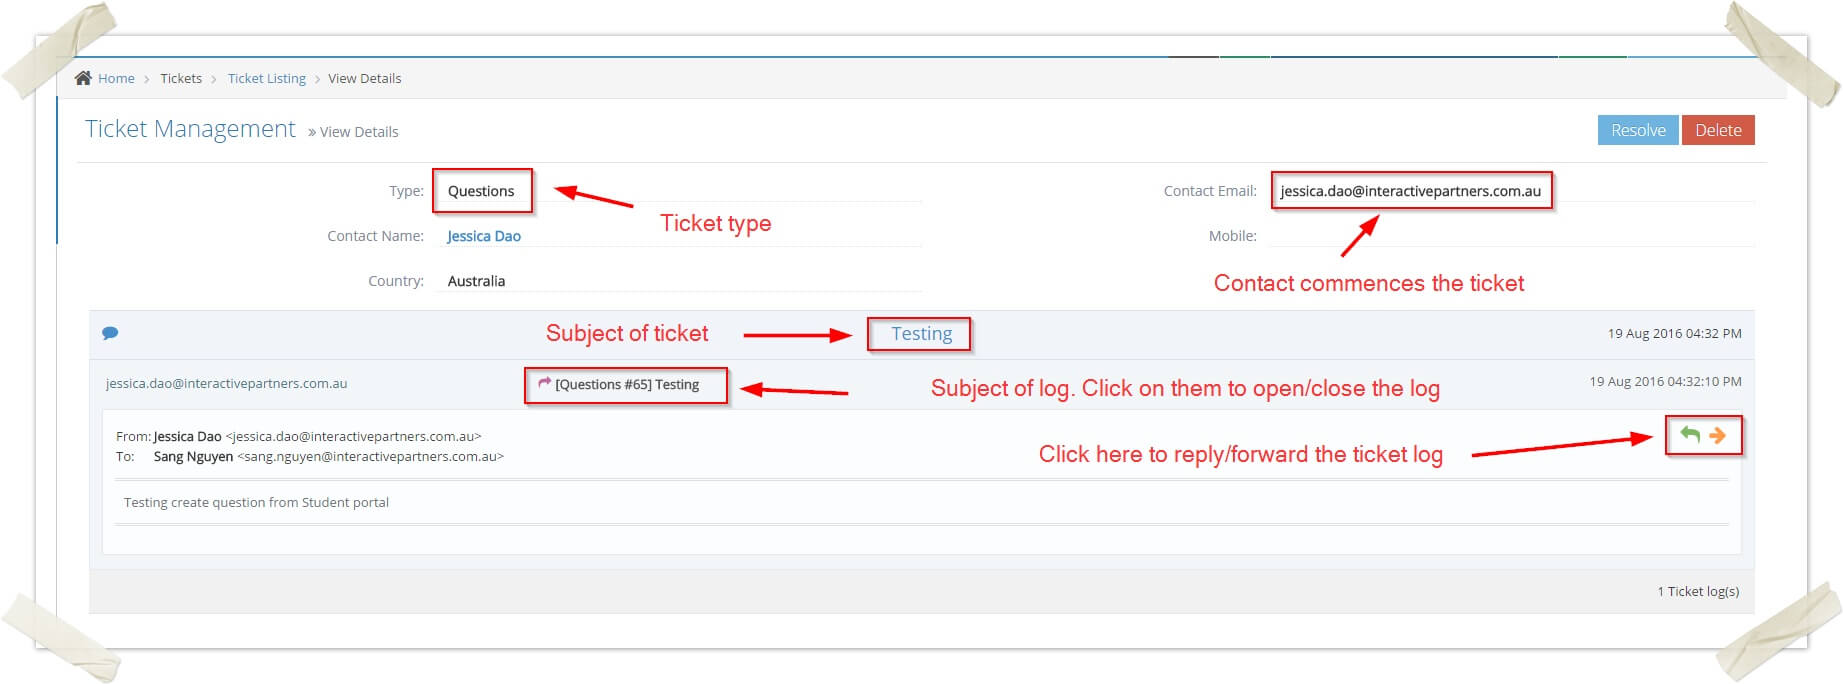
- How to view detail of a ticket
- How to reply to a ticket
- How to forward a ticket
- How to delete a ticket
- How to reassign a ticket
- How to mark a ticket as resolved or reopen it
- How to merge tickets
- How to lock a ticket
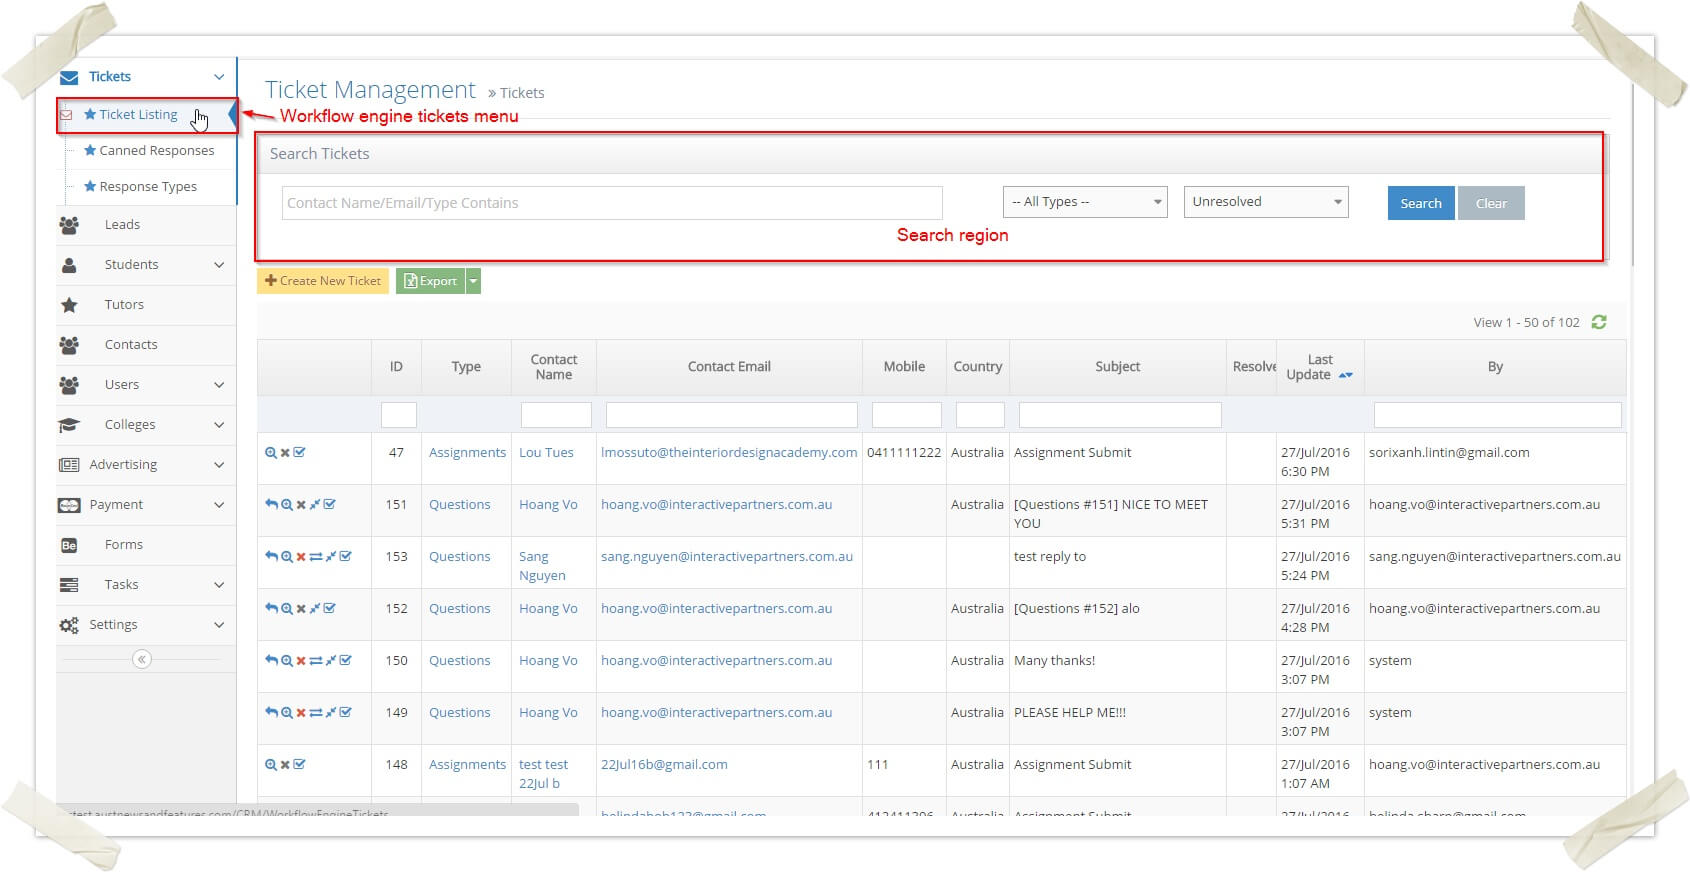
How To Manage Workflow Engine Ticket
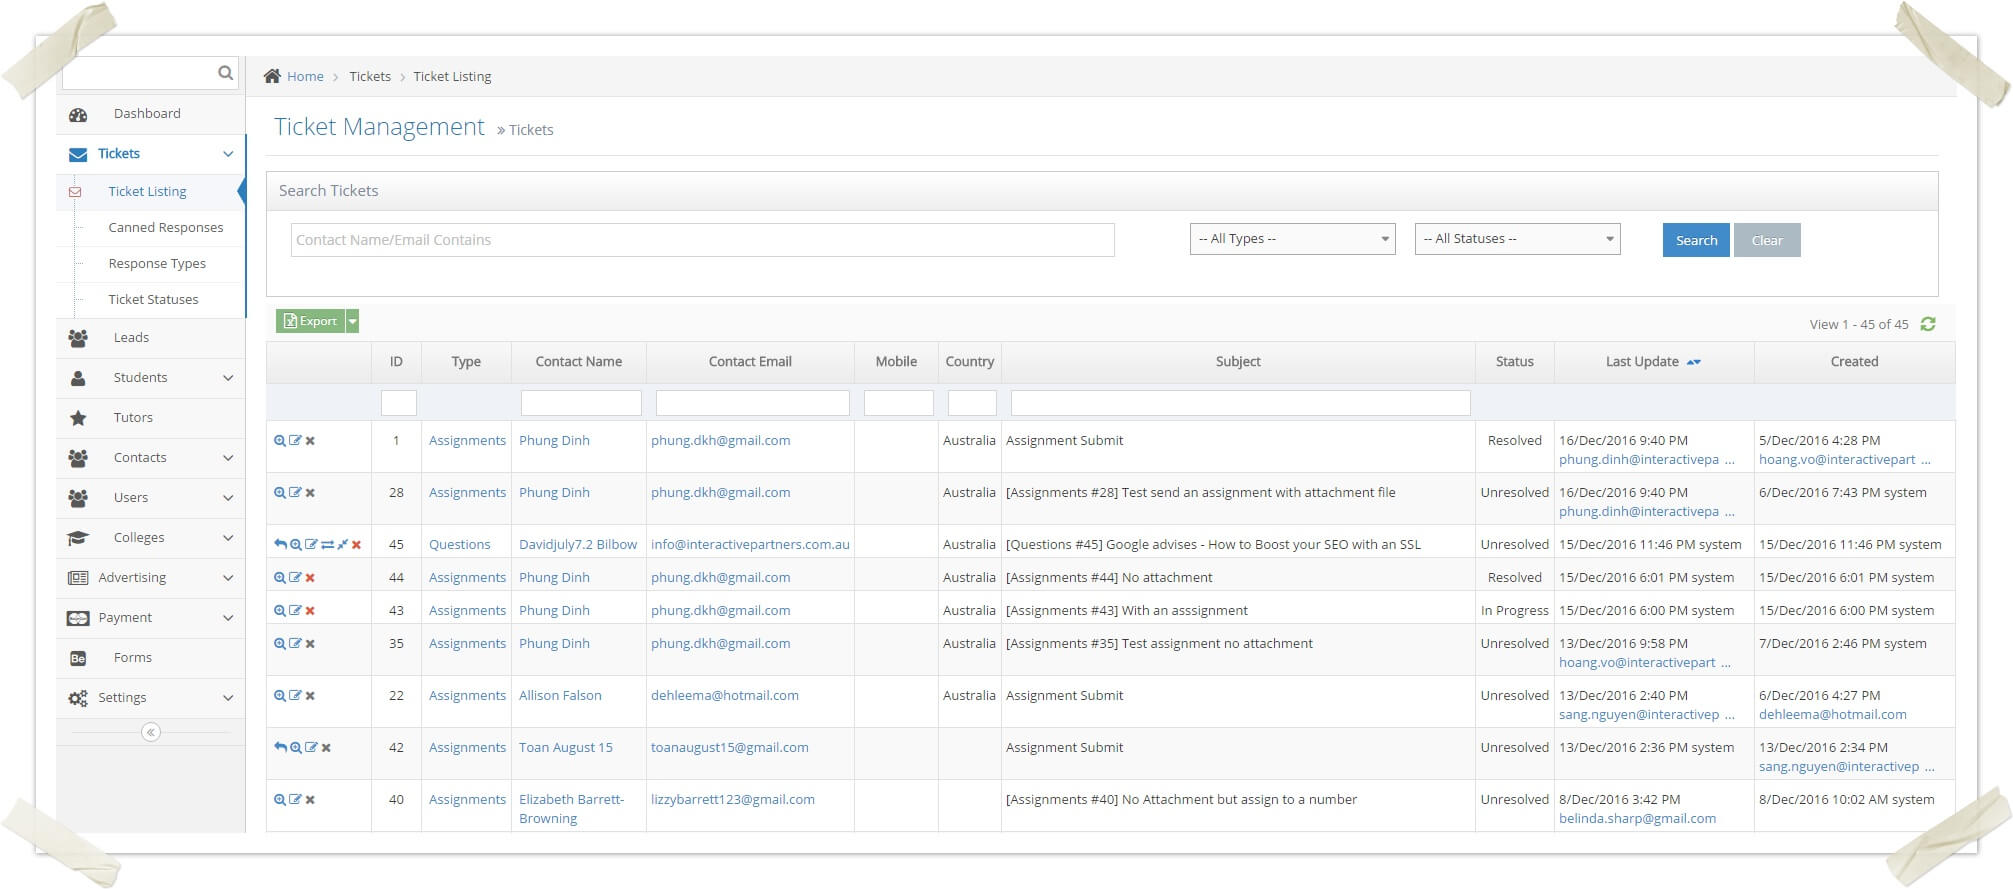
How to view the tickets list and search for tickets
STEP-BY-STEP
-
1Go to CRM Portal>> Tickets >> Ticket Listing
List all the tickets that are created on CRM/Student/Tutor portal or come or the emails that are sent to Assignments & Questions workflow engine types
-
2In the Search region >> You can search Tickets by
- Keyword (Contact Name/Email contains the keyword)
- Workflow engine type
- Status (Resolved or Not) - Unresolved is the default


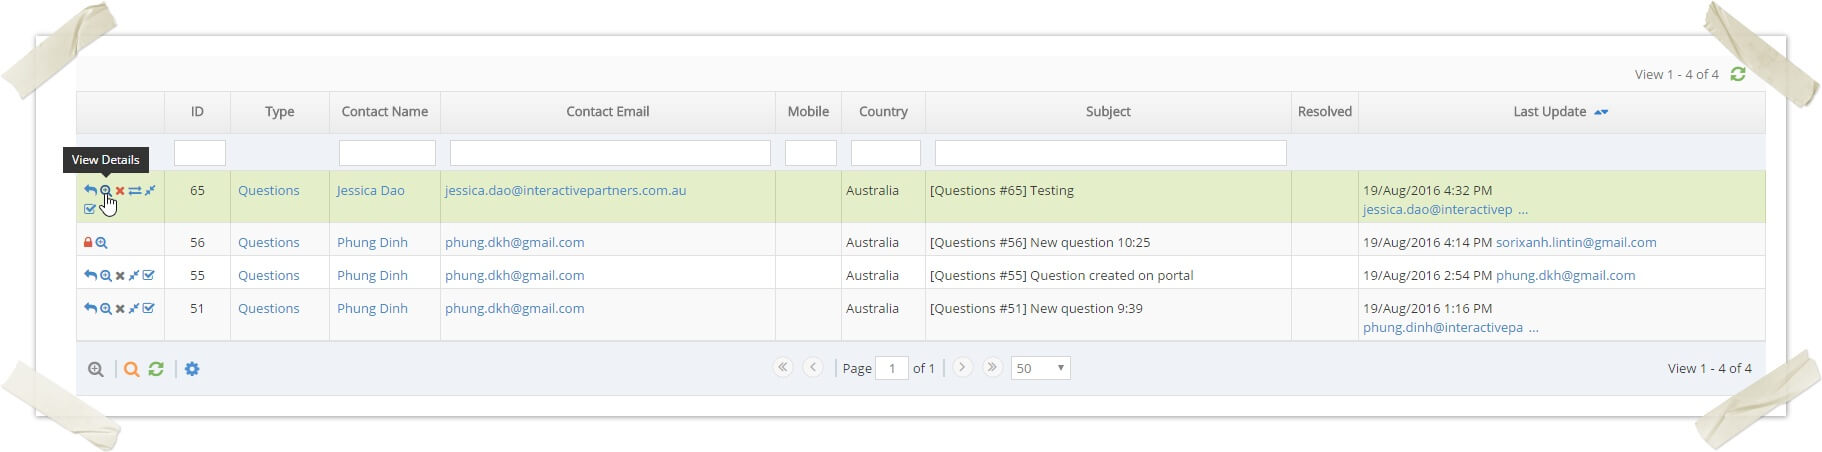
How to view detail of a ticket
STEP-BY-STEP
-
1Go to CRM Portal >> Tickets >> Ticket Listing
-
2Click on the View Details icon to the left of a ticket
-
3Two situations that can happen:
- If the ticket is an assignment >> go to the CRM/Student assignment details page
- If not, go to the ticket details page
-
4Ticket info on the top
-
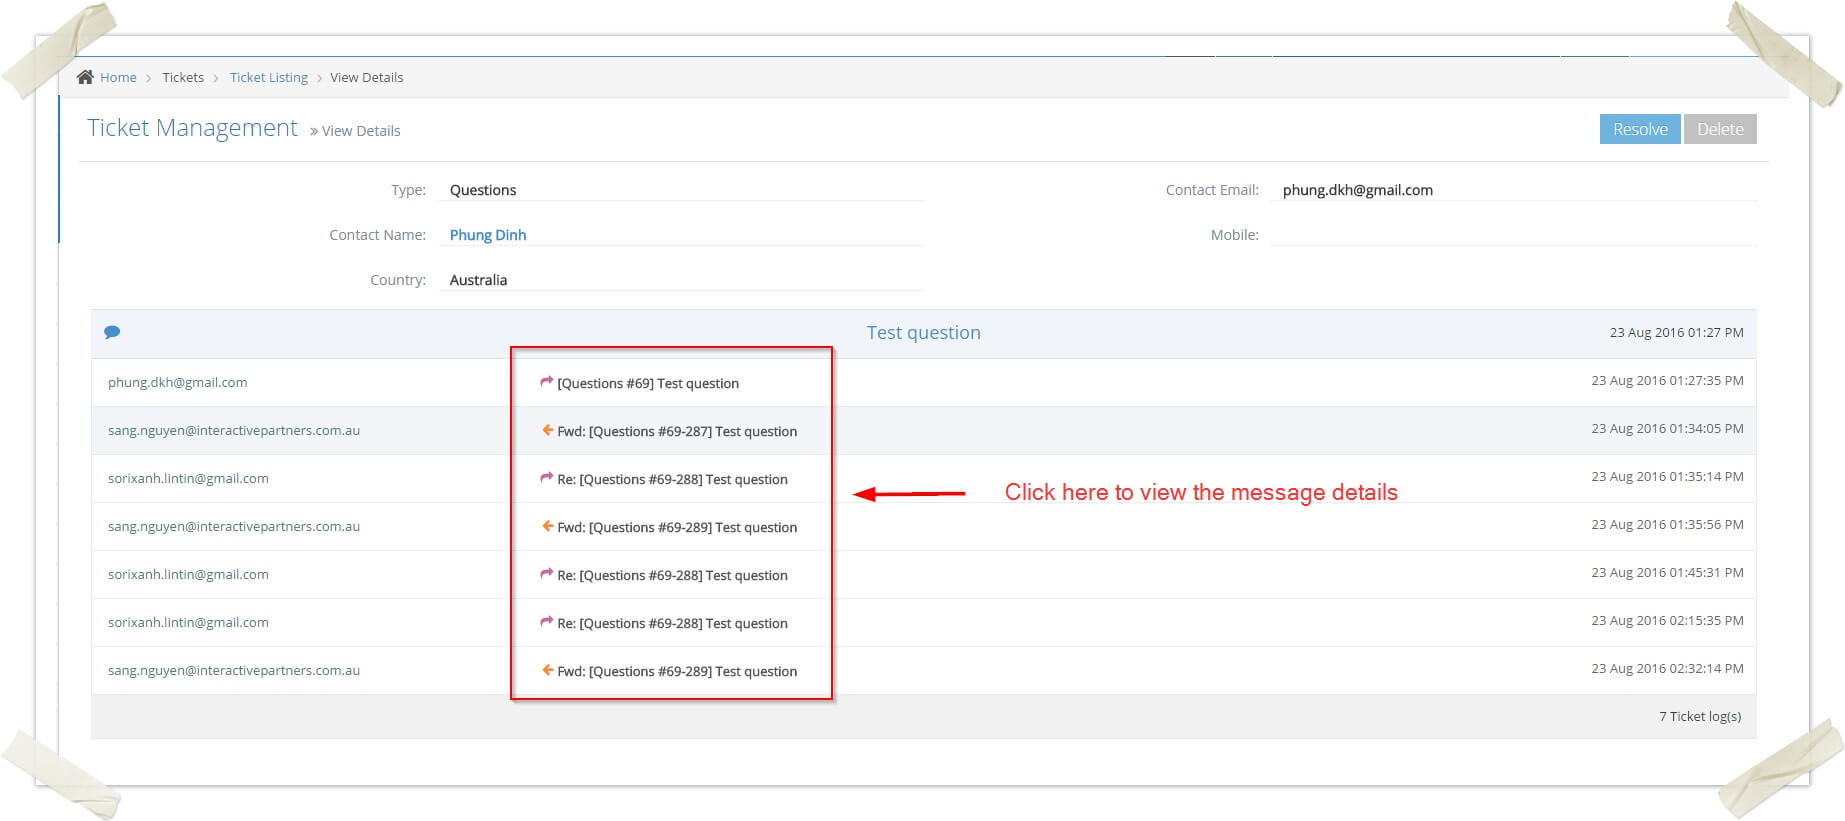
5Next to ticket logs
- The last log is open as default
- Click on the log subject to open or close a log
-
6Per the ticket log, the admin will receive will have two button reply and forward
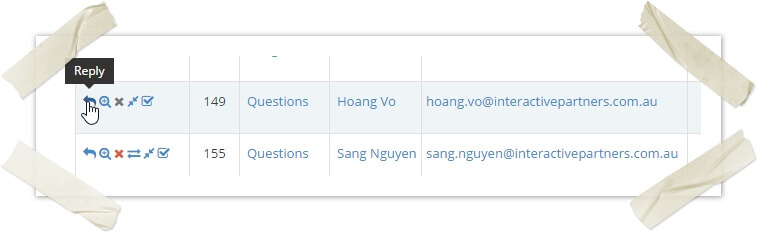
How to reply to a ticket
STEP-BY-STEP
-
1Go to CRM Portal >> Tickets >> Ticket Listing
-
2Click on the Reply icon to the left of a ticket
-
3You can only reply to question tickets
-
4Go to the ticket details page and automatically scroll to the bottom
-
5Click on the ticket log item that the admin received and click on the Reply button
-
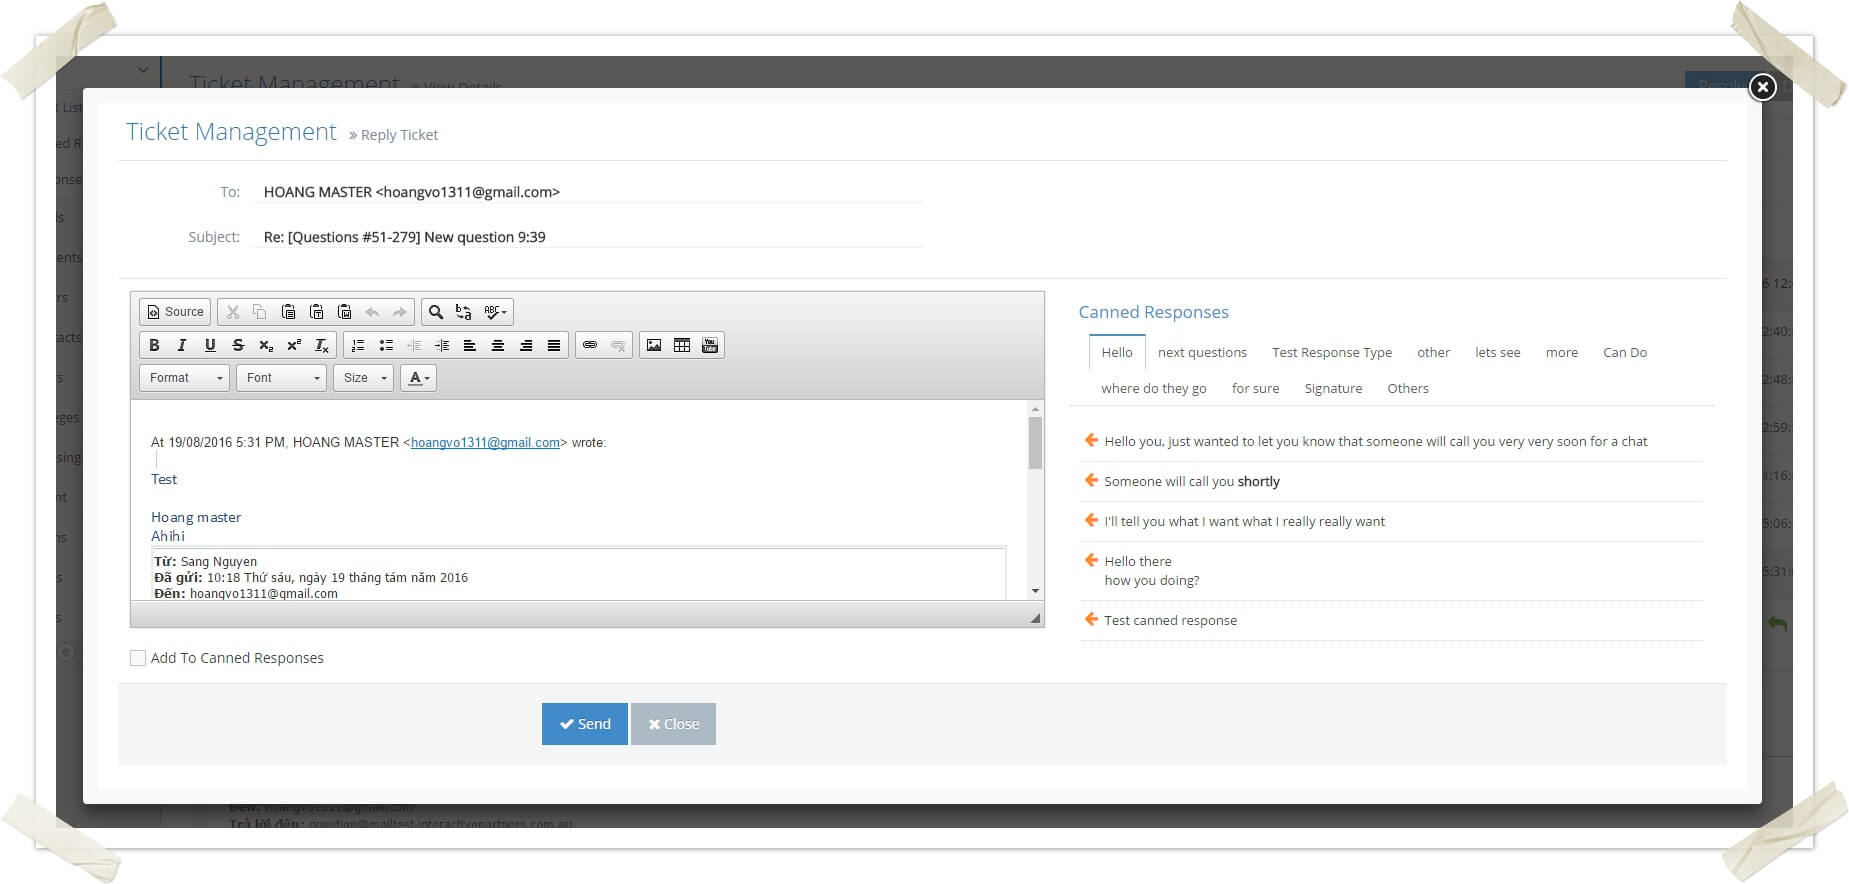
6Compose the ticket content
-
7You can use the pre-defined Canned Responses on the right
-
8You can also add a ticket content to canned responses for further use by checking on Add To Canned Responses check box and choosing the Canned Response Type
-
9And click on the Reply button
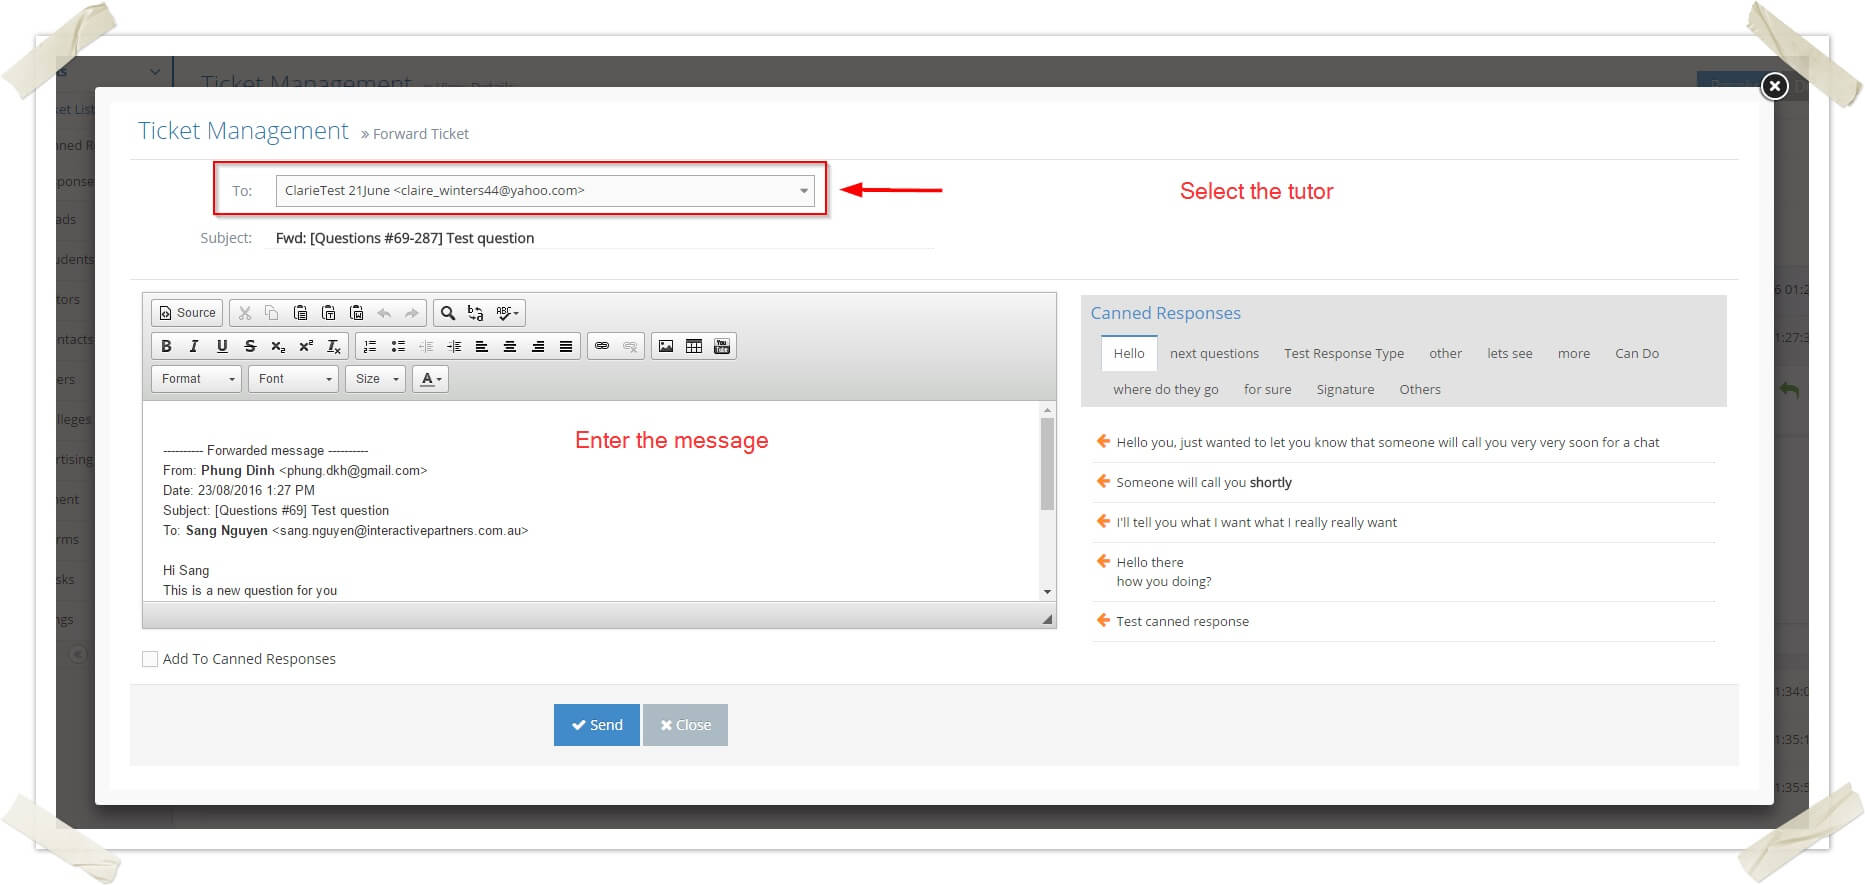
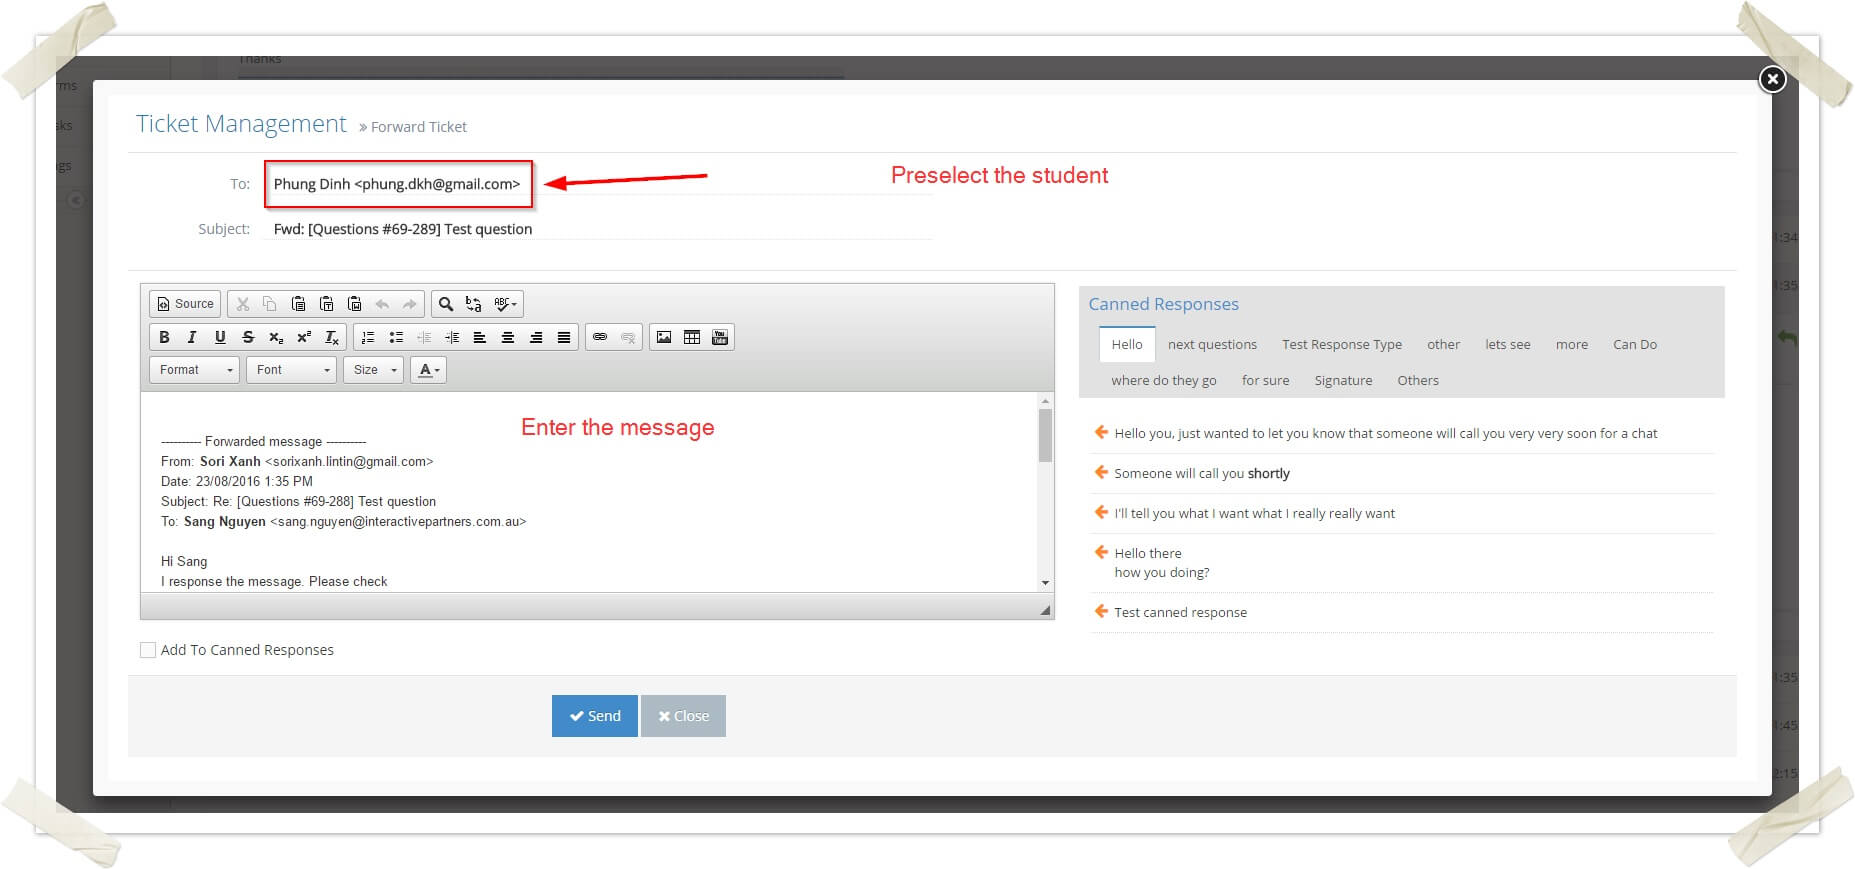
How to forward a ticket
STEP-BY-STEP
-
1Go to CRM Portal >> Tickets >> Ticket Listing
-
2Click the View Details icon

-
3Click on the Question Subject that has the received icon >> Click the Forward button to open the forward modal window


-
4Select the Tutor, enter the message if the message that admin received from a student
-
5Preselect the Student, enter the message that the admin received from the tutor.
-
6Click Send
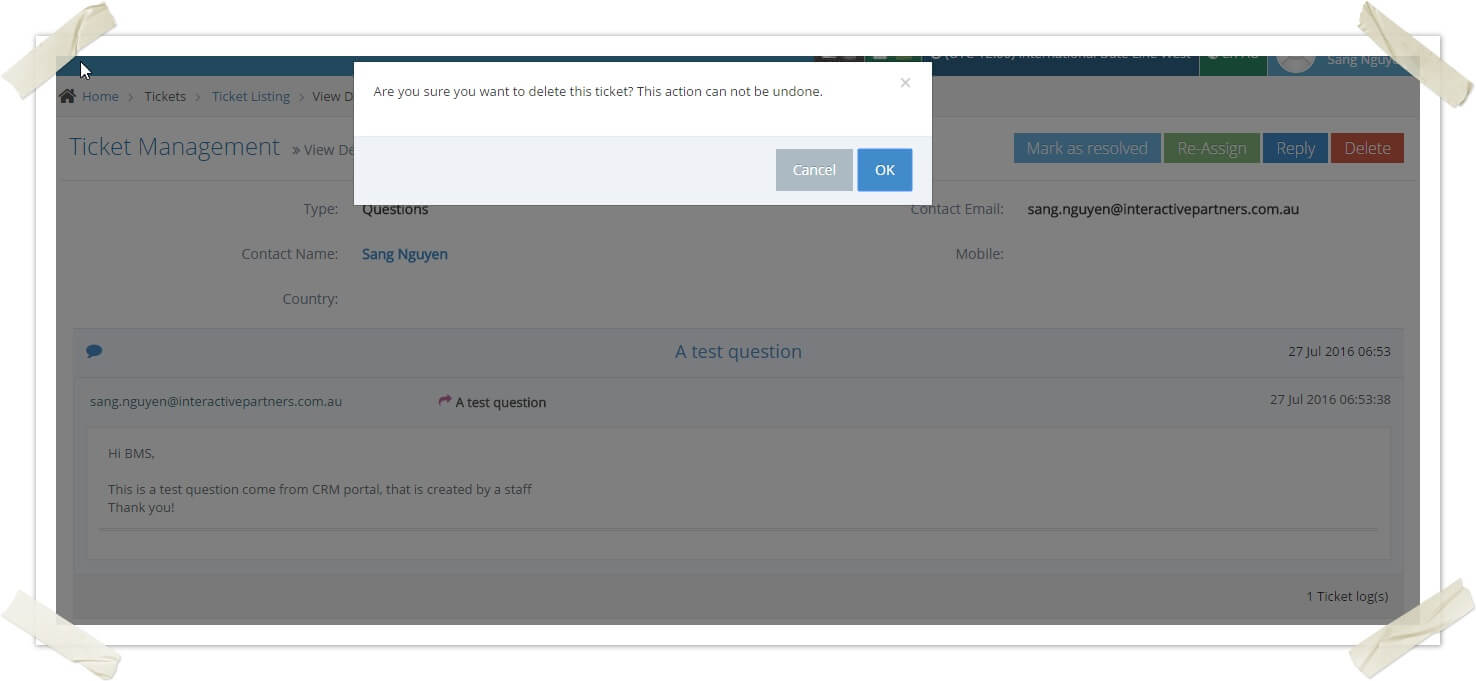
How to delete a ticket
STEP-BY-STEP
-
1Go to CRM Portal >> Ticket Listing
-
2Two situations can happen:
- If the ticket has an assignment type:

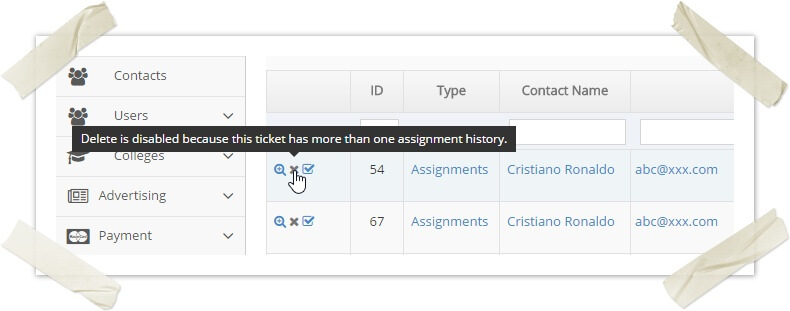
- If this assignment has only one history (is very after submitted by the student) >> Go to /wiki/spaces/ANFBMS/pages/28737748 (the ticket will also be deleted)
- If the assignment has more than one history
>> A tooltip is shown when hovering on the delete icon and cannot delete the assignment
- If not:
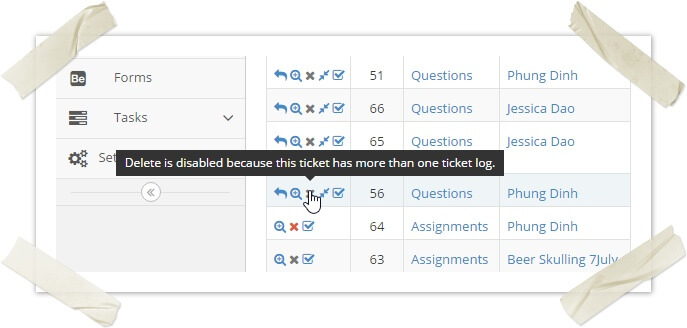
- If the ticket has more than one logs
>> A tooltip is shown when hovering on the delete icon and cannot delete the ticket
- If the ticket has more than one logs
- If the ticket has only one log
>> Go to ticket detail page and a popup message will be displayed
- If the ticket has an assignment type:
-
3Click on the OK button on the pop-up to confirm delete
-
4You can also click on the Delete button on the top right corner of the ticket details page to delete a ticket
How to reassign a ticket
STEP-BY-STEP
-
1Log in as an administrator and go to the Admin Dashboard.
Learn how to log in here → -
2Go to CRM Portal >> Ticket Listing
-
3You can only reassign a ticket if the ticket has only one log.
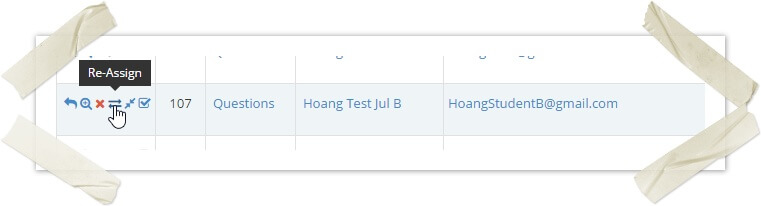
-
4Click on the Reassign icon to the left of a ticket
-
5The assigned ticket pop-up is open
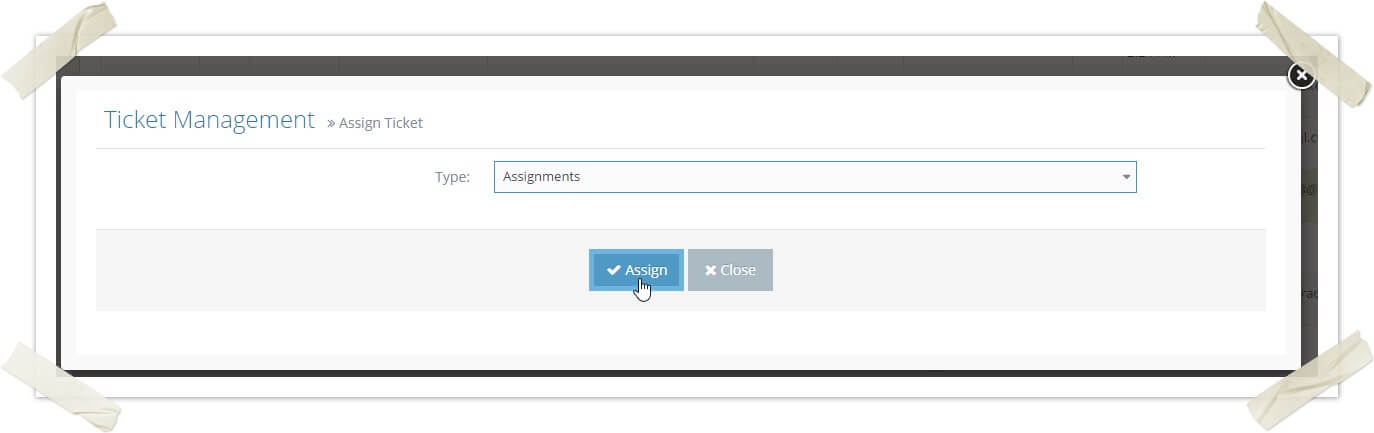
-
6Select the workflow engine type
-
7Click on the Assign/Question button to reassign
-
8You can also click on the Reassign button on the top right corner of the ticket details page to reassign it. This button is only displayed if the ticket can be reassigned
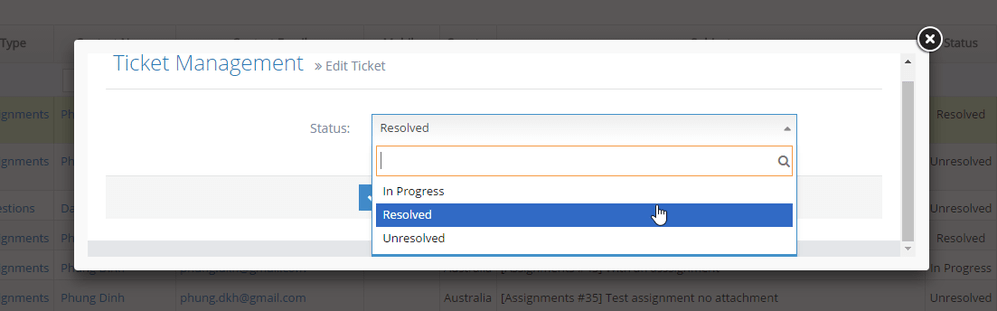
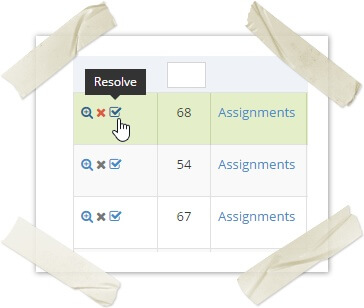
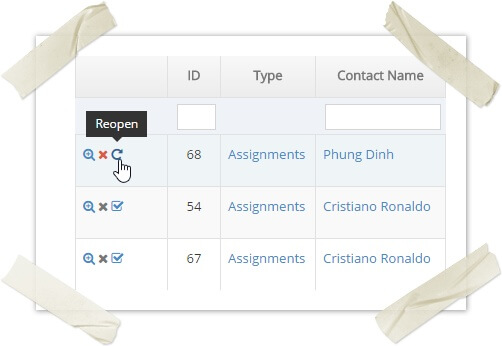
How to mark a ticket as resolved or reopen it
STEP-BY-STEP
-
1Log in as an administrator and go to the Admin Dashboard.
Learn how to log in here → -
2Go to CRM Portal >> Ticket Listing
-
3Click on Mark as Resolved icon to the left of a ticket that is open in order to resolve it.
-
4Click on Reopen icon to the left of a ticket that is already resolved to reopen it.
-
5You can also click on the Mark as resolved/Reopen button on the top right corner of the ticket details page to resolve/reopen it.
-
6Select the workflow engine type
-
7Click on the Assign/Question button to reassign
-
8You can also click on the Reassign button on the top right corner of the ticket details page to reassign it. This button is only displayed if the ticket can be reassigned
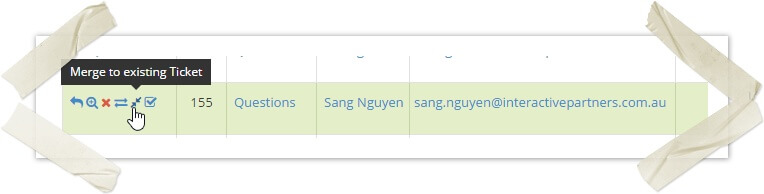
How to merge tickets
STEP-BY-STEP
-
1Log in as an administrator and go to the Admin Dashboard.
Learn how to log in here → -
2Go to CRM Portal>> Ticket Listing
-
3Click on the Merge to existing ticket icon to the left of a ticket
-
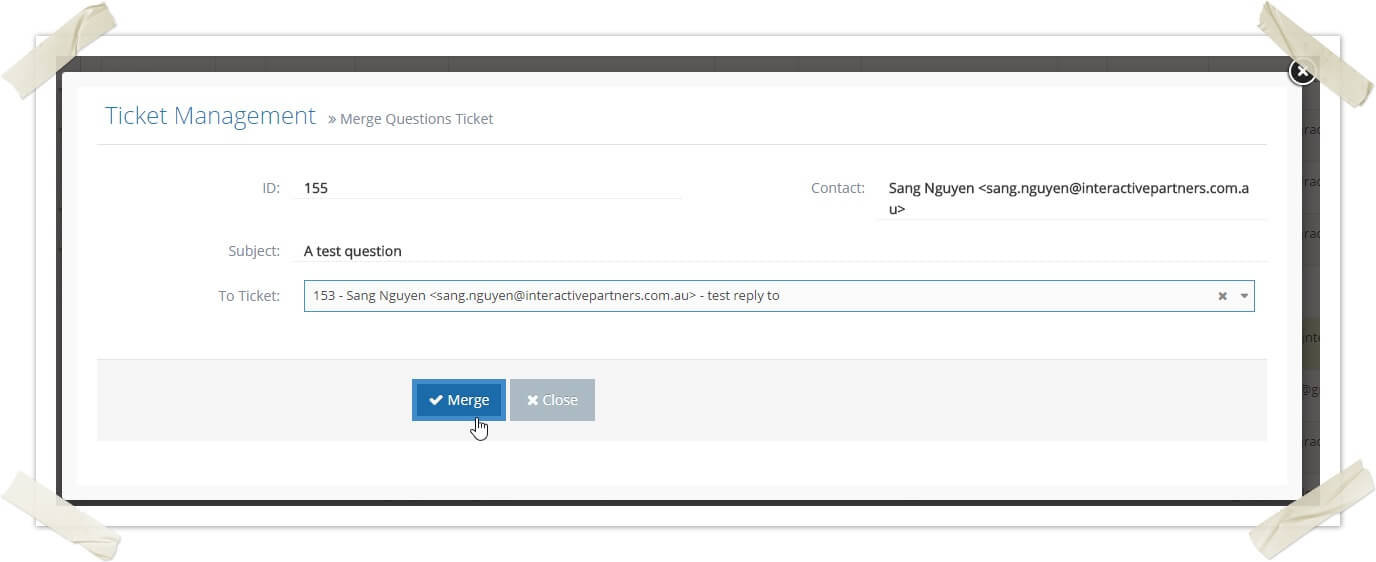
4The condition for merging:
- The source and the target tickets must have the same type (or the source ticket has NO type - in this case, it can be merged into a ticket with any type)
- Both tickets are NOT assignments.
- Both must belong to the same Contact
- And certainly, they have different IDs
-
5The merge ticket popup will be displayed
-
6Enter something about the ID, ticket subject or contact email of a ticket to filter the tickets and pick a target ticket
-
7Click on the Merge button to merge the source ticket with the target ticket
-
8After merging the target ticket will contain all logs of both tickets and the source ticket is deleted
How to lock a ticket
This function is to prevent multiple staff working on a ticket on the CRM portal simultaneously.
When a ticket is reviewing (go to ticket details page) by a staff, on the listing page there is a lock icon displayed on the left of the ticket, other function ions are hidden except detail icon
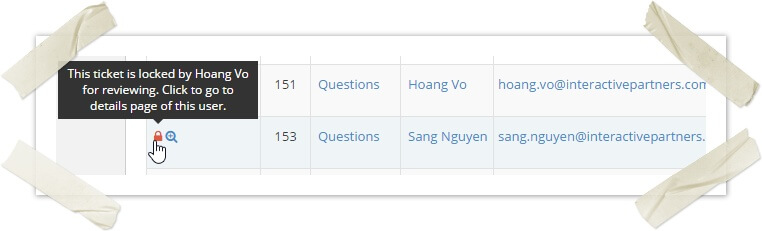
And when going to the detail page of this ticket, you cannot do anything with the ticket. On the top right corner of the details page, the message "Ticket is reviewed by ..." is displayed instead of function buttons