Datasheeting Overview
Datasheeting is a technique where you swap the content for an email address. It is the perfect way to build your marketing database. A datasheet can be any type of privileged content. Brochures, Price Lists, and White papers are all good examples of datasheets. The visitor is prompted to swap their email address for access to the content protected by the datasheet.
Why you would use a Datasheet
The datasheet is useful if a user wants to swap content for the visitor's email address or any other information.
Datasheet Requirements
- A key aspect of building a database of contacts is collecting email addresses and other information
- Swapping key content for email addresses supports this process
- Key content can include items such as product brochures, specification documents, white papers and price lists
- Any type of content can be referred to as key content
Datasheeting for Site Visitors
- As a site visitor, I want to see some key content
- When I click the link for the key content, I am prompted with a form to complete to access the key content
- When I complete this form, I am redirected to the key content
- The contact is saved in the contacts database
- The product of Interest for the contact will be the endpoint of the key content
- For any other key content in this session, I will not be prompted
- On my next visit, I will be prompted again for the datasheet information so the session controls how long the data is persisted
Datasheeting for Content Administrators
- As a content administrator, I want to decide what content is key and will use data sheeting
- The way I can make datasheet content is by placing a link on a page to the key content
- Example "Click here to see our specifications sheet for product Blah"
- When I go to place a link on the key content, I can select either a page, PDF, image or any other kind of content at any time
- Anything on the site can be accessed
- Instead of a link direct to the content, I insert a link which is datasheet?formID=X&datasheet=EndPoint (or similar) which I use for the datasheet module
- This is instead of using a normal hyperlink but it works the same way
- I can make any link on my site a datasheet by replacing the href in this way
- Example href="media/pdf/whitepaper.pdf" would become href="datasheet?formID=X&datasheet=media/pdf/whitepaper.pdf"
- Now I have one step (after building the form) to make any datasheet active
Datasheeting for Contact Filtering
- Each time a site visitor submits the datasheet form, a contact is created
- Contacts are matched on matching rules as per the site settings - see How to Site Setting: Contact Matching Rule Setting
- Contacts are tagged with the endpoint of the datasheet requested
- Example href="datasheet?formID=X&datasheet=media/pdf/whitepaper.pdf" would record media/pdf/whitepaper.pdf as the product of interest
Creating new Asset Listing entry
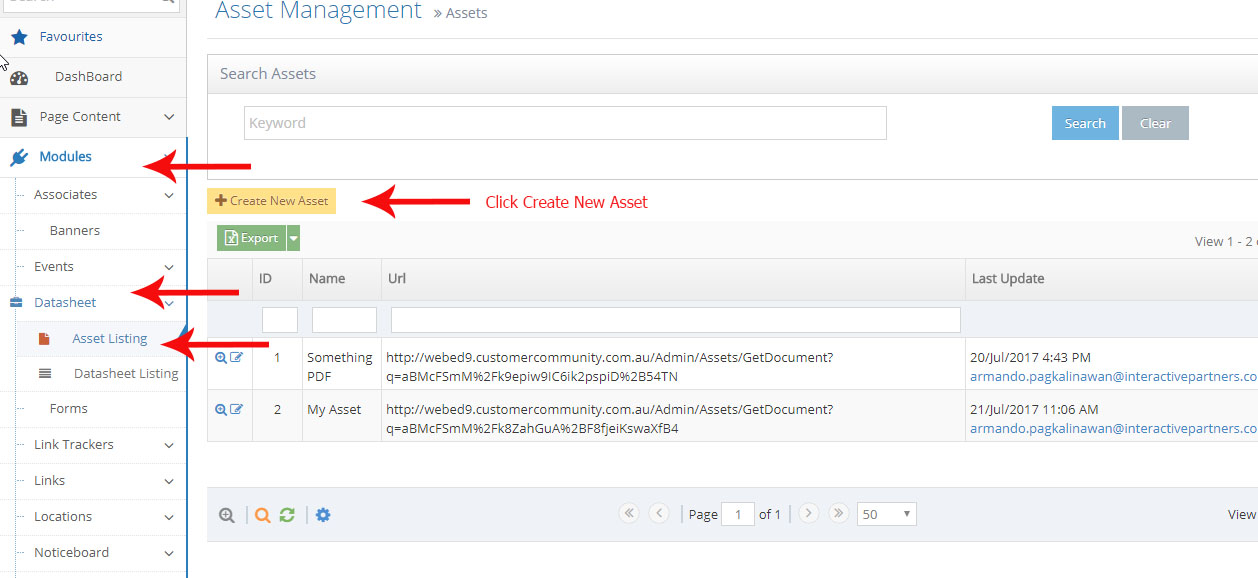
- Go to admin > Modules > Datasheet > Asset Listing and click Create New Asset
- Enter the details of asset management.
- Name - The name of the asset or file
- File: upload your data files, either pdf, word etc.
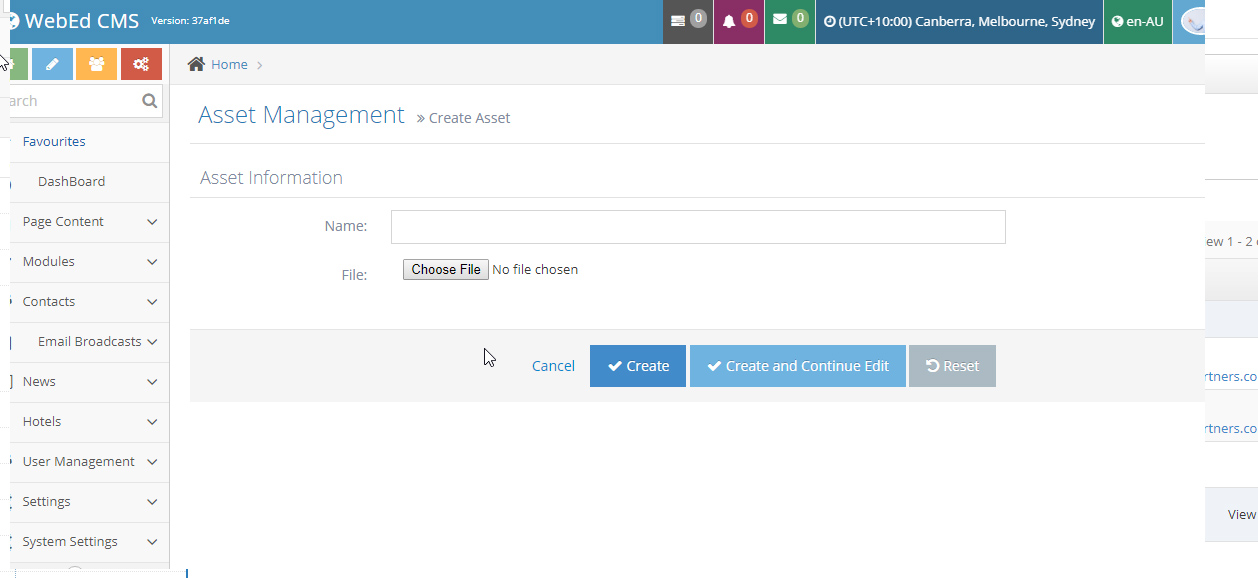
- Click Save
How to add Datasheet into forms
- Go to admin > Modules
- Select Forms and click Create New Form button
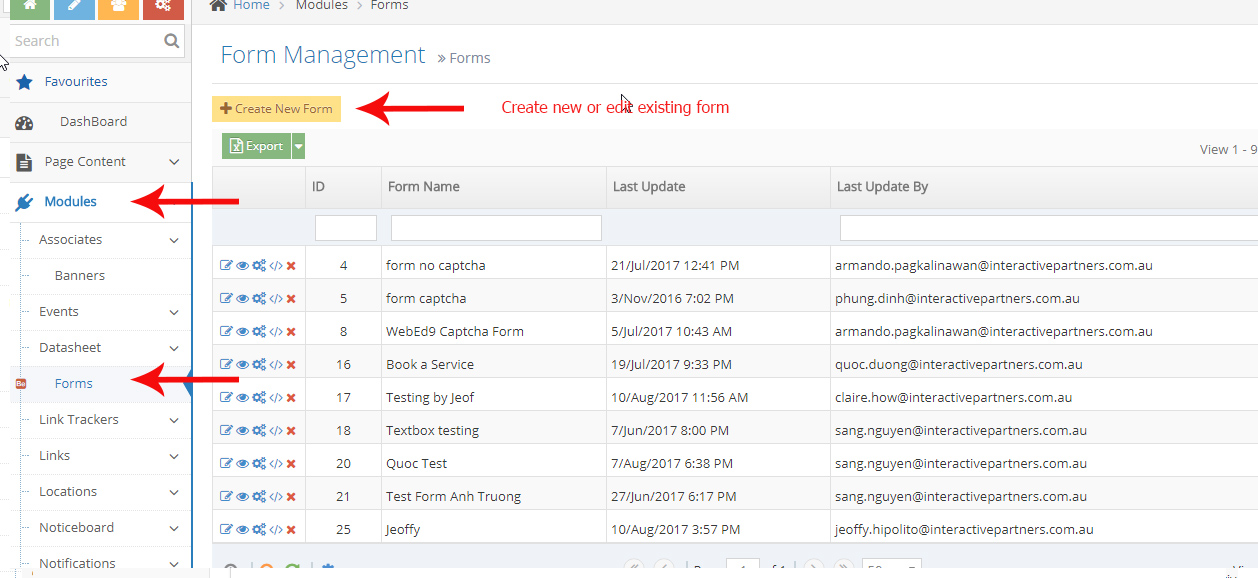
- Configure the form and fields you want
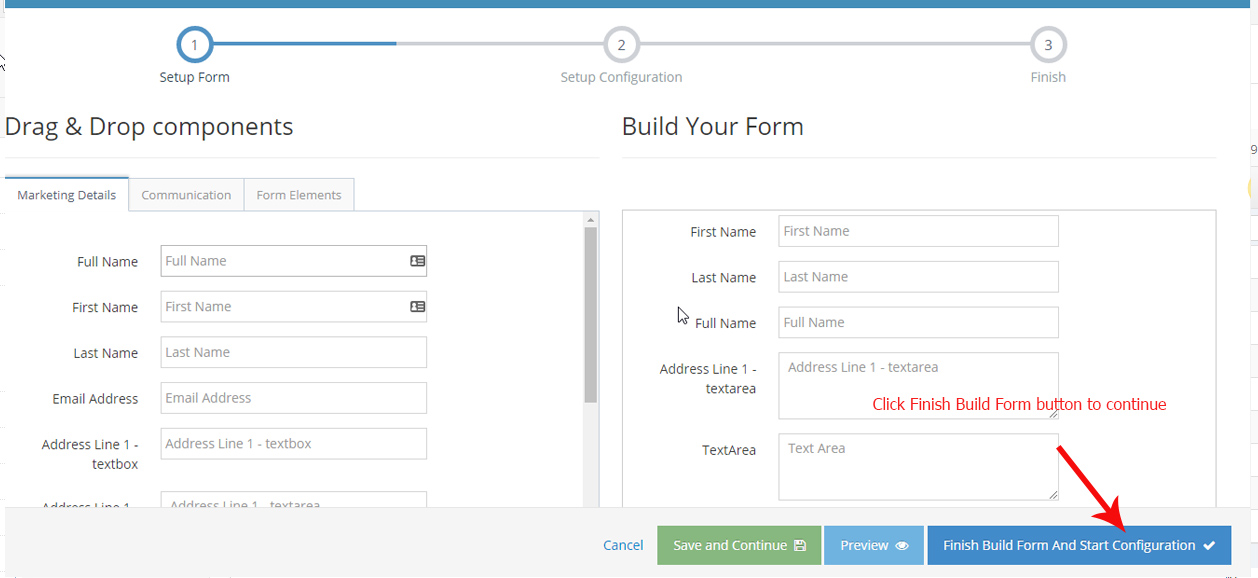
- Click Finish Build Form And Start Configuration button
- On the configuration form page at the bottom section click Advance Option
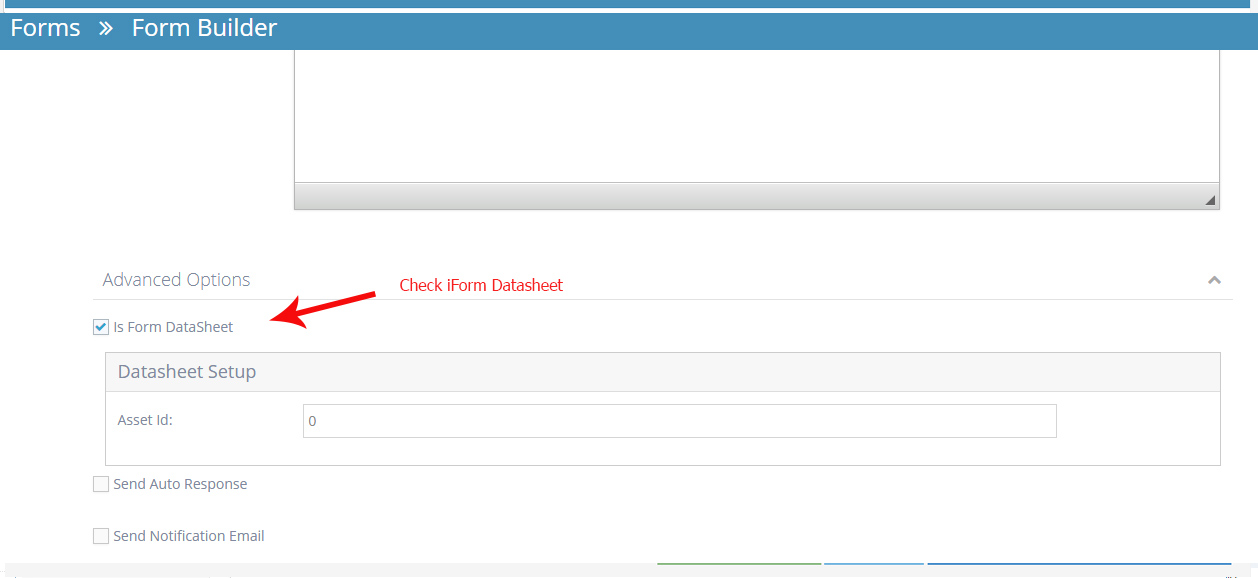
- Check - Is Form DataSheet
- On the Datasheet Setup grey box put the Asset Id
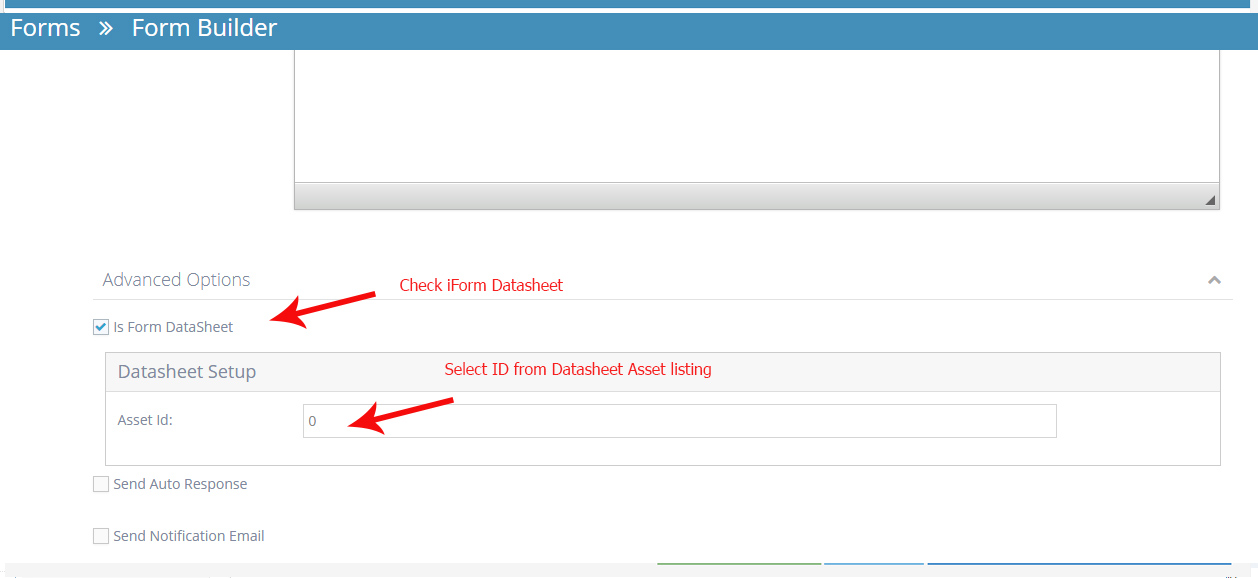
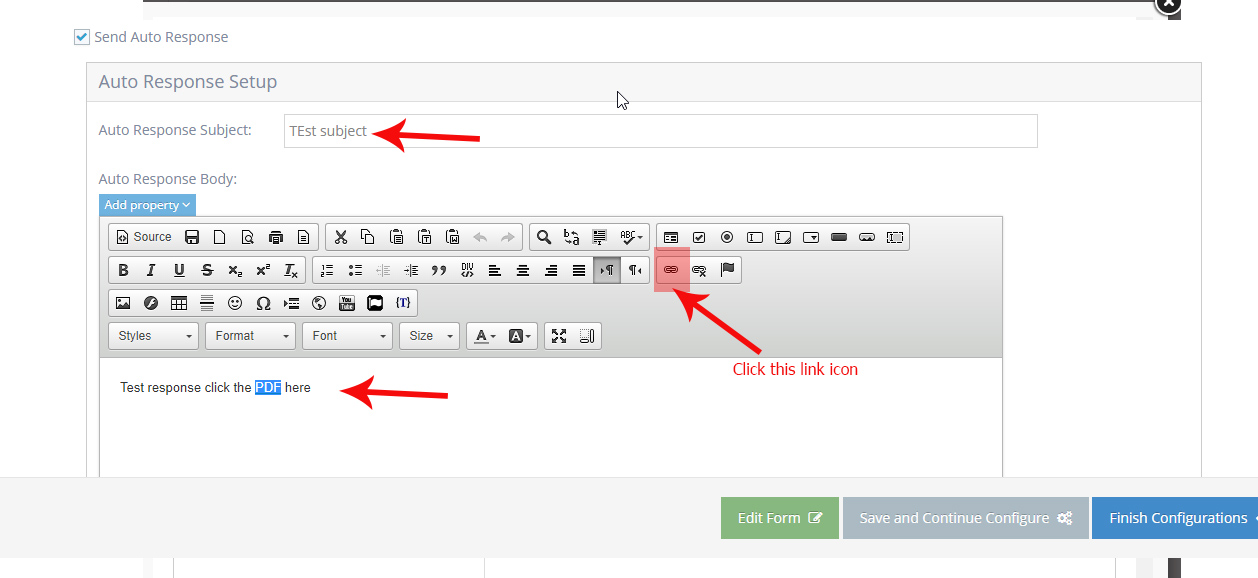
- Next check the Send Auto Response
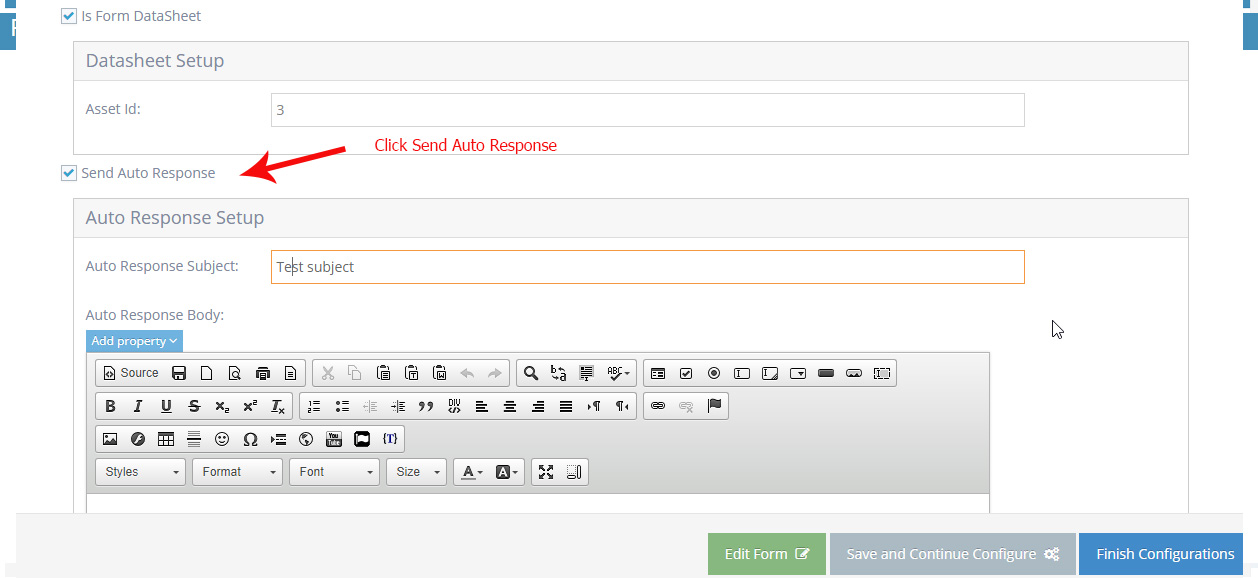
- Auto response subject - the subject name of your autoresponse email
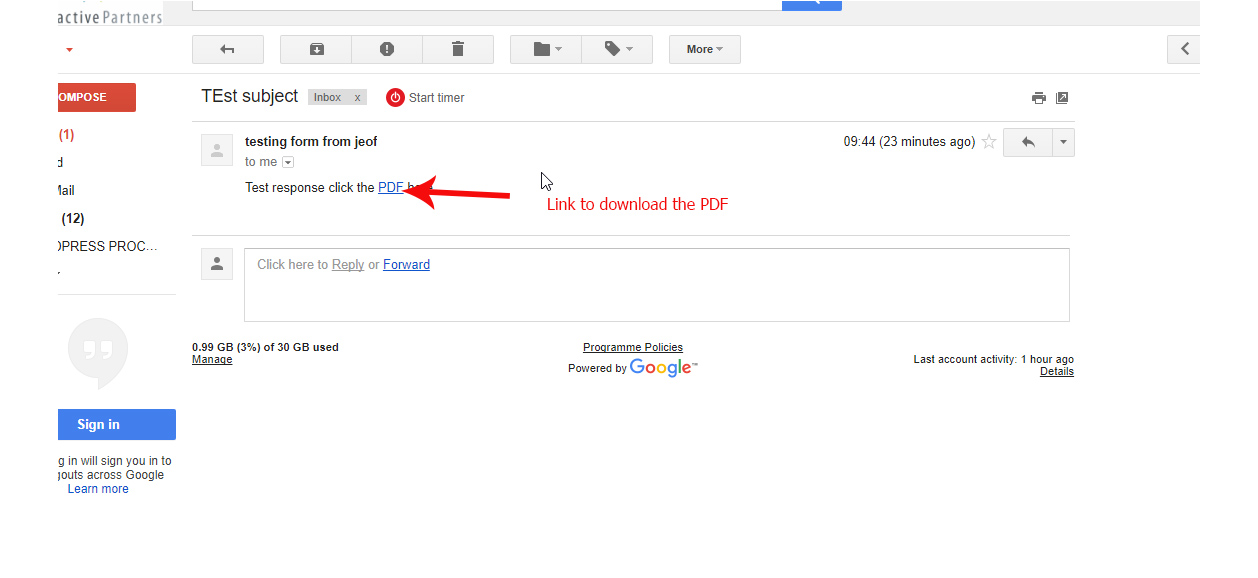
- Auto response body - here you can put the message you want for the PDF or datasheet information like the PDF name or link
- Setup the URL/link of your datasheet
- Click on the link Icon
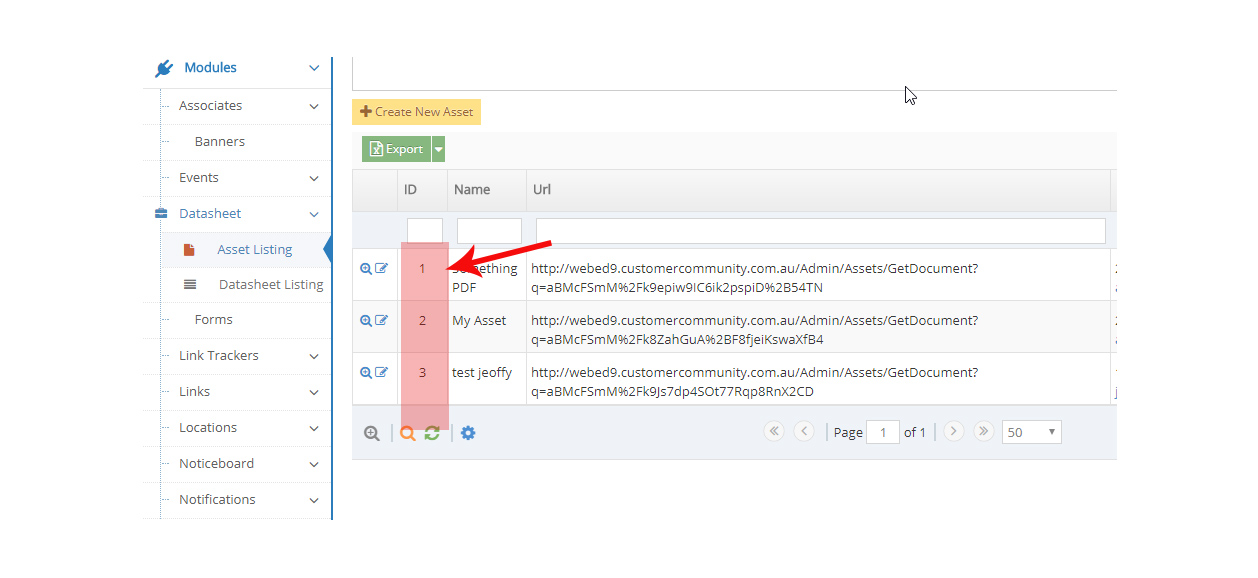
- Go back to your Datasheet Asset Listing
- Copy the Url of your sheet
- Paste it on the Link toolbar dialogue box on the Auto response body
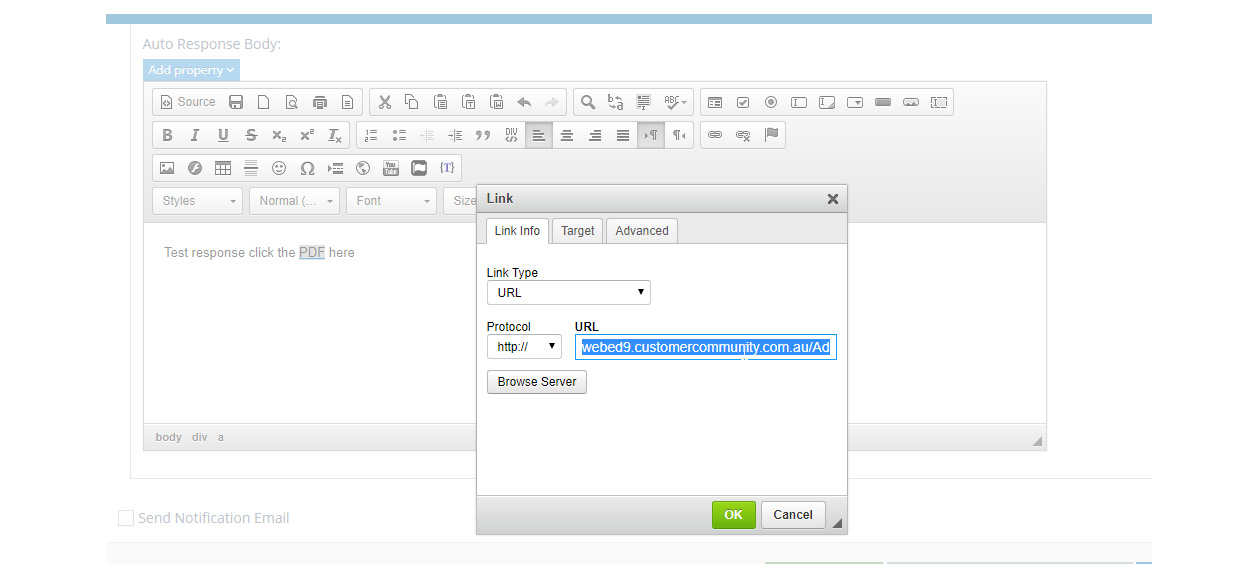
- Click OK button
- Click Finish Configuration
Apply the form and datasheet on the pages
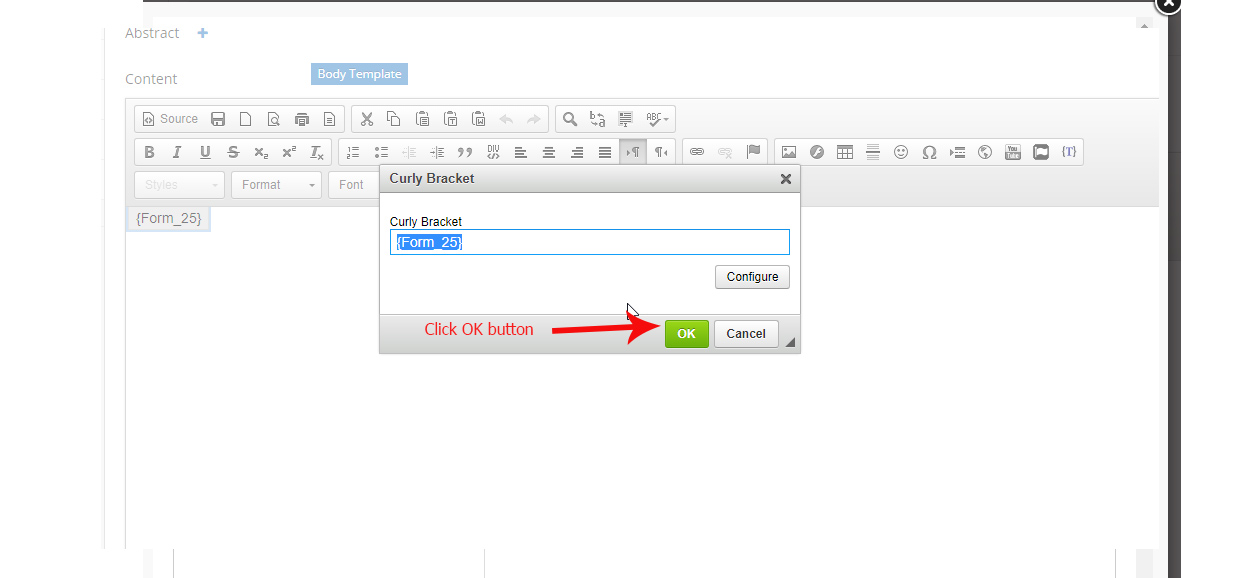
- Create a form using a curly bracket on the editor's page. To add the form using a curly bracket click here for the documentation
- Select the curly bracket on the page editor and search - Form
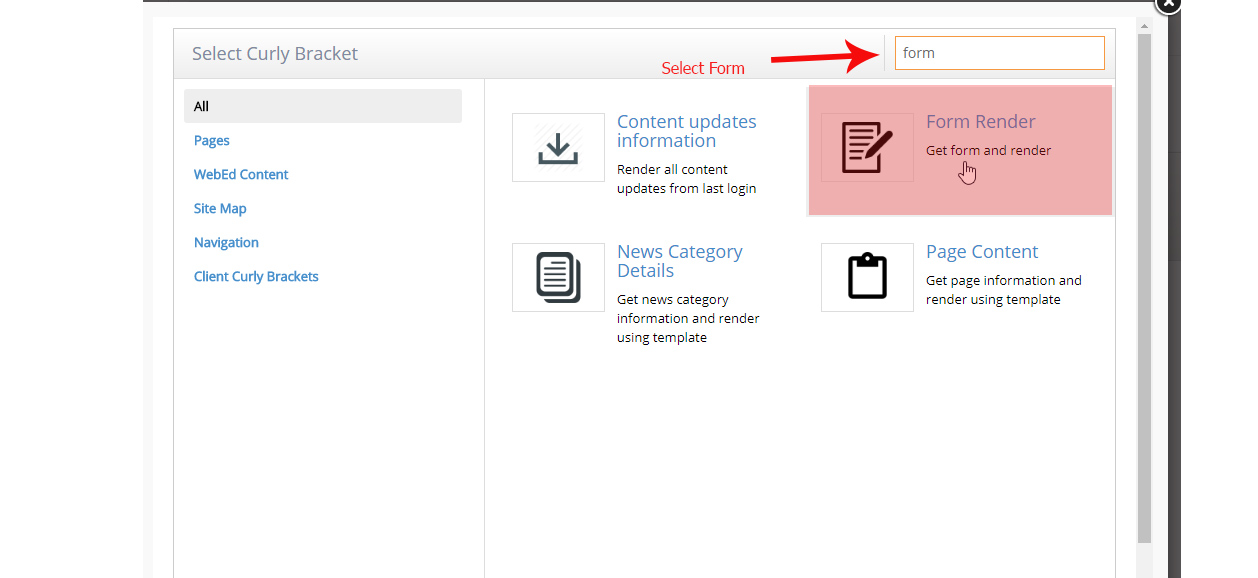
- Select the form you created with the datasheet from the auto-response email
- Click Insert, then click the OK button.
- Save the page
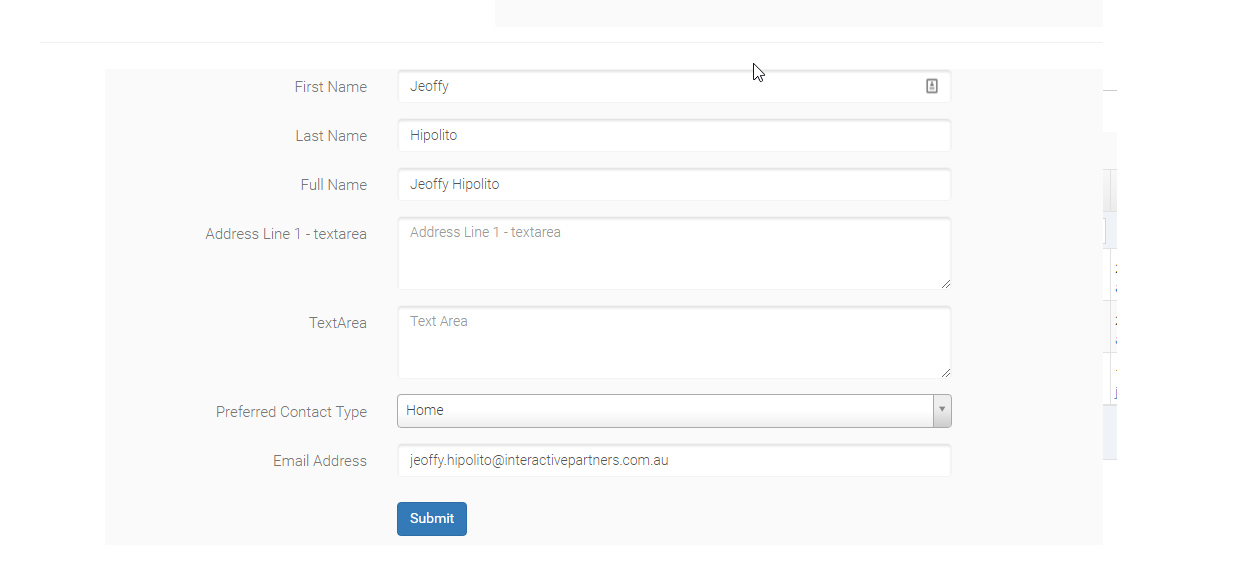
- Go to your page with the form
- Try to fill up and submit a form.
- Then check your email if the auto-response is working including the datasheet link
