- Creating Pages
- The Page Editor
- Inserting Image in the WebEd Content Editor
- Moving a Page
- Editing Pages
- Deleting Pages
- Moving Pages
- Importing Text
- Using Body Templates
- Include / Hide a Page from Site Navigation
- Rotating Images
- Using the Video and Photo Strip
- Using the Rollover Thumbnail
- Website Styles
- Internal Links
- Uploading Documents
- Keywords
- Changing the Page URL
- Using Tables
- SEO Scoring
- Content Tags
- Secure Pages
- Child Pages
- Page History
- Inserting iFrames
- Coloured Call to Action Buttons
- Dynamic Links
- Read More Button
Inserting Image in the WebEd Content Editor
STEP-BY-STEP
-
1Log in as an administrator and go to the Admin Dashboard.
Learn how to log in here → -
2
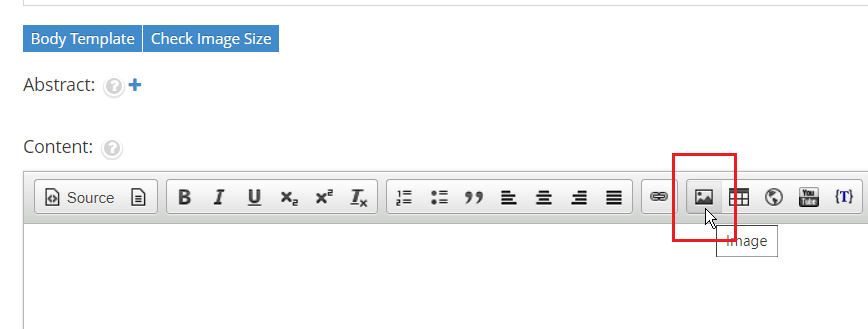
Click on the Image icon

-
3
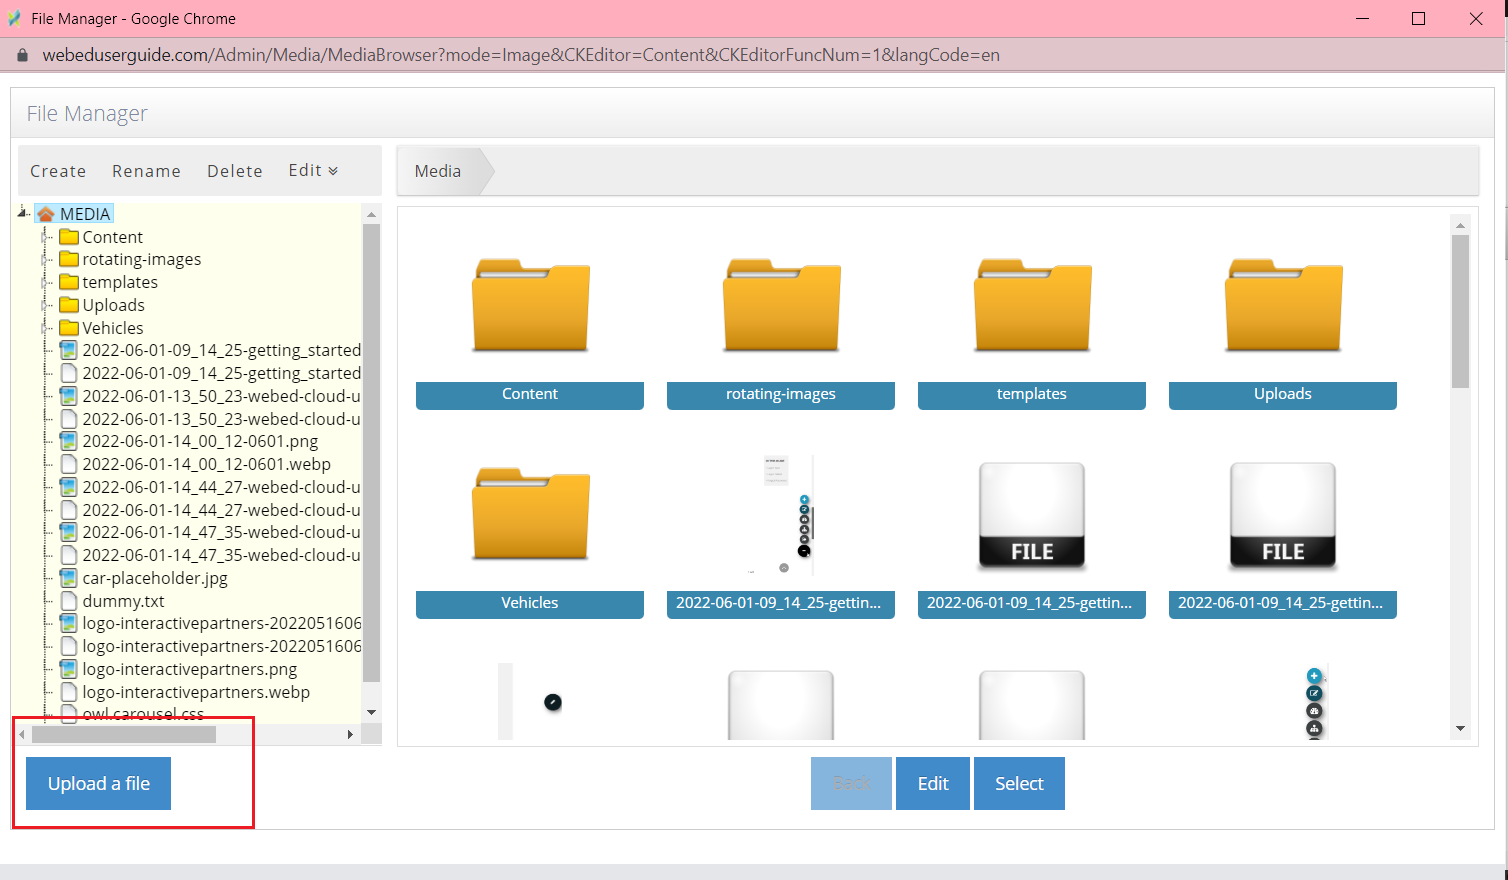
After you click the Image icon, a File Manager box pops-up. You have the option to either Browse an Image in the yellow folder icon on the left side or you may upload a new image by clicking the Upload a file button to find the image you wish to insert.

-
4
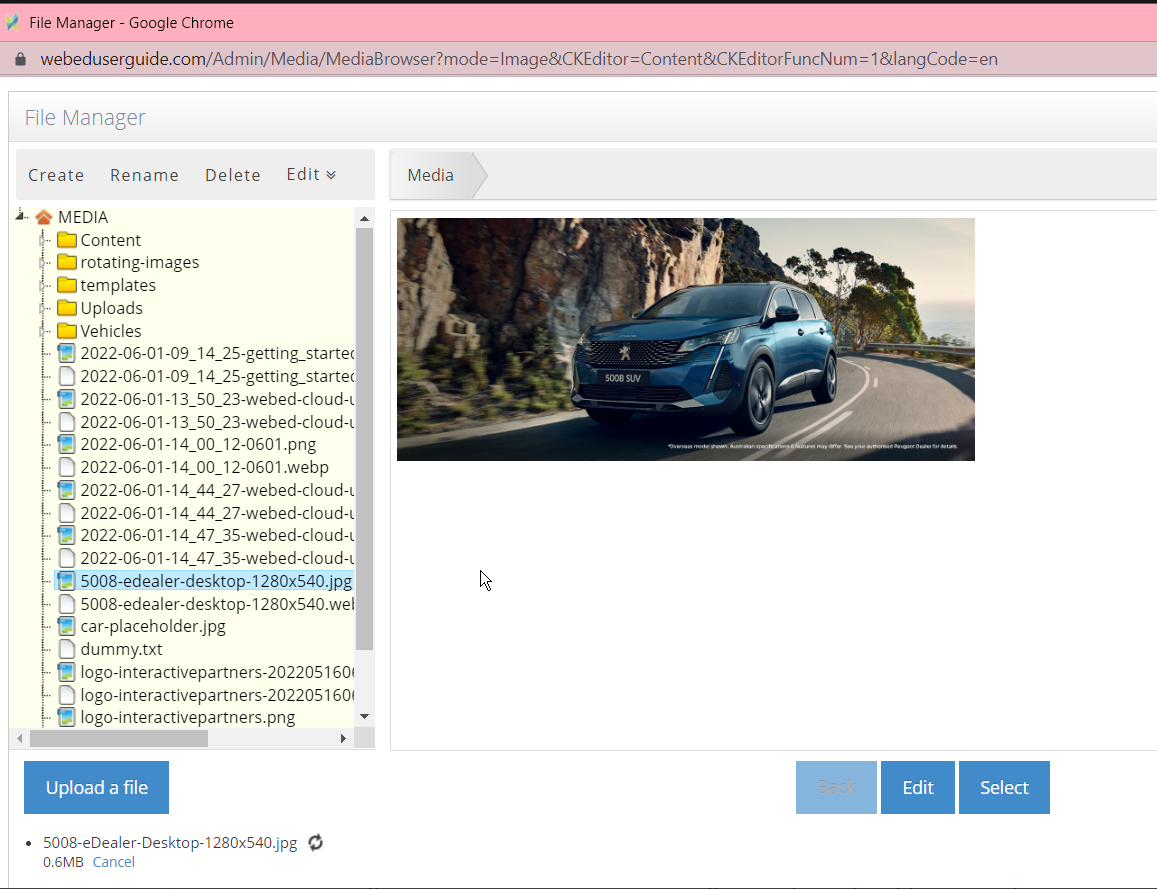
Click on the Select button to Select an image


-
5
After you click the Select button, the image you selected will appear in the content editor.
